Using your voice to control Windows can be a helpful option if you physically can’t or don’t want to use your mouse and keyboard. You can dictate text to create emails, documents, and more.
Windows has long provided its own Speech Recognition tool to set up and use voice dictation. Windows 10 adds to the mix with its own speech settings. The trick is to get Windows to understand you clearly enough so the process is worth the effort. Learn the best way to set up and use voice recognition in Windows.
SEE: Windows 10 power tips: Secret shortcuts to your favorite settings (Tech Pro Research)
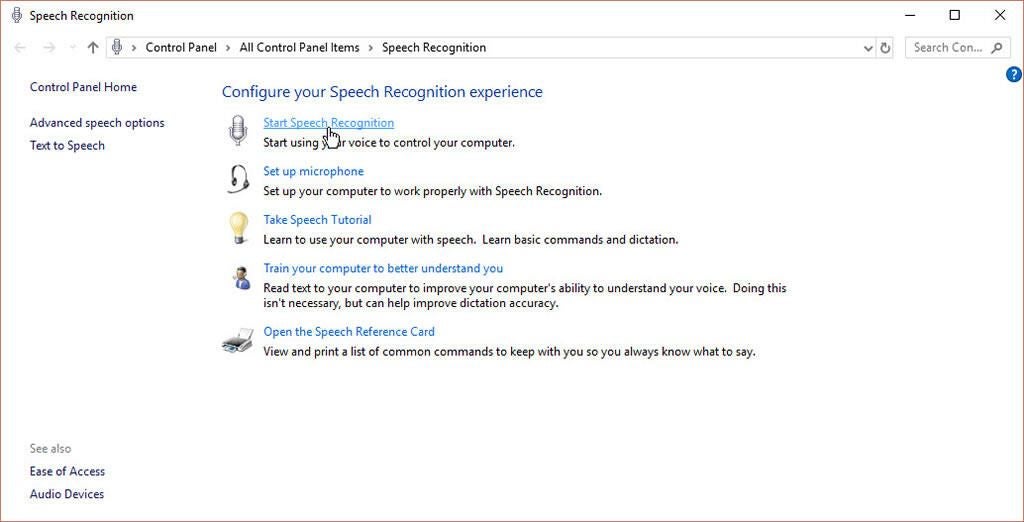
In any supported version of Windows, including Windows 10, you can set up voice dictation in Windows through Control Panel. To do this, open Control Panel in icon view and click the icon for Speech Recognition. At the Speech Recognition screen, click the link to Start Speech Recognition (Figure A).
Figure A
Choose the type of microphone you’re using, and then dictate the displayed words to teach Windows your voice. After you’re finished, the Speech Recognition bar pops up at the top of the screen. You can immediately begin dictating text.
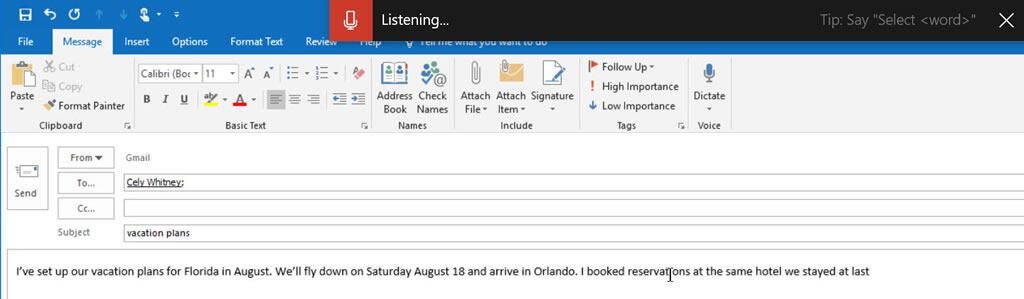
Open a document, email, or other file in which you want to dictate. Click the microphone icon on the Speech Recognition bar to start listening mode. Dictate your text. You can dictate punctuation, symbols, and other parts of speech as well as specific actions such as “new line” and “new paragraph.” To find out what you can say, right-click the Speech Recognition bar and select Open Speech Reference Card. When you’re finished, click the microphone icon again to turn off listening mode (Figure B).
Figure B
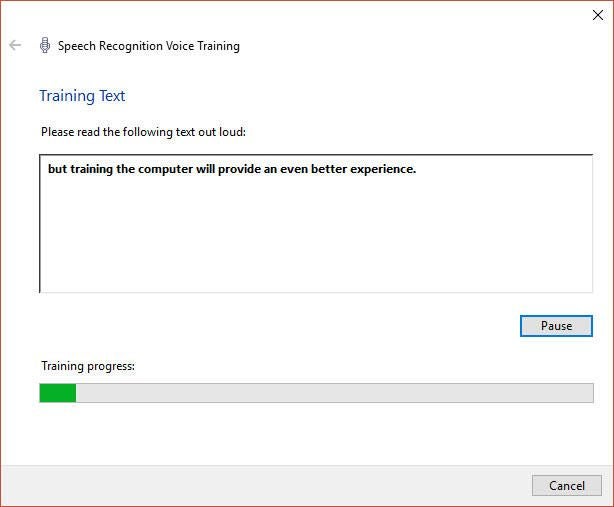
If Windows is having trouble understanding your words, right-click the Speech Recognition bar, move to Configuration, and select Improve Voice Recognition. Windows takes you through a lengthy series of screens where you dictate certain sentences to help it better pick up your speech (Figure C).
Figure C
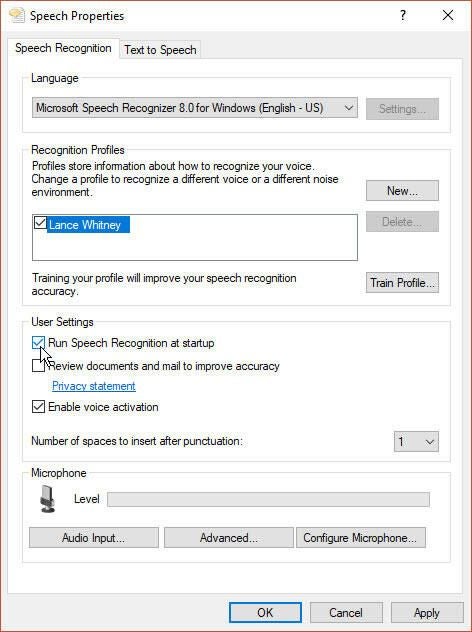
You can also view and modify certain settings for speech recognition. From the Speech Recognition Control Panel window, click the link for Advanced Speech Options. From here, you can opt to create a new voice profile, take the training for your current profile, opt to run Speech Recognition each time Windows starts, give Windows permission to review your documents and emails to better understand the words you use, and configure your microphone (Figure D).
Figure D
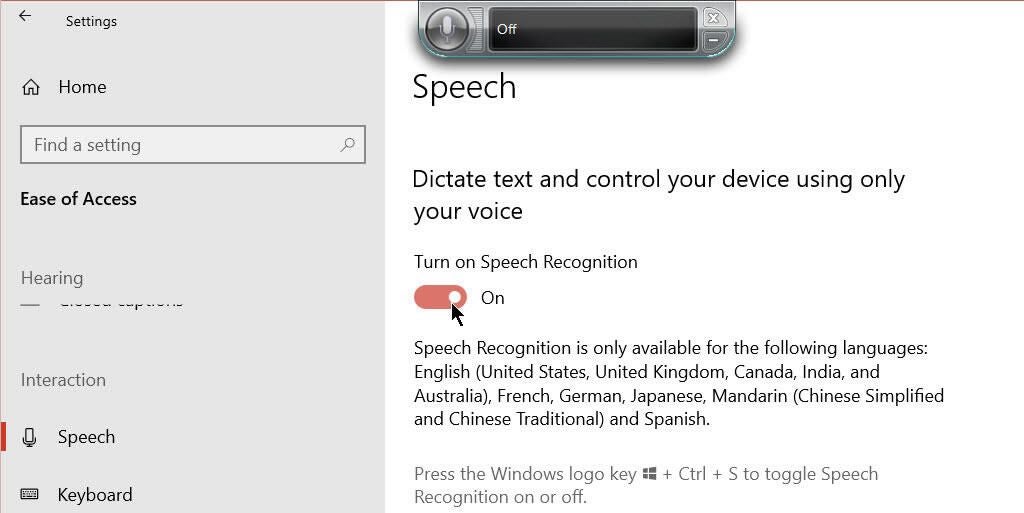
The Control Panel applet is an effective way to set up speech recognition, but it is time consuming. In Windows 10, you can also get started by accessing the relevant options in the Settings app. Open Settings. Go to Ease Of Access and click the setting for Speech. Scroll down the page and enable the switch to Turn On Speech Recognition. That action displays the Speech Recognition bar (Figure E).
Figure E
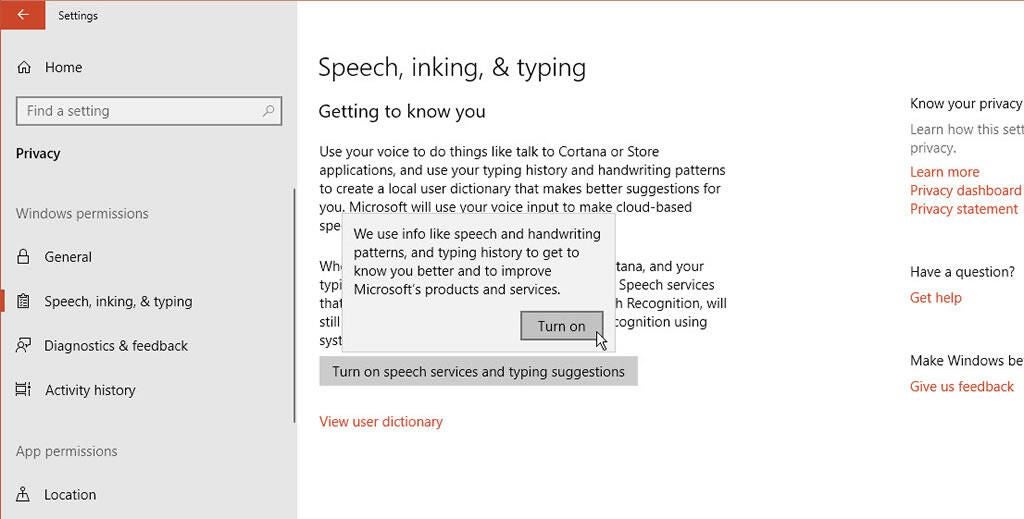
As an alternative to activating the Speech Recognition bar, you can use the speech recognition built into Windows 10. At the Speech setting in Ease Of Access, click the link to Get More Info About Dictation–a Microsoft support page explains how to use dictation and what commands you can say in Windows 10. In Settings, go to Privacy and select Speech, Inking & Typing. If this option is turned off, the button will say Turn On Speech Services And Typing Suggestions–click that button to turn on this service (Figure F).
Figure F
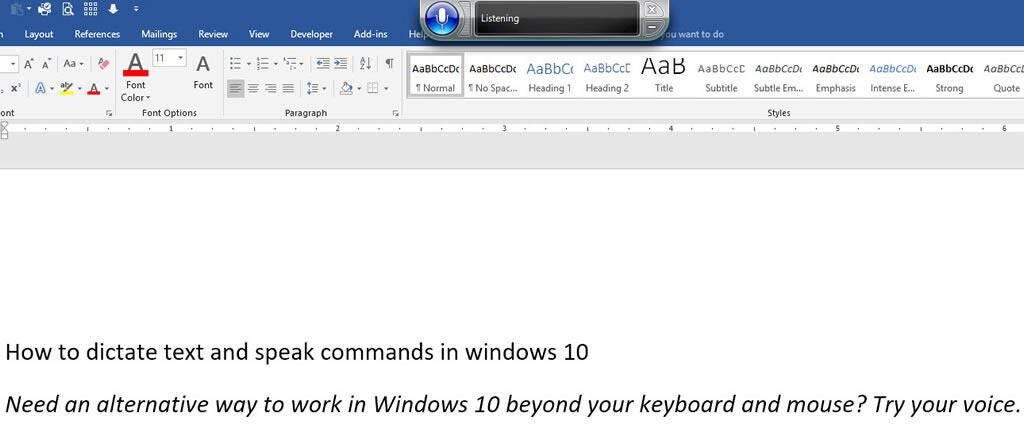
To use the Windows 10 speech recognition, open a document, email, or other file into which you want to dictate. Hold down the Windows key and press H to trigger the dictation toolbar. You can now dictate your text. When you’re done, press Win key + H to turn off the dictation toolbar (Figure G).
Figure G