
Image: Photographer: Andrey Popov, Getty Images/iStockphoto
Formulas are one of the most important components of an Excel sheet and as such, deserve–warrant–protection. You don’t want users accidentally changing formulas and impacting the purpose of your work. Fortunately, using Excel’s Protection feature, you can prevent users from inflicting accidental damage. Beyond protecting, sometimes you’ll need to hide formulas altogether. Usually, you’ll do so to protect proprietary and conditional information.
The good news is that protecting and hiding Excel formulas is a simple process and I’ll show you how to do so in this article. (Note: This article about protecting Excel formulas is available as a free PDF download.)
I’m using Office 365’s Excel 2016 (desktop) on a Windows 10 64-bit system. Protection has been around for a long time though, so you can implement what you learn in older versions. Protection is partially supported by the browser edition, but you can’t implement or disable it in the browser. There’s no demonstration file; you won’t need one. You can work with any Excel data.
SEE: Software Usage Policy (Tech Pro Research)
Let’s begin with a warning
It’s important to clarify the difference between protection and security. Excel protection isn’t a security feature. Protection is meant to prevent well-meaning users from accidentally damaging your work. It won’t protect sensitive and confidential data from falling into the wrong hands. For instance, did you know that anyone can copy data from a protected Excel sheet into another workbook or even Google Sheets to access protected data? Excel protection is lost once data is copied somewhere else. It really is that easy, so don’t make the mistake of thinking a protected sheet is secure.
Display formulas
When creating a sheet, you need the ability to enter and modify data and formulas, so everything’s visible and accessible by default. You can see formulas in the Formula bar or by pressing F2 for in-cell editing. In addition, to see all formulas at once, as shown in Figure A, you can use the Show Formulas option. Simply click the Formulas tab and then click Show Formulas in the Formula Auditing group. Click it again to display the results. Or, press Ctrl+` (that’s the backtick character below the tilde character).
Figure A

Use Show Formulas to see all formulas.
Protecting a sheet disables many options. However, it doesn’t disable Show Formulas or the Formula bar. Next, I’ll show you how to hide the Formula bar.
Hide the Formula bar
Without protecting the sheet, there’s no way to truly hide the formulas other than to hide the Formula bar. Usually, you won’t want to disable the Formula bar unless viewers are working with a read-only file. To hide the Formula bar, simply click the View tab and then uncheck Formula Bar in the Show group. As you can see in Figure B, the Formula bar is hidden. You can still access the cells, but you can’t see formulas.
Figure B
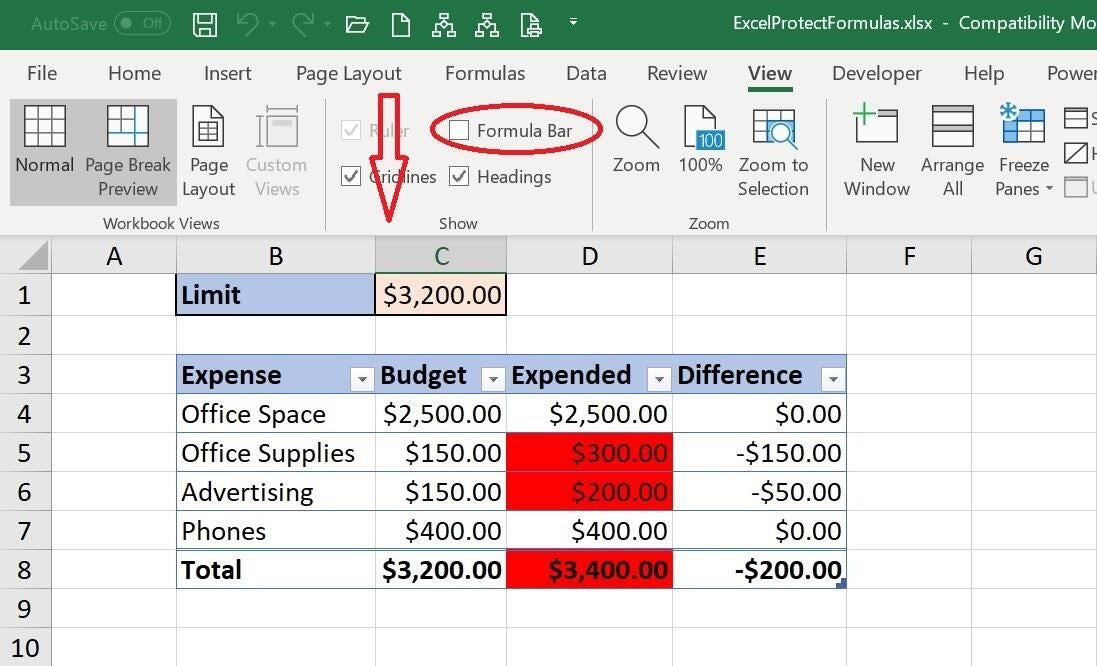
Disable the Formula bar.
However, hiding the Formula bar won’t protect your formulas from being modified or viewed:
- Show Formulas will still toggle the formulas and their results.
- A user can enable the Formula bar just as easily as you disabled it.
- Pressing F2 to engage in-cell editing also displays the formula and allows users to make changes.
It’s worth noting that you can disable the Formula bar via Excel’s Advanced options (via the File menu). In the Display section, uncheck Show formula bar. Keep in mind that a user can change this option as easily as you did. It’s great to know that you can hide the Formula bar but doing so won’t protect formulas. Now, let’s look at a couple of cell formats that will protect and hide formulas.
Protect and hide formulas
At the cell level, it’s easy to both protect and hide formulas using simple formats–albeit not a format in the traditional sense. To illustrate, let’s run through a quick example:
- First, select the cells with formulas you want to hide and protect, cells E4:E7 in our example sheet.
- Right-click the selection and choose Format Cells from the resulting submenu.
- In the resulting dialog, click the Protection tab.
- Check the Hidden option (Figure C), and then click OK. Notice that the Locked option is checked by default.
Figure C
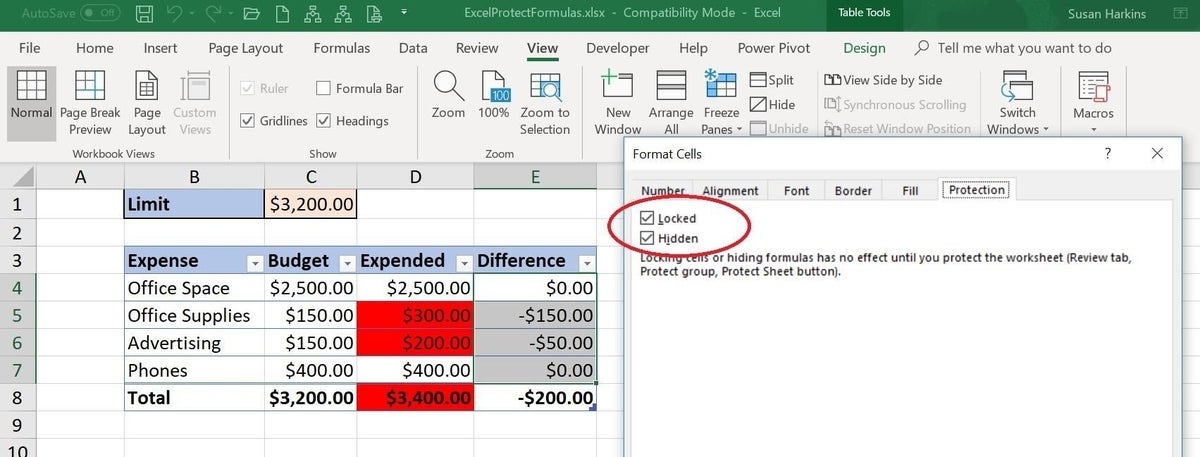
Simple formats protects and hides formulas.
At this point, both formats are set, but not active. You must enable sheet protection to activate these formats. To enable protection, click the Review tab and then click Protect Sheet in the Protect group. In the resulting dialog, enter a password, as shown in Figure D, and click OK. Confirm the password and click OK. As you can see in Figure E, you can’t see the formula in the Formula bar.
Figure D
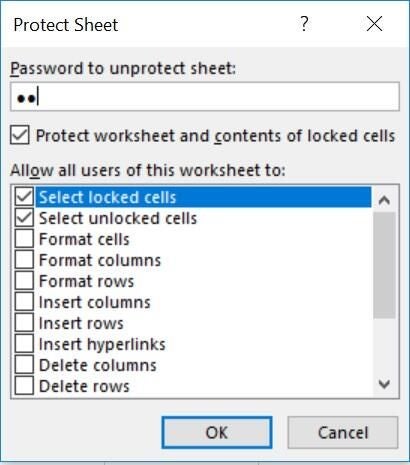
Enter an easy-to-remember password for now.
Figure E
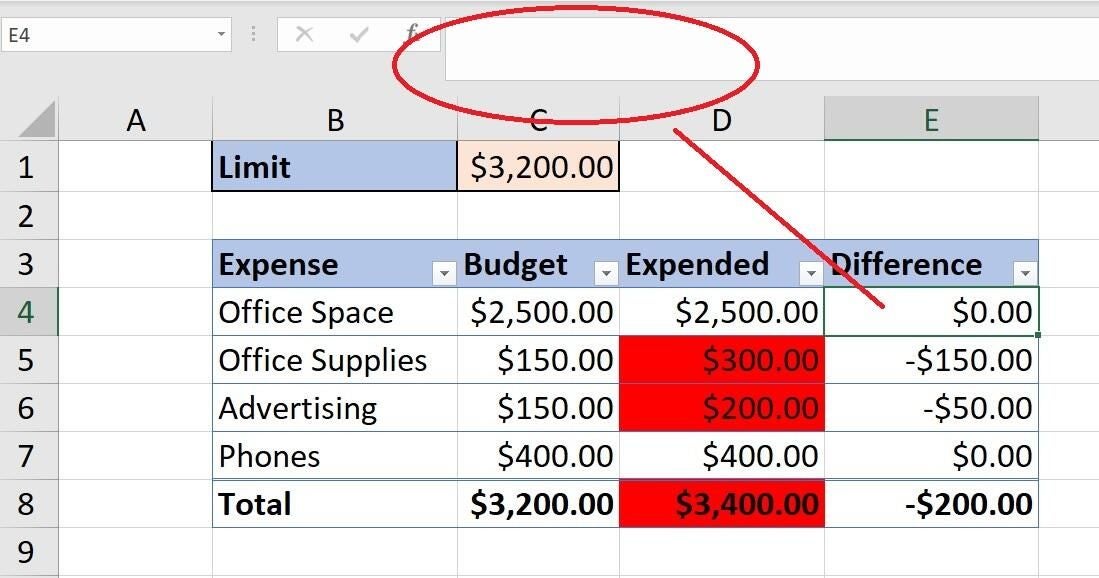
The formulas aren’t visible.
By locking and hiding the formulas, you keep users from changing and viewing the formula. This is enough to keep well-meaning users from unintentionally damaging your work.
However, if you open a protected Excel file in the browser edition, you can see hidden formulas, but you can’t modify them. For most sheets, hiding formulas is overkill but easily implemented. It’s important to note that locking is the default, (step 4 above) so you must unlock cells you want users to access before protecting the sheet, rather than the other way around. You’ll need to unlock input cells.
Apply read-only property
You can bypass protection altogether if you don’t care to hide formulas. To do so, password protect the entire file as follows:
- From the File menu, choose Save As.
- Click the More options link below the name and file type controls.
- Click the Tools dropdown (next to the Save button) and choose General Options.
- In the resulting dialog, enter a password in the Password to modify control (Figure F) and click OK.
- Re-enter the password to confirm and click OK.
Figure F
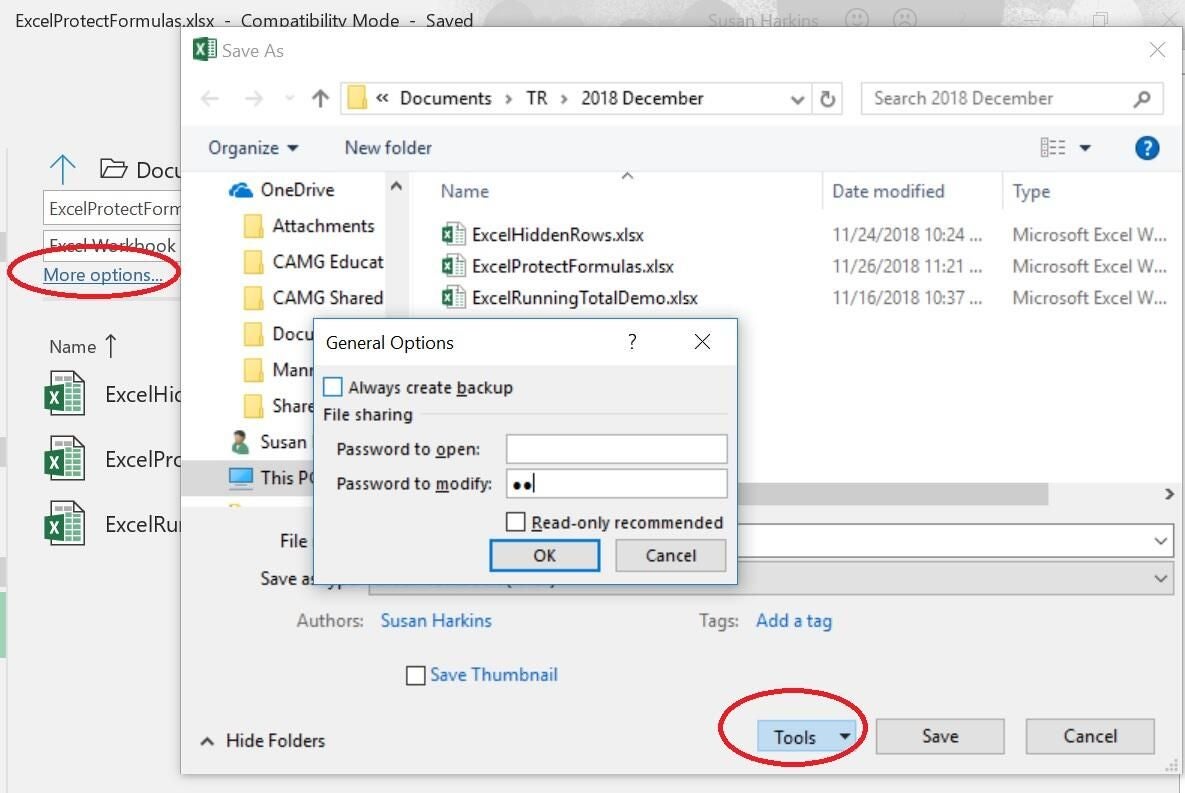
Password protect the file, so users can view but can’t modify it.
Anyone can open and view the data, but only those who know the password can modify the contents–you protect the formulas and everything else. But remember, viewers can see the formulas.
Problems to consider
In the earlier warning section, I mentioned that users can circumvent protection by copying data into another workbook or some other program. The good news is that this method copies only data, not formulas. However, you can prevent this breach with a simple formatting setting; don’t allow users to select protected cells.
Figure D shows several options that add flexibility to the protection feature. In particular, the first two, Select locked cells and Select unlocked cells, are checked by default. By unchecking Select locked cells, you can prevent users from selecting and copying data in those cells into another program. Crisis averted–kind of.
Permission to copy the entire workbook is another problem. For instance, if you open a protected Excel file in the browser edition, you can see hidden formulas. You can’t modify locked cells–the browser supports this protection. However, users will be able to view your formulas. You’ll need help from your systems administrator to keep users from copying the Excel workbook.
Send me your question about Office
I answer readers’ questions when I can, but there’s no guarantee. Don’t send files unless requested; initial requests for help that arrive with attached files will be deleted unread. You can send screenshots of your data to help clarify your question. When contacting me, be as specific as possible. For example, “Please troubleshoot my workbook and fix what’s wrong” probably won’t get a response, but “Can you tell me why this formula isn’t returning the expected results?” might. Please mention the app and version that you’re using. I’m not reimbursed by TechRepublic for my time or expertise when helping readers, nor do I ask for a fee from readers I help. You can contact me at susansalesharkins@gmail.com.
See also
- Normalizing foreign data for Access (TechRepublic)
- 2 ways to quickly copy graphic files in Word or PowerPoint (TechRepublic)
- 9 ways to clean foreign or imported data (TechRepublic)
- Office Q&A: Validation violators and Windows Quick access (TechRepublic)
- How to crop images in Microsoft PowerPoint (TechRepublic)
- Microsoft to add new geography, stocks data types to Excel (ZDNet)
- Microsoft Office 365 for business: Everything you need to know (ZDNet)