
Companies use Microsoft OneDrive to manage file shares across locations and users and give team members the ability to collaborate more effectively across multiple platforms such as Windows, iOS, iPadOS, Android and macOS. Most organizations steeped in the Microsoft ecosystem choose OneDrive because it works so well with Office 365 and Windows.
For many business users, OneDrive is built into Windows 11 and available by default, but on Macs, there are some steps you’ll need to take to get up and running with OneDrive. We’ll walk through these in this article and get OneDrive working in the Finder, so you can collaborate with other OneDrive users and easily store your documents in the cloud.
Jump to:
- Creating an account and downloading OneDrive
- Setting up OneDrive on Mac
- Customizing your OneDrive setup
Creating an account and downloading OneDrive
The first step to setting up OneDrive is getting an account. If your organization uses OneDrive for Business, use your existing work email login and you should have access to the necessary account.
PREMIUM: OneDrive Cloud Usage Policy.
If you’re using OneDrive for personal use, you’ll need to create an account by heading to the Microsoft OneDrive page and signing up for free — the free version gives you 5GB of cloud storage. Once you have an account, download the software and set up the app on the Mac.
With account credentials in hand, download the OneDrive app for Mac. The easiest way to get OneDrive is if your organization allows the Mac App Store; you can visit the OneDrive page on the Mac App Store and download and install the app with one click.
Another way to download and install the app is by visiting the OneDrive download page and clicking Download. Be sure to visit this page on your Mac, so it downloads for the correct platform.
Setting up OneDrive on Mac
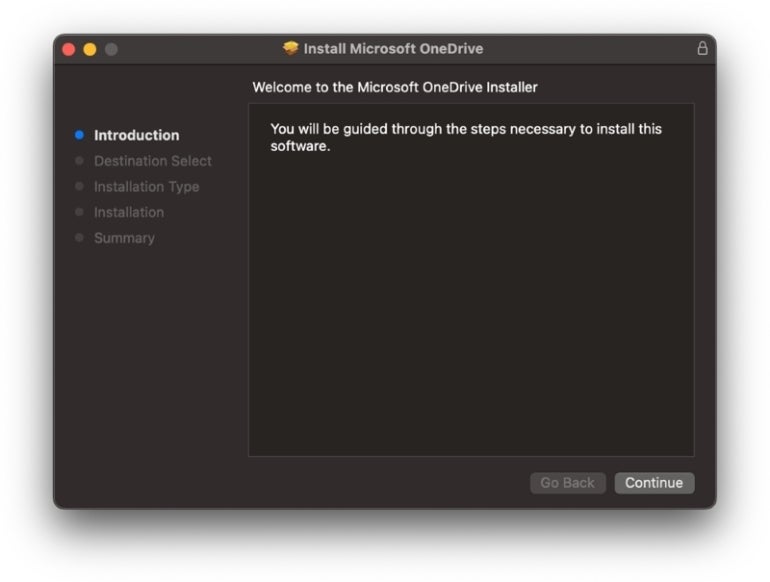
Once you’ve downloaded the software, open the installer from your Downloads folder — named OneDrive.pkg — and follow along in the OneDrive installer (Figure A).
SEE: Avoid these common mistakes when running OneDrive on Apple devices.
Figure A
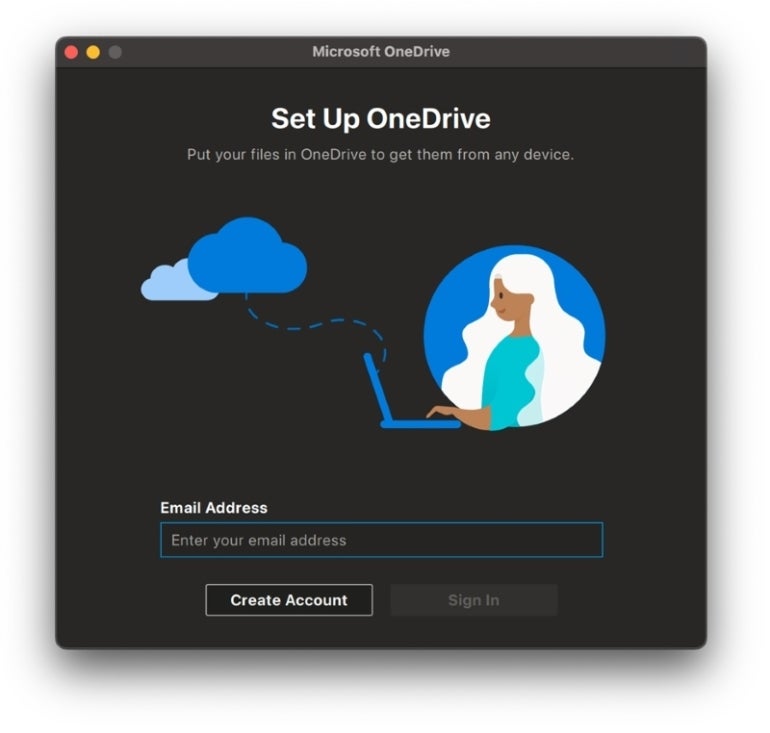
After installing the software, you’ll see a OneDrive icon in the Applications folder on your Mac. Double-click to open the app. At the first screen in the Set Up OneDrive program (Figure B), enter your account’s email address and click the Sign In button.
Figure B
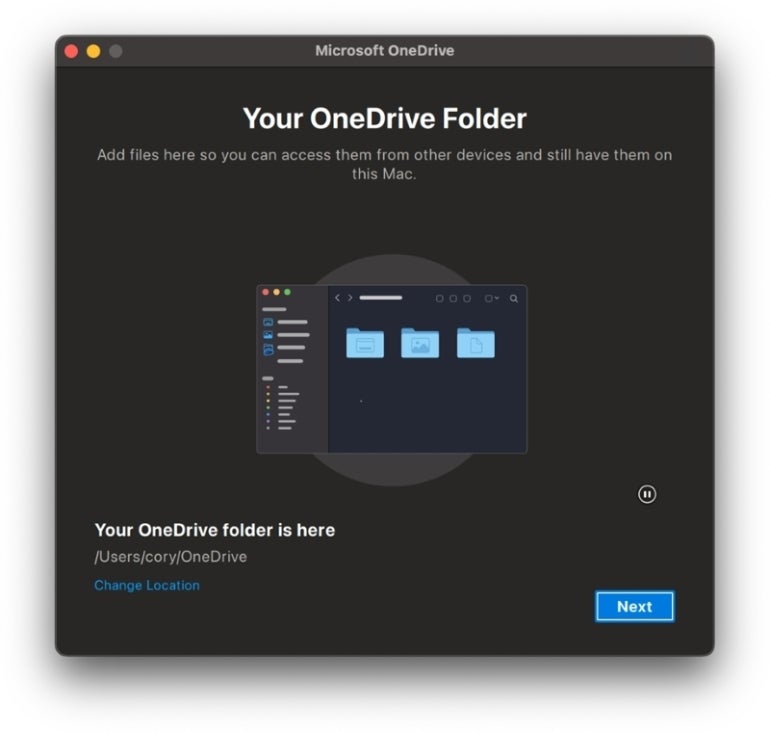
Follow the setup assistant through the first few screens, answering the questions about your account. The screen for Your OneDrive Folder displays the location that will be used to store your synced folders and files. You can change it to a different location by clicking the button titled Change Location; otherwise, click Next (Figure C).
Figure C
The next few screens provide basic information on how to set up and use OneDrive. Click Next at each screen. At the Get The Mobile App screen, click the Later button — you can always download the iOS or Android app another time.
SEE: Here’s how to use Microsoft OneDrive on your iOS or Android device.
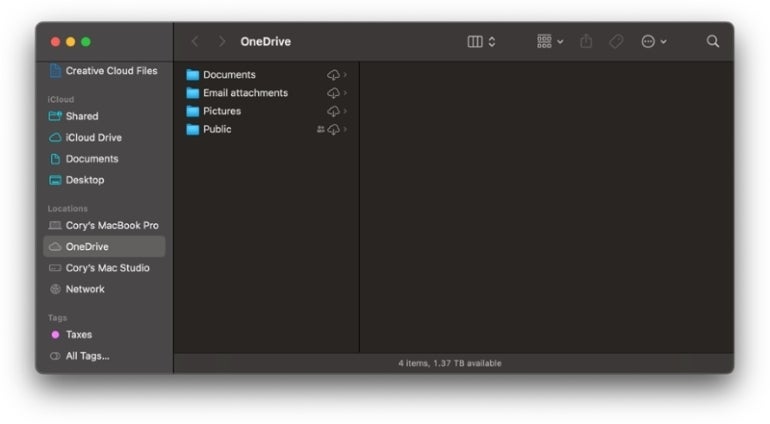
At the final setup screen, click the button to Open OneDrive Folder. If you’ve already been using OneDrive on a Windows computer or other device, your synced folders and files will start appearing in the OneDrive folder on your Mac. If not, then the folder will contain a few default folders and files (Figure D).
Figure D
Customizing your OneDrive setup
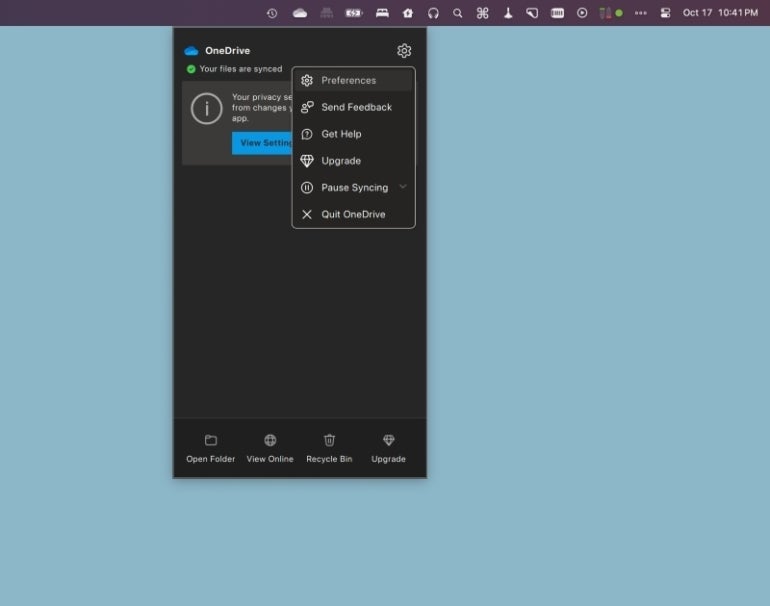
Next, you’ll want to customize OneDrive on your Mac to make it work the way you expect. Click the OneDrive menu bar icon at the top right of the screen, then select the Preferences button from the window that appears (Figure E).
Figure E
General preferences
Some of the General preferences you’ll want to consider toggling include:
- Open at Login: OneDrive automatically starts each time you sign into your Mac.
- Hide Dock icon: You can opt to hide or not hide the Dock icon and decide if you need to see notifications about sharing or editing.
- Warn me before my files I deleted are removed from the cloud: This can function as a precaution against accidental file deletions.
You’ll also want to choose whether or not to use Files On-Demand. With this option turned on, any folders and files synced through OneDrive are stored online but not stored on your Mac. Any such file from OneDrive is downloaded to your computer only when you need to access it.
The advantage here is that you save on disk space. The disadvantage is that you need to be online to access your files. If your Mac is low on storage, you may want to keep Files On-Demand enabled.
To ensure that files are downloaded to your Mac and not stored only in the OneDrive cloud:
1. Open the Preferences section of the OneDrive app from the menu bar.
2. Click the button to Download files as you use them (recommended) (Figure F).
Figure F
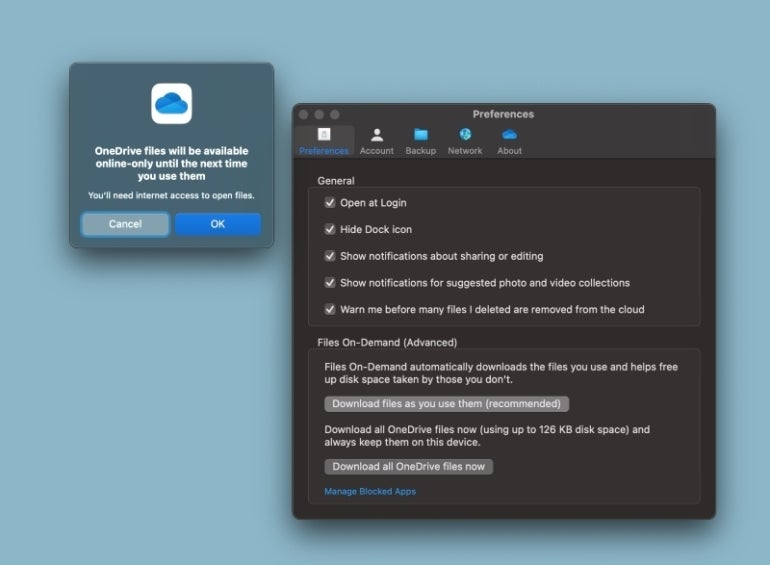
3. Click the button for Download all OneDrive files now, and all of your OneDrive files will be downloaded to your Mac.
Account preferences
Under the Account section for Preferences, you can see the name of your OneDrive account and how much space your OneDrive files are using in the cloud. Here, you can choose where your files are stored on your device. To do so:
1. Click the Choose Folders button. This section shows you which folders are being synced between your Mac and your cloud storage.
2. Select or deselect any folder or file (Figure G). Any that you deselect will be removed from your Mac and stored only online. You may want to deselect any folders you don’t need on your Mac but want to keep in OneDrive.
Figure G
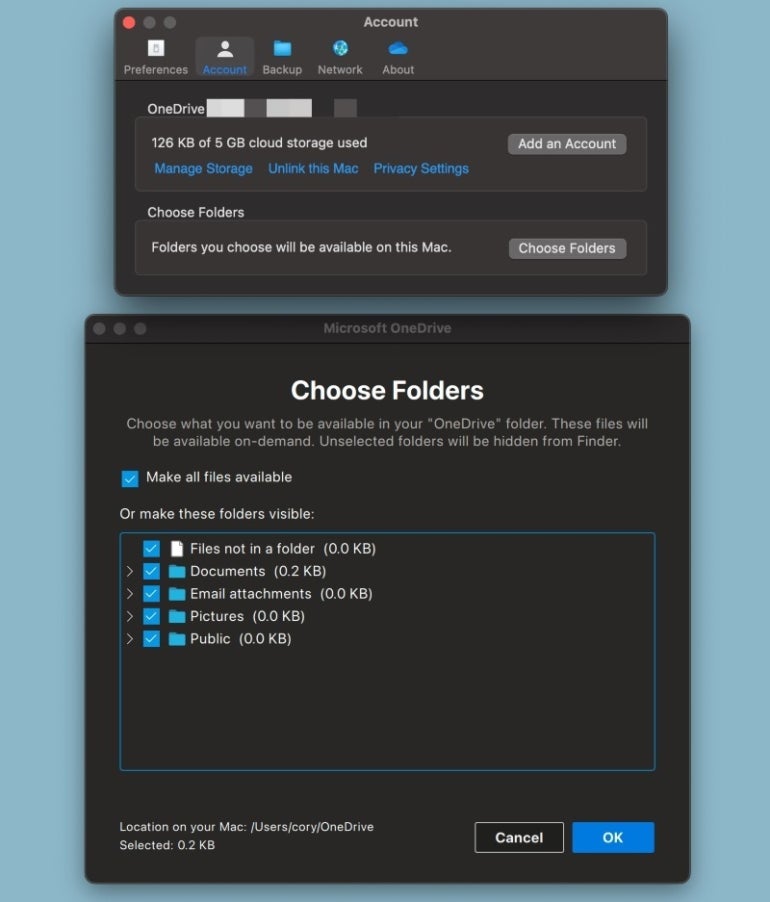
3. Click OK when done.
Backup preferences
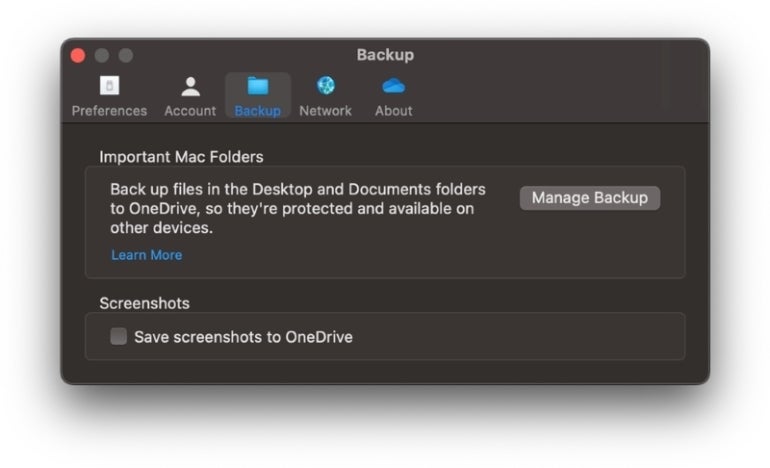
From the Backup section for Preferences, you can choose to backup and store files and folders in your Desktop and Documents folder on your Mac to OneDrive automatically. To do so, you’ll need to click the Manage Backup button and choose to store any taken screens in OneDrive automatically (Figure H).
Figure H
When done, close the OneDrive Preferences window. Based on your customizations, OneDrive will now work in the background to back up and synchronize your selected folders and files.
