
Microsoft
Microsoft87 Excel Tips and Tricks: From Beginners to Pros
Discover 87 Excel tips and tricks that will take you from a beginner to a pro. Improve your efficiency, productivity and skills with these helpful Excel techniques.
Discover 87 Excel tips and tricks that will take you from a beginner to a pro. Improve your efficiency, productivity and skills with these helpful Excel techniques.

Phi-2 is a generative AI model with 2.7 billion-parameters used for research and development of language models.

The UK's Competition and Markets Authority is seeking comments about who controls Microsoft and OpenAI and possible risk of a merger.
Microsoft just rolled out two new Copilot-enabled devices: Surface Pro 10 and Surface Laptop 6.

Already common for enterprises, for the first time, individuals will also get the option to pay for extended security updates for a Windows operating system that's out of support.

Get a cloud education with this training bundle for just $32 when using code ENJOY20 at checkout. Offer ends April 16th.
The premier project management tool from Microsoft is on sale for a one-time payment of just $25.99. Use code ENJOY20 at checkout before April 16.
Microsoft Copilot can write basic SQL code, which could help your employees be more efficient and productive.
Trying to decide which version of Microsoft Copilot is right for you? This guide will help you compare and choose the one that best suits your needs.
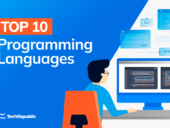
The programming language PHP falls further down the rankings.

Make a QR code in Chrome, Adobe, ChatGPT Plus or one of the other options detailed.
Microsoft just rolled out two new Copilot-enabled devices: Surface Pro 10 and Surface Laptop 6.

Microsoft PowerToys is a free download that can manage application windows, rename files in bulk, preview file contents and more.

Generative artificial intelligence has rapidly gained traction amongst businesses, professionals and consumers. But what is generative AI, how does it work and what is all the buzz about? Read on to find out.

Get up and running with ChatGPT with this comprehensive cheat sheet. Learn everything from how to sign up for free to enterprise use cases, and start using ChatGPT quickly and effectively.

Looking for a new job? You can learn to be an Azure administrator and start an exciting new tech career. Now at $28 with coupon code SECURE20 through April 7th.

The change brings international Microsoft Teams into line with the European Economic Area and Switzerland and adds a standalone Teams product for enterprise.

A great way to stay current with the latest technology trends and innovations is by attending conferences. Read and bookmark our 2024 tech events guide.

Boost your bottom line by quickly developing advanced Excel skills with this beginner-to-advanced course while it’s on sale for just $16.97 (reg. $80) through April 2nd.
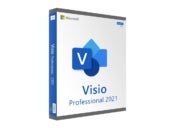
Create org charts, flow diagrams, mind maps, SWOT analysis and even floor plans with user-friendly controls and over 250,000 preset templates.