


Wine serves as a compatibility layer so that users can run Windows applications on Linux. Using this software, more than 26,000 Windows applications and games can be run on Linux. Version 4.0 of the software was released (with more than 6,000 changes) and is a marked improvement over previous iterations.
Wine 4.0 includes features like:
- Vulkan support.
- Direct3D 12 support.
- Game controllers support.
- High-DPI support on Android.
- Plenty of new Direct3D 10 and 11 features.
Open source: Must-read coverage
- Debian vs Ubuntu: Which Linux Distro Fits Your Needs Best?
- Ubuntu Server: A Cheat Sheet
- Llama 3 Cheat Sheet: A Complete Guide for 2024
- CISA Report Finds Most Open-Source Projects Contain Memory-Unsafe Code
This is a rather important upgrade for Wine, thanks to the added Vulkan support (a low-overhead, cross-platform 3D graphics and computing API, which targets high-performance real-time 3D graphics applications such as video games and interactive media).
But how do you install this newest Wine release? I’m going to demonstrate using Ubuntu Desktop 18.10. These same steps should work fine on any Ubuntu or Debian derivative.
SEE: System update policy template download (Tech Pro Research)
What you need
The only things you need for this are a Ubuntu- (or Debian-) based desktop distribution and a user account with sudo privileges. That’s it. Let’s get to work.
Add the repository
The first thing to do is to add the necessary repository. To do that, open a terminal window and add the Wine GPG key and the repository with the following commands:
wget -nc https://dl.winehq.org/wine-builds/winehq.key

sudo apt-key add winehq.key

sudo apt-add-repository 'deb https://dl.winehq.org/wine-builds/ubuntu/ cosmic main'
Note: If you use Ubuntu 18.04 (or any of its derivatives), substitute the final command above with the following:
sudo apt-add-repository 'deb https://dl.winehq.org/wine-builds/ubuntu/ bionic main'
Install Wine 4.0
Now it’s time to install Wine 4.0. Back at the terminal window, issue the following command:
sudo apt install --install-recommends winehq-stable
To make sure you have Wine 4.0 installed, issue the command:
wine --version
You should see version 4.0 listed (Figure A).

Wine Config
Once you have Wine installed, run the winecfg command to set up the Wine environment (as well as install Mono and Gecko). After running the command, you’ll be prompted to install Mono (Figure B).

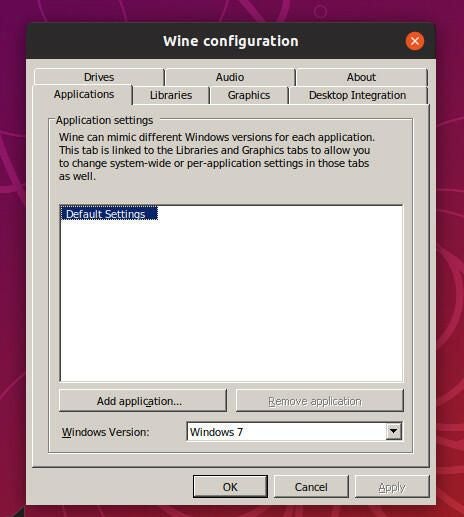
Click Install and then, when prompted, click Install a second time (to install Gecko). When the Gecko installation completes, the Wine configuration tool will open (Figure C), where you can configure:
- The Windows environment Wine is to use.
- Dynamic libraries.
- Window settings.
- Desktop integration settings.
- Manage drives.
- Audio devices.
That’s it. You are now ready to start using Wine 4.0. Enjoy the much-improved experience with Windows application support. Download those Windows installation files to your Linux desktop and start installing.