


Deleting a deposit in QuickBooks is permanent and should be done with caution. At a minimum, it can throw off your account balances and undo previous bank reconciliations. At worst, it may lead to compliance issues. But if you’re confident that deletion is the right move, this guide will walk you through how to do it and what to watch out for along the way.
How to delete a deposit in QuickBooks Online
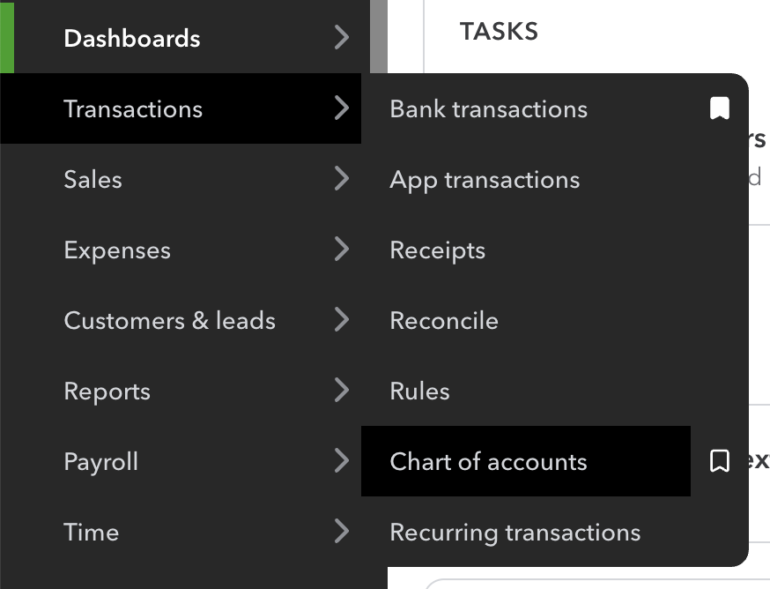
1. Navigate to Transactions and click Chart of accounts.
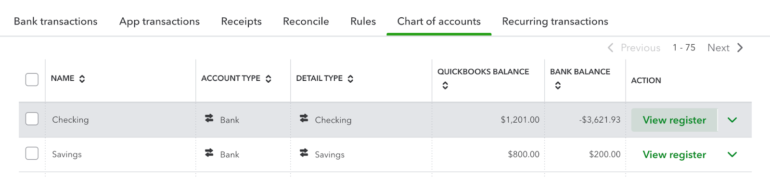
2. Locate your Checking account and click View register.
3. Find the check entry you want to delete and click it. Then, click Delete.

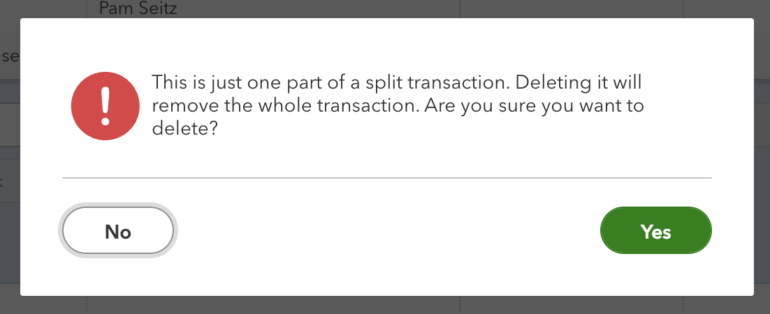
4. A warning box will appear. Click Yes to proceed to deletion. Once deleted, a floating notification saying “Transaction deleted” will appear.
How to delete a deposit in QuickBooks Desktop
1. Open the Check Register.
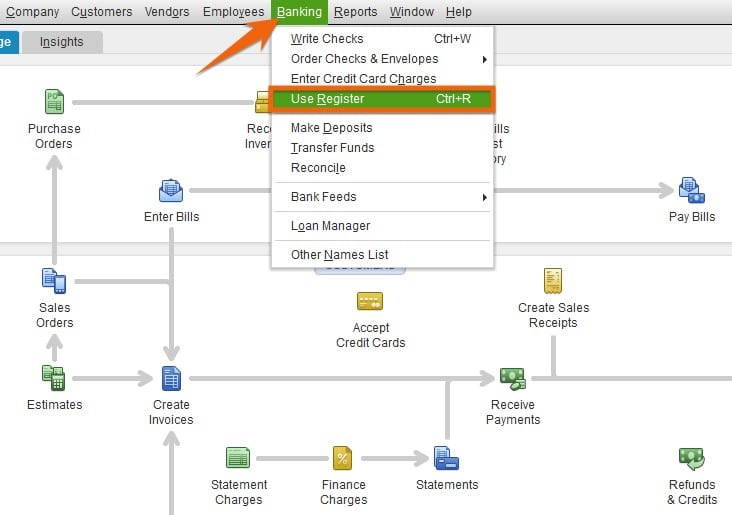
2. Locate the deposit you want to delete.
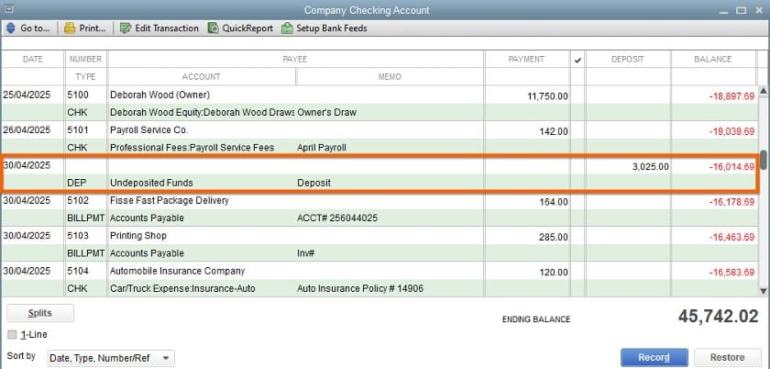
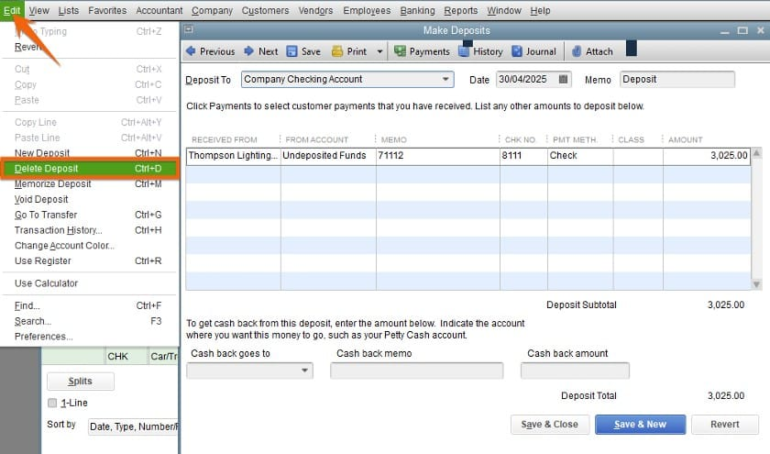
3. Delete the deposit. Navigate to Edit and select Delete Deposit. Alternatively, you can use the shortcut Ctrl+D for Windows users or Cmd+D for Mac users.
Precautions before deleting deposits
Deleting a deposit in QuickBooks is permanent, so it should only be done when you’re certain the transaction should be removed entirely. If there’s any doubt or if you want to preserve a record of the original entry, voiding the deposit is the safer option as it zeroes out the amount while keeping a trace in your records.
Hence, here are some precautions you should remember:
1. Confirm the action is approved
Always get approval from the chief accountant, business owner, or someone authorized before deleting a deposit. This protects you from making a decision that could impact tax reporting, cash flow tracking, or audit readiness. Deleting a deposit without proper sign-off can create inconsistencies in financial records and put you in a tough spot if questions come up later. When in doubt, ask. It’s better to pause than to fix avoidable mistakes later.
2. Verify if deposit is unreconciled
Never delete a deposit that’s already been reconciled with your bank statement. Doing so will unbalance past reconciliations, making your books harder to trust and more difficult to explain to stakeholders, auditors, or lenders. If the deposit needs to be changed and it’s part of a closed period, talk to your accountant first. It’s much easier to maintain clean records than to unravel a reconciliation that no longer matches your bank.
3. Use deletion only as a last resort
Deleting a deposit removes it completely from your books, which can be risky if the transaction was ever needed for reference. In most cases, voiding is a smarter move; it sets the amount to zero but keeps the transaction in your records, preserving your audit trail. This is especially important if you’re working in a team, going through an audit, or managing multiple revisions. Only delete when you’re absolutely certain the deposit should never have been entered in the first place.
Frequently asked questions (FAQs)
Can I recover a deleted deposit in QuickBooks?
No, once a deposit is deleted in QuickBooks, it cannot be recovered automatically. There’s no undo option. However, you can manually re-enter the deposit using your reports or audit log as a reference. This is why it’s important to review the transaction carefully — and consider voiding instead — before deleting.
How do I delete a deposit that includes multiple payments?
If the deposit was created from multiple payments (often grouped from the Undeposited Funds account), you can still delete it as a single transaction. When you do, all included payments will return to the Undeposited Funds account, allowing you to reselect or regroup them later if needed. Just be careful not to duplicate deposits during this process.
What’s the difference between a deleted and voided deposit in QuickBooks?
A deleted deposit is permanently removed from your books, leaving no trace unless re-entered manually. A voided deposit, on the other hand, remains in your records but with its amount changed to $0. Voiding is usually preferred when you want to keep a paper trail or preserve your audit history.