


 Spam can get into just about anything, including your WordPress site. On a WordPress platform, there can be spam accounts, spam within forums, spam product orders, and spam comments in posts.
I’ll walk
you through my best practice for blocking spam on a WordPress site. It’s not as challenging as you might suspect.
Block spam in comments
Comment threads are one of the first areas that are targeted for spam; this is where spammers can post links to their spam sites and other less-than-desired information.
The
most obvious way to prevent spam in comments is to turn off comments. This might be advantageous for a business-centric site, as that is
inviting trouble (in the form of flames, trolling, negative feedback, or support requests). To turn off comments, follow these steps:
- Log in to your WordPress site as the
administrator. - From the Dashboard, go to Settings | Discussions
(Figure A). - In the next screen, uncheck the option for Allow
People To Post Comments On New Articles. - Scroll down and click Save Changes.
Figure A
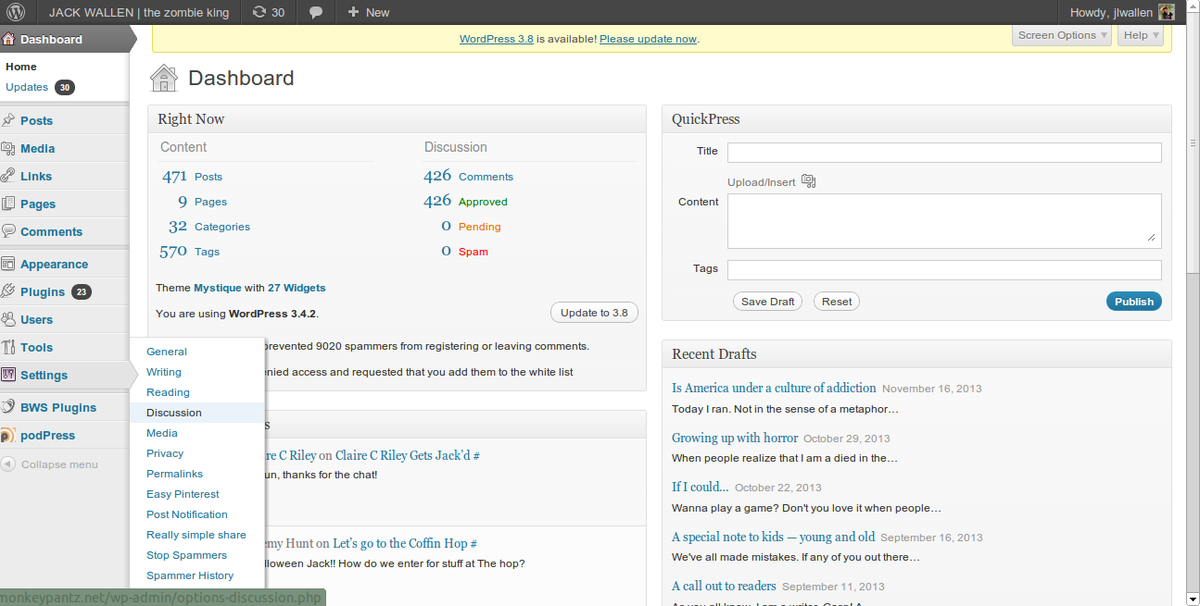
Access comment (discussion) settings from the WordPress
Dashboard. (Click the image to enlarge.)
If you don’t want to completely disable comments, you can
(from the same settings pages) limit comments to only registered users and require administrator approval for every comment. Both options should be
enabled if you want to leave commenting on for your site.
There is another unique feature to use in this same section.
In the Comment Moderation section, you will see a text area that allows you to
enter a blacklist of words that, when detected in a comment’s body, title, link, email, or IP, will cause WordPress to hold the comment for
moderation.
Below that section is a comment blacklist. When WordPress detects any of the words in your blacklist in a comment’s content, name, URL, or IP address, it will automatically mark
it as spam. This system means less moderation on
the part of the administrator.
Be sure to click the Save Changes button after you add text to either the Moderator or Blacklist.
Block registration
If you have no need for users to register on your site,
why not avoid potential issues by disabling the membership feature? Without the ability
to register, unwanted users will not gain access to features that might allow
them to spam your site.
To do this, follow these steps:
- Log in to your WordPress site as the
administrator. - From the Dashboard, go to Settings | General.
- Uncheck the box for Membership (Figure B).
- Scroll down and click Save Changes.
Figure B
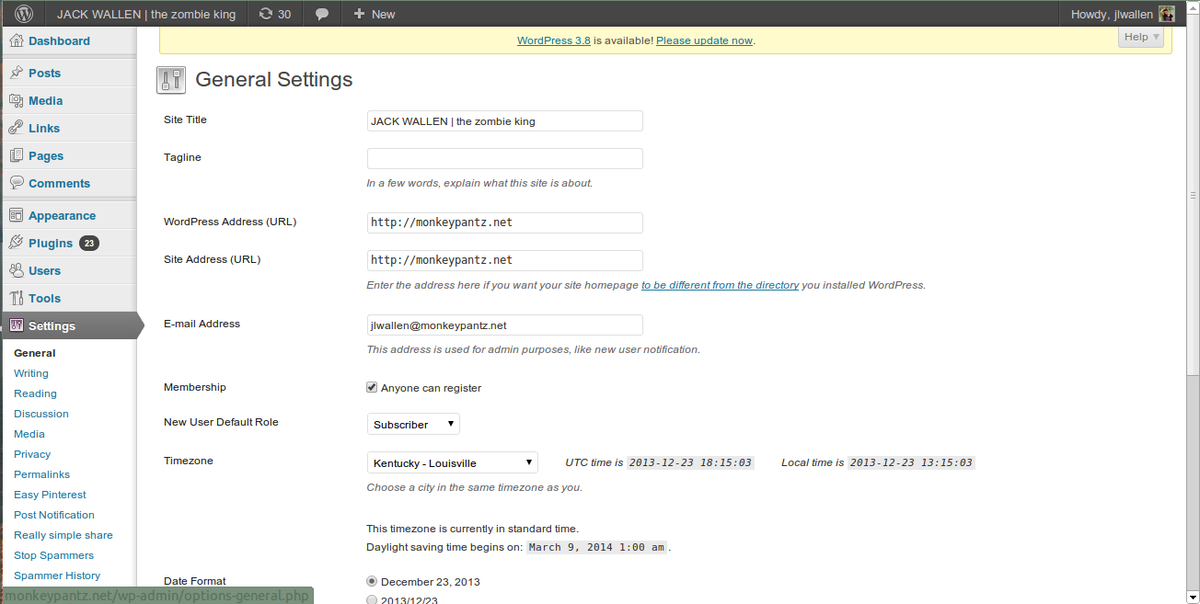
If you don’t need user-level features, disable Membership. (Click the image to enlarge.)
Install this must-have plugin
I’ve tried a number of the spam blocker WordPress plugins; some offer decent
results, while others can be disastrous. The plugin I find most
effective is Stop Spammers. It checks logins, registrations, and comments for
spam users and blocks them when they are detected. Stop Spammers also checks against
numerous well-known spam lists (e.g., Spamhaus.org, StopForumSpam.com,
Project Honeypot, BotScout), checks HTTP_ACCEPT headers, and checks
for bots hitting your site.
Here’s the easiest method of installing Stop Spammers:
- Log in to your WordPress site as the
administrator. - From the Dashboard, click Plugins.
- Click the Add New button.
- Enter Stop Spammers in the search field.
- Locate the Stop Spammers plugin.
- Click Install Now.
- Click OK.
- When the installation completes, click Activate
Plugin.
After you add the plugin, a new entry will appear in the Settings menu for Stop Spammers. If you click the Settings button from the plugin listing (Figure C), you will see a lot of available options.
Figure C
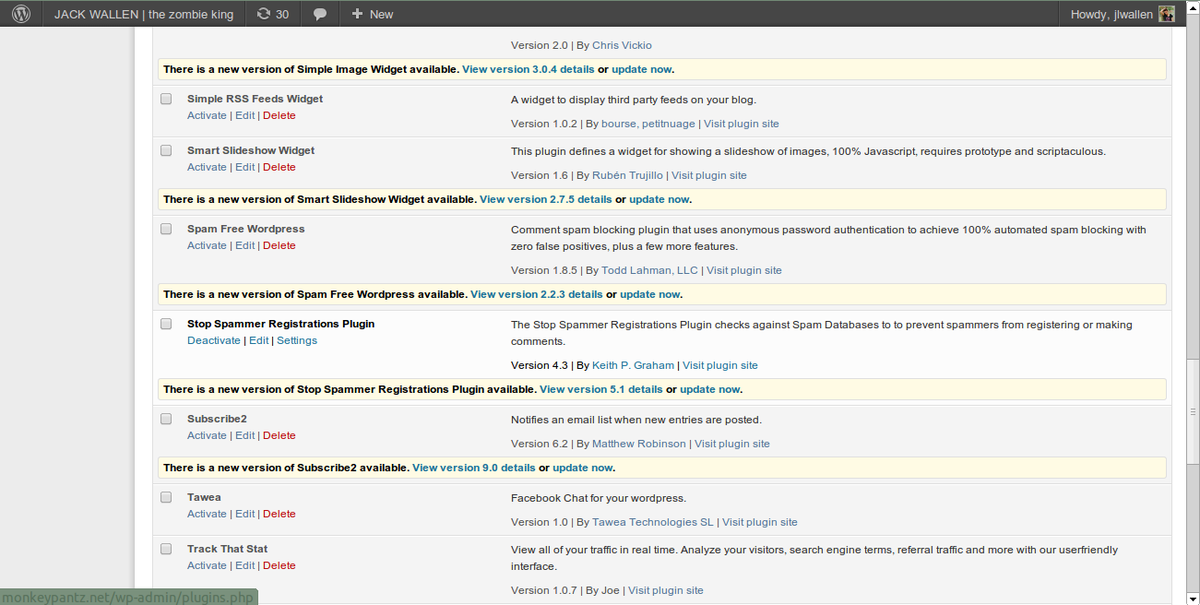
The Stop Spammers plugin is ready for action. (Click the image to enlarge.)
It’s very important to click the Check Your IP button immediately, because if your IP is on any of the spam listing sites,
you’ll be blocked from your own WordPress site. If the plugin detects that your IP is on a spam listing site, it
will automatically deactivate the plugin so you can continue working with your
platform. If this happens, you should work with your provider to
remove your IP from the listing.
These are the options types of options available with the plugin:
- Prevent Lockouts
- IP Checking
- API Keys
- Spam Limits
- Header checks
- Session timeouts
- Disposable email denial
- Red Herring checks
- JavaScript trap
- IP check against Akismet db
From the Settings window, you can create your own whitelist, blacklist, and spam word lists or block email domains or TLDs, and more.