


A document’s table of contents is predictable and generally reliable. An index, on the other hand, can be helpful or disappointing, because the creation process isn’t as established. There are few rules to determine what an author should or shouldn’t include in an index. Too many or too few entries will confuse and frustrate your reader. In this article, we’ll discuss the process for generating a helpful index in Word and some of the choices you’ll need to make when deciding what goes in and what doesn’t.
When working through the indexing example, you can use any document — or you can download the example .docx or .doc file. Figures and instructions are in Word 2010, but you should have no problem applying instructions to Word 2003 through 2013.
A little background
A good index is more than a list; a good index is intuitive and consistent, and that takes a specialized skill. Although Word’s indexing feature is powerful and easy to implement, the key to a good index is more plan than execution.
Word will help you create a concordance or a mark-up index. A concordance is an alphabetical index of the principal words in a book or document; an index is a list or relative entries in alphabetical order. What’s the difference? A concordance is a collection of words whereas an index lists (related) items that have meaning within the context of the written work. An index shows the result of some analysis or knowledge of the work. You’ll create a concordance only when you have a specific reason for doing so, and we won’t cover the process for creating a concordance in this article.
A mark-up index takes more planning but produces a more intuitive and context-reliable reference. This type of index requires an expertise in the subject because you tag the entries in the actual document. When you generate the index, Word uses those tags to determine what makes the index. It takes more effort or your part, but the results are more helpful to readers.
You’ll often see cross-references, which come in two flavors: See and See also. A See reference points to the correct location for a reference that isn’t defined at that location. Instead of finding nothing, the index refers the reader to another entry. This type of reference can be annoying, so use them wisely. If there’s nothing of contextual value at that location, why include the entry at all? See also references related entries that the reader might find useful in addition to the current entry. The document’s length, subject, and complexity will drive your decision to use cross-references.
Think ahead
Before you start marking up the document, you need a plan. If your organization has index conventions, you have a plan already. If not, here are a few things to consider:
- Will you cross-reference? If so, will you include See references?
- How will you handle (grammatical) articles such as The and A?
- How will you sort numbers — alphabetically or numerically?
- How will you display references that span more than a single page?
- Will you index the table of contents and other headings?
There’s no right or wrong, unless your content dictates otherwise. Your readers will adjust to your choices quickly enough if you’re consistent. Whether you tag as you write or after the document is done is also up to you, although giving the index your full attention after the writing is done might produce a more thorough index. More importantly, the visual tags are distracting to the creative process. My advice is to tag after you’re done writing, editing, and formatting the document.
Index tags are case- and space-sensitive. In other words, the terms “Cardinal” and “cardinal” aren’t the same; both will appear in your index. Similarly, “Cardinal” and ” Cardinal” won’t sort together. The space character at the beginning of the latter will force that entry to the top of the index. So, when you start tagging, tag carefully and consider these two sensitivity issues. If something’s out of place, one of these two issues might be the culprit.
Mark the text
After planning the contents for your index, you’re ready to start tagging, as follows:
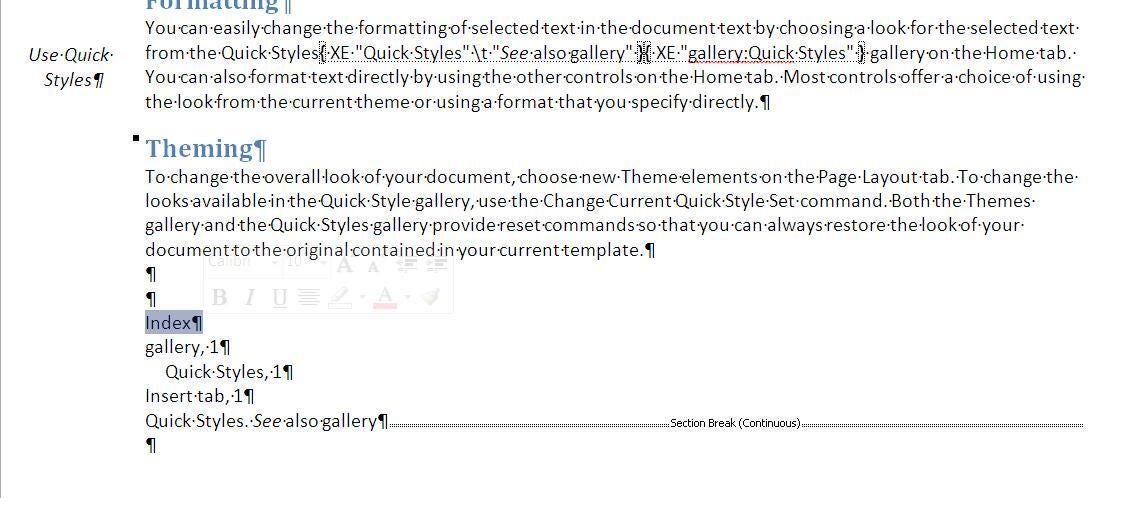
- Select the term you want to index. In this example, select the phrase Insert tab in the first line of the first paragraph (Figure A). As you can see, the highlight doesn’t include the space before or the comma and space that follow the phrase.
Figure A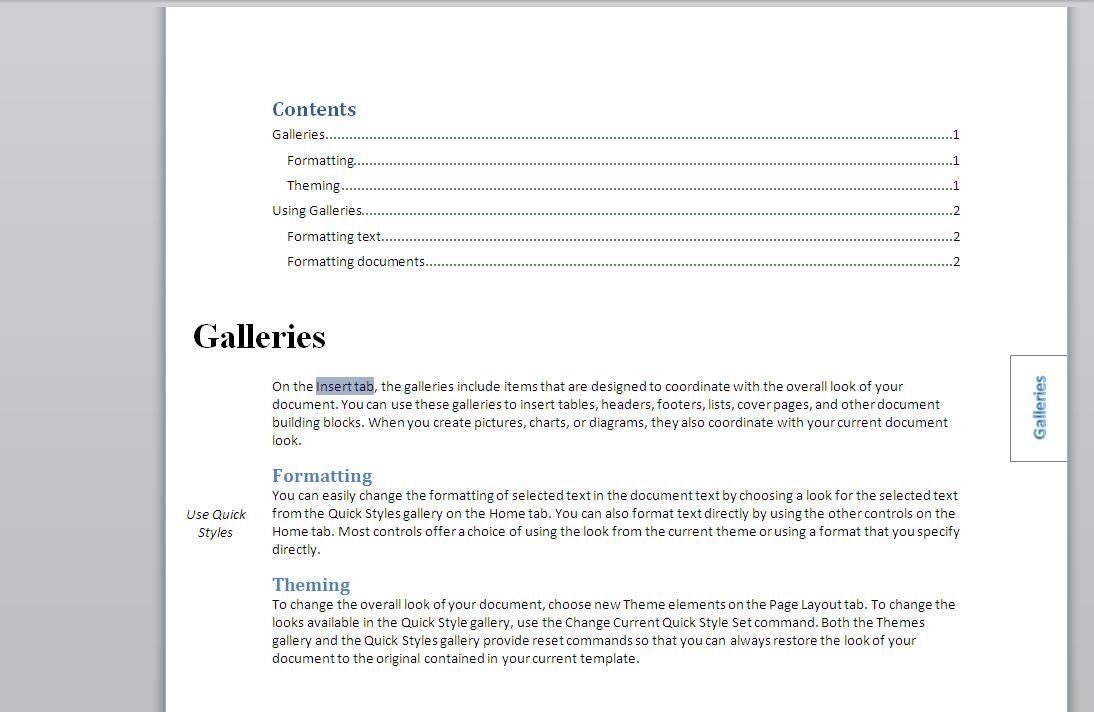
- Click the References tab, and then click Mark Entry in the Index group — or press [Shift]+[Alt]+[x]. In Word 2003, choose Mark Index Entry on the Insert menu. (If this command isn’t available in Word 2003, use the keyboard shortcut or see the Word 2003 command below.)
- Click Mark (Figure B).
Figure B
The resulting tag is shown in Figure C.
Figure C
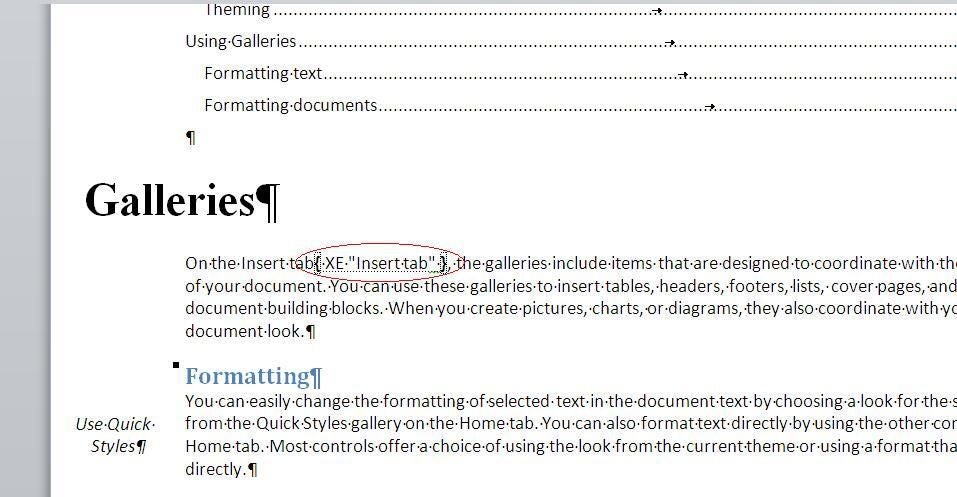
Word visually identifies tagged text.
The tag { XE “Insert tab” } is a specialized field that includes the marked text and additional attributes, such as cross-referencing. In this simple example, we didn’t change any of the defaults. We didn’t add a cross-reference or apply any special formatting. You could make other choices. In a document with many tab references, you might want to make Tab the main entry and Insert a subentry. You might even want to do both — and if you do, cross-references might be in order.
Add a second index tag by marking galleries in the first line, as shown in Figure D. This time, replace the galleries with gallery in the Main entry control and then click Mark All.
Figure D

You can tag a term and change the entry.
As you can see in Figure E, the tag contains the word gallery instead of galleries. Although gallery is the index entry, the index will reference locations for galleries. In addition, by clicking Mark All, you tagged all instances of the term galleries in your document, except in the table of contents and headings.
Figure E
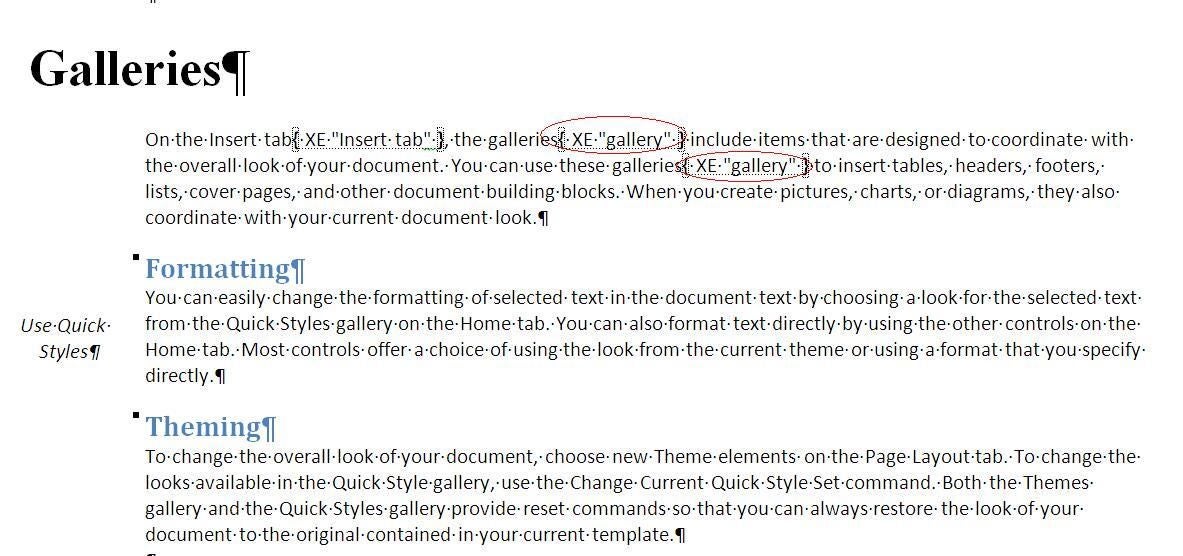
The second tag is different.
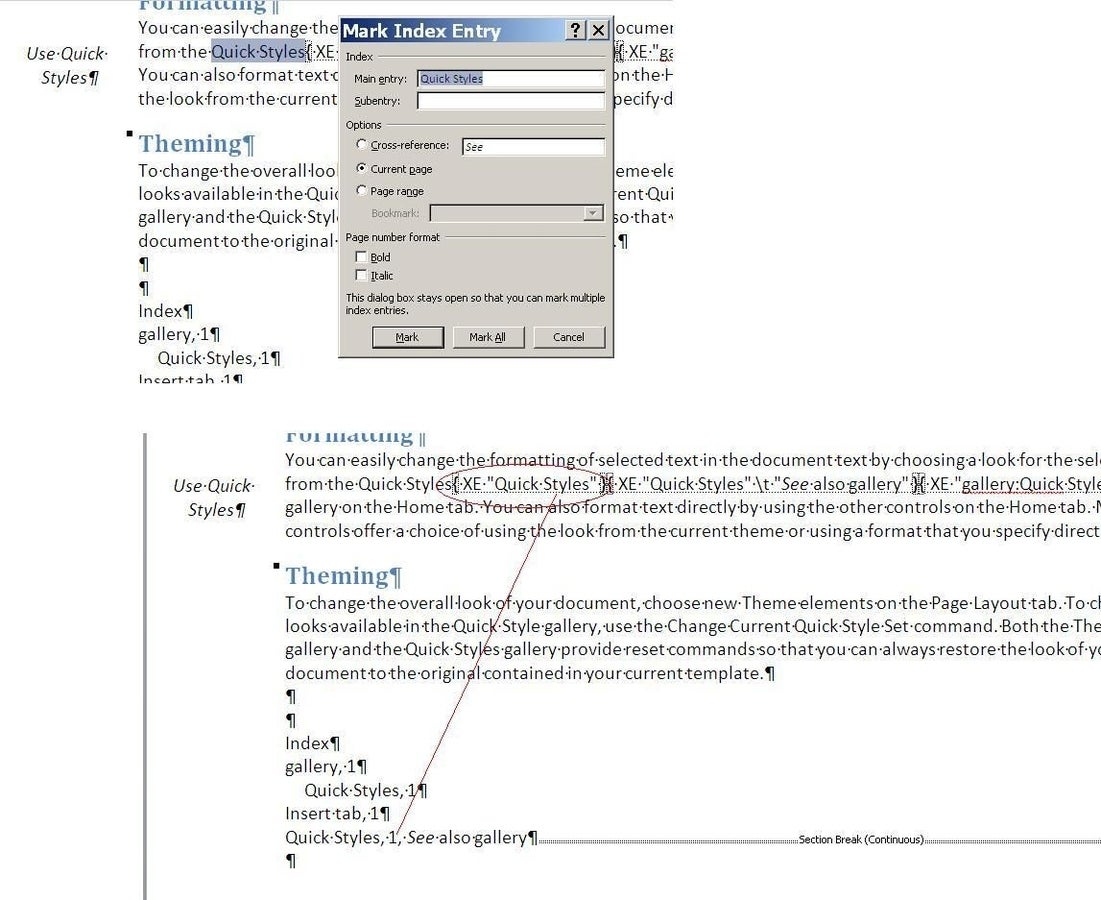
Now, let’s look at a more complex entry — Quick Styles in the second paragraph. In Word terminology, Quick Styles is a gallery. As such, it would be reasonable to include two entries: one for Quick Styles, and again under gallery.
- { XE “Quick Styles” \t “See also gallery” } Click Cross-reference in the Options section and add the text See also gallery to add a cross-reference to gallery for the main entry Quick Styles. The \t flag denotes a cross-reference.
- { XE “gallery:Quick Styles” } Enter gallery as the Main Entry text and Quick Styles as the Subentry text to enter Quick Styles as a subentry to gallery.
Figure F shows the result of adding two index tags:
Figure F
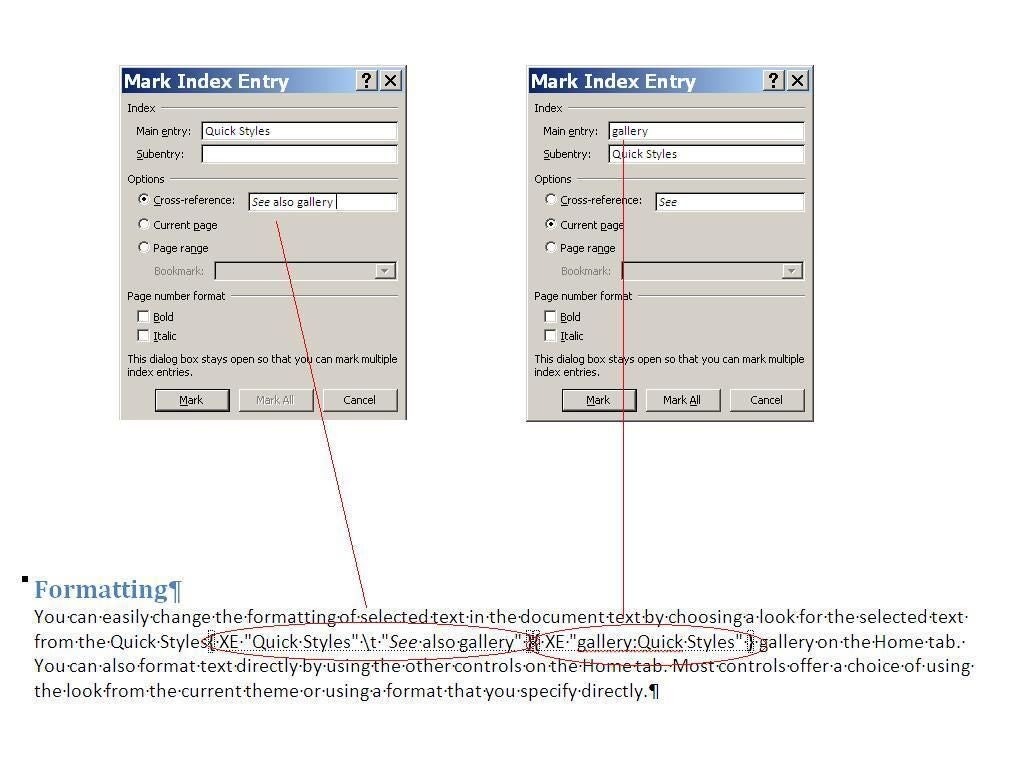
The same text can be marked to create subentries and cross-references.
Word 2003 command
If you’re still using Word 2003 and the Mark Index Entry command isn’t on the Insert menu, you can use the keyboard shortcut to open the Mark Index Entry dialog — or add the command to the Insert menu as follows:
- Choose Customize from the Tools menu, and then click the Toolbars tab.
- Make sure Menu Bar is checked in the Toolbars list (it’s a default, so it should be checked).
- Click the Commands tab.
- In the Categories list, click All Commands.
- In the Commands list, select MarkIndexEntry and drag the command to the Insert menu.
- Drag the command icon to the location where you want to the command to appear on the menu and release it.
- Close the Customize dialog.
Generate the index
There are several terms and phrases we could index in this short document, but let’s move on now and generate an index. Position the cursor at the end of the document (you’ll probably add a new page to your document). In the Insert group (still on the References tab), click Insert Index. In Word 2003, choose Reference from the Insert menu and then choose Index and Tables. The default settings are adequate for the first run, but change the Columns to 1, as shown in Figure G.
Figure G
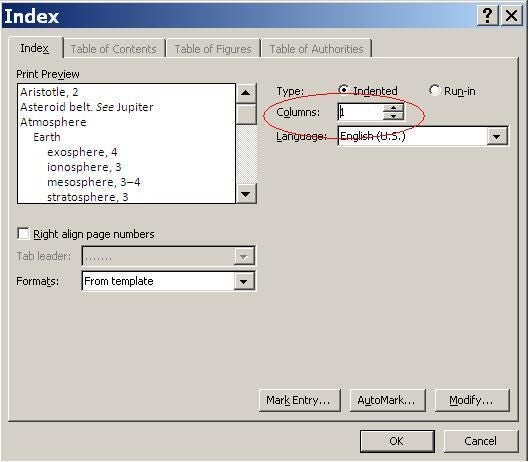
Generate a one-column index.
You’ll find a one-column index, similar to the one shown in Figure H, which is easier to proof and edit. The index includes your tagged entries and the page number on which they occur. The index also inserts a section break automatically. (I added the Index label, not Word.)
Figure H
The index is the result of your tags.
Entries are in alphabetical order. The first entry, gallery, occurs on page 1 but also has a subentry, Quick Styles. The main entry for Quick Styles entry has a cross-reference to gallery. Remember to be consistent. For example, if you marked another gallery, such as the Styles gallery, you’d want to add it to the gallery entry as a subentry and to cross-reference the gallery entry in the Styles main entry. Consistency is the key to generating a readable and helpful index.
Modifying the index
Unless you’re an index master or you’re indexing a simple document with only a few entries, the chances are that you won’t get things right the first time. For instance, you might have noticed that the Quick Styles main entry has a cross-reference but no page number. If you review Figure F, you’ll notice that you can add a page number of a cross-reference in the same tag, but not both. You need another tag to include a page number for the Quick Styles main entry.
You can’t modify the index directly. Instead, modify the index tag in question or add a new one. Then generate a new index. In this case, add a main entry tag for Quick Styles by highlighting Quick Styles in the document and adding a main entry tag as shown in Figure I. After closing the Mark Index Entry dialog, generate a new index. You don’t have to worry about position; Word will replace the existing index. When Word prompts you to confirm this action, click OK. In the resulting index, Quick Styles has a page number and a cross-reference.
Figure I
A main entry can have a page number and a cross-reference.
Extras
You’ve learned a lot, but there’s much more. There are several options you can use to create a more advanced index. For instance, you can create a second subentry by separating text with a colon character (:). Third-level entries (and further) are seldom necessary, but Word will let you create as many levels as you need.
You can format entries in several ways:
- In the Mark Index Entry dialog, use the Page number format options to format page numbers.
- In the tag, apply formats to the entry text.
- In the tag, use flags (which I’ll mention next).
There are several flags that you can insert into the tag to gain more control:
- Use \b to bold the entry.
- Use \i to italicize the entry.
- Use \t to add a cross-reference.
- Use \r to reference a bookmark (which we didn’t cover in this article). You can use this flag to create a page range.
The Mark Index Entry dialog has a button at the bottom called AutoMark. You’ll use this button to create a concordance index (which isn’t covered in this article).
You don’t have to close the Mark Index Entry dialog each time you mark an entry — that would be tedious. Leave the dialog open while you highlight terms. If the Main Entry control doesn’t update with the new text, click inside the control. After the control displays the new text, set the necessary options, and click Mark or Mark All. Repeat marking until you’re done. Then close the dialog.
Use the Show/Hide option in the Paragraph group on the Home tab to hide and display the index tags, as needed.
Send me your question about Office
I answer readers’ questions when I can, but there’s no guarantee. When contacting me, be as specific as possible. For example, “Please troubleshoot my workbook and fix what’s wrong” probably won’t get a response, but “Can you tell me why this formula isn’t returning the expected results?” might. Please mention the app and version that you’re using. I’m not reimbursed by TechRepublic for my time or expertise, nor do I ask for a fee from readers. You can contact me at susansalesharkins@gmail.com.