


Wireless networking in an office environment can supplement the Ethernet network in case of an outage or, in some cases, replace it altogether. Using Wireless Access Points (WAPs) to connect remote users or desktop PCs can be a very simple way to get everything up and running quickly. And leveraging the power and centralization of Active Directory when setting up your wireless infrastructure can save time for all parties involved.
Getting started
To get the ball rolling, I suggest creating a new Group Policy Object (GPO) to configure for Wireless settings. This will keep all the wireless settings contained so they can be enabled and disabled easily. Note: when performing the steps needed to configure these settings, I will be using the Group Policy Management Console (GPMC) — available at Microsoft downloads.
Follow these steps:
- Open the GPMC from the Administrative Tools menu.
- Expand the Forest node on the left pane of the console.
- Expand Domains and expand your domain.
- Locate the Organizational Unit (OU) where you wish to link the GPO.
- Right-click the OU and select Create and Link a GPO Here.
Note: Once the GPO is added here, any objects that exist in this OU will have the policies defined by the linked GPOs applied to them.
Enter a name for the GPO you are creating and click OK. Doing this will create the object and link to the OU. Be sure to use a descriptive name for the GPO to make future management a bit easier. Once the object is created, there will be no settings defined within the object. Right-click the GPO and select edit to configure the settings you need.
Many, many settings for a GPO
When opening the GPO for editing, there will be many options available for configuration. To find the Wireless settings, expand the computer configuration node, then expand Windows Settings and from there, Security Settings.
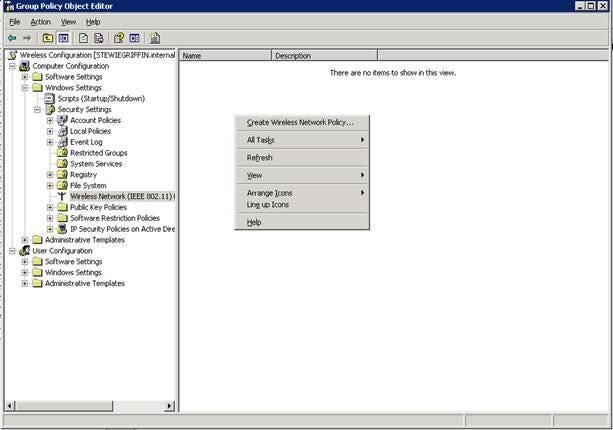
Listed under Security Settings you will see Wireless Network (IEEE 802.11) Policies. Click on this node to display any existing configuration items.
Creating a new Wireless Network Policy
Right-click in the details pane on the right of the console with the Wireless Network Policies node highlighted and select Create Wireless Network Policy, as shown in Figure A.
Figure A
This will open the Wireless Network Policy Wizard. Click Next to bypass the welcome screen. On the next screen, enter a name for the Wireless Network Policy and a description, as in Figure B.
Figure B
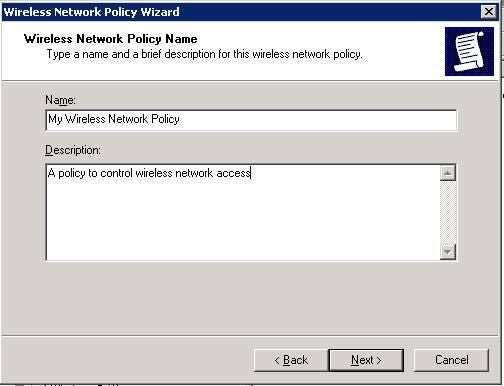
Note: Using a description can help you in the event that modifications are needed later.
Clicking Next in the dialog box will complete the wizard and display the Completing the Wireless Network Policy Wizard dialog box. Leave the Edit properties box checked so that you can move right into creating the settings for the policy, as shown in Figure C.
Figure C

On the properties sheet for the Wireless network policy, the general page displays the settings created by the wizard, the name and description, but also allows you to configure the following:
- Check for Policy Changes Every x Minutes allows you to set the interval for checking for updates.
- Networks to Access options:
- Any available network (access point preferred)
- Access point (infrastructure) networks only
- Computer to computer (ad hoc) networks only
- Use Windows to Configure Wireless Network Settings for Clients allows Windows to manage the wireless settings on client computers.
- Automatically Connect to Non-Preferred Networks allows you to connect to networks that are not listed on the preferred tab of the properties dialog box.
The Preferred Networks tab of the Wireless Network Policy Properties dialog (Figure D) allows configuration of the preferred networks that clients should connect to.
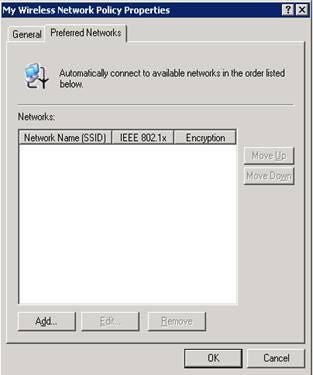
To add a preferred network, complete the following steps:
- Click the Add button on the Preferred Networks tab.
- Enter the Network Name (SSID) for the preferred network.
- Enter a description of the network.
- Select the Network Authentication type for the network.
You can choose from the following network types:
- Open: no authentication needed
- Shared: authentication key shared automatically
- WPA: Wi-fi Protected Access
- WPA-PSK: Wi-Fi Protected Access – Pre Shared Key
Select the data encryption type associated with the authentication method chosen that meets the needs of your organization. For Open and Shared authentication types, you can choose not to provide the key automatically. With either WPA setting, this option is grayed out.
Select if this network is a computer-to-computer (ad hoc) network that does not use access points. If you do not need to configure other settings, click OK to close the properties dialog box. After clicking OK and allowing Group Policy to refresh in your Domain, any objects moved into the OU with this GPO linked and enabled will be configured to allow Wireless Network Policies to be used.