


In a previous article, Get
started with Windows 8 Client Hyper-V the right way, I reminded you that Microsoft
is ending
support for Windows XP SP3 on April 8th 2014. I then told you that if you are
running a 64-bit version of Windows 8 Professional or Windows 8 Enterprise, you
could use Client Hyper-V to run a virtual Windows XP machine inside of Windows
8. I then focused in on the steps for setting up Windows 8’s Client Hyper-V.
Then, in the article Create
a virtual switch in Windows 8 Client Hyper-V, I showed you how to create a
virtual switch in order for your virtual machines to connect to your network
and the Internet. As I did, I mentioned that once you have a virtual switch in
place, you can create a virtual machine and in the process connect it to the
virtual switch.
In this week’s article, I’ll show you how to create a
virtual machine in Windows 8 Client Hyper-V designed for Windows XP. I’ll then
show you how to install Windows XP on your new virtual machine.
This article is also available as a TechRepublic Slideshow Gallery.
Changing the default folders
Before we get started with creating a virtual machine, I
want to point out that I like to change the default folders in which Client
Hyper-V stores its files in order to make it easier to have these files
included in my regular backup. That way, if anything should happen to my hard
disk, performing a restore operation will also return my virtual machines to their
previous state.
By default, Hyper-V stores all the files and folders that
make up a virtual machine in the C:\ProgramData\Microsoft\Windows\Hyper-V
folder. It then stores the virtual hard disks in the C:\Users\Public\Documents\Hyper-V\Virtual
Hard Disks folder. I prefer to keep them all together in the Documents folder
so that they are included in my regular backup. (Keep in mind that you may
choose any location you wish or you can leave the default folders settings as
they are.)
I created a folder called Hyper-V in the Documents folder
and then inside of that folder, I created two subfolders called Virtual
Machines and Virtual Hard Disks. I then configured Hyper-V to use those folders
from within the Hyper-V Settings tool. Let’s take a closer look.
With the folders in place, launch Hyper-V Manager, pull down
the Action menu, and select Hyper-V Settings command, as shown in Figure A. (You’ll notice that for the
purpose of making my screen shots easier to read, I have disabled the Actions
pane.)
Figure A
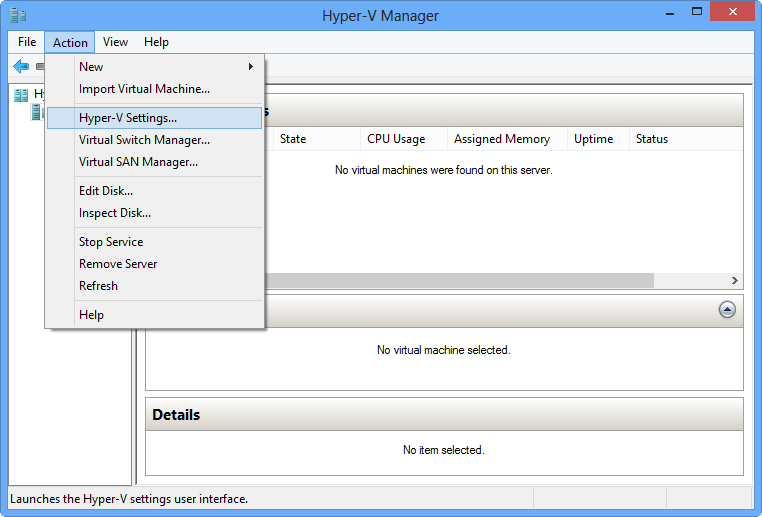
- From the Action menu, select the Hyper-V Settings command.
- When you click the Browse button, you can use the Select Folder dialog box to choose where you want Client Hyper-V to store its files.
- I have changed the location where Client Hyper-V stores files for Virtual Hard Disks and Virtual Machines so that they are included in my regular backup.
- New Virtual Machine Wizard
- To create virtual machine, select the New | Virtual Machine command.
- You can create a custom virtual machine or select a preconfigured one.
- When you create a custom virtual machine, you’ll start by naming the computer.
- You’ll specify the amount of memory that you want to designate to your virtual machine.
- You’ll leave the Connection set at Not Connected for now.
- You can specify a new virtual hard disk now using the default settings or use an existing virtual hard disk.
- There are several ways that you can install the operating system on your virtual machine.
- Make sure that your virtual machine is selected in the Hyper-V Manager and then select the Settings command from the Action menu.
- Windows XP requires a legacy network adapter.
- Once you specify the Legacy Network Adapter, you can connect it to your virtual switch.
- Installing Windows XP
- To begin the Windows XP installation procedure, click the green start button.
- You’ll follow through the steps to install Windows XP as you normally would.
- Windows XP running on a virtual machine in Windows 8 Professional.
- What’s your take?
From the Action menu, select the Hyper-V Settings command.
When the Hyper-V Settings window appears, you’ll find that
the Server section in the left pane contains items titled Virtual Hard Disks and
Virtual Machines. When you select either of these items, you can then click the
Browse button and change the location in which Client Hyper-V stores its files.
As you can see in Figure B, using
the Select Folder dialog box I have selected my new Virtual Hard Disks folder.
Figure B
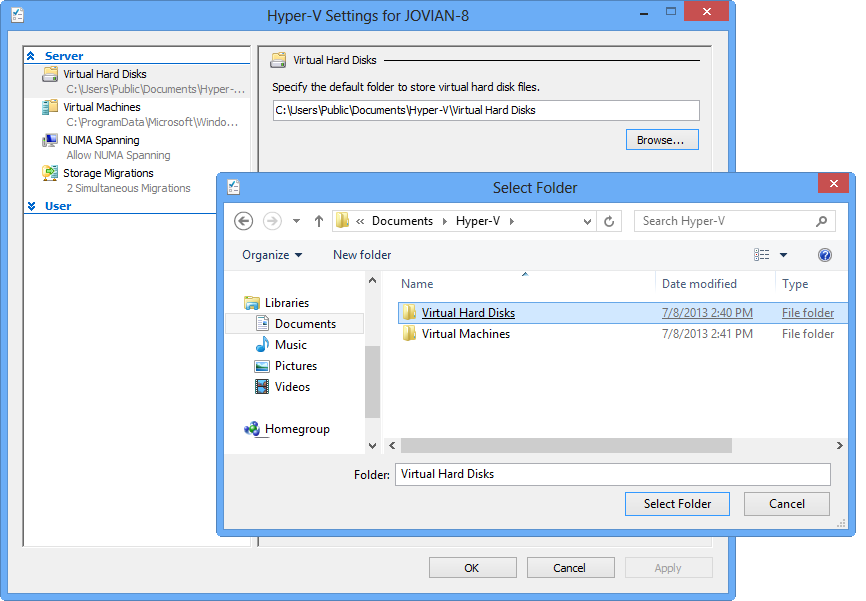
When you click the Browse button, you can use the Select Folder dialog box
to choose where you want Client Hyper-V to store its files.
I then performed the same operation to change the default
location in which Client Hyper-V stores the files for the virtual machines. As
you can see in Figure C, Hyper-V
will now store the Virtual Hard Disks and Virtual Machines files in my
Documents\Hyper-V folder. To complete this part of the operation, just click
OK.
Figure C
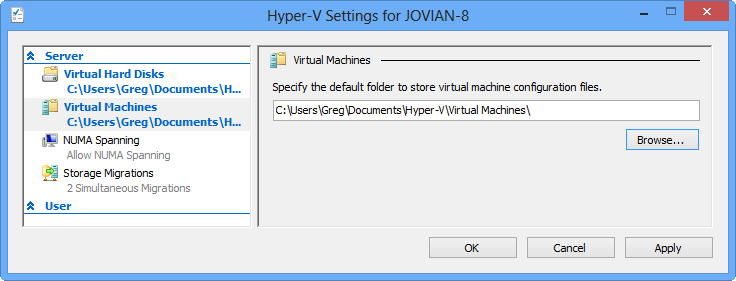
I have changed the location where Client Hyper-V stores files for Virtual
Hard Disks and Virtual Machines so that they are included in my regular backup.
New Virtual Machine Wizard
Creating a virtual machine is easy with the New Virtual
Machine Wizard; to begin, pull down the Action menu and select the New | Virtual
Machine command, as shown in Figure D.
Figure D
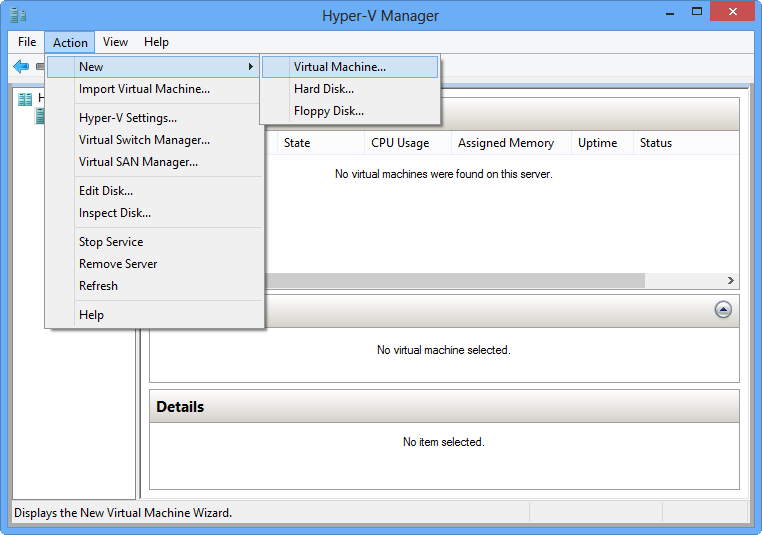
To create virtual machine, select the New | Virtual Machine command.
When the first screen of the New Virtual Machine Wizard
appears, as shown in Figure E, you’ll
discover that there are two ways that you can create a virtual machine. You can
just click the Finish button and the New Virtual Machine Wizard will create a
virtual machine that is configured with default values or you can work through
the wizard and choose your own settings.
Figure E
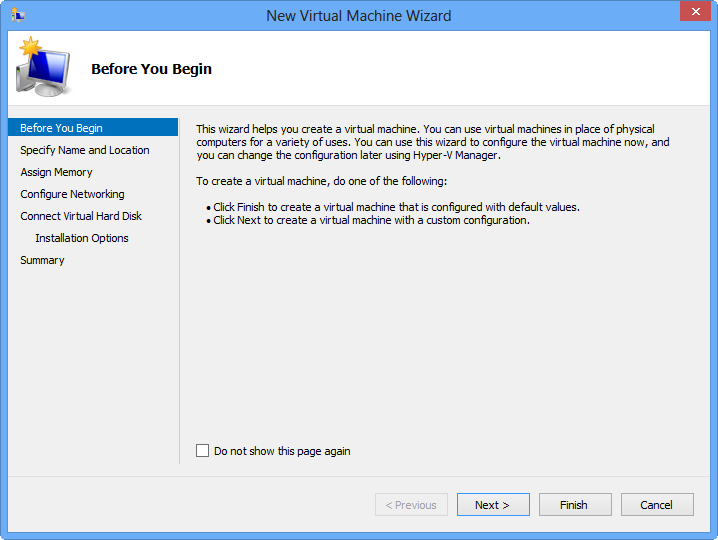
You can create a custom virtual machine or select a preconfigured one.
When creating a virtual machine for Windows XP for this
article, we’ll work through the wizard. Doing so will give you a good idea of
what is involved in the procedure and will be helpful later on when you need to
customize the virtual machine. To proceed, click the Next button.
On the screen titled Specify Name and Location, shown in Figure F, you’ll give your machine a
name. As you can see, for my example I have chosen to call the virtual machine
Windows XP – VM. You’ll also notice that the virtual machine will be created in
the folder that I specified earlier. If you chose not to change the default
location in the Hyper-V settings, you can do so here if you wish by selecting
the check box, which will enable those controls. To continue, click the Next
button.
Figure F
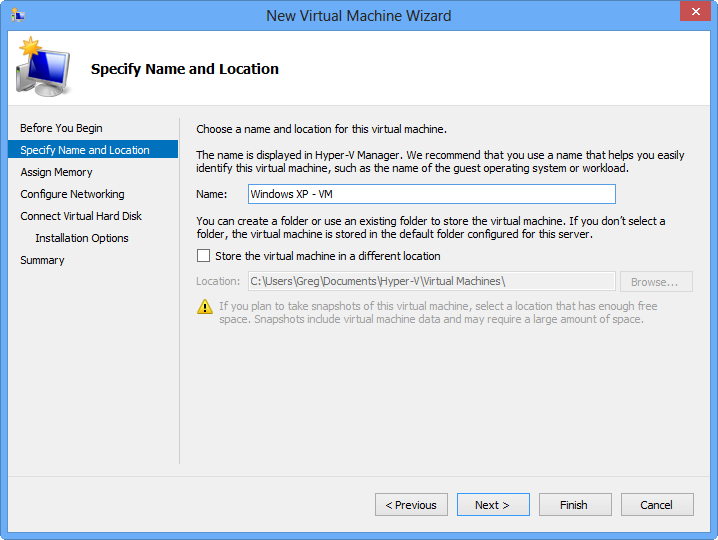
When you create a custom virtual machine, you’ll start by naming the
computer.
On the screen titled Assign Memory, you’ll specify the
amount of memory that you want to dedicate to your virtual machine. As you can
see in Figure G, I have highlighted
the range of memory that Hyper-V will allow me to allocate to this virtual
machine – between 8MB and 1804MB. To arrive at the upper value in this range,
Hyper-V takes the total amount of memory on the host system (on my example
system 4GB), calculates how much is currently in use, how much will be required
by the host machine to run the virtual machine, and then sets the limit on how
much you can assign to the virtual machine. As such, I chose to specify 1024MB
in the Startup memory text box.
Figure G
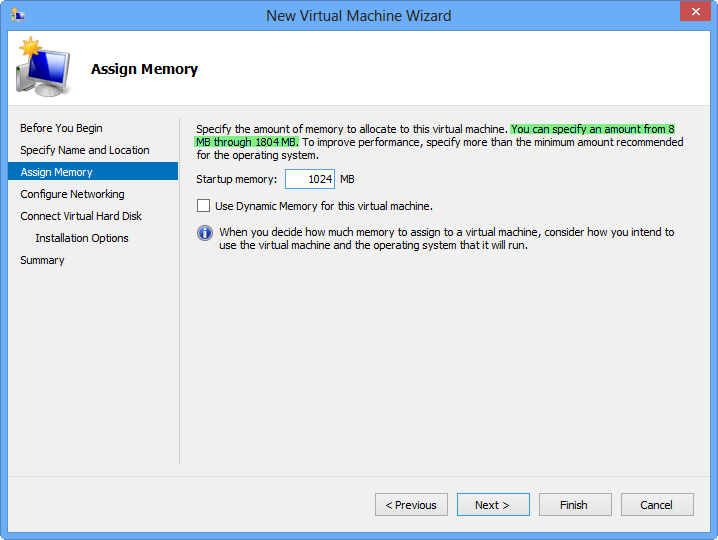
You’ll specify the amount of memory that you want to designate to your
virtual machine.
Even though the text box is titled Startup memory, in the
case of the Windows XP operating system, this will be the total amount of
available memory. In other words, it will essentially be static memory. Being
an older operating system, Windows XP is not supported by Hyper-V’s
Dynamic Memory feature, so you’ll leave that check box unselected
Moving ahead, you’ll be prompted to link your virtual
machine to the virtual switch that you created, as shown in Figure H. For now, you’ll leave this
setting at its default setting of Not Connected. In the case of Windows XP,
some additional configuration is necessary when it comes to networking and we’ll
take care of that once we complete the wizard. So for now, just click Next.
Figure H
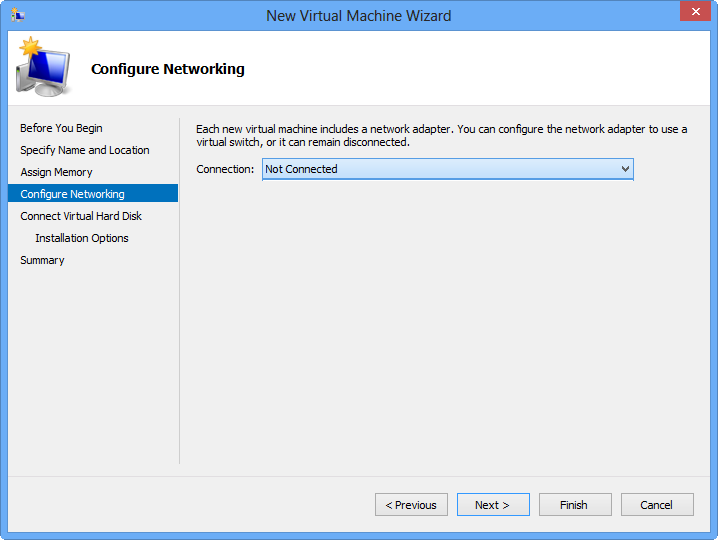
You’ll leave the Connection set at Not Connected for now.
On the screen titled Connect Virtual Hard Disk, you’ll see
that the wizard automatically fills in the Create a virtual hard disk section.
As you can see in Figure I, the hard
disk has the same name as the virtual machine, is saved in the folder that I
specified, and is set to be 127GB in size. You can change the size if you wish.
If you have an existing virtual hard disk that you want to use for your virtual
machine, you can connect it now or later.
Figure I
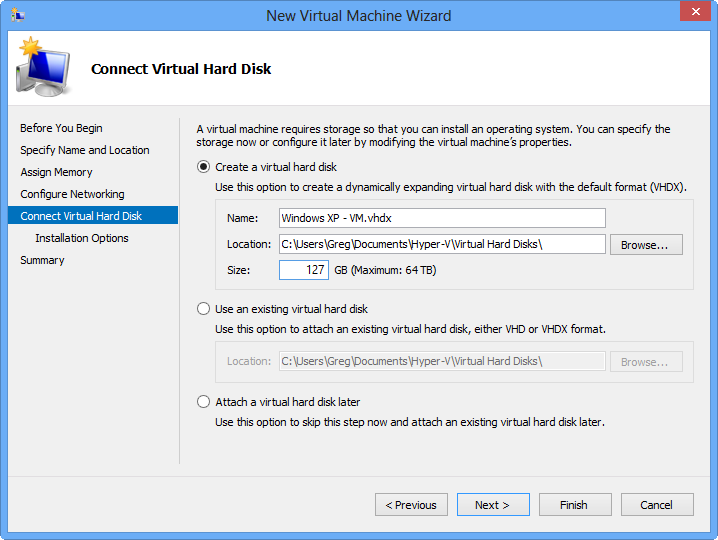
You can specify a new virtual hard disk now using the default settings or
use an existing virtual hard disk.
On the Installation Options screen, shown in Figure J, you’ll specify when and how
you will install an operating system on the virtual machine. As you can see, I’ve
selected to install the operating system from the DVD drive, but I could also
choose to install from an ISO file, a bootable virtual floppy disk, or a
network installation server. I can also choose to install the operating system
later.
Figure J
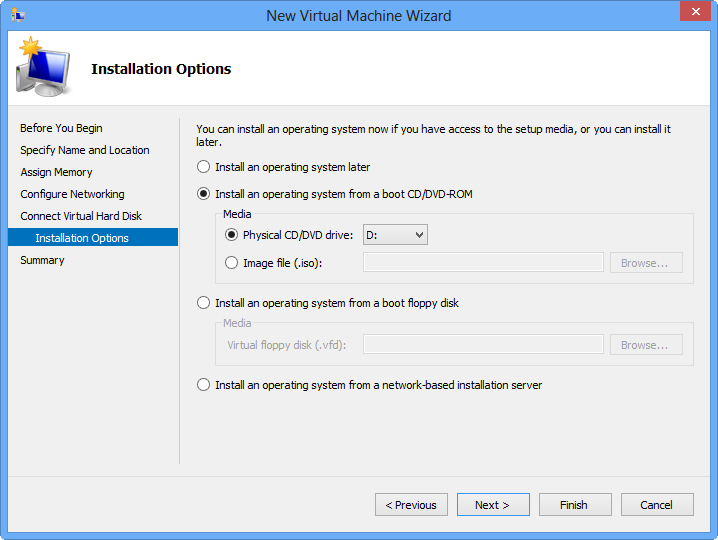
There are several ways that you can install the operating system on your
virtual machine.
At this point you can click Next to go to a Summary screen
or you can just click Finish. When the Wizard closes, you’ll see your virtual
machine in the Hyper-V Manager.
Configuring the network connection
As I mentioned, when it comes to networking Windows XP
requires some additional configuration. This is because Windows XP
is an old operating system and isn’t capable of recognizing Hyper-V’s default
virtual network adapter. As such, you need to reconfigure the virtual network
adapter.
To begin, make sure that your virtual machine is selected in
the Hyper-V Manager. Then pull down the Action menu and select the Settings
command, as shown in Figure K.
Figure K
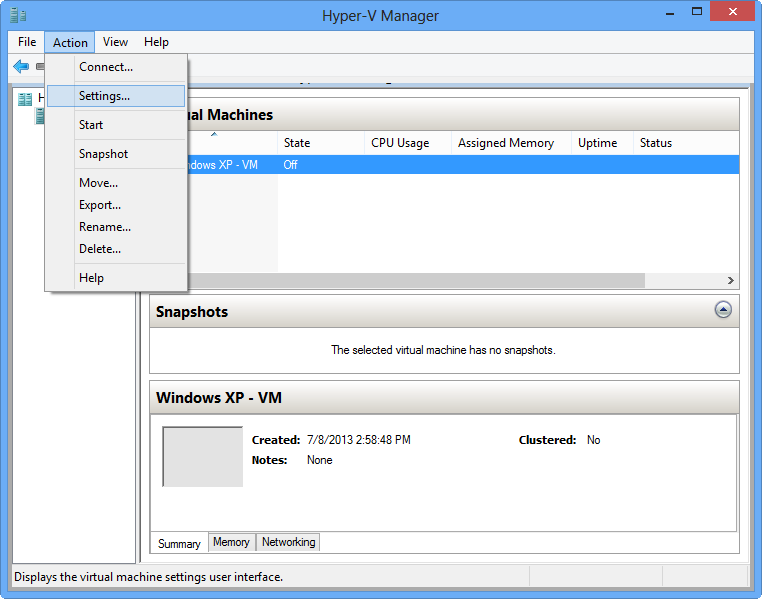
Make sure that your virtual machine is selected in the Hyper-V Manager and
then select the Settings command from the Action menu.
When the Settings window appears, you’ll see that there are
a multitude of settings that you can configure to customize the hardware and
management of your virtual machine. For the purposes of this article, I’ll just
cover the settings that you need to change to get your Windows XP virtual
machine connected to the network.
Again, because Windows XP is an old operating system, it isn’t
capable of recognizing Hyper-V’s default virtual network adapter. As such, you
will need to select the Legacy Network Adapter item, as shown in Figure L, and click the Add button.
This will create a virtual network adapter using a legacy configuration that
Windows XP can recognize.
Figure L
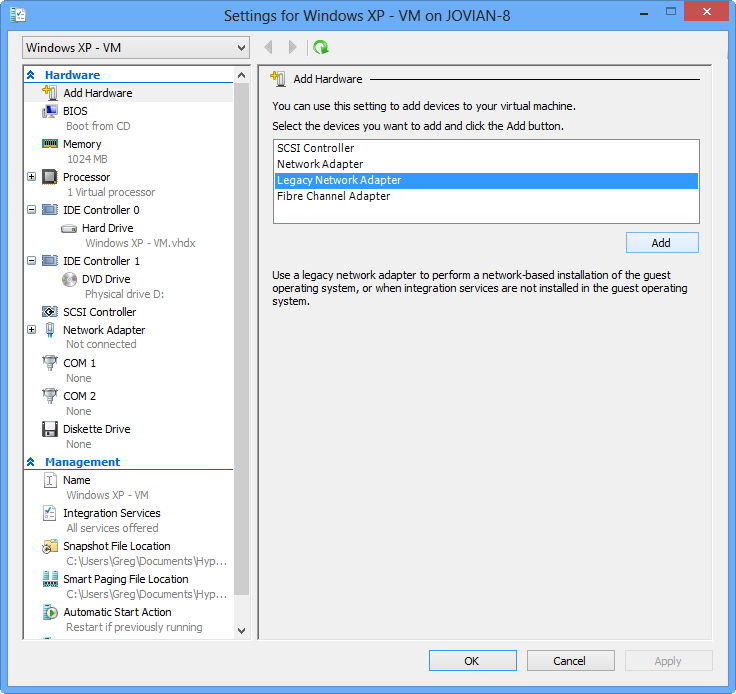
Windows XP requires a legacy network adapter.
When you click the Add button, Hyper V will add the Legacy
Network Adapter to the Hardware list and immediately take you to that section.
Since I already created a virtual switch, I’ll select the Virtual Switch 1 from
the drop down, as shown in Figure M.
Then, click OK to save your changes and close the Settings window. If you haven’t
already set up a Virtual switch for the Network Adapter, you can do so at any
time. (See my blog post, Create
a virtual switch in Windows 8 Client Hyper-V.)
Figure M
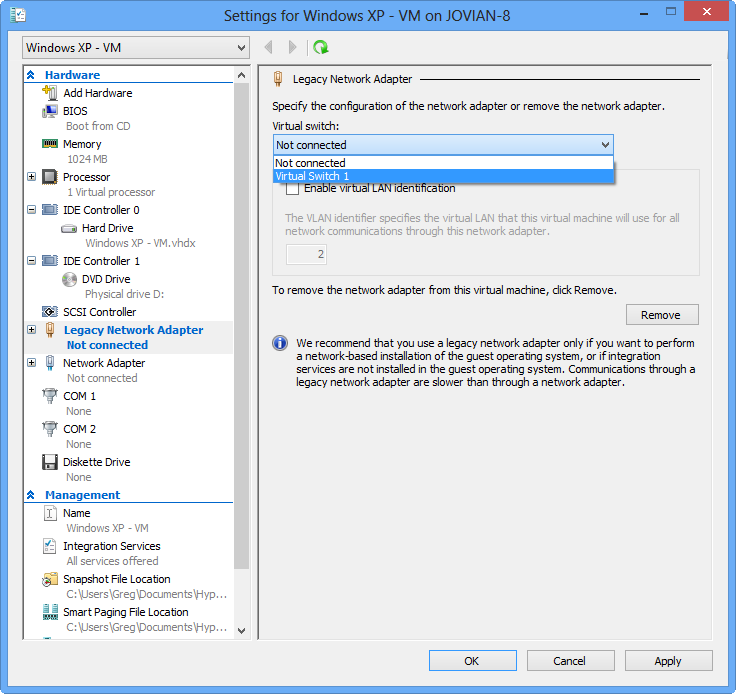
Once you specify the Legacy Network Adapter, you can connect it to your
virtual switch.
Installing Windows XP
Installing Windows XP in a Hyper-V virtual machine is easy.
To begin, make sure that your virtual machine is selected in the Hyper-V
Manager and then insert the Windows XP CD in the optical drive. Next, pull down
the Action menu and select the Connect command. When you do, you’ll see a
virtual machine window that tells you that the machine is turned off. At this
point, just click the green Start button on the menu bar, as shown in Figure N.
Figure N
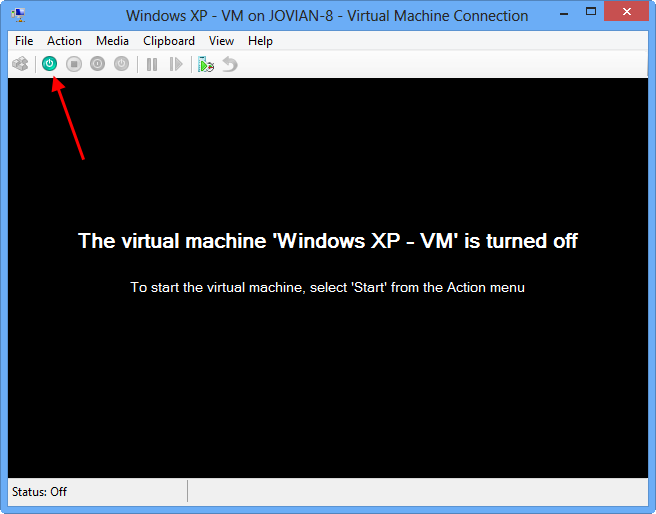
To begin the Windows XP installation procedure, click the green start
button.
In a moment, the Windows XP installation procedure will
begin. Figure O shows the Welcome to
Setup screen. Now, you’ll follow through the steps to install Windows XP as you
normally would.
Figure O
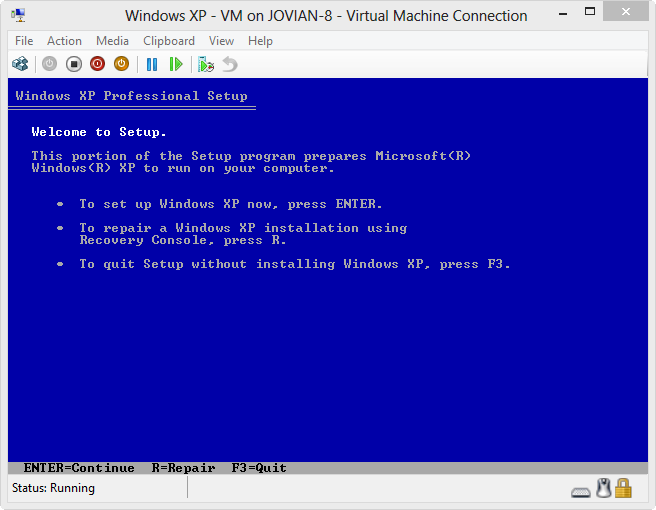
You’ll follow through the steps to install Windows XP as you normally
would.
Once the installation is complete, you’ll see the Windows XP
desktop in a virtual machine in Windows 8, as shown in Figure P, and can begin using your virtual Windows XP system. In
future articles, I’ll cover some tips and tricks that will help you to get the
most out of your virtual Windows XP system.
Figure P
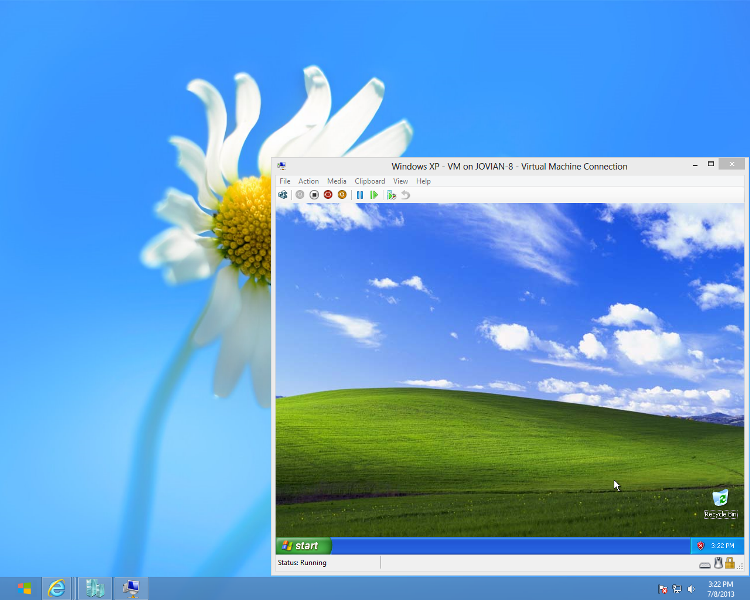
Windows XP running on a virtual machine in Windows 8 Professional.
What’s your take?
Have you had a chance to experiment with Windows 8 Client
Hyper-V yet? Will you install Windows XP in a Hyper-V virtual machine in
Windows 8? As always, if you have comments or information to share about this
topic, please take a moment to drop by the TechRepublic Community
Forums and let us hear from you.
Also read:
- Get
started with Windows 8 Client Hyper-V the right way - Create
a virtual switch in Windows 8 Client Hyper-V - Install
Windows XP in Windows 8 Client Hyper-V