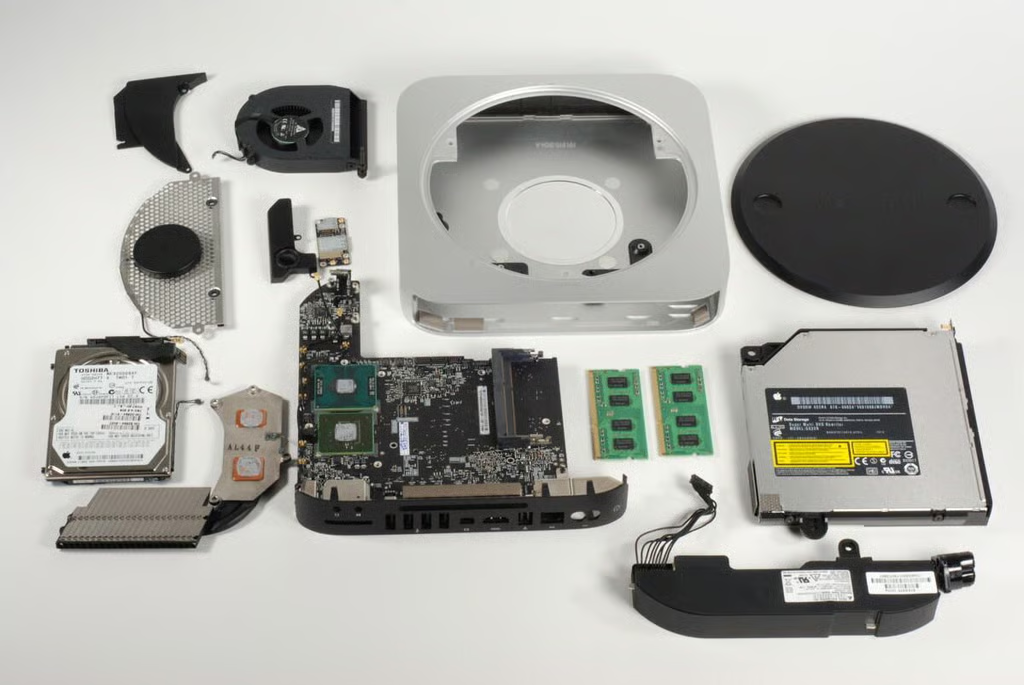
Our base model Mac Mini (A1347) cost $699 (US) and came with a 2.4GHz Intel Core 2 Duo CPU, 2GB RAM, 320GB hard drive, 8x double-layer SuperDrive, NVIDIA GeForce 320M GPU, and Mac OS X Snow Leopard.
Photo credit: Bill Detwiler / TechRepublic

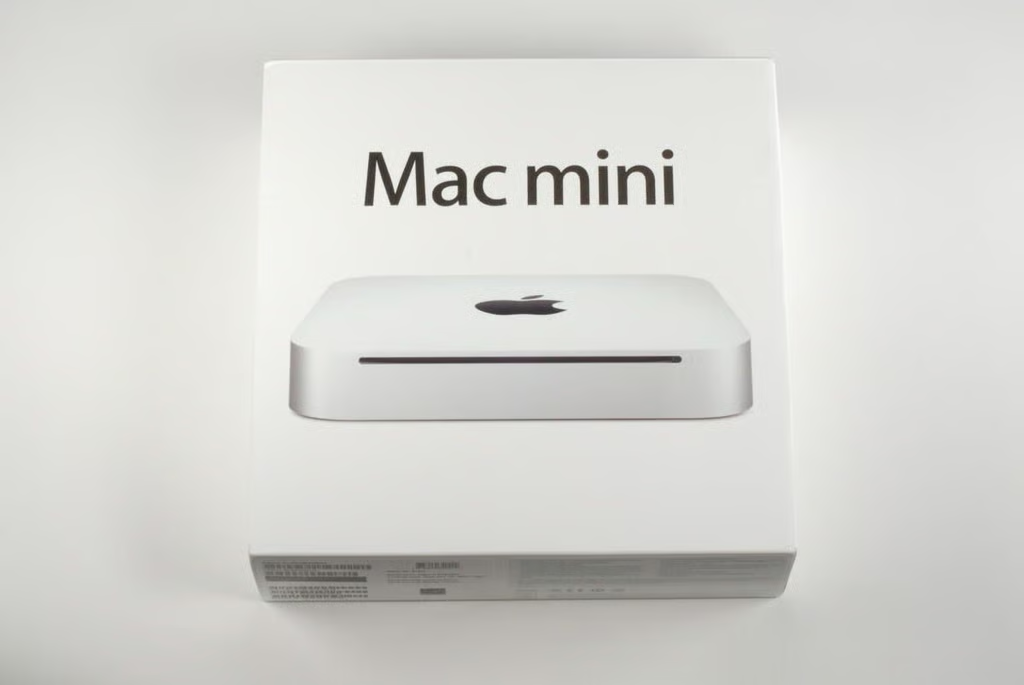
Lifting the top off the Mac mini box, we get our fist look at the A1347’s aluminum unibody enclosure.
Photo credit: Bill Detwiler / TechRepublic
Under the Mac mini, you’ll find the rest of the box contents.
Photo credit: Bill Detwiler / TechRepublic
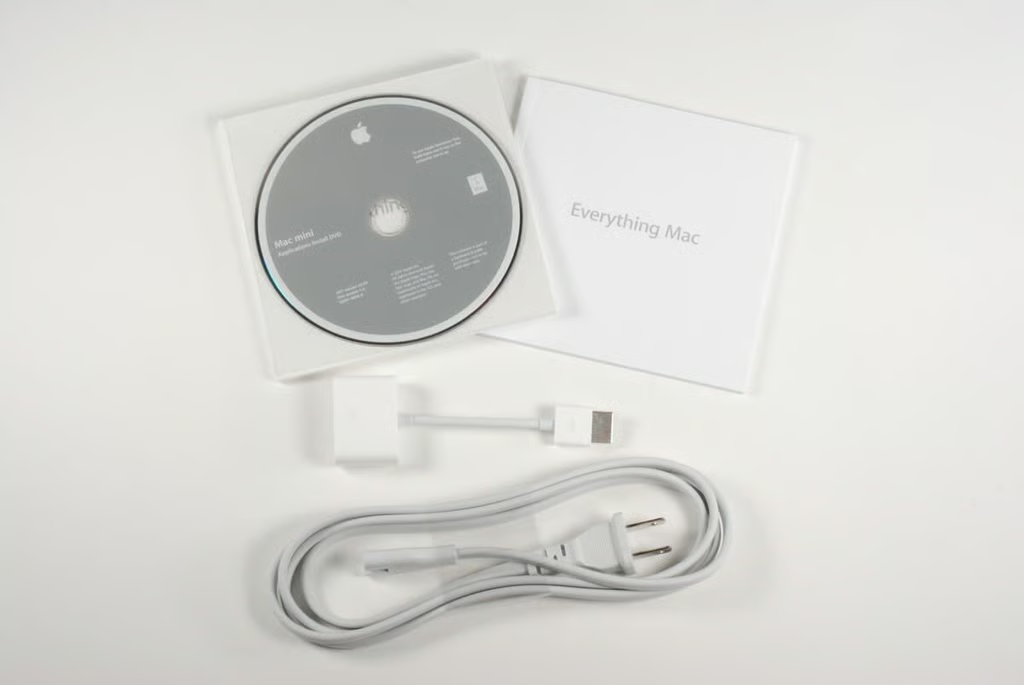
Included with the Mac mini is the power cord, HDMI to DVI adapter, documentation, and OS disc.
Photo credit: Bill Detwiler / TechRepublic
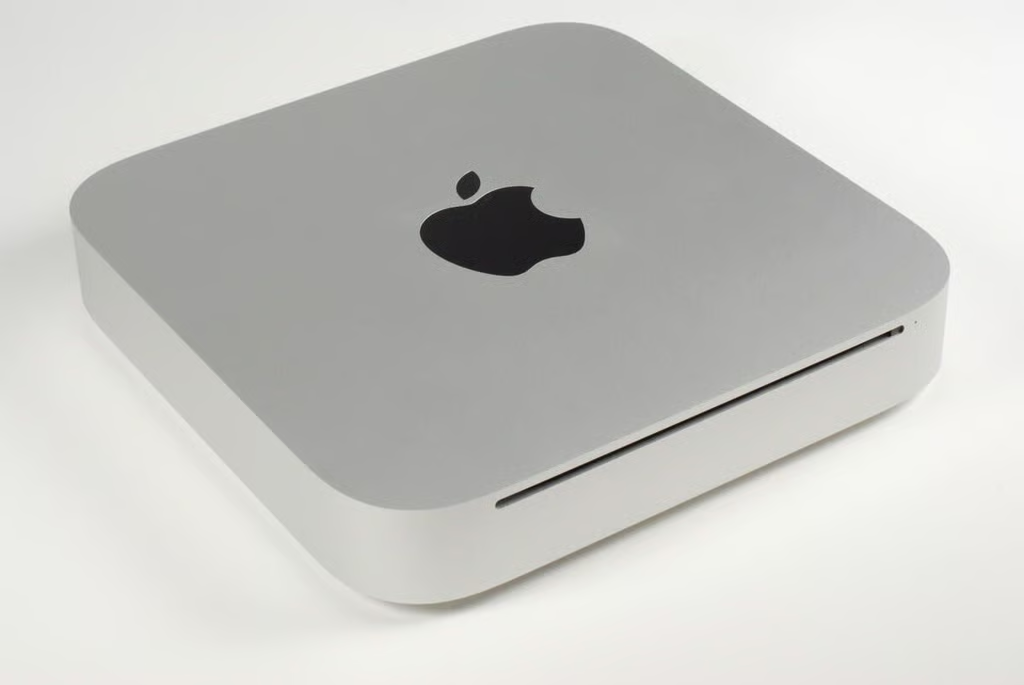
The new Mac mini is significantly thinner than previous versions, and continues the line’s minimalist design. The front of the computer has only the power/activity light and disc slot.
Photo credit: Bill Detwiler / TechRepublic
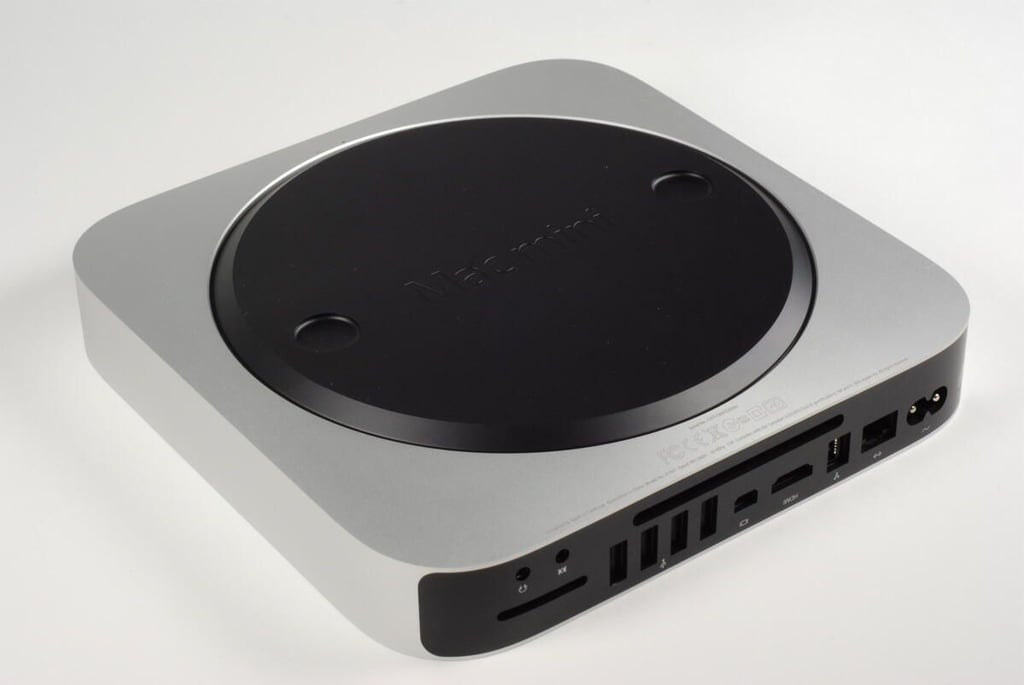
The bottom of the Mac mini is dominated by a large, circular access plate. This plate can be removed without tools and gives the user easy access to the machine’s RAM chips.
Photo credit: Bill Detwiler / TechRepublic
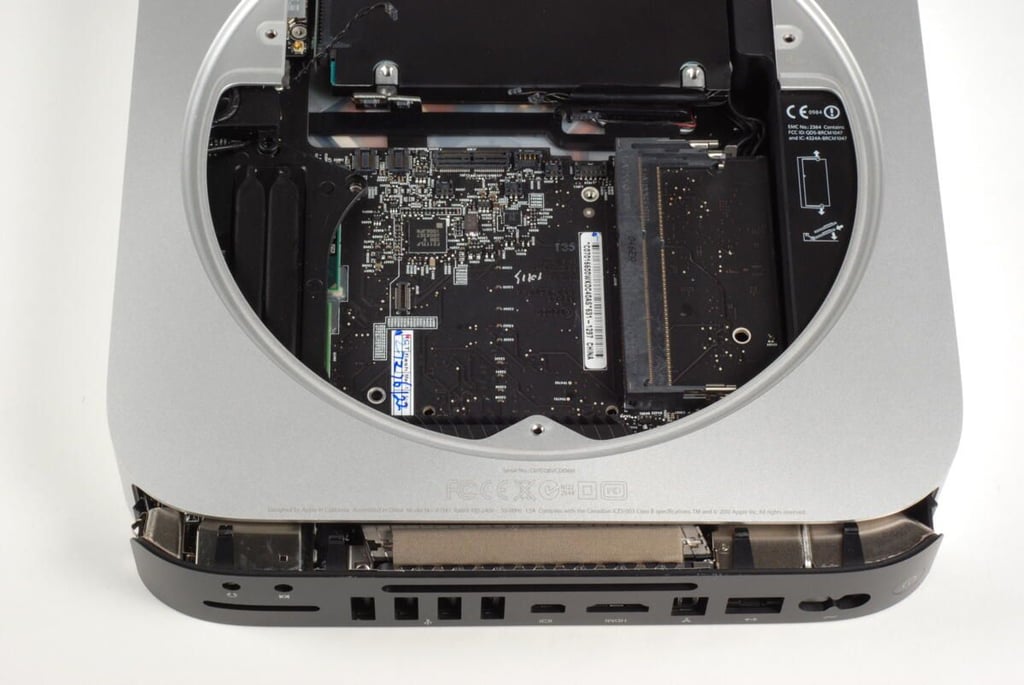
Along the back of the Mac mini, are the power button, AC power input, 10/100/1000BASE-T Ethernet port, Firewire 800?port, HDMI out, Mini DisplayPort four USB 2.0 ports, SD card slot, audio line in minijack, and audio line out/headphone minijack.
Photo credit: Bill Detwiler / TechRepublic
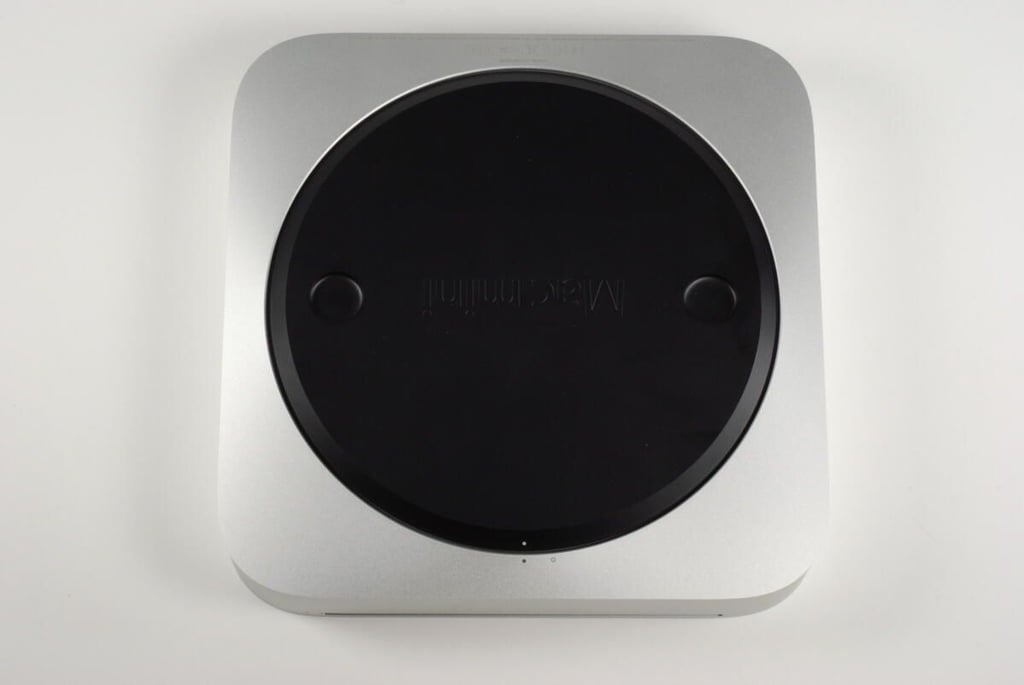
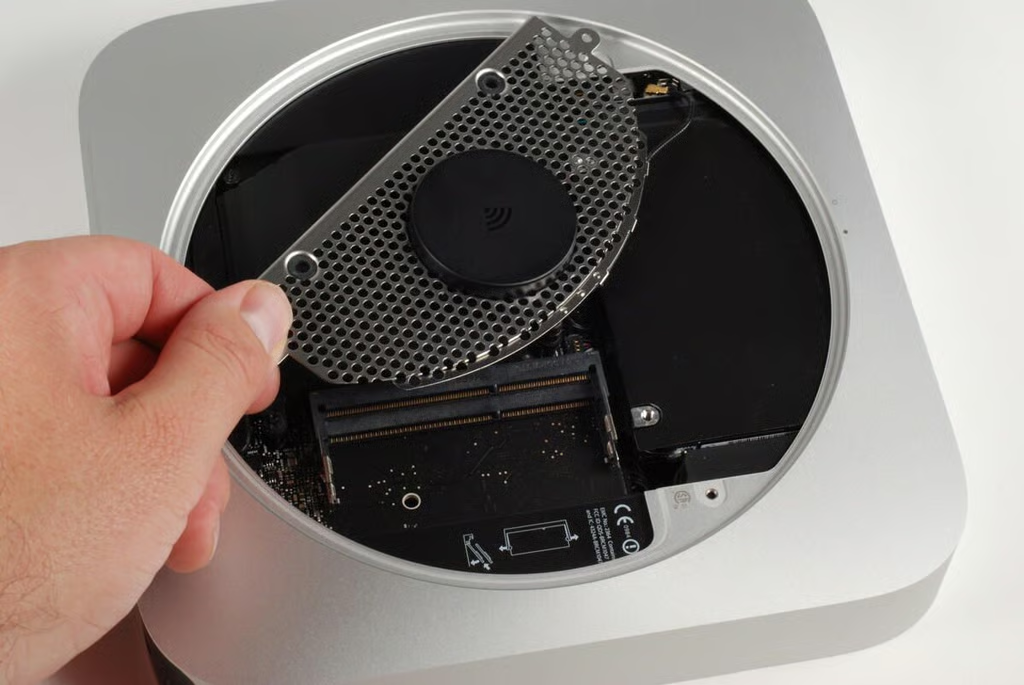
The Mac mini’s access plate can be easily removed by rotating it from the locked position (shown here) to the unlocked position (indicated by the open circle on the aluminum enclosure).
Photo credit: Bill Detwiler / TechRepublic
You unlock the Mac mini’s access plate by turning it so that the white dot on the plate aligns with the hollow black circle on the aluminum enclosure.
Photo credit: Bill Detwiler / TechRepublic
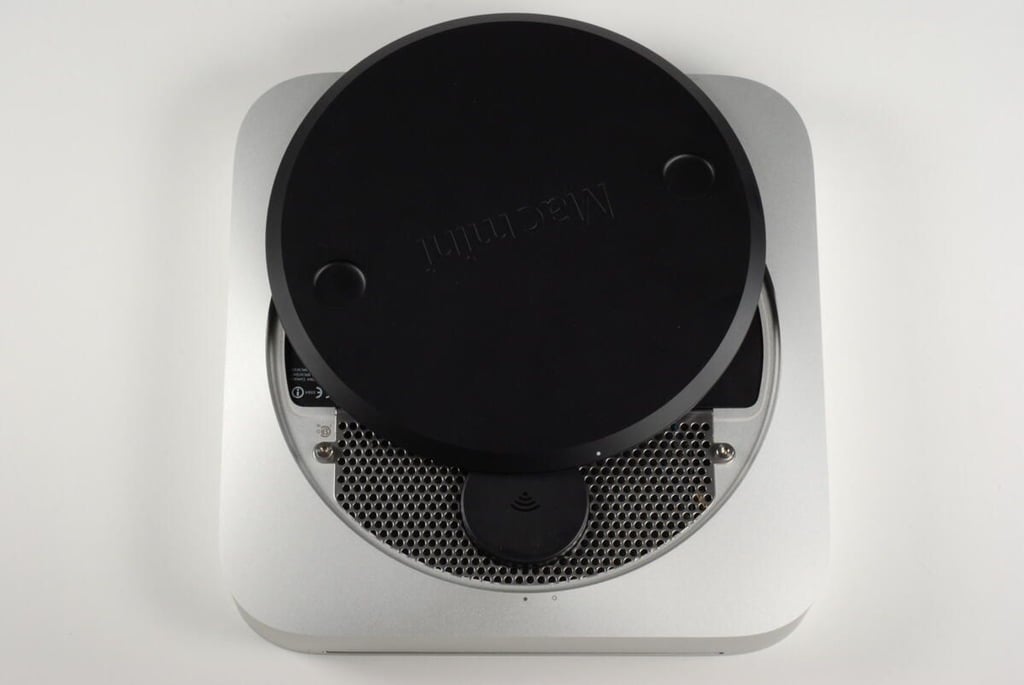
Photo credit: Bill Detwiler / TechRepublic
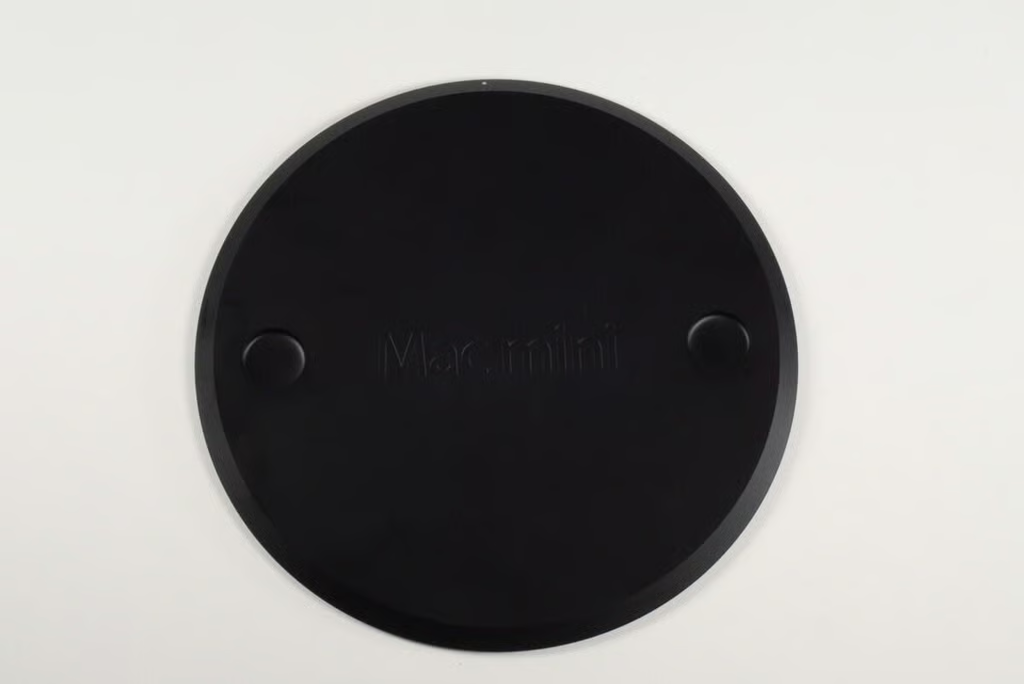
The Mac mini’s access plate not only allows you to open the machine’s case, but serves as a non-slip surface on which to rest the computer.
Photo credit: Bill Detwiler / TechRepublic
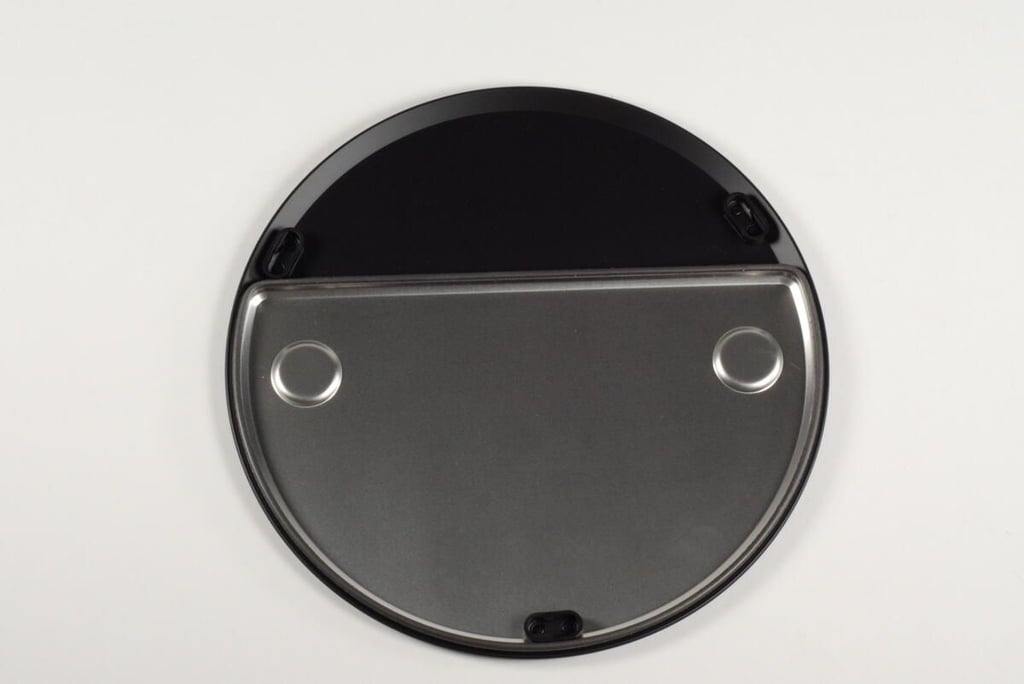
A thin metal shield is attached to the back of the Mac mini’s access plate.
Photo credit: Bill Detwiler / TechRepublic
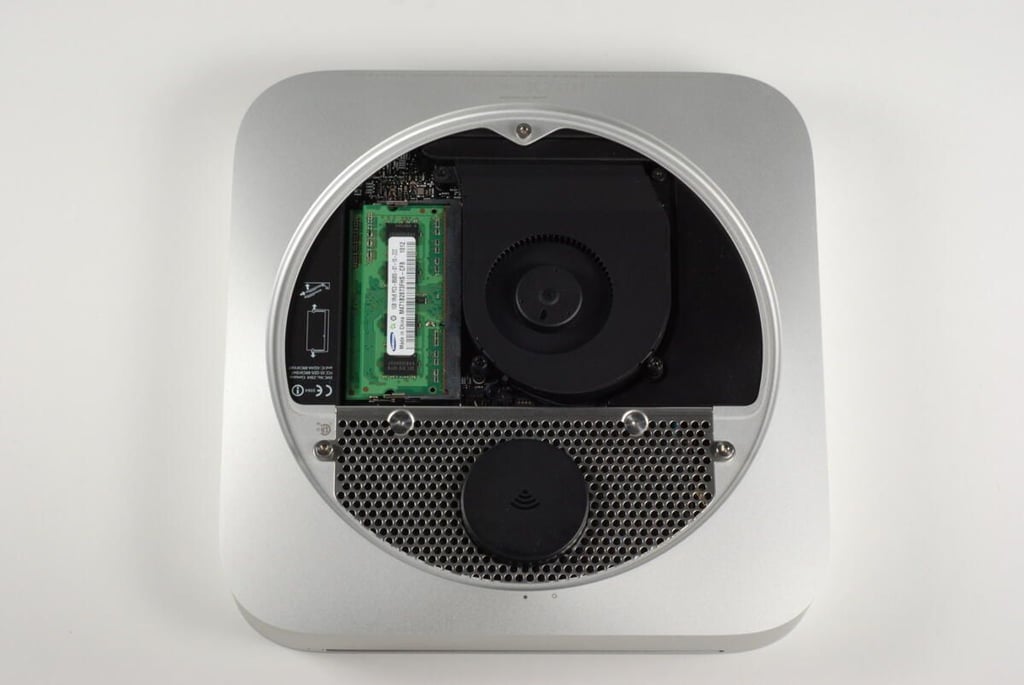
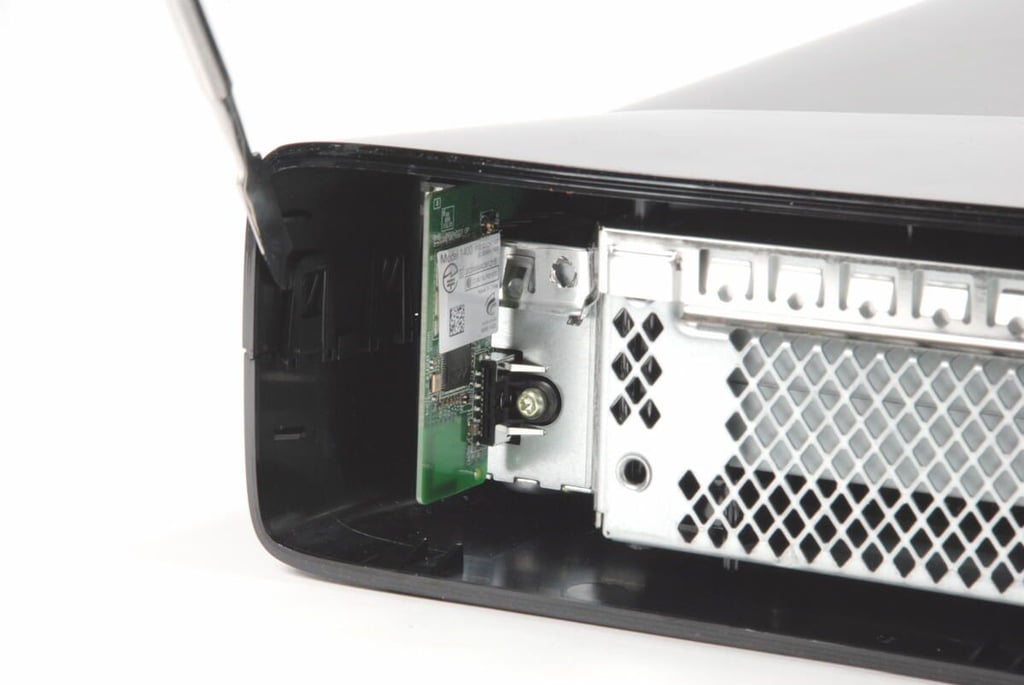
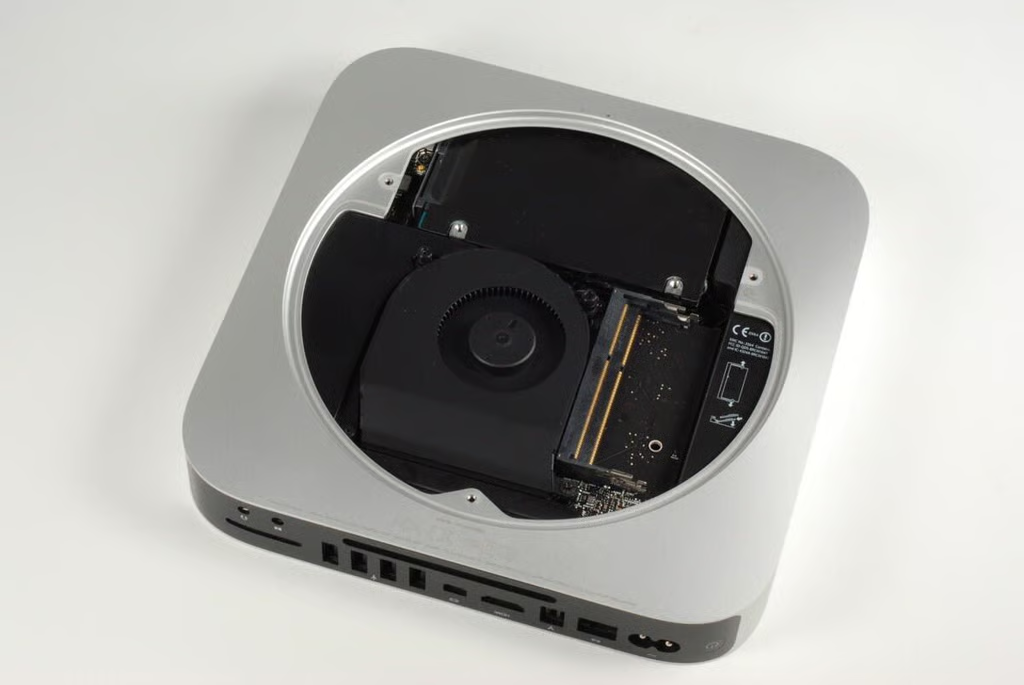
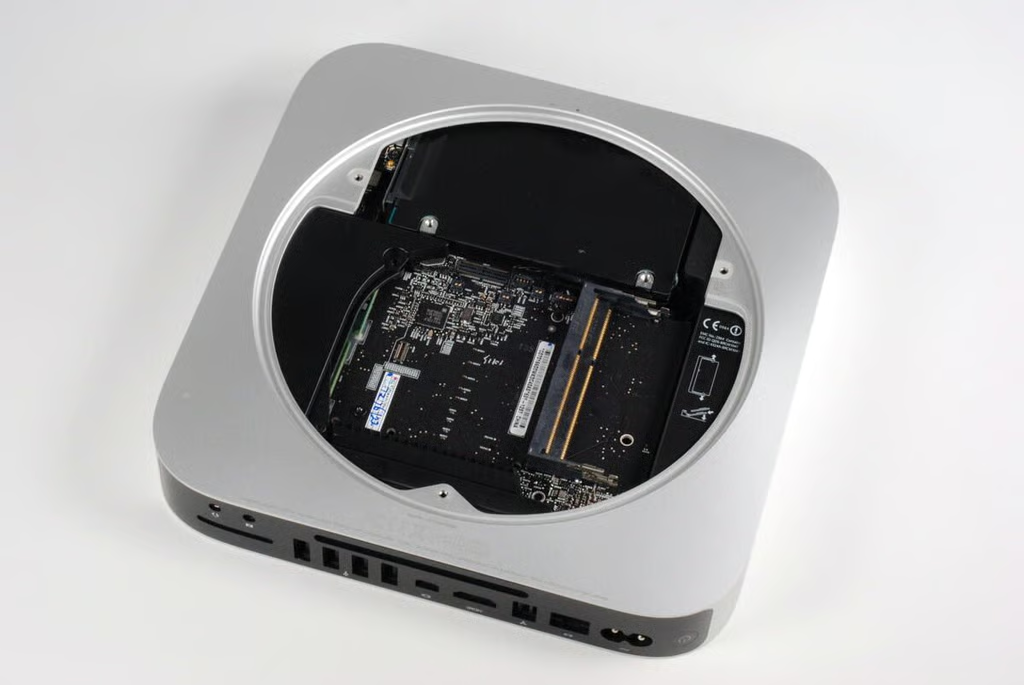
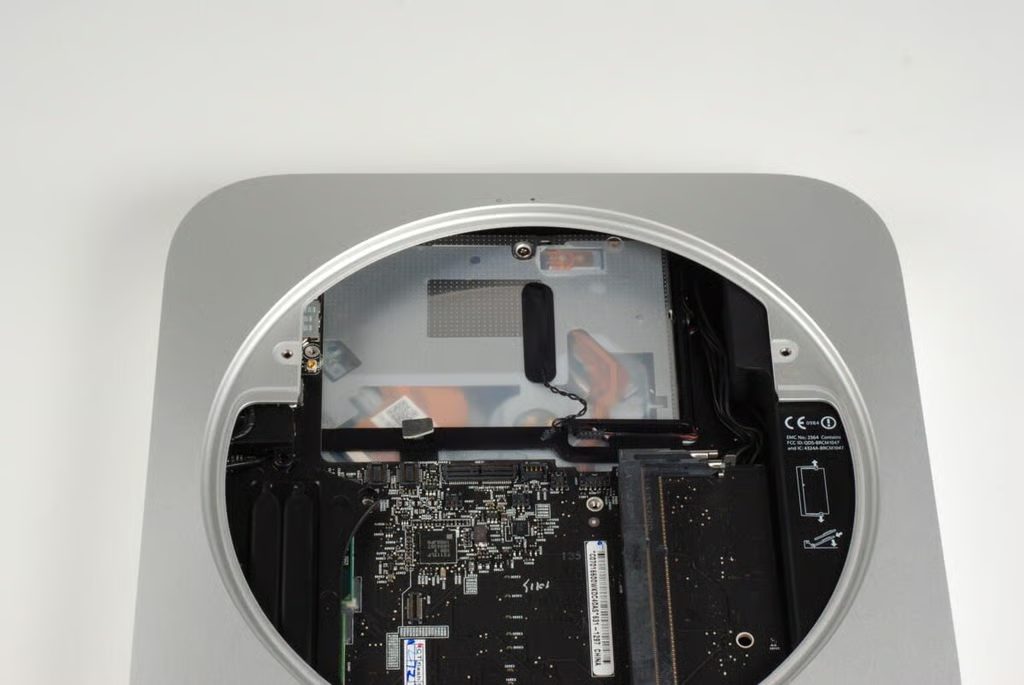
With the access plate removed, we get our fist look inside the Mac mini (A1347). The RAM chips, cooling fan, and Wi-Fi antenna are clearly visible.
The access plate is a huge improvement over previous Mac mini designs as it allows users to upgrade the machine’s RAM without having to “crack open” the case.
Photo credit: Bill Detwiler / TechRepublic
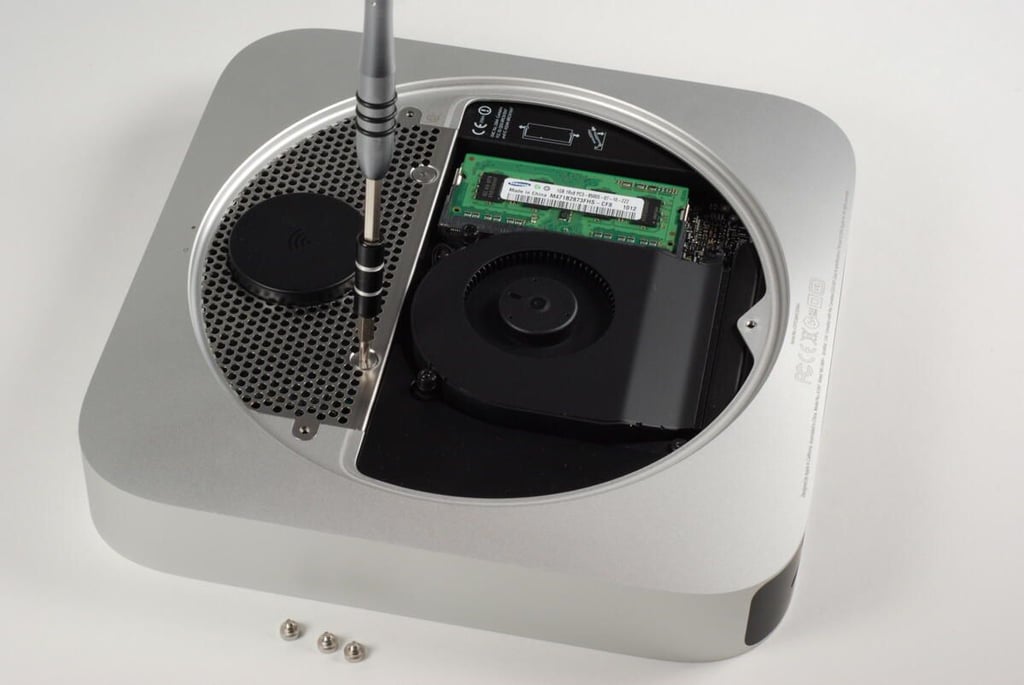
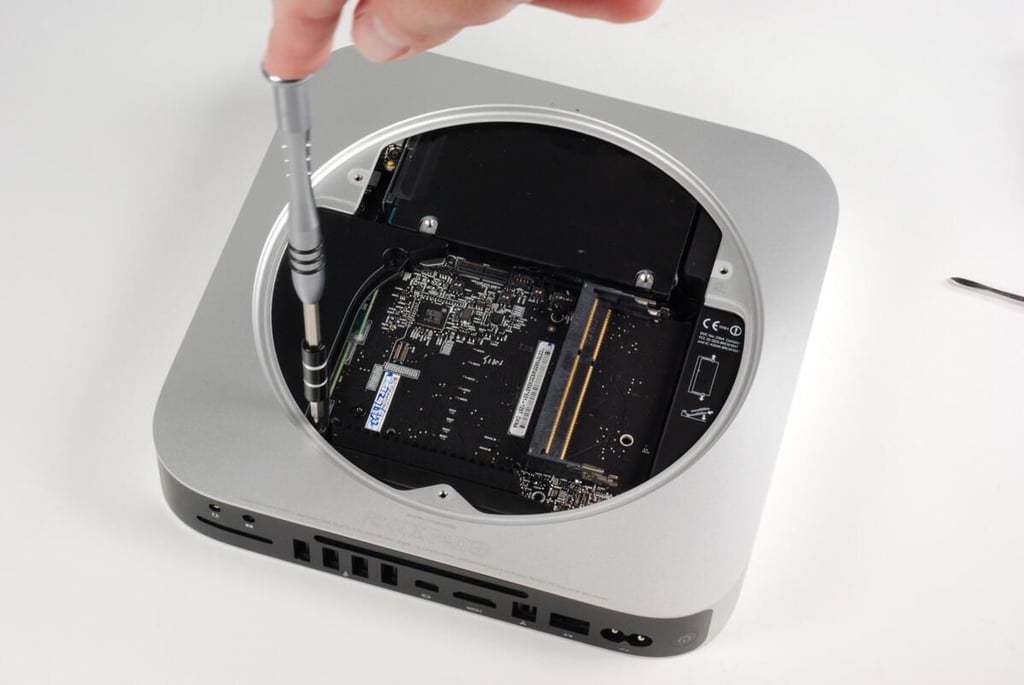
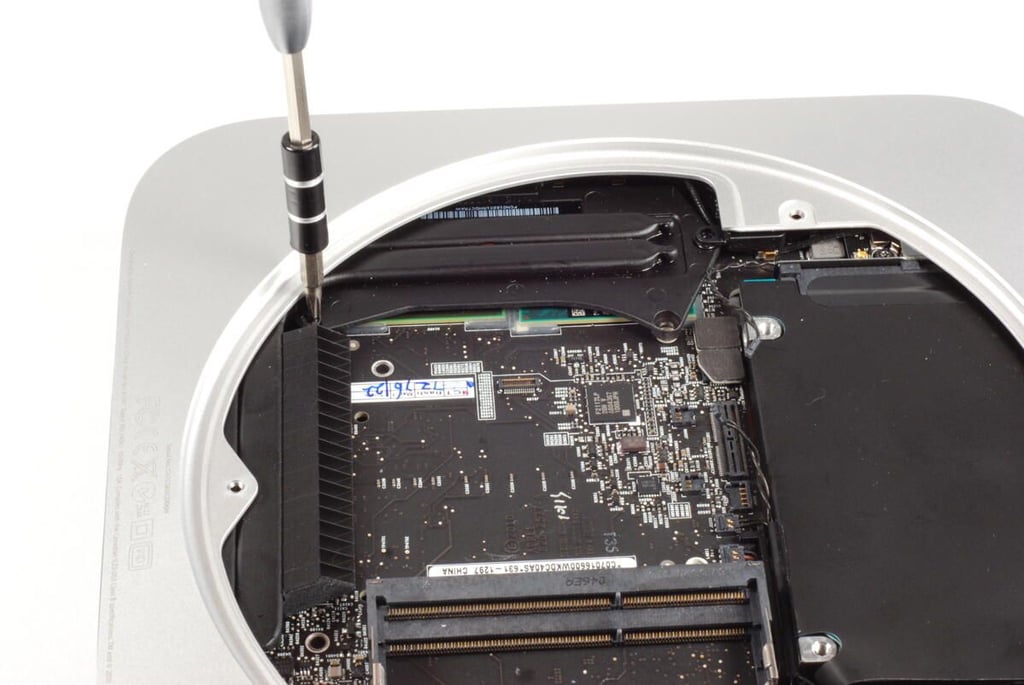
To begin disassembling the Mac mini, I removed the three T8 Torx screws that serve as posts for the catches on the access plate. Two of these screws also hold the Wi-Fi antenna in place.
Photo credit: Bill Detwiler / TechRepublic
There are two more T8 Torx screws holding the Wi-Fi antenna plate in place.
Photo credit: Bill Detwiler / TechRepublic
The Mac Mini has two memory slots. Our base model came with 2GB (two 1GB SO-DIMMs) of 1066MHz DDR3 SDRAM. The two slots can support up to 8GB (two 4GB SO-DIMMs).
Photo credit: Bill Detwiler / TechRepublic
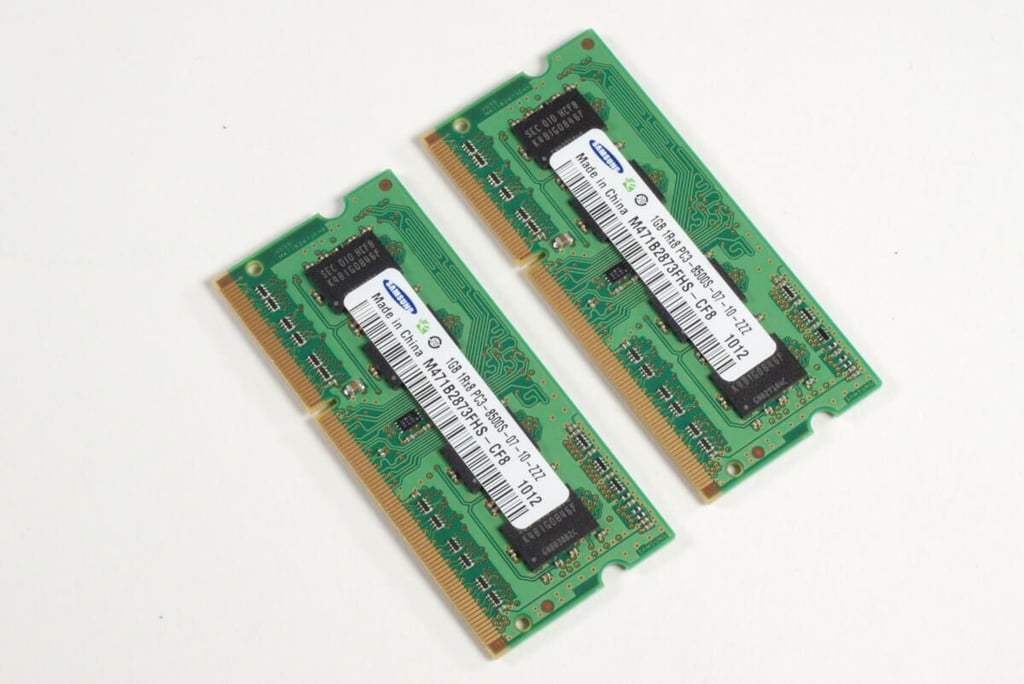
Two Samsung 1GB 1Rx8 SO-DIMMs
Photo credit: Bill Detwiler / TechRepublic
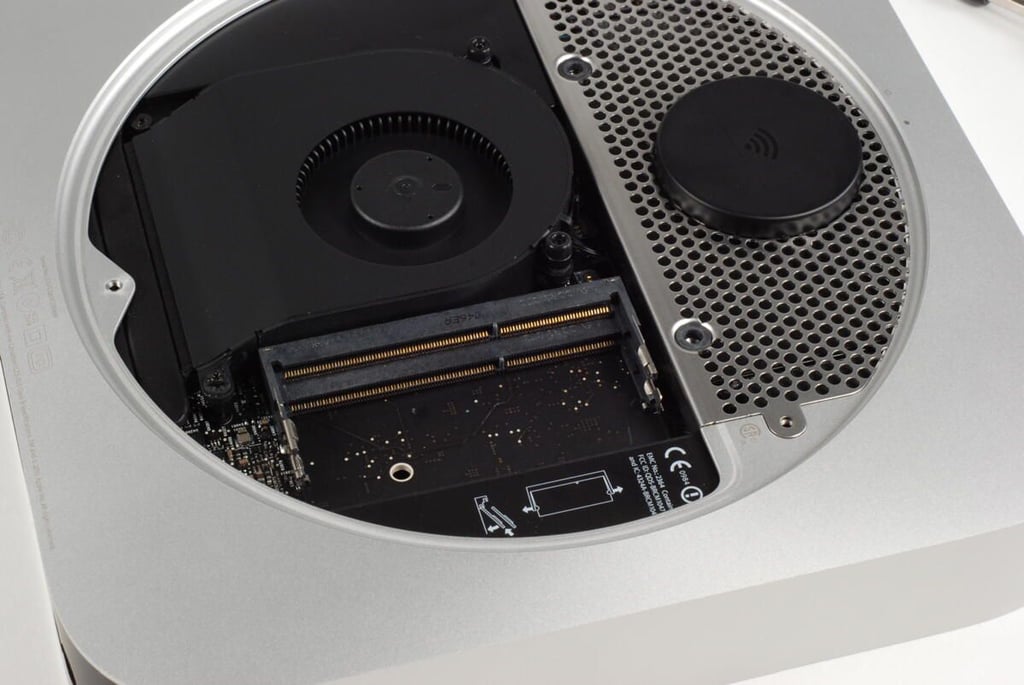
Photo credit: Bill Detwiler / TechRepublic
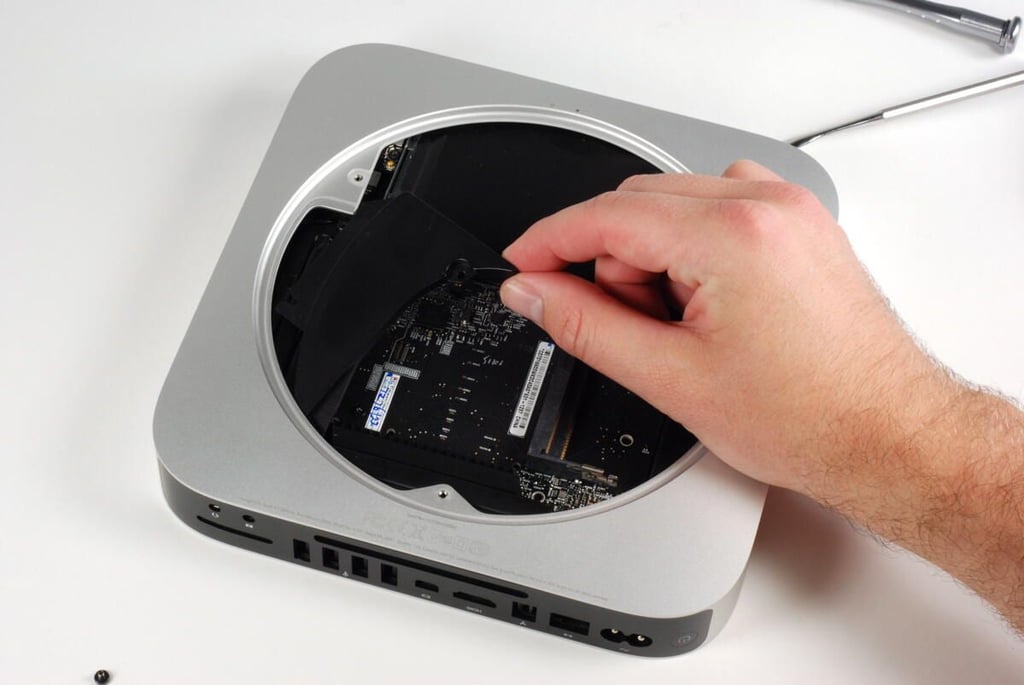
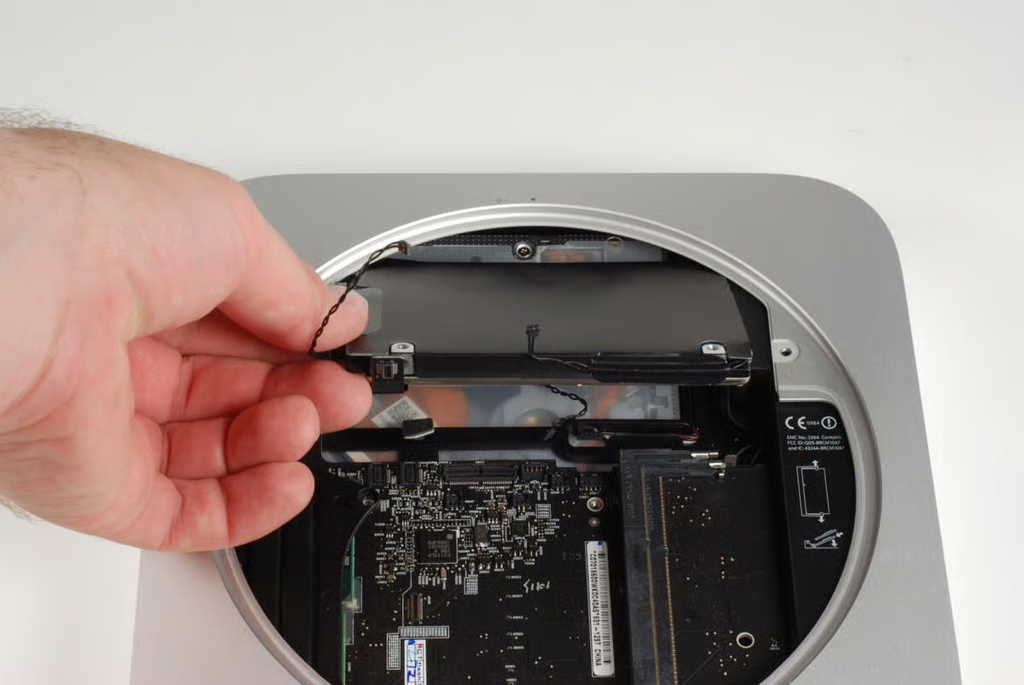
With the ram remove, you can let the Wi-Fi antenna plate away from the case.
Note: There is a wire connecting the antenna to the AirPort/Bluetooth board. You’ll need to disconnect this wire before removing the plate.
Also, you may want to remove the cooling fan and black plastic cowling (which I do later), before removing the antenna plate. You can slide the plate past these two components, but it’s a tight fit.
Photo credit: Bill Detwiler / TechRepublic
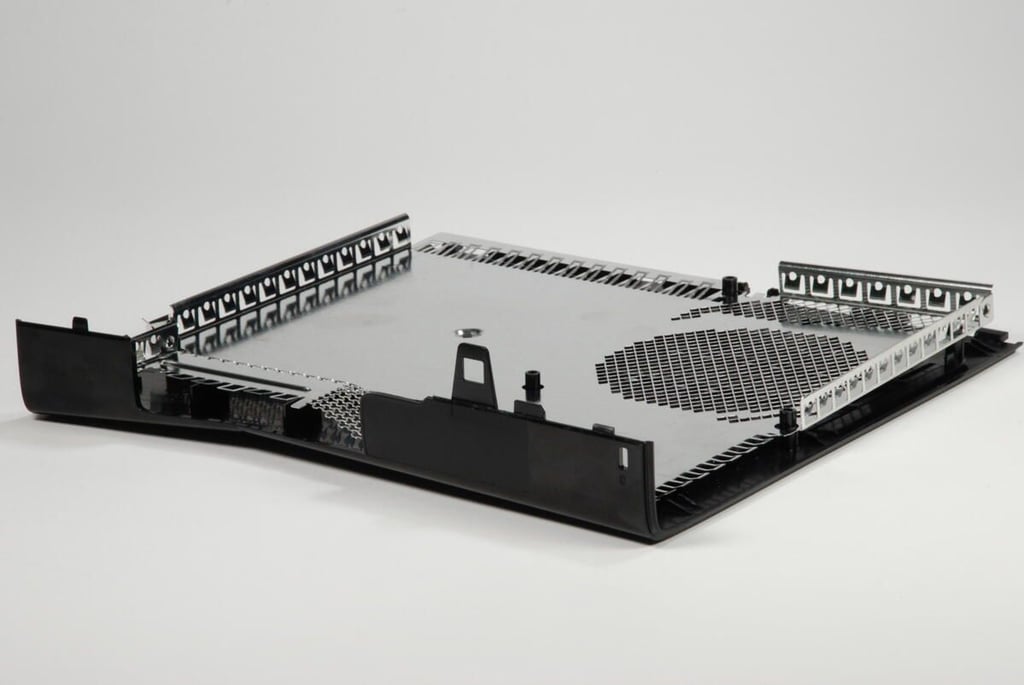
Photo credit: Bill Detwiler / TechRepublic
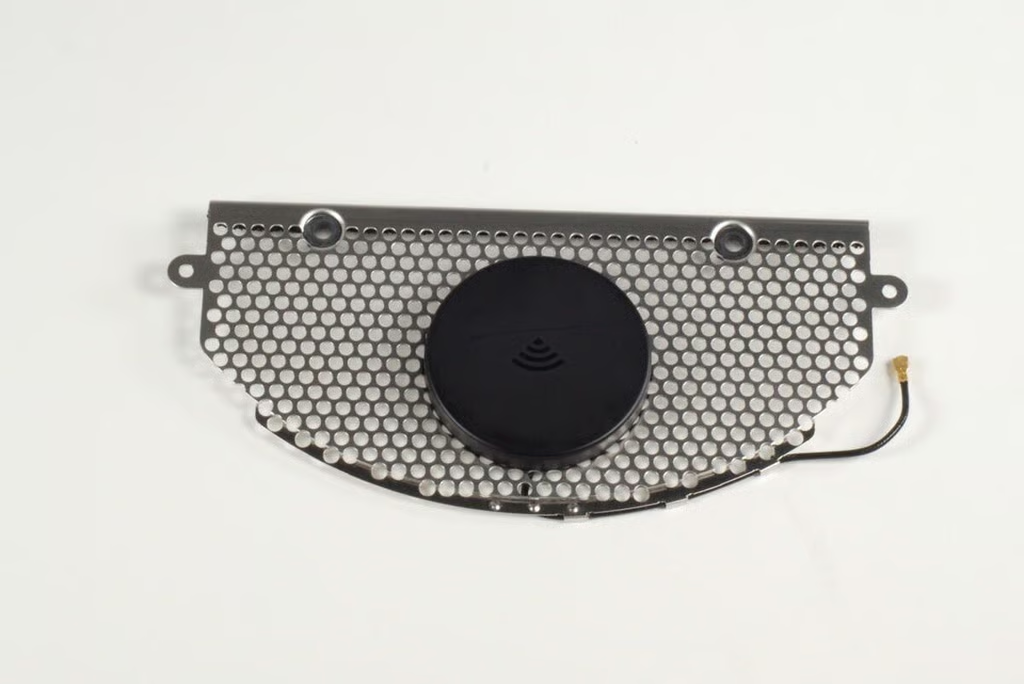
Photo credit: Bill Detwiler / TechRepublic
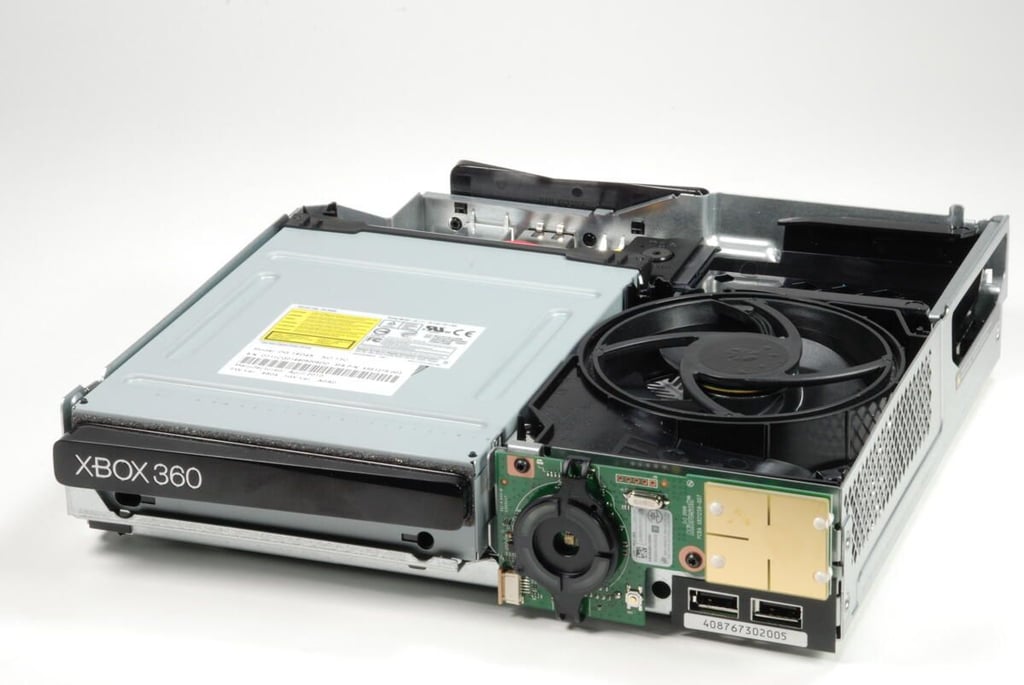
Photo credit: Bill Detwiler / TechRepublic
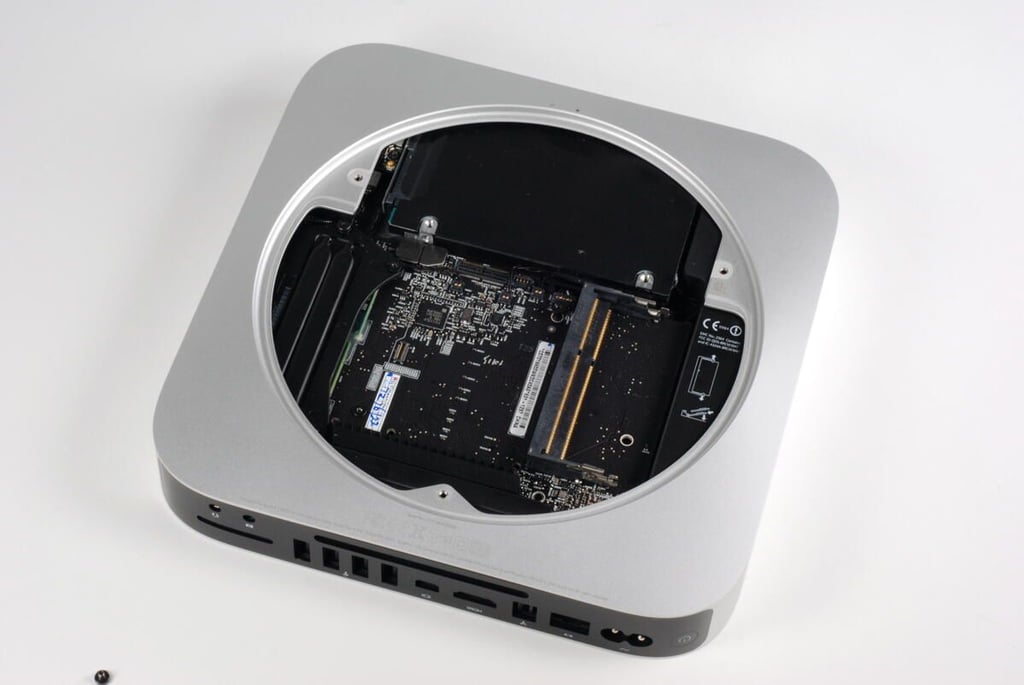
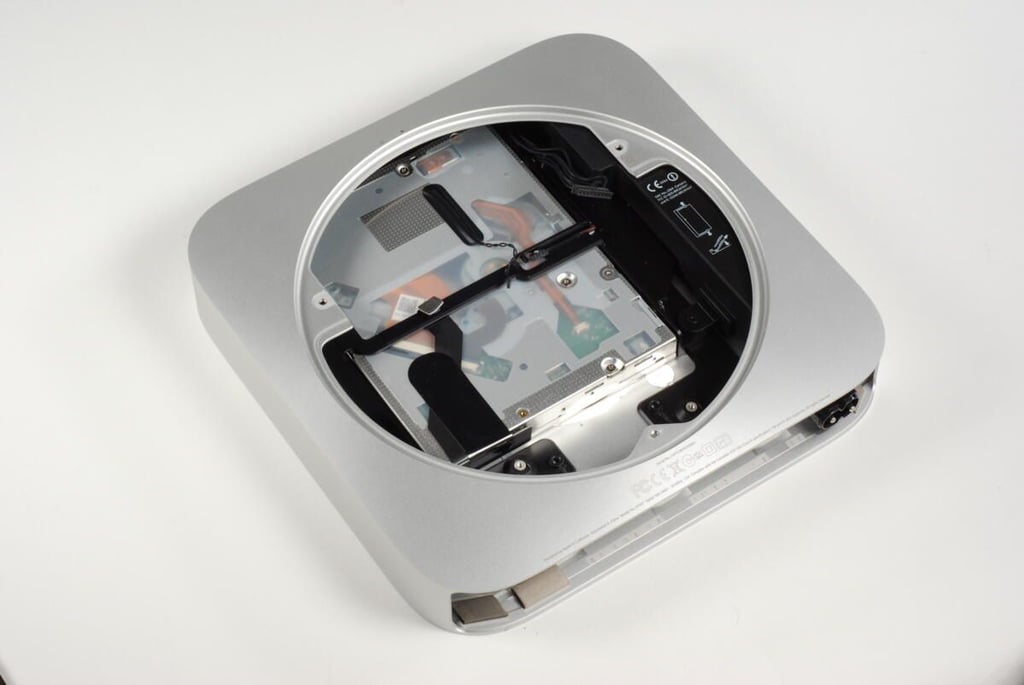
With the Wi-Fi antenna plate removed, we can see the 320GB Serial ATA hard drive (glad in black plastic).
Photo credit: Bill Detwiler / TechRepublic
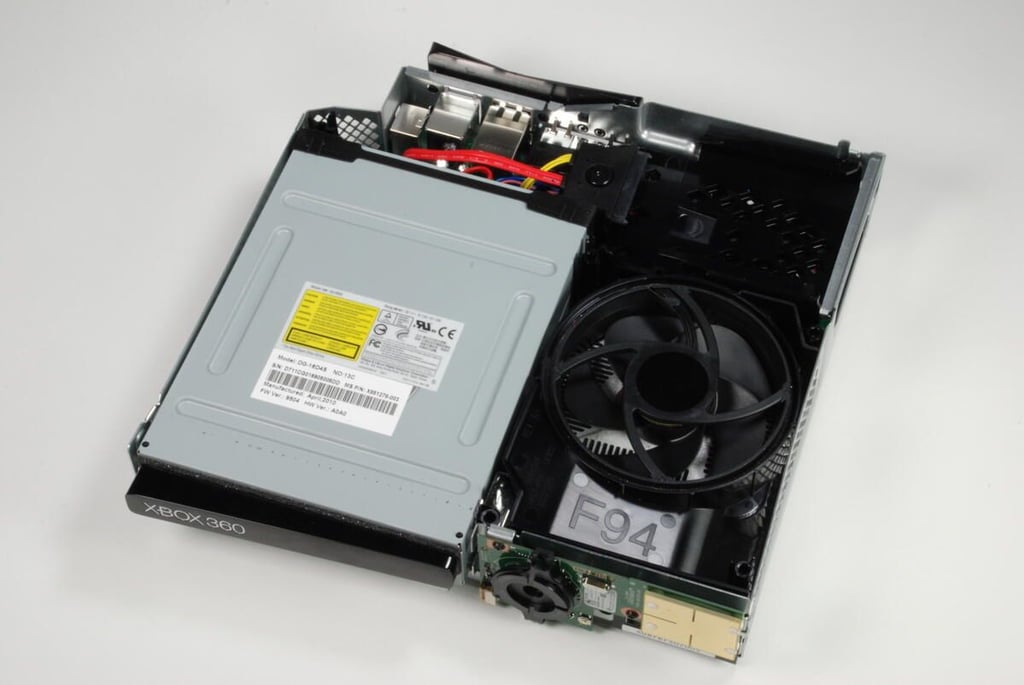
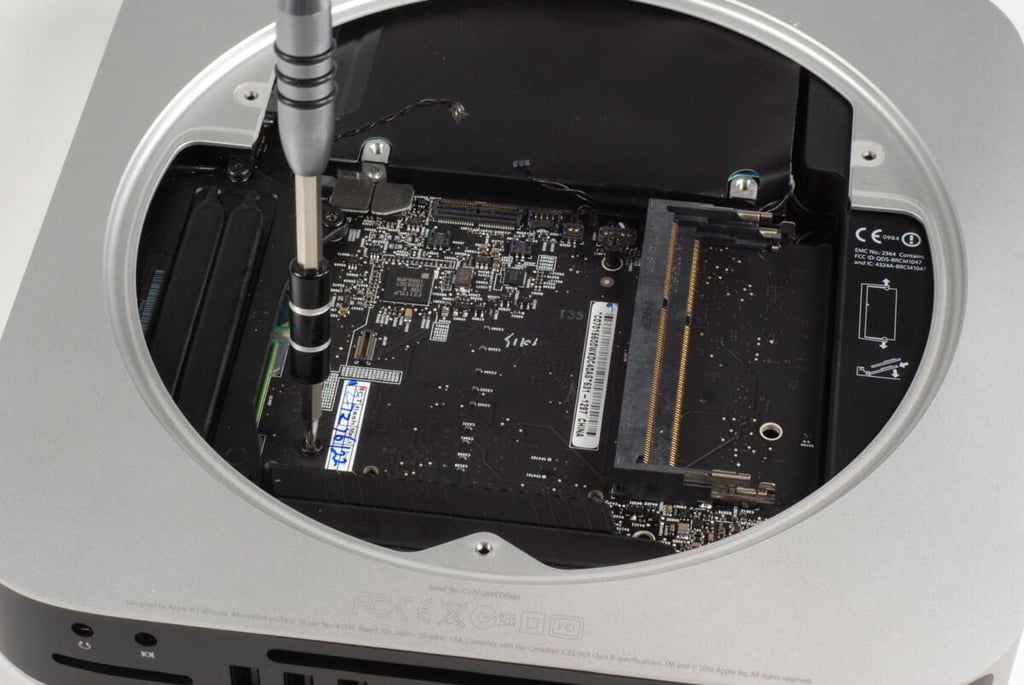
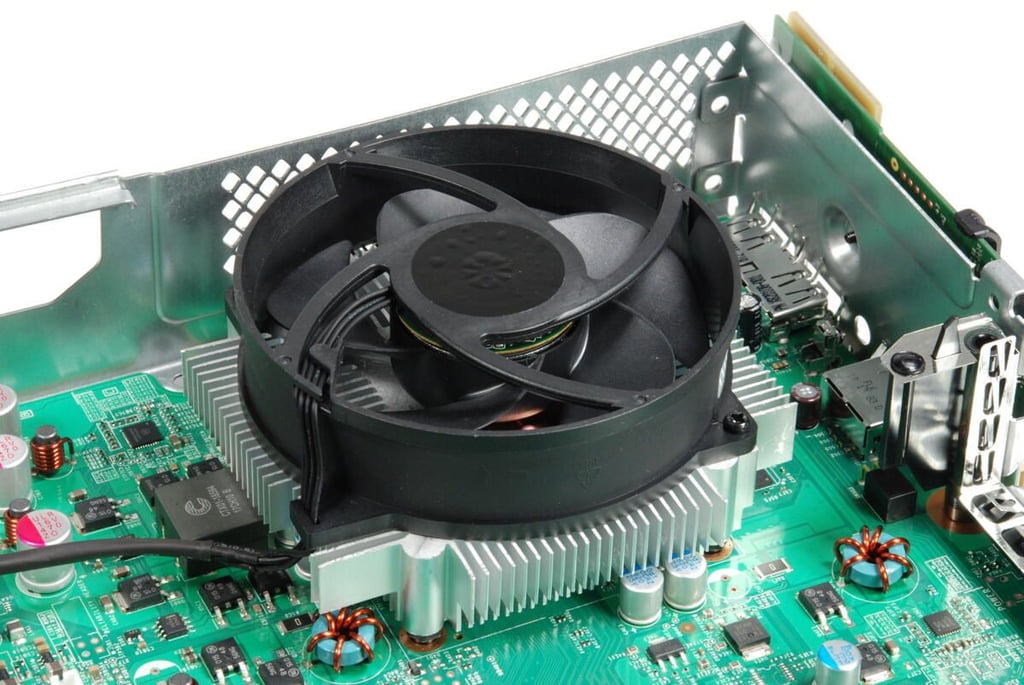
There are two T6 Torx screws that secure the Mac mini’s cooling fan to the logic board.
Photo credit: Bill Detwiler / TechRepublic
With the screws removed, you can gently lift the cooling fan away from the Mac mini’s unibody enclosure. Before removing it completely, you’ll need to disconnect the wire that connects the fan to the main logic board.
Photo credit: Bill Detwiler / TechRepublic
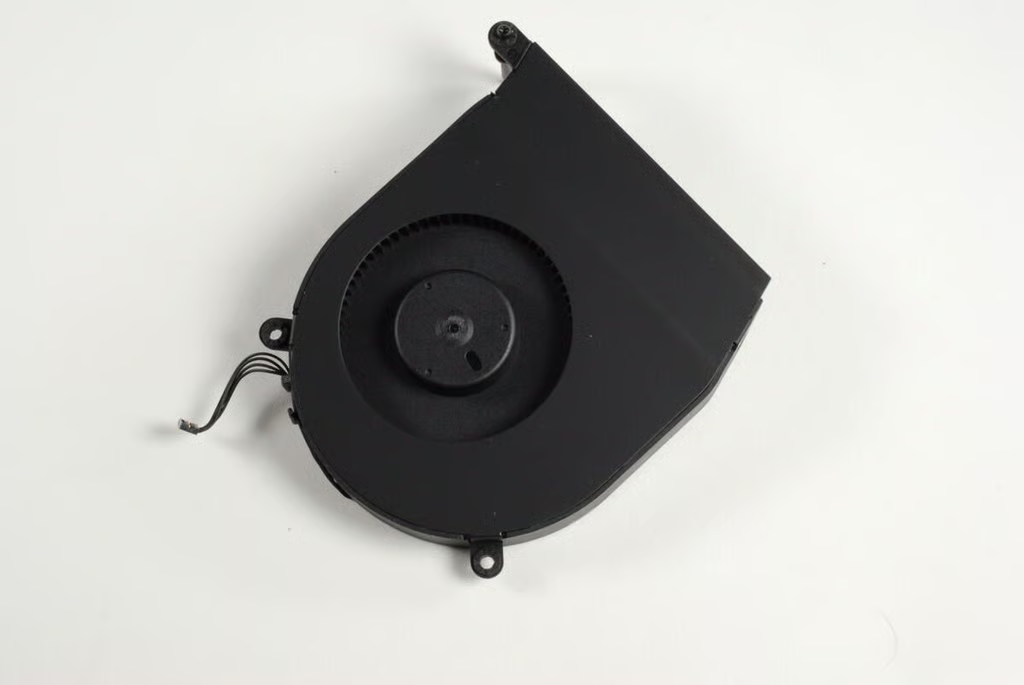
The cooling fan is a welcome addition to the redesigned Mac mini A1347.
Photo credit: Bill Detwiler / TechRepublic
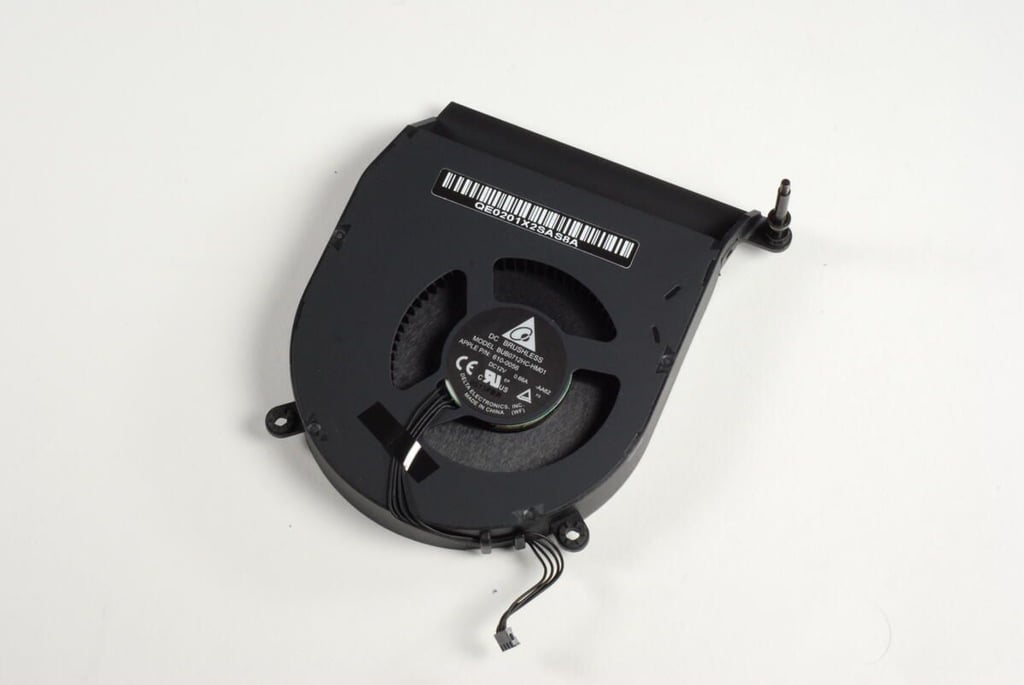
Photo credit: Bill Detwiler / TechRepublic
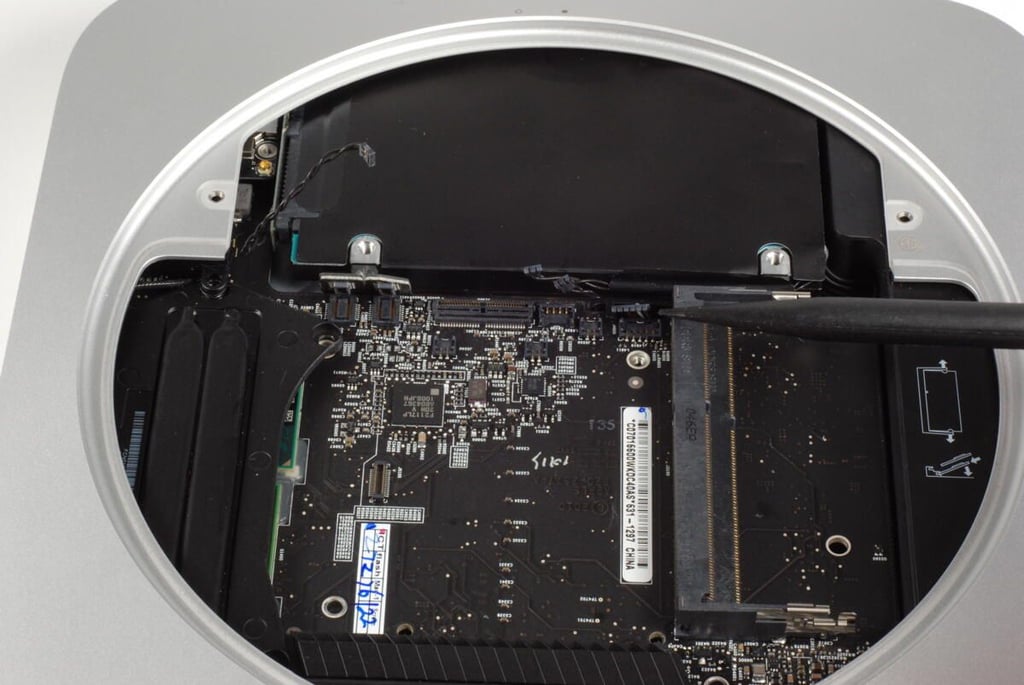
With the fan removed, we get our first good look at Mac mini’s main logic board.
Photo credit: Bill Detwiler / TechRepublic
With the cooling fan removed, a single T6 Torx screw holds the cowling to the heat sink.
Photo credit: Bill Detwiler / TechRepublic
You may have to wiggle the cowling to pull it free from the unibody enclosure.
Photo credit: Bill Detwiler / TechRepublic
With the cowling removed, you can see the heat sink beneath.
Photo credit: Bill Detwiler / TechRepublic
There are several screws and standoffs that hold the main logic board and hard drive in place. Before proceeding, I removed all of these. Just make sure you note where each screw/standoff goes and some are not interchangeable.
Photo credit: Bill Detwiler / TechRepublic
One of the standoffs attached to the Mac Mini’s main logic board.
Photo credit: Bill Detwiler / TechRepublic
This screw holds the Mac mini’s heat sink in place.
Photo credit: Bill Detwiler / TechRepublic
A second screws on the Mac mini’s heat sink.
Photo credit: Bill Detwiler / TechRepublic
This screw holds the Mac mini’s hard drive in place.
Photo credit: Bill Detwiler / TechRepublic
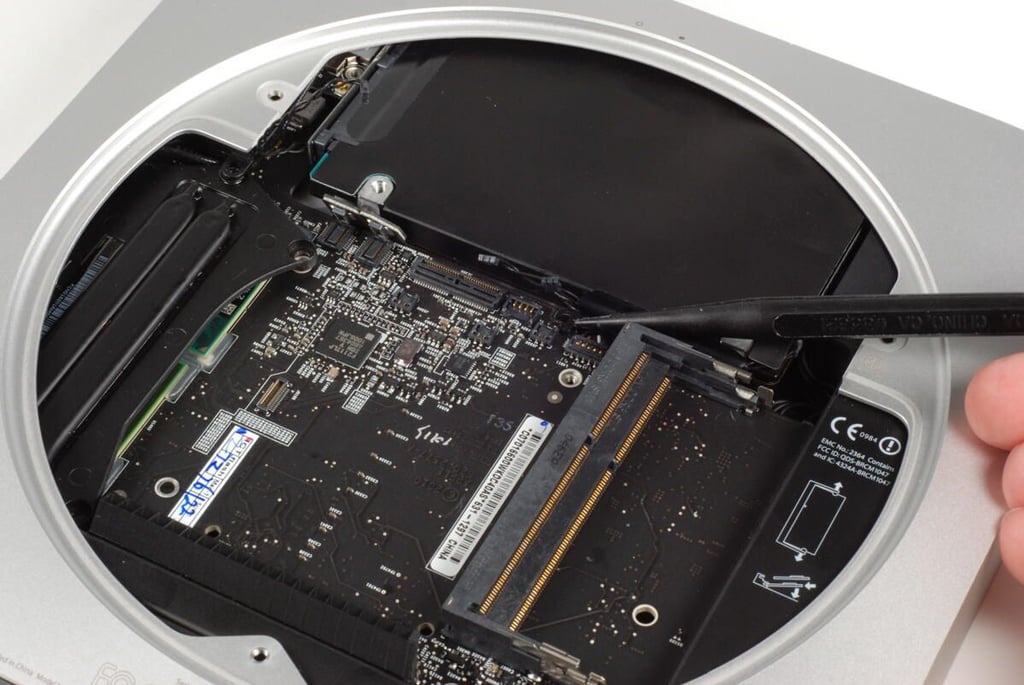
There are a series of connectors on the Mac mini’s main logic board for the optical drive, hard disk, thermal sensor, and IR senor. You will need to gently disconnect all these cables before removing the logic board from the Mac mini’s unibody enclosure.
Photo credit: Bill Detwiler / TechRepublic
The large connectors belong to the hard drive and optical drive.
Photo credit: Bill Detwiler / TechRepublic
To the right of the drive connectors are two thermal sensor connectors (one for each drive) and the IR sensor connector.
Photo credit: Bill Detwiler / TechRepublic
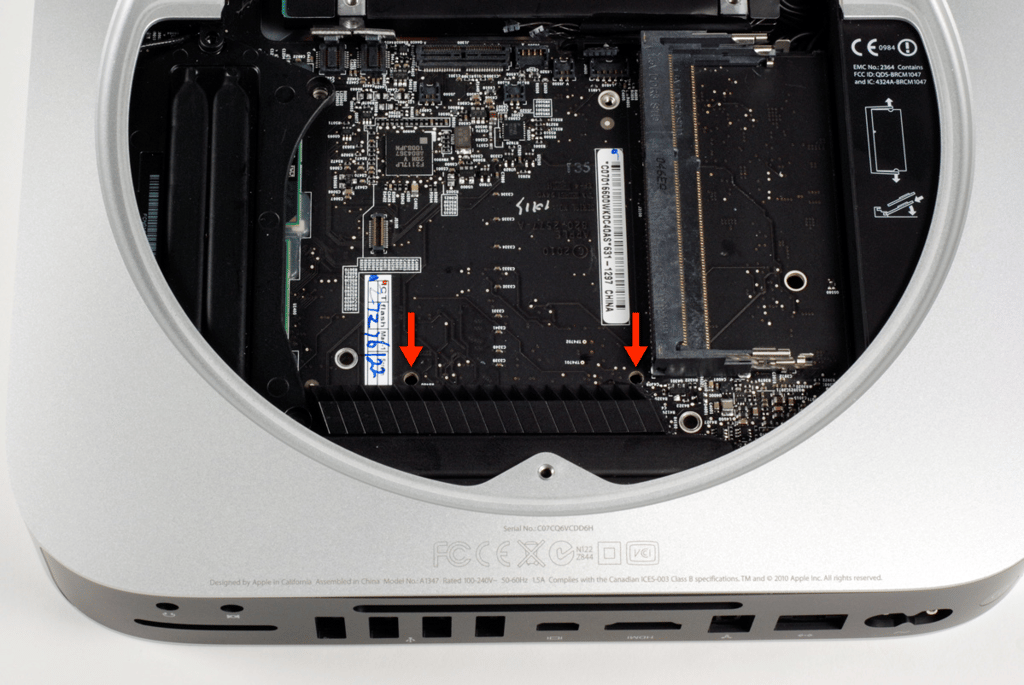
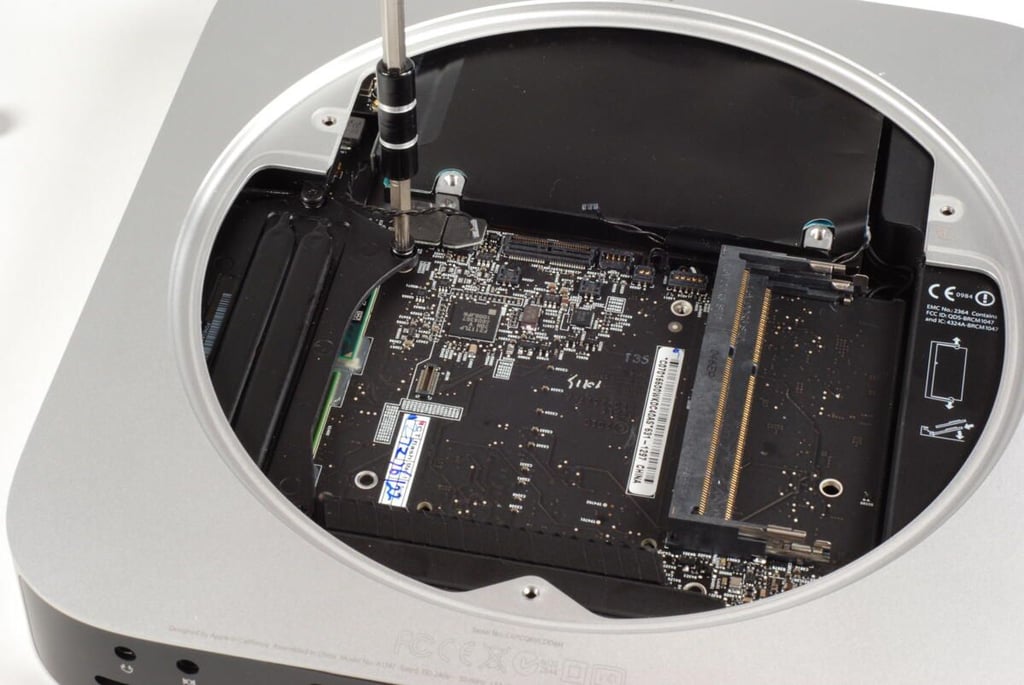
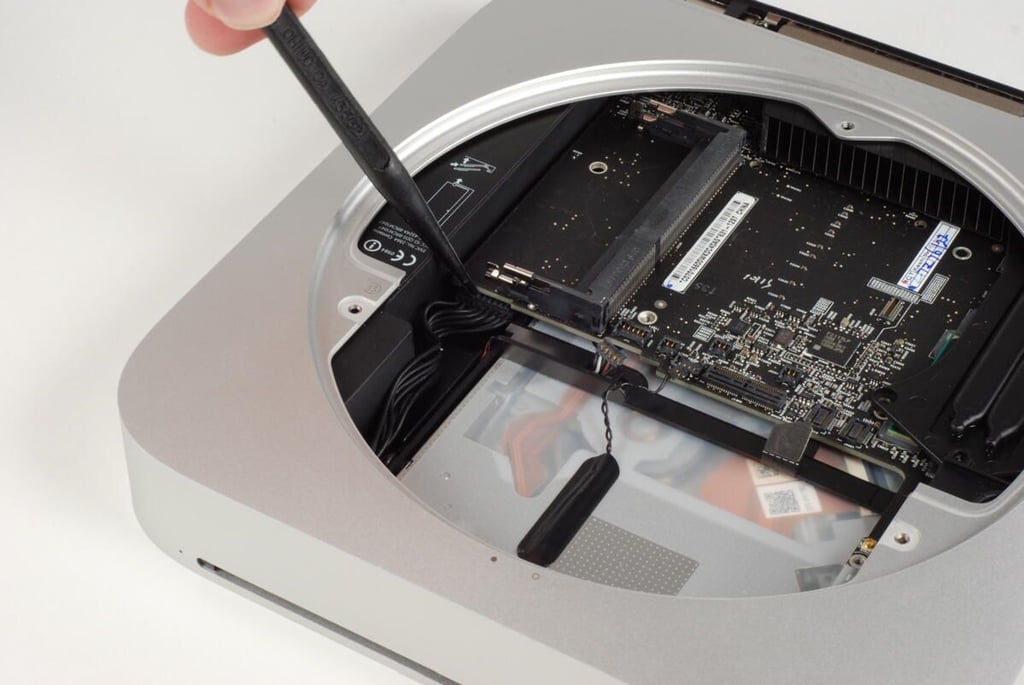
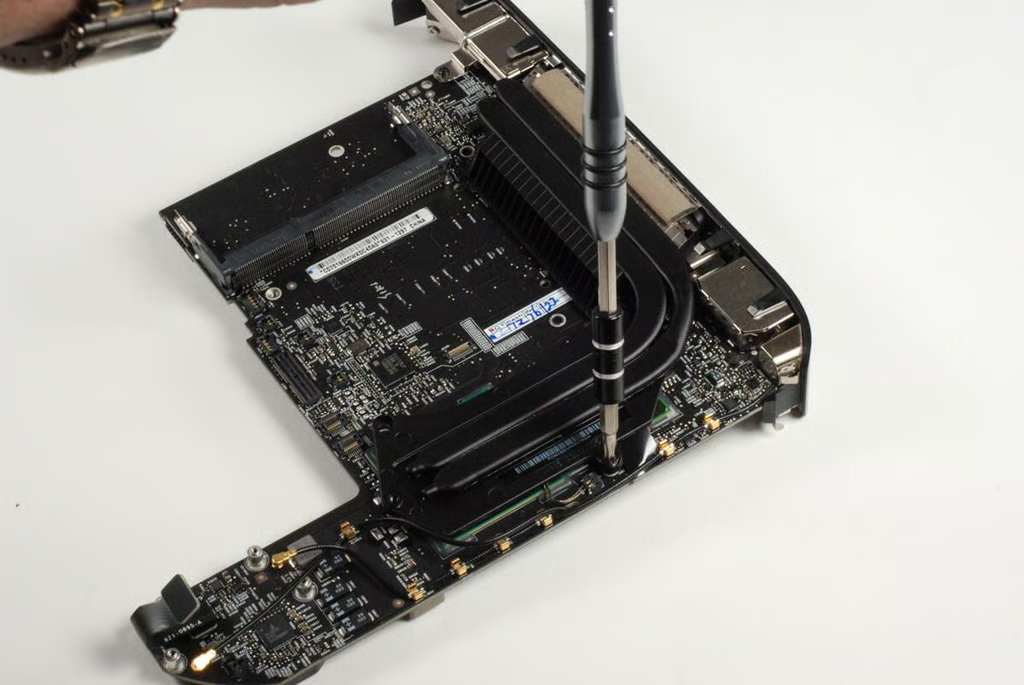
To remove the Mac mini’s logic board, you’ll need to insert two thin, cylindrical rods into these two holes and gently pry the board and attached components out the back of the unibody enclosure.
Warning: Using any other holes to pry loose the main logic board, could damage the board.
Photo credit: Bill Detwiler / TechRepublic
Two small screwdrivers work well when prying loose the Mac mini’s main logic board.
Photo credit: Bill Detwiler / TechRepublic
Once the main logic board as moved just past the end of the enclosure, you can remove the screwdrivers.
Photo credit: Bill Detwiler / TechRepublic
With the main logic board shifted, we can remove the hard drive from the Mac mini.
Photo credit: Bill Detwiler / TechRepublic
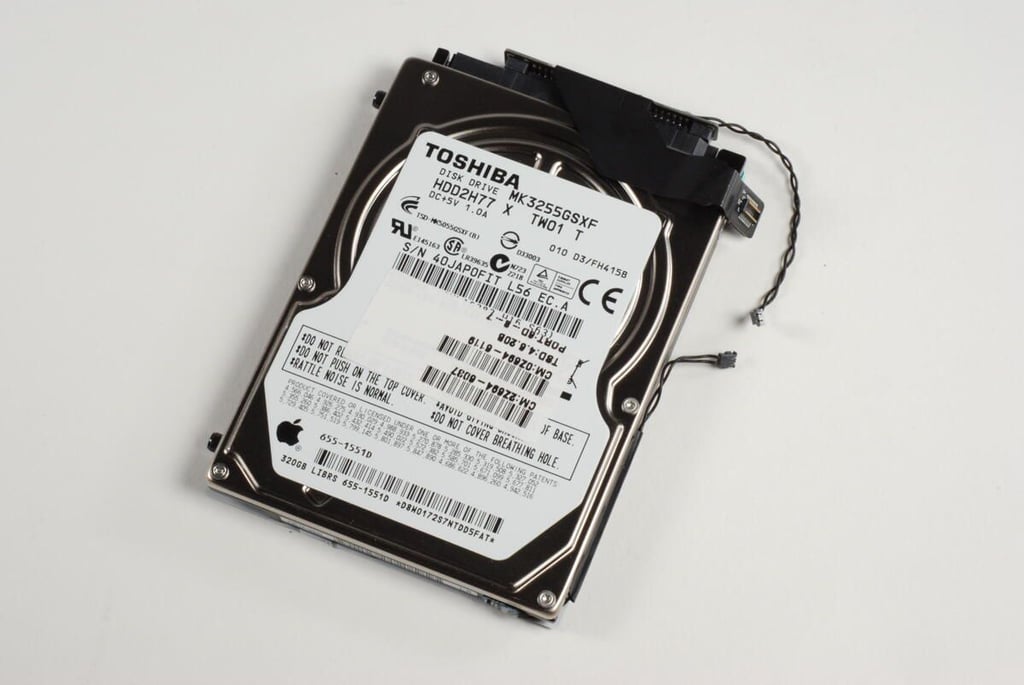
Our base model Mac mini came with a 320GB Toshiba HDD2H77 hard drive.
Photo credit: Bill Detwiler / TechRepublic
With the hard drive removed, we can the optical drive below.
Photo credit: Bill Detwiler / TechRepublic
Before removing the main logic board, I disconnected the connector to the power supply. With the cable disconnected you can pull the logic board free from the unibody enclosure.
Photo credit: Bill Detwiler / TechRepublic
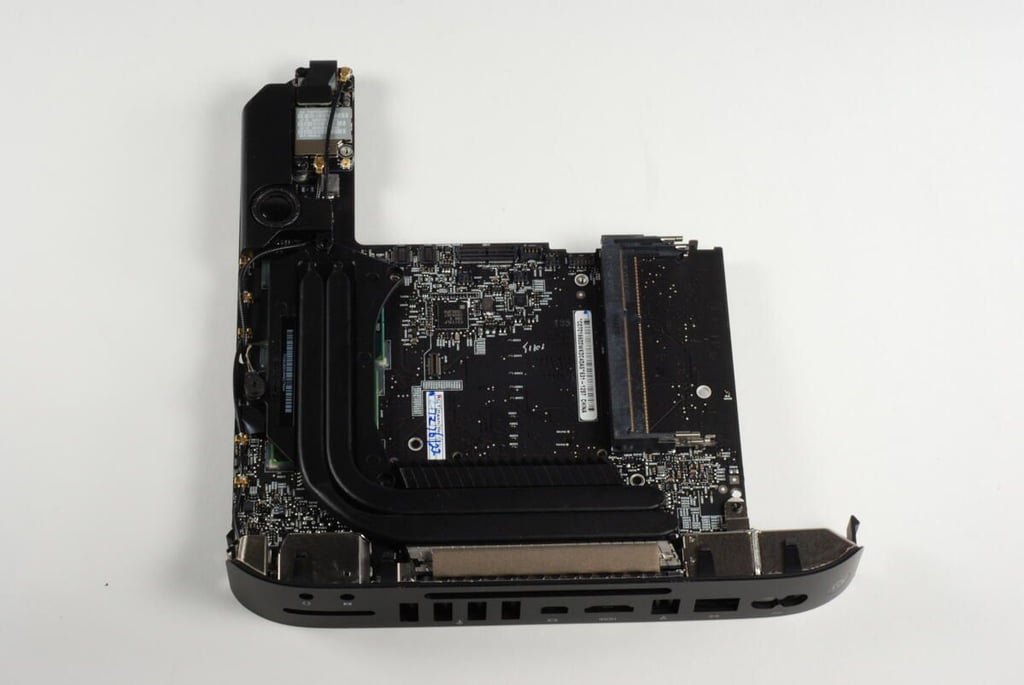
The heat sink, speaker and wireless card are still attached to the top of the Mac mini’s main logic board.
Photo credit: Bill Detwiler / TechRepublic
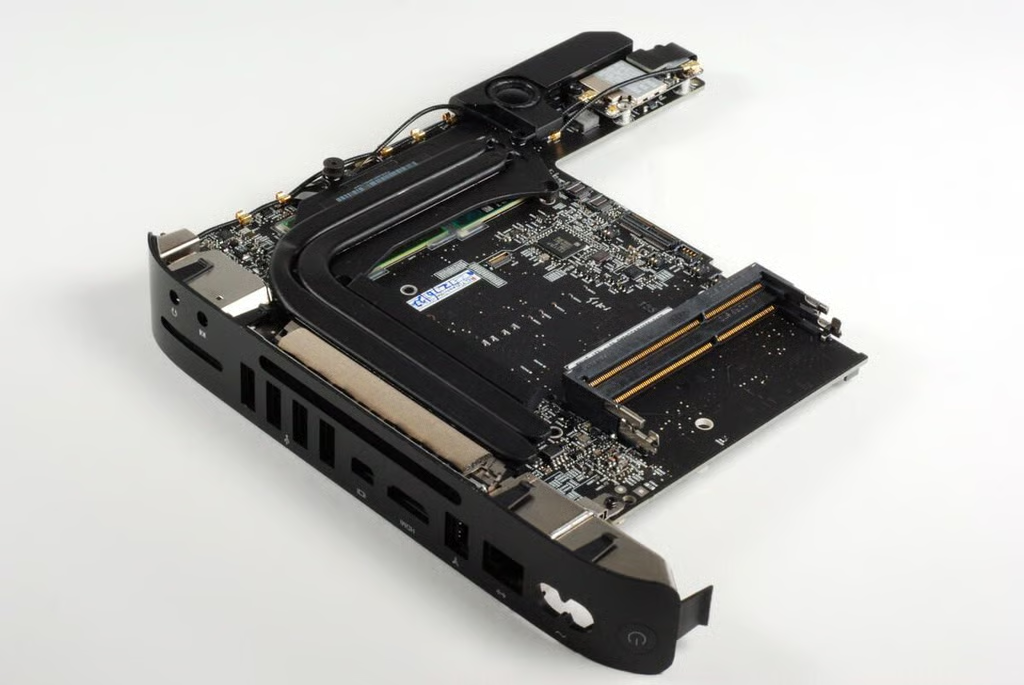
Photo credit: Bill Detwiler / TechRepublic
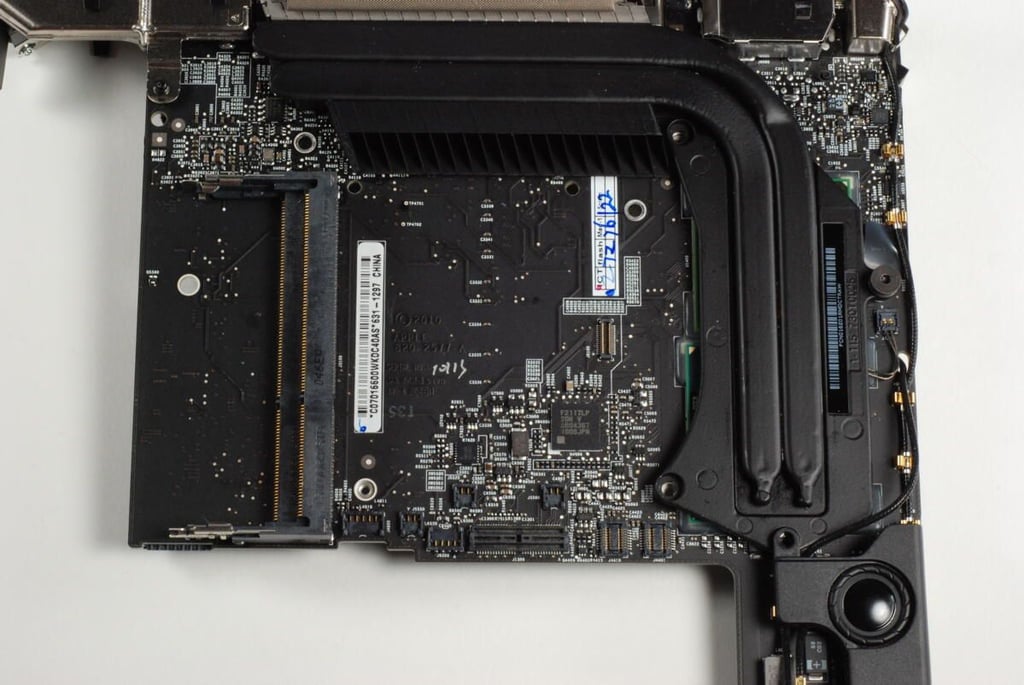
The Mac mini’s heat sink is mounted over the Intel CPU and NVIDIA GPU, and curves around to the back of the logic board where the cooling fan can move air across it.
Photo credit: Bill Detwiler / TechRepublic
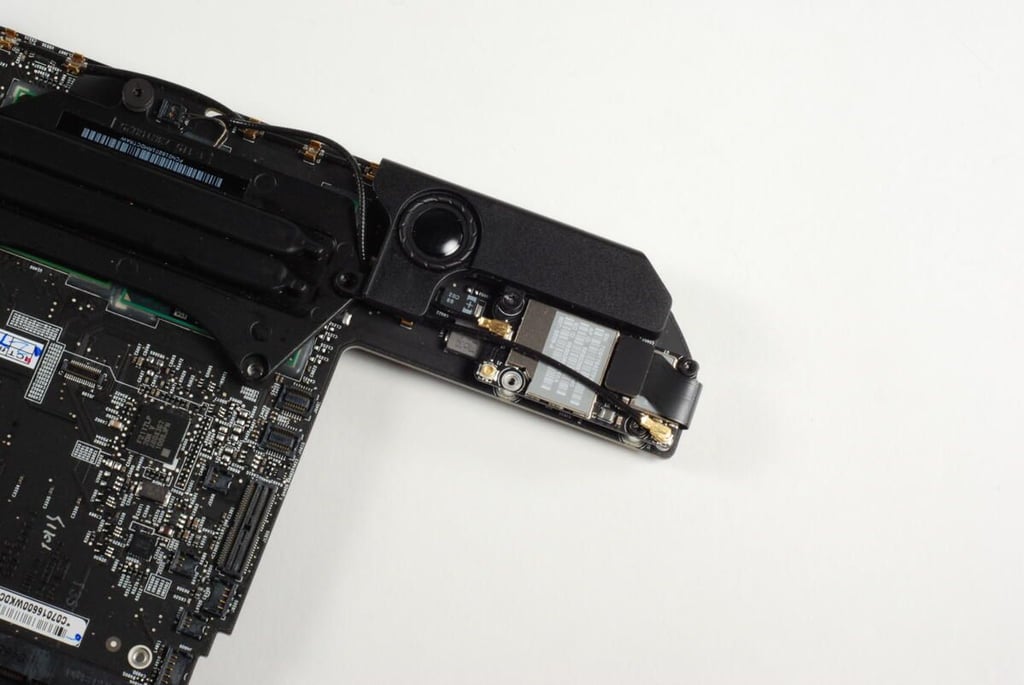
The Mac mini’s internal speaker and AirPort Extreme card are mounted on this small protrusion on the main logic board.
Photo credit: Bill Detwiler / TechRepublic
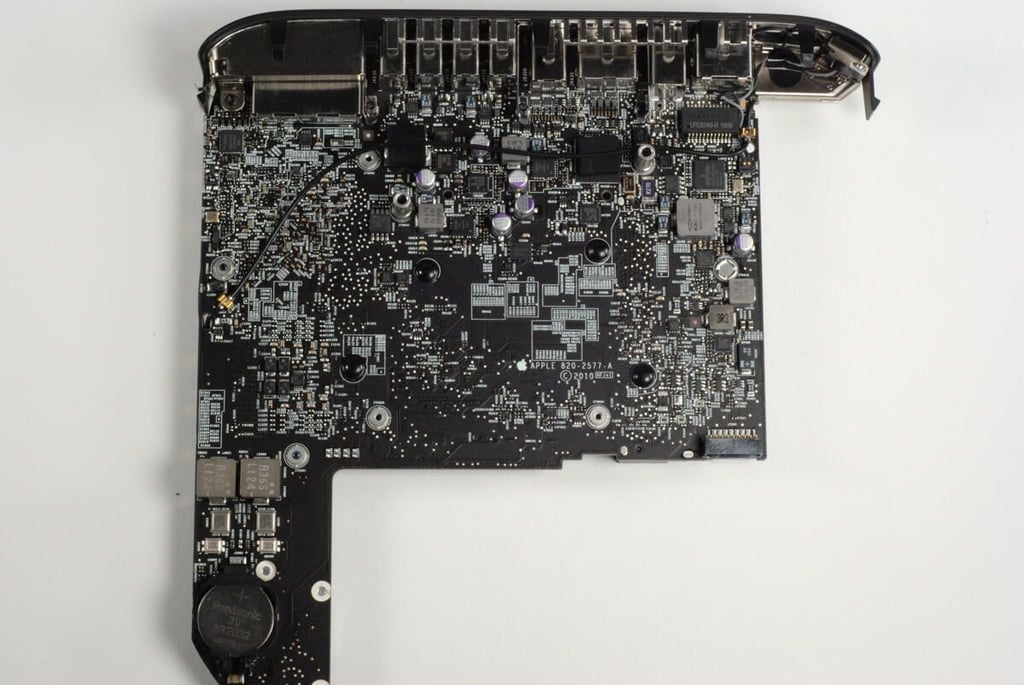
Photo credit: Bill Detwiler / TechRepublic
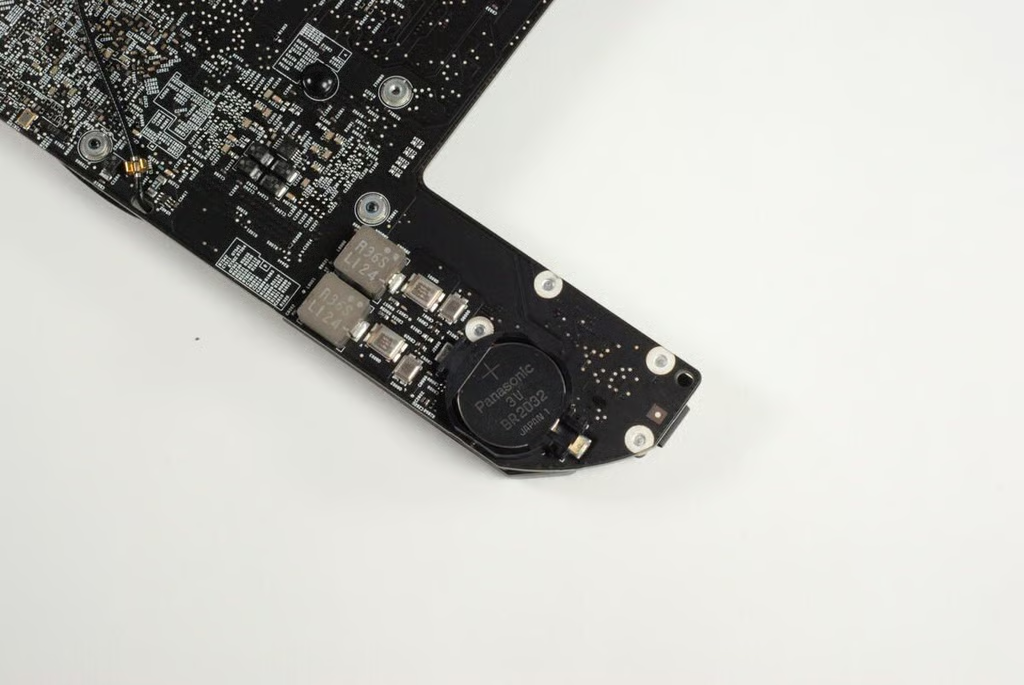
Our Mac mini came with a Panasonic 3V BR2032 system battery.
Photo credit: Bill Detwiler / TechRepublic

Photo credit: Bill Detwiler / TechRepublic
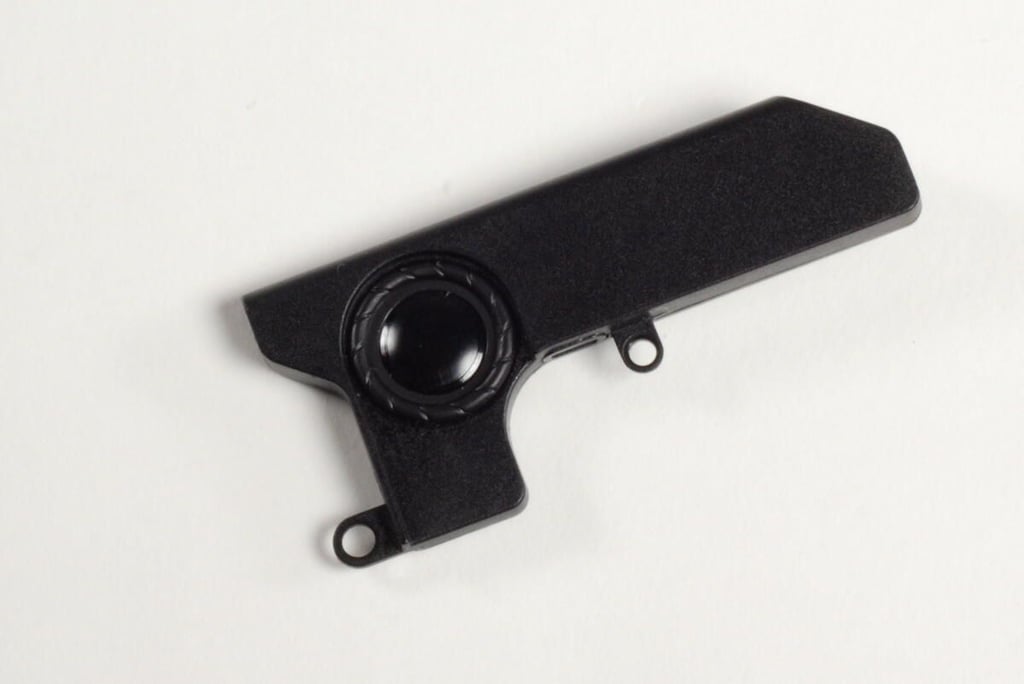
Photo credit: Bill Detwiler / TechRepublic
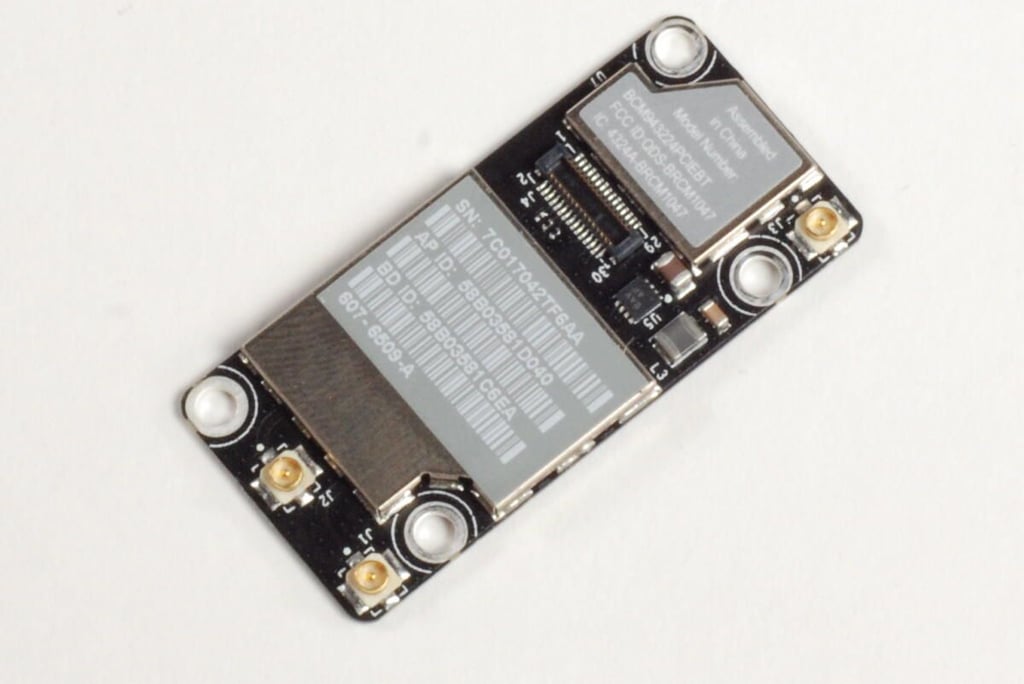
Photo credit: Bill Detwiler / TechRepublic
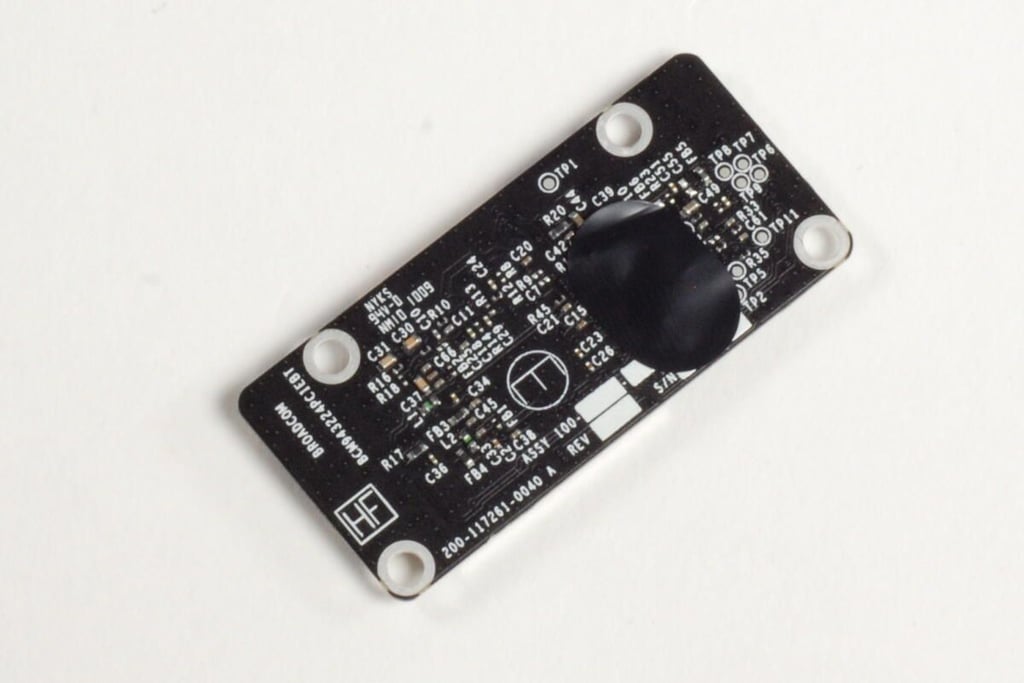
The Mac Mini A1347 has 802.11n Wi-Fi and Bluetooth 2.1. Broadcom appears to have manufactured this card or supplied most of the chips for it as “Broadcom” is clearly marked on the underside of the card.
Photo credit: Bill Detwiler / TechRepublic
At this point, a a couple of spring-loaded T8 Torx screws hold the heat sink to the main logic board.
Photo credit: Bill Detwiler / TechRepublic
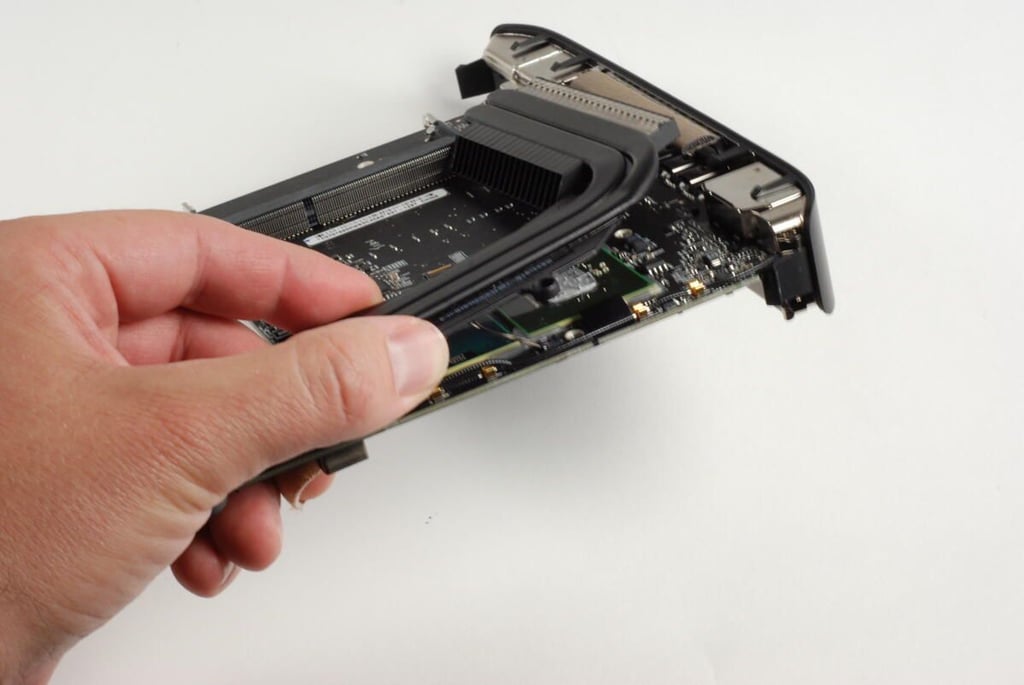
With all the screws removed, you can lift the heat sink away from the main logic board and the CPU and GPU.
Photo credit: Bill Detwiler / TechRepublic
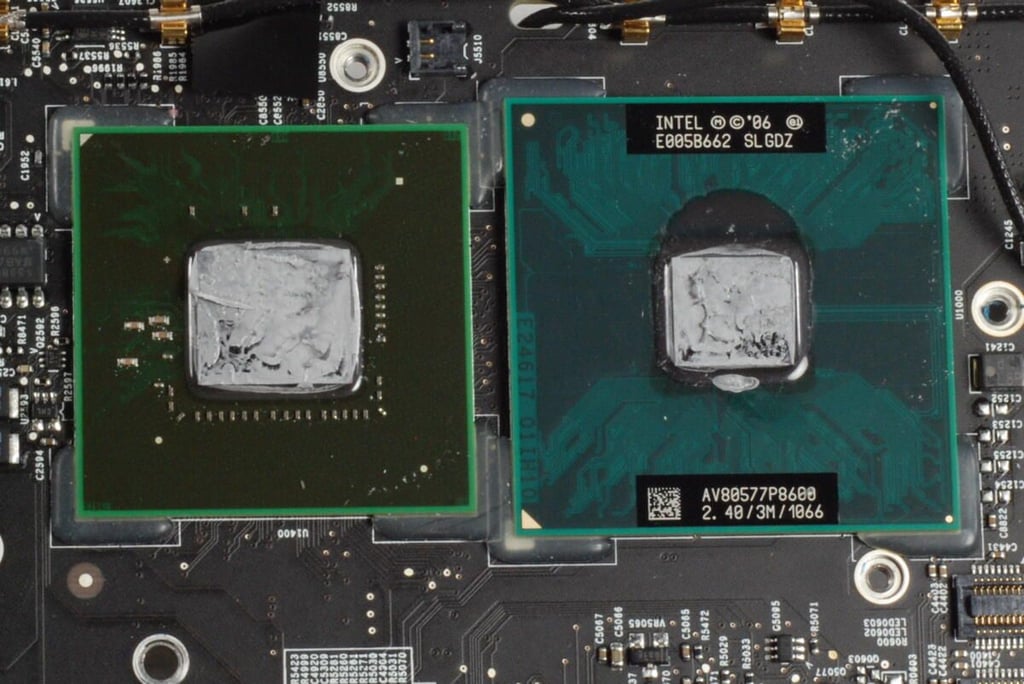
On the right, is the Intel P8600 2.4 GHz Core 2 Duo processor. A 2.66GHz CPU is also available.
On the left is the NVIDIA GeForce 320M GPU with 256MB of shared DDR3 SDRAM.
Photo credit: Bill Detwiler / TechRepublic
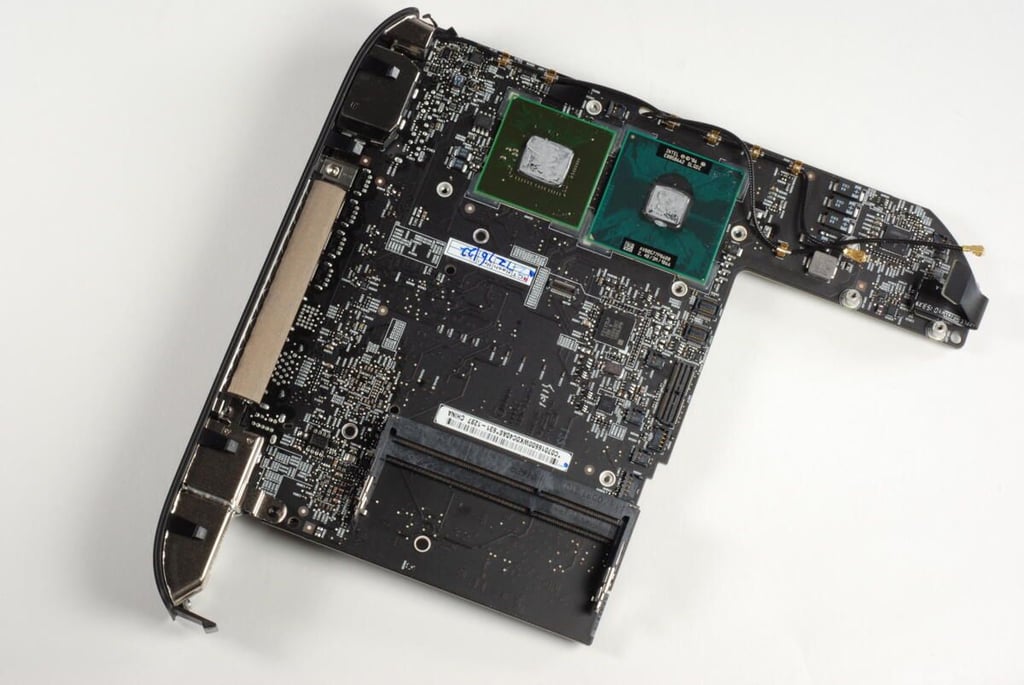
With nearly all the internal components removed, we can see the Mac mini’s entire logic board.
Photo credit: Bill Detwiler / TechRepublic
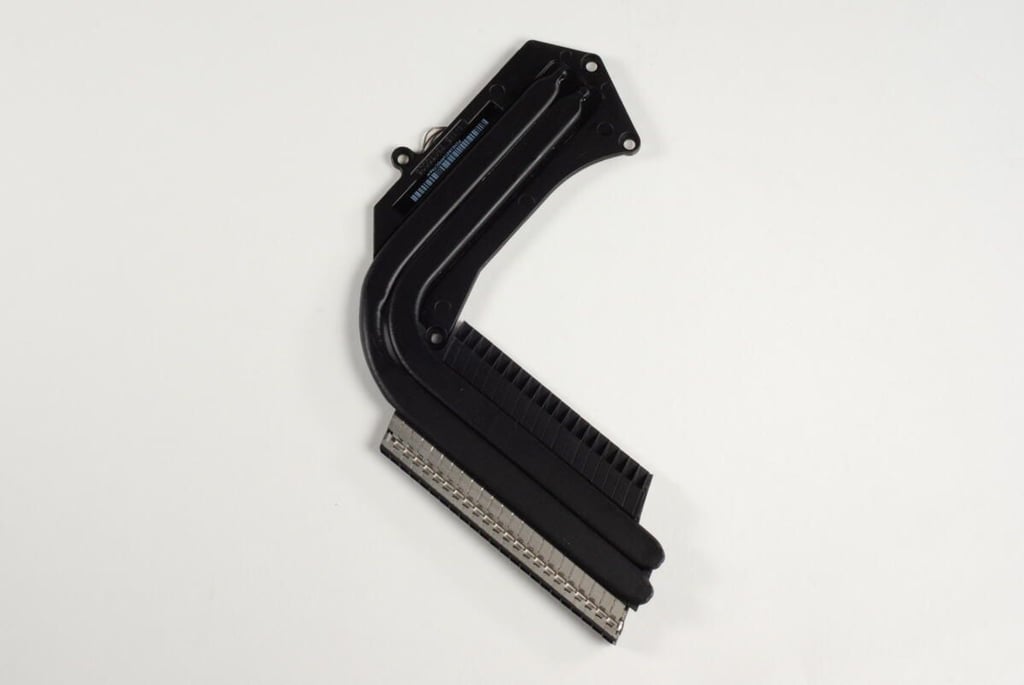
Photo credit: Bill Detwiler / TechRepublic
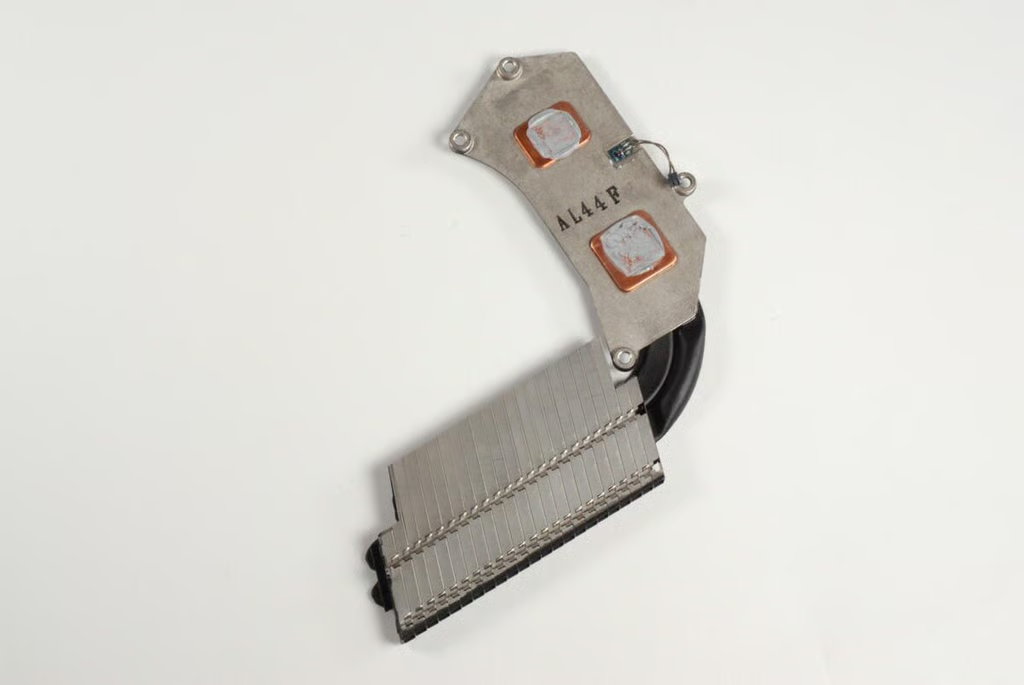
On the underside of the Mac mini’s heat sink we find the connector for the thermal sensor, the air channels, and the plates that physically connect the heat sink to the CPU and GPU. A think layer of thermal paste is still on the contact plates.
Photo credit: Bill Detwiler / TechRepublic
The main logic board removed, all the remains within the Mac mini’s unibody enclosure are the optical drive and the power supply.
Photo credit: Bill Detwiler / TechRepublic

Apple opted for an internal power supply with the Mac mini A1347. this design eliminates the need for an external power block common on laptops and game consoles.
Photo credit: Bill Detwiler / TechRepublic
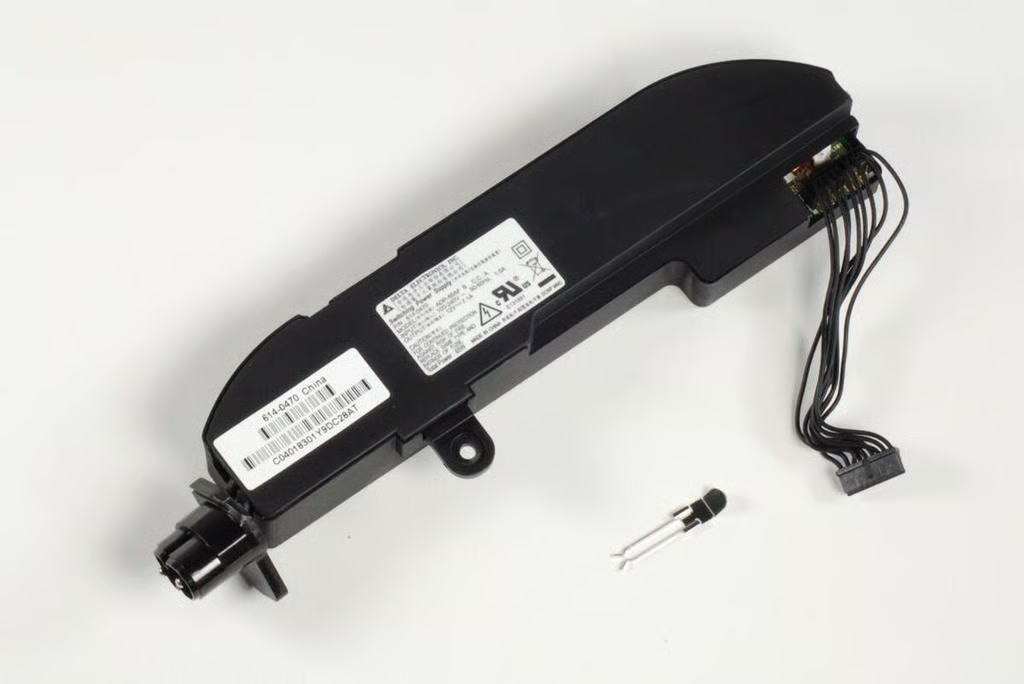
Information on the Mac mini’s power supply are located on the underside labels. This unit is a Delta Electronics Model ADP-85AF S rated for 85W of total power.
Photo credit: Bill Detwiler / TechRepublic
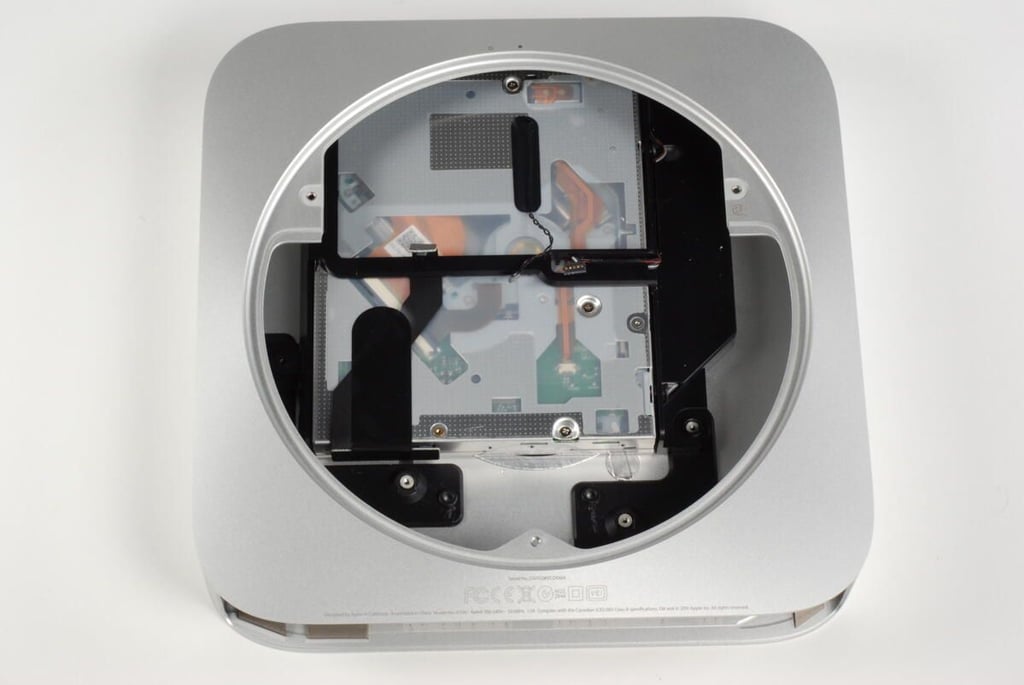
With the power supply removed, only the optical drive remains.
Photo credit: Bill Detwiler / TechRepublic
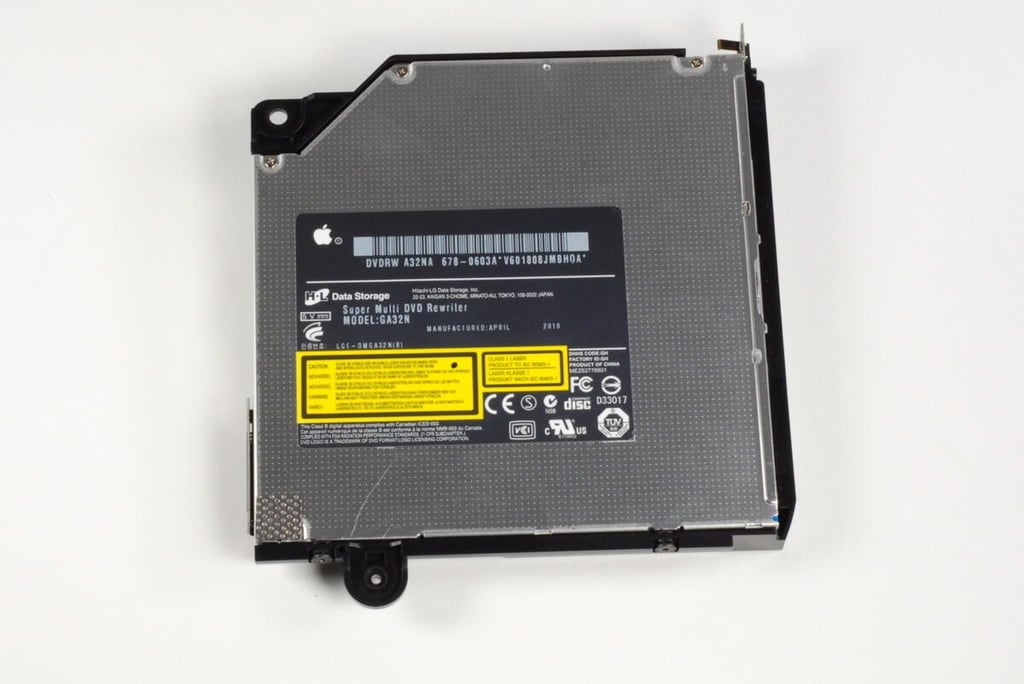
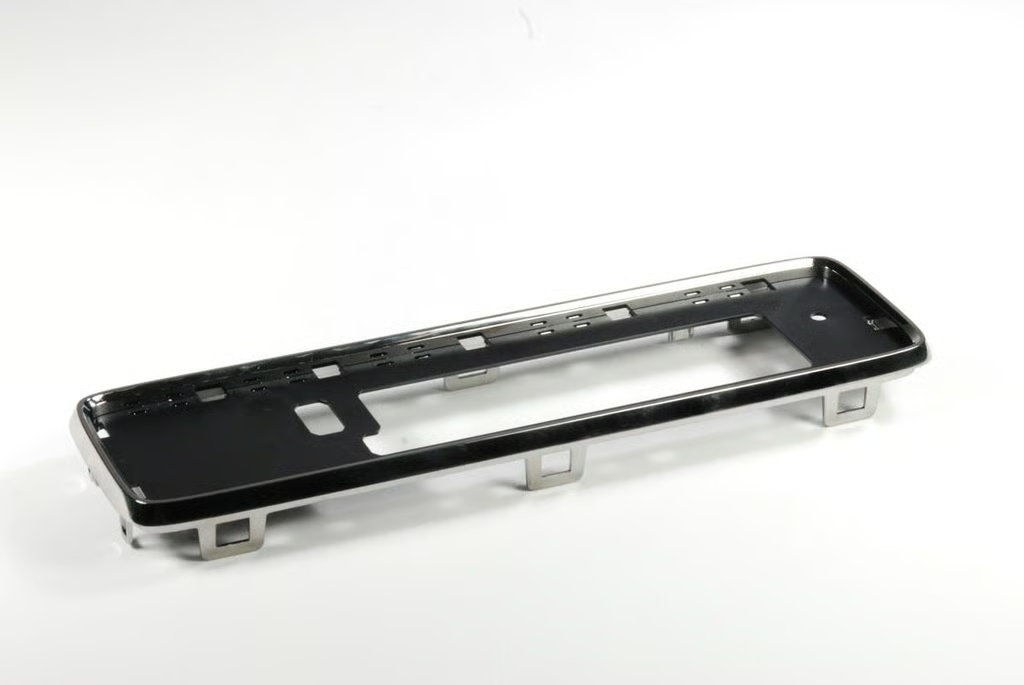
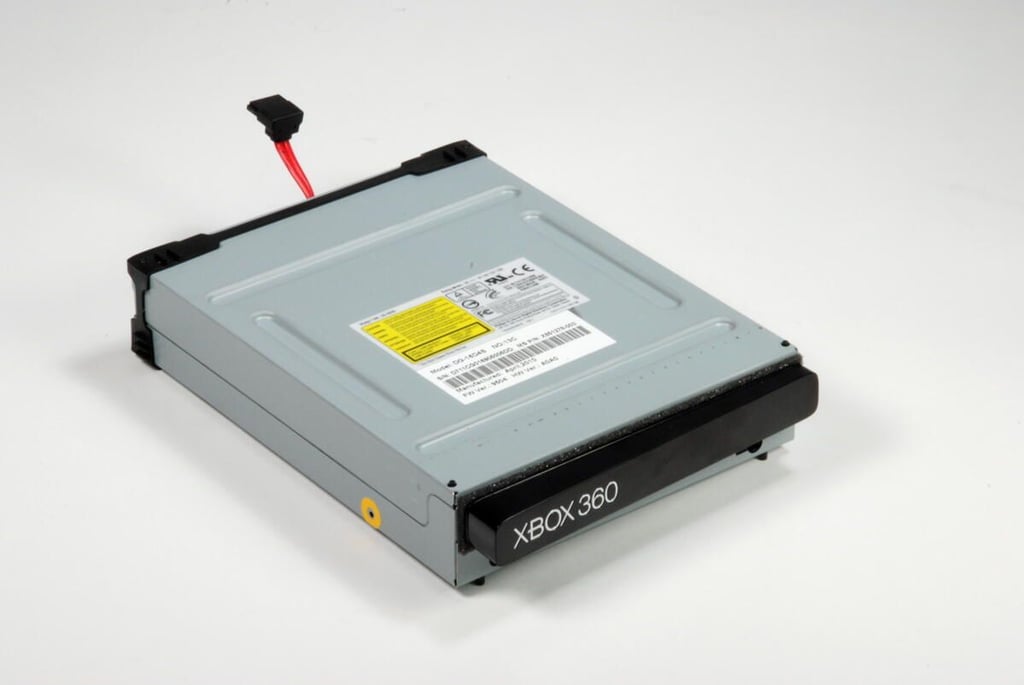
The Mac mini’s optical drive and plastic frame are removed as a single unit. The Mac mini contains a Hitachi-LG Data Storage Super Multi DVD rewriter — Model: GA32N.
Photo credit: Bill Detwiler / TechRepublic
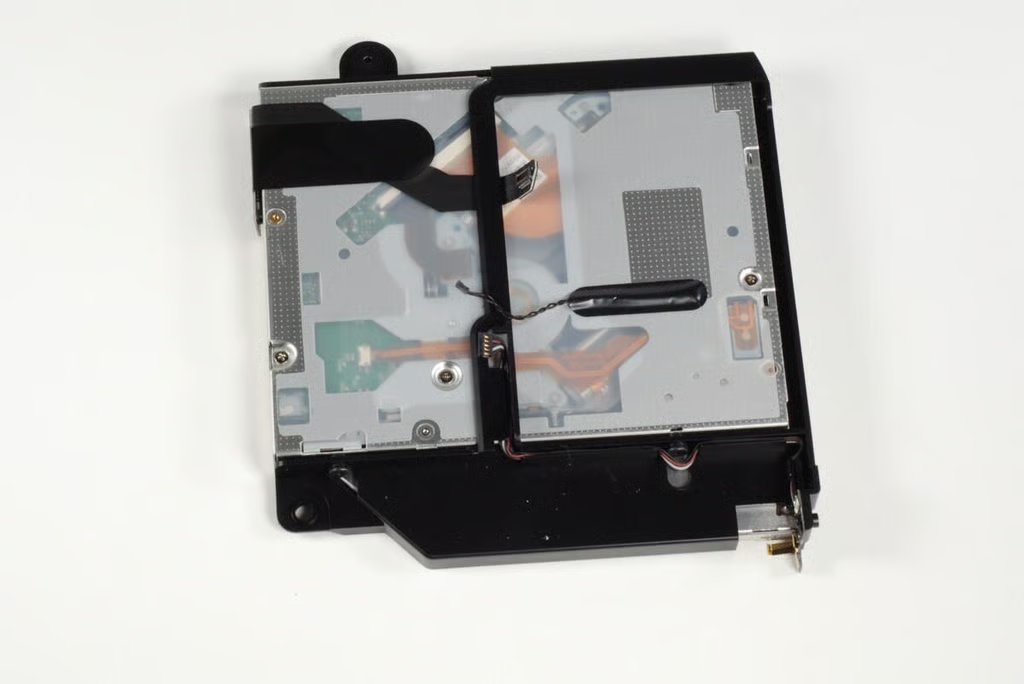
Photo credit: Bill Detwiler / TechRepublic
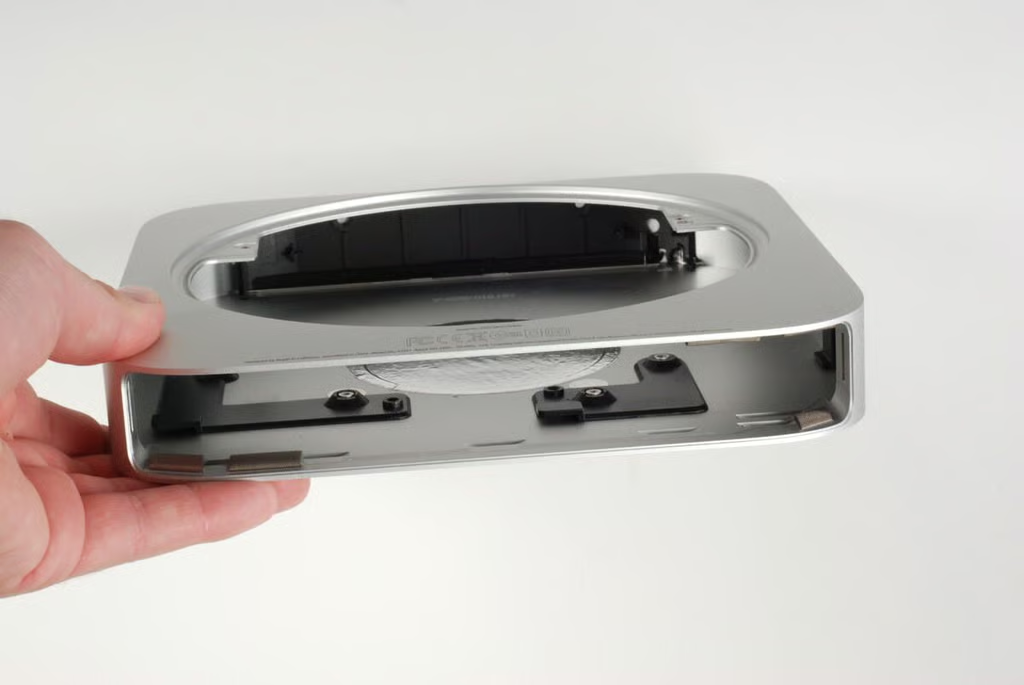
With all the internal components removed, there’s not much left inside the Mac mini unibody enclosure.
Photo credit: Bill Detwiler / TechRepublic
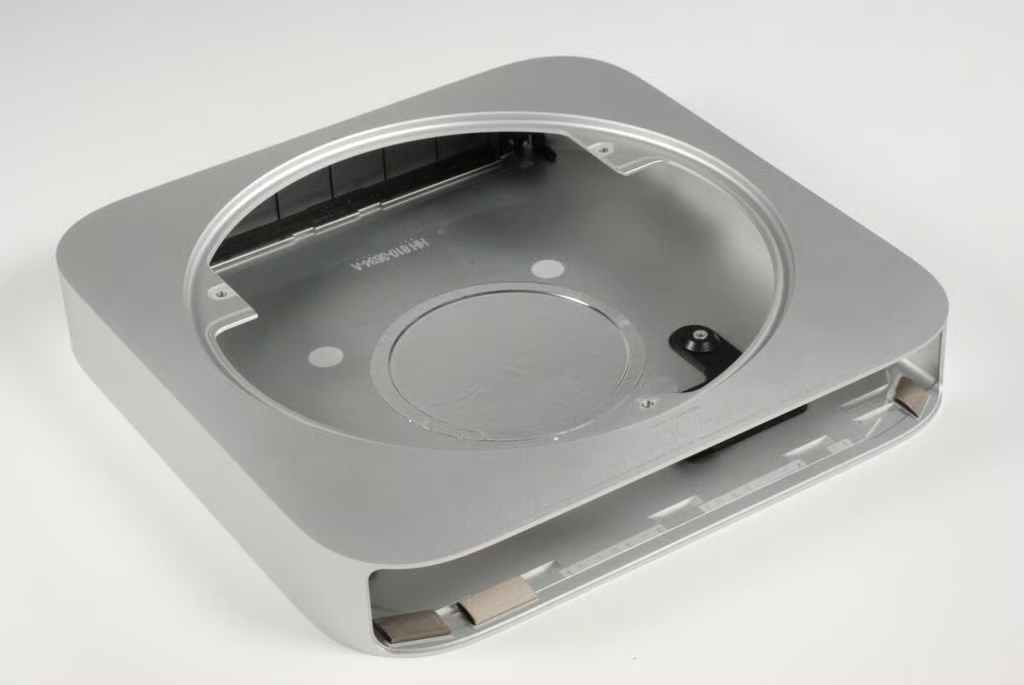
Photo credit: Bill Detwiler / TechRepublic
The Mac mini A1347 was significantly easier to disassemble than previous versions. The addition of the bottom access plate, and standard screws make the A1347 a very serviceable, machine.
Photo credit: Bill Detwiler / TechRepublic
Bill Detwiler is the Editor for Technical Content and Ecosystem at Celonis. He is the former Editor in Chief of TechRepublic and previous host of TechRepublic's Dynamic Developer podcast and Cracking Open, CNET and TechRepublic's popular online show. Previously, Bill was an IT manager in the social research and energy industries. He has bachelor's and master's degrees from the University of Louisville, where he has also lectured on computer crime and crime prevention.


