Calibrate your computer display's color settings and see the difference - TechRepublic

Calibrate your computer display’s color settings and see the difference

  • 457769.png

    Click dccw.exe

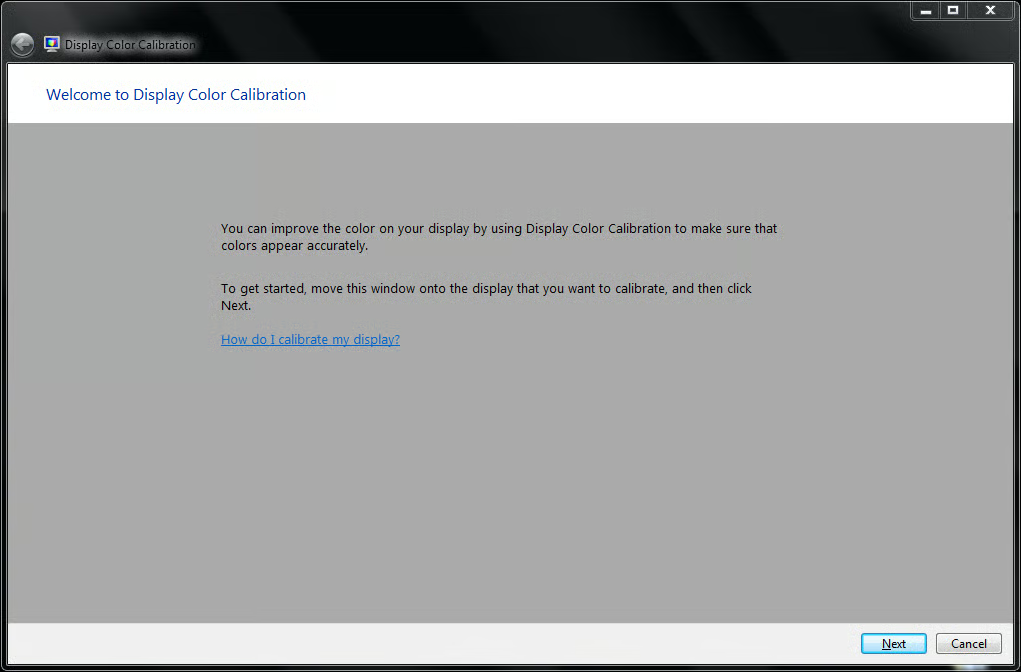
    \n\tTake a long look at your computer monitor. Is the contrast and brightness right? Have you calibrated the color correctly? Have you ever calibrated the display at all? For the amount of time you spend staring at the pixels that monitor generates, calibration should be something you do at least once. It is not a difficult process and Microsoft Windows 7 includes built-in applications that make the process really simple.
    \n\t
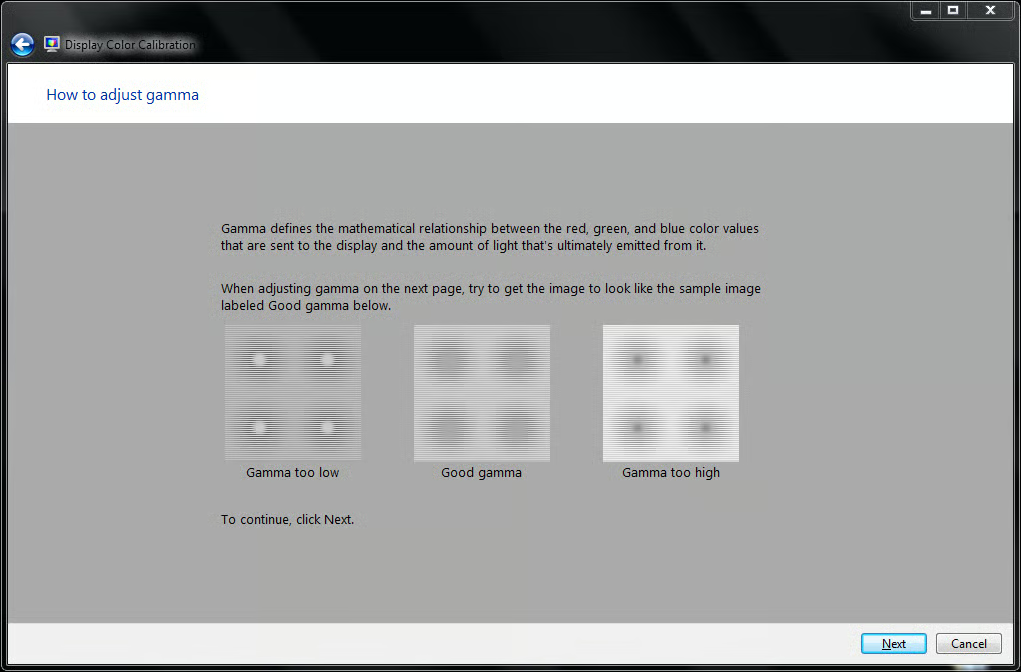
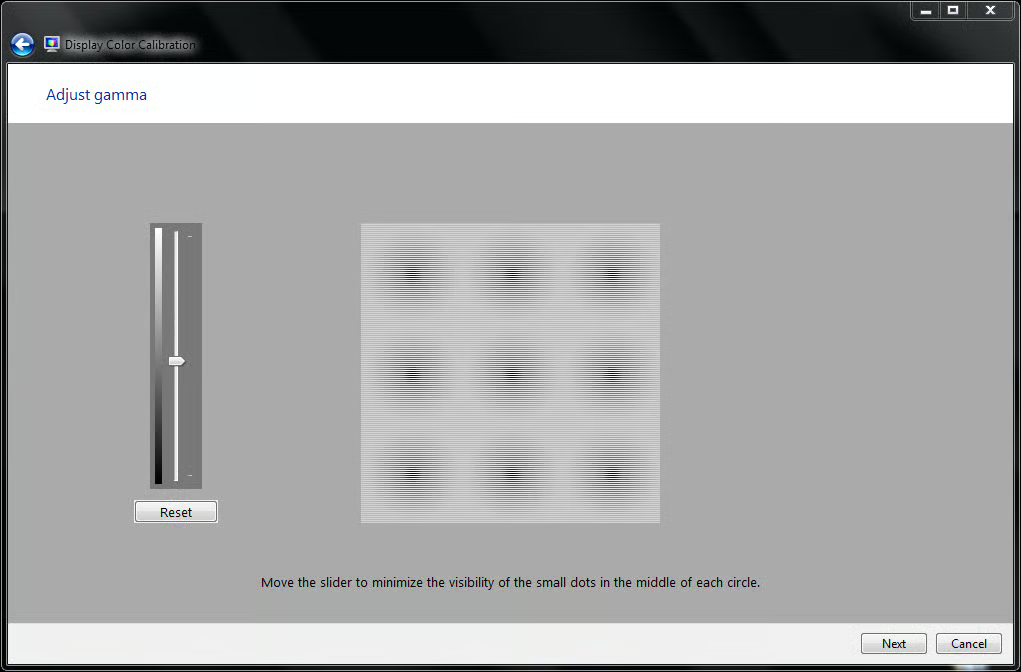
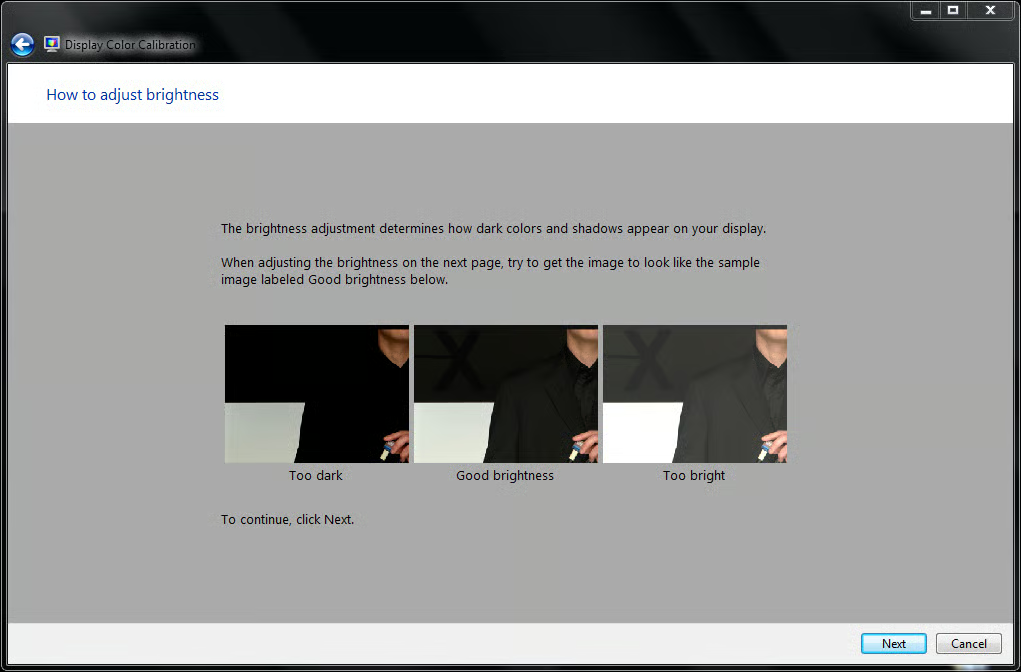
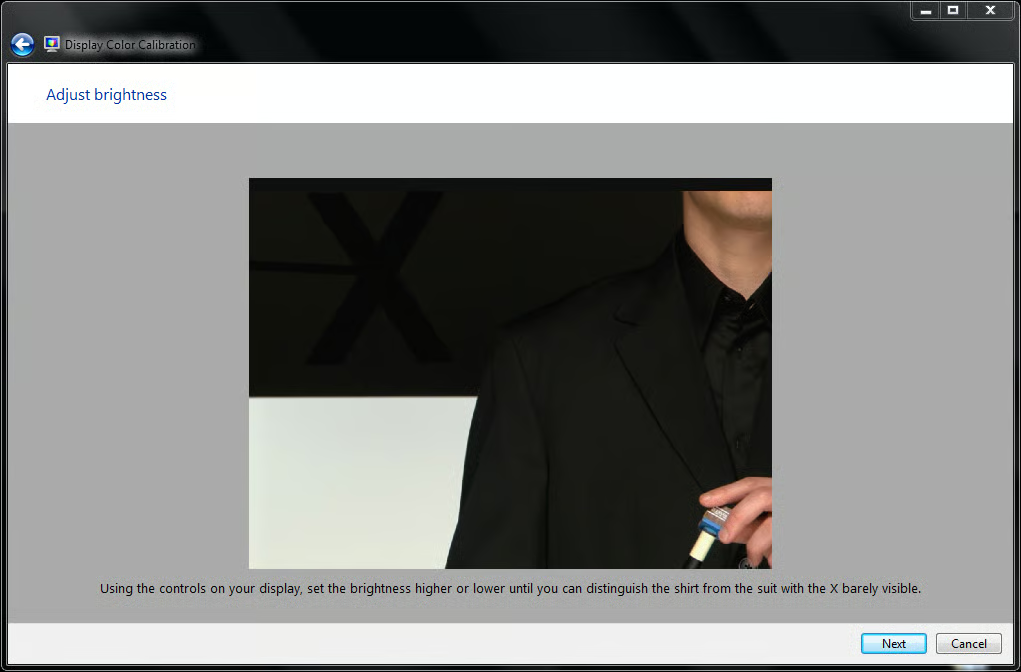
    \n\tGamma, brightness and contrast
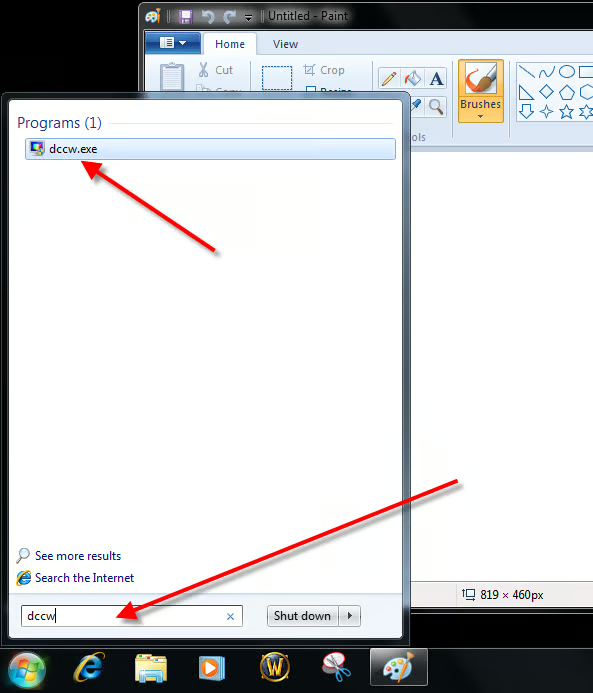
    \n\tTo start the display calibration process in Windows 7, type dccw in the Desktop Search box, and click the dccw.exe file.
    \n\t
    \n\tThis gallery is also available as a TechRepublic blog post and download. Image created by Mark Kaelin for TechRepublic. The gallery was originally published in August 2010.

  • Display Color Calibrator

    The Display Color Calibrator is not very fancy but it is effective.

    This gallery is also available as a TechRepublic blog post and download. Image created by Mark Kaelin for TechRepublic.

  • Factory defaults

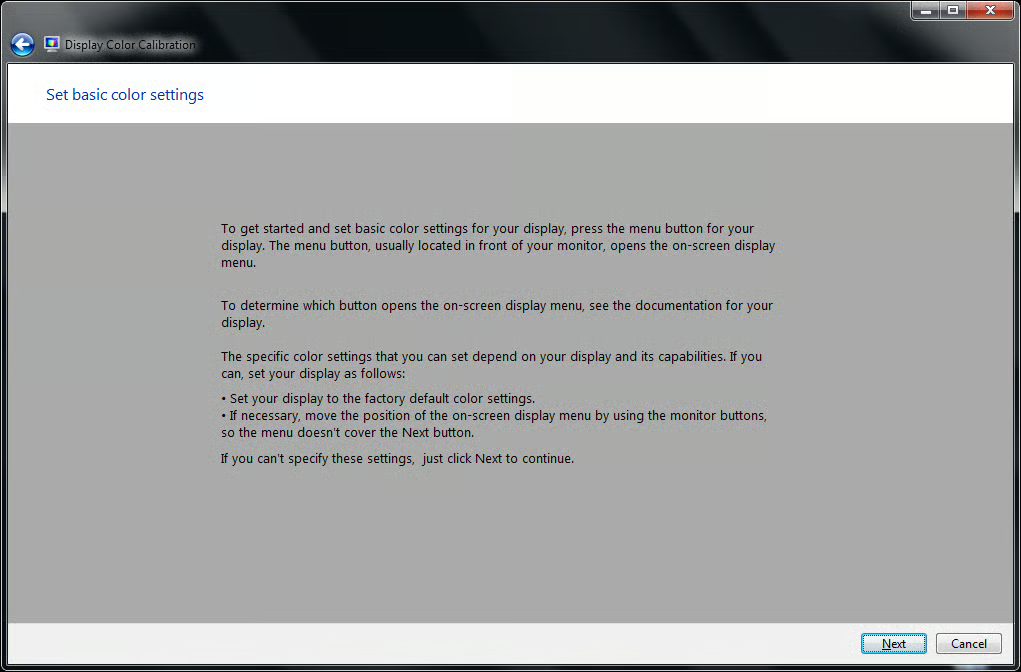
    The first step the Display Color Calibrator asks you to do is to load the factory defaults. If you are like most people that is what the monitor is set to, so you really don’t have to do anything but click the Next button.

    This gallery is also available as a TechRepublic blog post and download. Image created by Mark Kaelin for TechRepublic.

  • Gamma defined

    The first test and setting to adjust is the Gamma. The Display Color Calibrator shows you what Gamma means and what your Gamma should look like.

    This gallery is also available as a TechRepublic blog post and download. Image created by Mark Kaelin for TechRepublic.

  • Adjusting Gamma

    Then it takes you to an adjustment page where you can adjust Gama settings.

    This gallery is also available as a TechRepublic blog post and download. Image created by Mark Kaelin for TechRepublic.

  • Brightness and contrast

    Brightness and contrast are the next aspects to be tested.

    This gallery is also available as a TechRepublic blog post and download. Image created by Mark Kaelin for TechRepublic.

  • Brightness and contrast explained

    The explanation of the brightness and contrast test makes it sound so simple.

    This gallery is also available as a TechRepublic blog post and download. Image created by Mark Kaelin for TechRepublic.

  • The brightness calibration test

    The brightness calibration test itself is deceivingly simple; you’ll have to have a good eye to get the best result.

    This gallery is also available as a TechRepublic blog post and download. Image created by Mark Kaelin for TechRepublic.

  • Contrast calibration test explained

    The contrast test is explained and it also seems deceivingly simple.

    This gallery is also available as a TechRepublic blog post and download. Image created by Mark Kaelin for TechRepublic.

  • Adjust the contrast

    The contrast calibration test is probably the most difficult to adjust with the naked eye. Your brain will play tricks on you as you make adjustments.

    This gallery is also available as a TechRepublic blog post and download. Image created by Mark Kaelin for TechRepublic.

  • Color calibration explanation

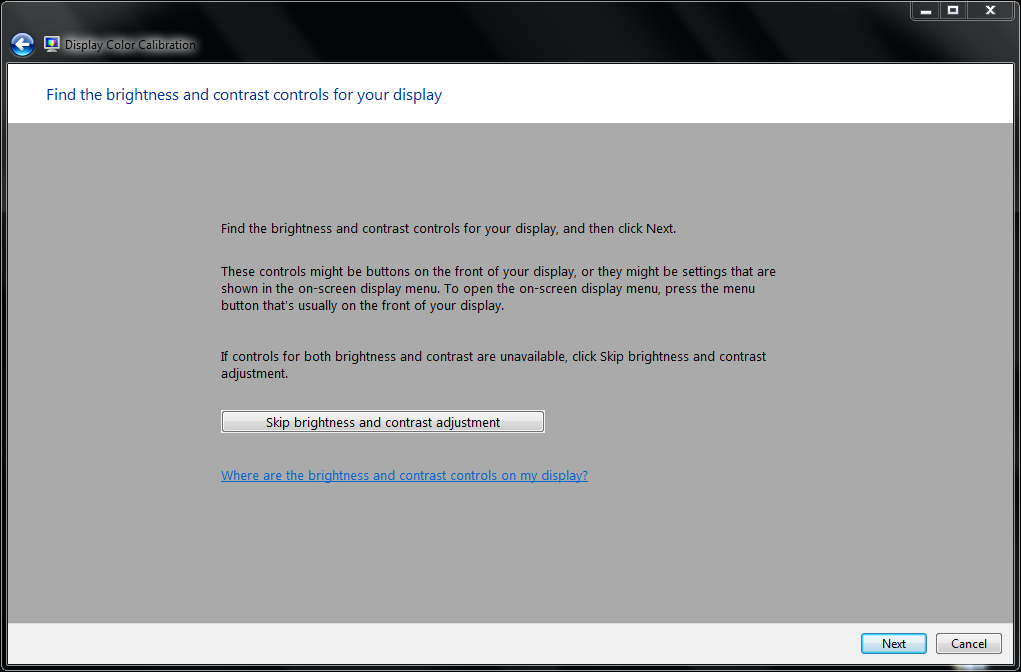
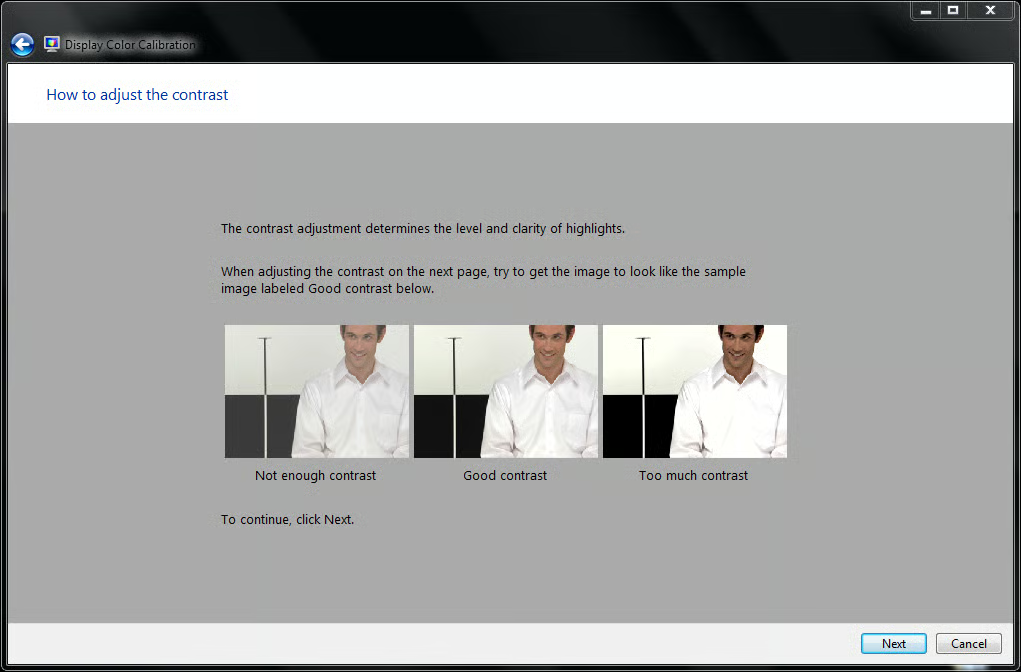
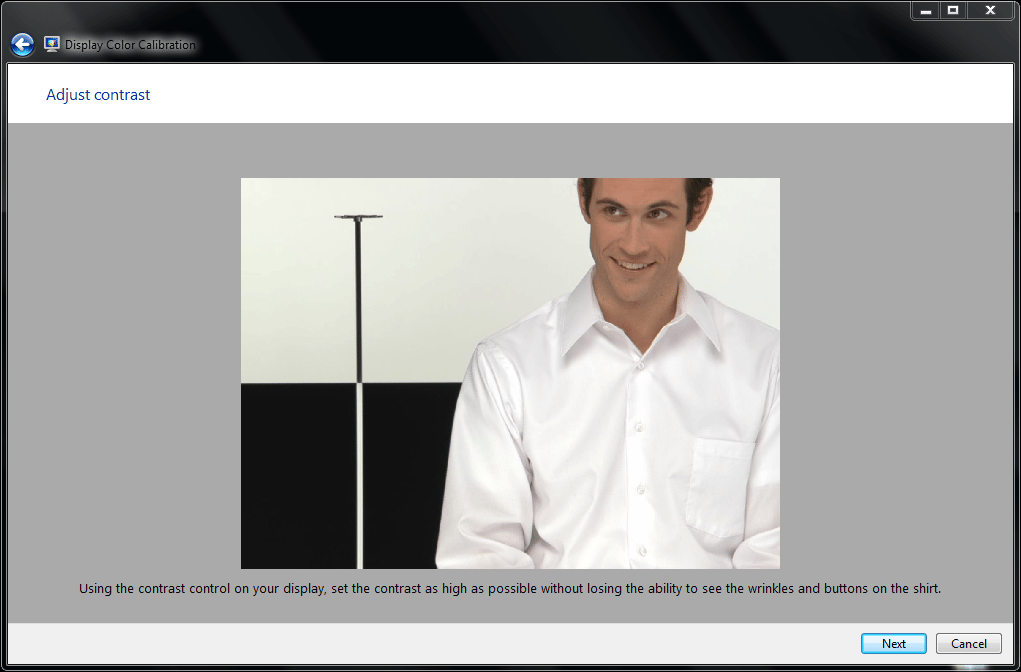
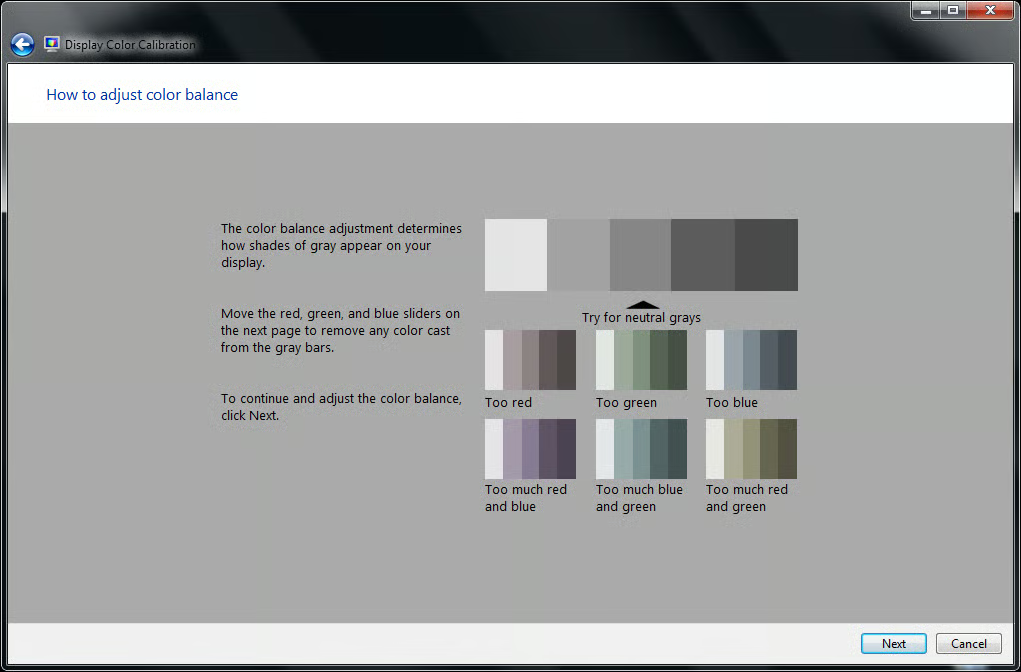
    Color calibration is often necessary because manufacturers and retailers like to up the color saturation of the monitors as they leave the factory to make them stand out to consumers.

    This gallery is also available as a TechRepublic blog post and download. Image created by Mark Kaelin for TechRepublic.

  • A true shade of grey

    Move the sliders to the correct position to get the most pure form of grey.

    This gallery is also available as a TechRepublic blog post and download. Image created by Mark Kaelin for TechRepublic.

  • Better

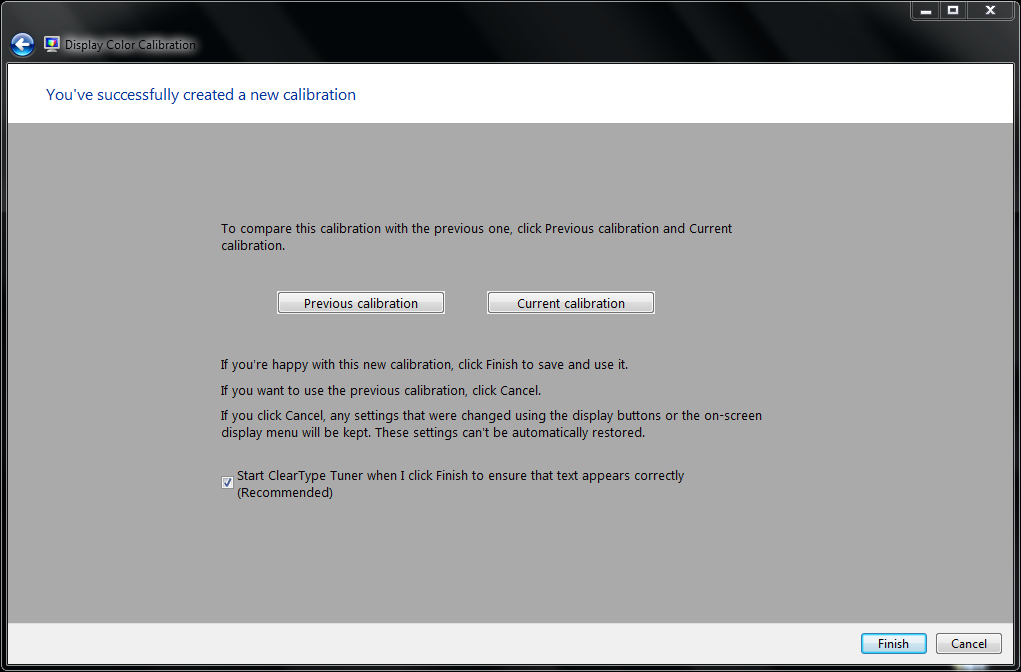
    Assuming you made adjustments, you can look at the quality of your display before and after calibration. If you did it right, your display should look better after calibration. If it doesn’t, perhaps you would like to use a piece of hardware to calibrate your display? We’ll get to that in a bit.

    This gallery is also available as a TechRepublic blog post and download. Image created by Mark Kaelin for TechRepublic.

  • Clear Type is on

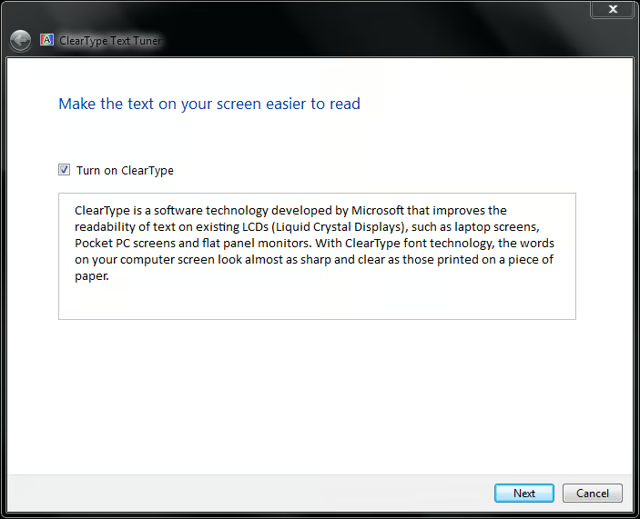
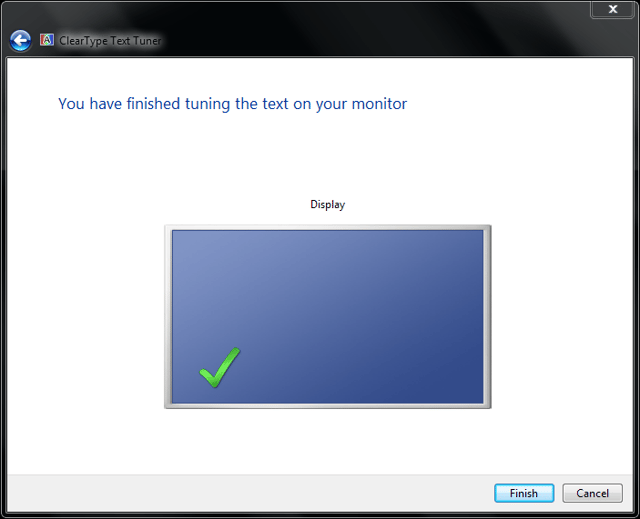
    Moving on to the Clear Type calibration is an important step – at least as far as I am concerned. As someone who spends hours looking at text, I really need my text to be displayed as clear as it can possibly be. All my Windows PC operate with Clear Type turned on.

    This gallery is also available as a TechRepublic blog post and download. Image created by Mark Kaelin for TechRepublic.

  • Native resolution please

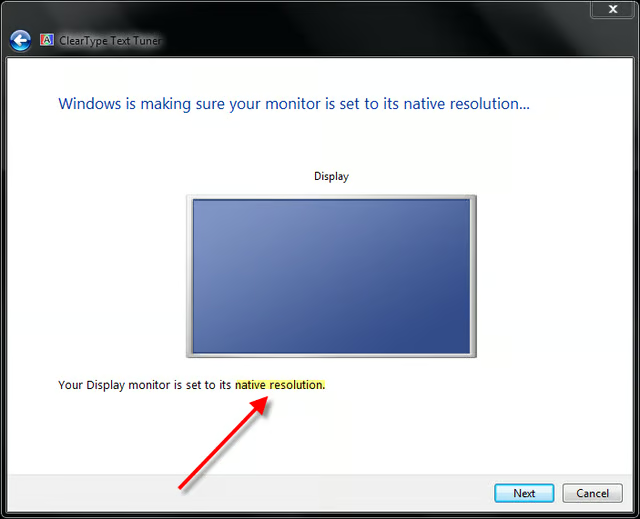
    The next screen talks about native resolution. For LCD monitors in particular, this is a very important consideration for proper calibration. An LCD will always display a better quality image when it is in its native resolution.

    This gallery is also available as a TechRepublic blog post and download. Image created by Mark Kaelin for TechRepublic.

  • Clear Type 1

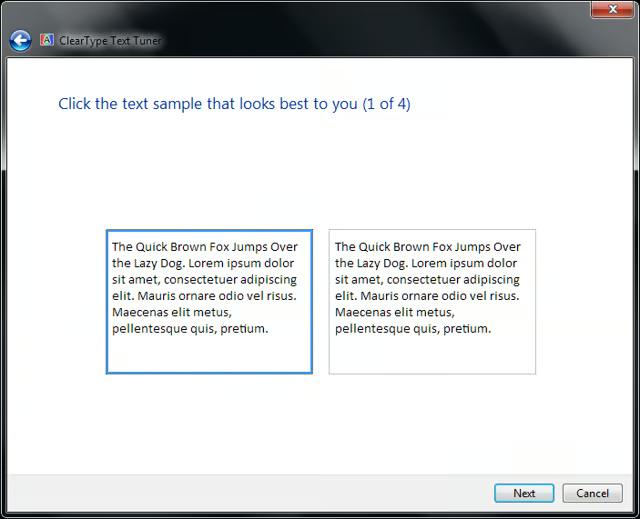
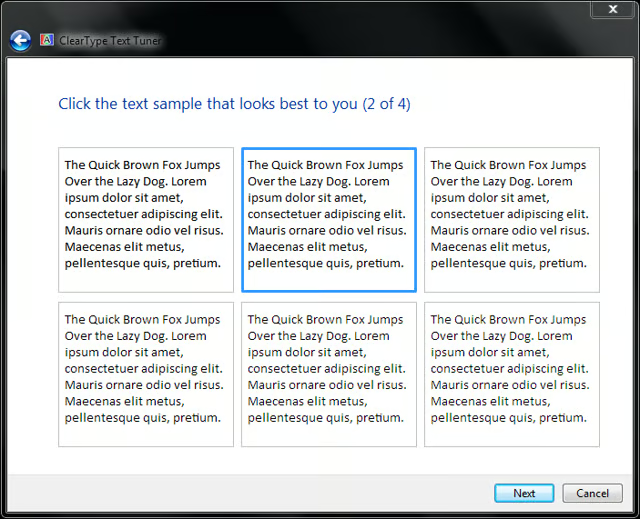
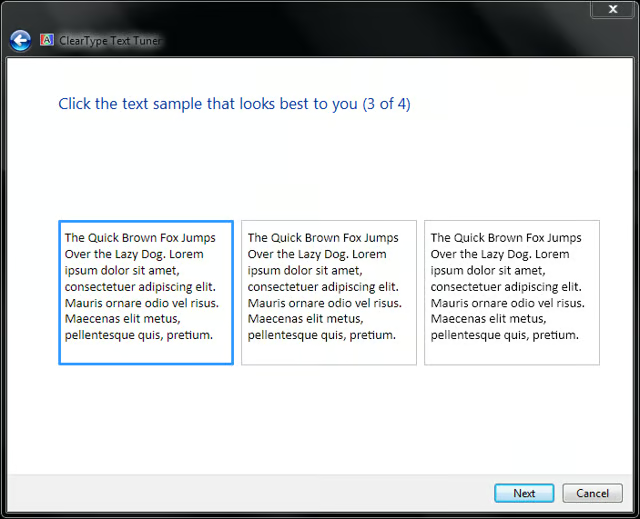
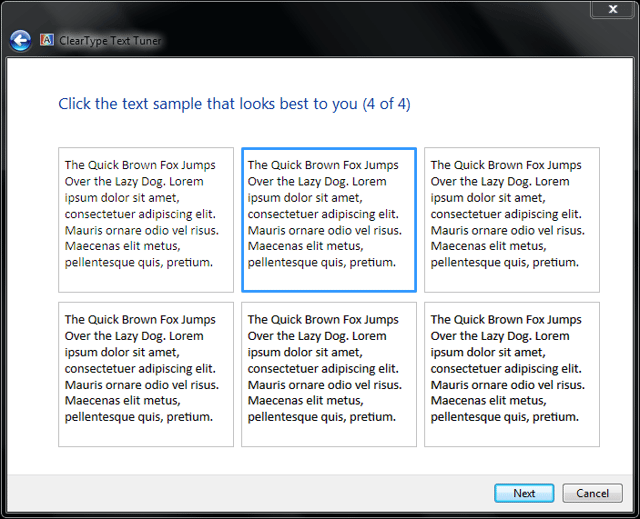
    The next four screens show text boxes of varying attributes. Each individual is likely to pick a different combination, so don’t be persuaded to choose what I have because this is really a calibration test that matches text to your eye.

    This gallery is also available as a TechRepublic blog post and download. Image created by Mark Kaelin for TechRepublic.

  • Clear Type 2

    This gallery is also available as a TechRepublic blog post and download. Image created by Mark Kaelin for TechRepublic.

  • Clear Type 3

    This gallery is also available as a TechRepublic blog post and download. Image created by Mark Kaelin for TechRepublic.

  • Clear Type 4

    This gallery is also available as a TechRepublic blog post and download. Image created by Mark Kaelin for TechRepublic.

  • Calibration complete

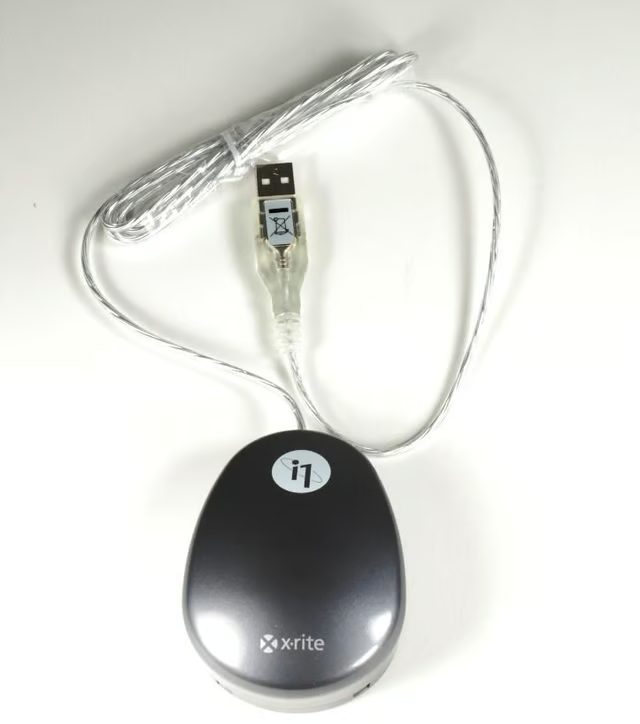
    Make your calibration choices and you will reach the end with a display with better attributes than you stared with. However, if you really want to get a true gamma, brightness, contrast, and color calibration and adjustment, you will have to invest in a specialized piece of hardware, like the Eye-One Display 2.

    This gallery is also available as a TechRepublic blog post and download. Image created by Mark Kaelin for TechRepublic.

  • X-Rite Eye-One Display 2

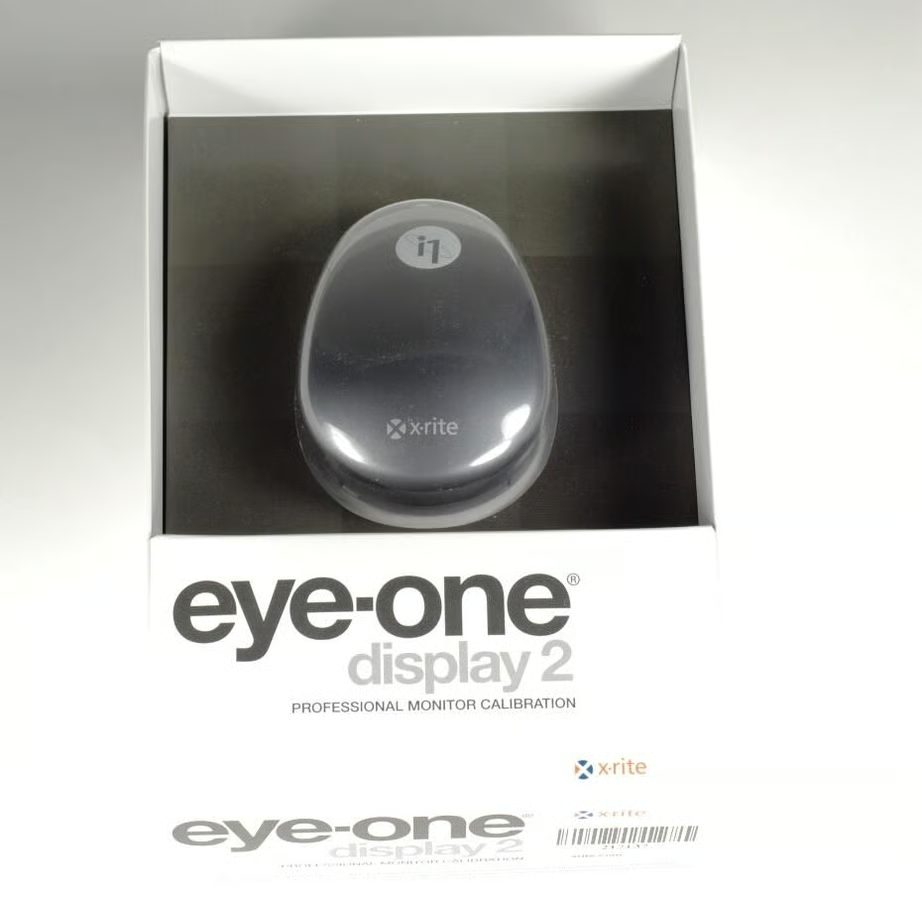
    The X-Rite Eye-One Display 2 is a small piece of hardware that looks much like a mouse.

    This gallery is also available as a TechRepublic blog post and download. Image created by Mark Kaelin for TechRepublic.

  • USB interface

    However the Display 2 is designed specifically for professional monitor calibration using the USB interface.

    This gallery is also available as a TechRepublic blog post and download. Image created by Mark Kaelin for TechRepublic.

  • Eye-One Match 3 testing

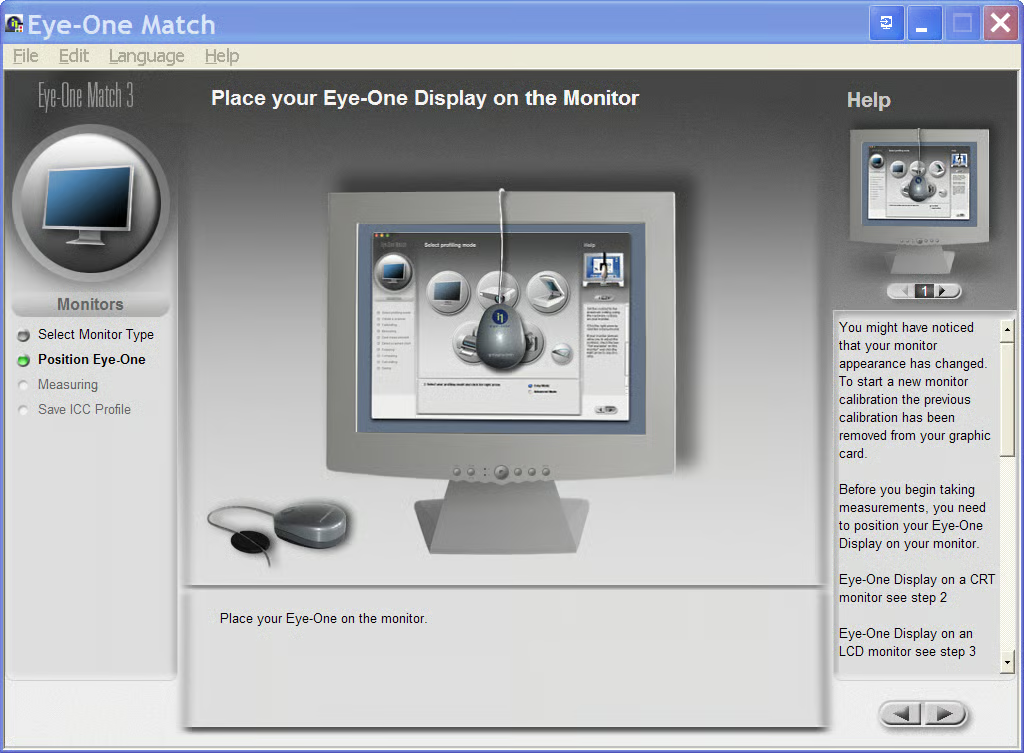
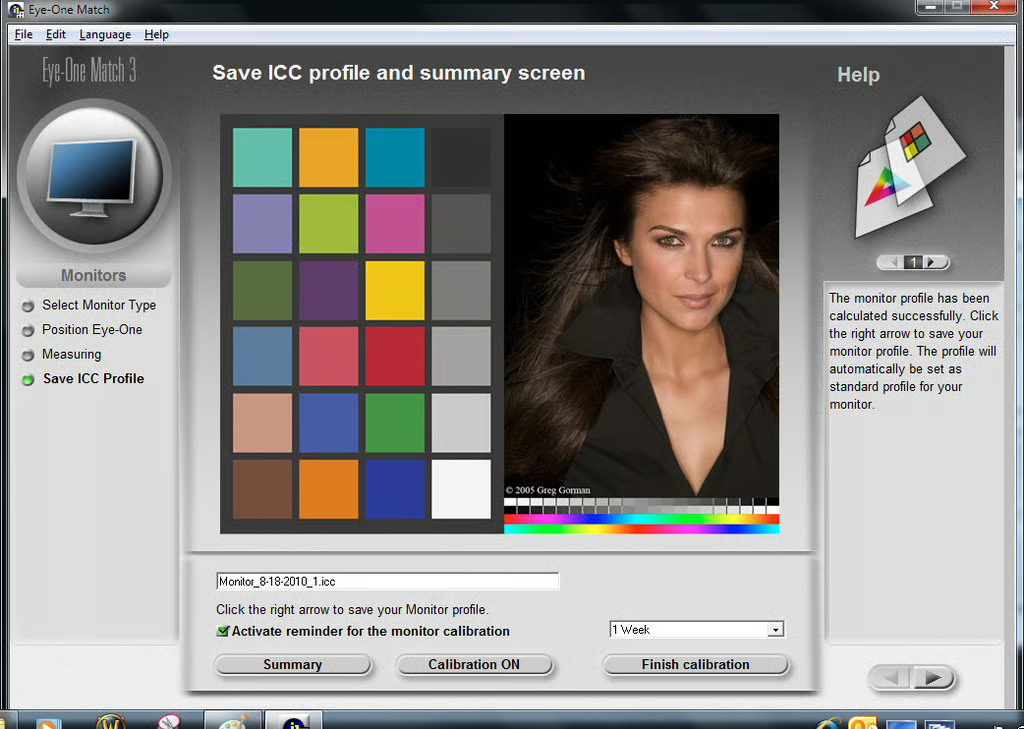
    The Eye-One Match 3 software will automatically calibrate and adjust your monitor depending on what the device actually sees when it is stuck to your monitor.

    This gallery is also available as a TechRepublic blog post and download. Image created by Mark Kaelin for TechRepublic.

  • Eye-One Match 3 summary page

    When the test complete you will get a summary page. You will also see a Before & After button.

    This gallery is also available as a TechRepublic blog post and download. Image created by Mark Kaelin for TechRepublic.

  • Before Calibration

    If you click the Before & After button you can see how much the Eye-One Display 2 has adjusted your monitor.

    This gallery is also available as a TechRepublic blog post and download. Image created by Mark Kaelin for TechRepublic.

  • After calibration

    This gallery is also available as a TechRepublic blog post and download. Image created by Mark Kaelin for TechRepublic.

1 of 26
Mark W. Kaelin

Mark W. Kaelin has been writing and editing stories about the information technology industry, software, hardware, gaming, finance, accounting, and technology geekdom for more than 30 years.