
My home backup solution is a little elaborate. I’ve built a FreeNAS server with two 500GB drives in a JBOD configuration for 1TB of storage. That data is then replicated to a Windows Device based NAS with four 250GB drives in a Raid 5 configuration. From there, the most essential folders and data are backed up to a Powervault 120t 4000 DLT IV tape backup library.
The aim of this document will be to illustrate how to recreate this configuration – which is a suitable, inexpensive alternative to more expensive data replication solution for a small office or data center on a limited budget – or overkill for the propeller head who can’t be away from the hum of a data-center without going into withdrawals.
Sun VM setup
Open Sun VirtualBox and click the “New” button to create a new machine.
This gallery is also available as a TechRepublic blog post and download.
All images by Donovan Colbert for TechRepublic
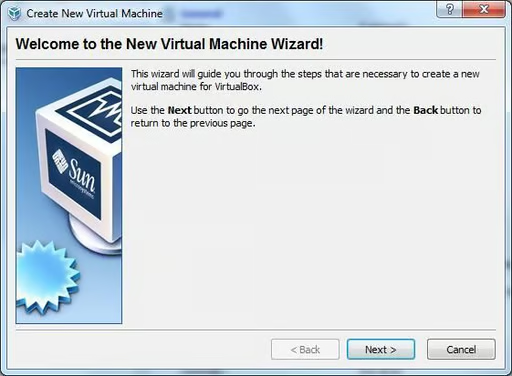
The “Welcome to the New Virtual Machine Wizard will run. Click “Next” to continue.
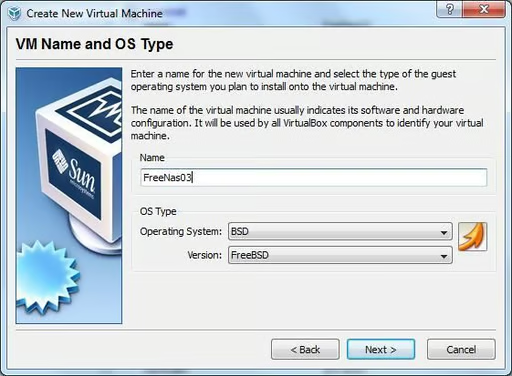
Name your virtual machine and select your OS and version. In this case, I am creating a second FreeNAS VM and therefore selecting BSD for the OS and FreeBSD for the Version. Click “Next” when done.
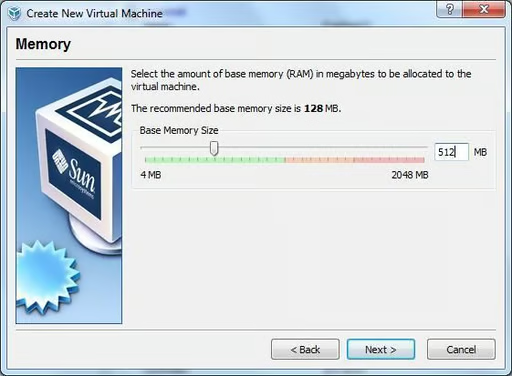
Select the appropriate amount of memory. For my FreeNas VM, I’ve selected 512MB of memory. Click “Next” when done.
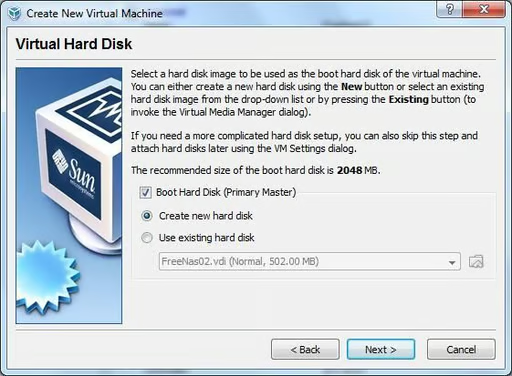
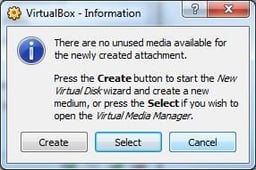
Sat “Virtual Hard Disk” check “Boot Hard Disk (Primary Master), select “Create new hard disk” button and click “Next” to continue.
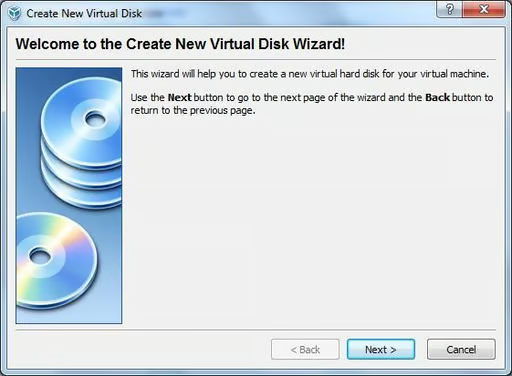
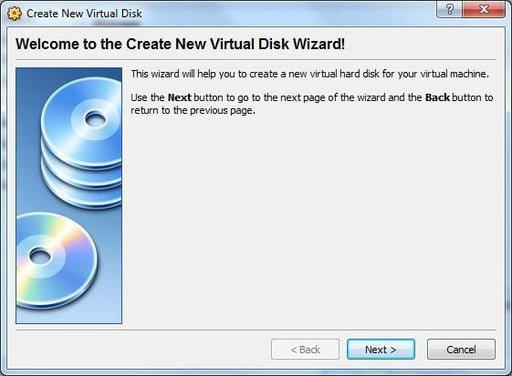
The “Welcome to the Create New Virtual Disk Wizard” will run. Click “Next” to continue.
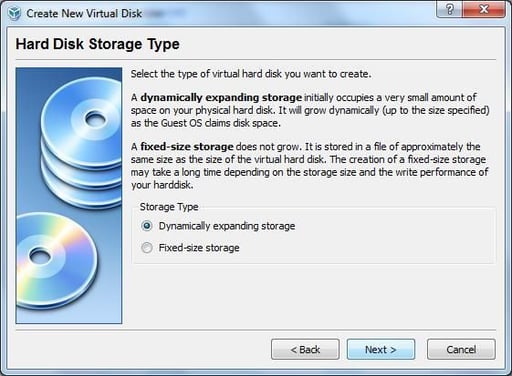
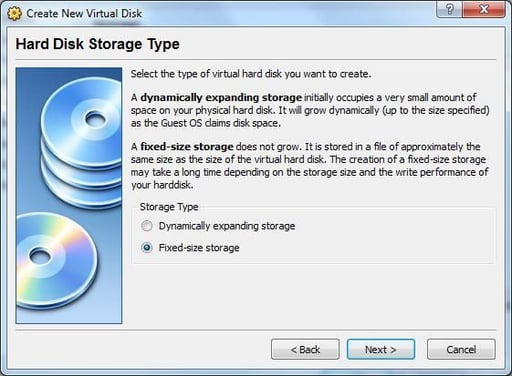
At “Hard Disk Storage Type” select “Fixed-size storage” and click “Next”.

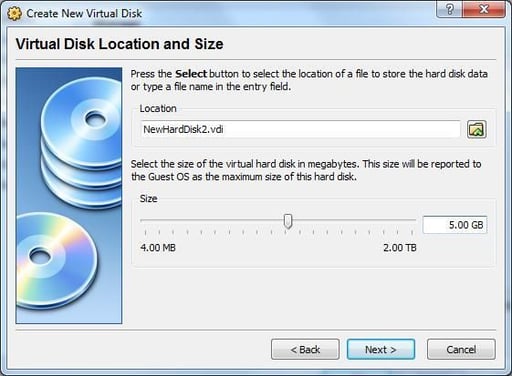
At “Virtual Disk Location And Size, set the size of the disk to 500MB either using the slider or by typing the size in the field. Click “Next” to continue.
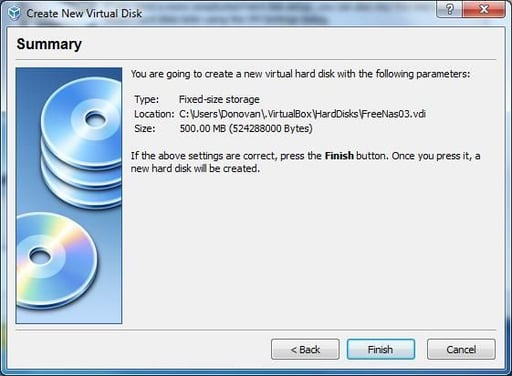
Verify the information for the new virtual disk is correct and click “Finish” to create the disk.
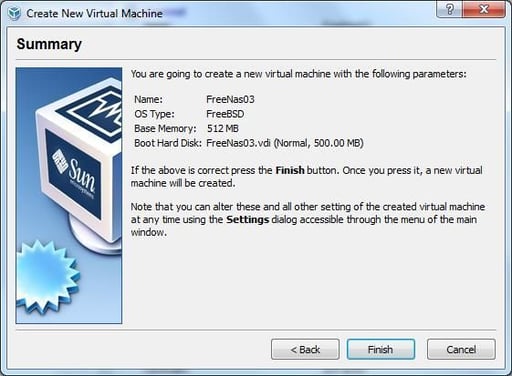
At the Summary window, verify for your settings and click “Finish” to create your FreeNAS Virtual Machine.

Network Setup VM
In Sun VirtualBox, select your VM and in the “Details” tab click “Network”.
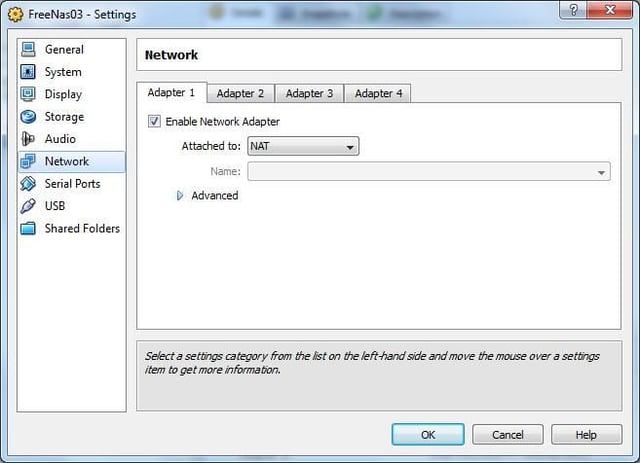
The Network configuration for that VM will appear.

In the Pull-down menu labeled “Attached to:” select “Bridged Adapter”
In “Name:” select the host NIC that you want the VM bridged to.
Under “Advanced” insure “Adapter Type” is “Intel Pro/1000 MT Desktop (8245OEM)” and click “OK” when finished.
Storage Setup VM
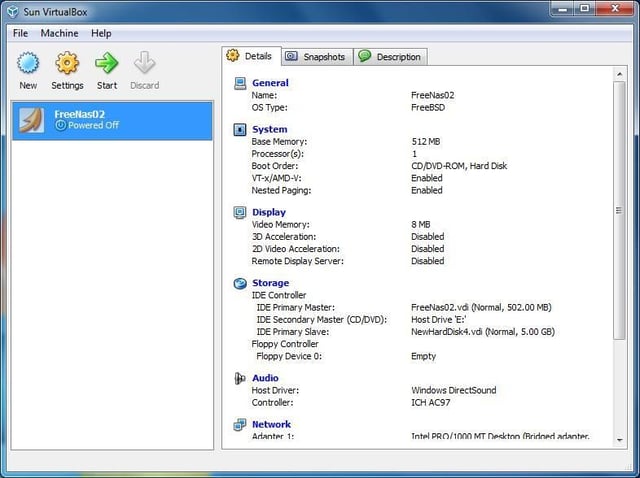
In Sun VirtualBox select your VM and in the “Details” tab select “Storage”.
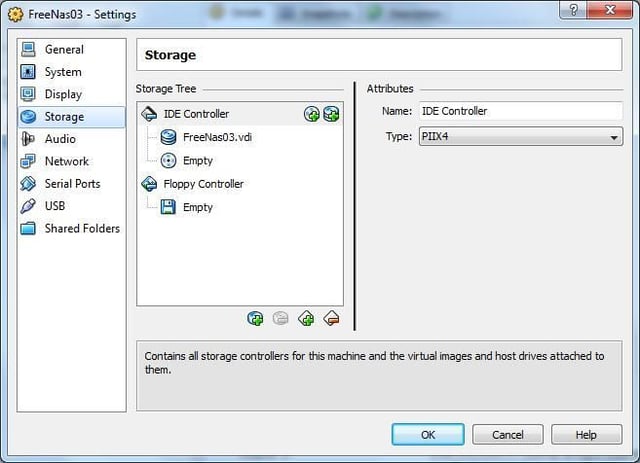
The Storage settings will display. In the Storage Tree, click the “Add Hard Disk Button” (it is the green plus sign in front of 3 disk platters). Depending on if you’ve created other Virtual Machines, the behavior of the Storage Tree window can be hard to understand.
At the “Welcome to the Create New Virtual Disk Wizard!” window, click “Next”.
Select the “Fixed-size storage” radio-button and click “Next”.
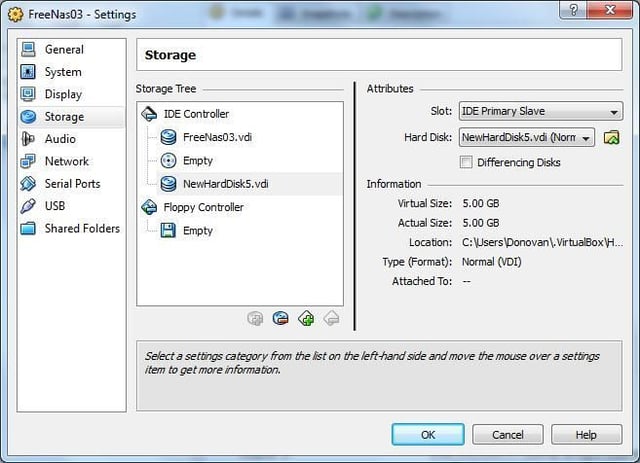
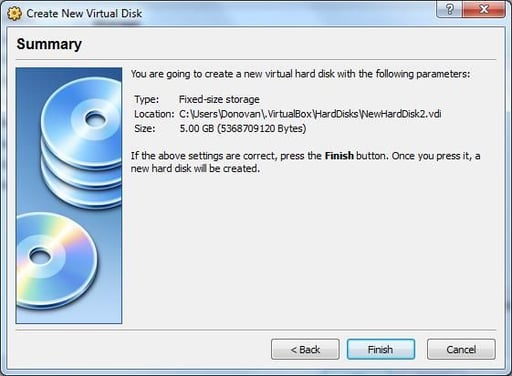
Use either the slider or the text field to enter the drive size as 5GB and click “Next”.
At the “Summary” window verify your settings and click “Finish” to continue.
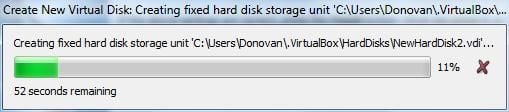
A progress bar will display while your drive is created.
Once the format is complete, click OK to return to the “Details” tab view of Sun VirtualBox.

FreeNAS Install
Place your FreeNAS live CD in the physical machine’s drive, select “Storage” from the “Details” tab on your VM, under” IDE controller” click the CD icon, in “Attributes”, under the “CD/DVD Device:” pull-down menu, select your Host CD/DVD Device (in this case, the E: drive on my host machine) and click OK.

Highlight your VM and click the Start icon (The large green arrow).
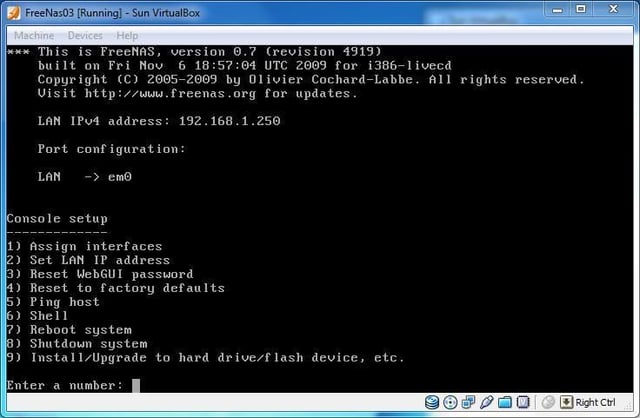
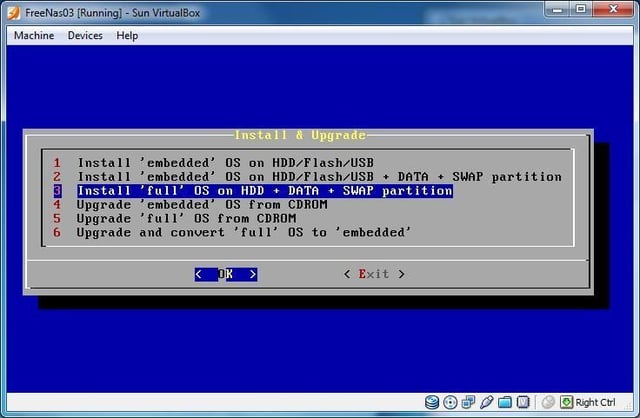
At the “Install & Upgrade” menu select “3 Install ‘full’ OS on HDD + DATA + SWAP partition” and click “OK” to continue.
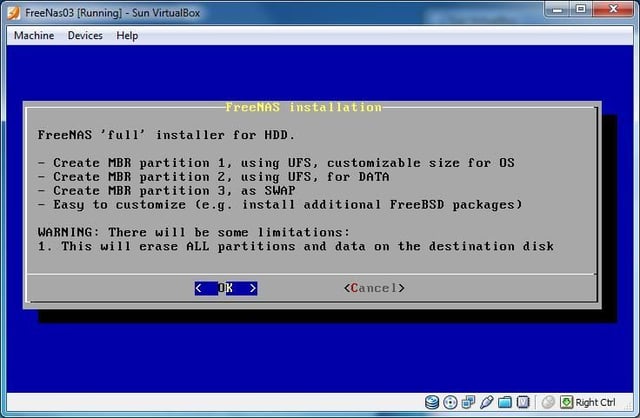
At the “FreeNAS installation” prompt, click “OK” to continue.
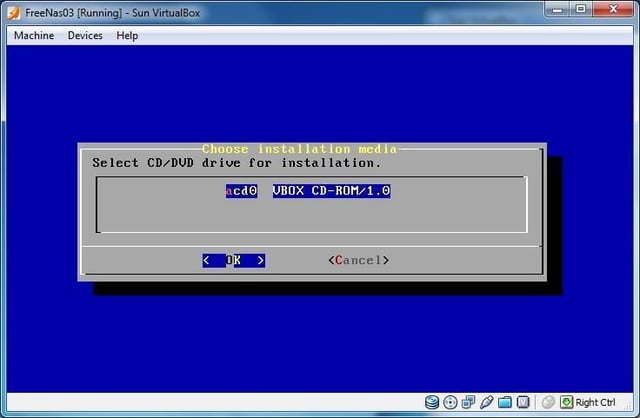
At the “Choose Installation media” window select the CD where the Live Boot CD is and click “OK”.
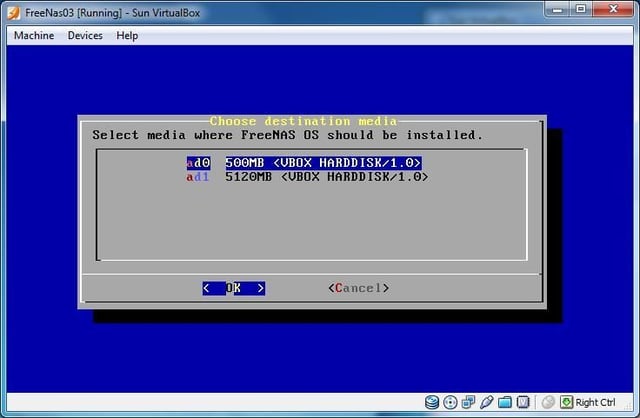
At the “Choose destination media” window select the 500MB boot disk and click “OK”.
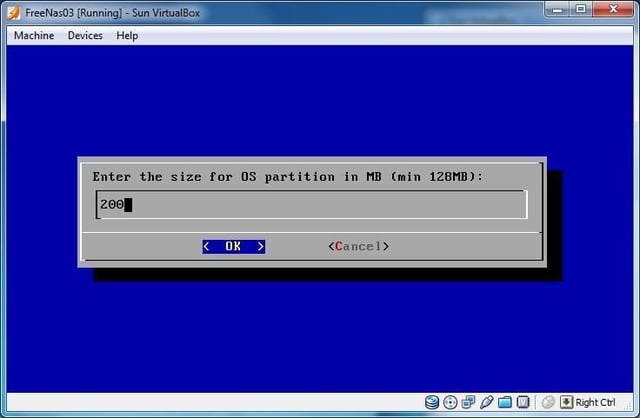
Enter 200MB for the OS partition and click “OK” to continue.
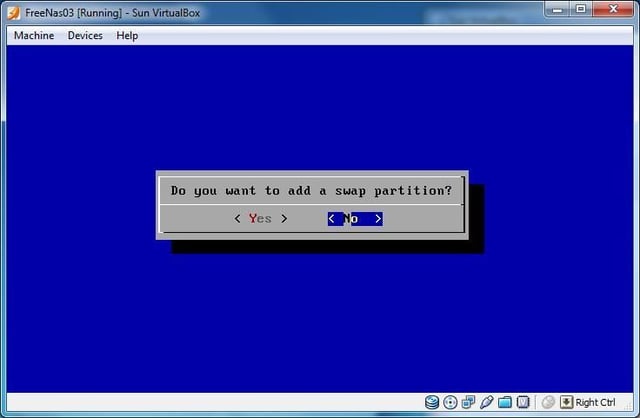
Select “Yes” when prompted “Do you want to add a swap partition”.
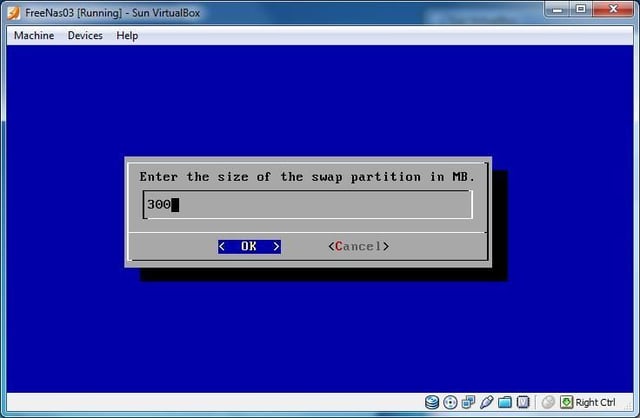
Enter the remaining space (in MB) for your SWAP partition and click “OK”. The system will install. Once install is complete hit
Select
In Sun Virtual box, select “Storage” in the “Details” tab.
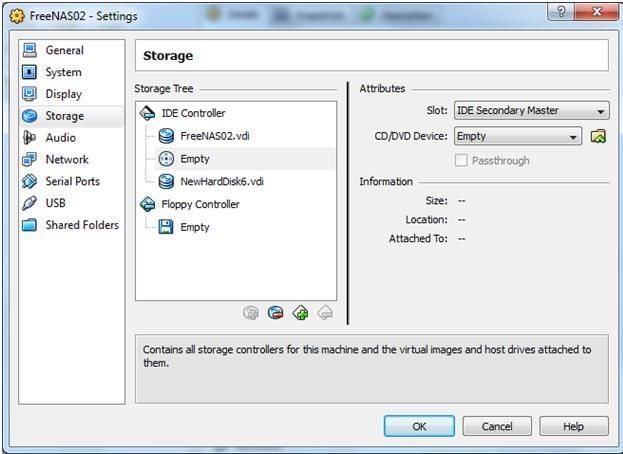
In the Storage Tree, under the IDE Controller, highlight the Host Drive. In Attributes, under CD/DVD device, select “empty” from the pull-down menu. Click “OK”. Restart your FreeNAS virtual machine \u2013 which will now boot from hard drive, instead of the CD.

Freemas VMNIC Setup
Exit out of the “Install & Upgrade” menu and return to the Console Setup numeric menu. Select “1) Assign interfaces”. This allows you to select and configure your active NIC.
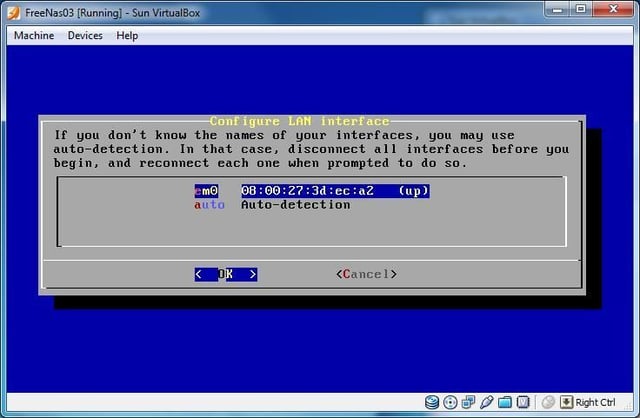
At the “Configure LAN interface” window select your interface by MAC address and click “OK”.
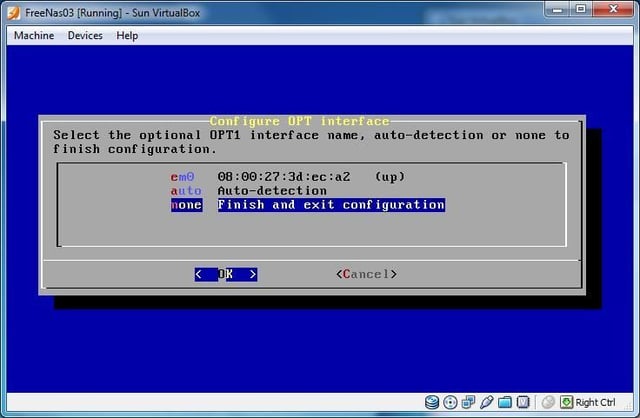
At the “Configure OPT Interface” window select “none” and click OK. Acknowledge any prompts and click “yes” the interface will initialize and return you to the Console Setup.

Select “2) Set LAN IP address”.
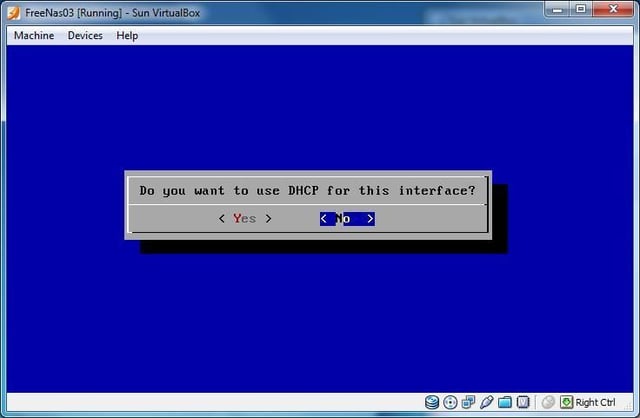
At the “Do you want to use DHCP for this interface” dialog, select “No”.

Enter your IP address and click “OK”.
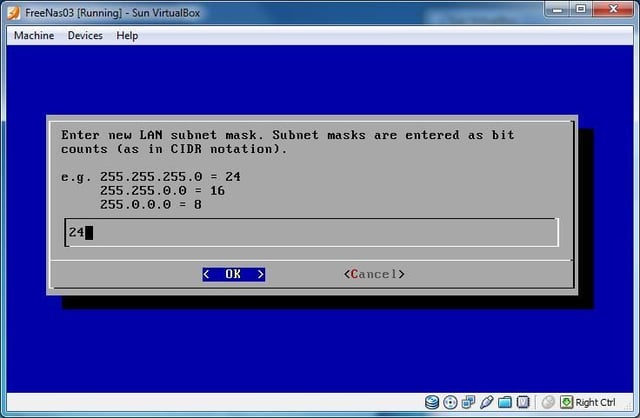
Enter the appropriate subnet mask and click “OK”.
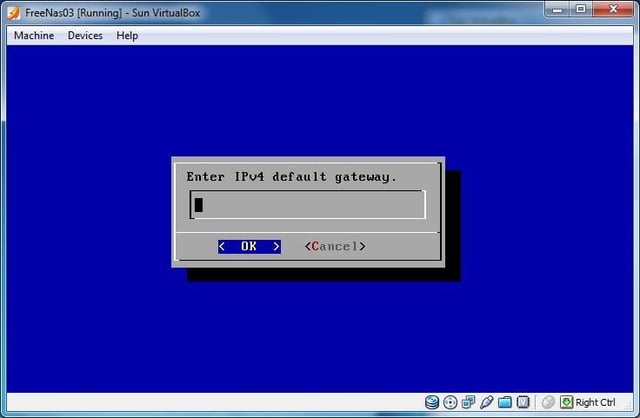
Enter the appropriate Default Gateway and click “OK”.

Enter the appropriate DNS information and click “OK”.
Select “No” when asked to configure IPv6 information. ?When you return to the numeric Console Setup menu, you’ve finished the installation and basic configuration of your FreeNAS virtual machine. Next we’ll connect with a Web browser from our host machine to the FreeNAS Web-based GUI interface and complete the configuration of the server.
FreeNAS GUI Setup
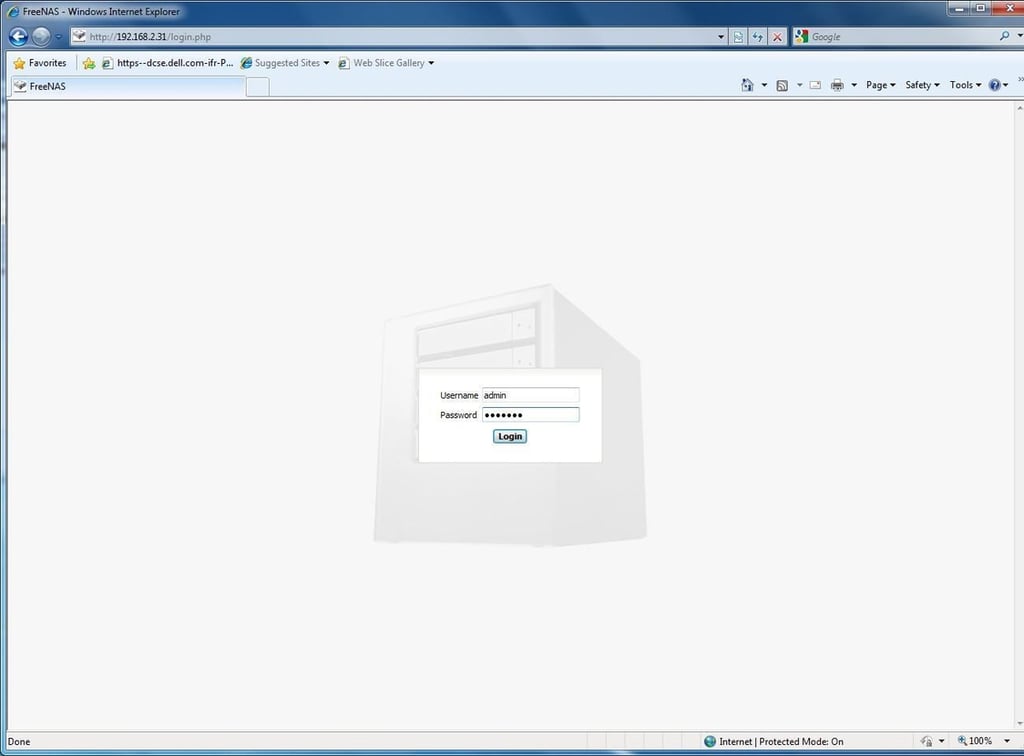
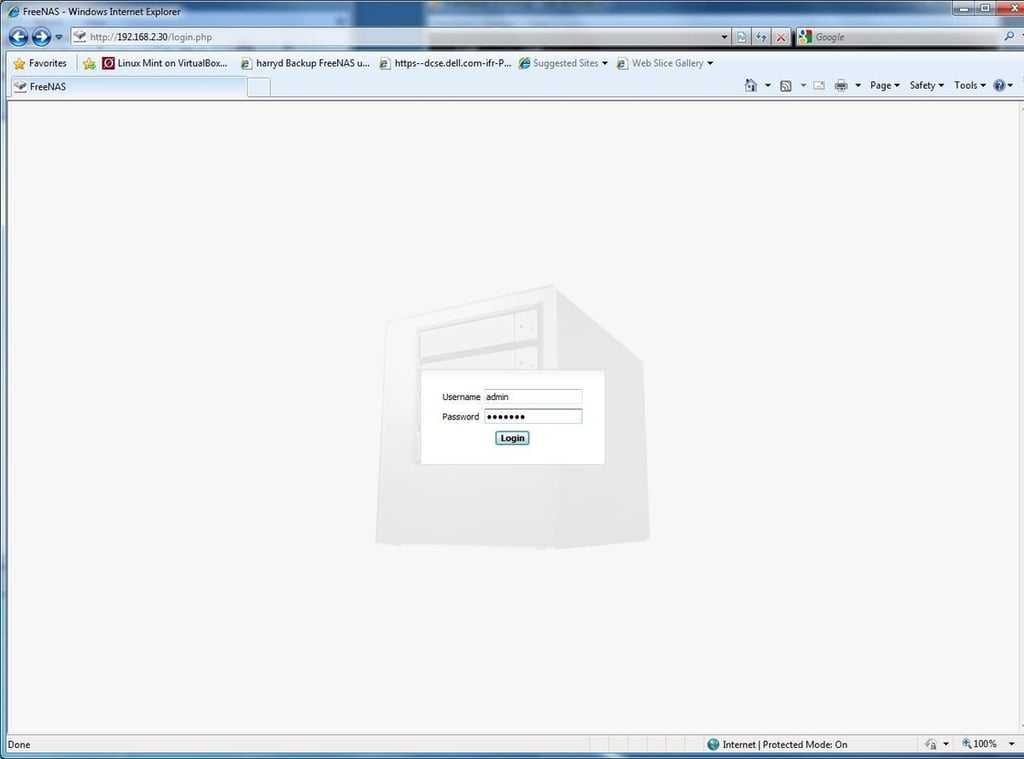
Open a browser in your Host OS and connect to your FreeNAS virtual machine. Default username is “admin” and password is “freenas”.
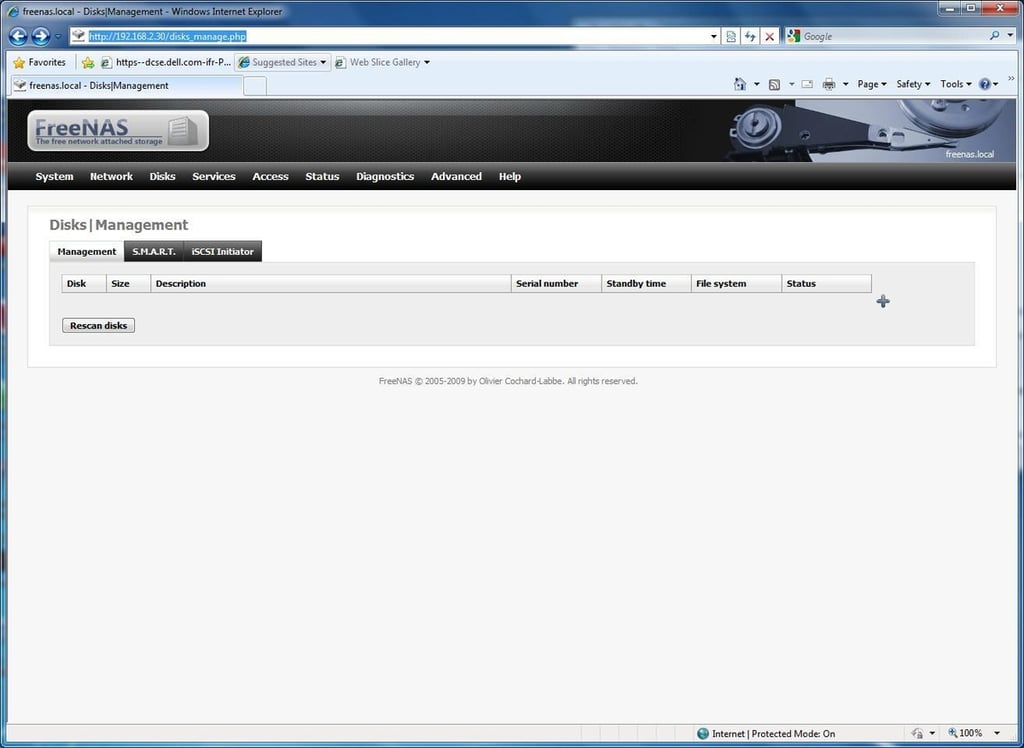
In the top menu bar, select Disks. In the Disk |Management page click the (+) sign.
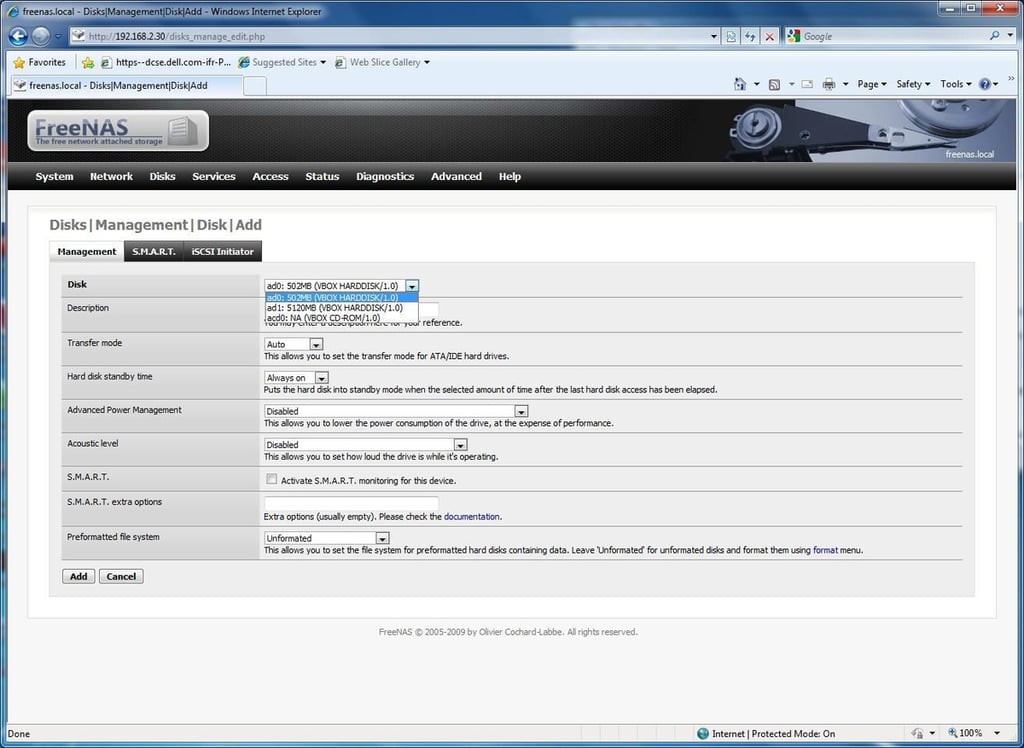
Select the 5GB disk from the drop down menu on the Disks|Management|Disk|Add menu. Click the “Add” button.
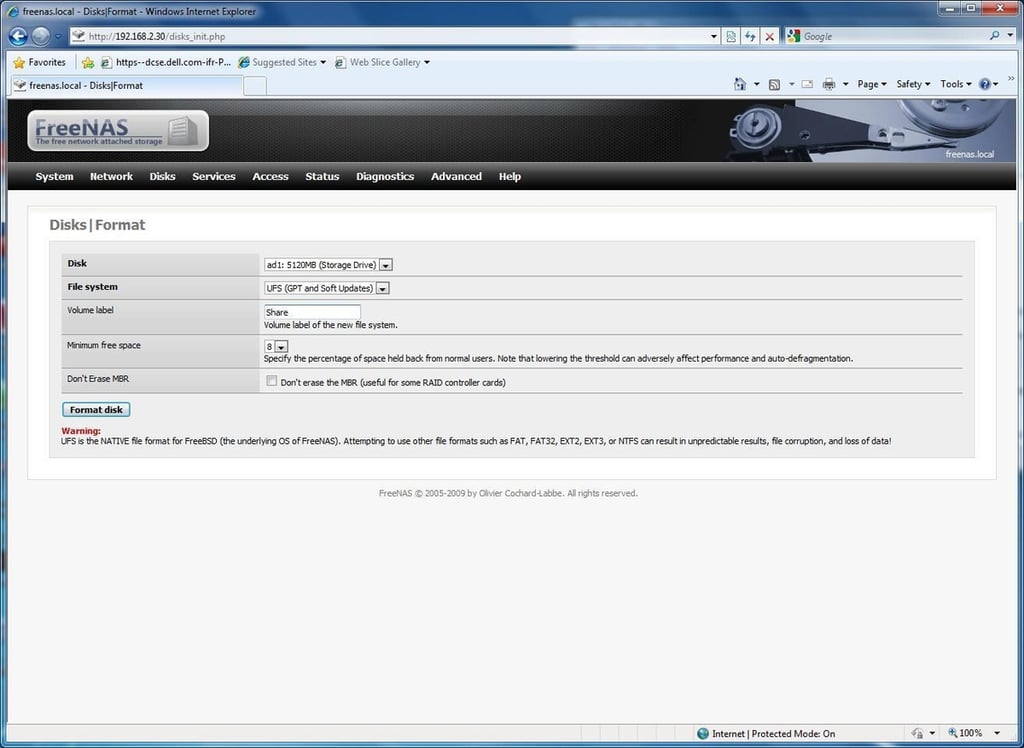
From the top menu bar select Disks|Format. Select the 5GB disk from the drop down menu. Leave the default “UFS” file system selected and click “Format disk”.
From the top menu bar select Disks|Format. Select the 5GB disk from the drop down menu. Leave the default “UFS” file system selected and click “Format disk”.
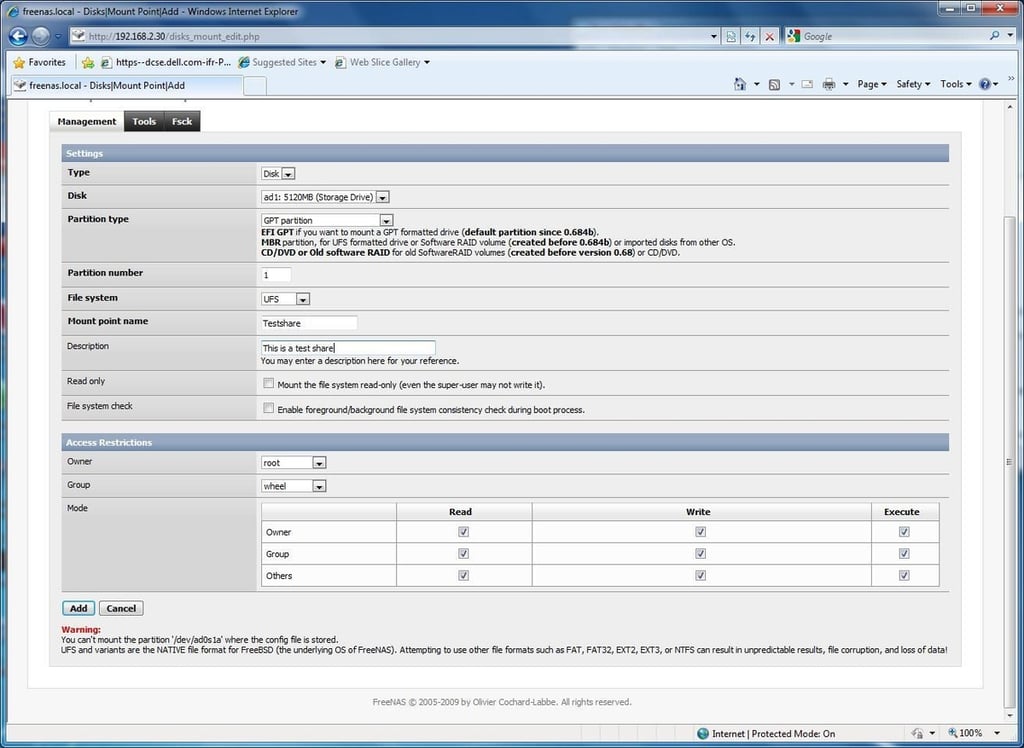
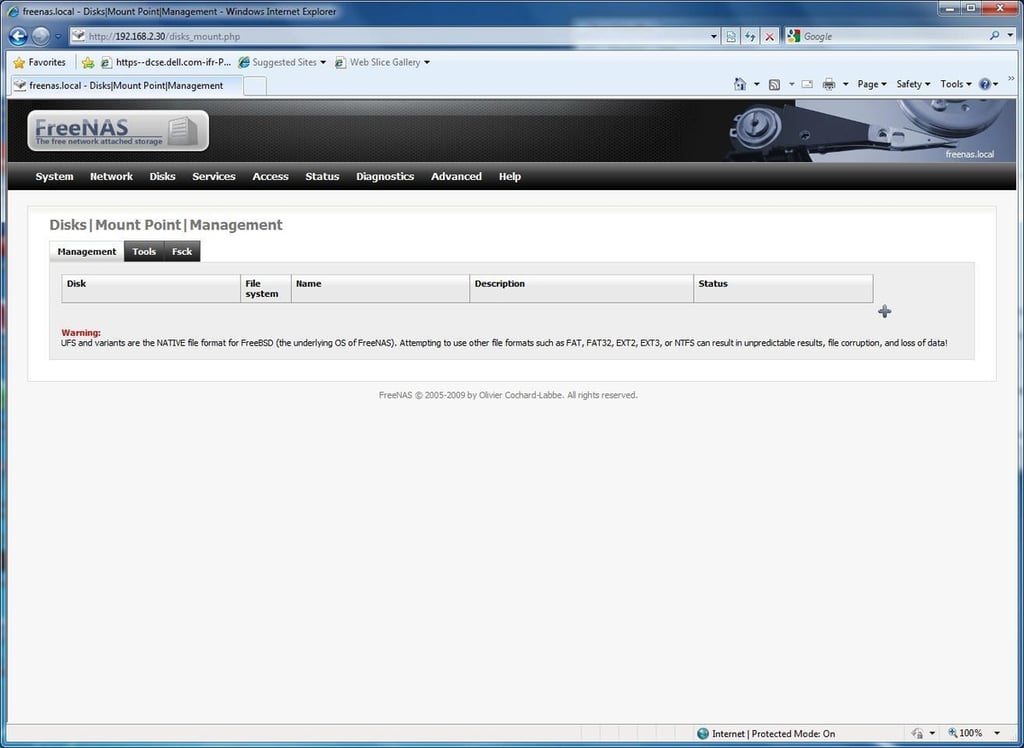
On the Management tab select the 5GB disk from the drop down menu and enter the mount point name (I’ve chosen “Testshare” for this mount point) and click the “add” button \u2013 then click “Apply changes”.
CIFS/SAMBA Setup
From the top menu, select “Services, CIFS\\SMB”. Check “Enable” to activate the CIFS/SMB file sharing service. In the “NetBIOS name” field enter the name you want the machine to register on your Windows network. In the “Workgroup” field enter your domain name or workgroup name. Scroll down to the bottom of the screen and click “Save & Restart”.
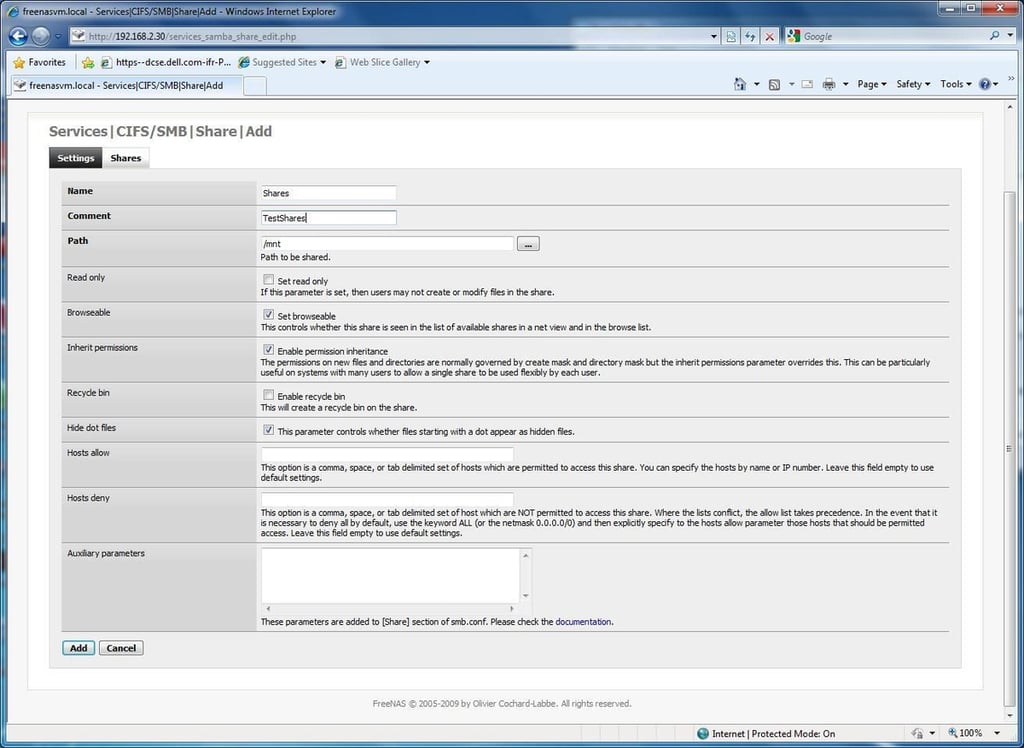
Click the “Shares” tab. Click (+). In the Name field enter the name of the share as you want it to appear in your network neighborhood. In the “Path” field you can type in the path you want to be shared or you can browse to the path you want to share. Once you’ve filled in this information, click “add”.

Click “Apply Changes” to activate your share.
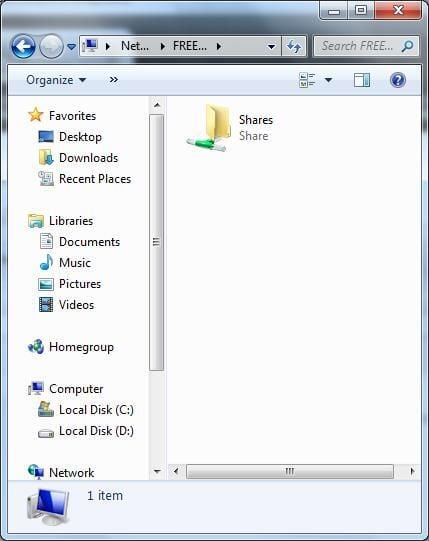
Verify that the share you have activated it visible on your network, and is writable.
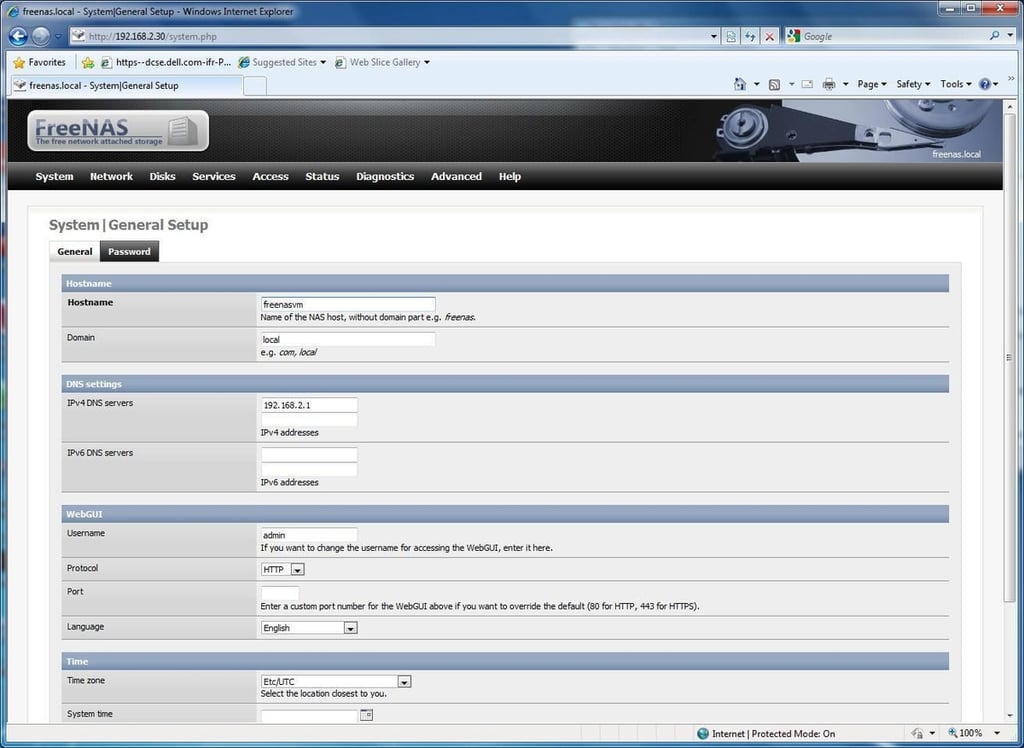
Setting the Freenas VM Hostname: Click on System | General.
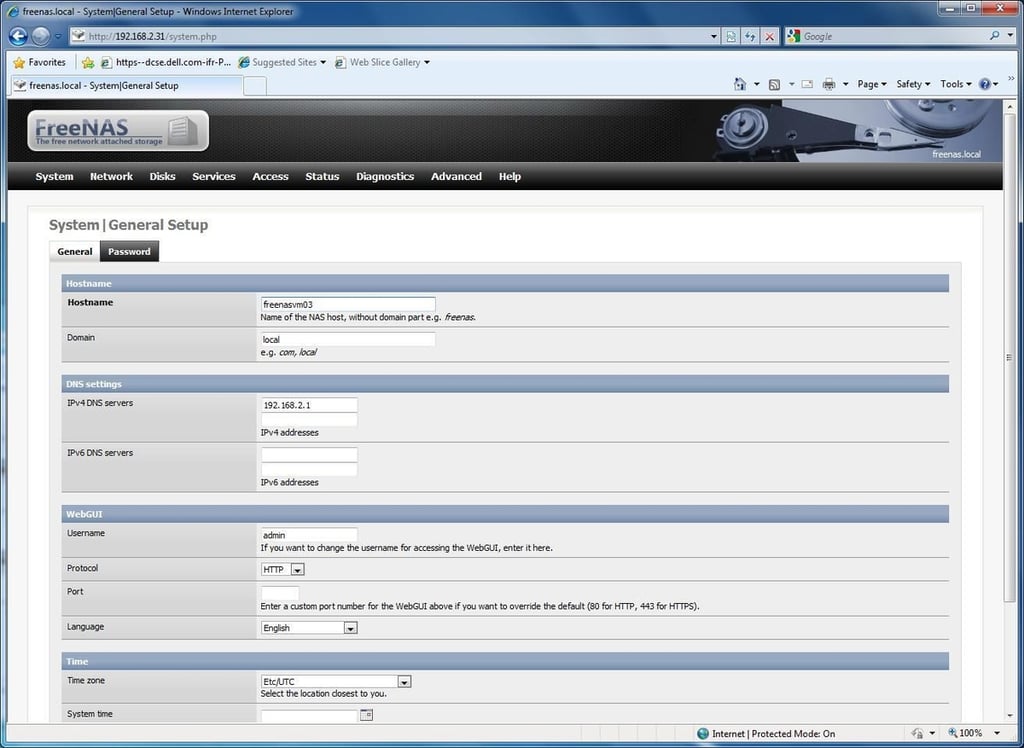
Rename the host name and click save.
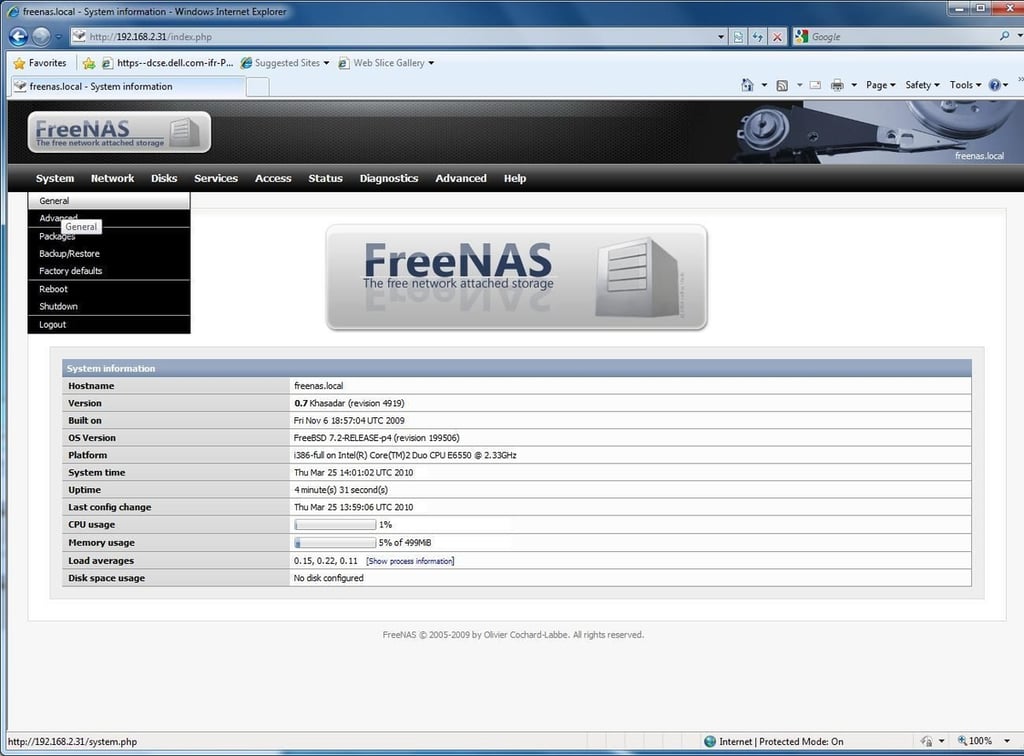
FreeNAS virtual machine server. Repeat all of the steps to build a second target Freenas virtual machine server \u2013 changing appropriate information as necessary (IP address, machine name, and any other unique settings).
You’ve completed building your source.
FreeNAS Rsync Configuration
Source FreeNAS server Rsync Configuration: Log into your source Freenas server.
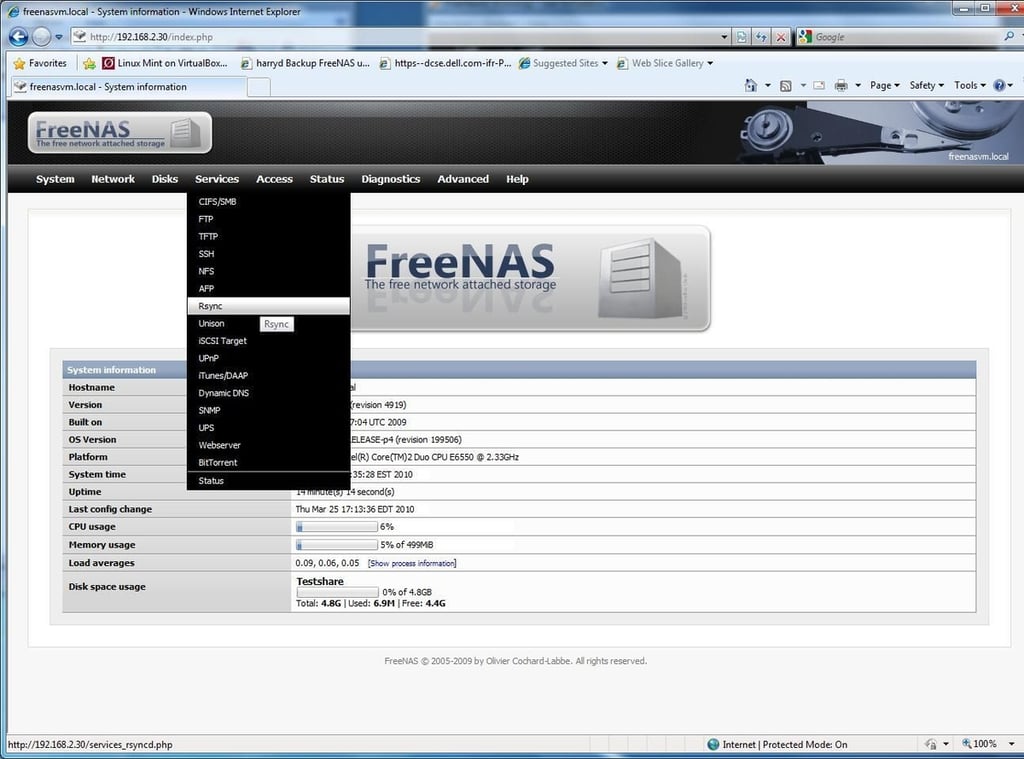
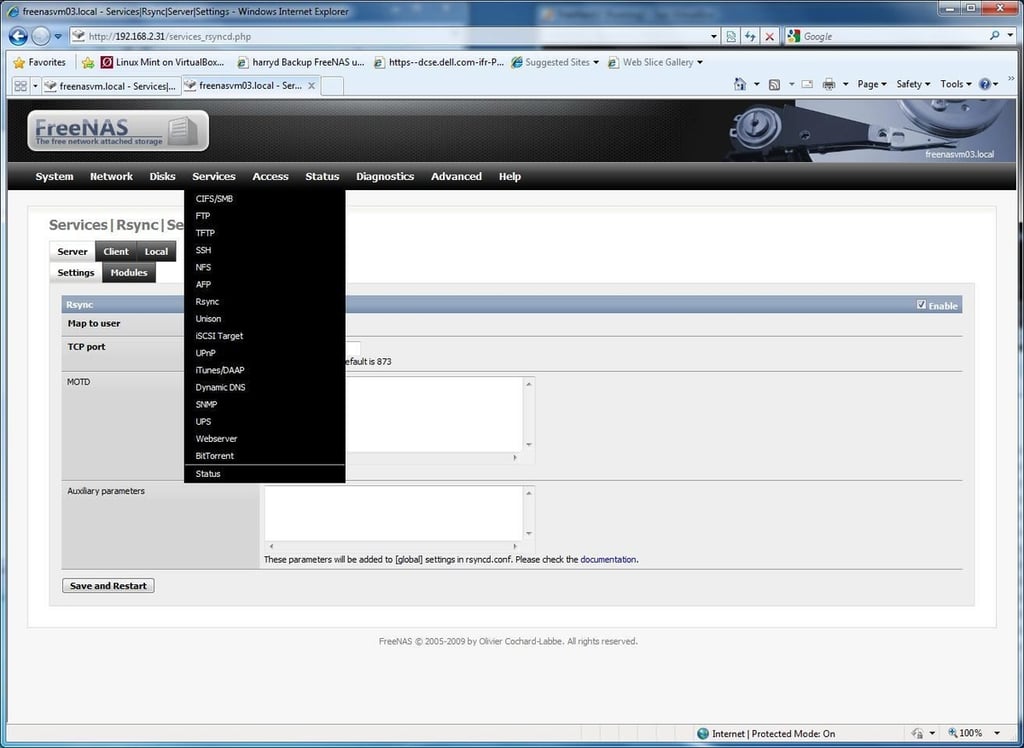
Select the services\\Rsync tab. Click the “enable” checkbox and click the “Save and Restart” button.
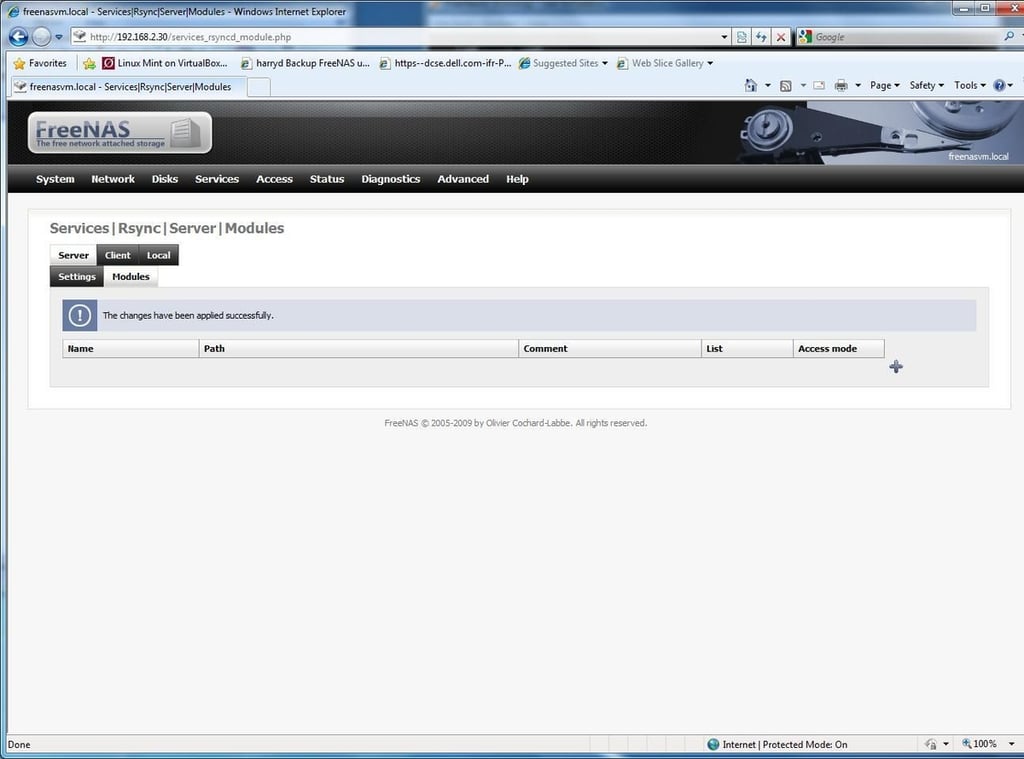
Select the “Server” tab and the “Modules” tab. Click the add icon.
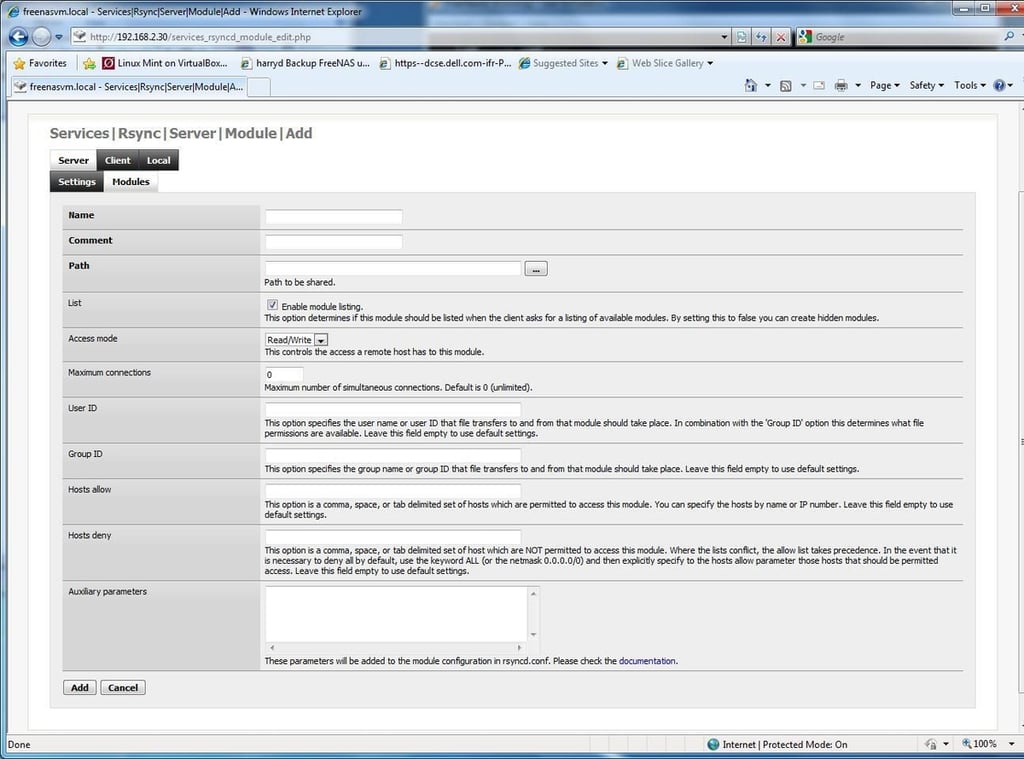
You’ll see the Services | Rsync | Server | Module | Add window. Enter a Name, and a comment (I’ve selected “testmod” as my name and comment) and click the browse button in “Path” to define your source Rsync share.
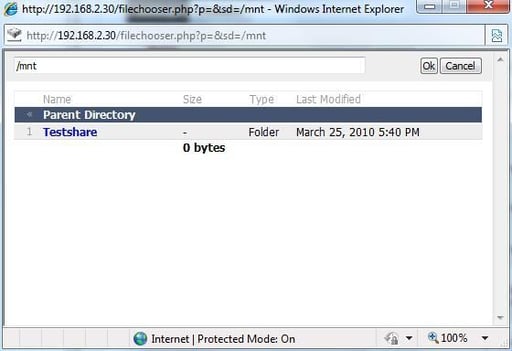
Click the share you want to sync. The path will change to reflect that path (in my case, /mnt/testshare) and then click “OK”.
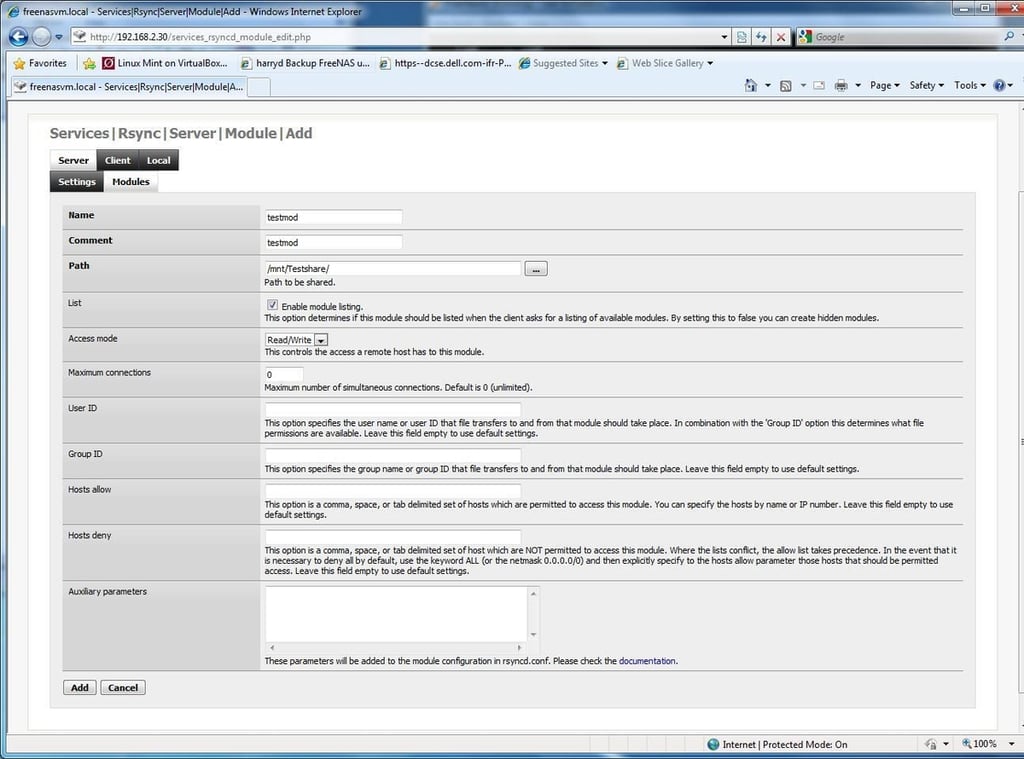
Verify your settings and click the add button at the bottom of the Services | Rsync | Server | Module | Add screen.

At the summary page verify your settings and then click the “Apply Changes” button.
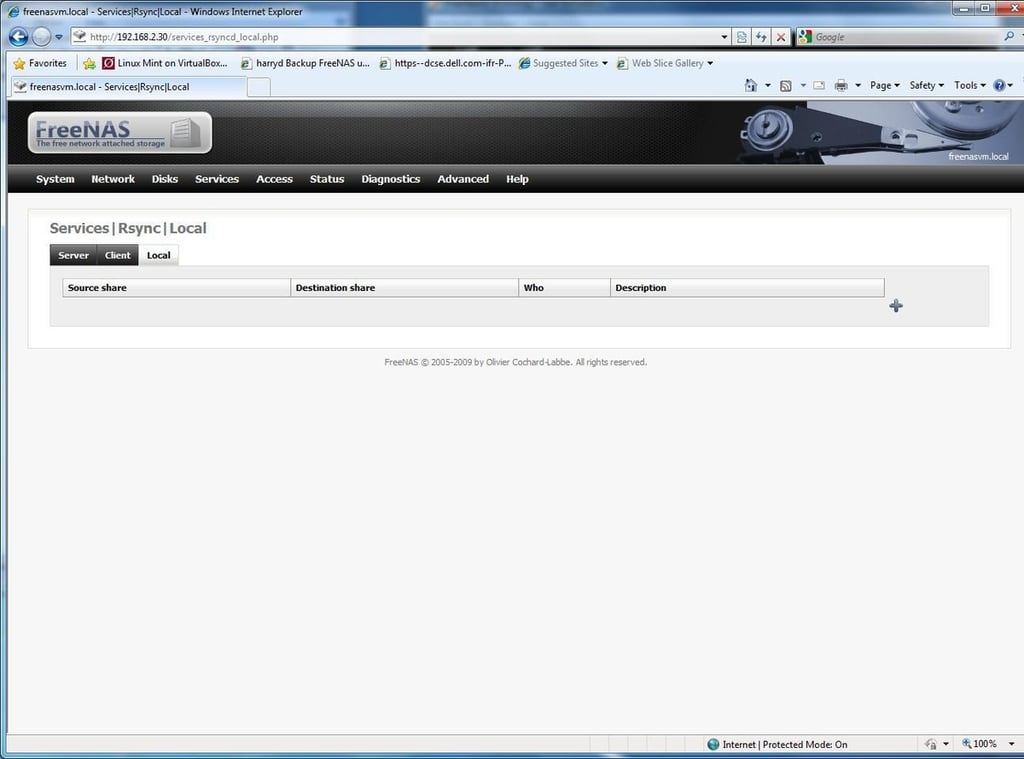
Select the “Local” tab. Click the “Add module” icon.
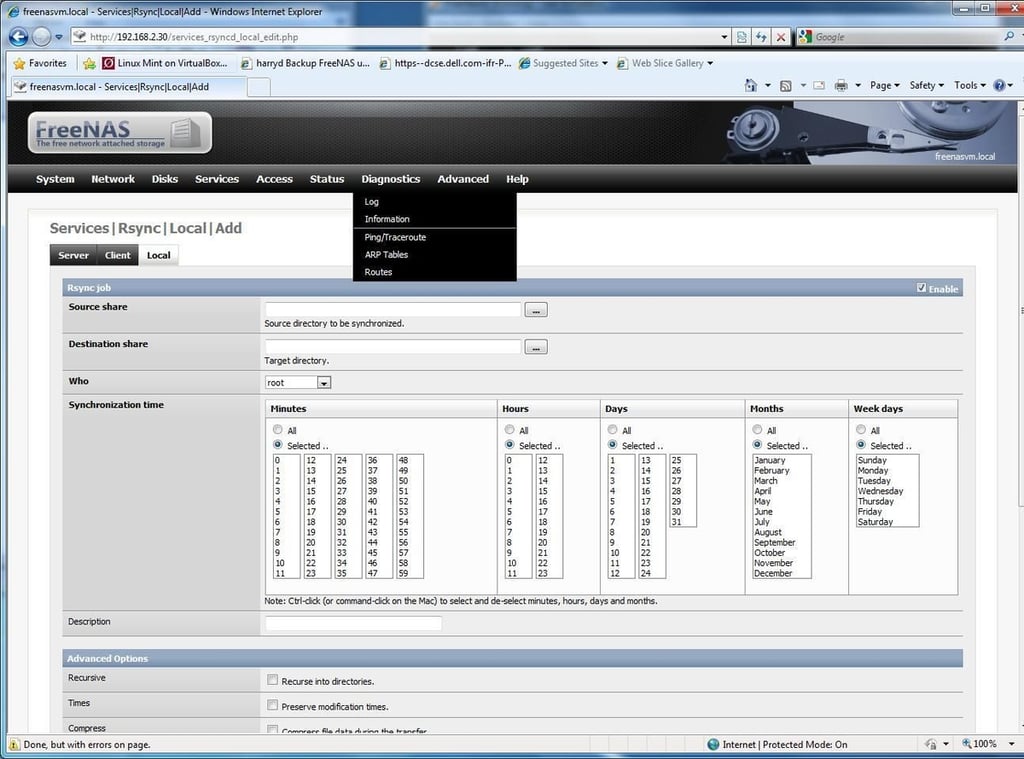
At the “Services|Rsync|Local|Add” page, in “Source Share” click the browse button.
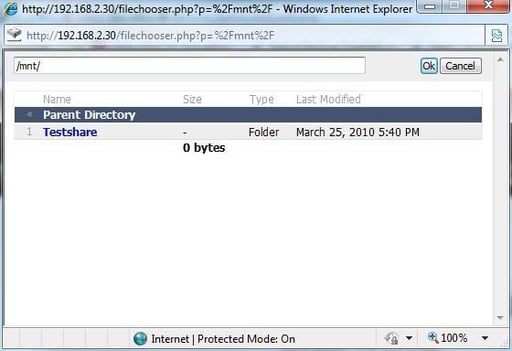
Double-click the appropriate source share, verify that the path is correct and click OK (in my case, /mnt/Testshare).
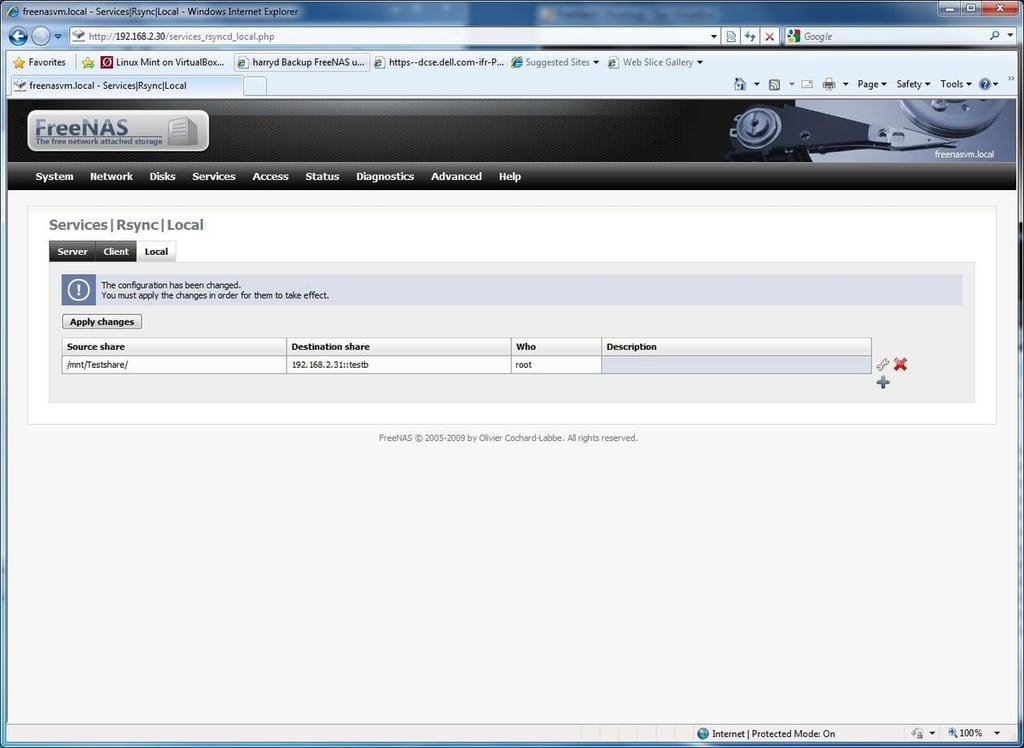
In the “Destination Share” enter the IP address and path of the destination share in the format [ipaddress::sharepath]. In my case, my destination server was “192.168.2.31::testb”. Please note that you can use FQDN if your FreeNAS is registered with your DNS server or otherwise configured to resolve.
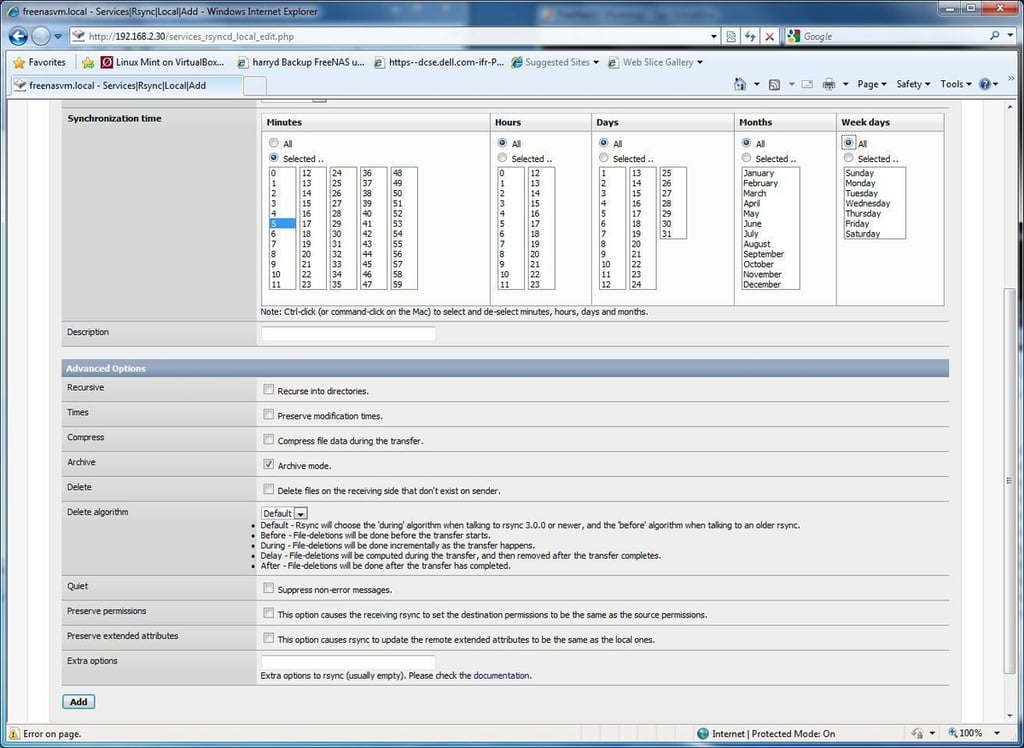
Select your “Synchronization time” preferences. I’ve selected every 5 minutes, every hour, every day, every month and all weekends. Click the “add” button at the bottom of the page. Click “Apply Changes”.
Target FreeNAS server Rsync Configuration: Log into your target FreeNAS server, select Services|Rsync from the main menu. Check the “enable” checkbox and click the “Save and Restart” button.
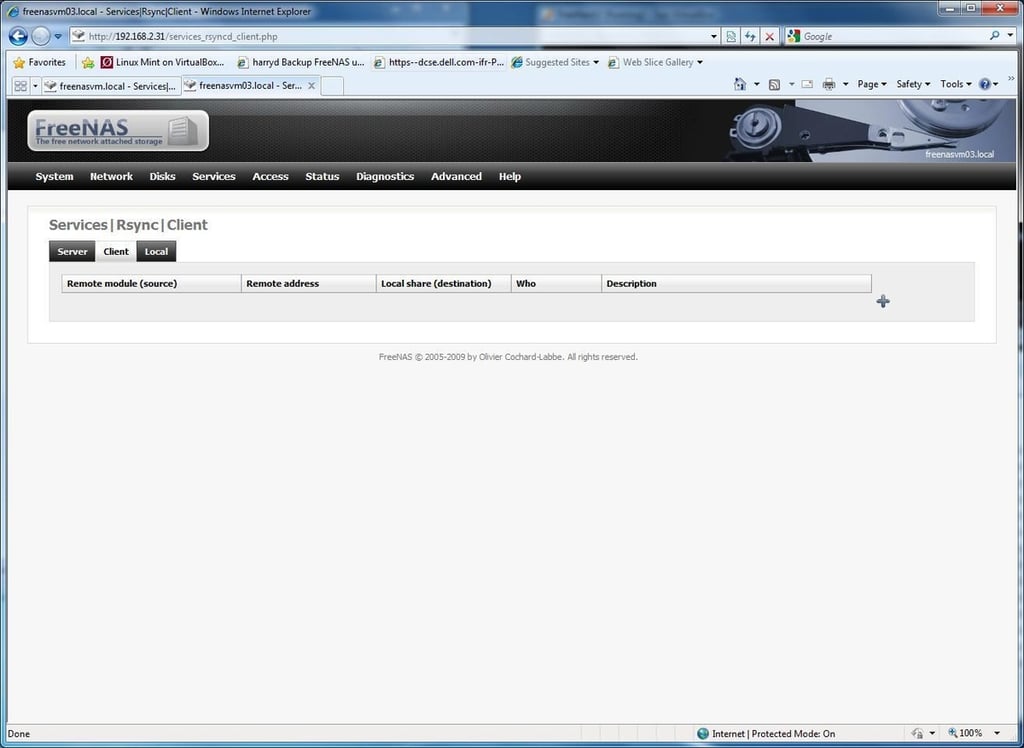
In the Services|Rsync|Client window, click the plus icon.
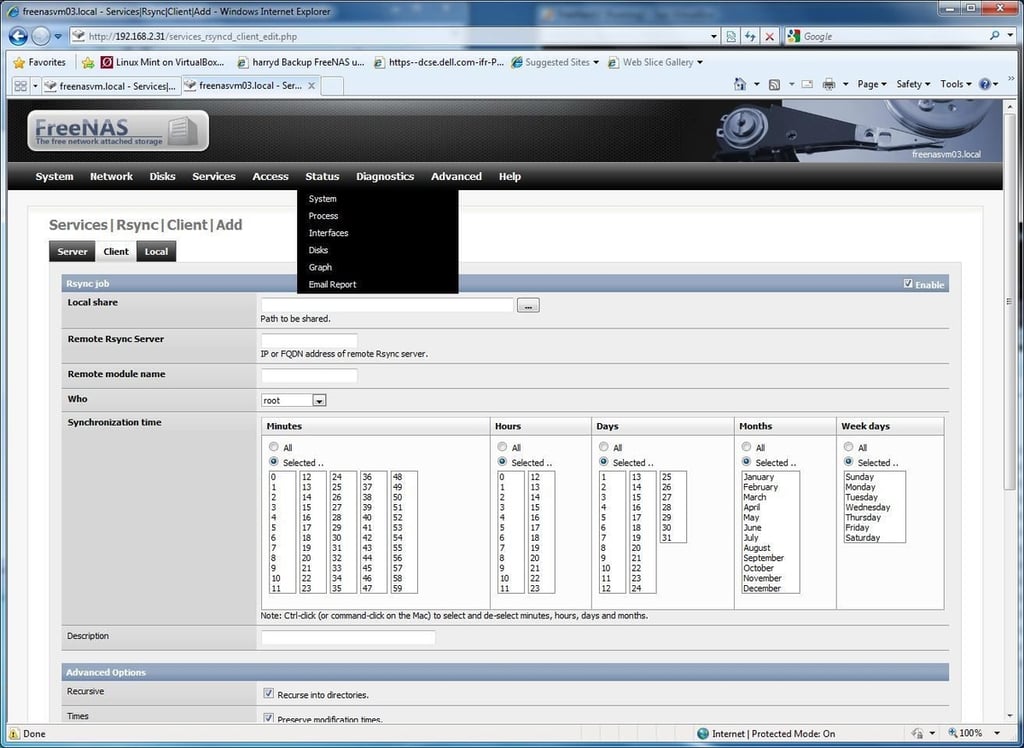
In “Local Share” click the Browse Button.
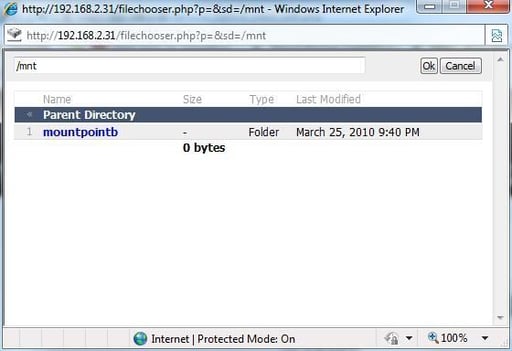
Select your target path (in my case, mountpointb) and verify the correct path (/mtn/mountpointb) for the destination Rsync path and click “OK”.
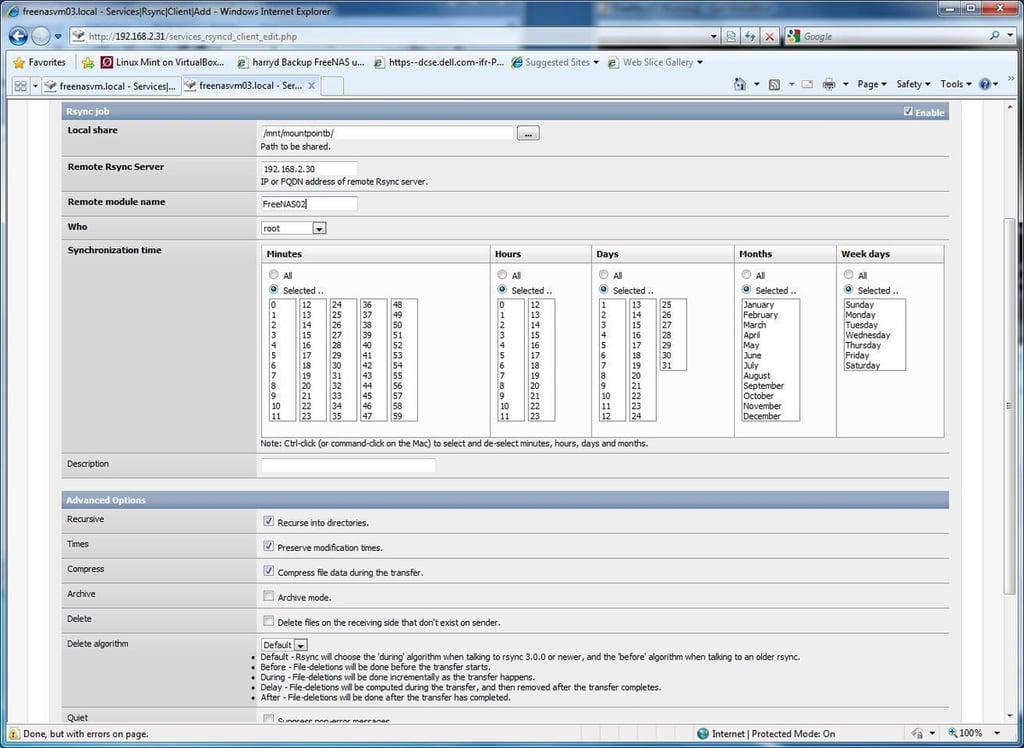
In the “Remote Rysnc Server” field enter the source FreeNAS server (in my case, 192.168.2.30. Again, if your machine is registered with DNS, you can use FQDN). Select the “Synchronization time” that matches the settings you entered on the host machines (in my case, every 5 minutes all hours, all days, all months and all days of the week). In Remote Module Name enter the name of the source server module we created on the source, “testmod”. Click the “add” button at the bottom of the page.
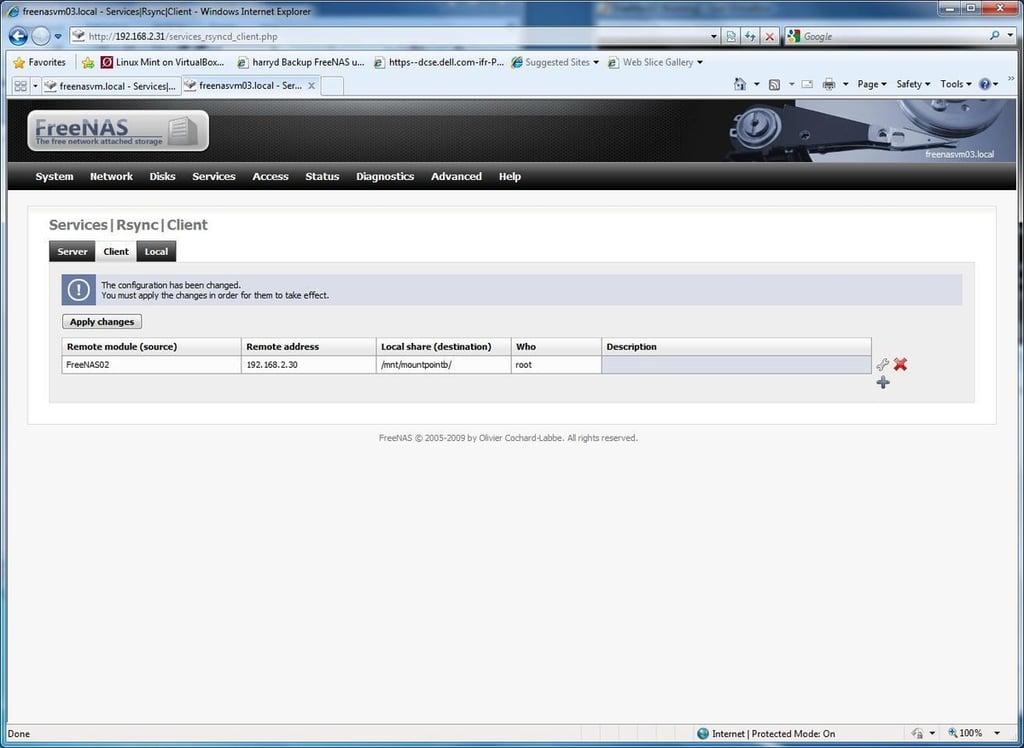
Click “Apply Changes”.
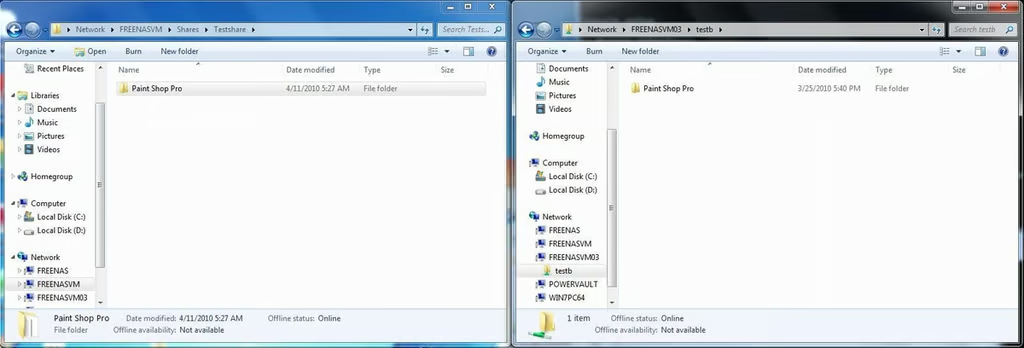
Open up a browse session to the share on the Source FreeNAS server and the Target FreeNAS server. Drop a file into the source, wait, and if everything is set up correctly, the file should shortly appear on the target share, as well. Congratulations, you’ve configured an inexpensive NAS solution that does Disk 2 Disk data replication.

I spent several years with MCI SGUS/VANSIS in the early 90s providing support for early ebusiness dialup applications including CampusMCI, California Smog Check II Vehicle Information Database, California Firearms Information Systems and others. \ \ In 1997 I moved to Fulltime Systems, makers of Octopus, CoStandBy Server and Fulltime Cluster (Legato Cluster) and Data Replication. \ \ In 2001 I joined Intel's Supplier Integration Systems group, part of the global eBuisness team tasked with making Intel a 100% eBiz company by 2003. \ \ I currently work for a medium sized organization hosting Electronic Medical Practice applications. \ \ I am experienced with Win32, Linux and Unix platforms - with an emphasis on systems design, implementation and support.\ \ You can follow me @dcolbert on Twitter. My personal blog, which often deals with non-technology and controversial subjects is at http://piddlyd.blogspot.com/


