\n\tLaptops are quickly overtaking desktops as the computer of choice. The heart of any laptop, meanwhile, is its hard drive. Explore this image gallery to see how one of the world’s most popular mobile hard disks (the Hitachi Travelstar) is put together to power countless laptops. You’ll gain a new perspective on the main component powering all those notebooks you see the next time you frequent the local coffeehouse.
\n\t
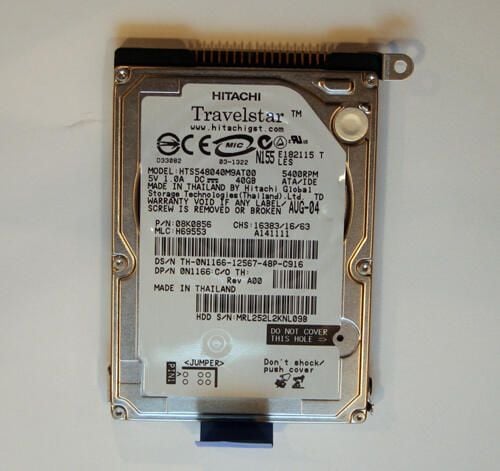
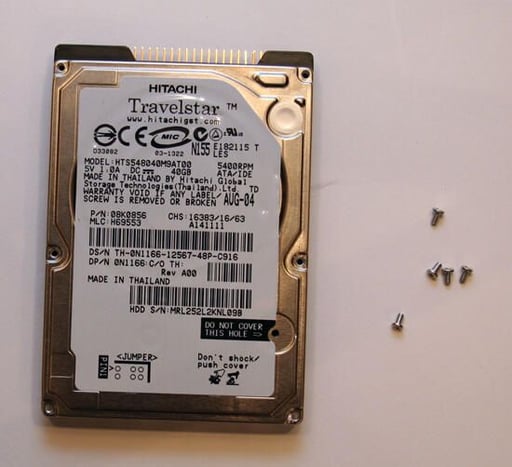
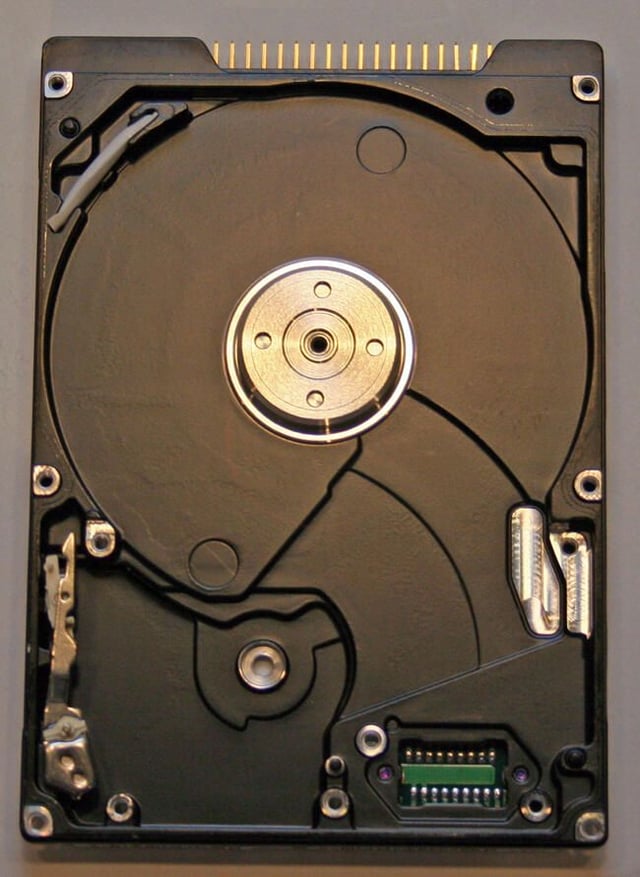
\n\tThe Hitachi Travelstar mobile hard disk. This model sported a 5400rpm motor, ATA interface and 40GB of data storage.
\n
\n\t\n\n
This particular Hitachi Travelstar was removed from a Dell Inspiron laptop.
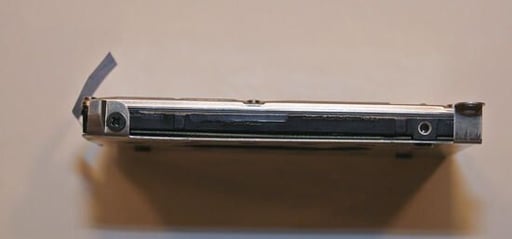
Several Philips screws (one of which is shown here at the top left corner) must be removed to free the Hitachi hard disk from the silver hard disk assembly used to hold the hard drive securely within the Dell Inspiron’s hard disk bay.
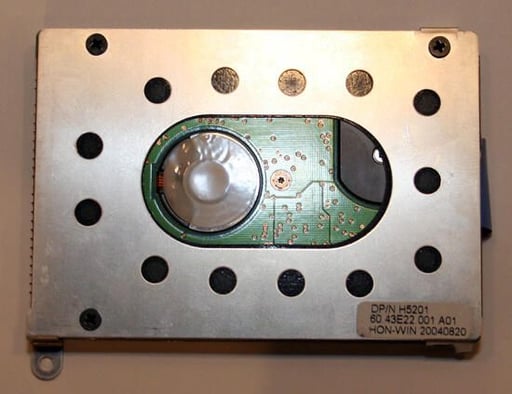
This silver cage, perforated to encourage cooling airflow, holds the hard disk securely within the Dell’s hard disk bay.
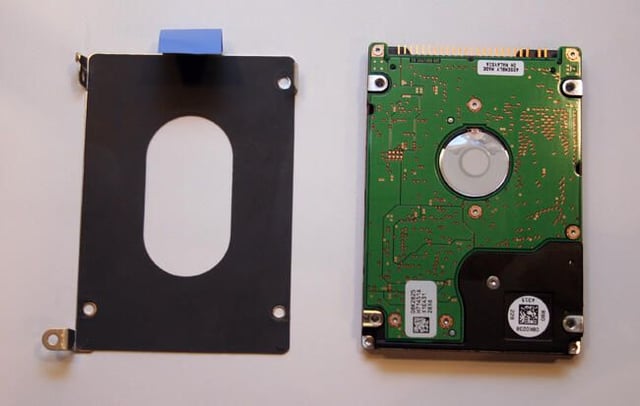
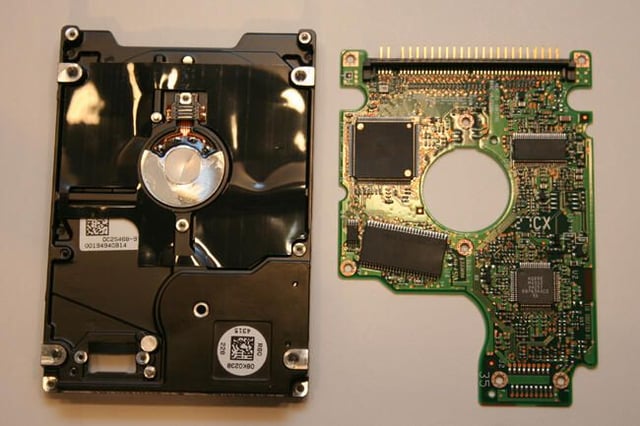
Once the hard disk cage’s screws are removed, the assembly falls free from the Hitachi hard drive. The Hitachi’s circuit board, shown here on the right, is then revealed.
To continue disassembling the Hitachi Travelstar, next several small Torx screws must be removed. So, too, must the drive’s label.

The hard disk’s label must be removed to reveal a seventh hidden Torx screw. Once this last Torx screw is eliminated, the cover freely opens.
It should be noted, of course, that removing the label (even if the screw behind the label remains) voids the manufacturer’s warranty.
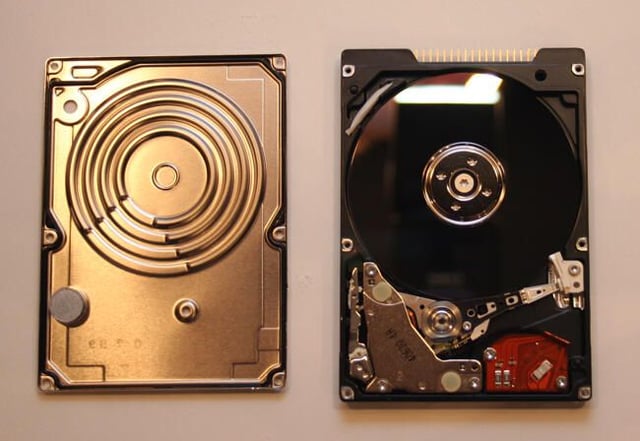
Once the seven Torx screws are removed, the drive’s front cover (now shown on the left) easily slips away.
Removing the cover reveals the actual Hitachi hard disk platter (the large silver mirror-like disk), actuator arm (whose arm begins at approximately the 7 o’clock position in this image) and spindle motor (the silver circle in the center). Meanwhile, the actuator arm mechanism, which is responsible for controlling and moving the actuator arm, is the silver metallic assembly in the bottom left corner.
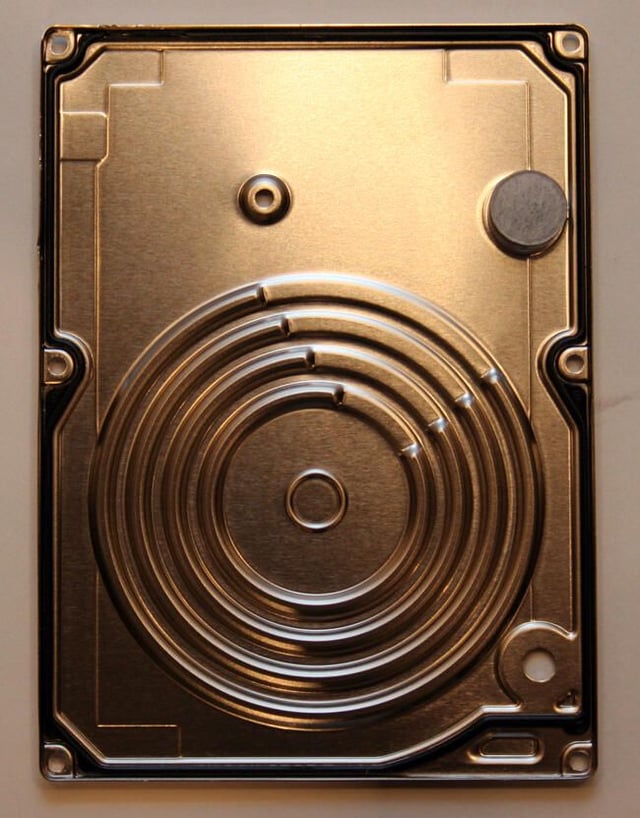
Here’s a close up of the underside of the Hitachi hard drive’s front cover.
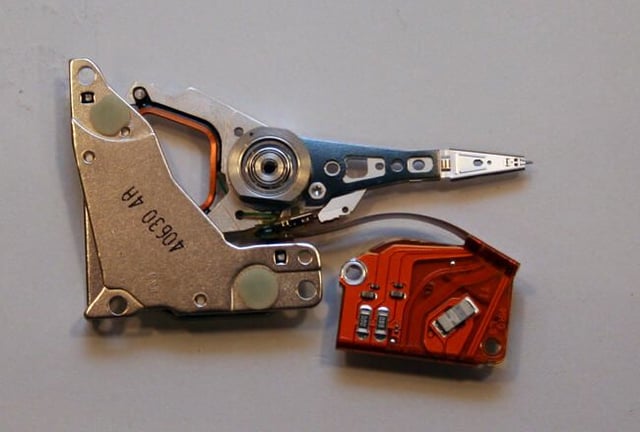
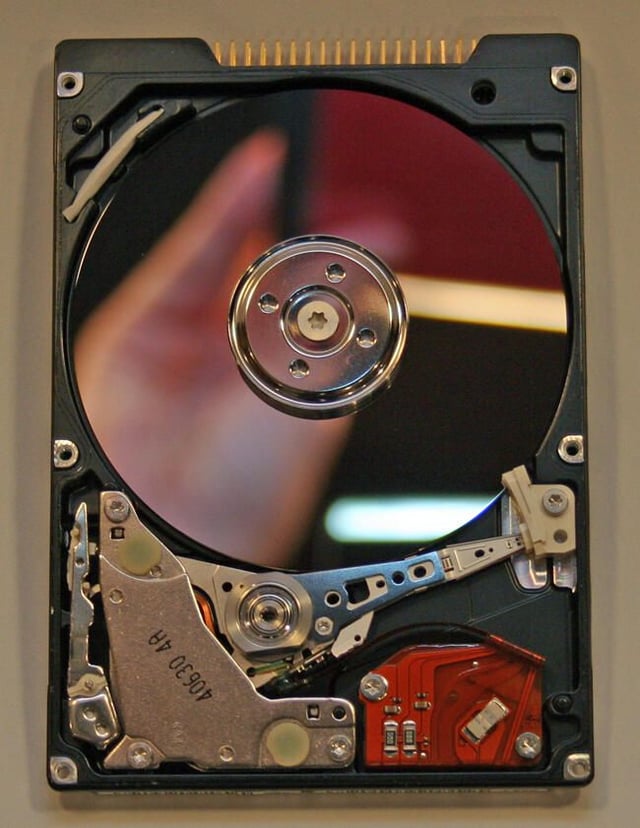
Here you can see the Hitachi Travelstar actuator arm, controller assembly and circuit board. The actual hard disk head, which is responsible for reading and writing data, sits at the very tip of the actuator arm.
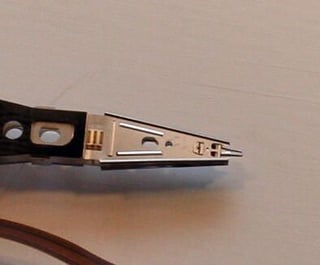
In this closeup of the Travelstar’s actuator arm, you can see the read/write head that sits at the arm’s tip. The head, of course, is responsible for reading and writing data to the Travelstar’s hard disk platter.

Here’s the Hitachi Travelstar hard disk with the actuator arm, assembly and circuit board removed. All that remains, essentially, is the Travelstar hard disk platter and the spindle motor hub.
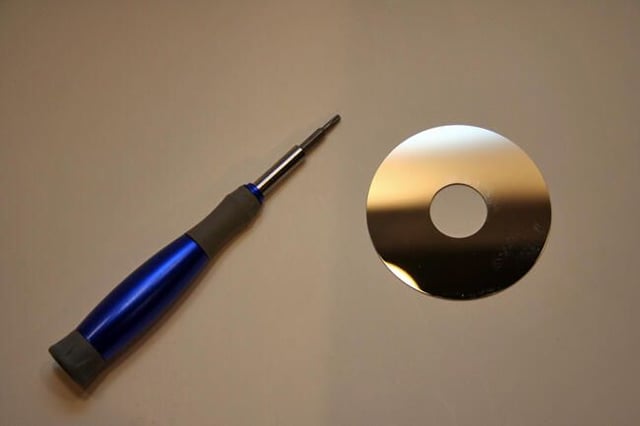
The actual Hitachi Travelstar hard disk is smaller than a mini CD. Here you can see it pictured next to a small screwdriver.
Once the actuator assembly, arm and circuit board, hard disk platter and spindle motor cap are removed, there’s little left behind in the Travelstar.
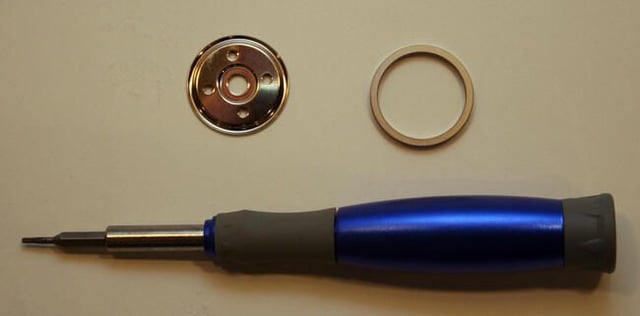
The Travelstar’s spindle (and spacer) are tiny. Engineered to perform at precise tolerances, the actual spindle cover and spacer are quite small; they must be to accommodate the smaller mobile two-and-a-half inch hard disks.
Removing several additional Torx screws from the drive’s bottom enables slipping the Travelstar’s circuit board away from the hard disk cover.
This specific board features Samsung-manufactured circuits. The board also contains the pin assembly (positioned here on the board’s left edge) used to connect the drive to a PC or IDE cable.
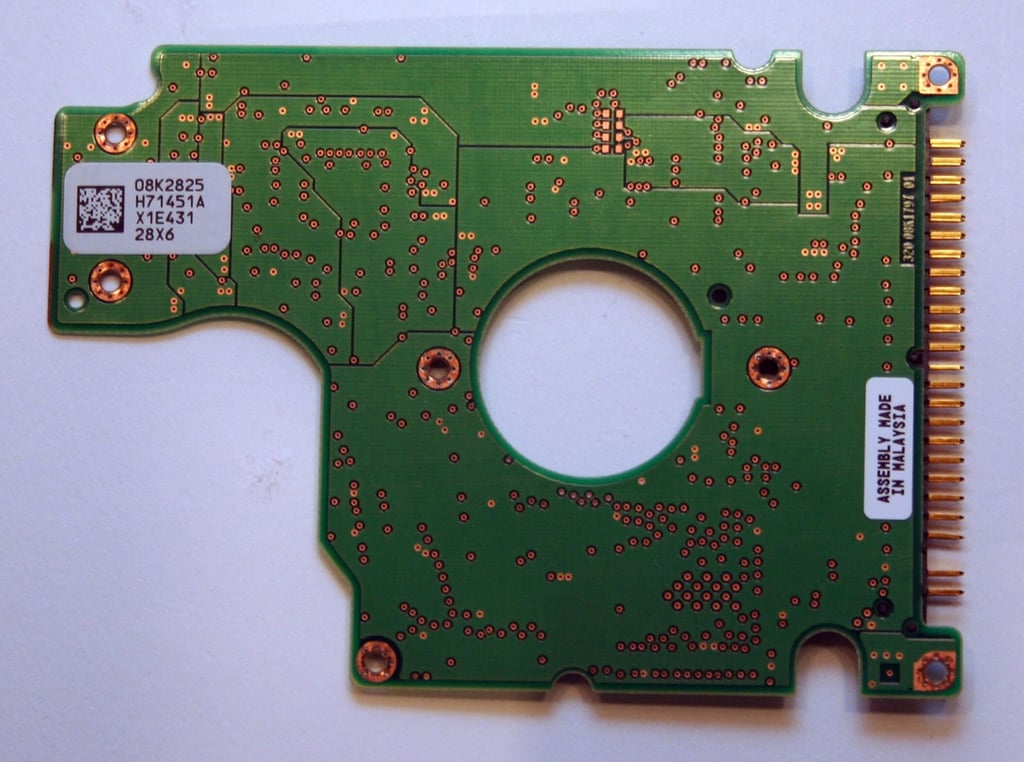
The backside of the Hitachi Travelstar Circuit Board reveals the component was manufactured in Malaysia.
Here you can also see another view of the same pin assembly shown in the last image (positioned here along the board’s right edge).
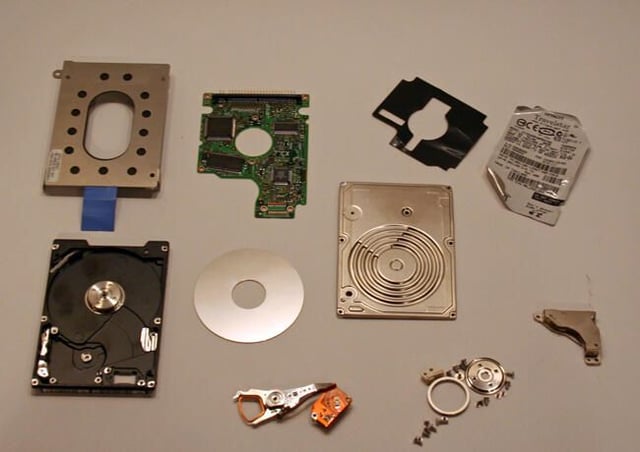
Here are all the components that powered this Hitachi Travelstar mobile drive through its three-year lifecycle.

Erik Eckel is a managing partner at Louisville Geek and president of Eckel Media Corp. He previously served as Executive Editor at TechRepublic. He received Microsoft Engineer accreditation from Sullivan University and earned his Bachelor's Degree in English from the University of Louisville. He's earned Network+, Windows NT 4.0 MCP+I and MCSE, and Windows 2000 Professional MCP accreditations.


