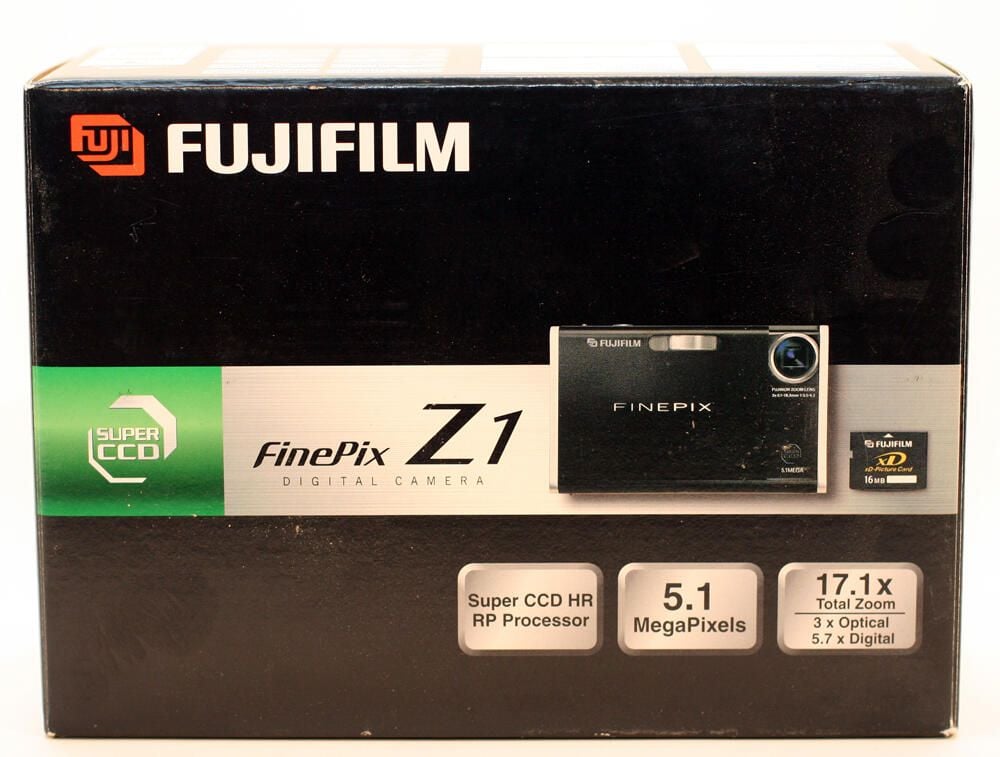
The Fuji FinePix Z1 box.
Photos by Erik Eckel for \u00a9 TechRepublic
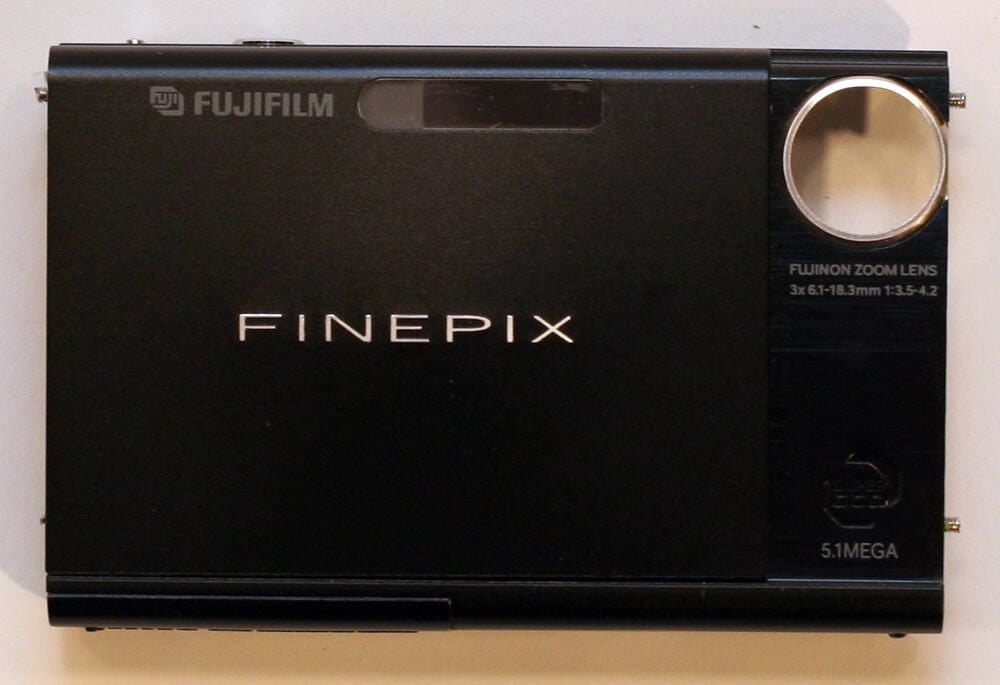
The Fuji FinePix Z1 was about as small as a standard deck of cards (less than 0.7 inches thick). Despite its small size, the digital camera featured a 5.1-megapixel CCD, a 2.5-inch LCD monitor and VGA movie capability.
Photos by Erik Eckel for \u00a9 TechRepublic
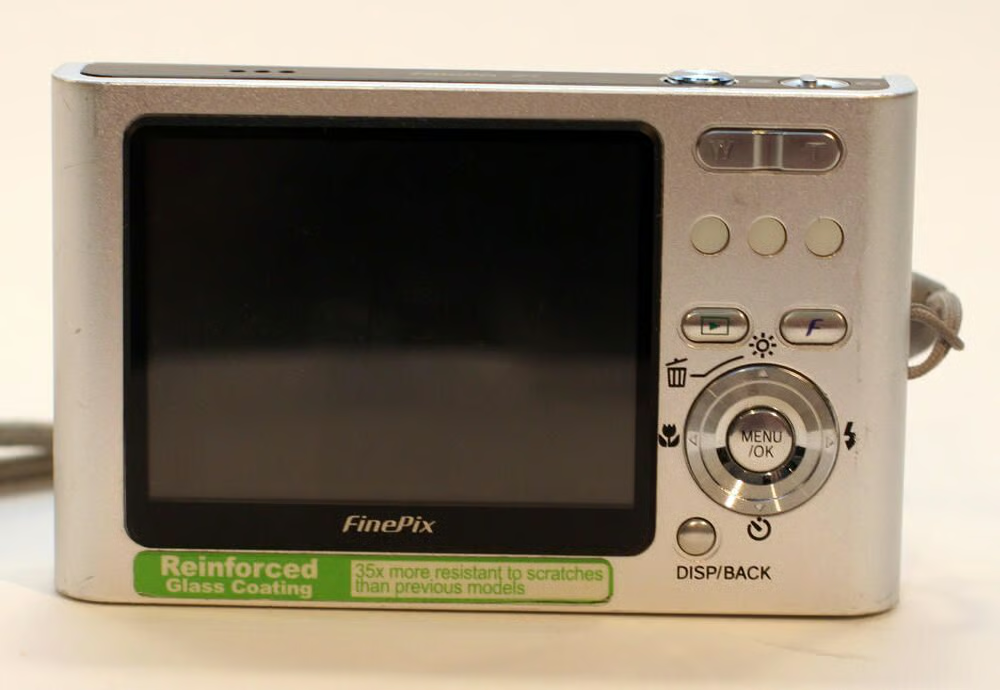
Controls are neatly organized on the rear of the FinePix Z1. The large LCD monitor dominates the camera’s backside, a necessary benefit as the manufacturer included no alternative optical viewfinder.
Photos by Erik Eckel for \u00a9 TechRepublic
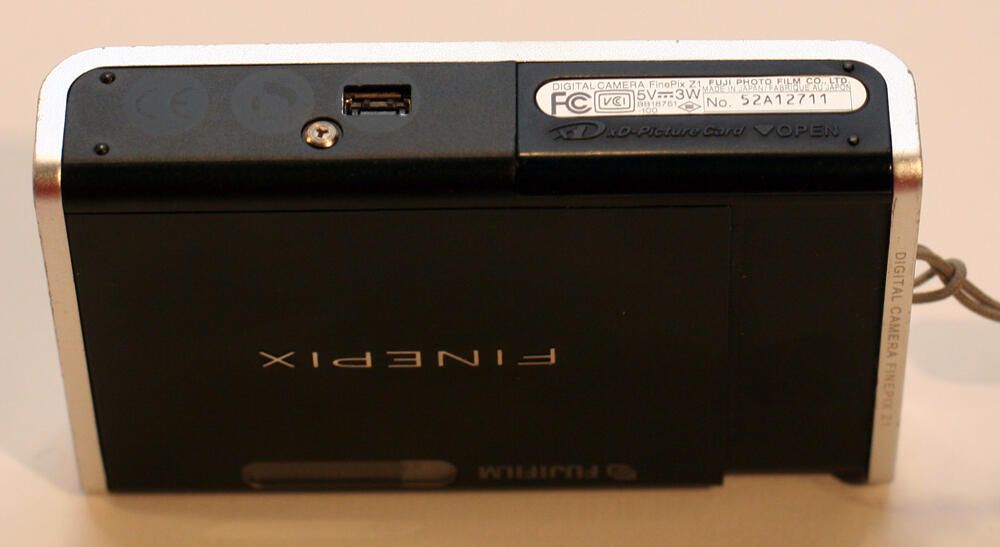
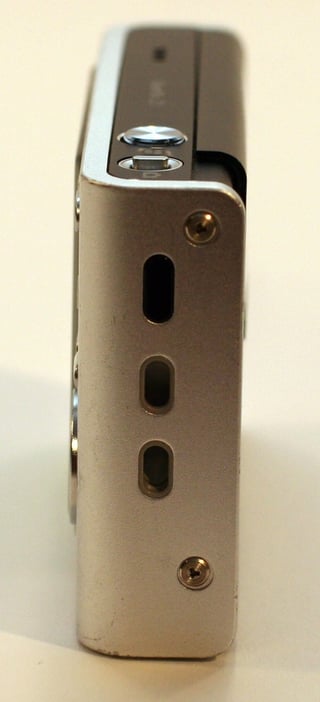
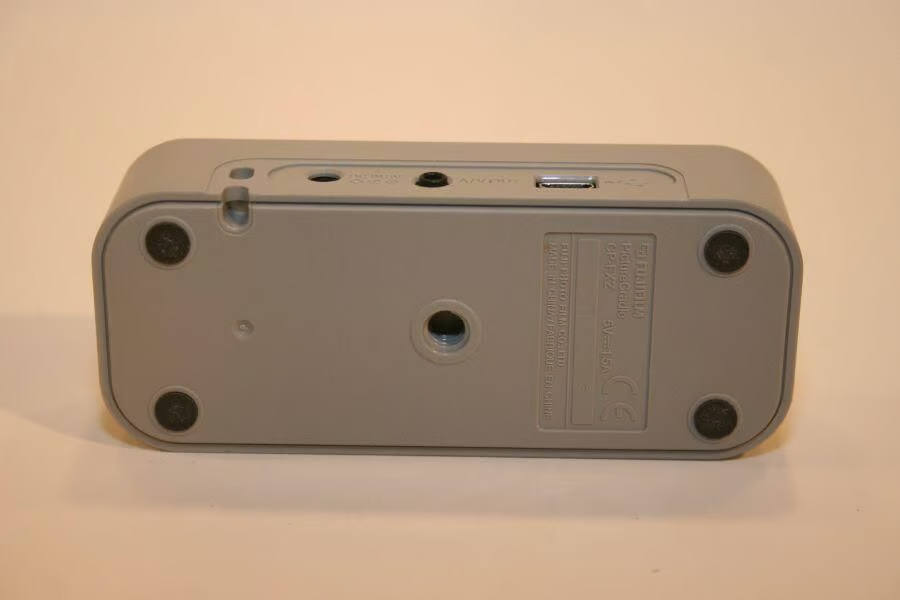
In addition to the slide out door (to the right), the FinePix Z1’s bottom possessed the unit’s cradle connection socket (located just to the right of the silver Tri Wing screw in this image).
Photos by Erik Eckel for \u00a9 TechRepublic
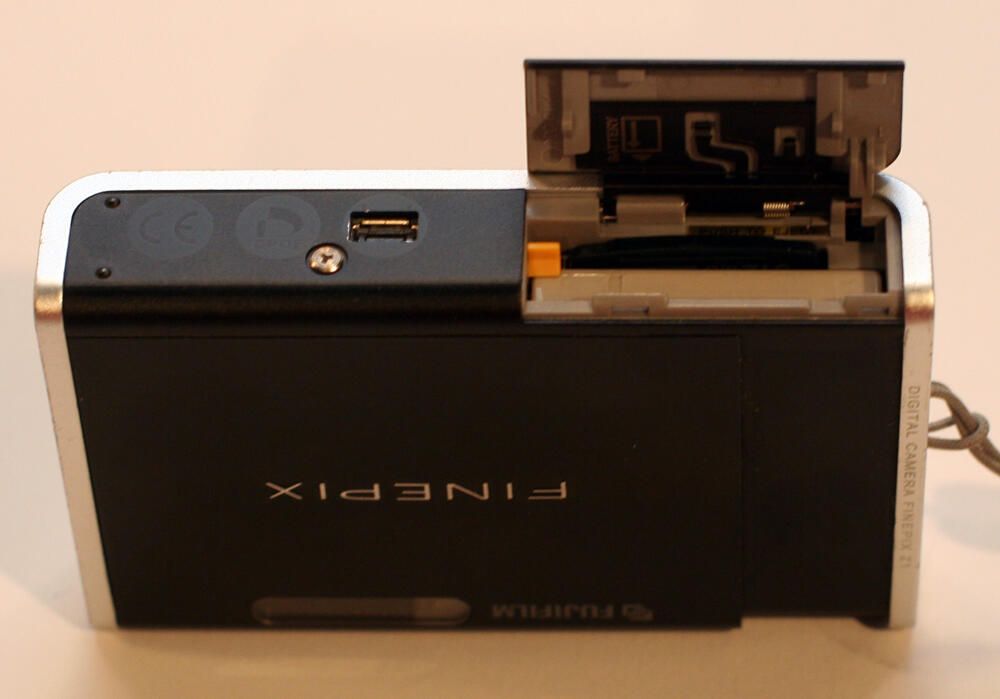
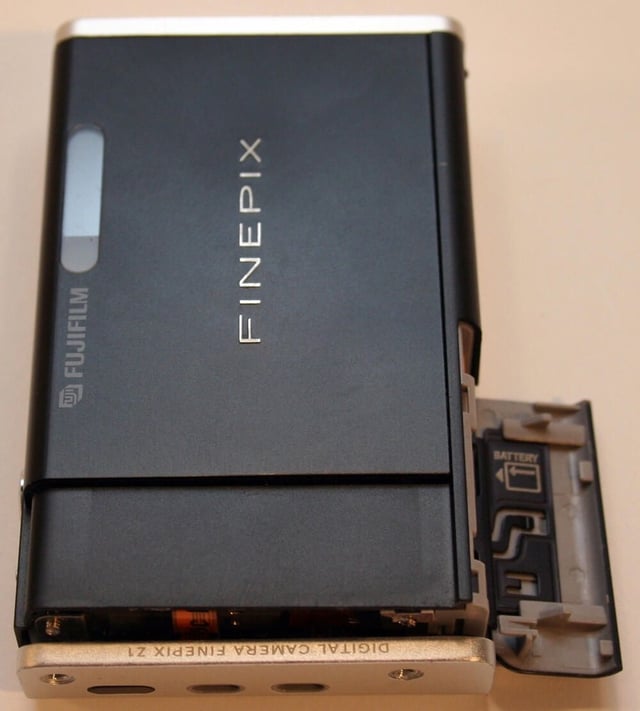
Both the camera’s battery and memory card are stored behind the battery cover door. The yellow tab to the left is the battery release catch.
Photos by Erik Eckel for \u00a9 TechRepublic
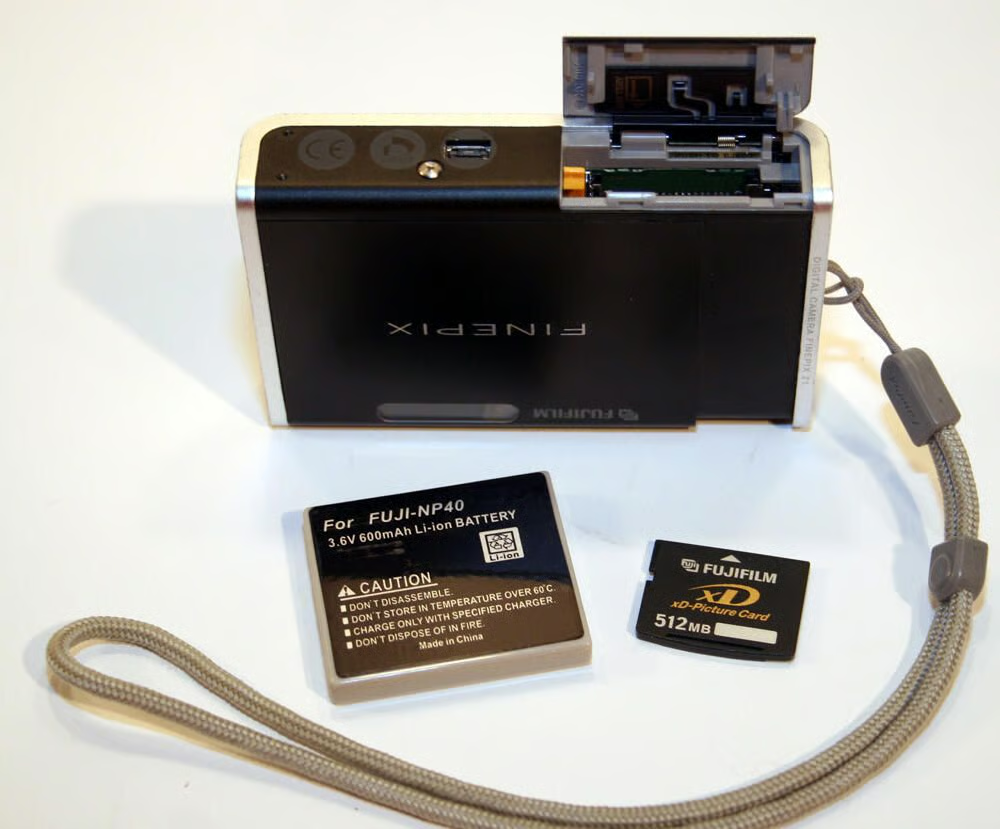
The FinePix Z1’s battery left some room for improvement. This 3.6-volt aftermarket battery (like its OEM counterpart) stored enough energy for approximately 170 shots.\n\nHere you can see the xD Picture Card has also been removed from the now empty battery compartment.
Photos by Erik Eckel for \u00a9 TechRepublic

The FinePix Z1 was turned on and off by sliding the lens cover open and closed. Here the lens cover is open, revealing the Fuji 3x optical and 5.7 digital zoom lens.
Photos by Erik Eckel for \u00a9 TechRepublic
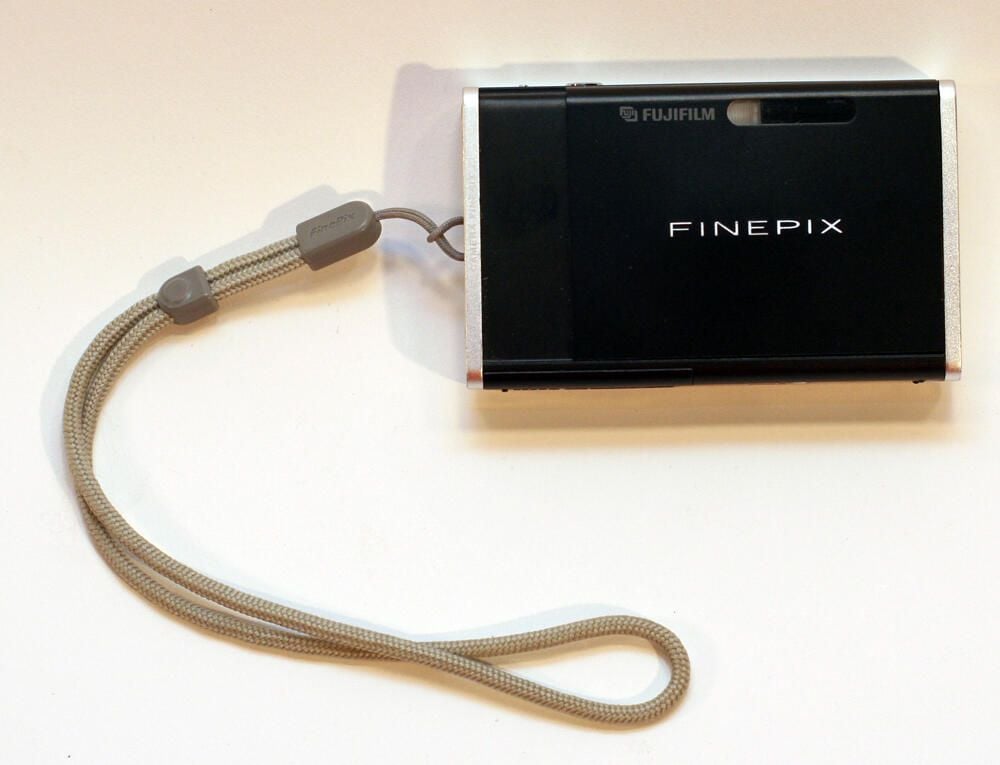
Here’s a look at the FinePix Z1 with the strap removed. In this image you can also clearly see the Tri Wing tamper-proof screws used to secure the outside casing.\n\nAt the top of the camera’s sideplate is an infrared port, an unsupported feature on this model.\n\nThe FinePix’s two topside controls are also visible. The first is the Mode Switch. If set to the right the camera is placed in Photography Mode. Moving the switch to the left prompts the camera to change to Movie (video) Mode operation.
Photos by Erik Eckel for \u00a9 TechRepublic
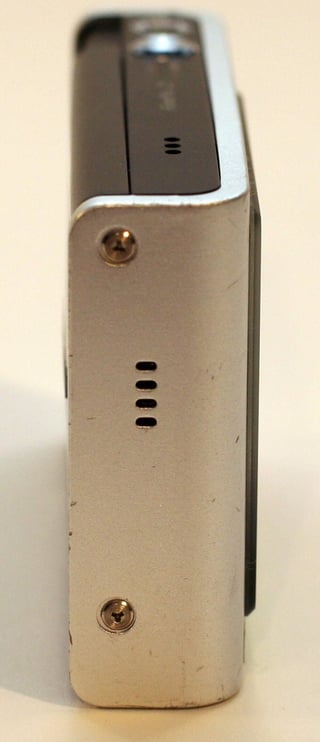
The FinePix Z1’s speaker (positioned behind the four slot cutouts) is located opposite the strap side. At the top of image you can also make out the three slots positioned over the unit’s microphone. This speaker/microphone combination enabled recording and playing back videos.
Photos by Erik Eckel for \u00a9 TechRepublic
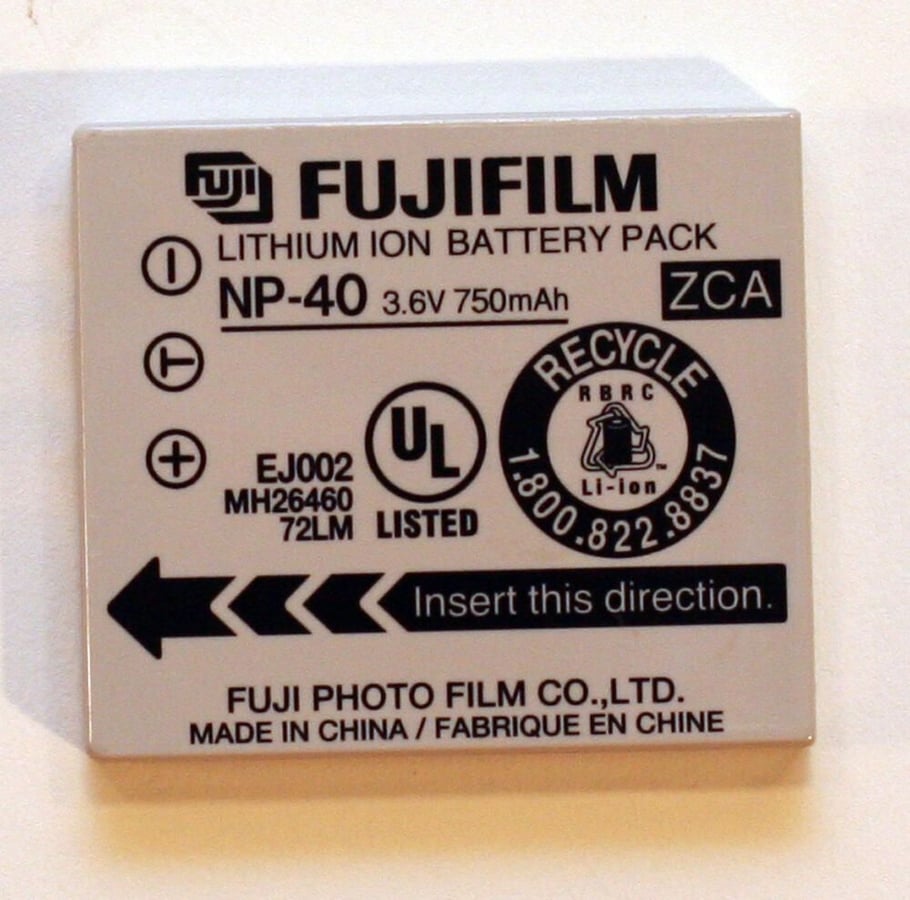
This is the originial Fuji FinePix Z1 battery. The NP-40 model Lithium-ion battery produced only 2.7 Wh of power.
Photos by Erik Eckel for \u00a9 TechRepublic
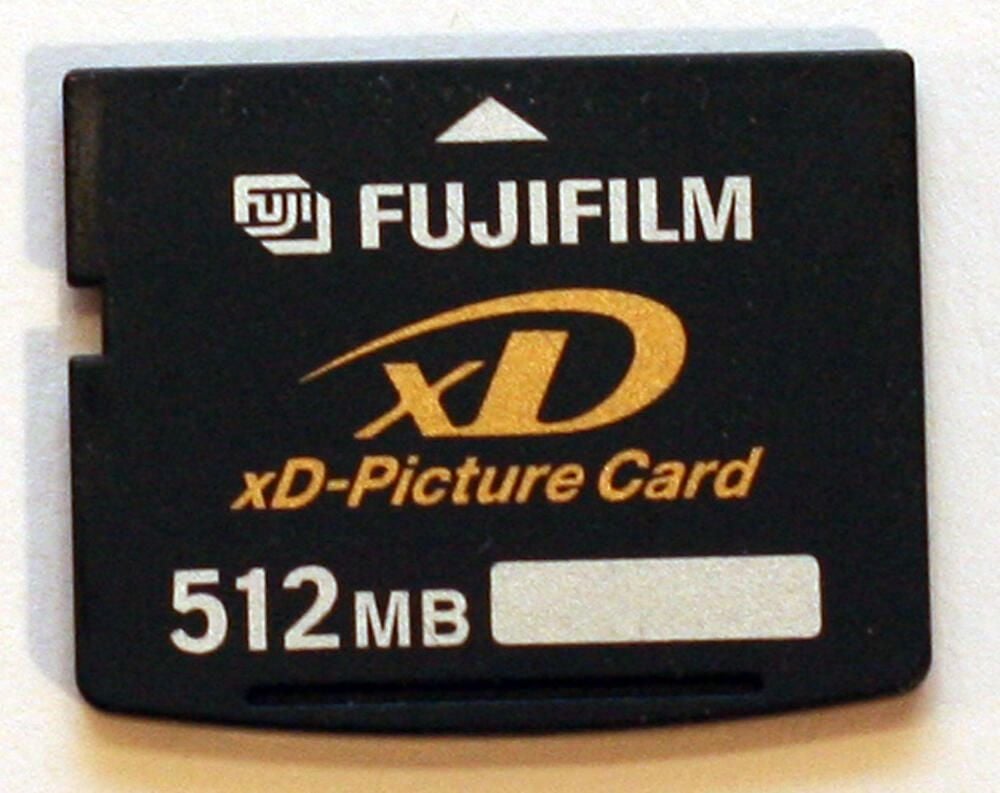
The FinePix shipped with a 16 MB xD Picture Card. Because so few images can be stored on a 16 MB media card, larger models (such as this half-gig card) are often used.
Photos by Erik Eckel for \u00a9 TechRepublic
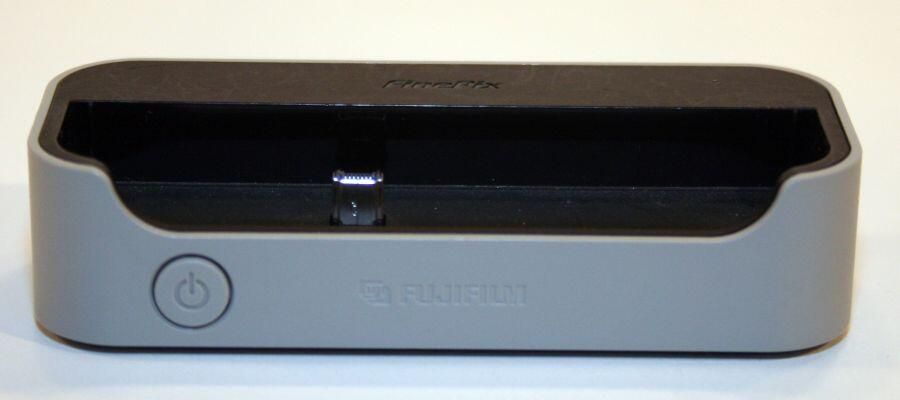
The FinePix Z1 cradle is required to recharge the FinePix battery and to transfer images from the camera to a PC or television.
Photos by Erik Eckel for \u00a9 TechRepublic
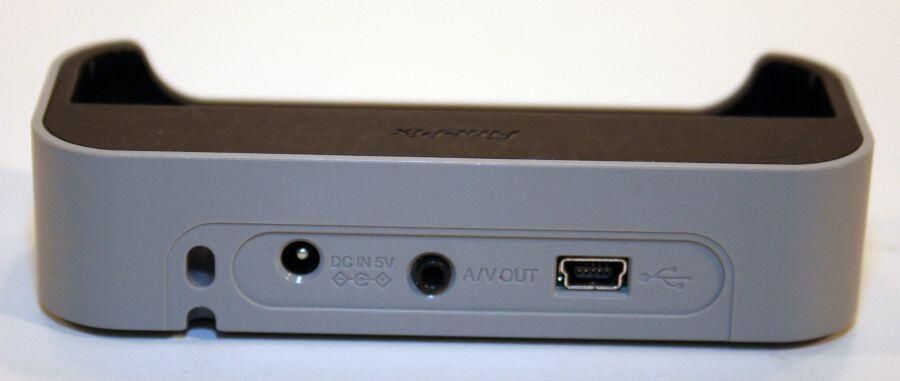
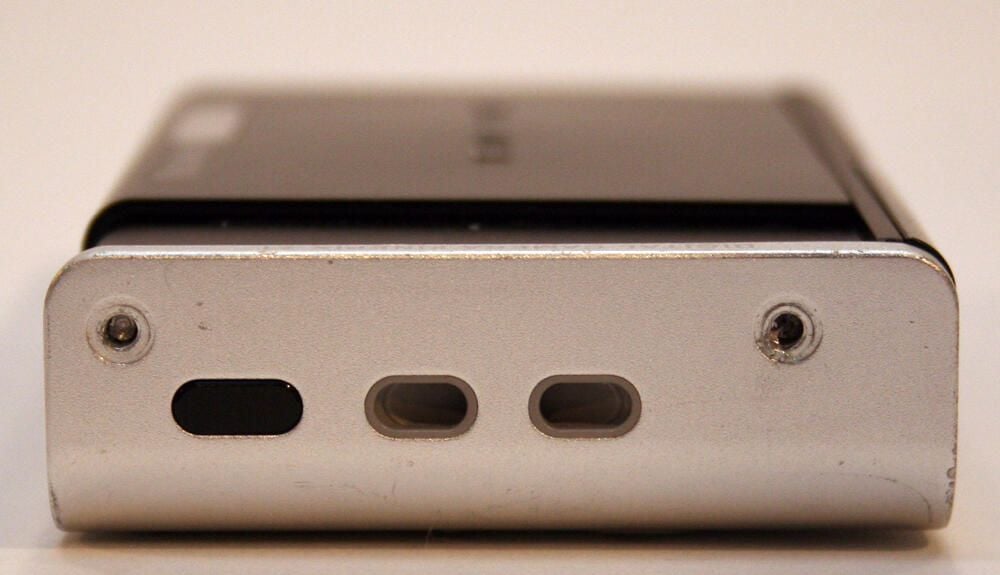
Fuji supplied an AC adapter that provided 5-volts of DC power. To the right of that DC port, which appears to the far left in this image, were ports for connecting the cradle either to a television (using the A/V out port) or a computer (using the mini-B USB port to the far right).
Photos by Erik Eckel for \u00a9 TechRepublic
Users wishing to attach the FinePix Z1 to a tripod will find it necessary to use the multifunction cradle; the tripod mount is built into the cradle, not the camera body itself.
Photos by Erik Eckel for \u00a9 TechRepublic
Normally it’s best to disassemble delicate electronics using the appropriate tools. In this case, the Klein 32-bit tamper-proof bit set I ordered to assist in dissecting this digital camera proved all too large. So, I turned to a trusty Dewalt 1/16-inch drill bit to remove the Tri Wing fasteners.
Photos by Erik Eckel for \u00a9 TechRepublic
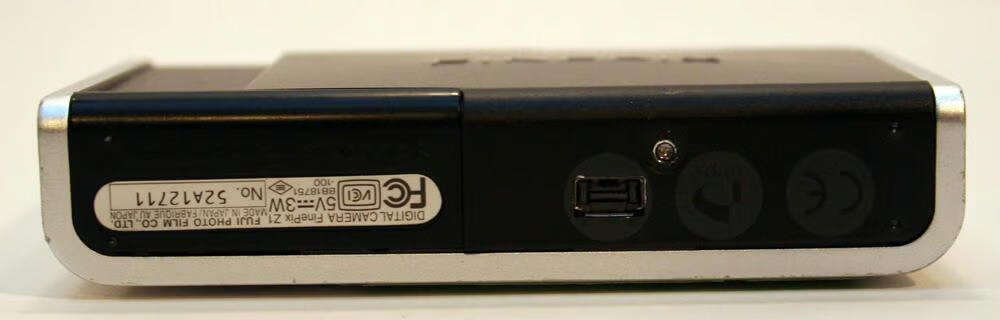
Some half-dozen Tri Wing fasteners must be removed before the FinePix Z1’s case can be opened. The Tri Wing screw located above the cradle connection socket (at the center of this image) was no match for the titanium-coated drill bit.
Photos by Erik Eckel for \u00a9 TechRepublic
With the Tri Wing fasteners removed, the case can be opened by simply pulling it apart. Here you can see the front cover separating from the back, wrap-around casing.
Photos by Erik Eckel for \u00a9 TechRepublic

Here’s a closer look at the FinePix case as it’s separated. In this image you can see the main data/power cable that connects the camera’s electronics to the main system board and battery.
Photos by Erik Eckel for \u00a9 TechRepublic
The on/off mechanism (more on that in a moment) is connected to the inside of the front cover. The small metal cage that holds the battery, meanwhile, appears on the right-side of this image.
Photos by Erik Eckel for \u00a9 TechRepublic
This is the metal chassis that secures the battery inside the FinePix Z1.
Photos by Erik Eckel for \u00a9 TechRepublic
The Fuji FinePix Z1 front cover, once removed from the camera body, looks like this.
Photos by Erik Eckel for \u00a9 TechRepublic
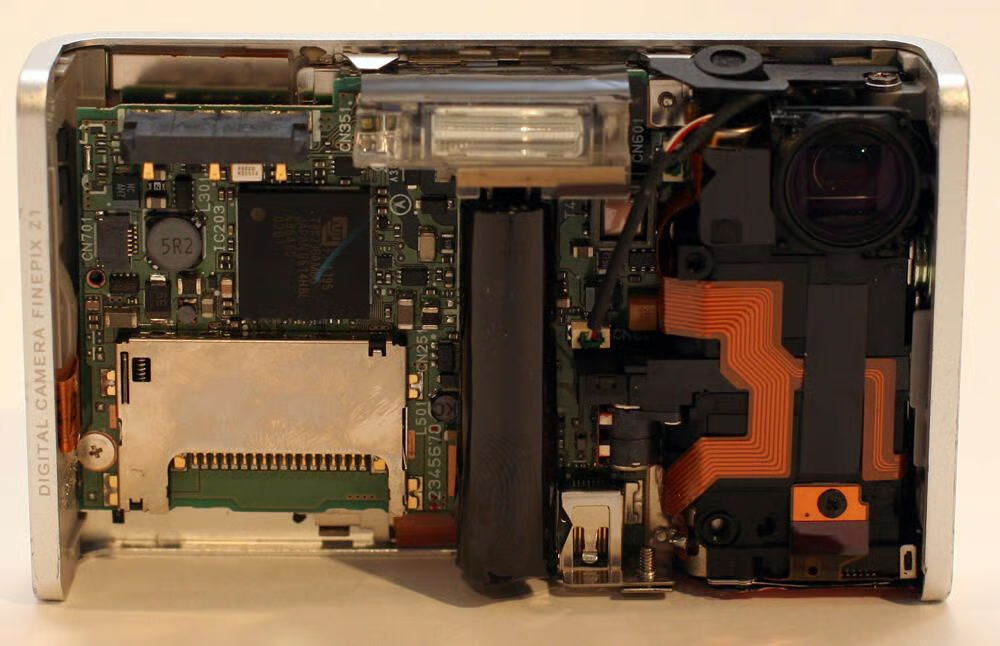
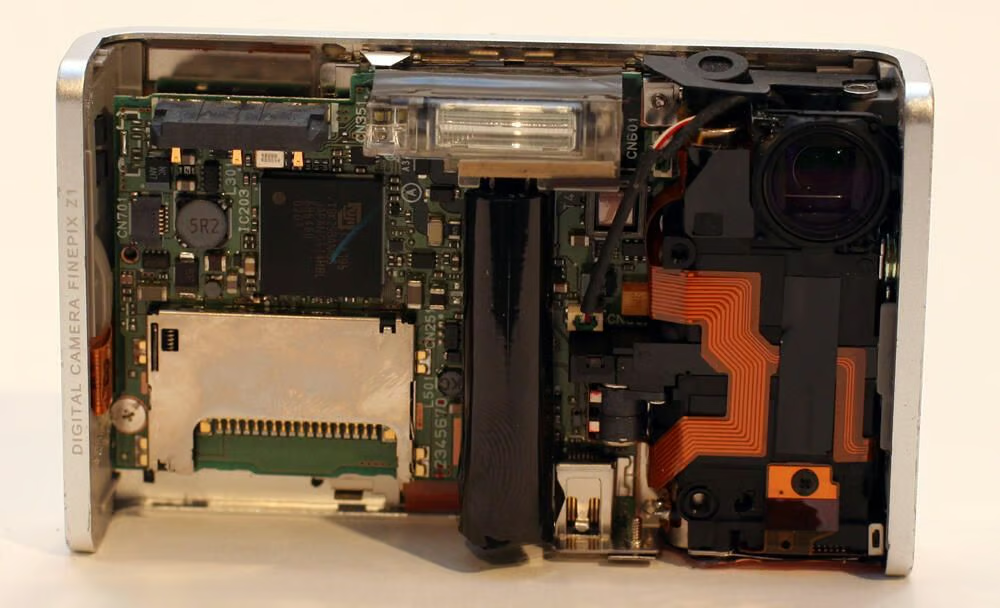
With the front cover removed, the FinePix’s main system board is clearly visible.
Photos by Erik Eckel for \u00a9 TechRepublic
The actual microchip that powers the digital camera’s operations is about half the size of a stamp. You can see it here (the black square with a blue mark across its top).
Photos by Erik Eckel for \u00a9 TechRepublic
The actual CCD is located on the back of the main system board, or at least the side that faces the camera’s rear casing. The FinePix Z1 features a CCD manufactured by Analog Devices. You can see it here, clearly labeled with white lettering, in the top left corner.\n\nCCD stands for charge-coupled device. The CCD plays a critical role in picture quality and color reproduction.
Photos by Erik Eckel for \u00a9 TechRepublic
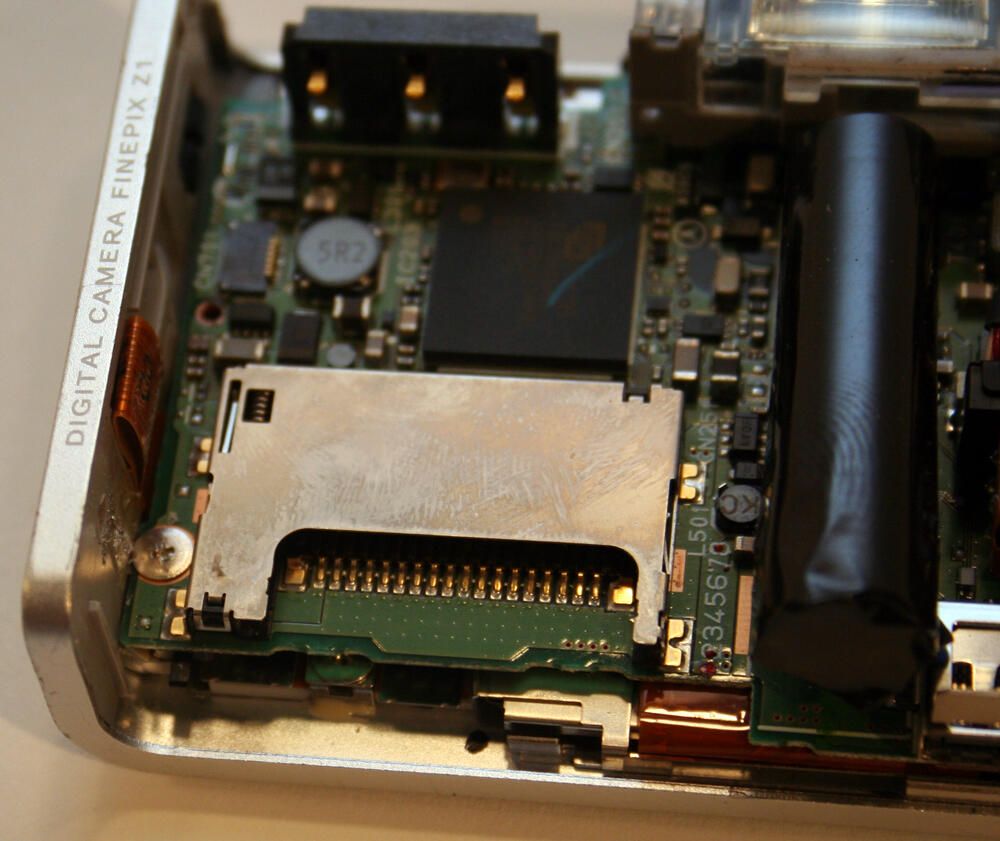
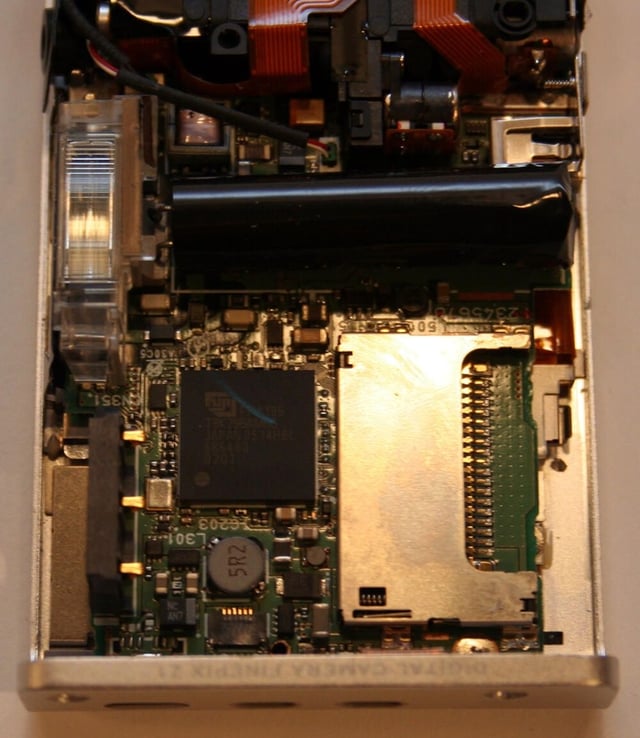
Prominent in this image is the FinePix’s xD Picture Card slot.
Photos by Erik Eckel for \u00a9 TechRepublic
The Fuji’s flash is powered by a large capacitor (the dark black cylinder positioned in the middle of this photograph). To the immediate left of the actual flash (top-center) sits the camera’s self-timer lamp.
Photos by Erik Eckel for \u00a9 TechRepublic
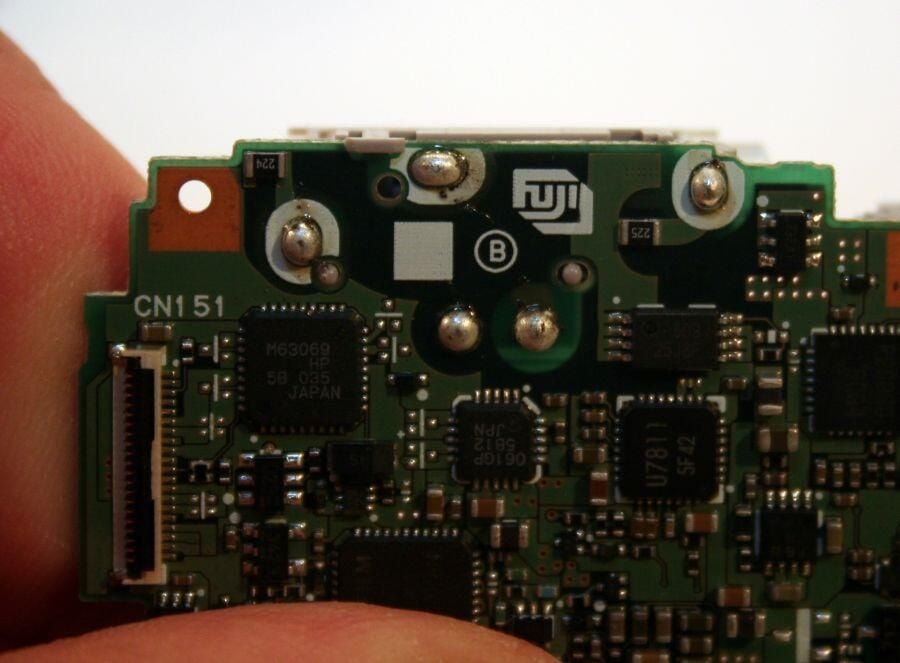
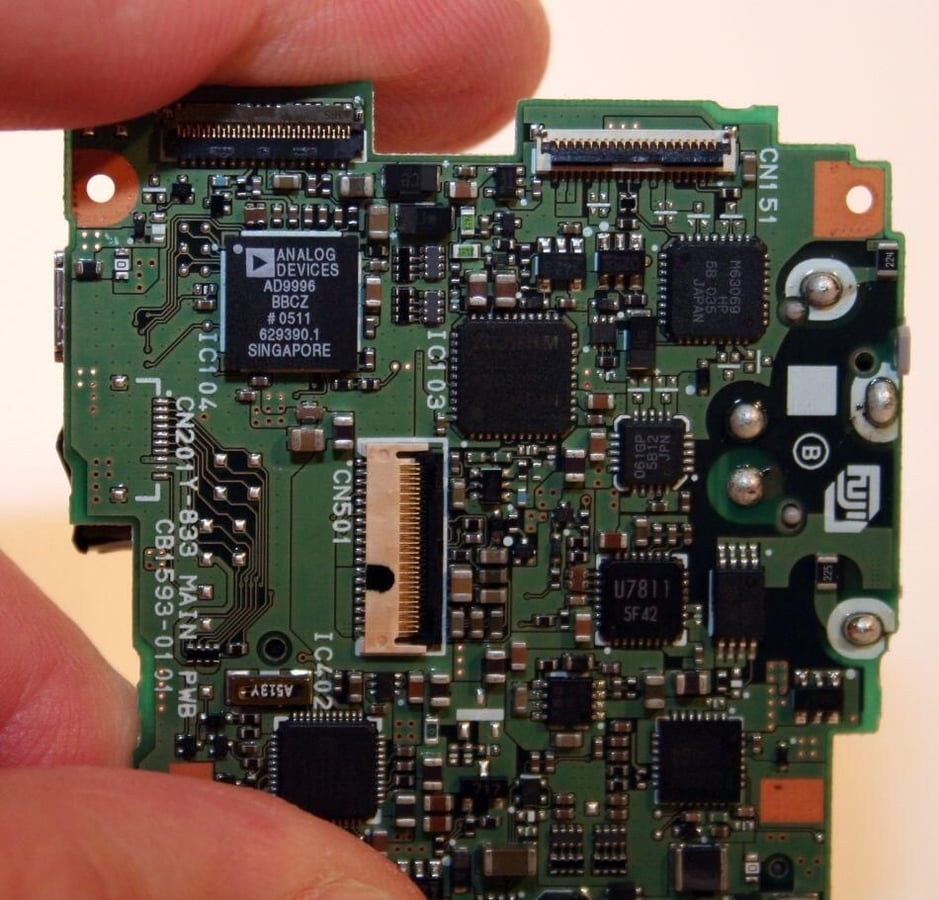
Fuji manufactures its own system board for the FinePix Z1. Here the Fuji logo is clearly marked on the board.
Photos by Erik Eckel for \u00a9 TechRepublic
A large data cable (the orange-brown ribbon in the center of this image) connects the main system board to the rear cover’s controls.
Photos by Erik Eckel for \u00a9 TechRepublic
Here the front cover is shown in the off, or closed, position. Note the positioning of the spring toward the image’s left-center.
Photos by Erik Eckel for \u00a9 TechRepublic
The front cover is shown here in the On position.
Photos by Erik Eckel for \u00a9 TechRepublic
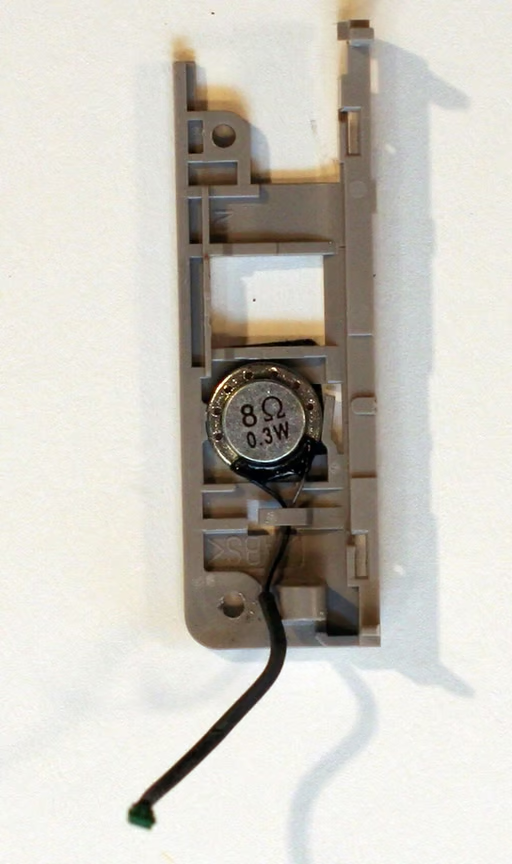
The FinePix audio (for video playback) is powered by this tiny .3 watt speaker.
Photos by Erik Eckel for \u00a9 TechRepublic
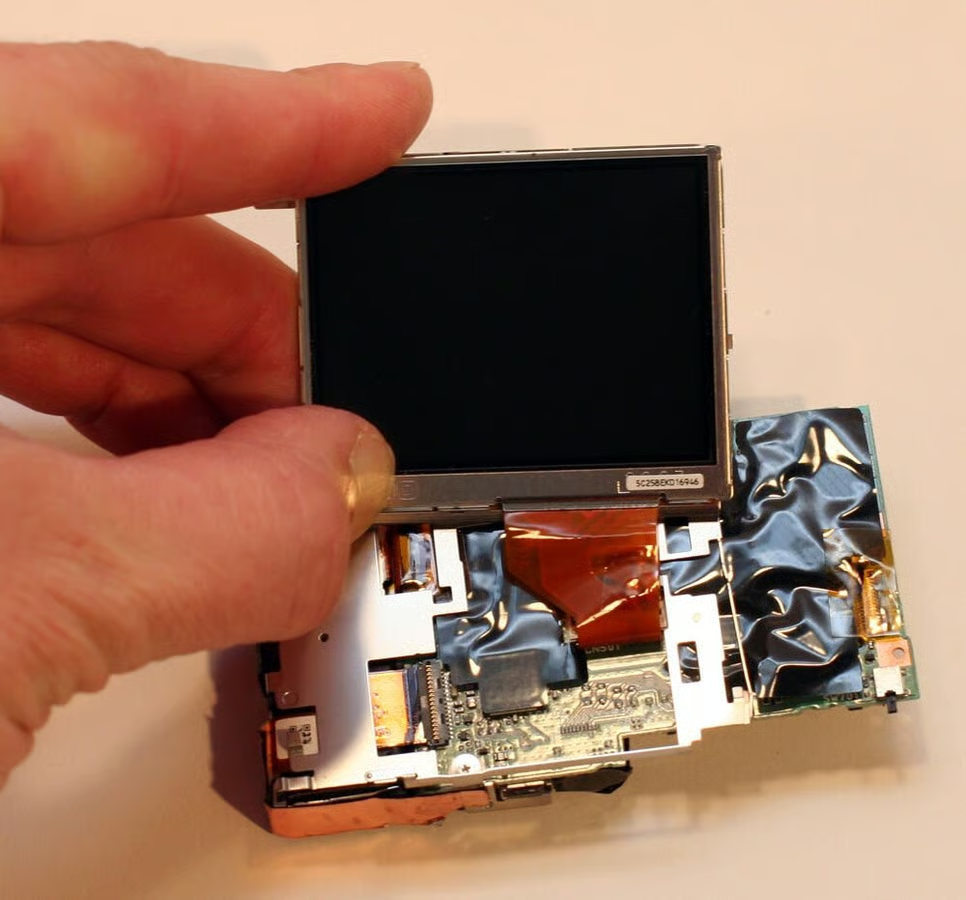
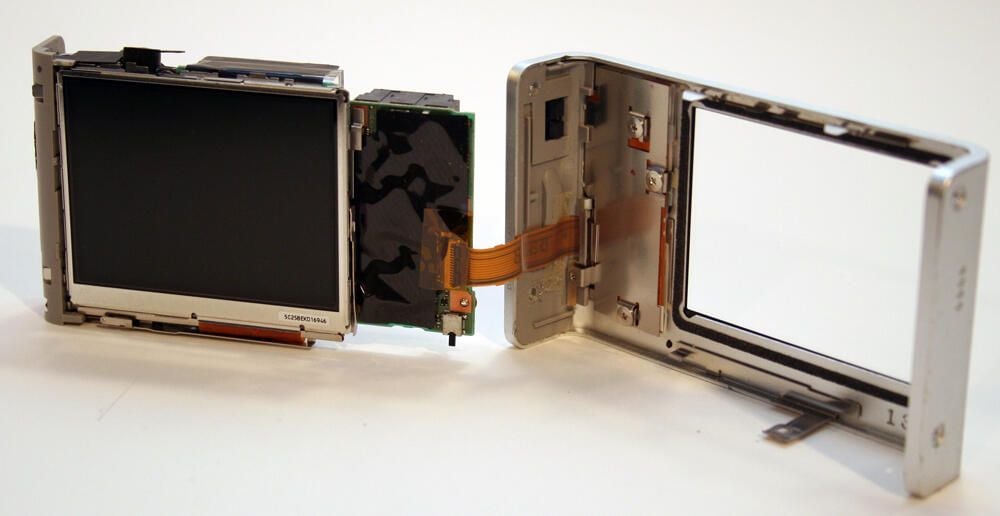
The FinePix Z1 LCD monitor is manufactured by Casio. In this image the LCD monitor is still connected to the main board by the orange-brown data ribbon cable.
Photos by Erik Eckel for \u00a9 TechRepublic
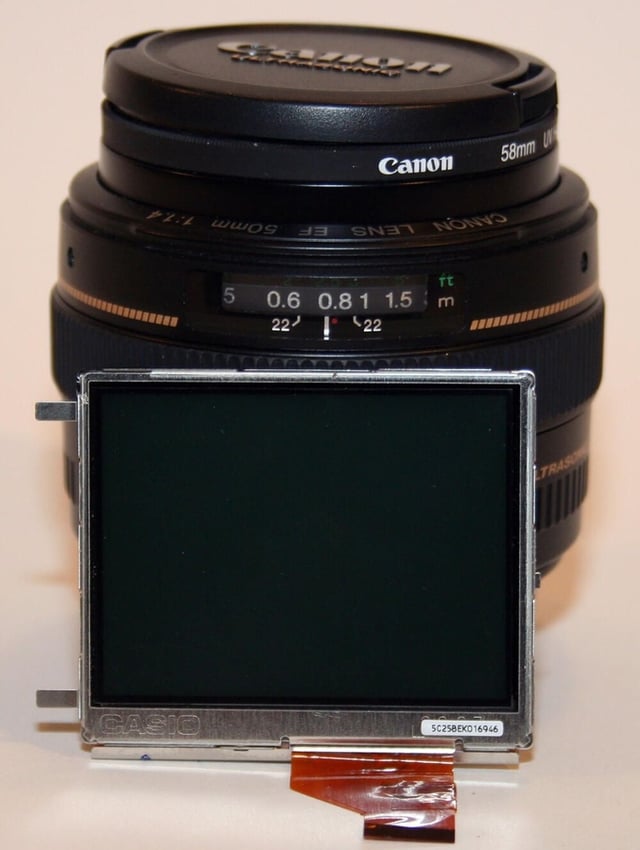
A close-up of the FinePix LCD reveals its Casio branding.
Photos by Erik Eckel for \u00a9 TechRepublic
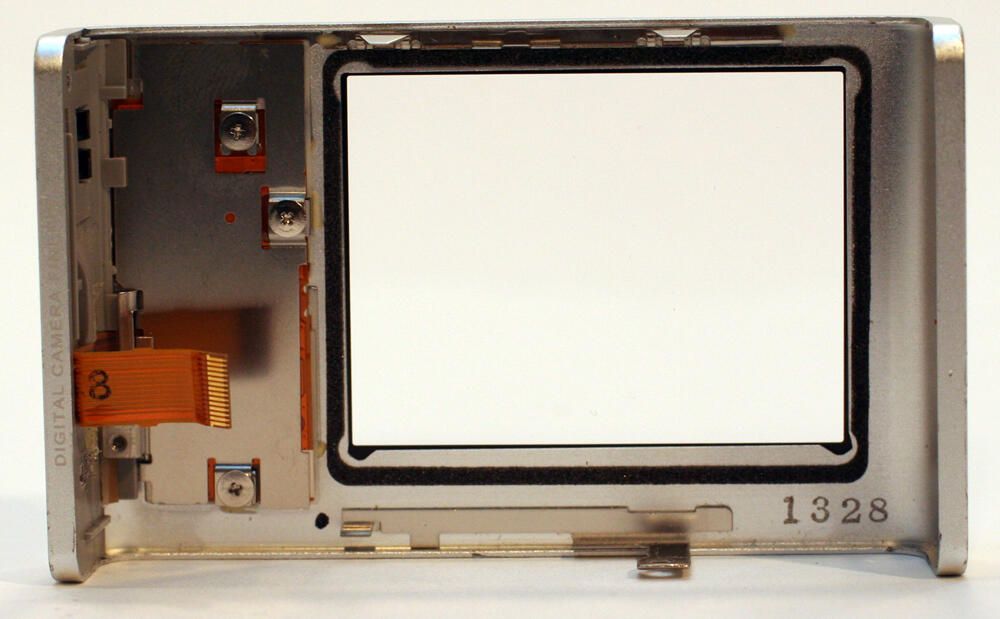
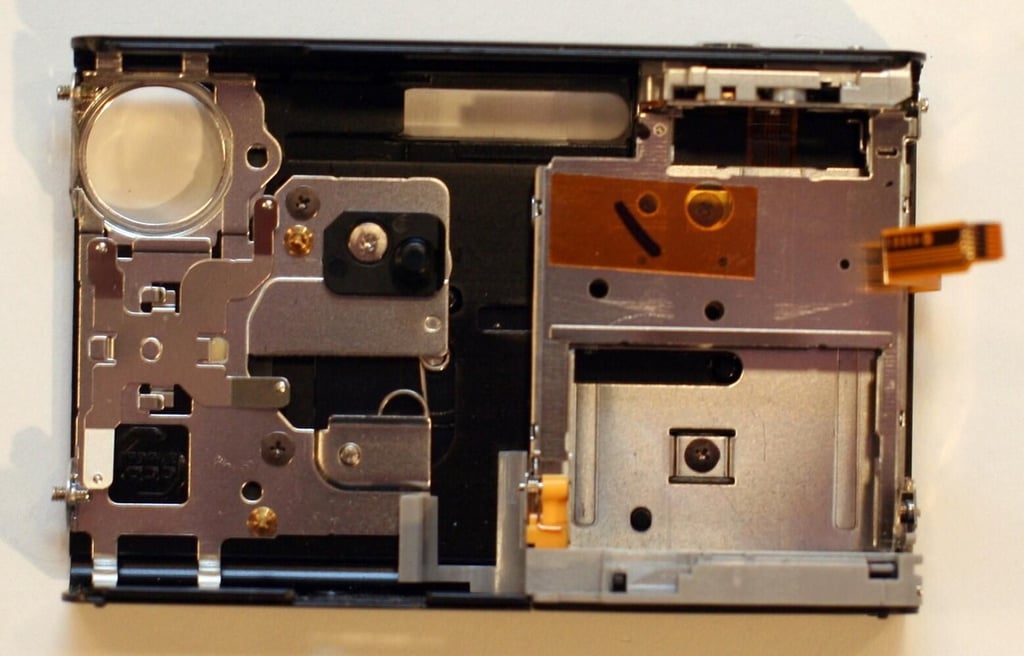
This is the view looking inside the FinePix Z1’s rear cover.
Photos by Erik Eckel for \u00a9 TechRepublic
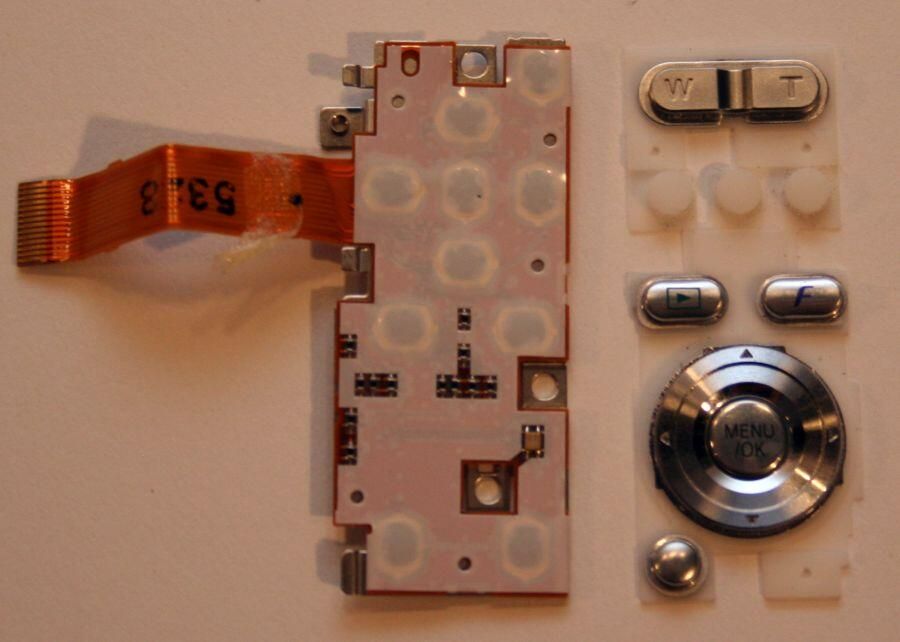
With three more Philips head screws removed, the controls (4-direction button, playback and photo mode buttons, Menu/OK button and zoom switch, among others, slip free of the rear case.\n\nOn the left is the circuit board that actually transmits the buttons’ signals to the main board; on the right are the actual external buttons themselves.
Photos by Erik Eckel for \u00a9 TechRepublic
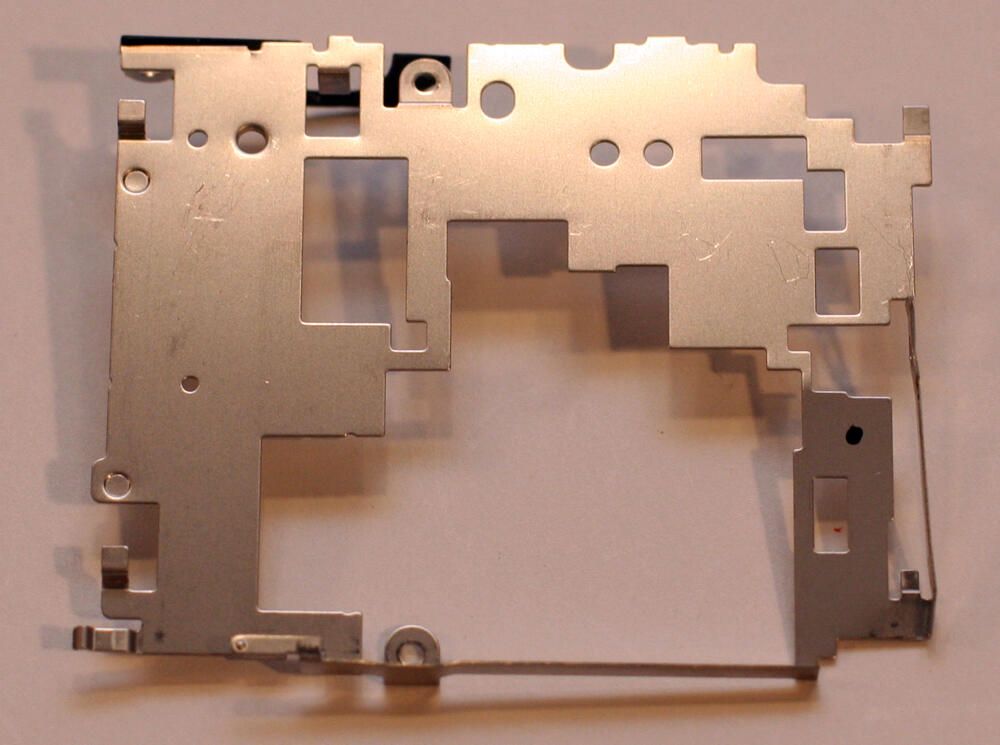
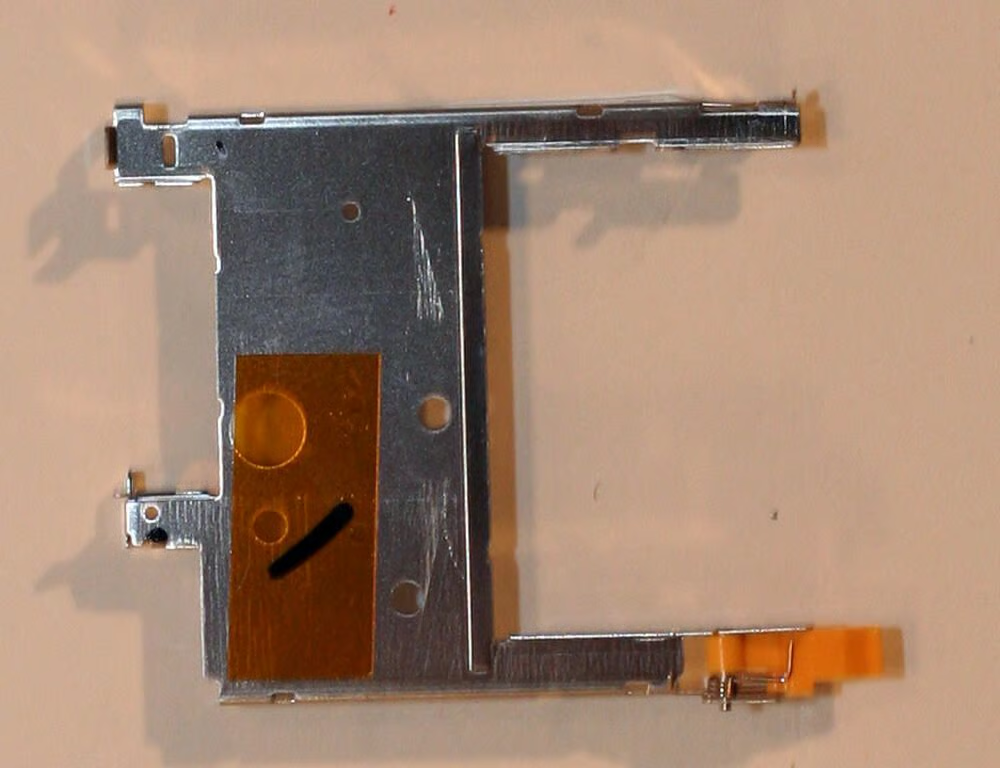
This metal cage helps secure the system board and lens element inside the Z1.
Photos by Erik Eckel for \u00a9 TechRepublic
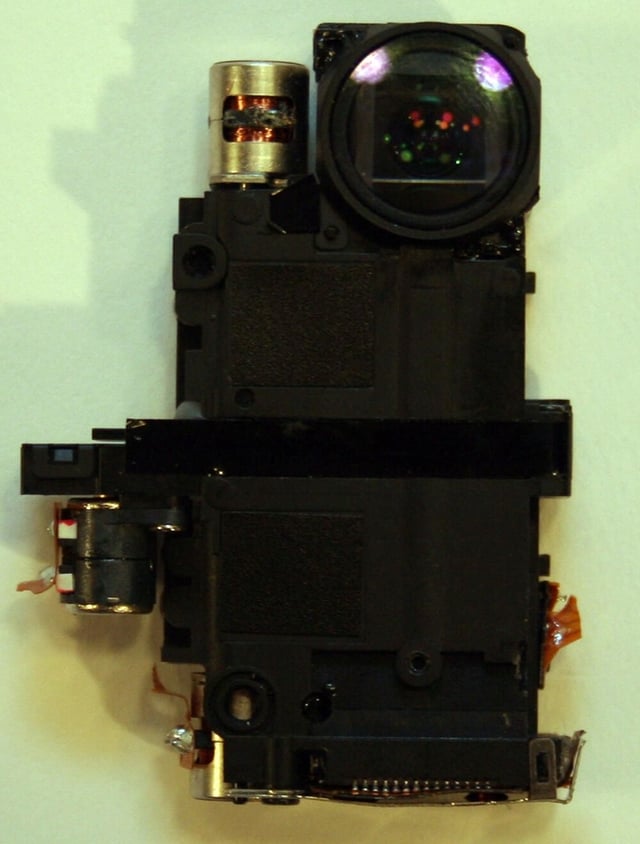
This is the Z1 lens element with all data cables removed.
Photos by Erik Eckel for \u00a9 TechRepublic
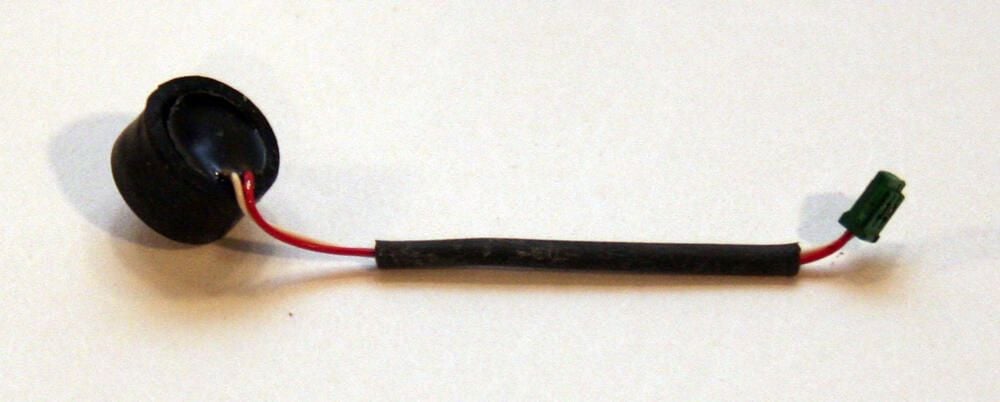
This rubberized switch activates the digital camera’s electronic shutter when depressed. The black cap sat just underneath the camera’s shutter button and plugged in to the main system board at its opposite end.
Photos by Erik Eckel for \u00a9 TechRepublic
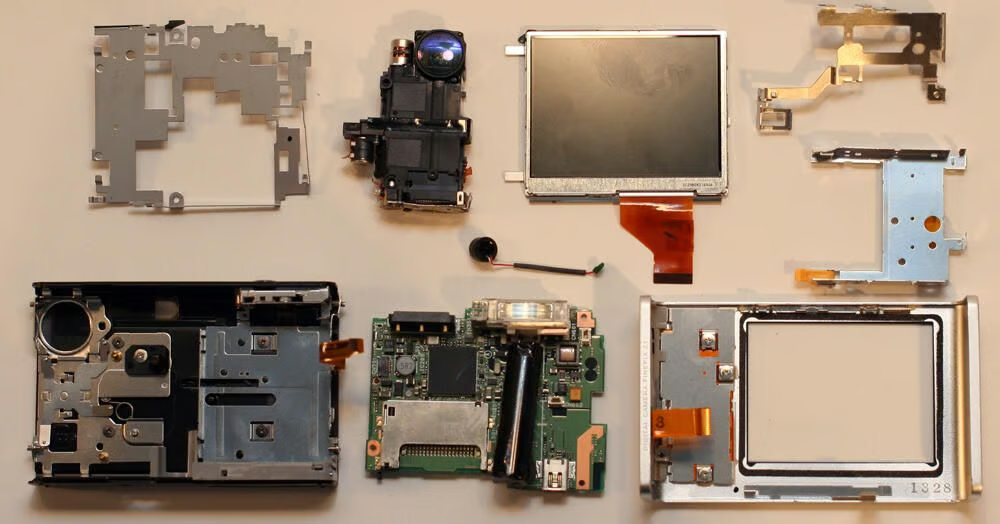
Numerous components are required to build even simple, small cameras, as evidenced by this cornucopia of parts.
Photos by Erik Eckel for \u00a9 TechRepublic

Erik Eckel is a managing partner at Louisville Geek and president of Eckel Media Corp. He previously served as Executive Editor at TechRepublic. He received Microsoft Engineer accreditation from Sullivan University and earned his Bachelor's Degree in English from the University of Louisville. He's earned Network+, Windows NT 4.0 MCP+I and MCSE, and Windows 2000 Professional MCP accreditations.


