After waiting for 13.5 hours in line at the Louisville, KY Apple store, I was finally able to purchased an iPhone 4–only to bring it back to the office an begin cracking it open.
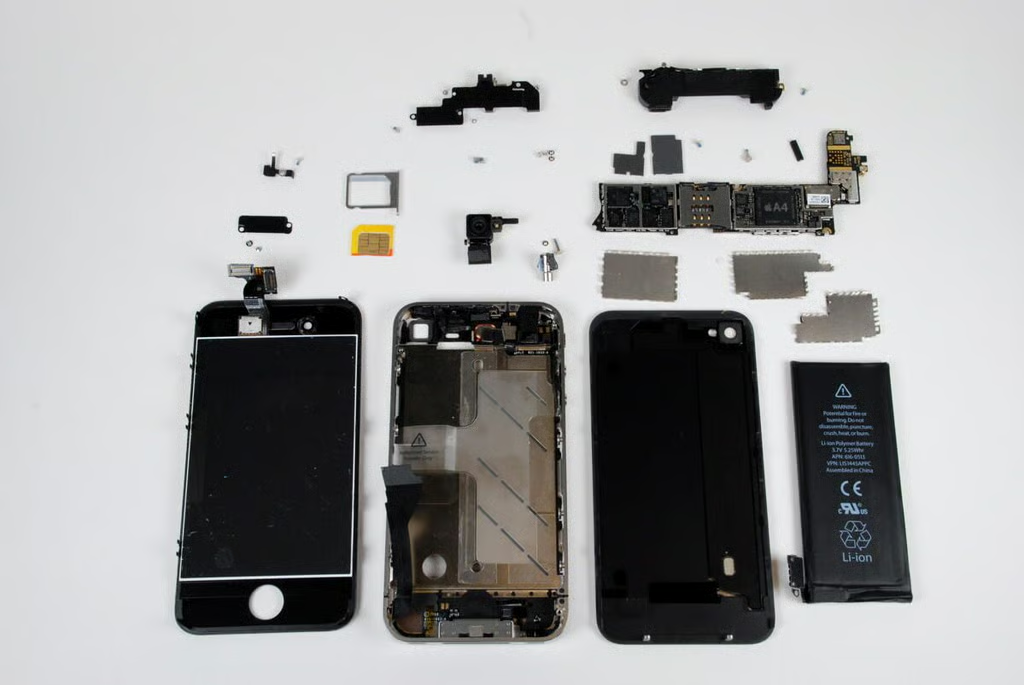
Unlike the iPhone, iPhone 3G, and iPhone 3G S, the Apple iPhone 4 was remarkable easy to disassemble. Follow along as I reveal the impressing hardware that runs Apple’s fourth generation smartphone.
Photo credit: Bill Detwiler / TechRepublic
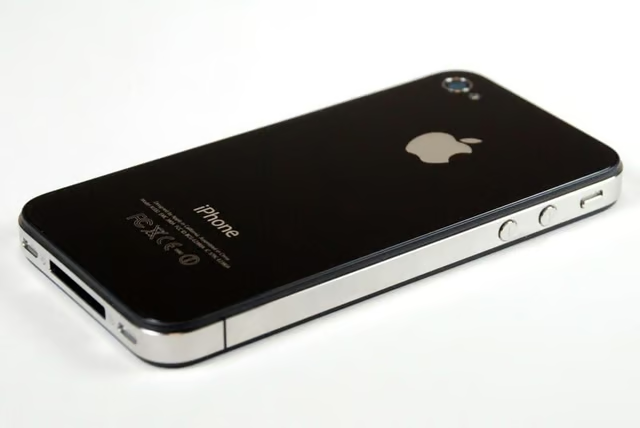
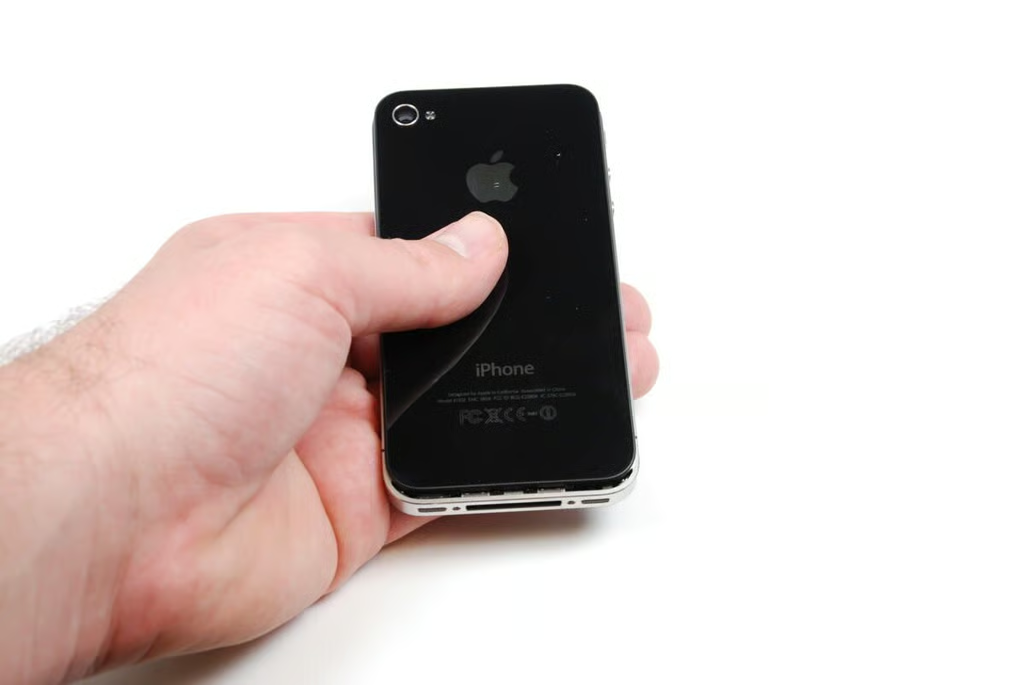
We purchased the 16GB, black iPhone 4. It measures 4.5 inches tall, 2.31 inches wide, and 0.37 inches deep. It weights 4.8 ounces.
Photo credit: Jason Hiner / TechRepublic
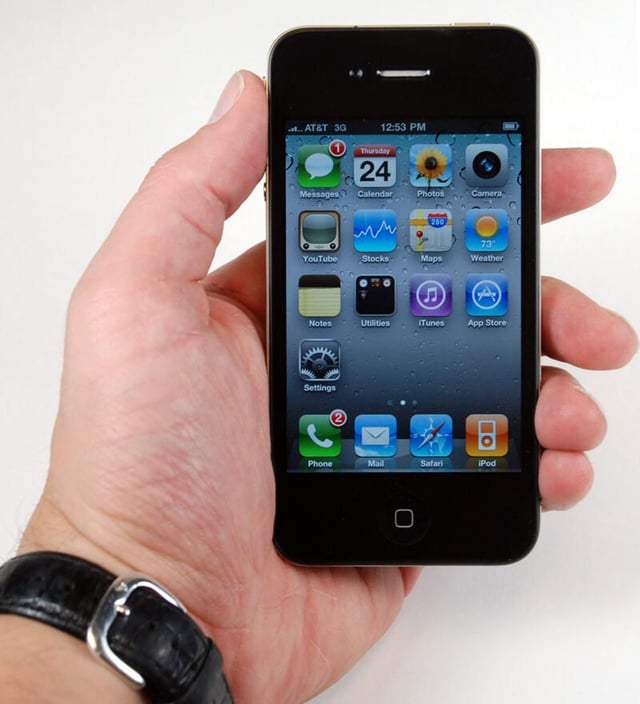
The iPhone 4 comes with Apple’s iOS 4 installed, which offers several benefits over previous versions.
For a complete review of the iPhone 4, check out Jason Hiner’s article, “Apple iPhone 4 review: Everything you need to know.”
Photo credit: Jason Hiner / TechRepublic
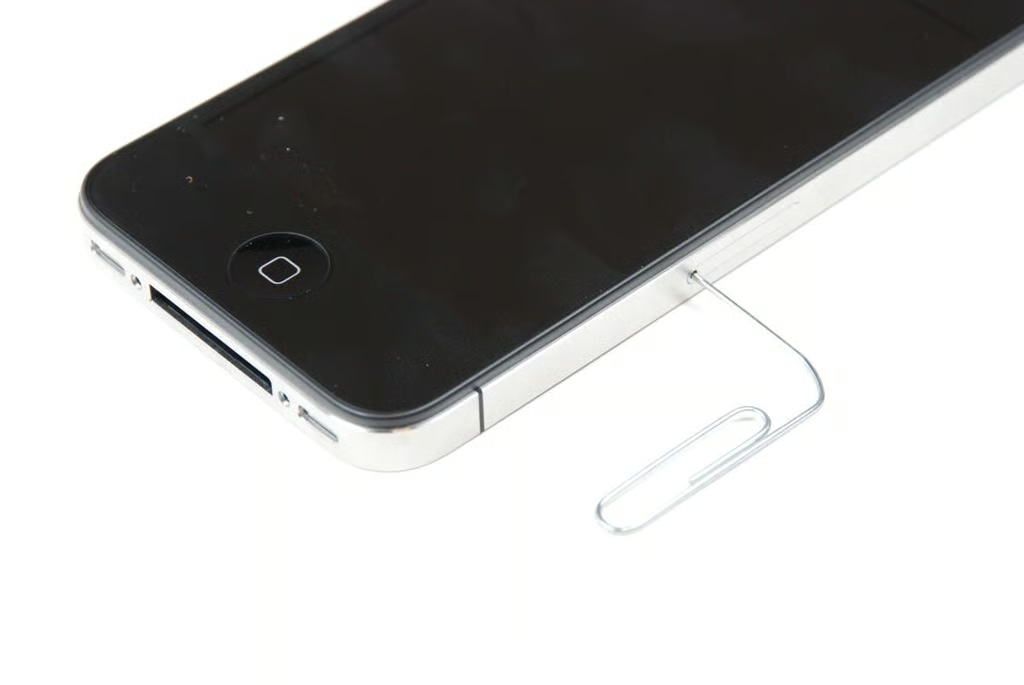
Before we crack the iPhone 4 open, we need to remove the microSIM card. This is easily done with the help of a trusty paperclip.
Photo credit: Bill Detwiler / TechRepublic
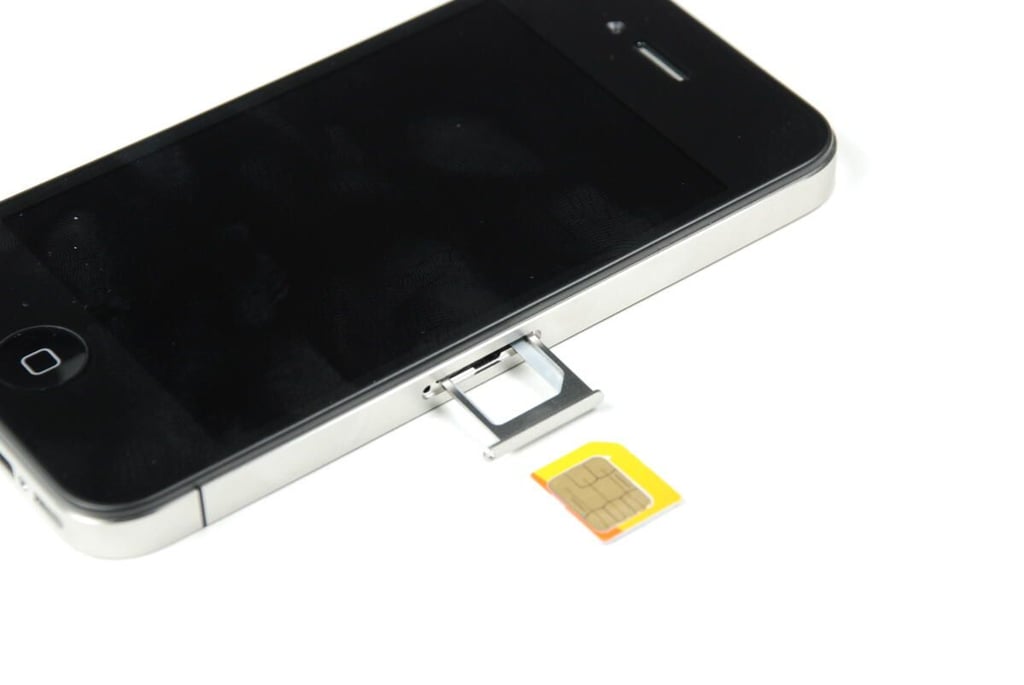
Like the Apple iPad 3G, the iPhone 4 uses an AT&T microSIM.
Photo credit: Bill Detwiler / TechRepublic
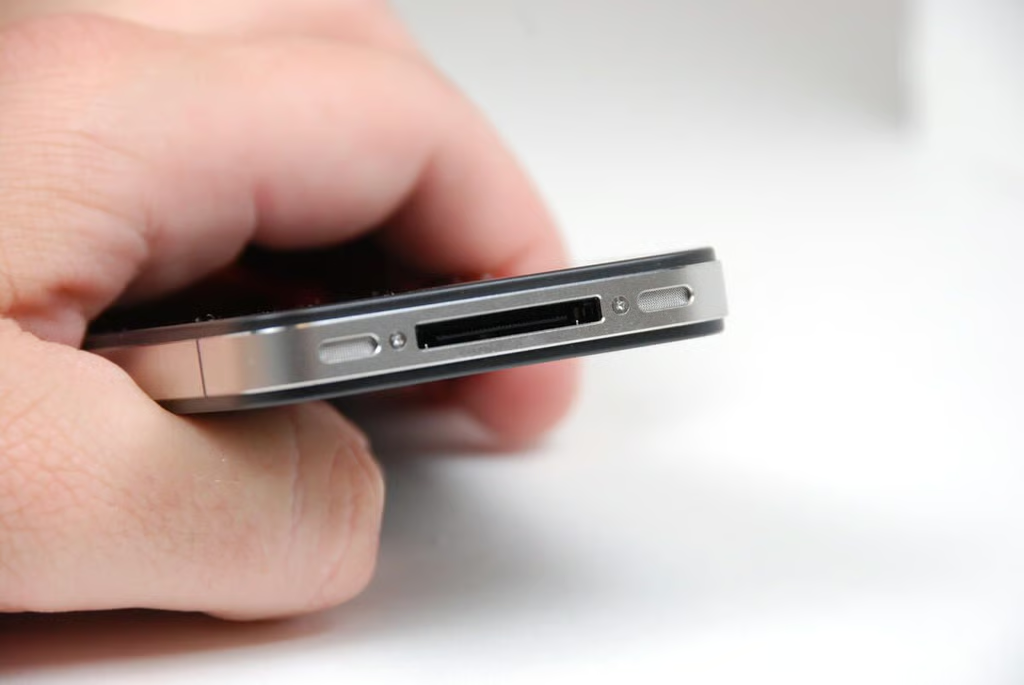
Our first step in cracking open the iPhone 4, is to remove the two Phillips #00 screws on the bottom of the device.
Photo credit: Bill Detwiler / TechRepublic
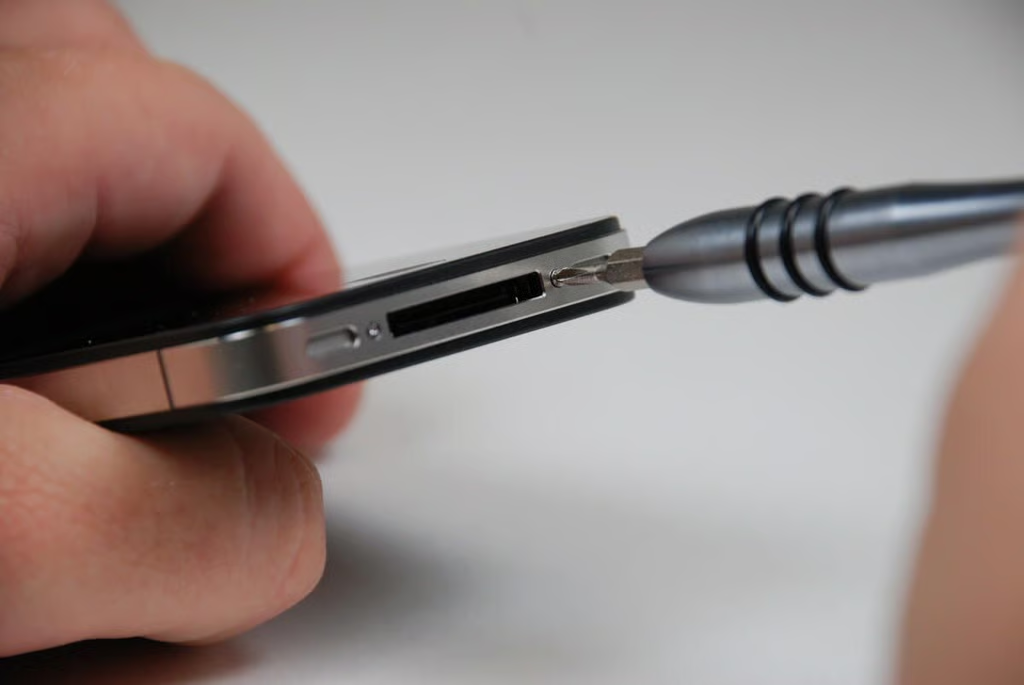
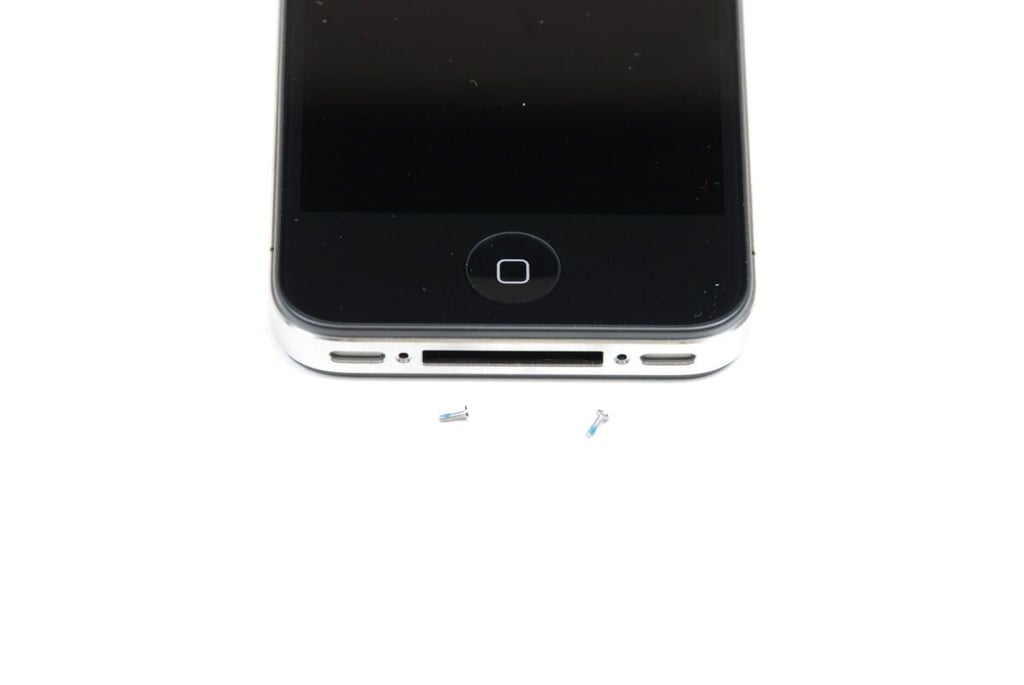
The iPhone 4 is filled with Phillips screws of varying length. During the tear down, you’ll want to store them in a safe place and mark their location.
Photo credit: Bill Detwiler / TechRepublic
With the two external screws removed, you can easily slide up and remove the iPhone 4’s back glass cover.
Photo credit: Bill Detwiler / TechRepublic
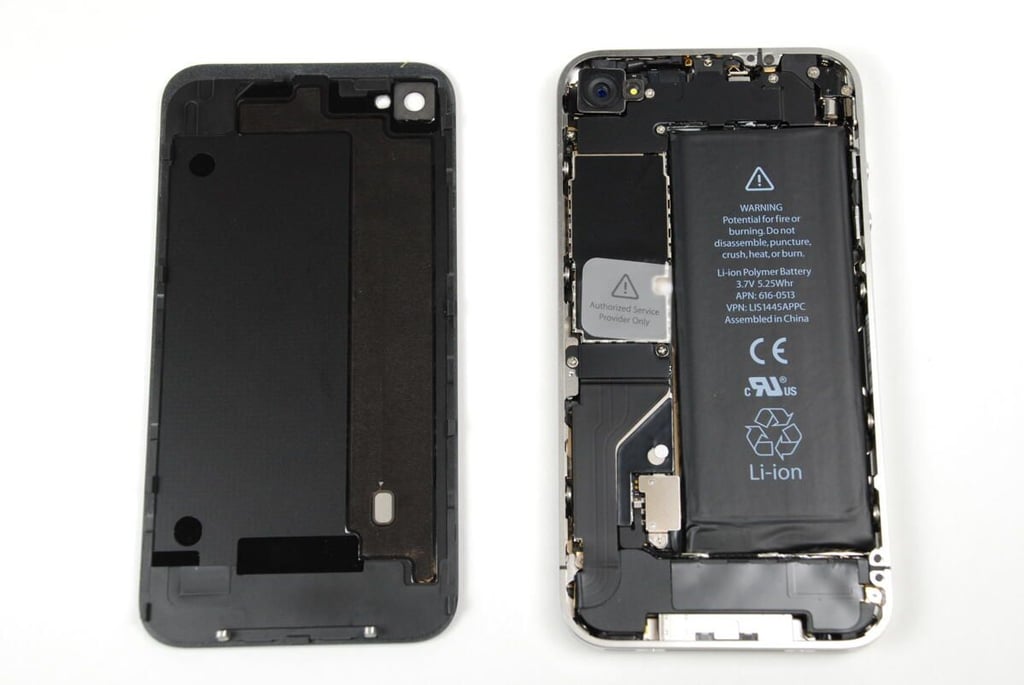
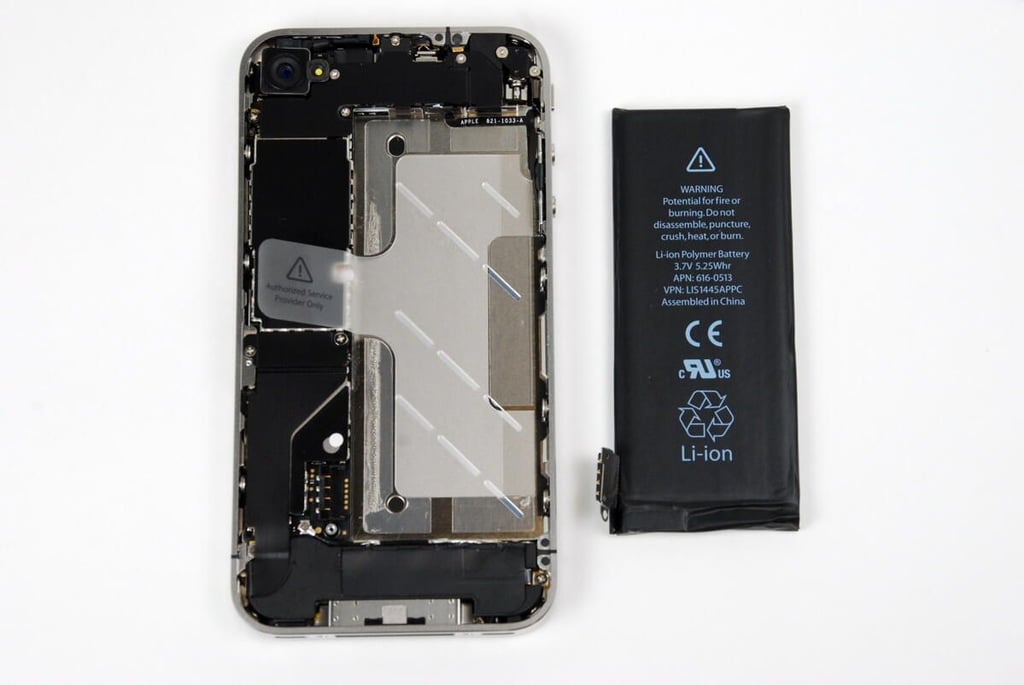
With the back cover removed, with get our first look inside the iPhone 4. The phone’s 3.7V 1420 mAh Li-Polymer battery takes up most of the space inside the case. According to Apple, the battery will give you up to 7 hours of talk time on 3G and up to 14 hours on 2G.
Photo credit: Bill Detwiler / TechRepublic
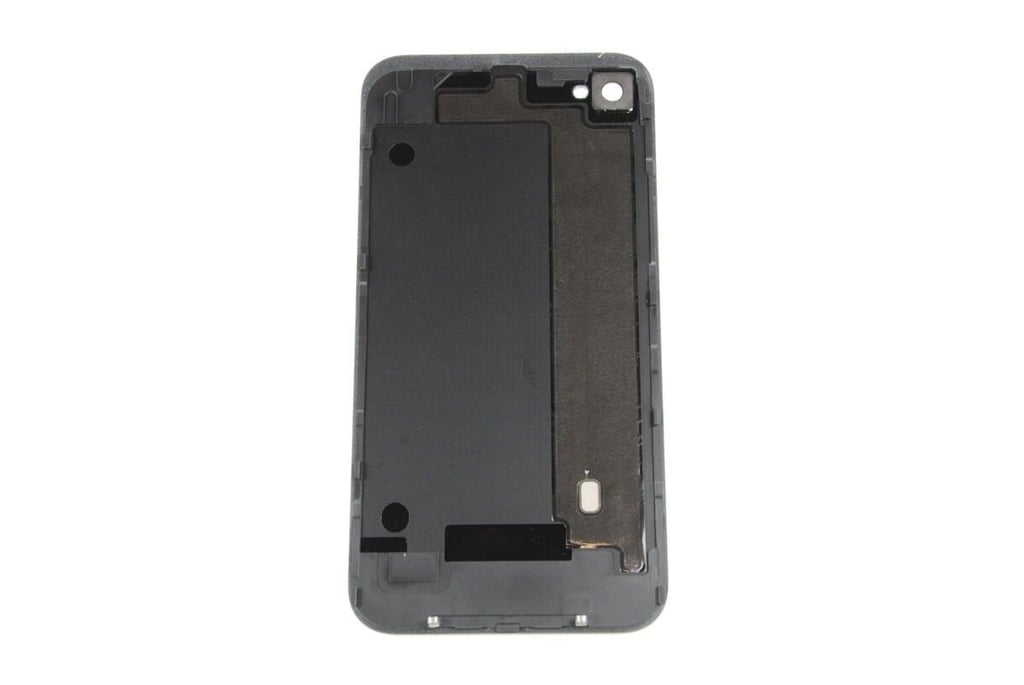
The internal side of the iPhone 4’s back cover.
Photo credit: Bill Detwiler / TechRepublic
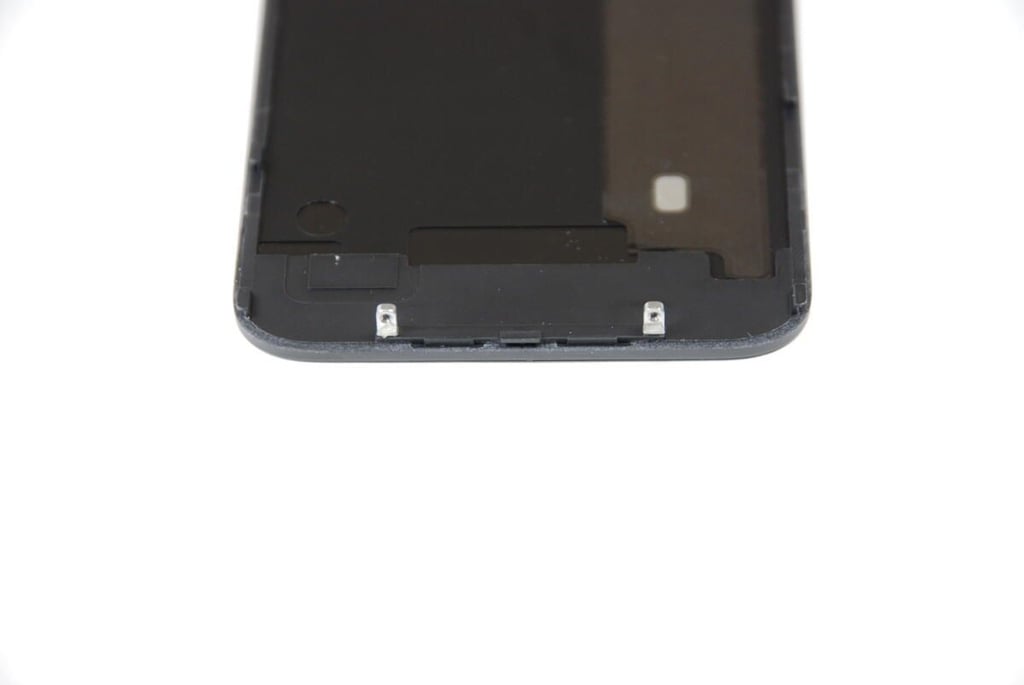
At the bottom of the iPhone 4’s back cover are two tabs which secure the cover to the metal case when the external screws are in place.
Photo credit: Bill Detwiler / TechRepublic
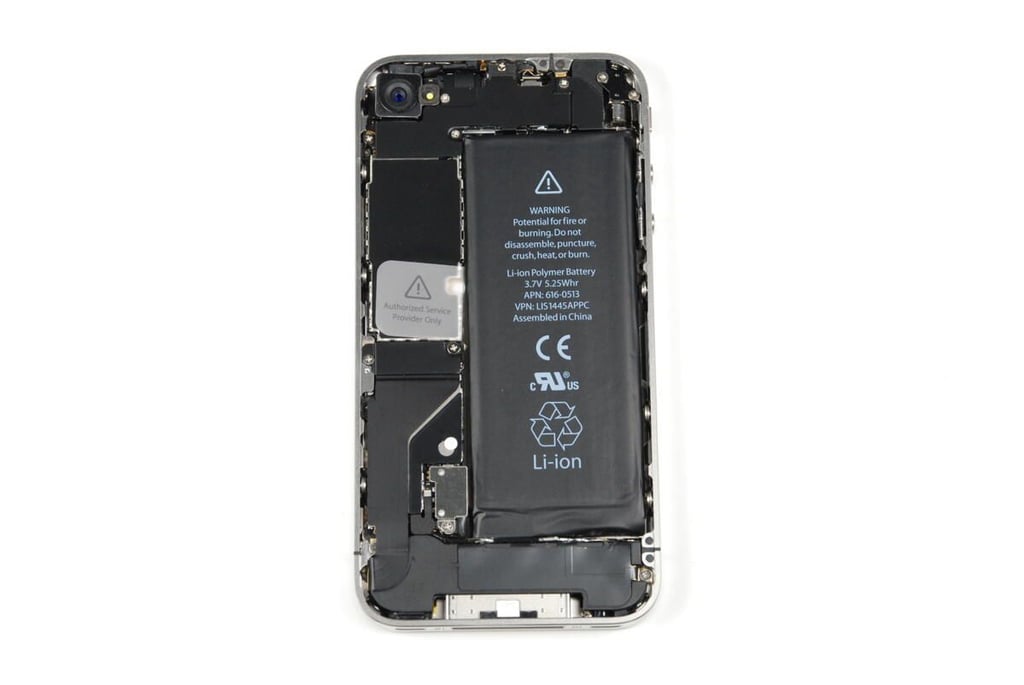
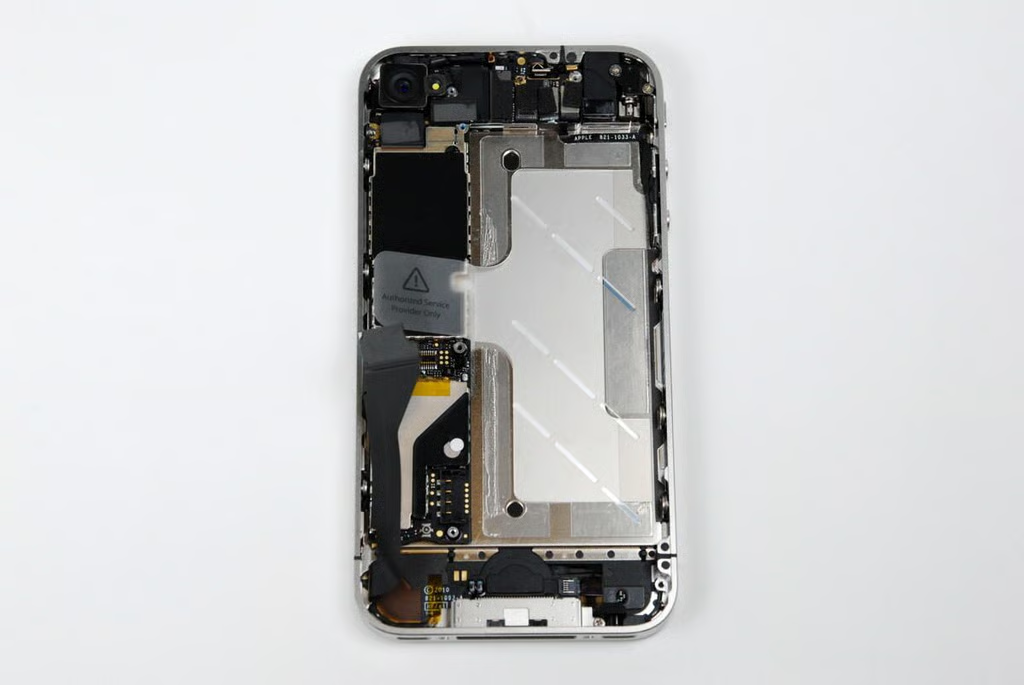
Even with just the back cover removed, we can see much of the iPhone 4’s impressive hardware. In the top-right corner is the vibration motor, in the top-left corner is the rear-facing camera, to the left of the battery is the part of the logic board, and at the bottom is the lower antenna/speaker assembly.
Photo credit: Bill Detwiler / TechRepublic

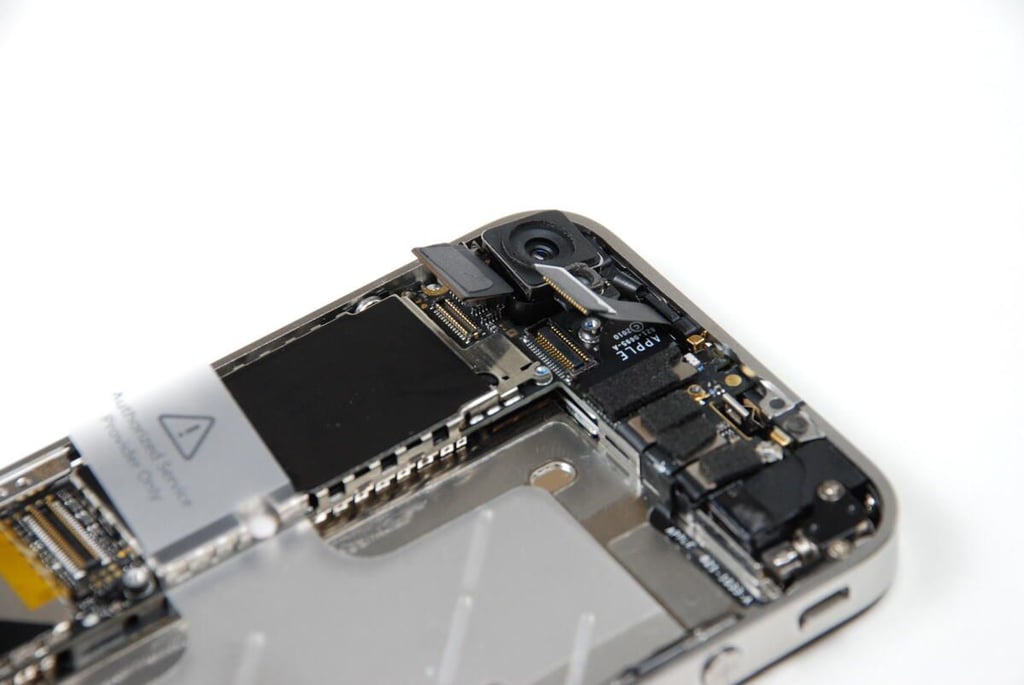
At the top of the iPhone 4, we can see the rear-facing camera. Below the camera is a black EMI shield that covers several connectors on the main logic board. In the top right corner is the small, silver vibration motor.
Photo credit: Bill Detwiler / TechRepublic
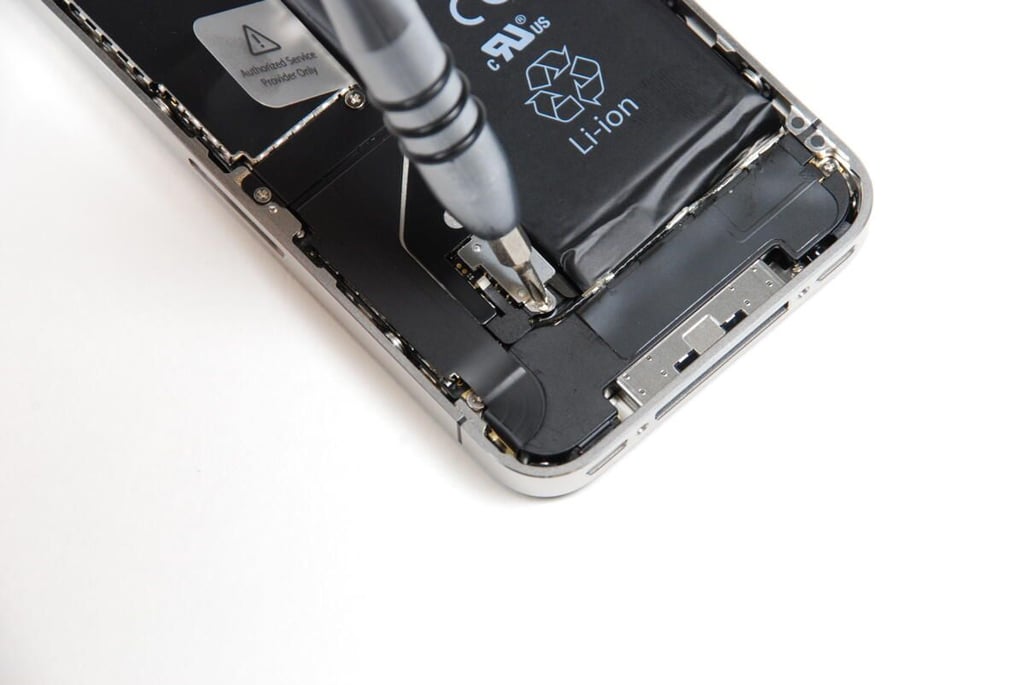
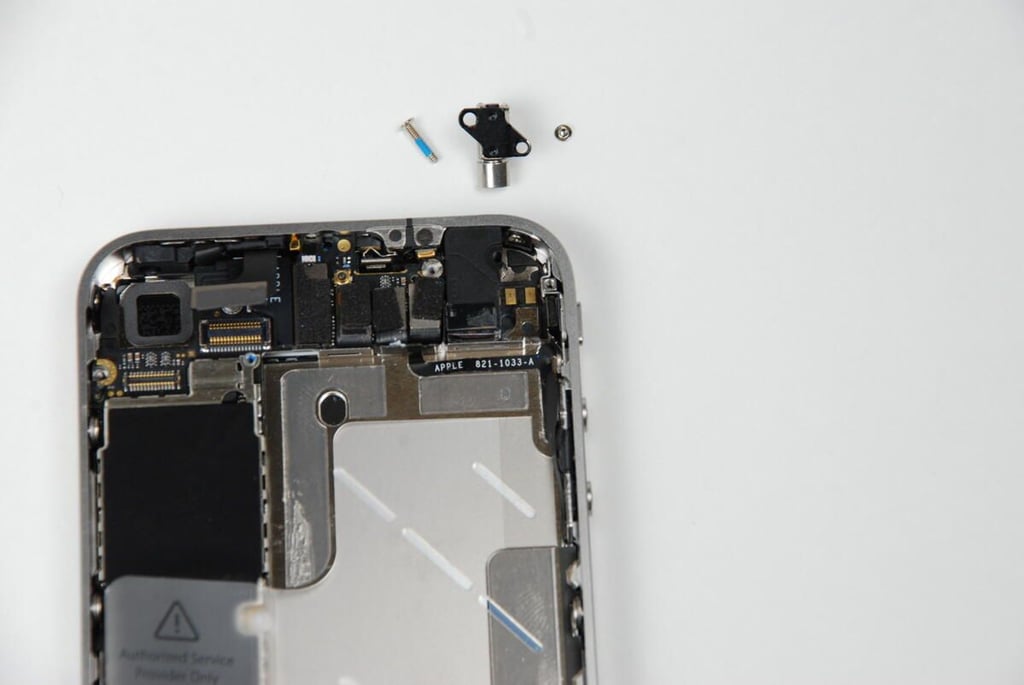
Before we can remove the battery, we need to remove this Phillips screw holding the battery connector in place.
Photo credit: Bill Detwiler / TechRepublic
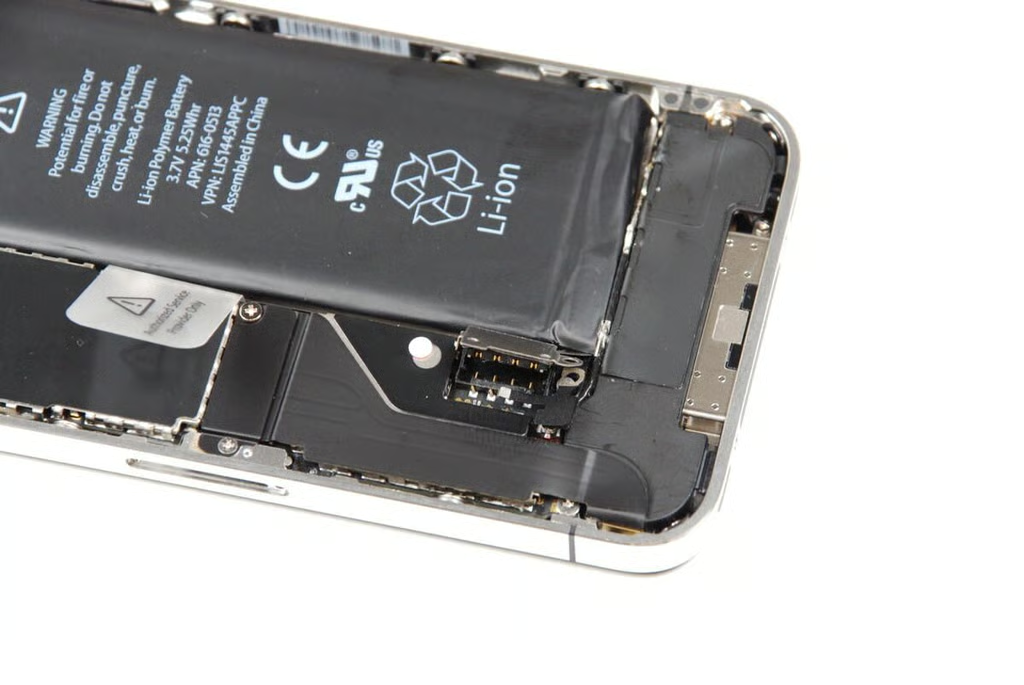
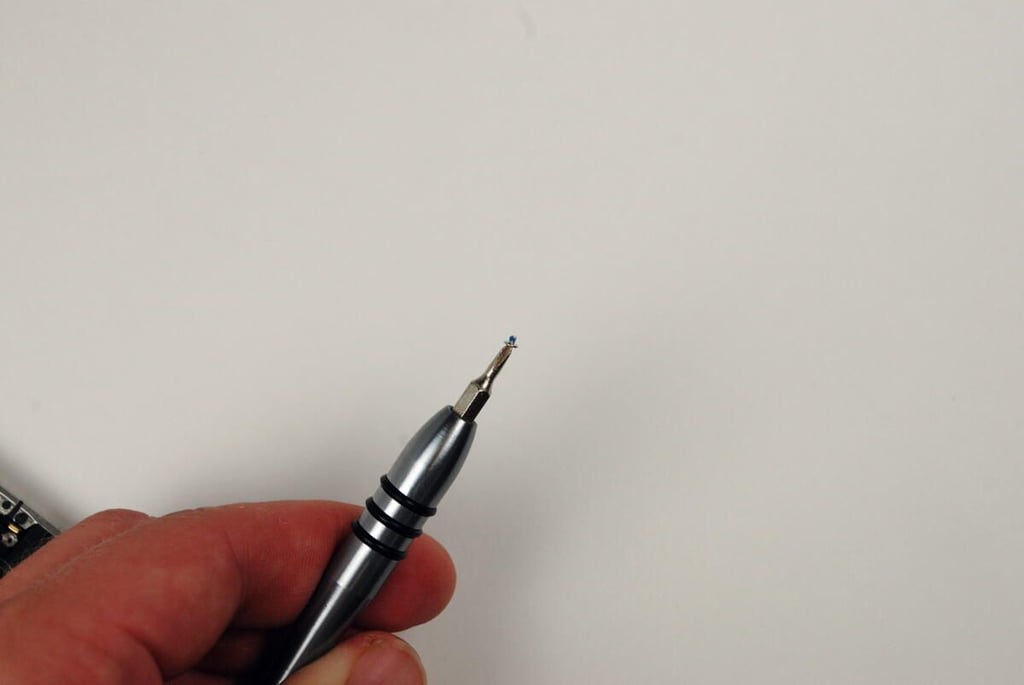
The iPhone 4’s battery connector is different than the iPhone 3G and iPhone 3G S. The connector’s screw also hold a tiny pressure contact in place.
Photo credit: Bill Detwiler / TechRepublic
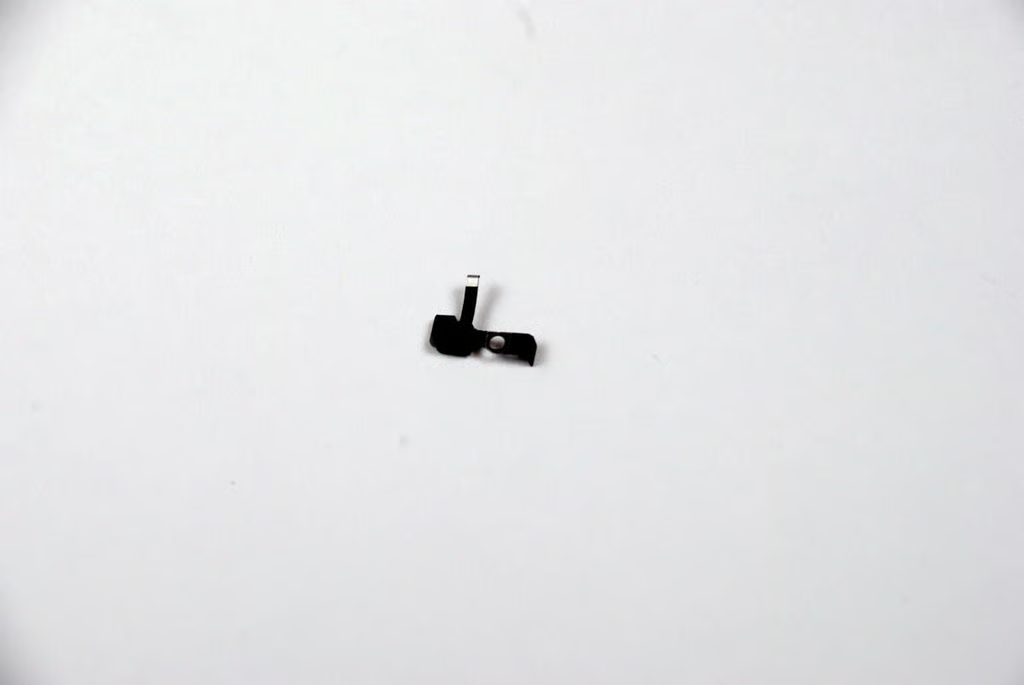
This connect touches the iPhone’s back cover when it is closed. This appears to be the contact for an antenna that is attached to the back cover.
Photo credit: Bill Detwiler / TechRepublic
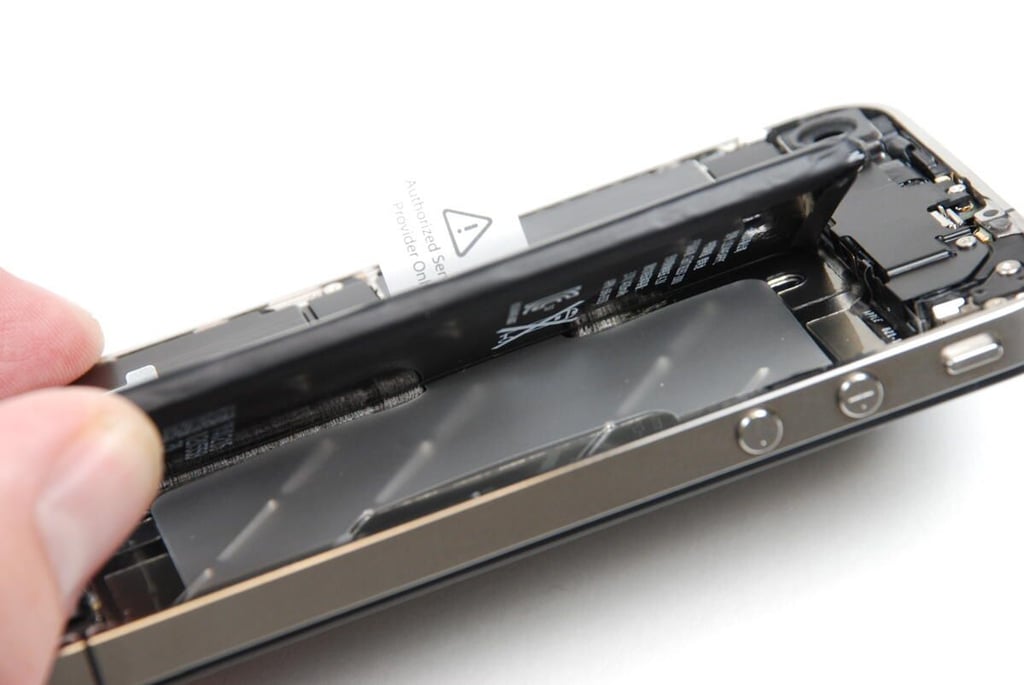
Luckily, Apple used a minimal amount of adhesive to hold the battery to the iPhone 4’s metal case.
Photo credit: Bill Detwiler / TechRepublic
Gently lifting up on the iPhone 4’s battery should separate it from the case.
Photo credit: Bill Detwiler / TechRepublic
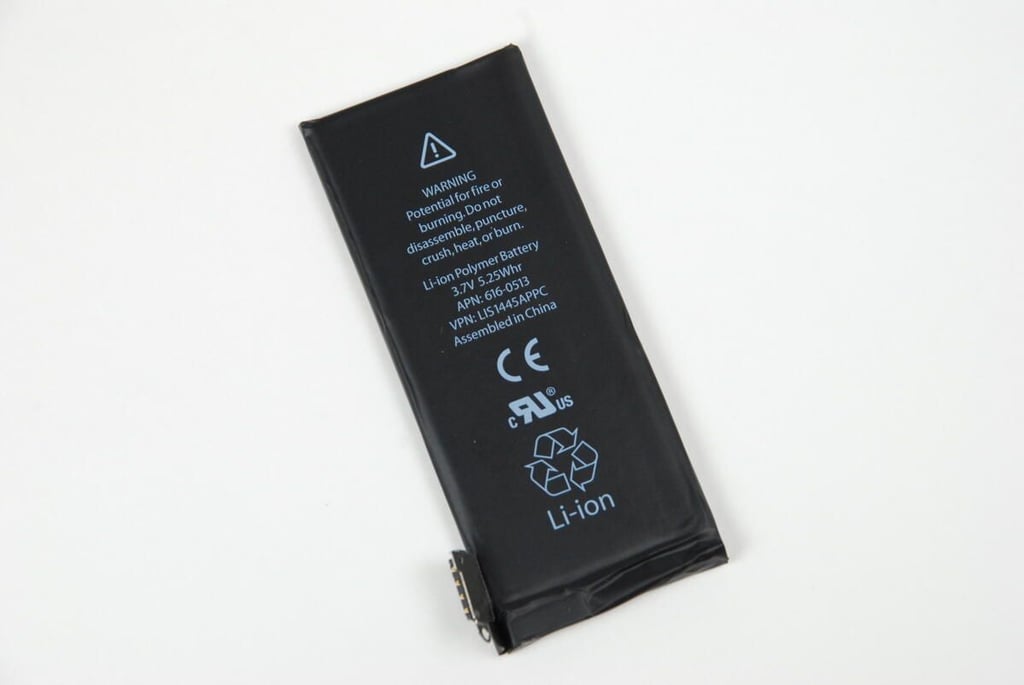
Photo credit: Bill Detwiler / TechRepublic
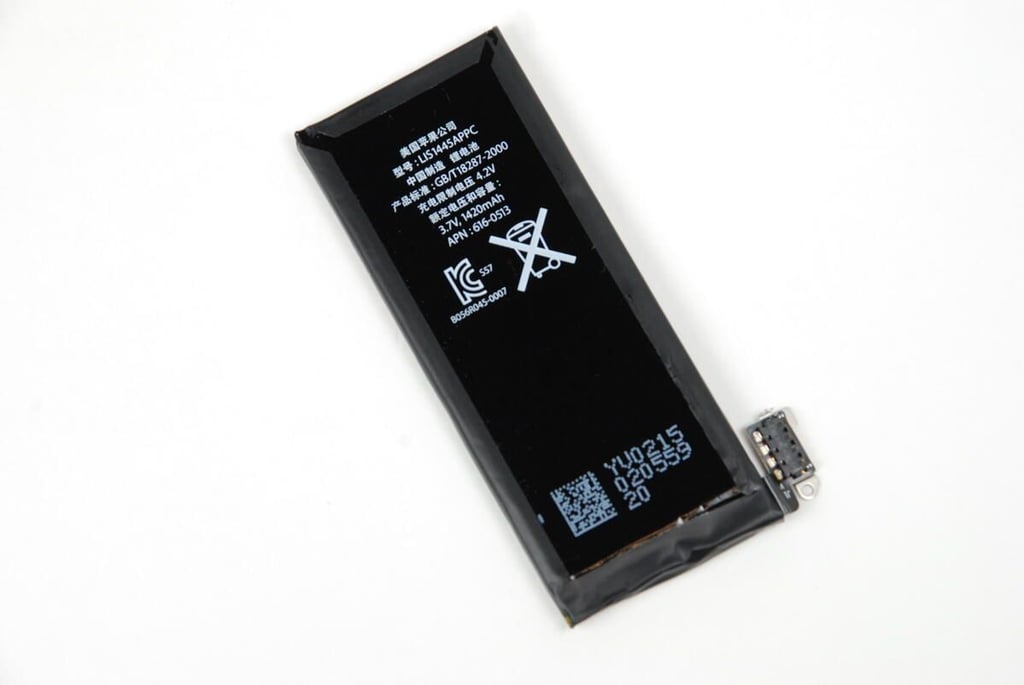
Photo credit: Bill Detwiler / TechRepublic
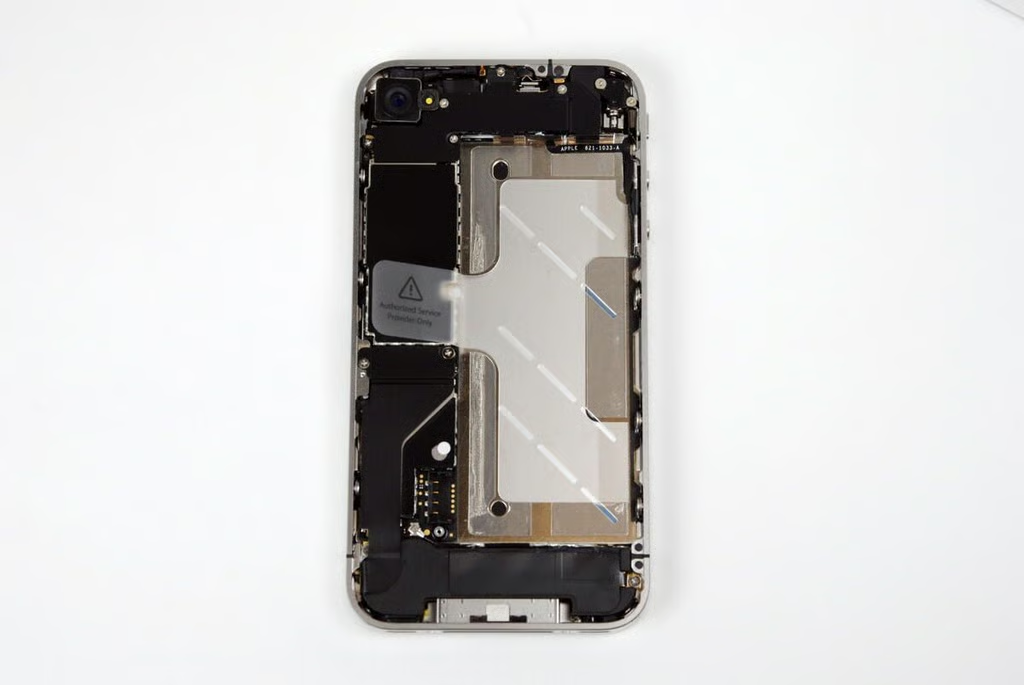
Photo credit: Bill Detwiler / TechRepublic

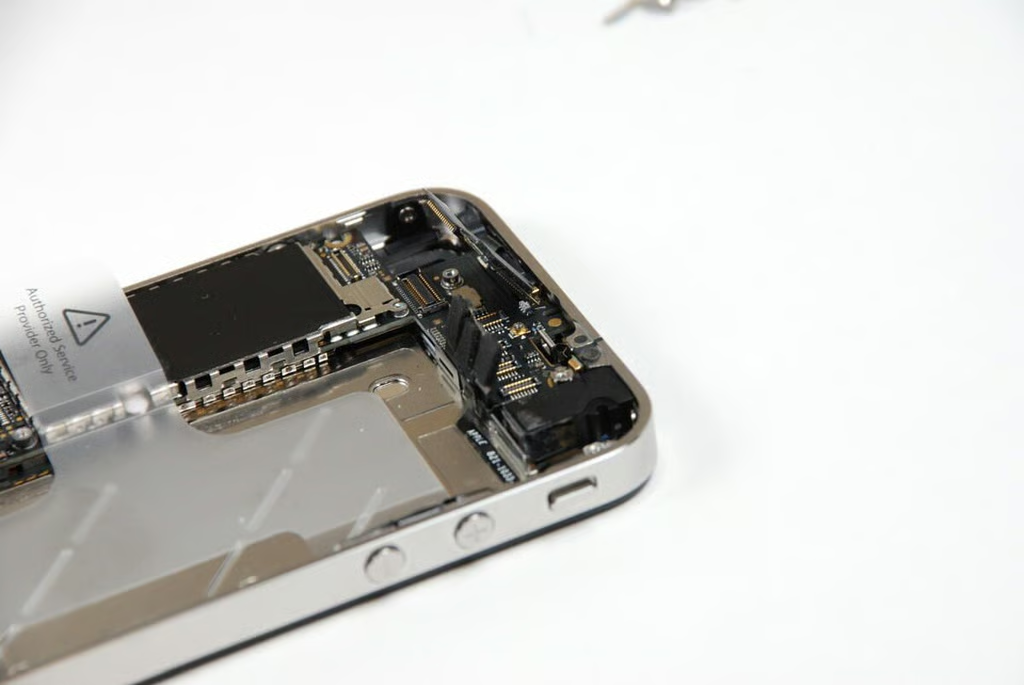
Moving to the top of the iPhone 4, we removed the black shield that cover part of the main logic board and several connectors. There are five screws holding the shield in place.
Photo credit: Bill Detwiler / TechRepublic
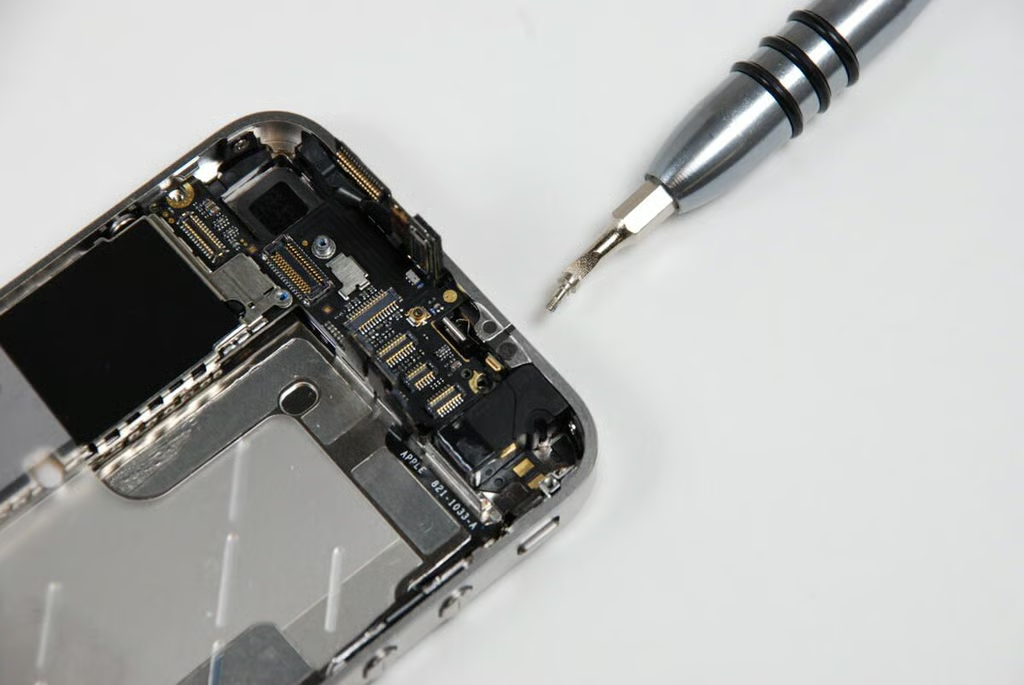
Under the upper shield, there are several connectors on the main logic board.
Photo credit: Bill Detwiler / TechRepublic
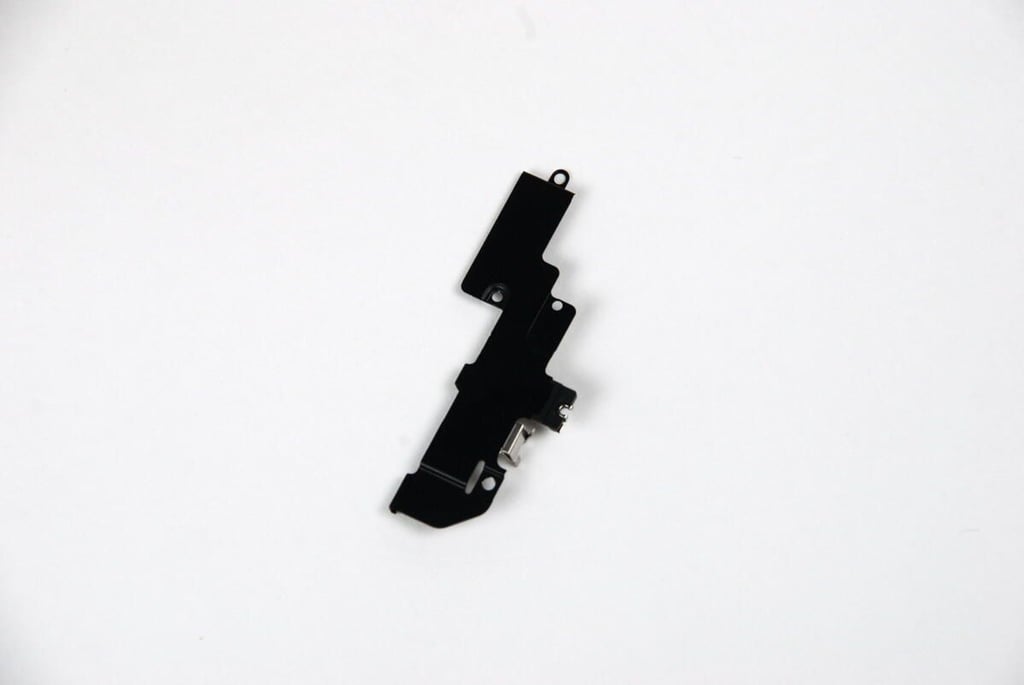
Photo credit: Bill Detwiler / TechRepublic
There is a second, smaller shield on the left side of the iPhone 4.
Photo credit: Bill Detwiler / TechRepublic
The black shield is held in place with two Phillips #00 screws.
Photo credit: Bill Detwiler / TechRepublic
Removing the second shield reveals another connector on the logic board.
Photo credit: Bill Detwiler / TechRepublic
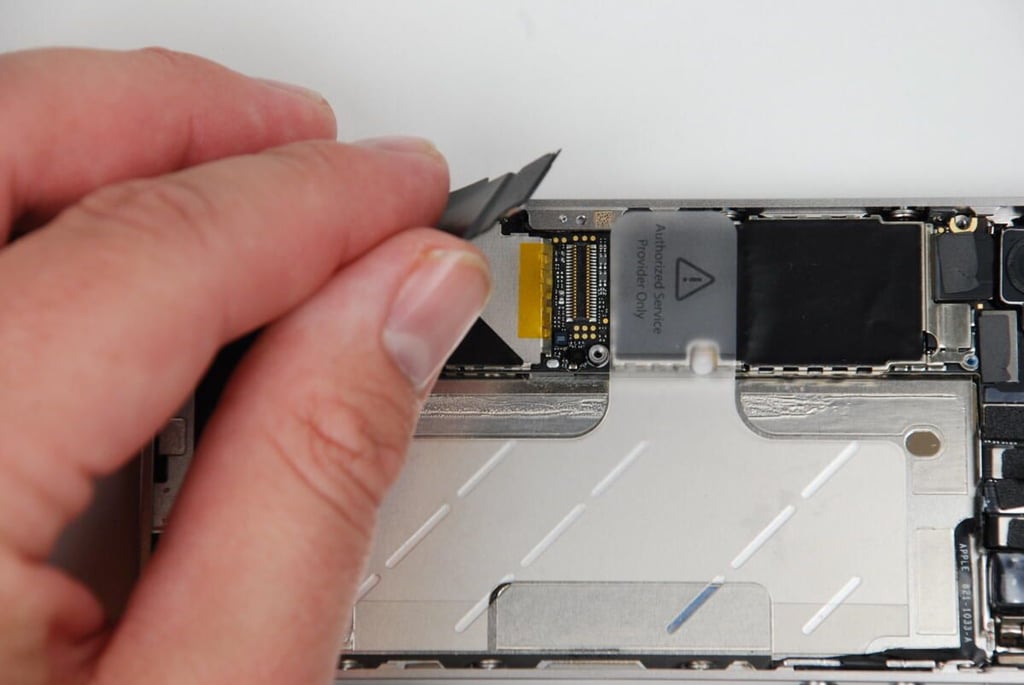
This large connector links components at the bottom of the iPhone 4 to the main logic board.
Photo credit: Bill Detwiler / TechRepublic
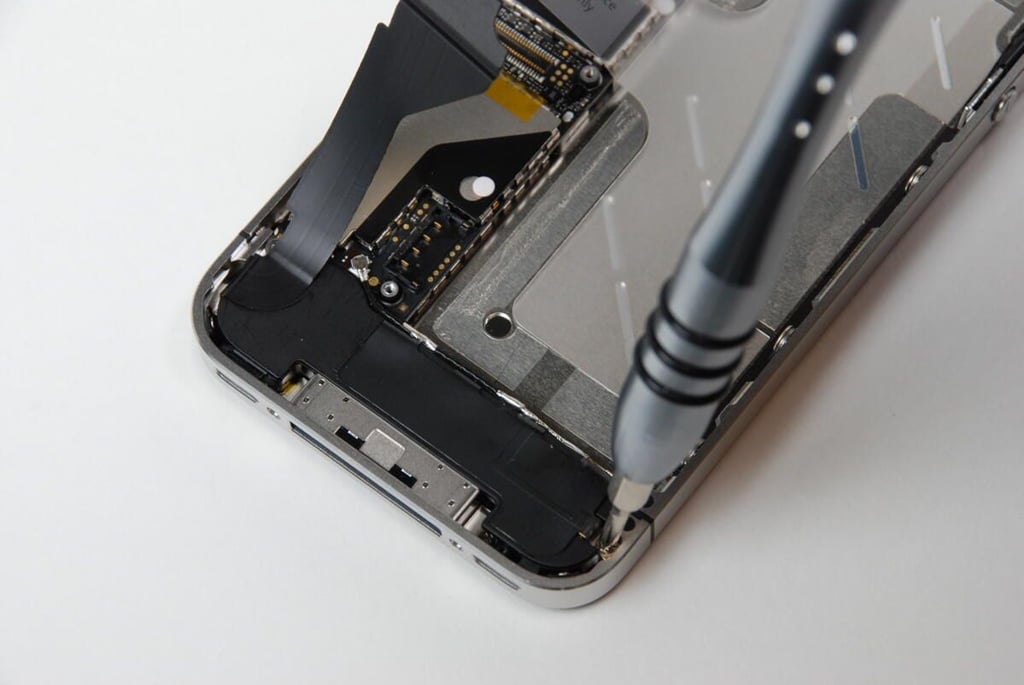
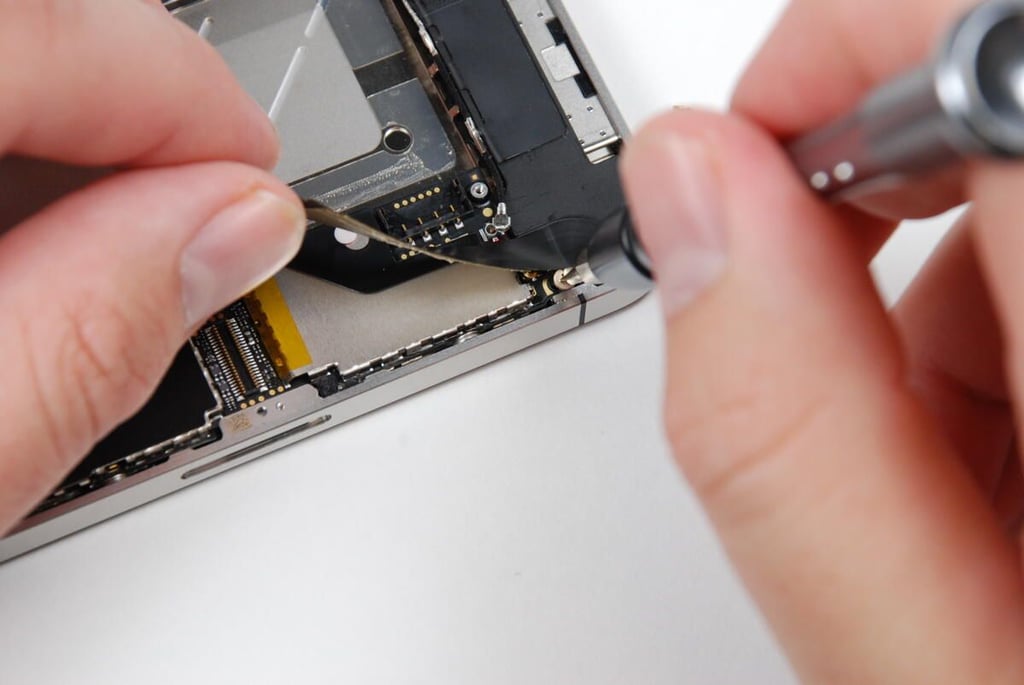
The iPhone 4’s lower antenna/speaker assembly is held in place by two screws. the right-side screws is easily accessible.
Photo credit: Bill Detwiler / TechRepublic
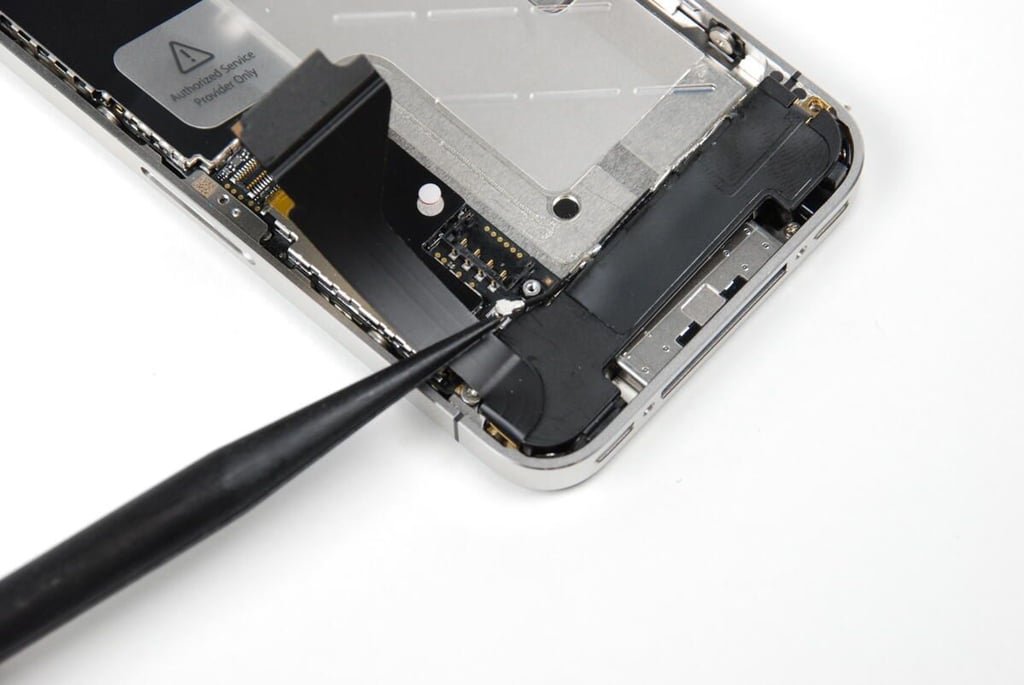
You should be able to disconnect the lower antenna connector by gently prying it upward.
Photo credit: Bill Detwiler / TechRepublic
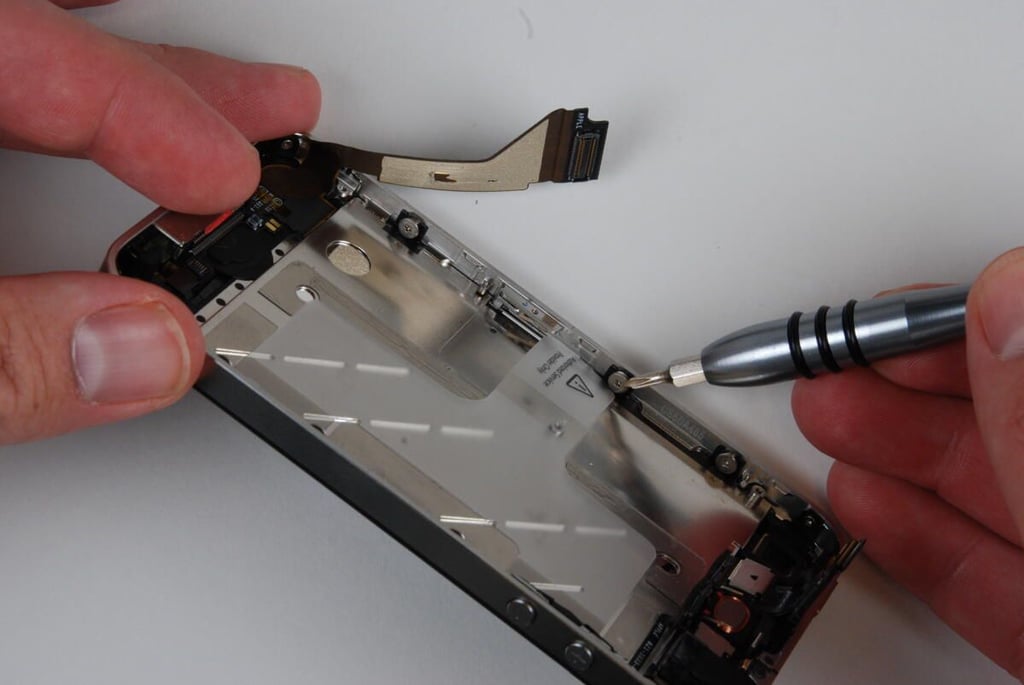
The second screw on the lower antenna/speaker assembly is partially covered by this thin ribbon cable.
Photo credit: Bill Detwiler / TechRepublic
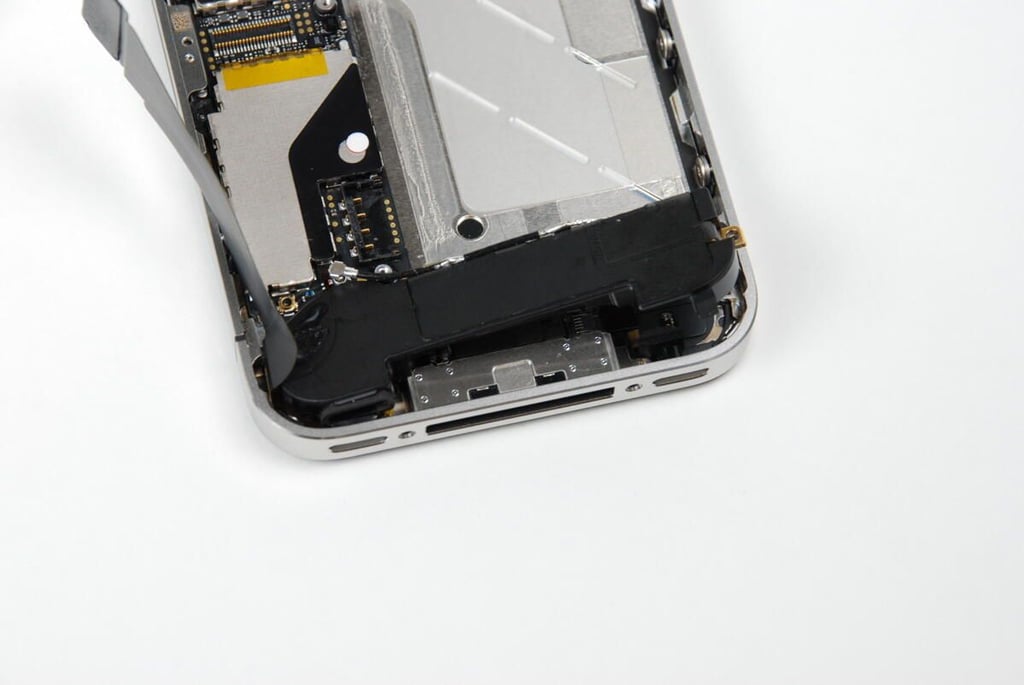
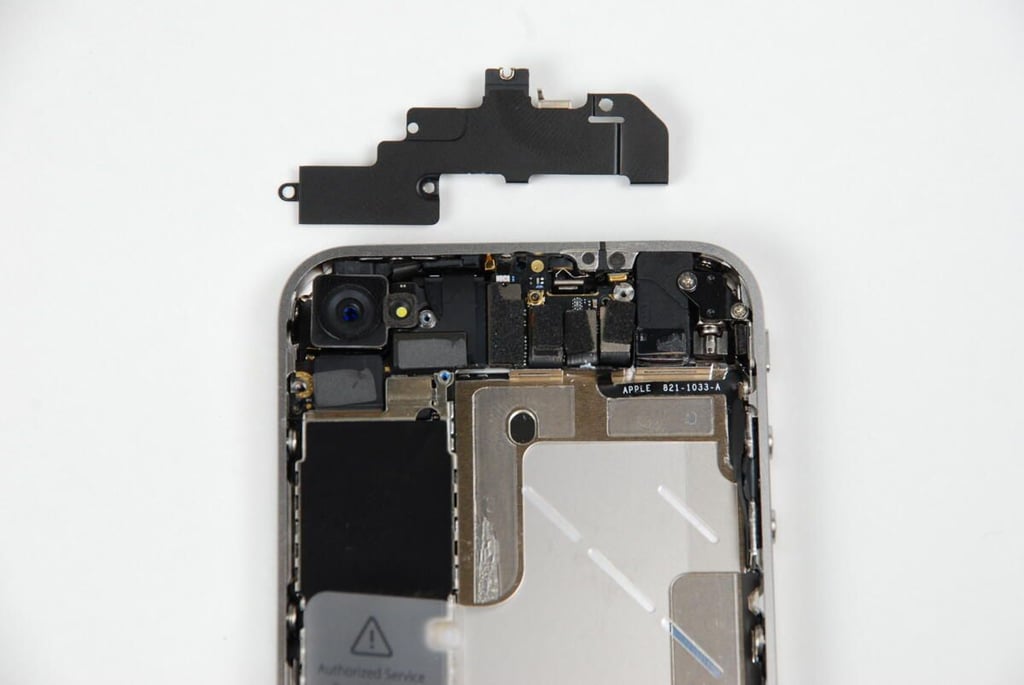
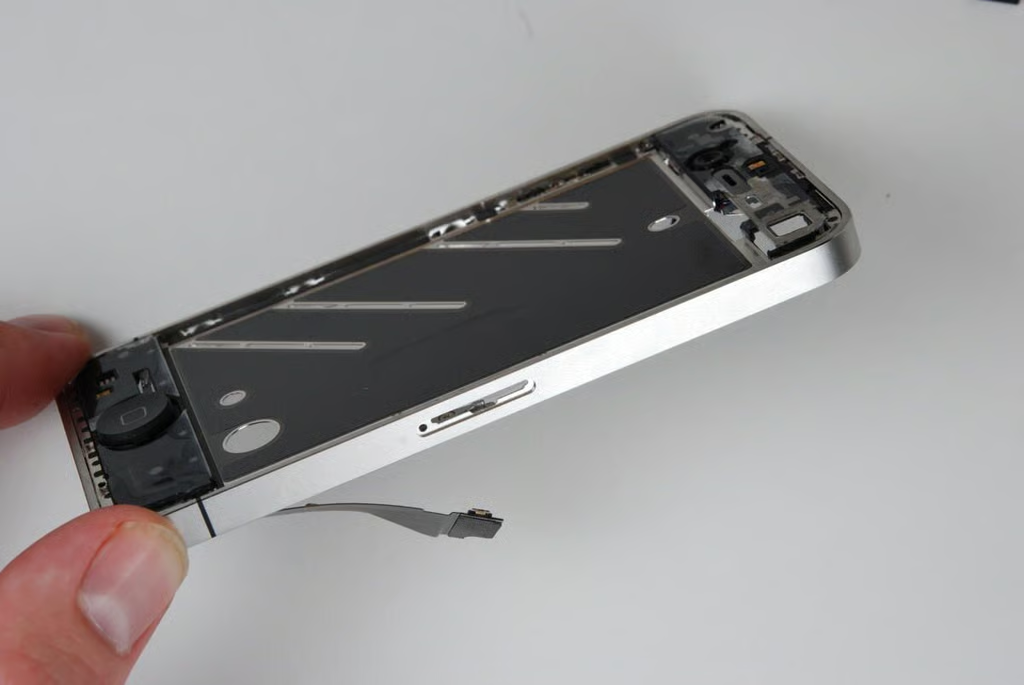
With the two screws removed and the antenna wire disconnected, we can lift the lower antenna/speaker assembly away from the iPhone 4 case.
Photo credit: Bill Detwiler / TechRepublic
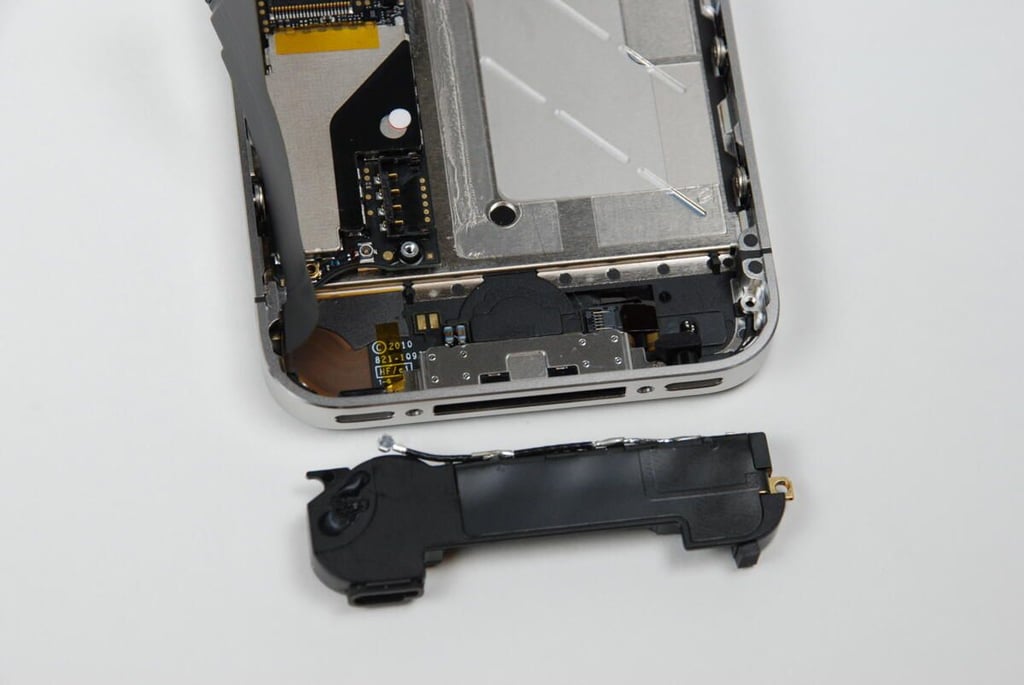
Photo credit: Bill Detwiler / TechRepublic
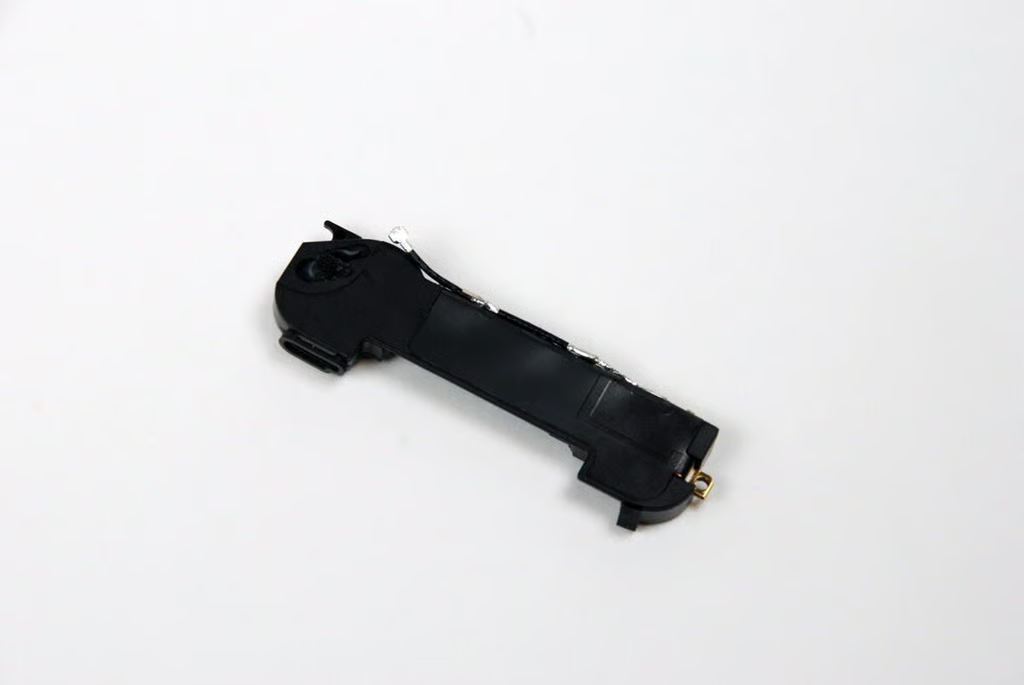
Photo credit: Bill Detwiler / TechRepublic
After removing the lower speaker assembly, it’s time to move back to the top of the iPhone 4 case and remove the rear-facing camera.
Photo credit: Bill Detwiler / TechRepublic
The iPhone 4’s rear-facing camera is connected to the main logic board by a single connector, which should pop free with little force.
Photo credit: Bill Detwiler / TechRepublic

The iPhone 4’s rear-facing 5 MP camera allows you to shoot 720p video at 30 FPS. It also features an LED flash.
Photo credit: Bill Detwiler / TechRepublic

Photo credit: Bill Detwiler / TechRepublic
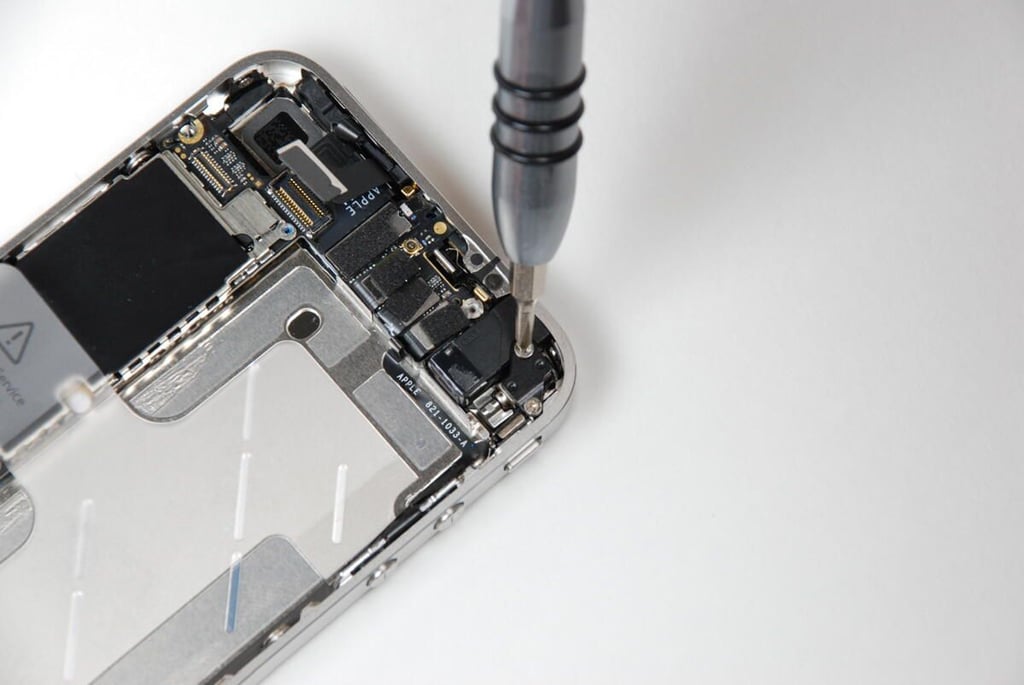
Photo credit: Bill Detwiler / TechRepublic
The iPhone 4’s vibration motor is attached with two Phillips #00 screws.
Photo credit: Bill Detwiler / TechRepublic
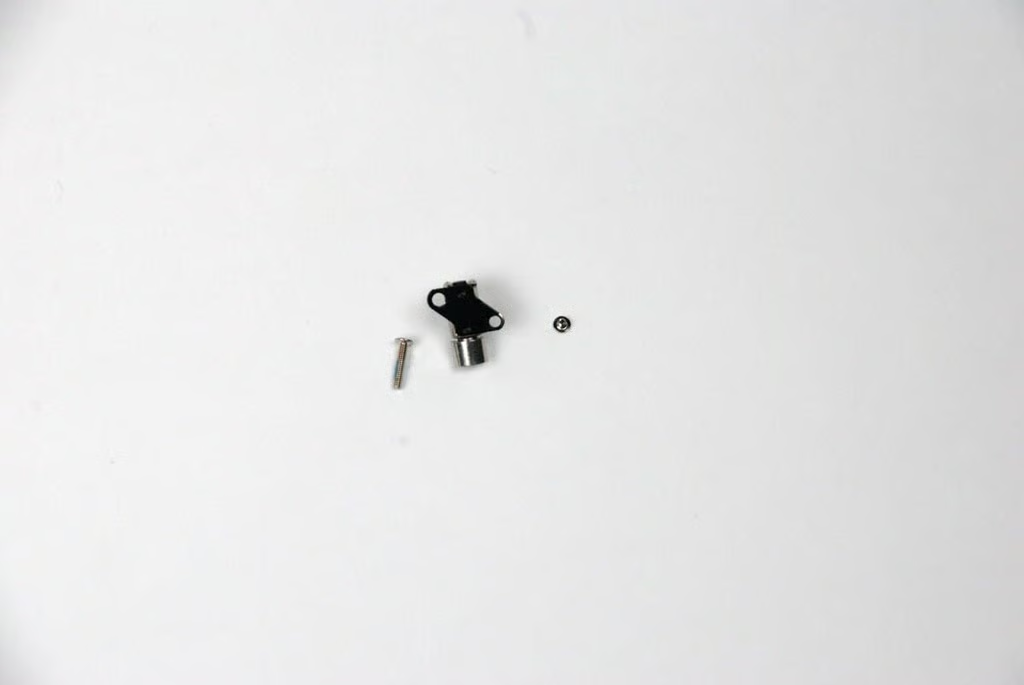
Photo credit: Bill Detwiler / TechRepublic
There are multiple connectors attached to the top of the iPhone 4’s logic board. These should all pop loose with a little effort.
Photo credit: Bill Detwiler / TechRepublic
This screw is probably the largest inside the iPhone 4.
Photo credit: Bill Detwiler / TechRepublic
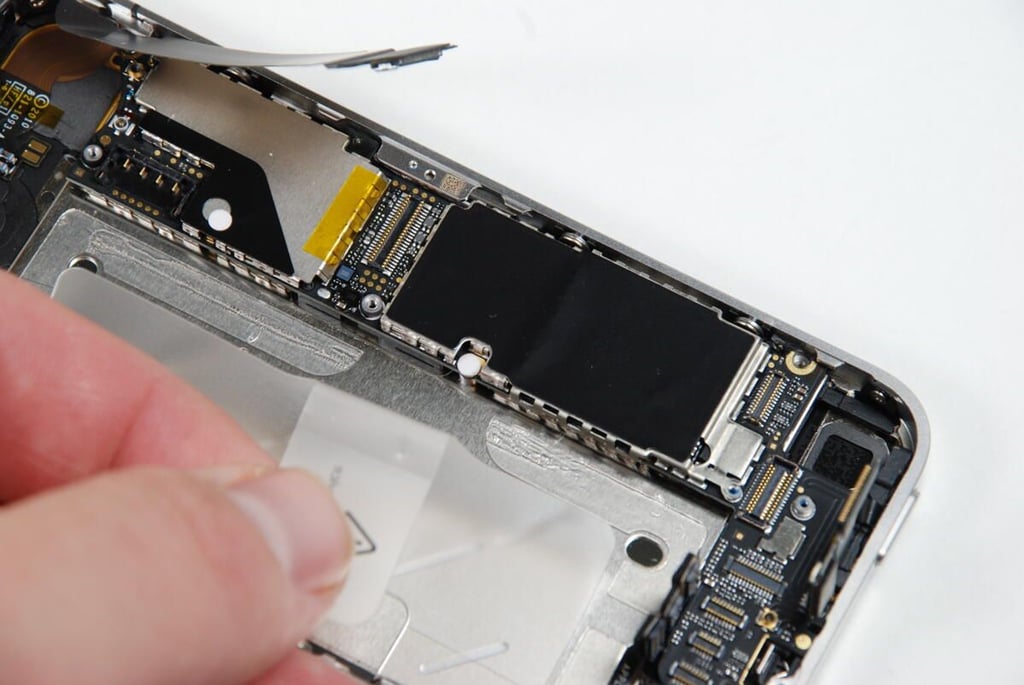
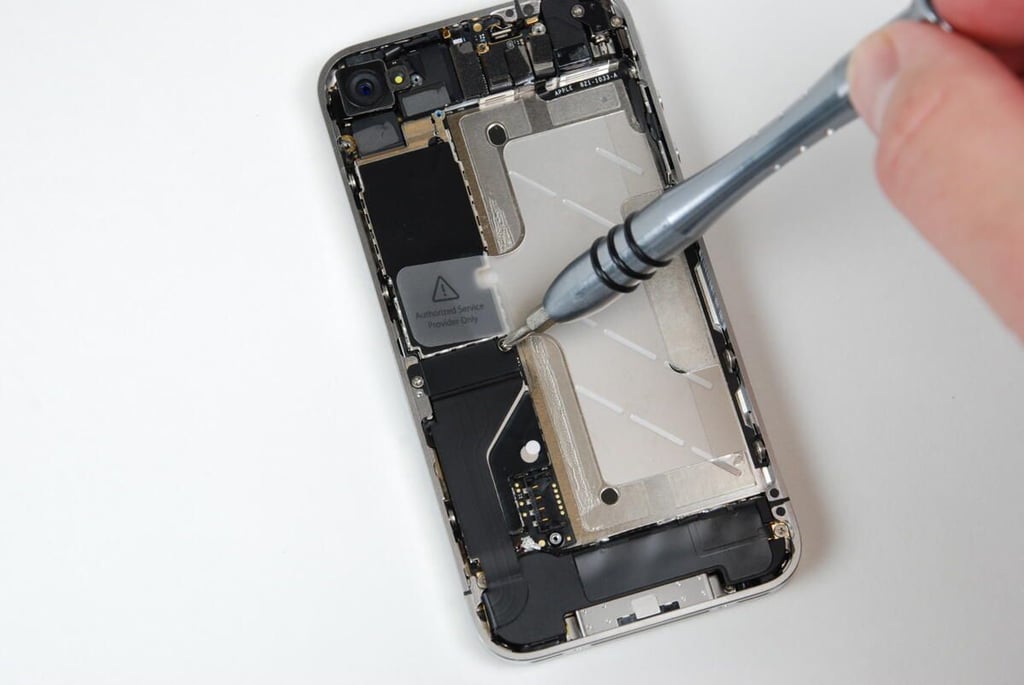
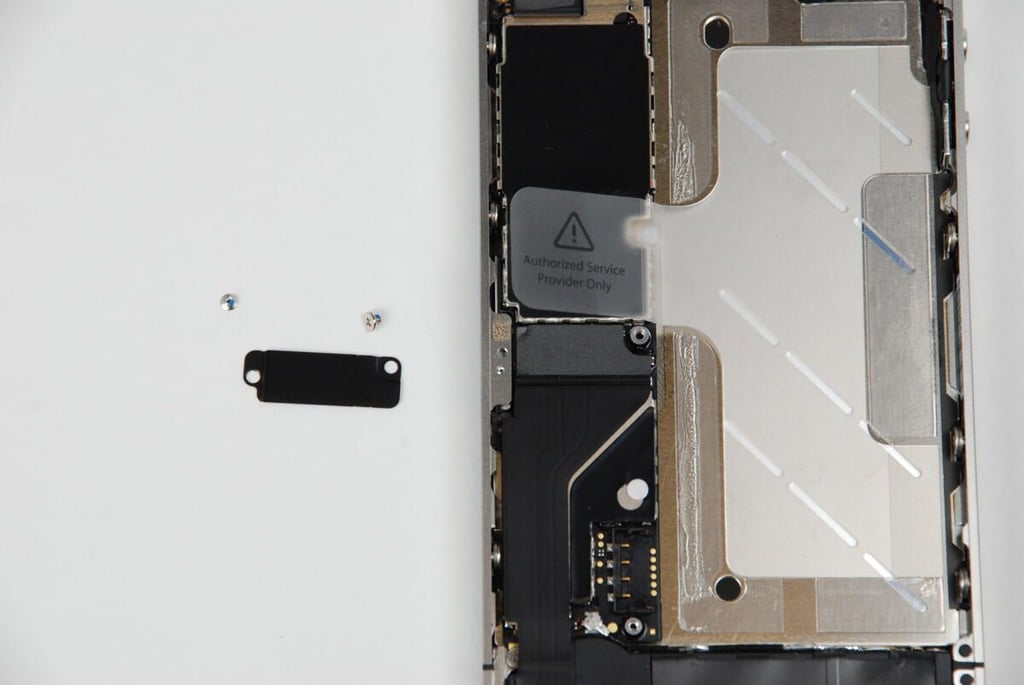
There’s one more screw we must remove before the iPhone 4’s logic board will come away from the case. It is hidden under that small white, circular sticker below the black metal shield.
Photo credit: Bill Detwiler / TechRepublic
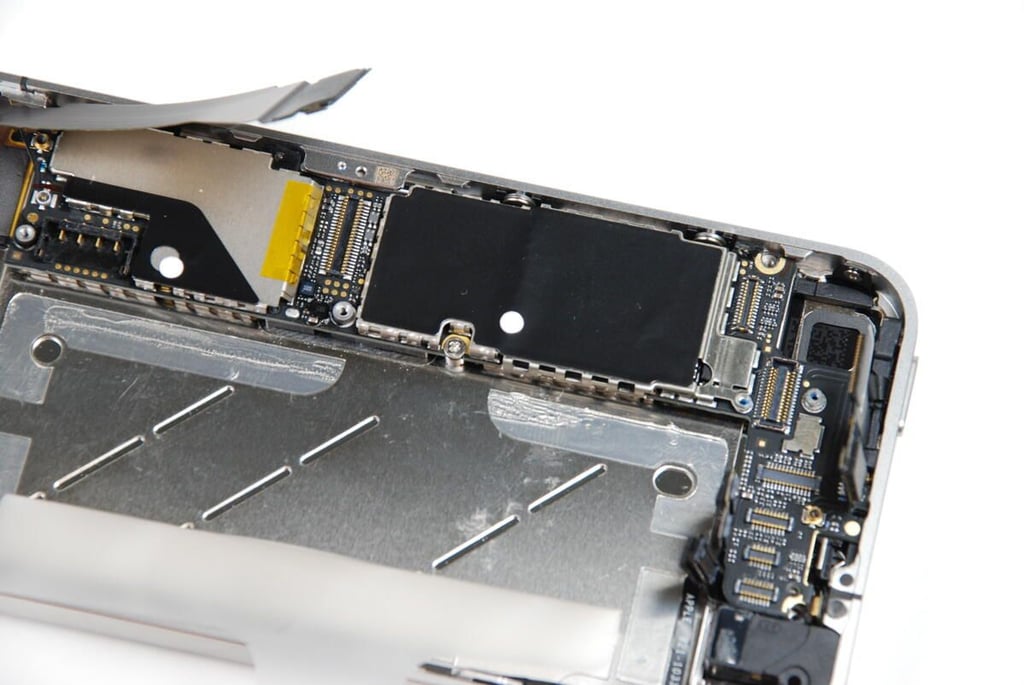
With the sticker removed, the last logic board screws is visible.
Photo credit: Bill Detwiler / TechRepublic

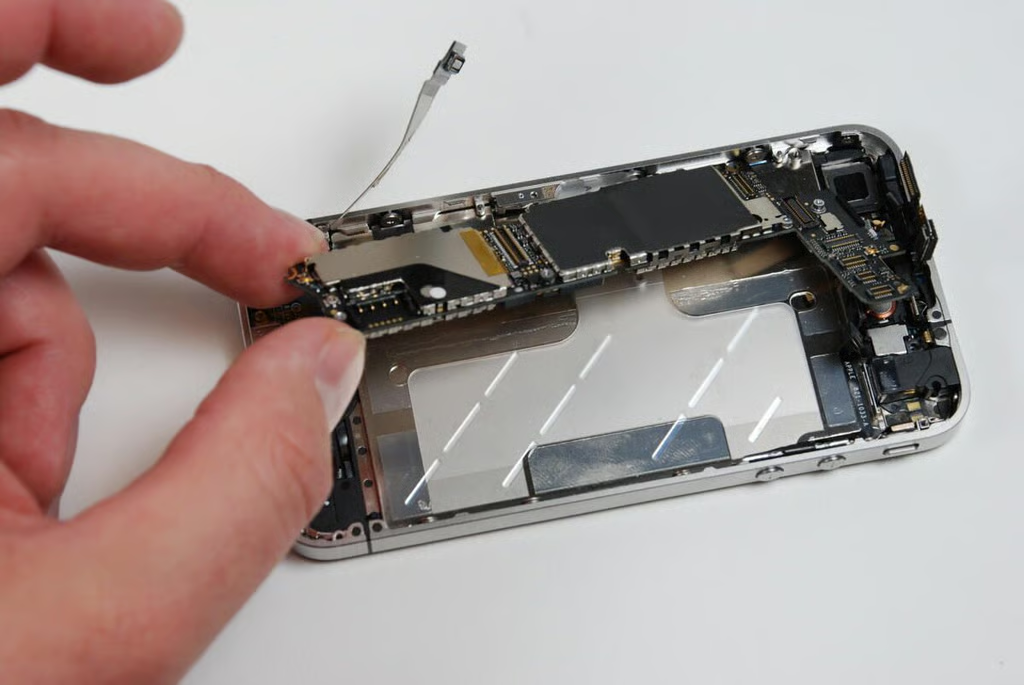
Using a Phillips #00 screwdriver, we can remove the final screw holding the iPhone 4 logic board in place.
Photo credit: Bill Detwiler / TechRepublic

On the back of the iPhone 4’s logic board (the side that faces the back of the phone), we find two large shields (one black and one silver) and at least 10 connectors.
Photo credit: Bill Detwiler / TechRepublic
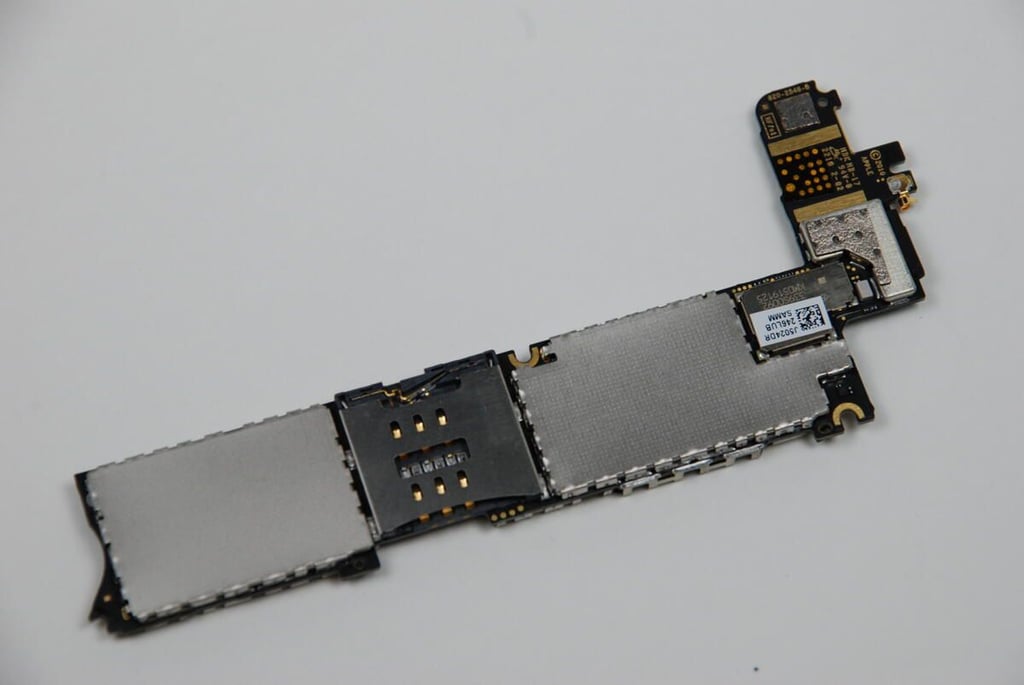
On the front of the iPhone 4’s logic board, we again find two shields covering all the chips. We’ll need to remove those to see the processor and other chips. The iPhone 4’s microSIM card slot is also located in the center of the logic board’s front side.
Photo credit: Bill Detwiler / TechRepublic
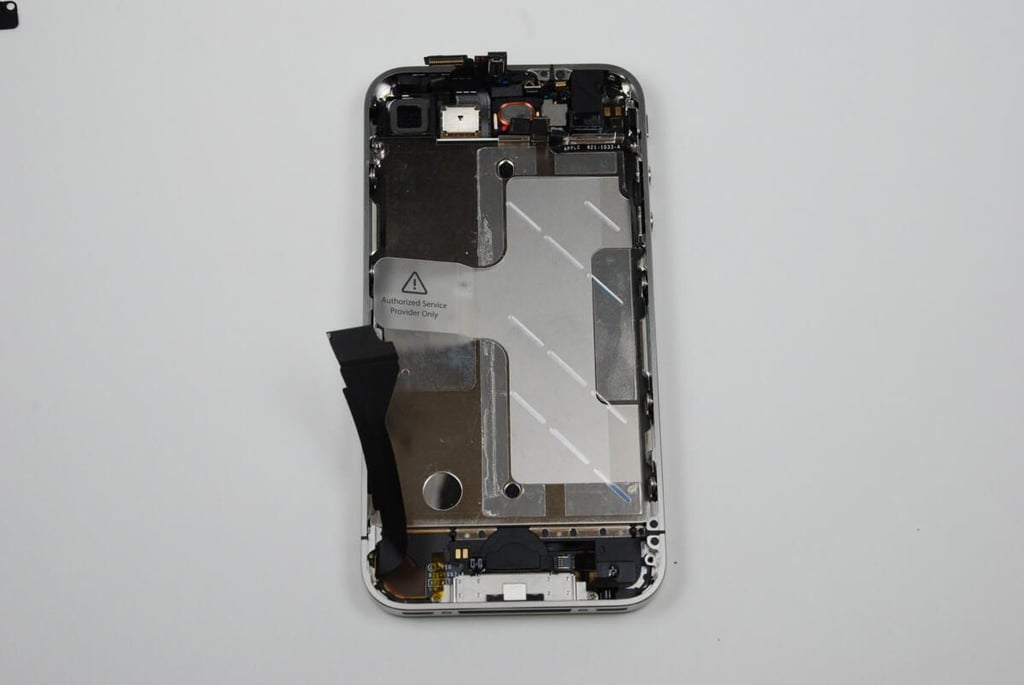
With the battery, logic board, lower antenna/speaker, rear-facing camera, and vibration motor removed, there’s not much left on the back side of the iPhone 4’s metal case.
Photo credit: Bill Detwiler / TechRepublic
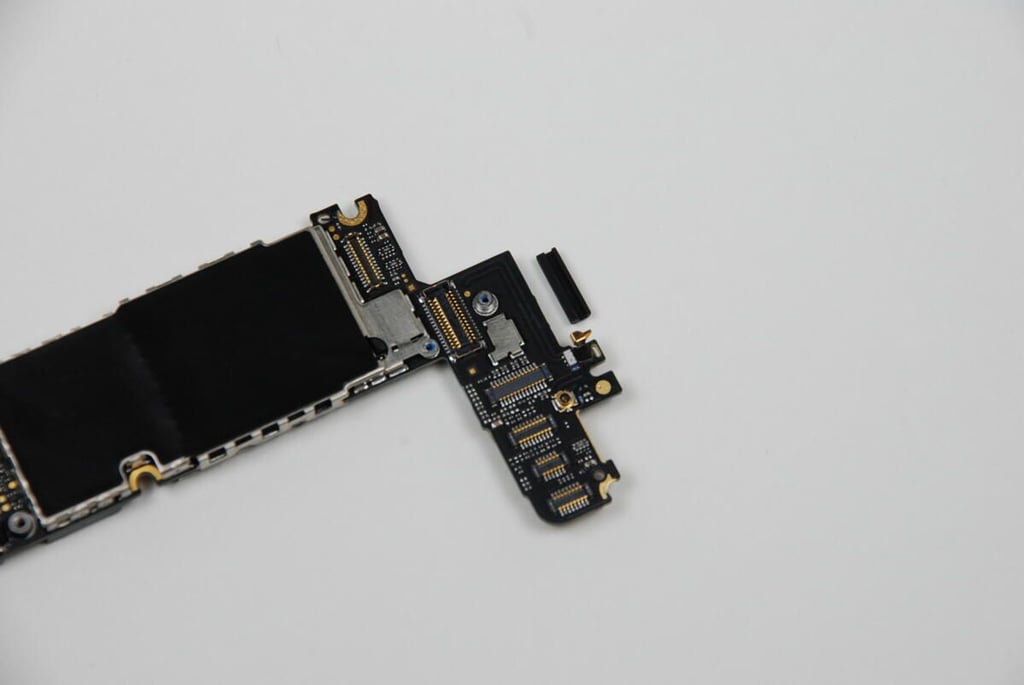
There is a small rubber bumper affixed to the top of the iPhone 4’s logic board. You’ll want to make you don’t lose this when you’re taking the iPhone 4 apart.
Photo credit: Bill Detwiler / TechRepublic
With the two metal shields removed from the top of the iPhone 4 logic board, we get our first look at the main iPhone 4 chips. Two molded rubber cushions cover the chips on the left of logic board.
Photo credit: Bill Detwiler / TechRepublic
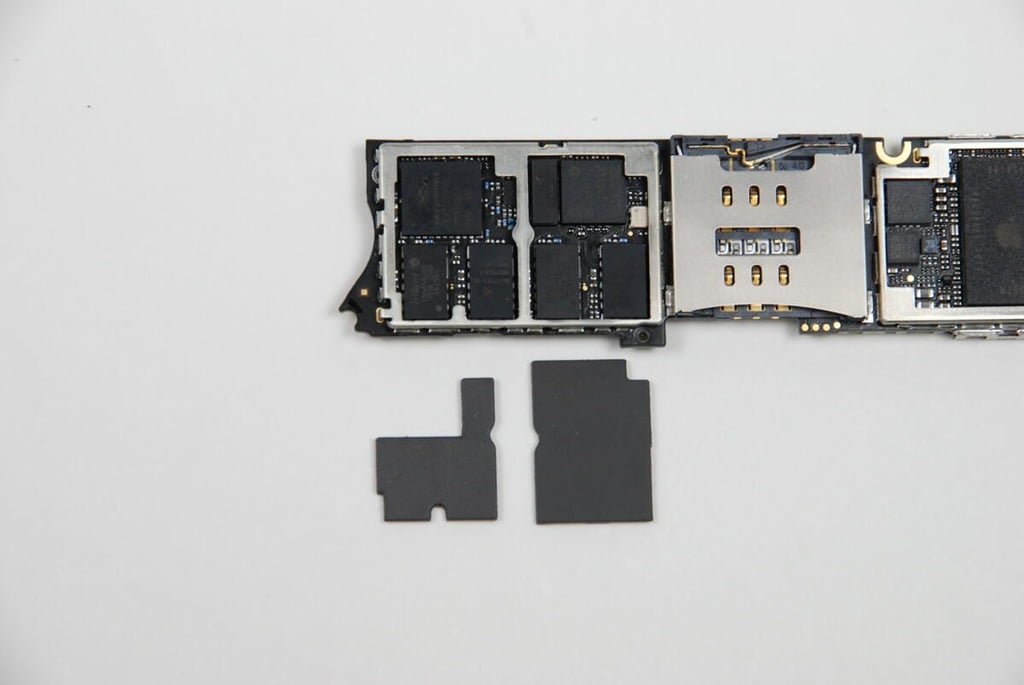
With the cushions removed, we can see the chips underneath.
Photo credit: Bill Detwiler / TechRepublic

Photo credit: Bill Detwiler / TechRepublic

Beneath the large black shield, you’ll find the Samsung flash memory module, Cirrus Logic audio codec, AKM8975 magnetic sensor, and Texas Instruments touch screen Controller. As this shield is soldered to the logic board at several points, I’m going to leave it in place. I want this phone to work when I put it back together.
Photo credit: Bill Detwiler / TechRepublic
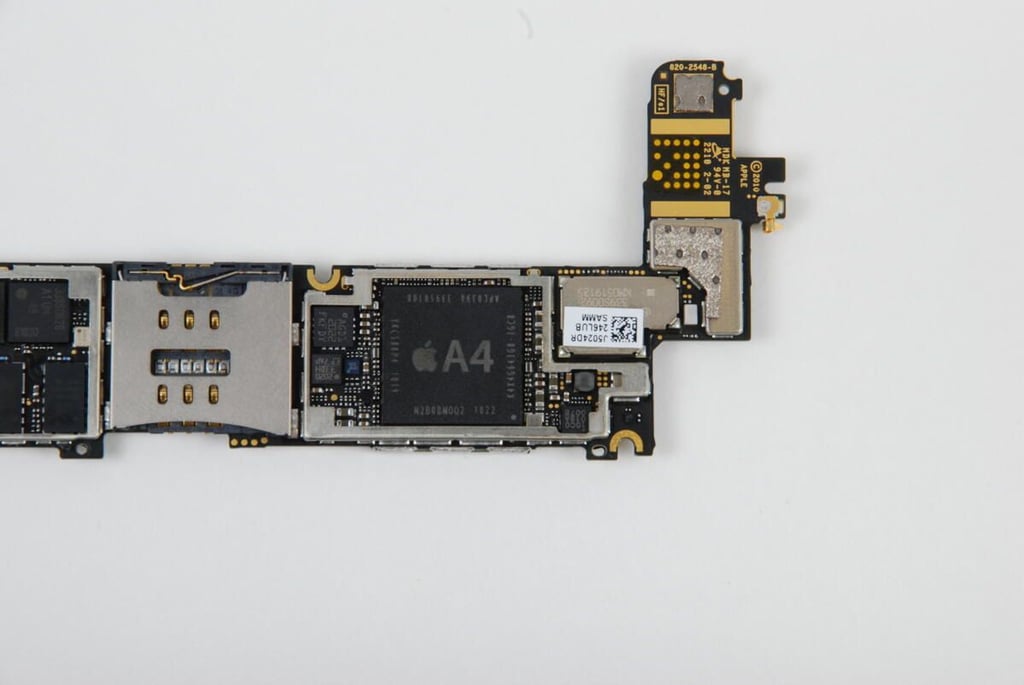
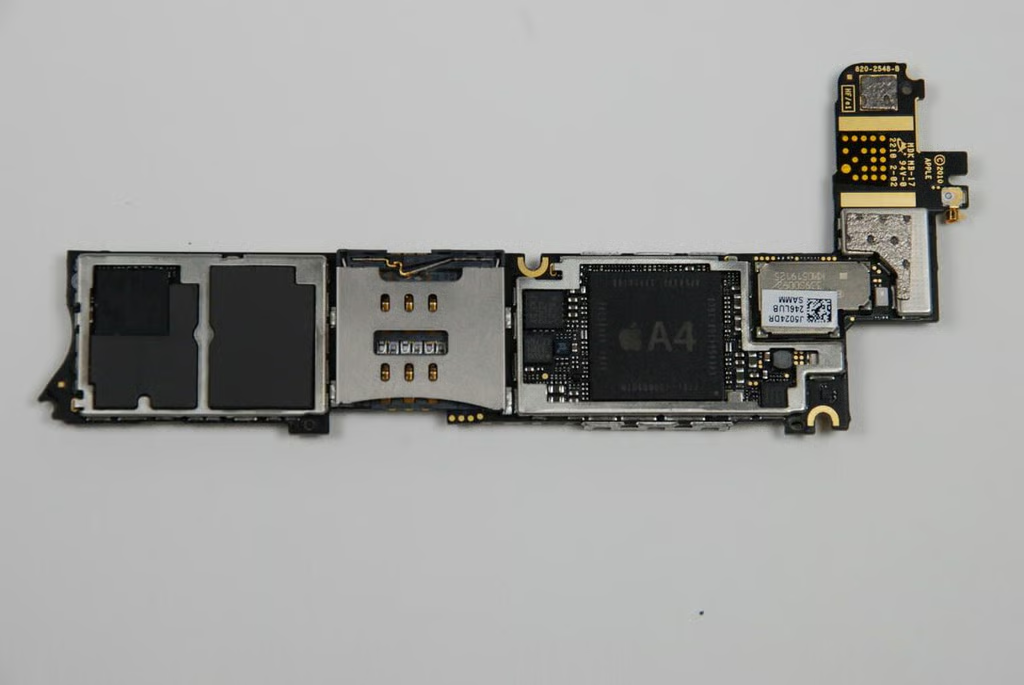
Like the iPad and iPad 3G, the iPhone 4 uses the Apple A4 processor, manufactured by Samsung.
The markings on the chip are:
A4
APL0398 33950108
YKC588P4 1019
N2B0BMOO2 1022
K4X4G643G8 1GC8
To the left of the A4 is a chip labeled AGD1. This chip is believed to be a 3-axis digital gyroscope manufactured for Apple by STMicroelectronics.
To the right of the A4 chips, under a small EMI shield are the Broadcom 802.11n with Bluetooth 2.1 + EDR and FM receiver and the Broadcom GPS receiver. This shield appeared to be soldered to the logic board, and I want to put the iPhone 4 back together in working order, I left the shield in place.
Photo credit: Bill Detwiler / TechRepublic
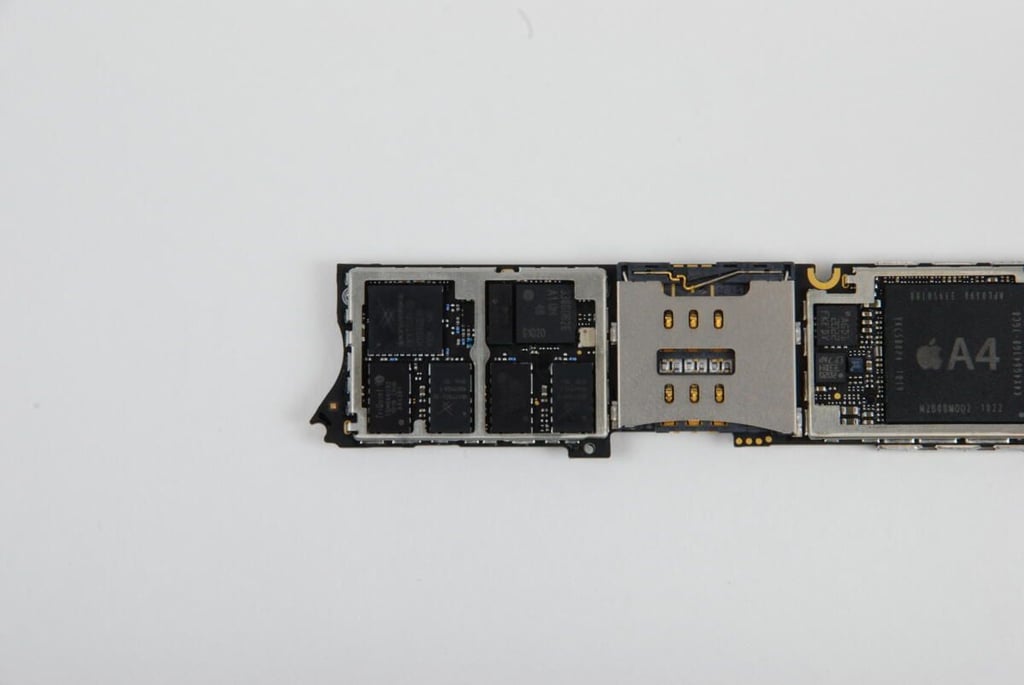
On the left of the iPhone 4’s logic boad (under the two molded rubber cushions), we find several chips with the following markings:
Skyworks SKY77542
Skyworks SKY77541
TriQuint TQM666092 1019 CHIN AR4381
STMicroelectronics STM33DH 3-axis accelerometer
Unknown 338S0626
Photo credit: Bill Detwiler / TechRepublic
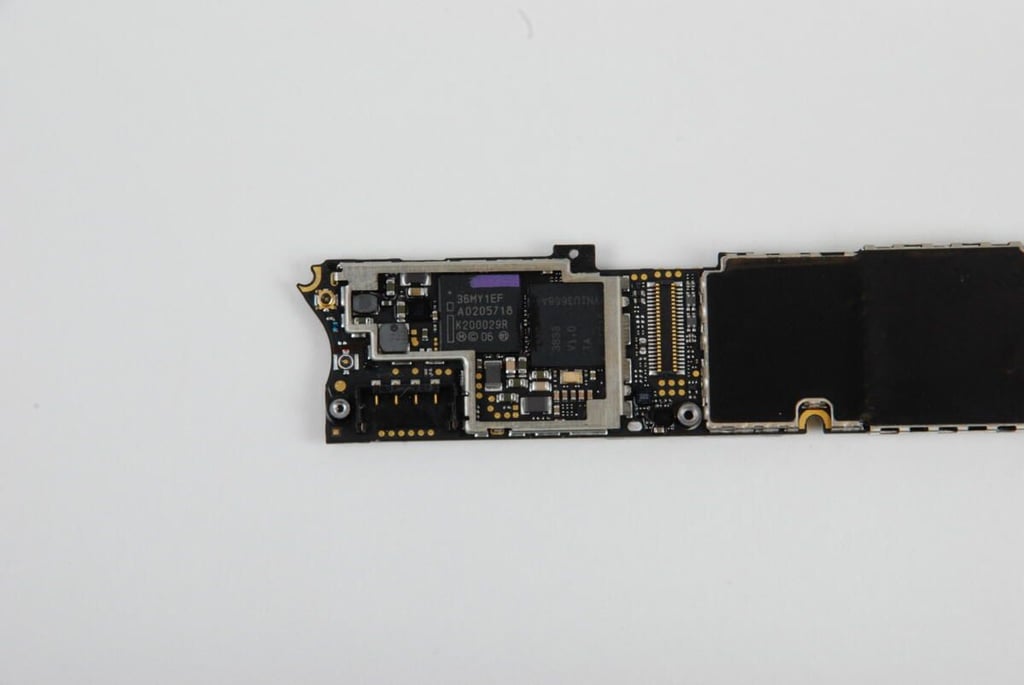
Beneath the silver-colored shield on the back of the iPhone 4 logic board, we find the the Infineon 36MY1EE and an unknown chip to its right.
Photo credit: Bill Detwiler / TechRepublic
With the logic board removed, it’s now time to remove the front panel assembly, which contains the display, home button, and digitizer. To remove the front panel, you must remove 10 screws.
Photo credit: Bill Detwiler / TechRepublic
The front panel assembly is held to the iPhone 4’s metal case with these six, large screws. There are three on each side.
Photo credit: Bill Detwiler / TechRepublic

In addition to the six large screws, there are four smaller screws in each corner.
Photo credit: Bill Detwiler / TechRepublic
When you pull the front panel assembly away from the iPhone 4’s metal case, make sure you do so slowly. You must thread these two connectors through the case in the process.
Photo credit: Bill Detwiler / TechRepublic
With the screws removed, you can gently begin to pry the front panel assembly away from the iPhone 4’s metal case. The front panel will be held on with some adhesive, but should give way without much effort.
Photo credit: Bill Detwiler / TechRepublic
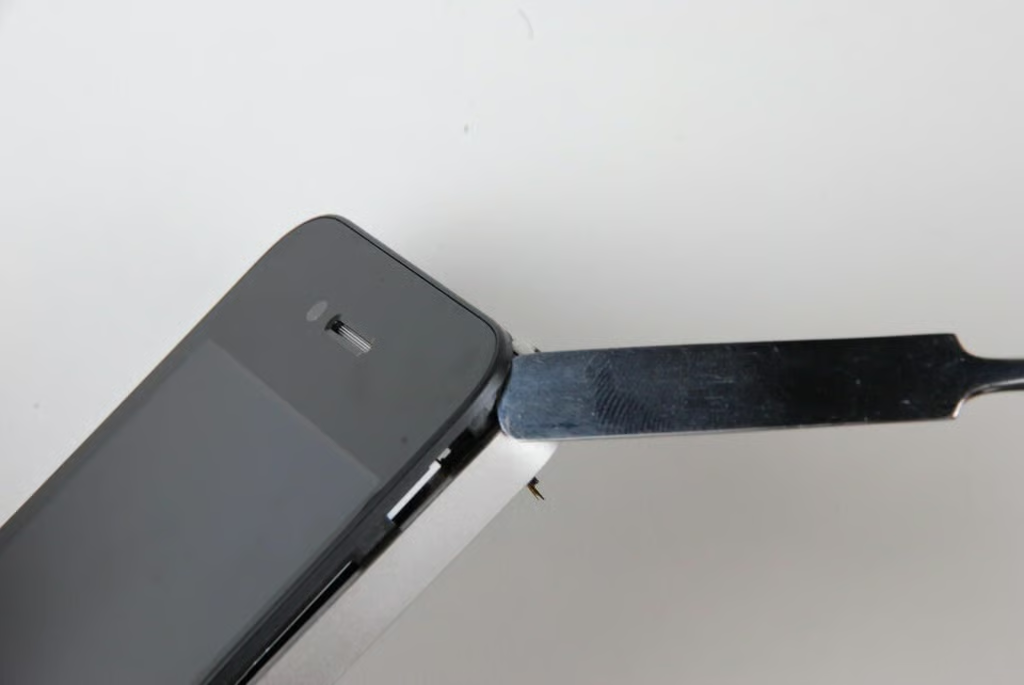
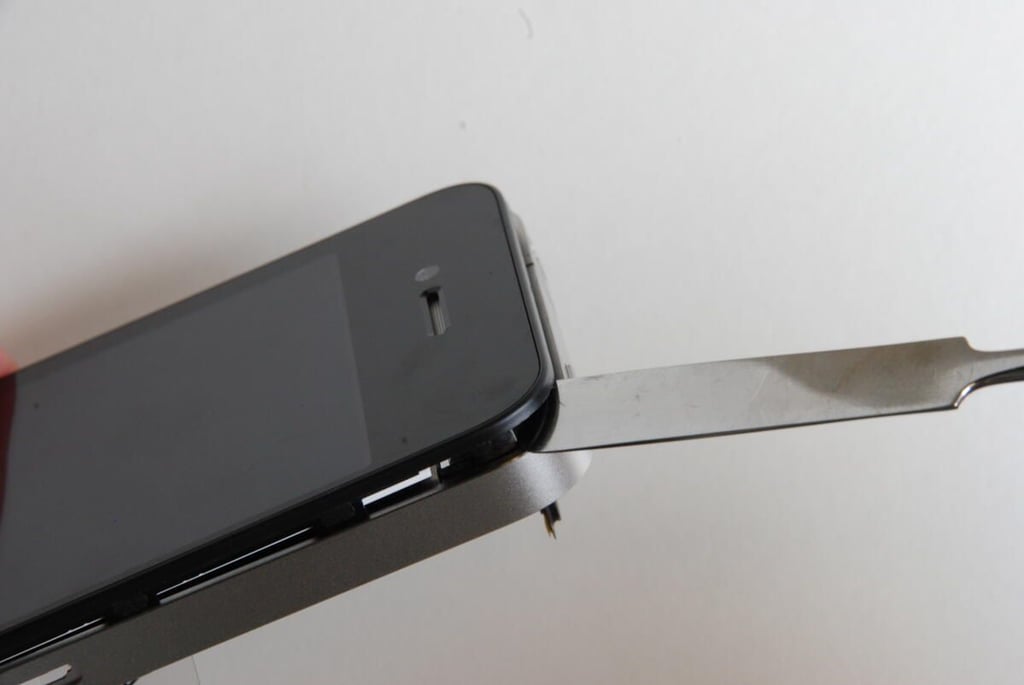
Using a thin metal spludger, work your way around the iPhone 4’s front panel, being careful not to crack the glass.
Photo credit: Bill Detwiler / TechRepublic
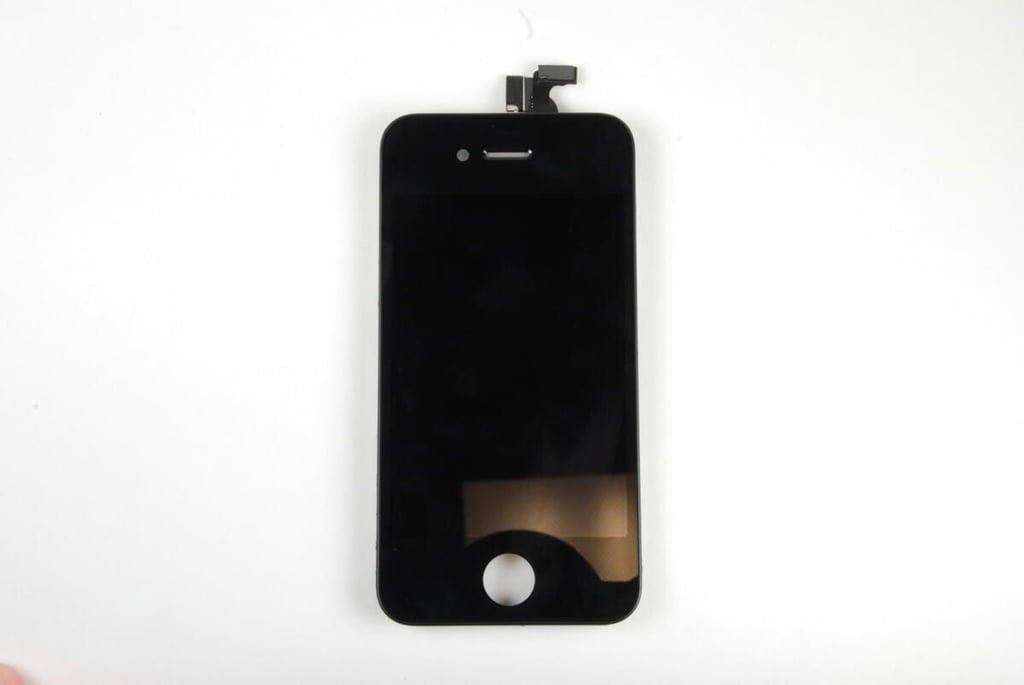
The iPhone 4 front panel assembly contains the digitizer, display, and LED backlight.
Photo credit: Bill Detwiler / TechRepublic

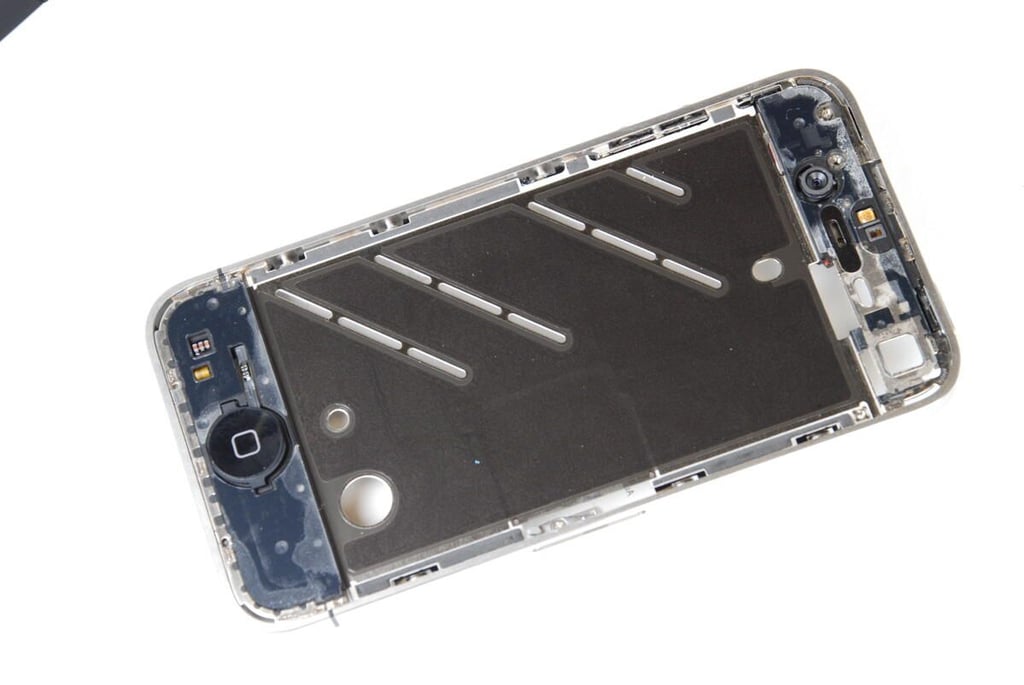
The iPhone 4’s stainless steel metal case contains the Home button, front-facing camera, top speaker, and dual microphones.
Photo credit: Bill Detwiler / TechRepublic
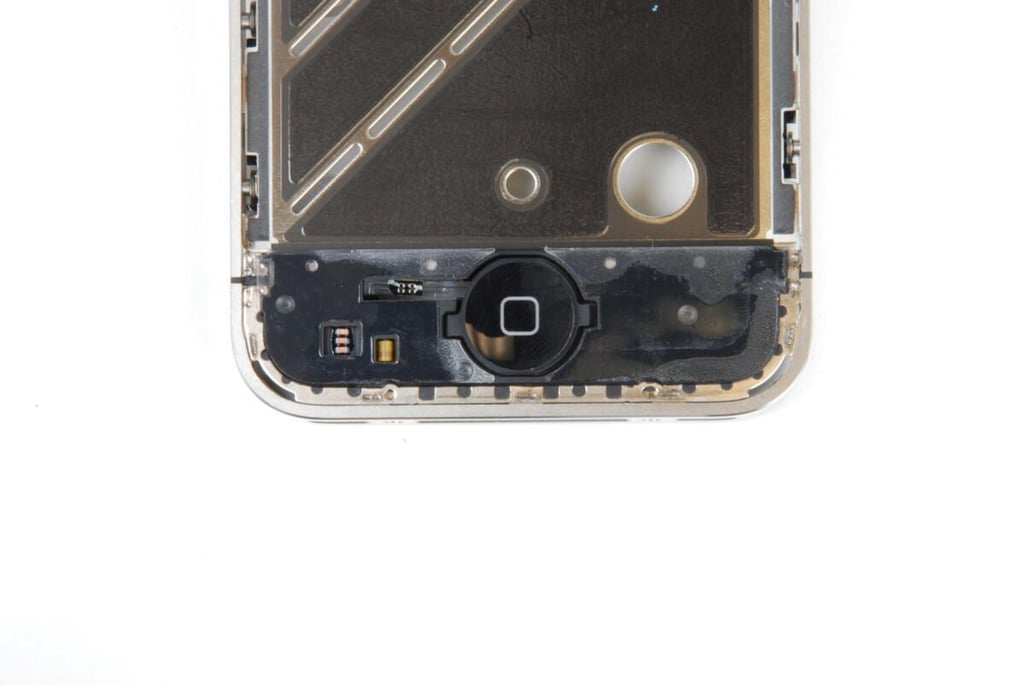
The home button can be removed as a single unit from the iPhone 4’s metal case. I choose to leave it connected.
Photo credit: Bill Detwiler / TechRepublic
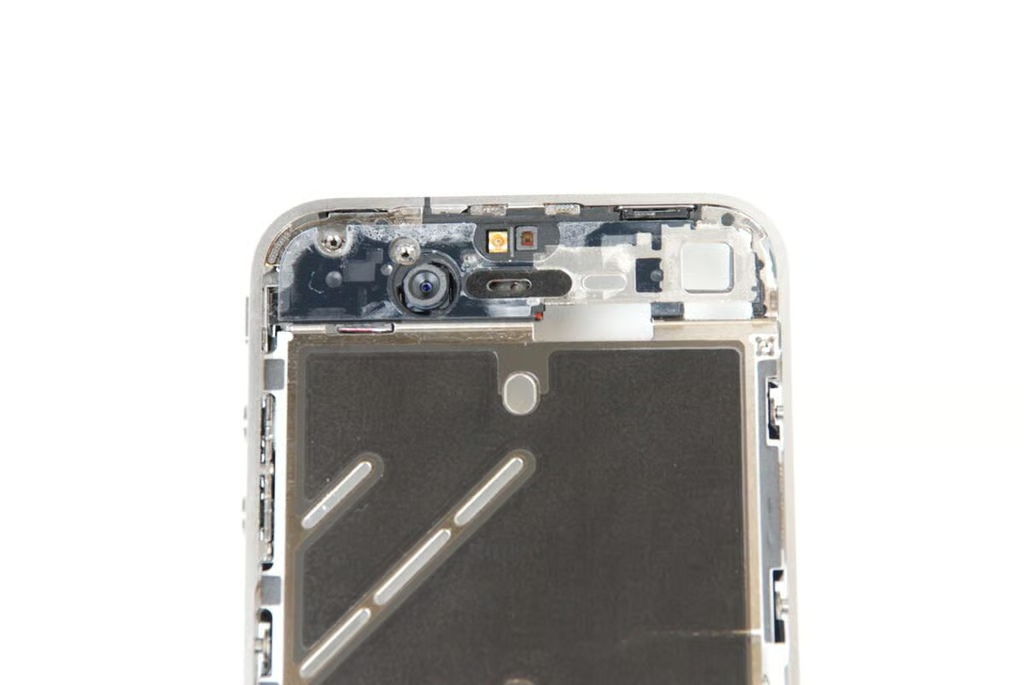
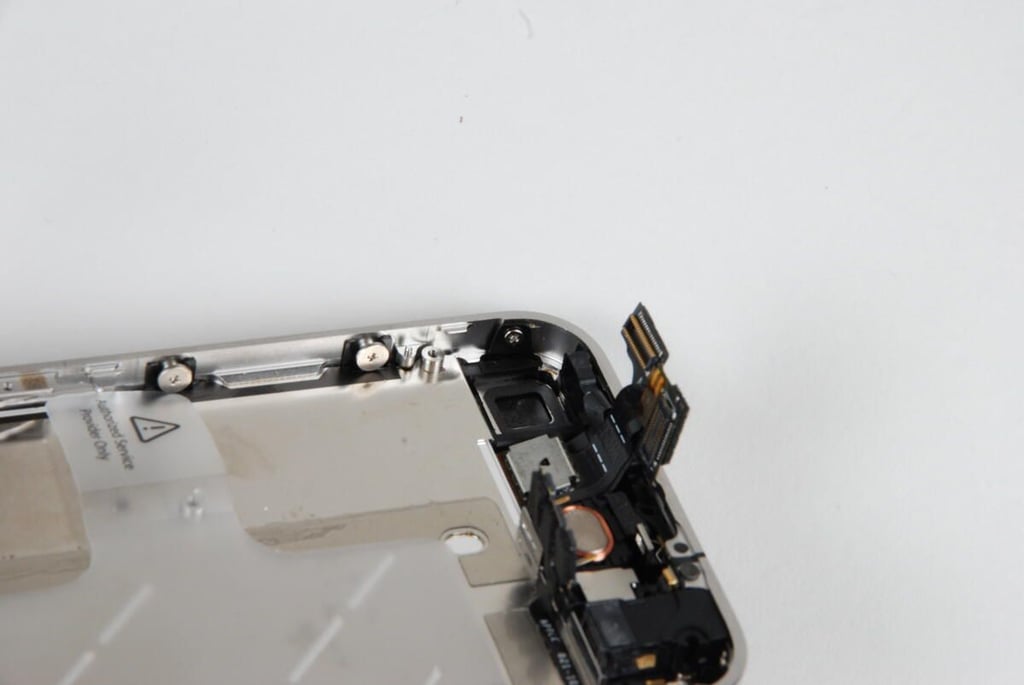
At the top of the iPhone 4’s stainless steel metal case are the front-facing camera and top speaker.
Photo credit: Bill Detwiler / TechRepublic
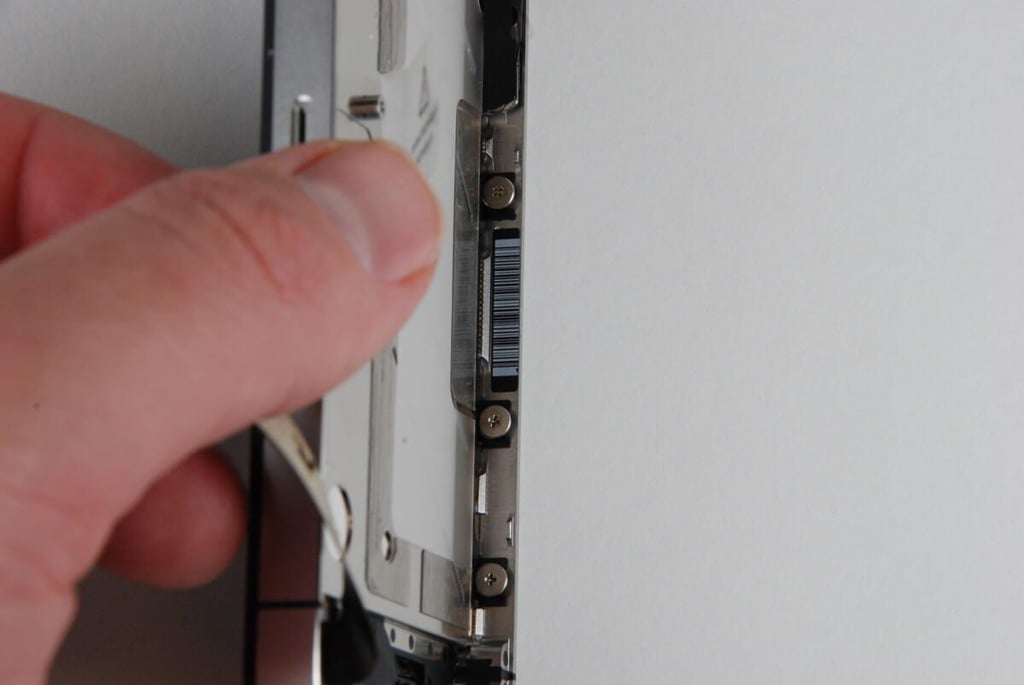
From the side, you can see just how thin the iPhone 4’s stainless steel metal case is.
Photo credit: Bill Detwiler / TechRepublic
It took about and hour to crack open the iPhone 4. And unlike previous versions, the iPhone was remarkably simple to disassemble. This iPhone was made to be serviced, and with a steady stream of spare parts, could see service for several years.
Photo credit: Bill Detwiler / TechRepublic
Bill Detwiler is the Editor for Technical Content and Ecosystem at Celonis. He is the former Editor in Chief of TechRepublic and previous host of TechRepublic's Dynamic Developer podcast and Cracking Open, CNET and TechRepublic's popular online show. Previously, Bill was an IT manager in the social research and energy industries. He has bachelor's and master's degrees from the University of Louisville, where he has also lectured on computer crime and crime prevention.


