\n\tiTunes users rejoice. Gone are the days when you had to watch that “Lost” episode you missed on a puny 19″ computer monitor. The Apple TV lets you experience your favorite iTunes music, movies, pictures, and shows on your widescreen television.
\n
\n\tThe Apple TV is an extremely thin, set-top media player designed to link your computer running iTunes 7.1 or later and your television. The media box offers component and HDMI outputs only–no s-video or composite. You’ll need an enhanced-definition (ED) or high-definition (HD) widescreen TV capable of 1080i, 720p, 576p, or 480p.
\n
\n\tBut what makes Apple’s latest creation tick? How did Apple fit everything into the Apple TV’s skinny case? Come along as we crack open the Apple TV and find out what lurks inside.
\n
\n\t\n\n
\n
\n\tNote: This gallery was originally published on April 6, 2007. I am resurfacing it as part of our coverage of the 2nd generation Apple TV–released in September 2010.
\n
\n
\n\t
\n\tCaption by: Bill Detwiler
\n
\n\t
\n
\n\t
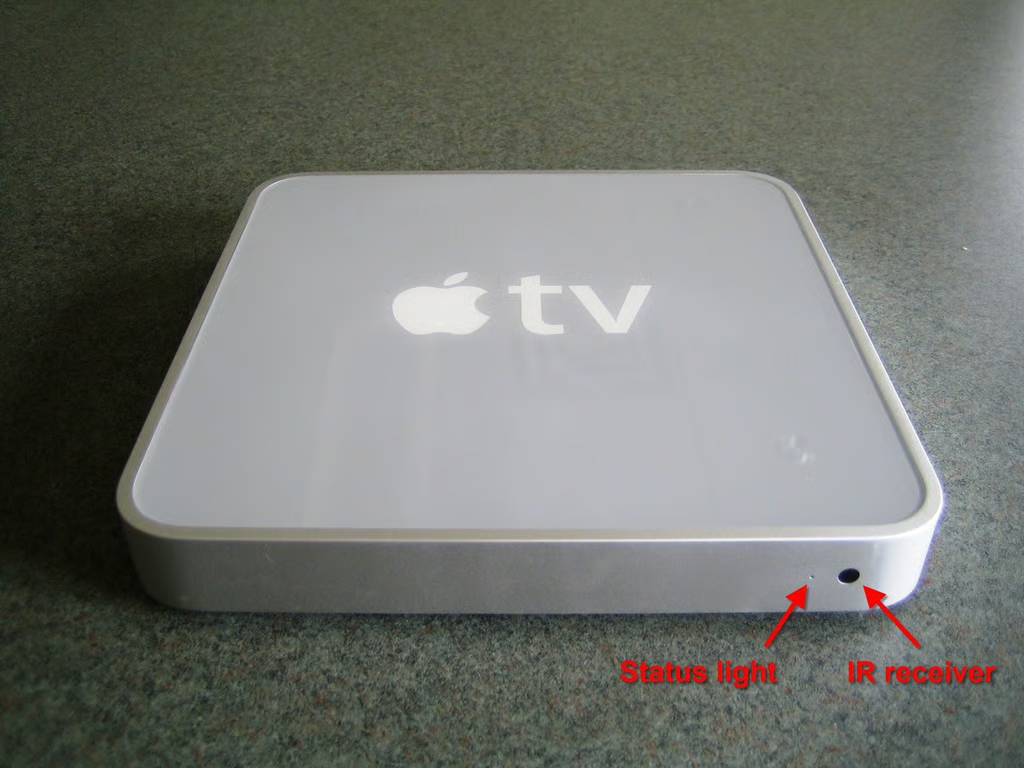
The Apple TV’s front panel contains only the IR receiver and status light.
Photo by: Bill Detwiler / TechRepublic
Caption by: Bill Detwiler
The Apple TV’s entire base is covered with a rubber pad. You must remove this pad to access the case and hard drive screws.
Photo by: Bill Detwiler / TechRepublic
Caption by: Bill Detwiler
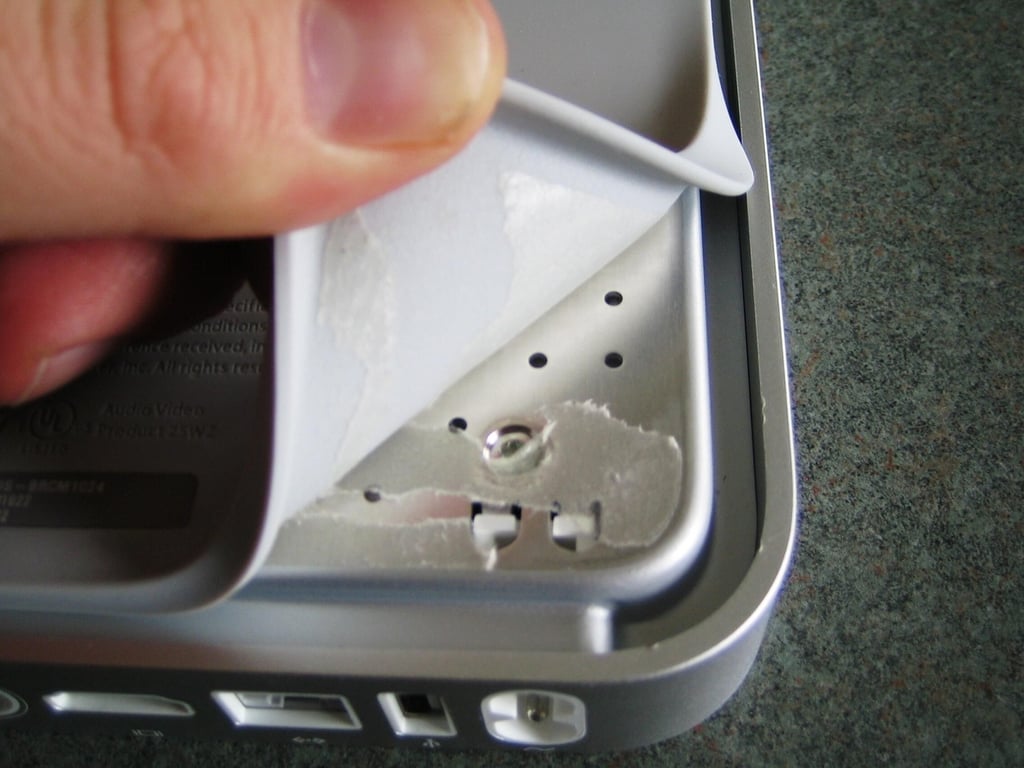
To remove the rubber base pad, use a flat head screwdriver or similar device to gently pry up on one of the corners. Then, gently pull the pad away from the metal base plate. You can separate the pad from the plate without damaging either part.
Photo by: Bill Detwiler / TechRepublic
Caption by: Bill Detwiler
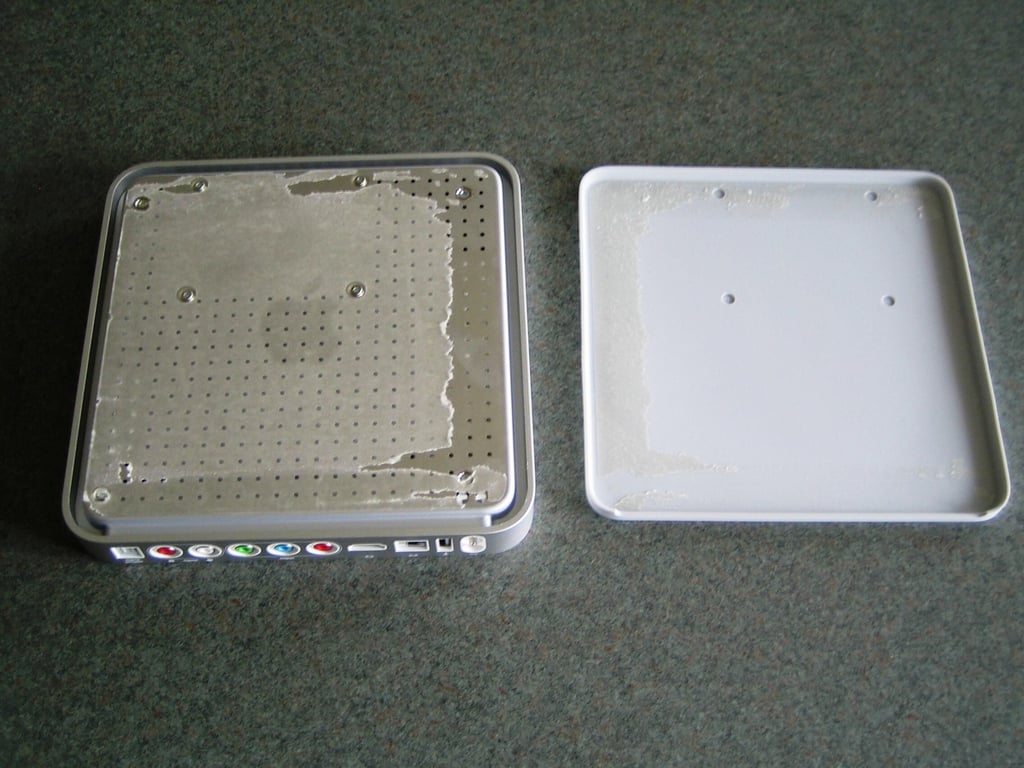
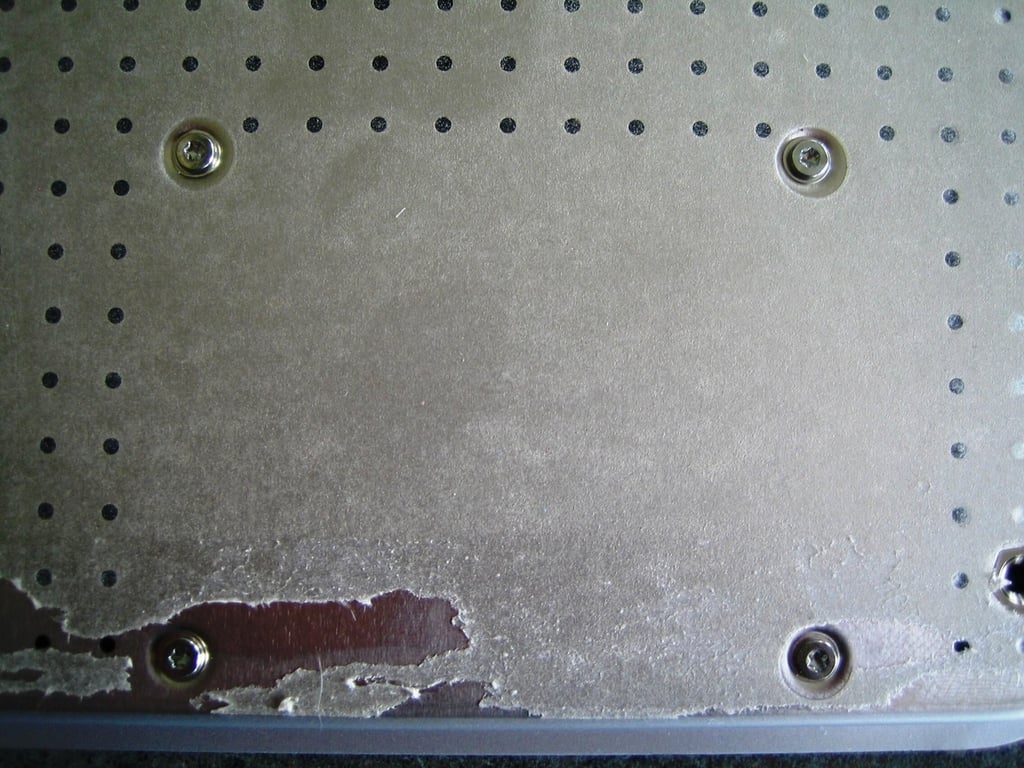
Removing the rubber pad will expose the Apple TV’s metal base plate. The base plate’s main surface and edges are vented. I assume this is to improve airflow through the unit and assist with heat dissipation. As the rubber pad covers the entire base plate, I’m not sure these vent holes actually do any good. I guess that’s a question for Apple’s design engineers. Perhaps the holes are just there to reduce the base plate’s weight.
Most of the adhesive used to secure the rubber pad will remain on the metal base plate. You could clean the sticky substance off, but I recommend just leaving it alone. It will help hold the rubber pad in place when you reassemble the Apple TV.
If you do decide to clean off the adhesive, wait until the unit is completely disassembled. It’s probably not a good idea to spill solvent on the Apple TV’s internal hardware.
Photo by: Bill Detwiler / TechRepublic
Caption by: Bill Detwiler
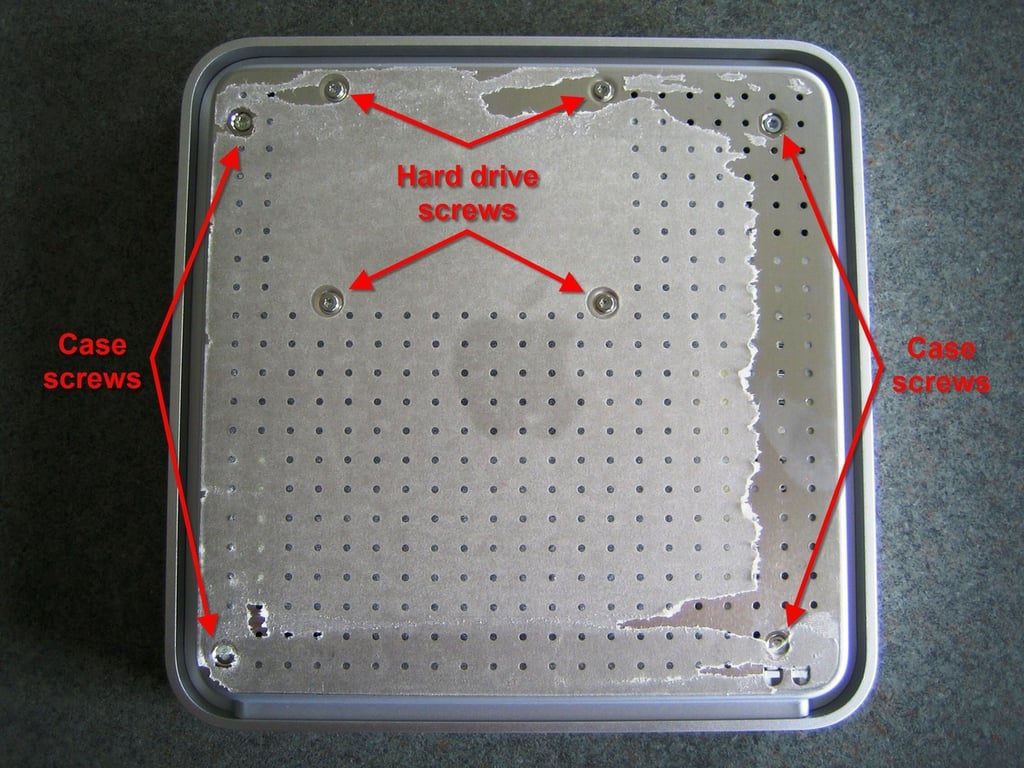
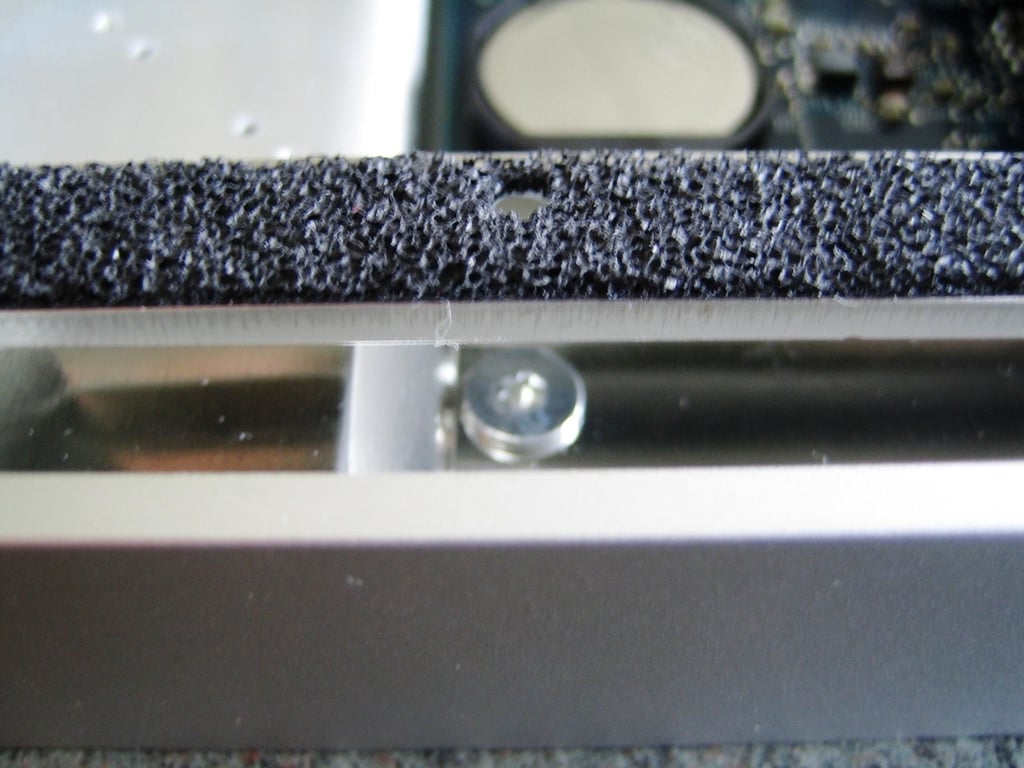
The metal base plate contain eight T8 screws. Using a Torx bit, remove the four outer, case screws.
We will remove the four inner, hard drive screws once we have separated the base plate from the Apple TV.
Photo by: Bill Detwiler / TechRepublic
Caption by: Bill Detwiler
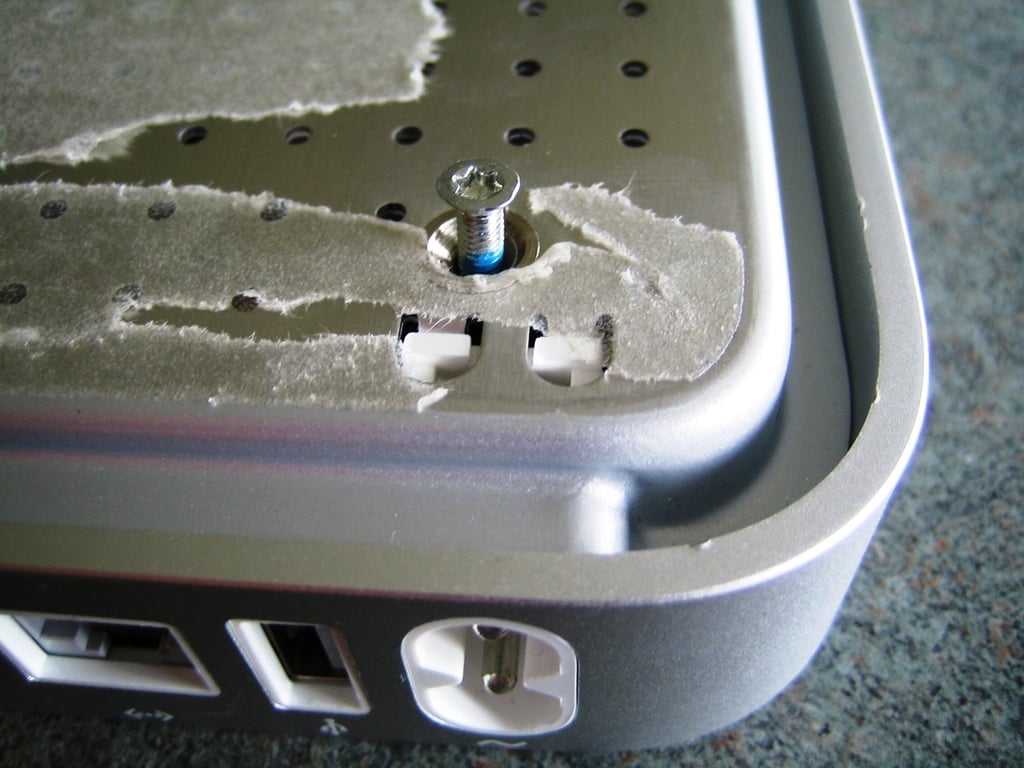
One of the T8 screws holding securing the Apple TV’s metal base plate.
Photo by: Bill Detwiler / TechRepublic
Caption by: Bill Detwiler
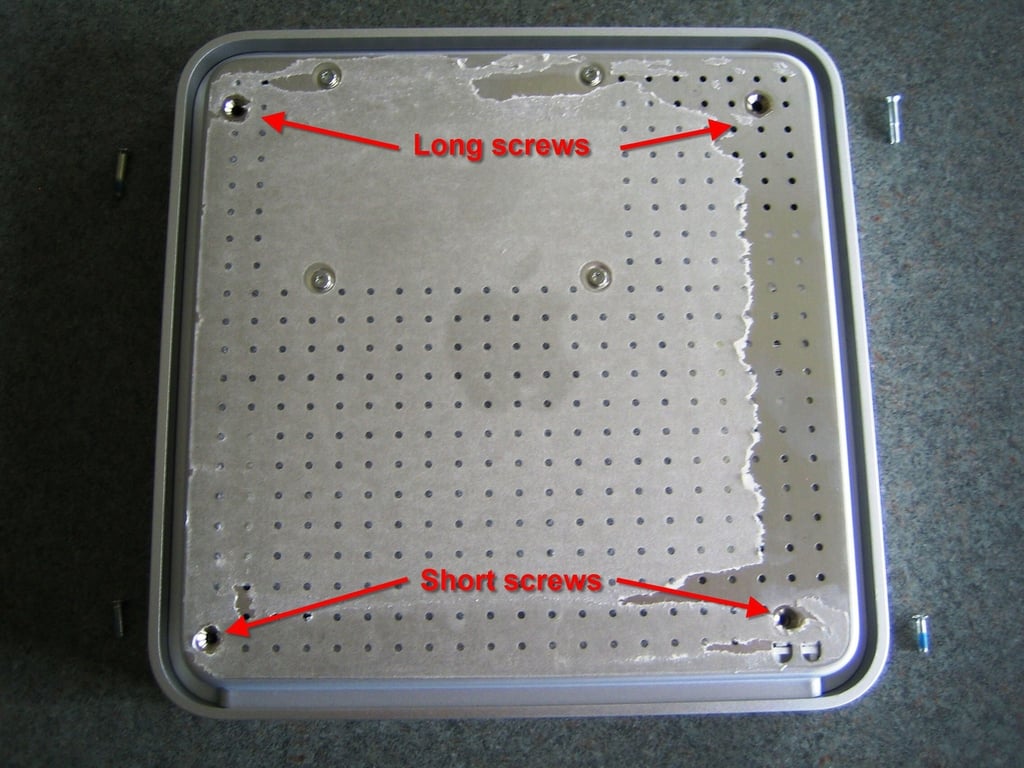
There are two 10 mm and two 15 mm T8 Torx screws holding the base plate in place. The longer screws are located at the front of the Apple TV and the shorter screws near the back.
Photo by: Bill Detwiler / TechRepublic.com
Caption by: Bill Detwiler
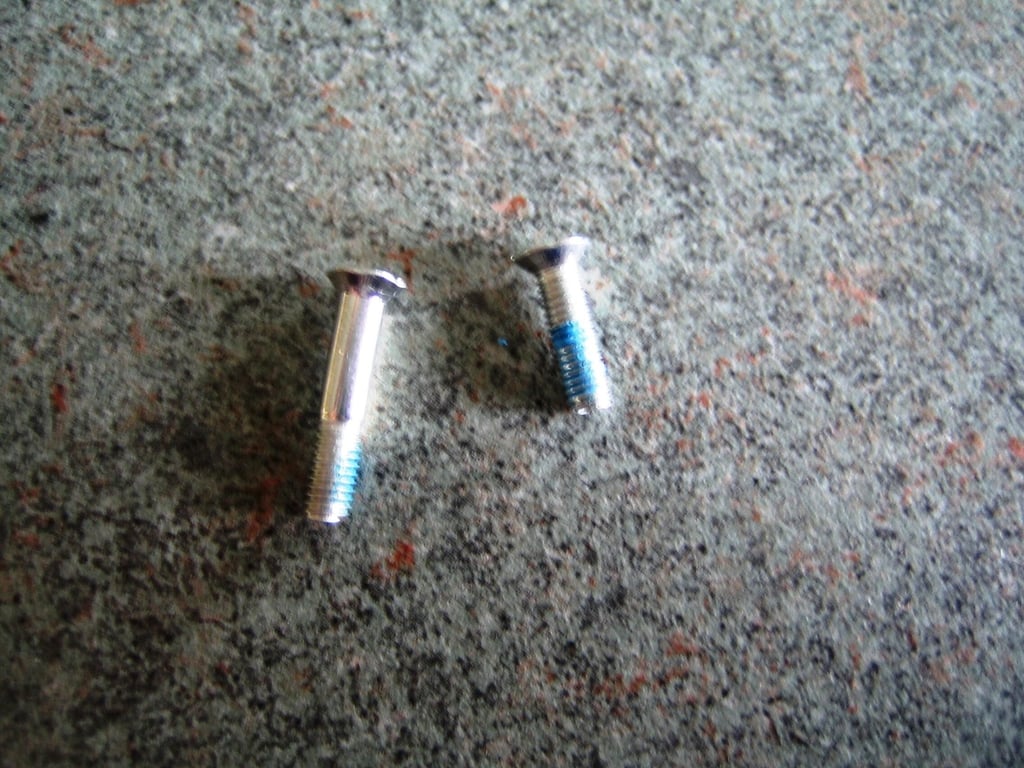
Photo by: Bill Detwiler / TechRepublic
Caption by: Bill Detwiler
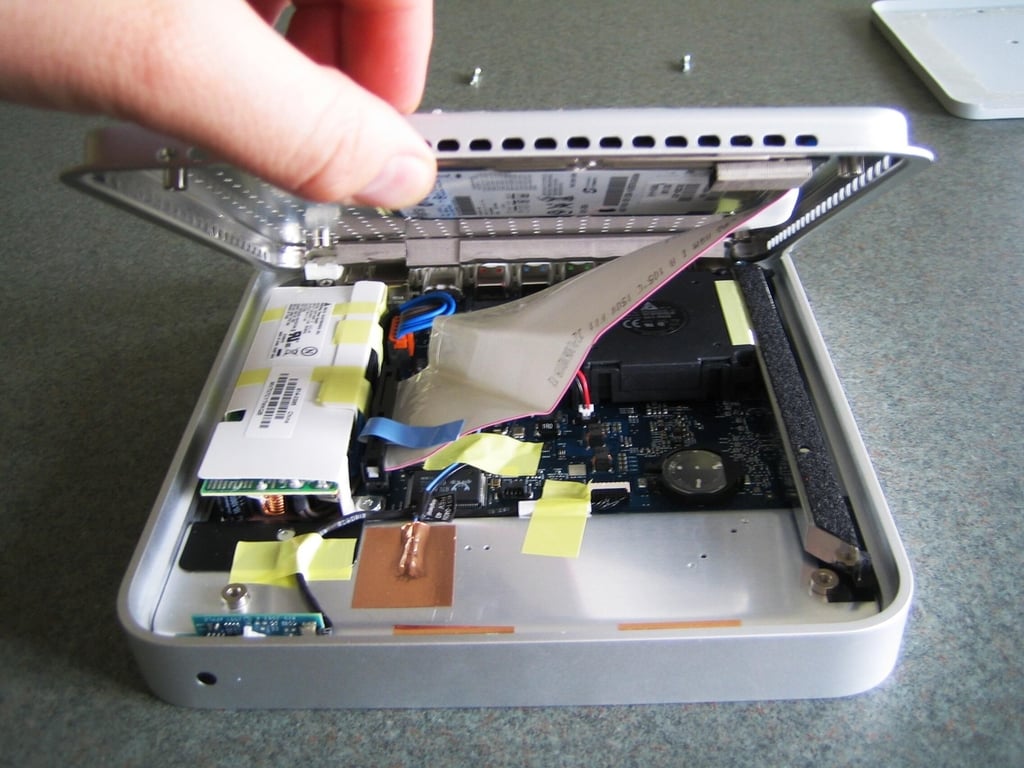
After removing the four case screws, gently lift up on the base plate. The hard drive is still attached to the base plate, and you must disconnect the drive ATA cable before completely removing the plate and drive.
Photo by: Bill Detwiler / TechRepublic
Caption by: Bill Detwiler
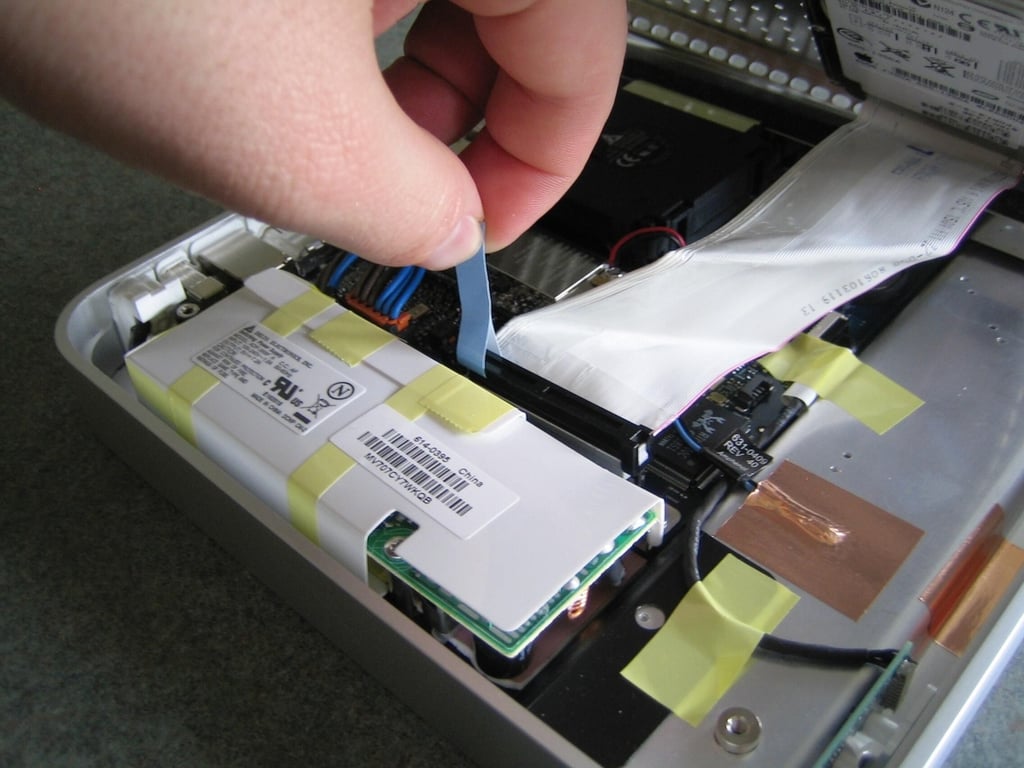
Gently, but firmly, pull up on the hard drive cable’s blue pull tab to disconnect the cable from the drive. This tab is a handy feature I wish all hard drive cables had.
Photo by: Bill Detwiler / TechRepublic
Caption by: Bill Detwiler
With the hard drive cable disconnected, we can remove and set aside the base plate. You can see the hard drive and cable are still connected to the plate.
Photo by: Bill Detwiler / TechRepublic
Caption by: Bill Detwiler
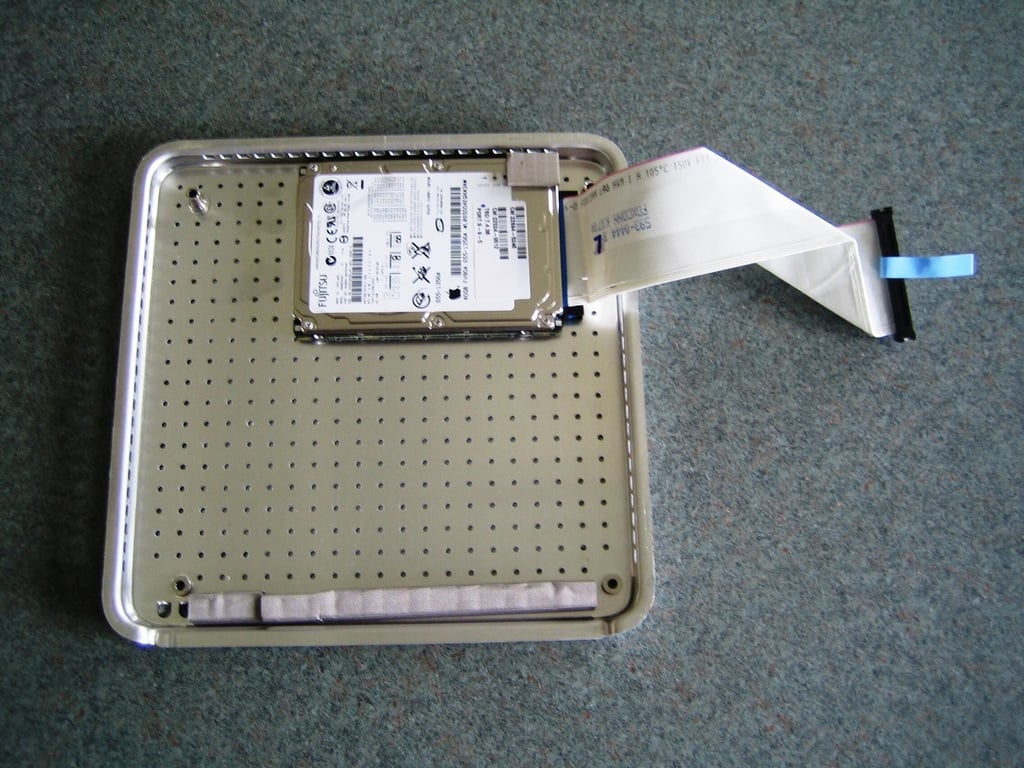
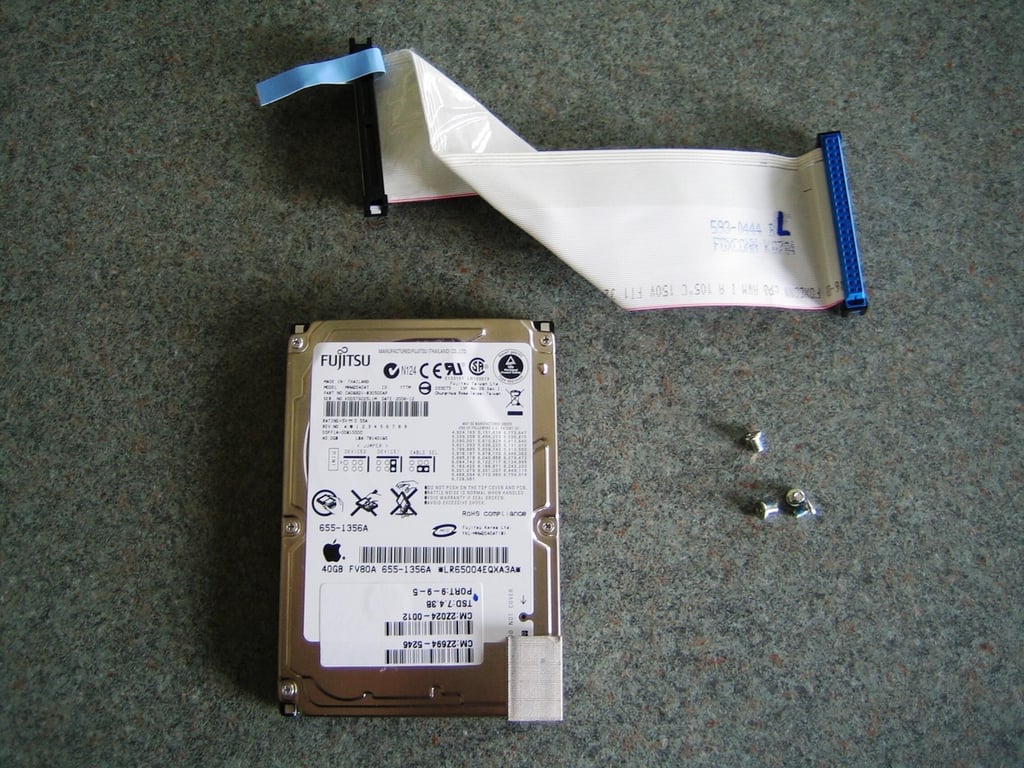
We can now remove the hard drive and cable from the base plate.
Photo by: Bill Detwiler / TechRepublic
Caption by: Bill Detwiler
First, flip the base plate over and rest the drive against a flat surface or hold the drive in your hand. Remove the four T8 screws that secure the hard drive to the base plate. Then, disconnect the ATA drive cable.
Photo by: Bill Detwiler / TechRepublic
Caption by: Bill Detwiler
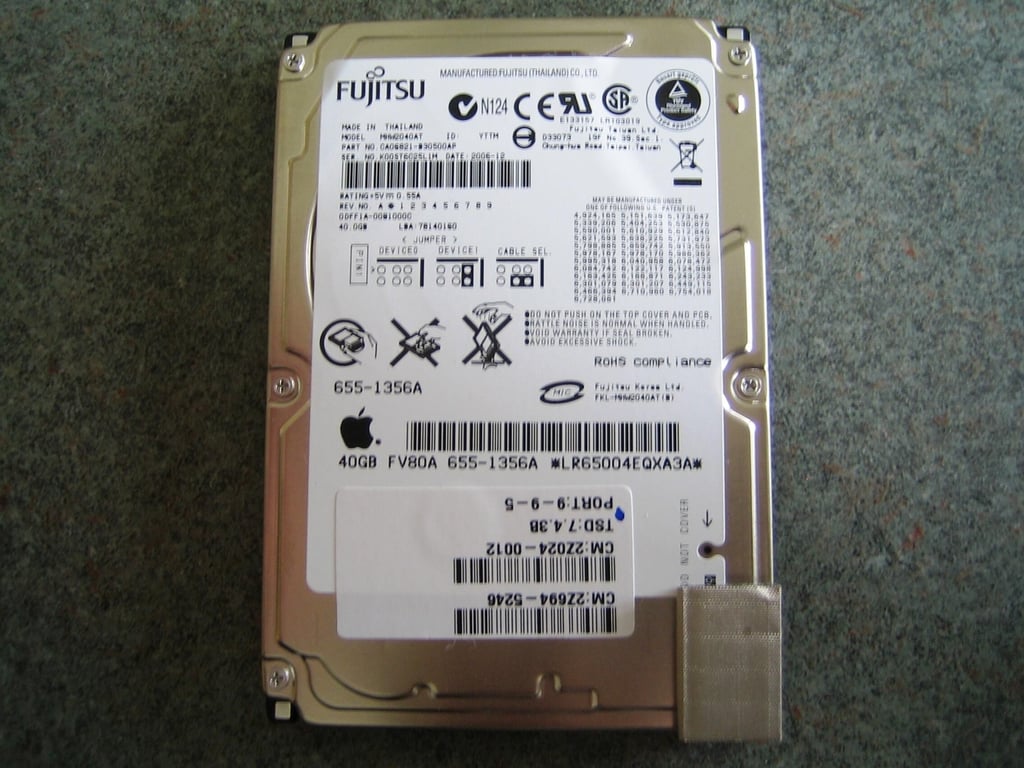
The Apple TV uses a Fujitsu 40GB hard drive (MHW2040AT).
Photo by: Bill Detwiler / TechRepublic
Caption by: Bill Detwiler
According to Apple Web site, the Apple TV’s 40GB hard drive will store “up to 50 hours” of video.
Photo by: Bill Detwiler / TechRepublic
Caption by: Bill Detwiler
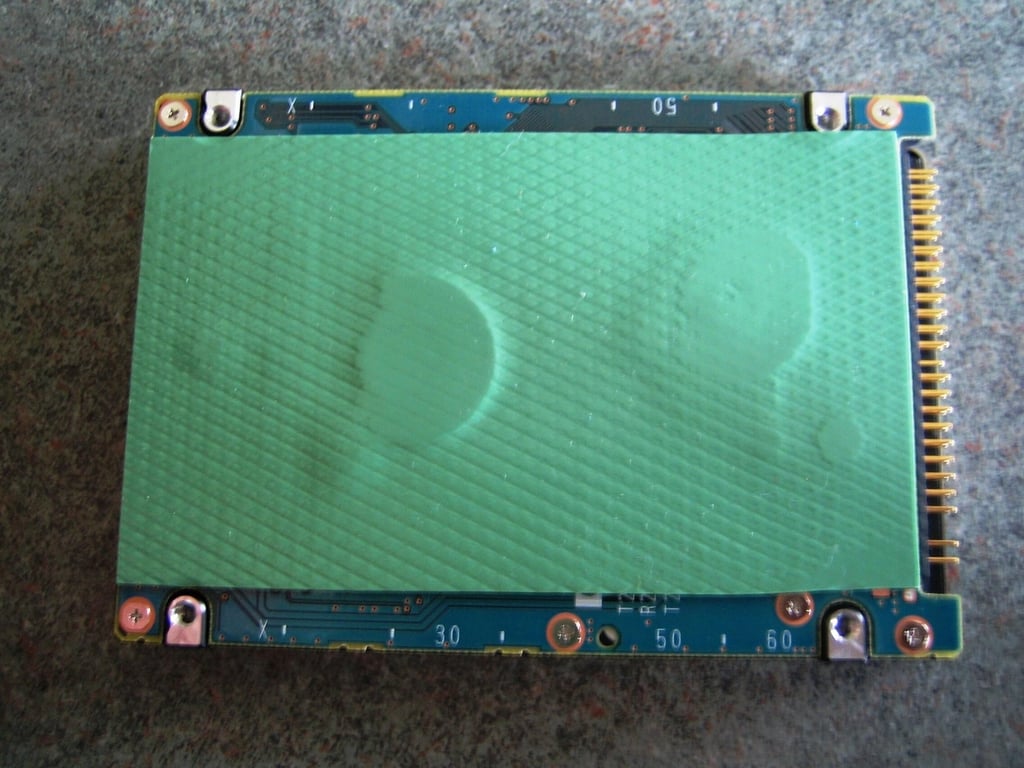
The Apple TV’s hard drive is separated from the metal base plate with a sticky, green pad. I assume the pad serves to dampen vibration from the drive and absorb any external shock.
Photo by: Bill Detwiler / TechRepublic
Caption by: Bill Detwiler

To remove the pad, gently lift it away from the drive. If you ever replace the Apple TV’s hard drive, you’ll want to reuse the pad.
Photo by: Bill Detwiler / TechRepublic
Caption by: Bill Detwiler
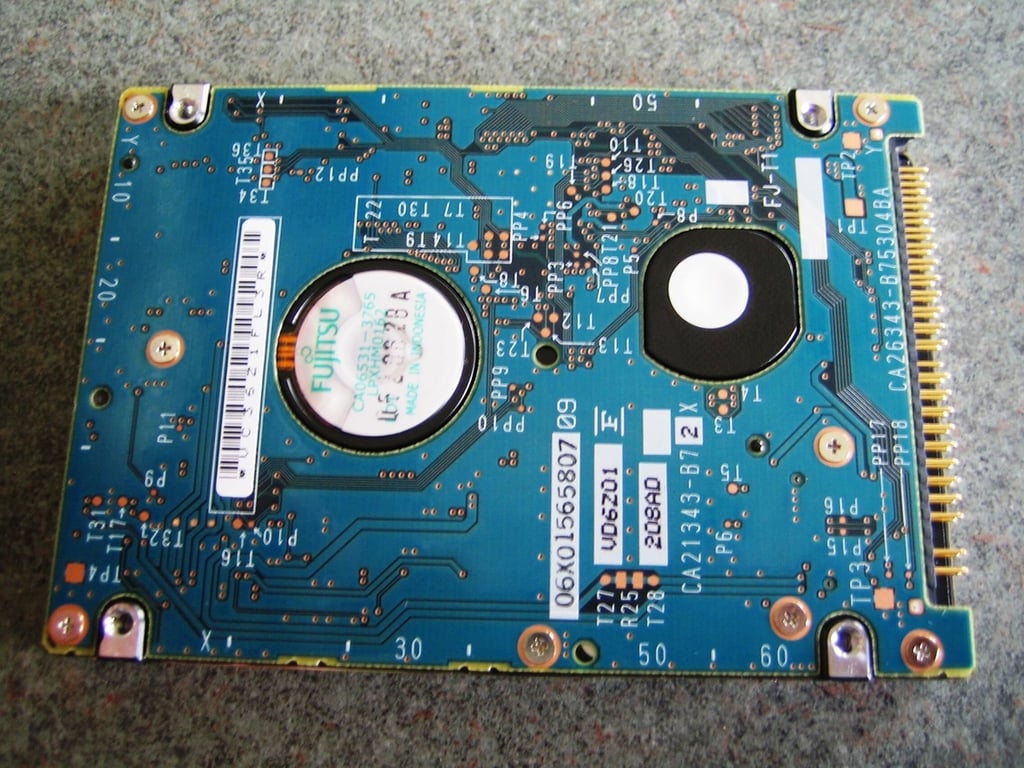
Photo by: Bill Detwiler / TechRepublic
Caption by: Bill Detwiler
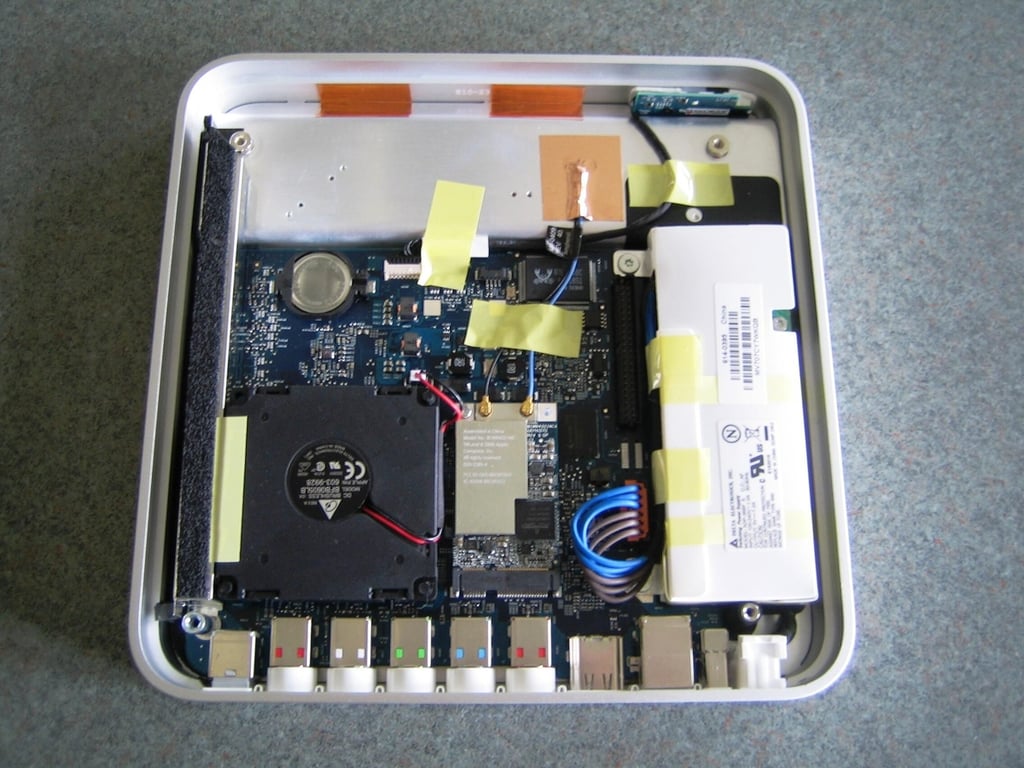
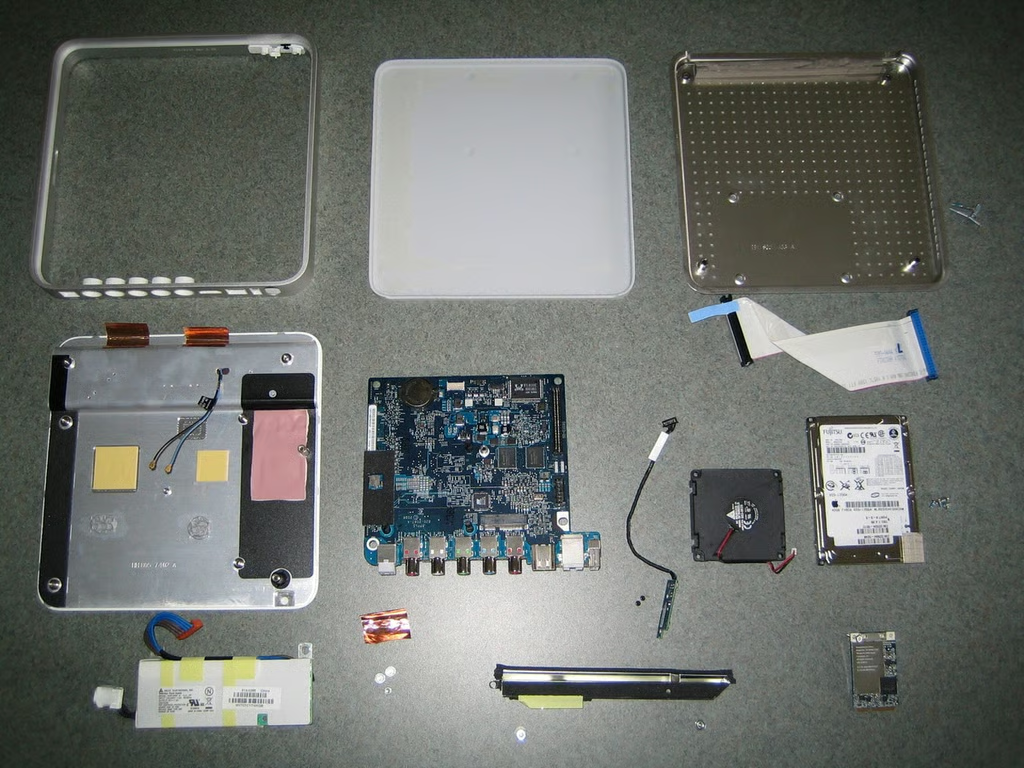
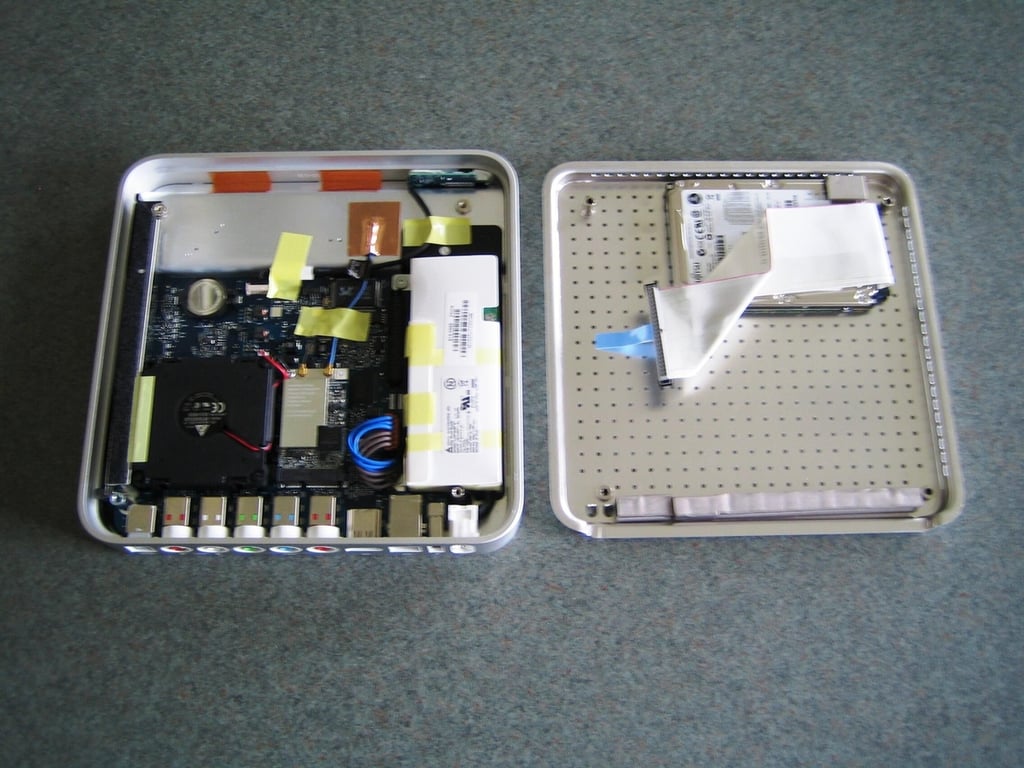
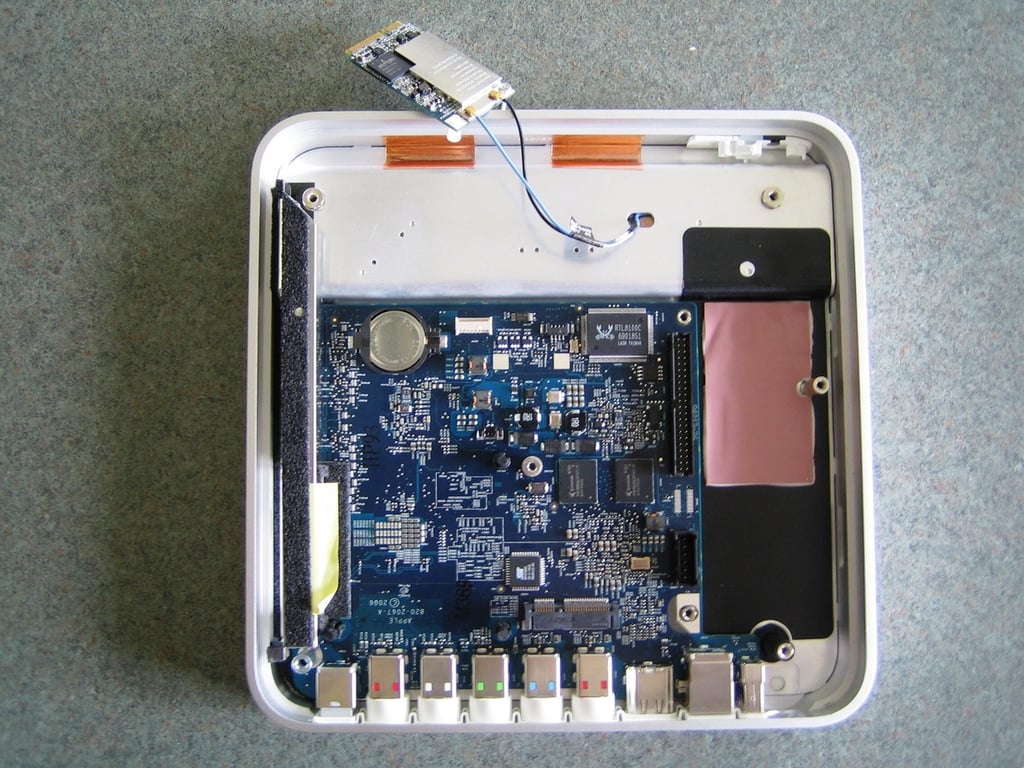
Removing the base plate gives us our first look at the Apple TV’s internal hardware. You can clearly see the main PCB, power supply, cooling fan, system battery, Wi-Fi card, IR receiver and status light PCB, ports, and hard drive interface.
Photo by: Bill Detwiler / TechRepublic
Caption by: Bill Detwiler
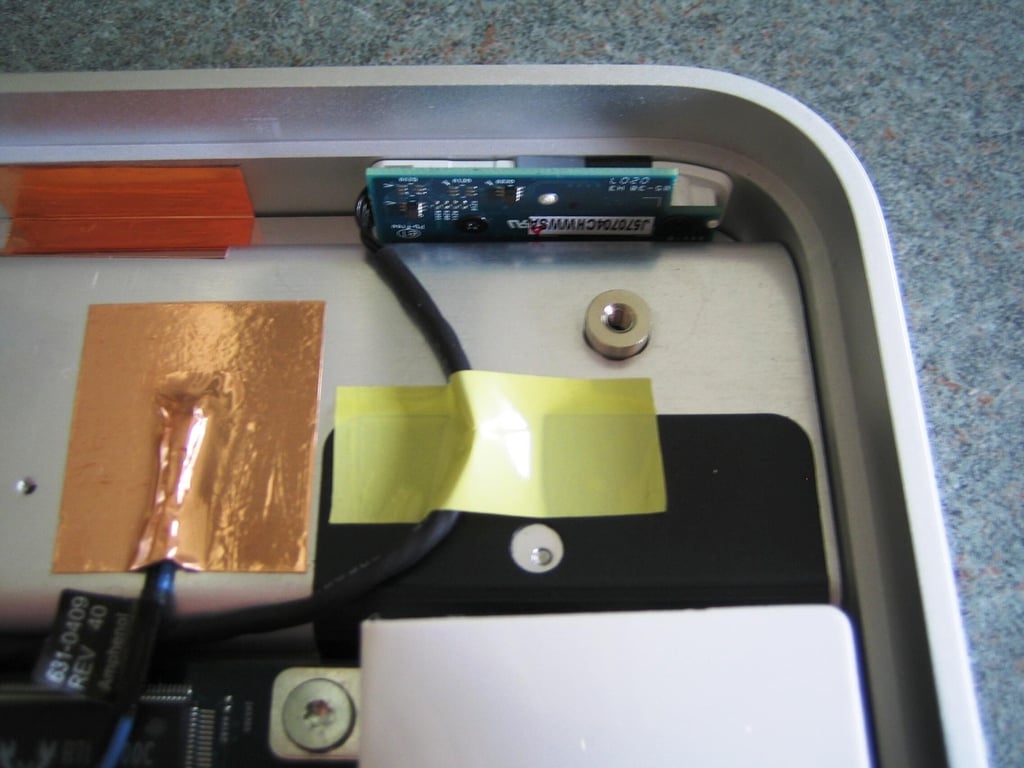
Photo by: Bill Detwiler / TechRepublic
Caption by: Bill Detwiler
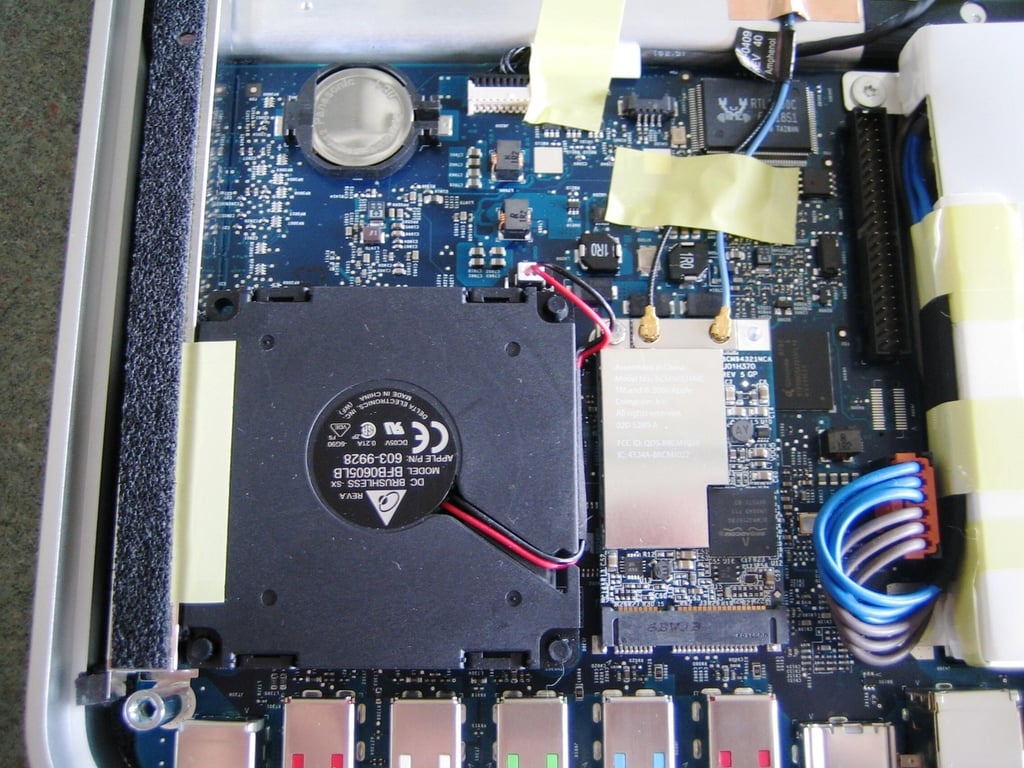
Photo by: Bill Detwiler / TechRepublic
Caption by: Bill Detwiler
Several pieces of yellow tape are used to hold internal wires in place. To fully disassemble the Apple, you must remove this tape. I was able to gently remove the tape and reuse it during reassembly.
Photo by: Bill Detwiler / TechRepublic
Caption by: Bill Detwiler
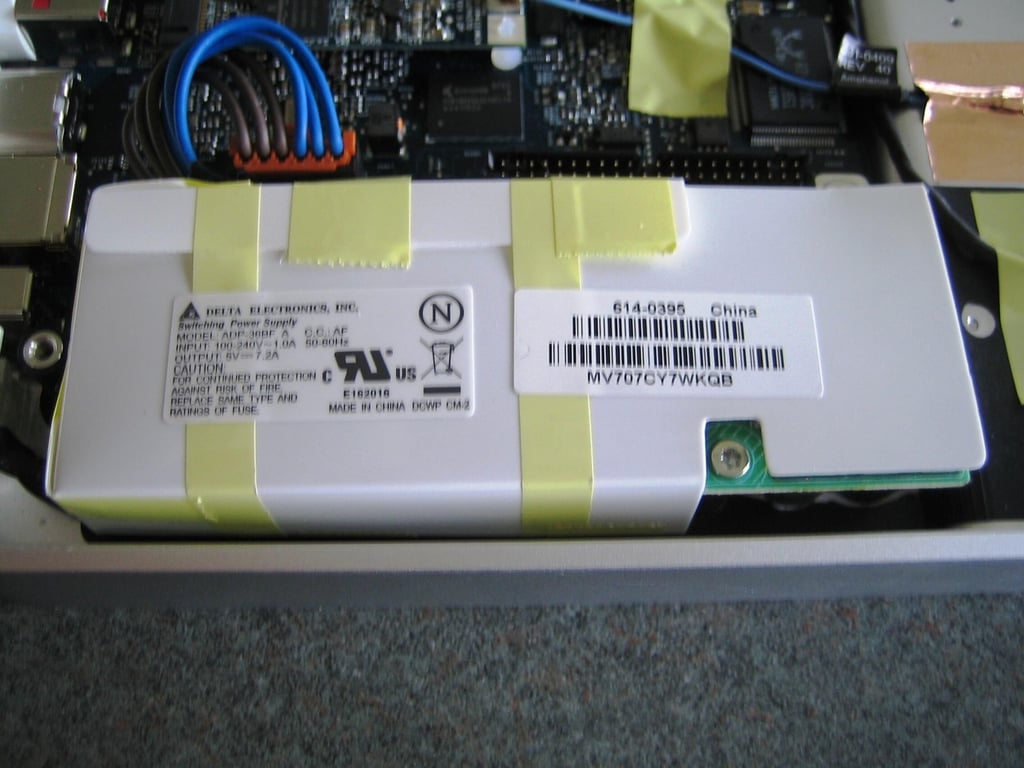
The Apple TV uses a Delta Electronics Switching Power Supply (Model: ADP-36BF A). The unit converts 100-240V ~1.0A AC to 5V 7.2A DC. The unit is wrapped in flexible, white plastic (held on with yellow tape), but the ends are exposed. Watch your fingers!
Photo by: Bill Detwiler / TechRepublic
Caption by: Bill Detwiler
To remove the Apple TV’s power supply, disconnect the cable from the main PCB and then remove the supply three screws.
Photo by: Bill Detwiler / TechRepublic
Caption by: Bill Detwiler
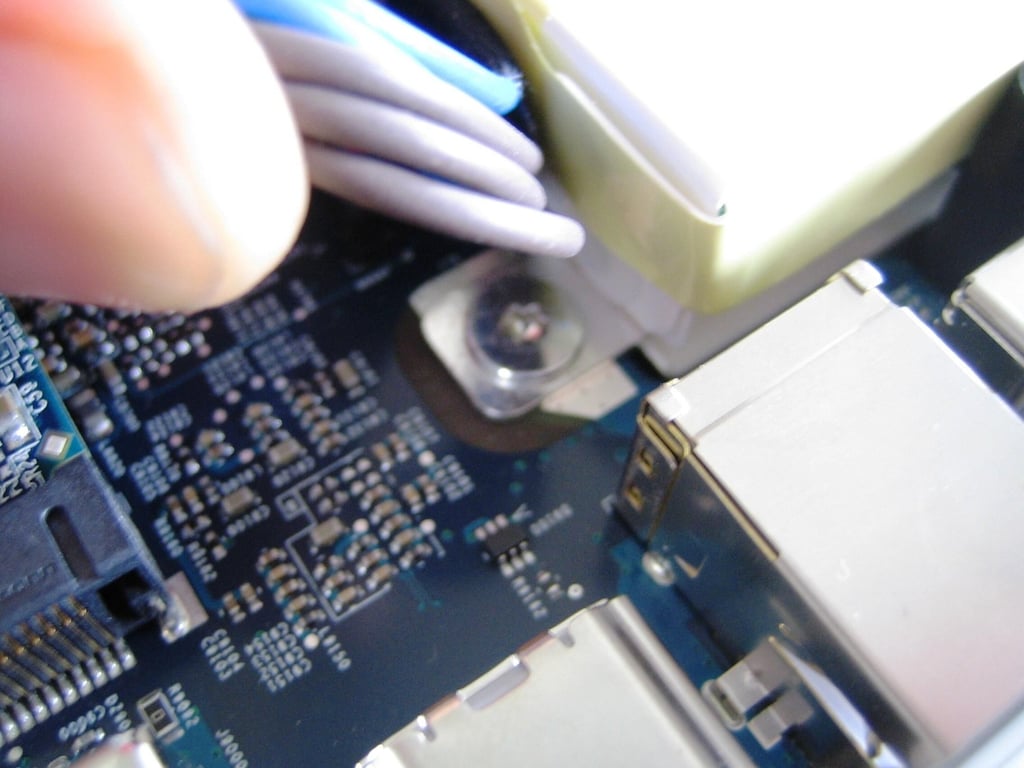
Photo by: Bill Detwiler / TechRepublic
Caption by: Bill Detwiler
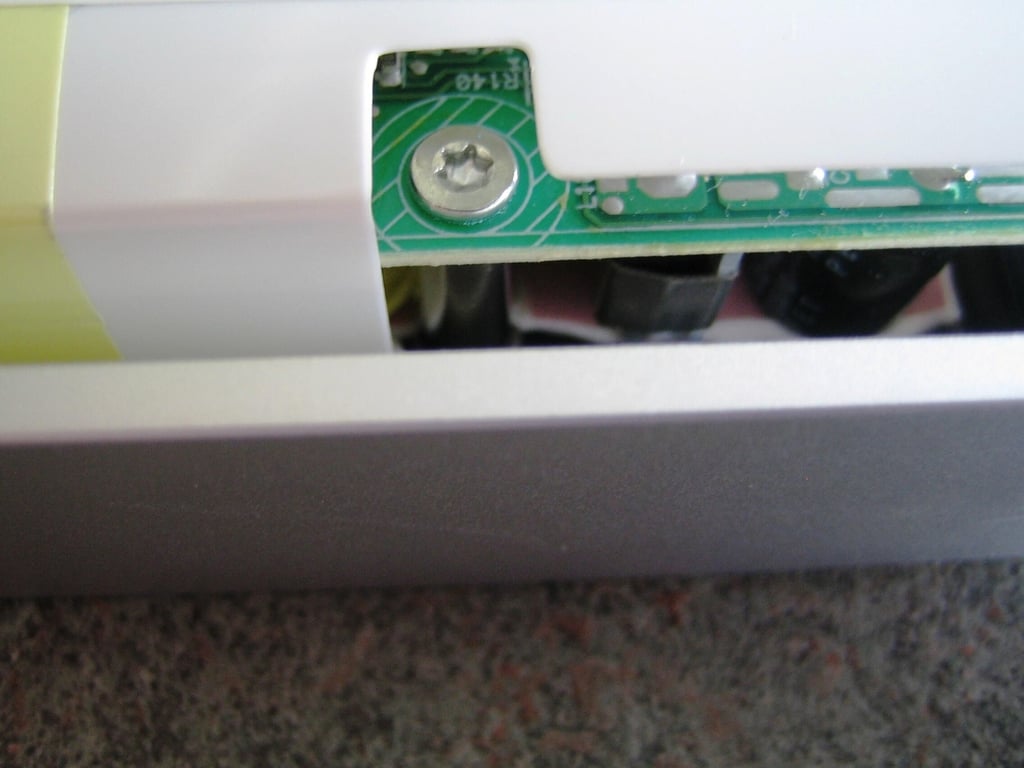
Photo by: Bill Detwiler / TechRepublic
Caption by: Bill Detwiler
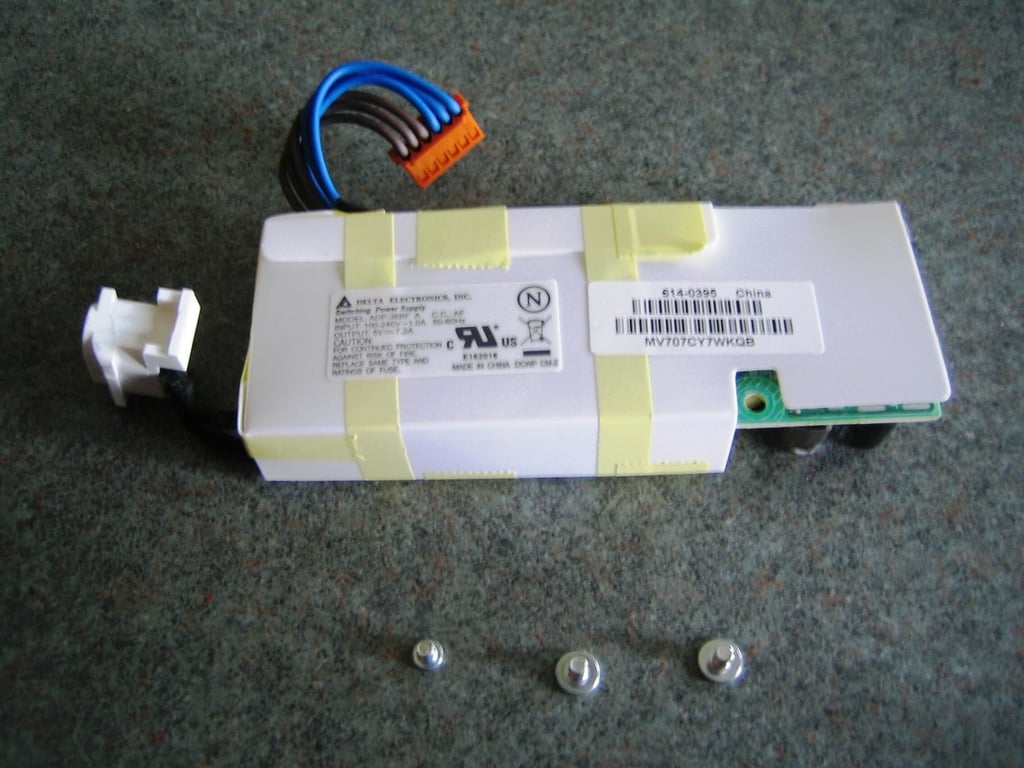
Photo by: Bill Detwiler / TechRepublic
Caption by: Bill Detwiler
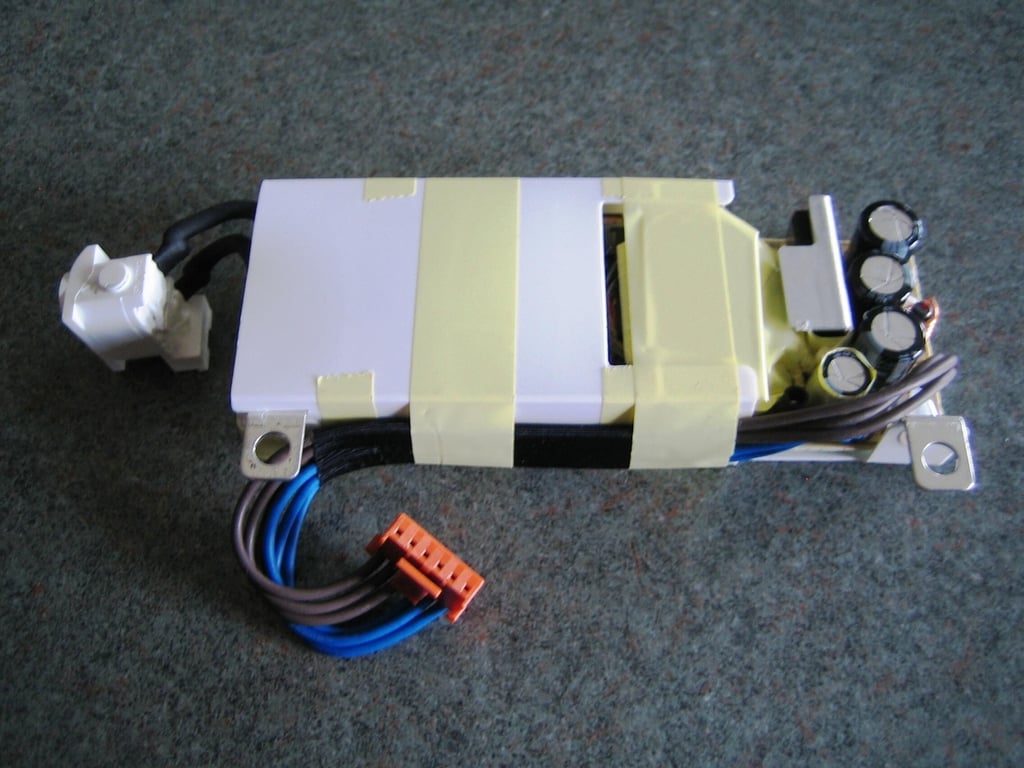
The power supply’s bottom and ends are partially exposed. Take care when handling the supply.
Photo by: Bill Detwiler / TechRepublic
Caption by: Bill Detwiler
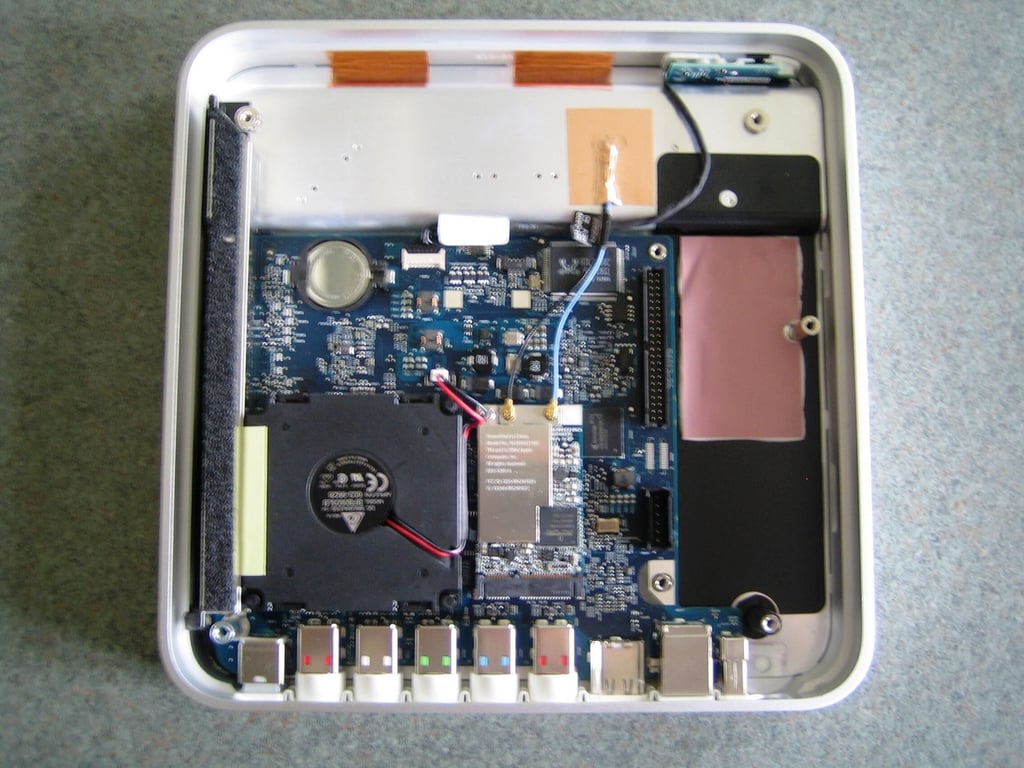
Photo by: Bill Detwiler / TechRepublic
Caption by: Bill Detwiler
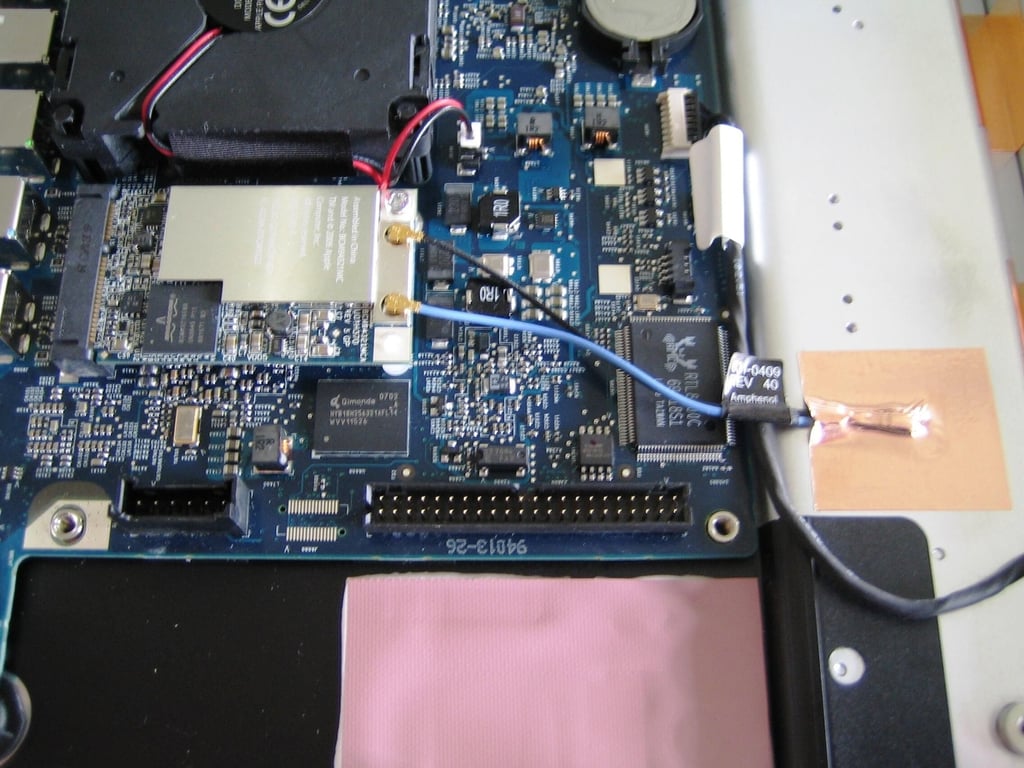
Photo by: Bill Detwiler / TechRepublic
Caption by: Bill Detwiler
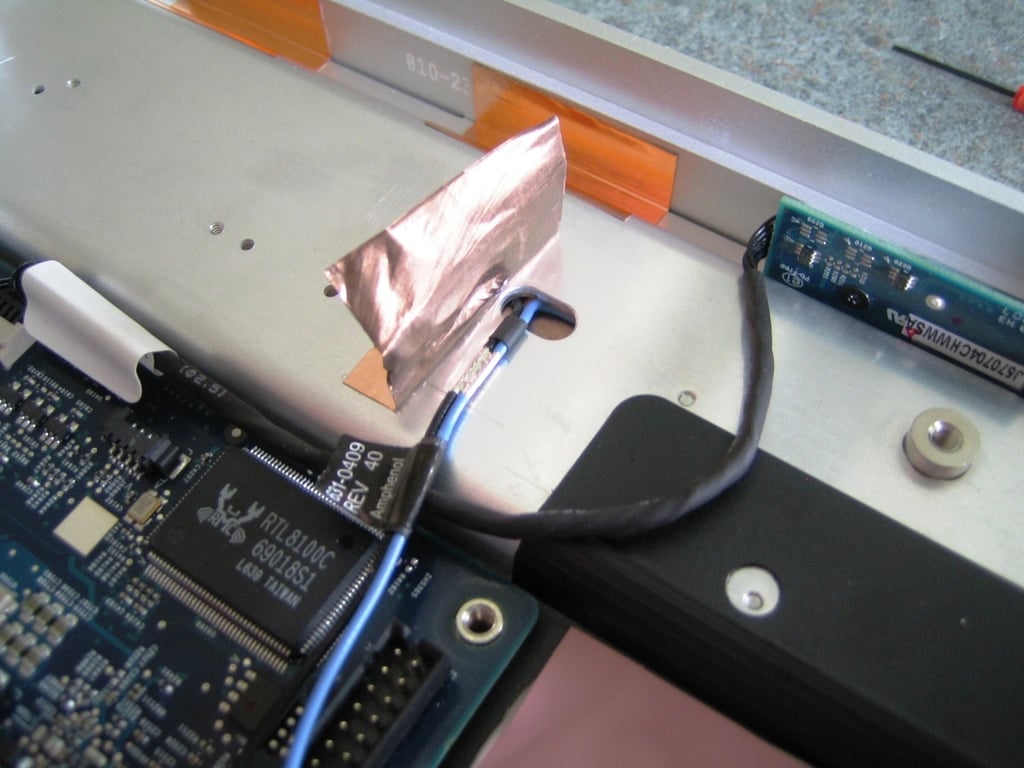
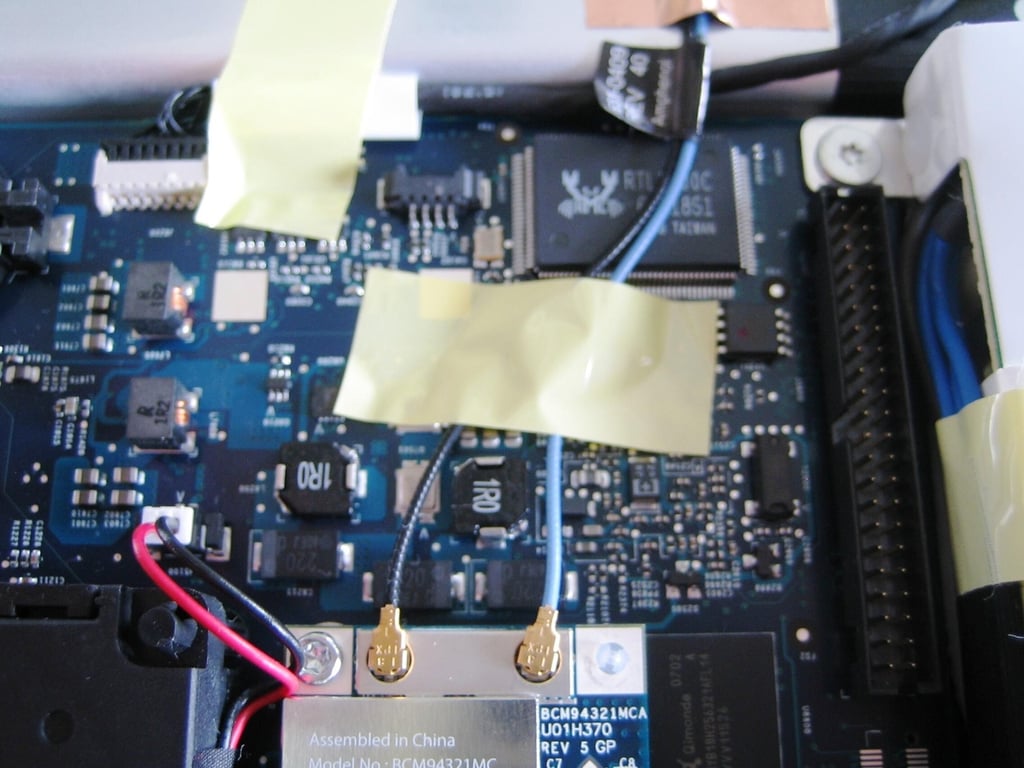
I decided to remove the metal tape that holds the Wi-Fi antenna wires in place. You don’t have to do this, but I didn’t know that at the time. You can leave the copper tape in place.
Photo by: Bill Detwiler / TechRepublic
Caption by: Bill Detwiler
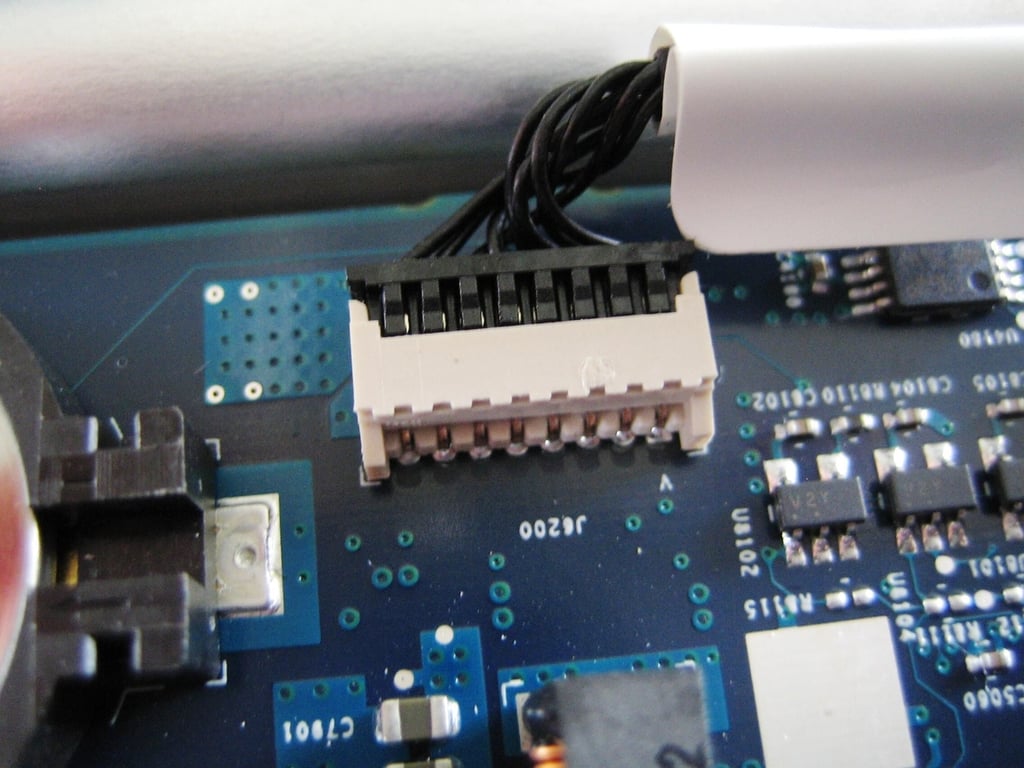
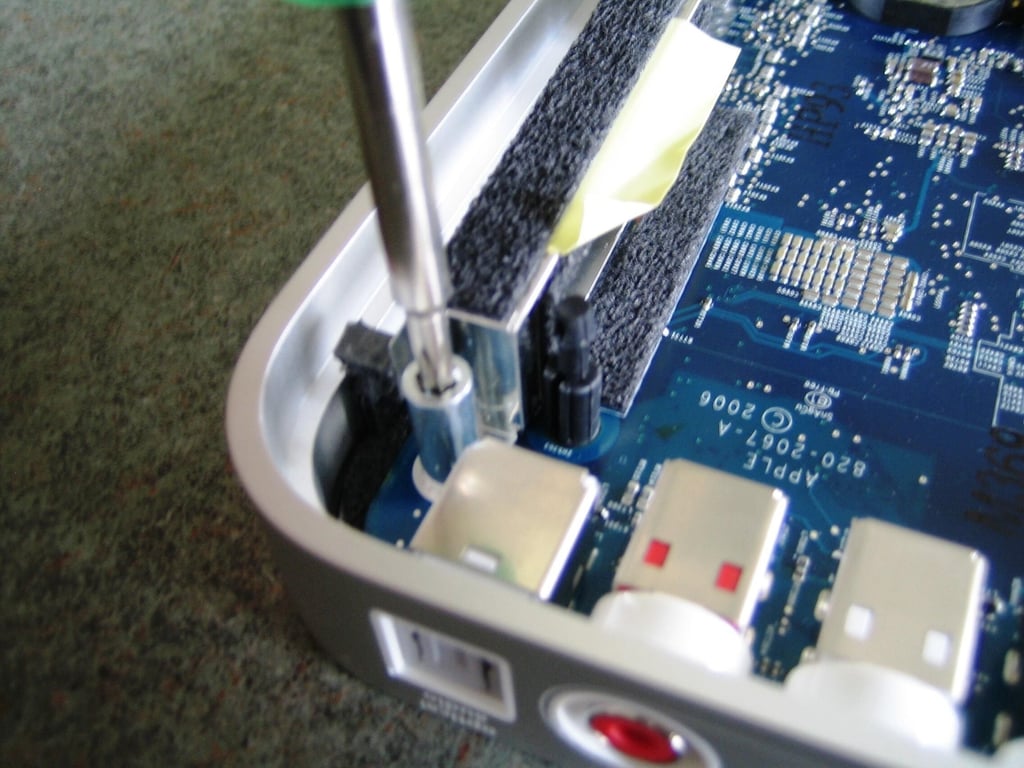
To remove the Apple TV’s IR receiver and status light PCB, disconnect the board’s cable from the motherboard connector.
Photo by: Bill Detwiler / TechRepublic
Caption by: Bill Detwiler
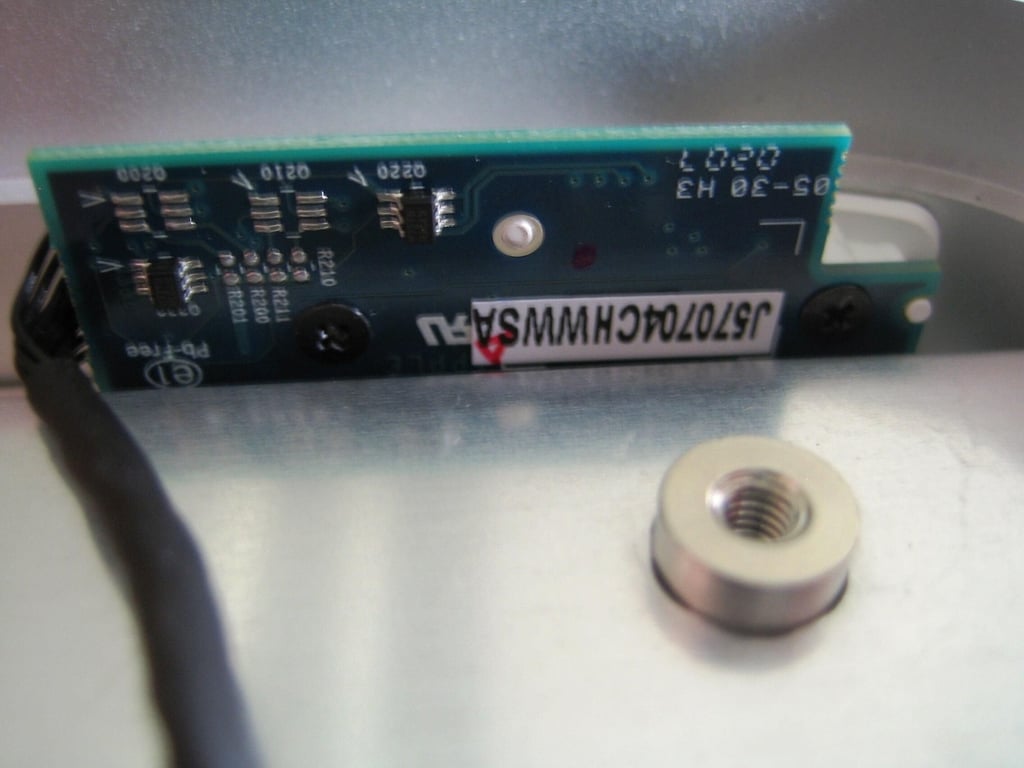
With the cable disconnected, remove the two black, Phillips screws that hold the card to the Apple TV’s side housing. The, gently lift the board and wire out.
Photo by: Bill Detwiler / TechRepublic
Caption by: Bill Detwiler
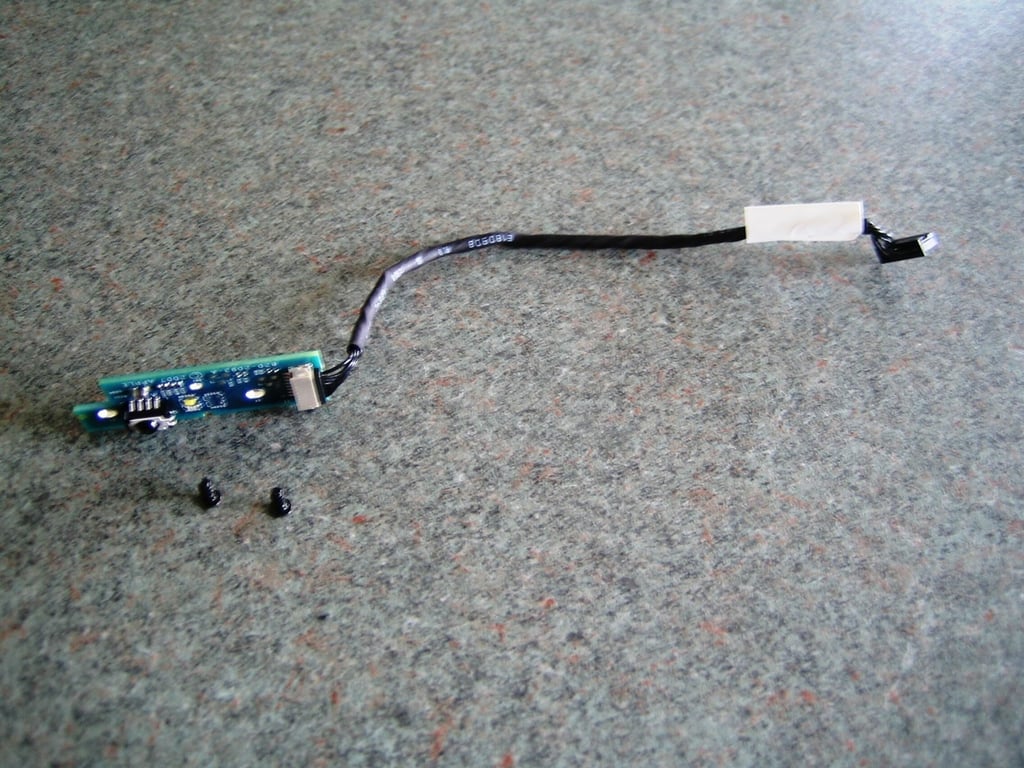
Photo by: Bill Detwiler / TechRepublic
Caption by: Bill Detwiler
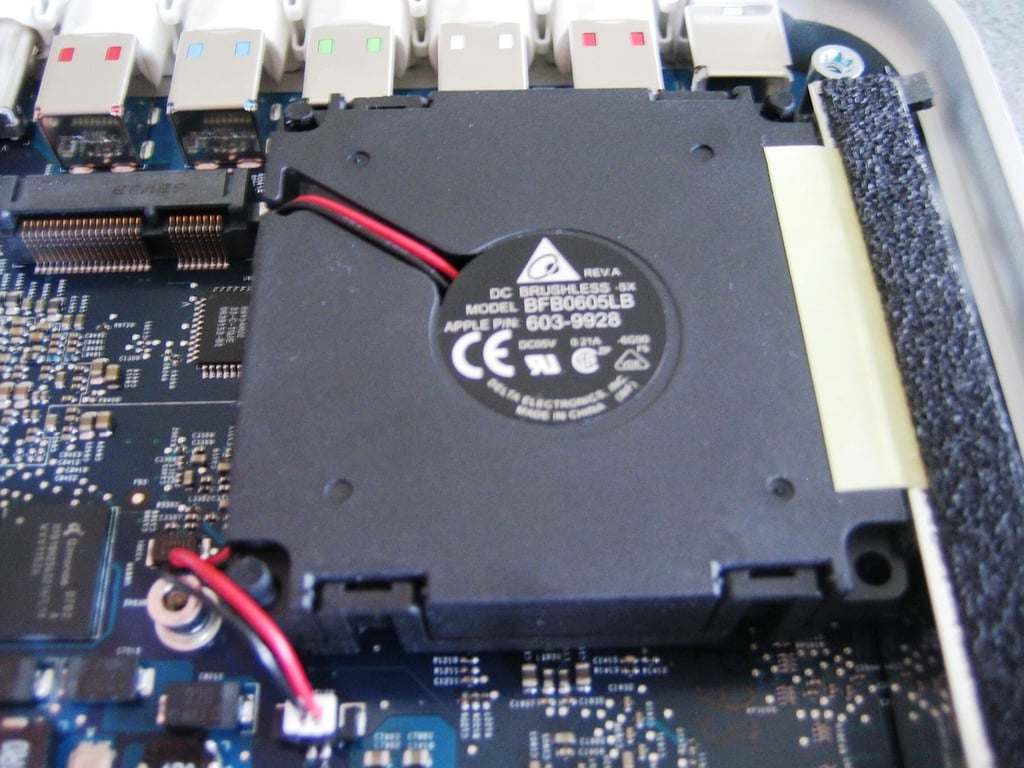
The cooling fan was next on my list of components to remove. The Apple TV’s Delta Electronics cooling fan (Model: BFB0605LB) is held in place by three rubber posts and a piece of yellow tape. You do not actually need to disconnect and remove the cooling fan to remove the main PCB from the case, but I wanted to see what was under the fan.
Photo by: Bill Detwiler / TechRepublic
Caption by: Bill Detwiler
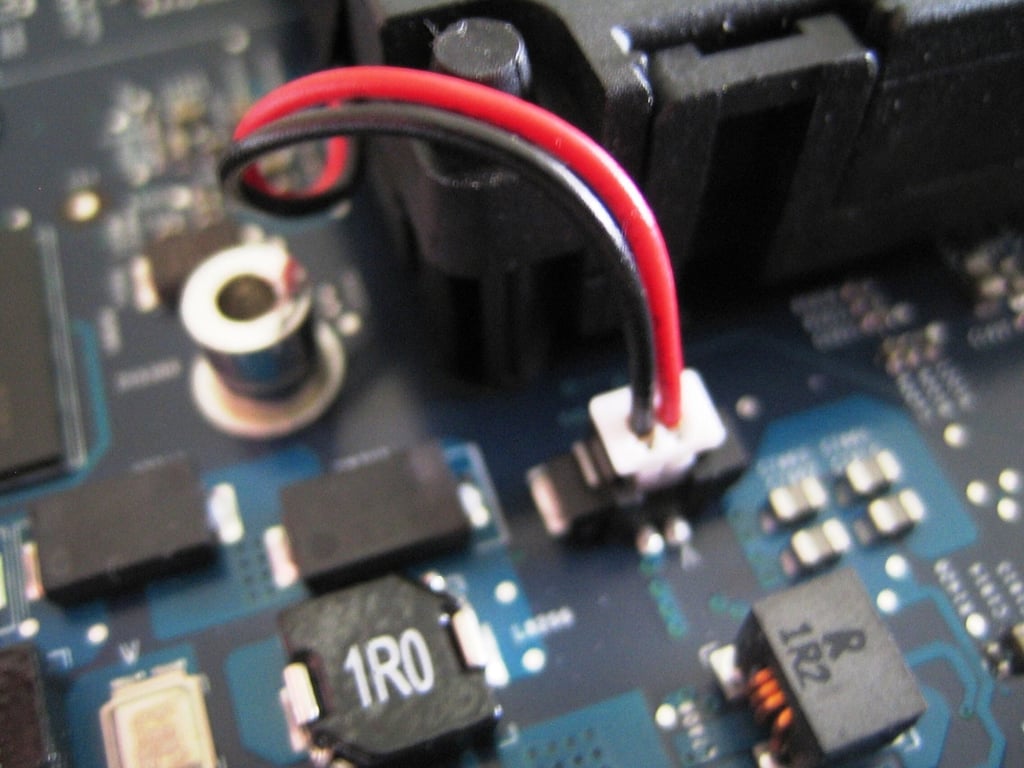
First, disconnect the fan’s cable from the main PCB connector.
Photo by: Bill Detwiler / TechRepublic
Caption by: Bill Detwiler
Now peel the yellow tape away from the cooling fan, but leaving the tape connected to the metal brace.
Photo by: Bill Detwiler / TechRepublic
Caption by: Bill Detwiler

Photo by: Bill Detwiler / TechRepublic
Caption by: Bill Detwiler
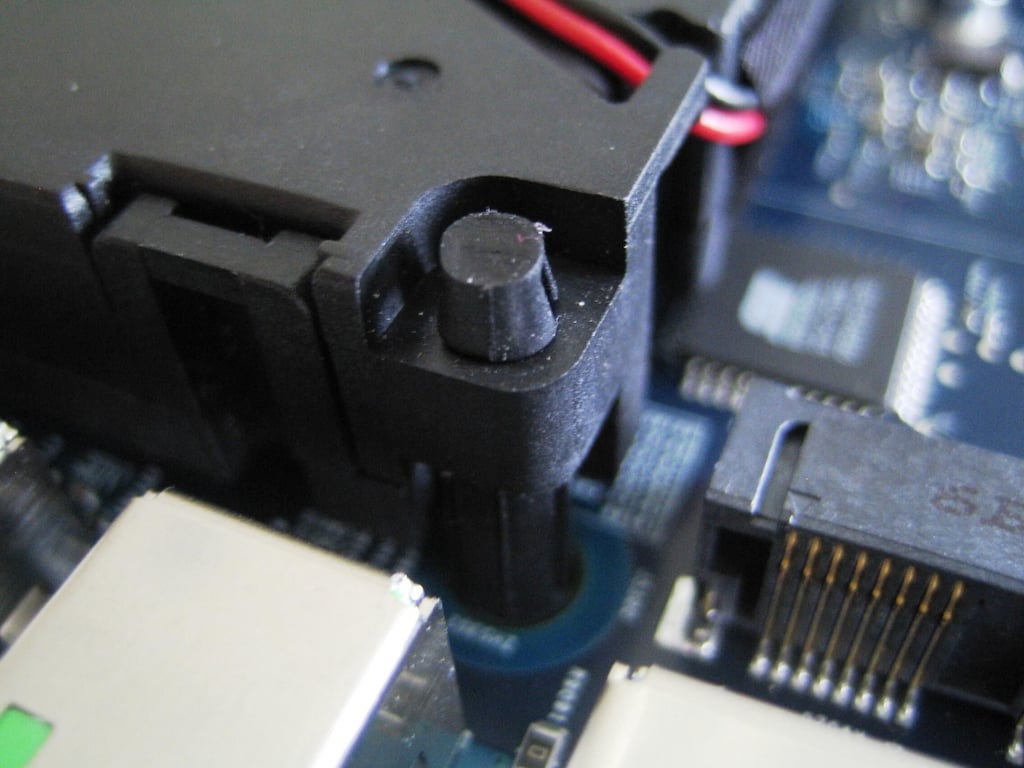
Using a screwdriver or similar thin object, push the top of each rubber post’s head down into the cooling fan’s post hole.
Photo by: Bill Detwiler / TechRepublic
Caption by: Bill Detwiler
After you push the head of each rubber post into its hole, gently lift the Apple TV’s cooling fan away from the main PCB.
Photo by: Bill Detwiler / TechRepublic
Caption by: Bill Detwiler
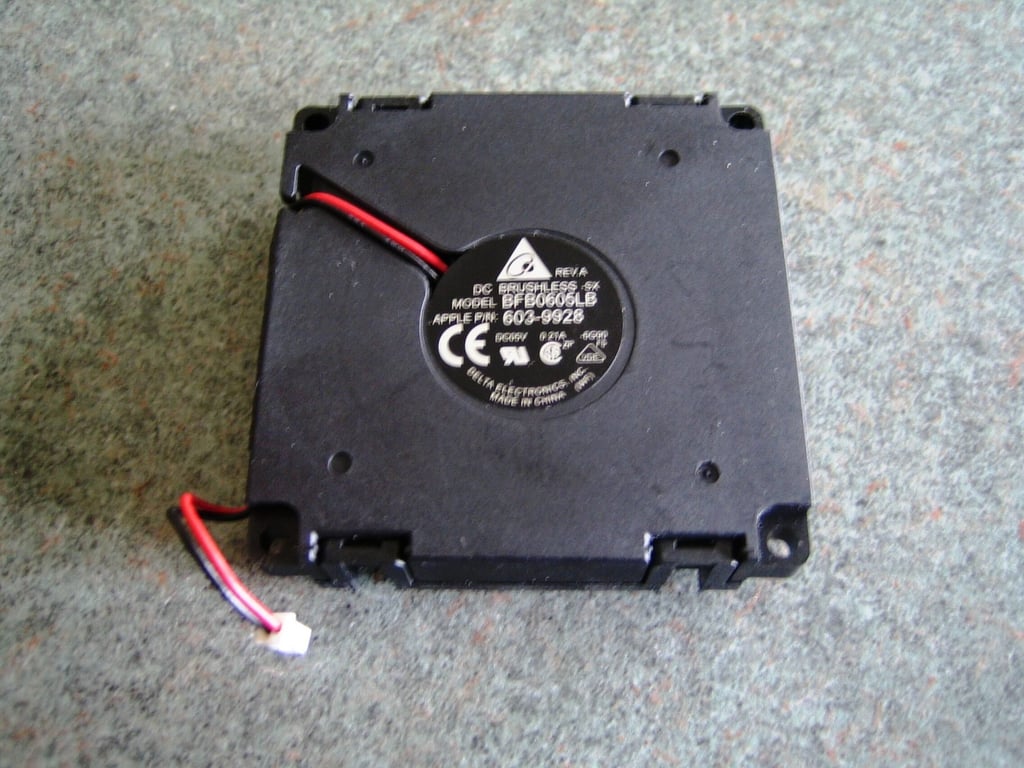
Photo by: Bill Detwiler / TechRepublic
Caption by: Bill Detwiler
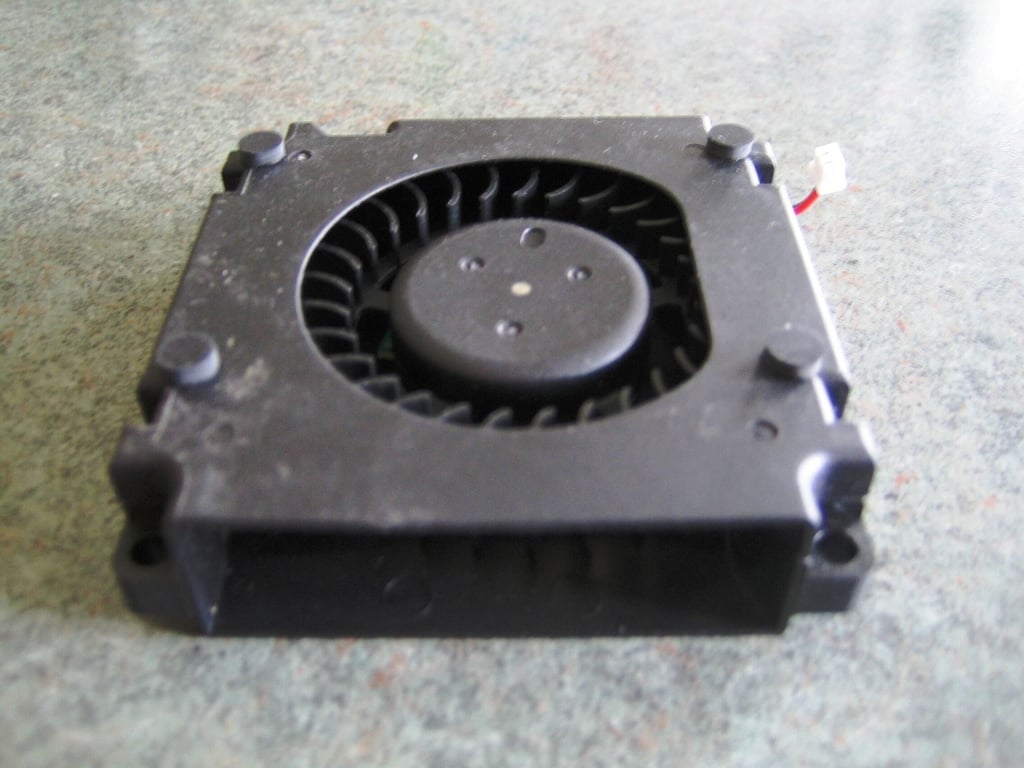
Photo by: Bill Detwiler / TechRepublic
Caption by: Bill Detwiler
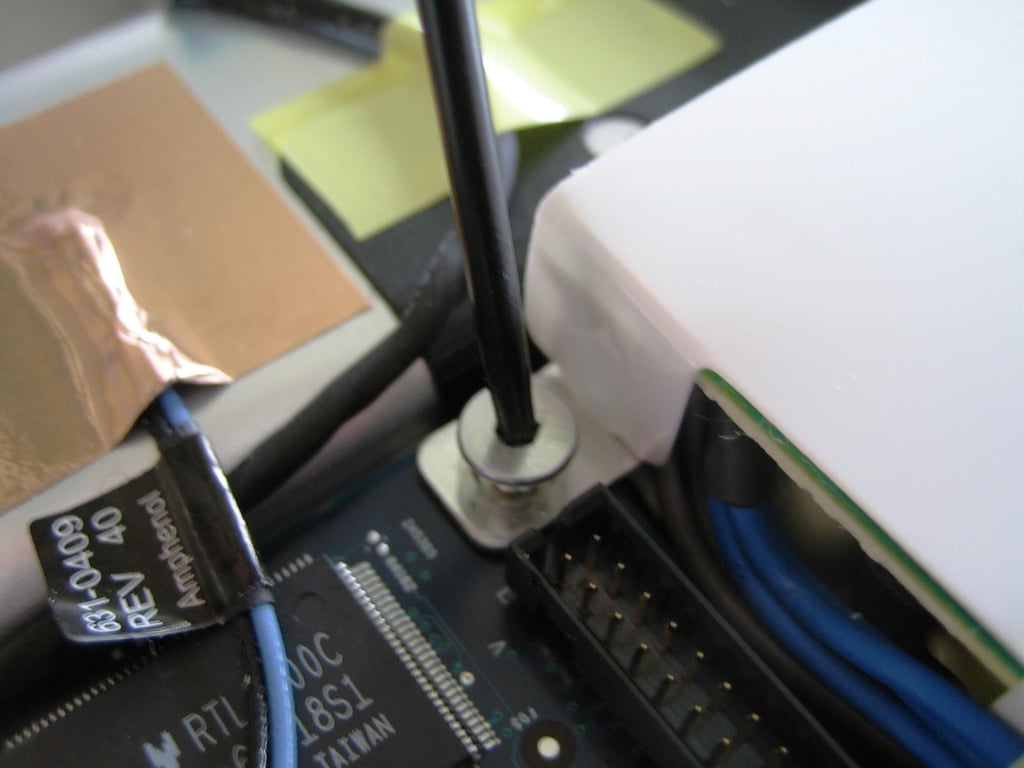
With the cooling fan removed, I decided to finally remove the main PCB. The silver-colored, bracing bar still holds the main PCB to the case. You must remove the brace before lifting out the main PCB.
Photo by: Bill Detwiler / TechRepublic
Caption by: Bill Detwiler
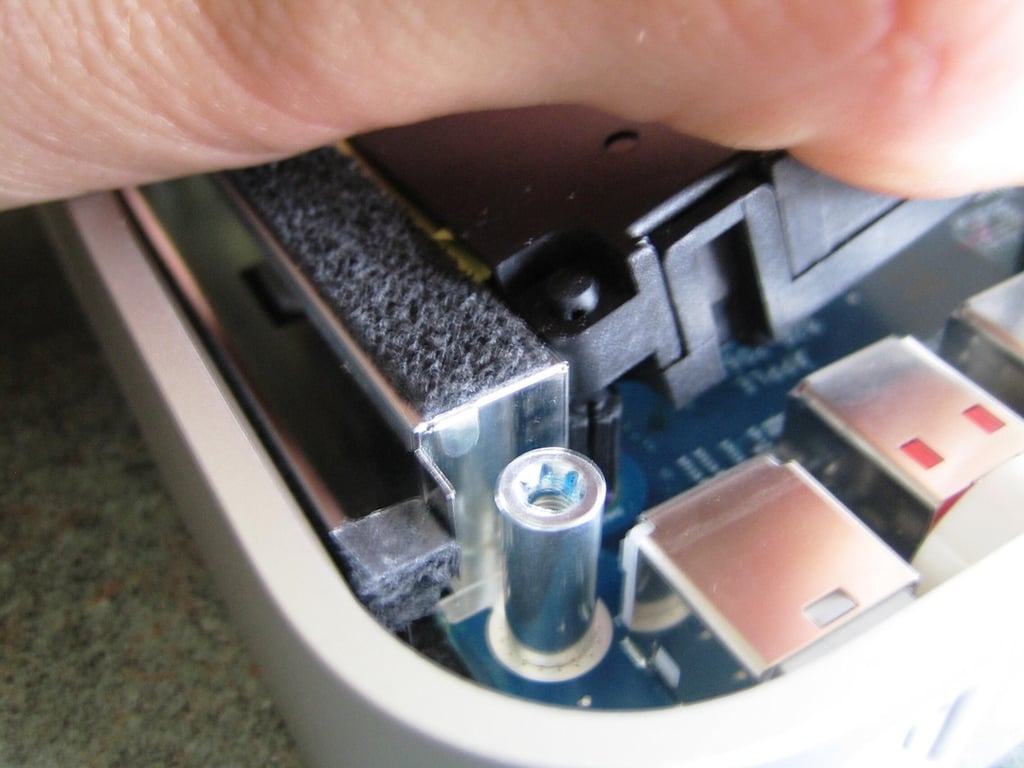
Remove the brace screw/case screw post from the end of the bracing bar. This post uses a slightly larger Torx bit than external case screws. I believe it requires a T10 bit.
Photo by: Bill Detwiler / TechRepublic
Caption by: Bill Detwiler
Another T8 screw hold the other end of the brace to the case. You can access this screw using the small hold in the brace directly above the screw’s head.
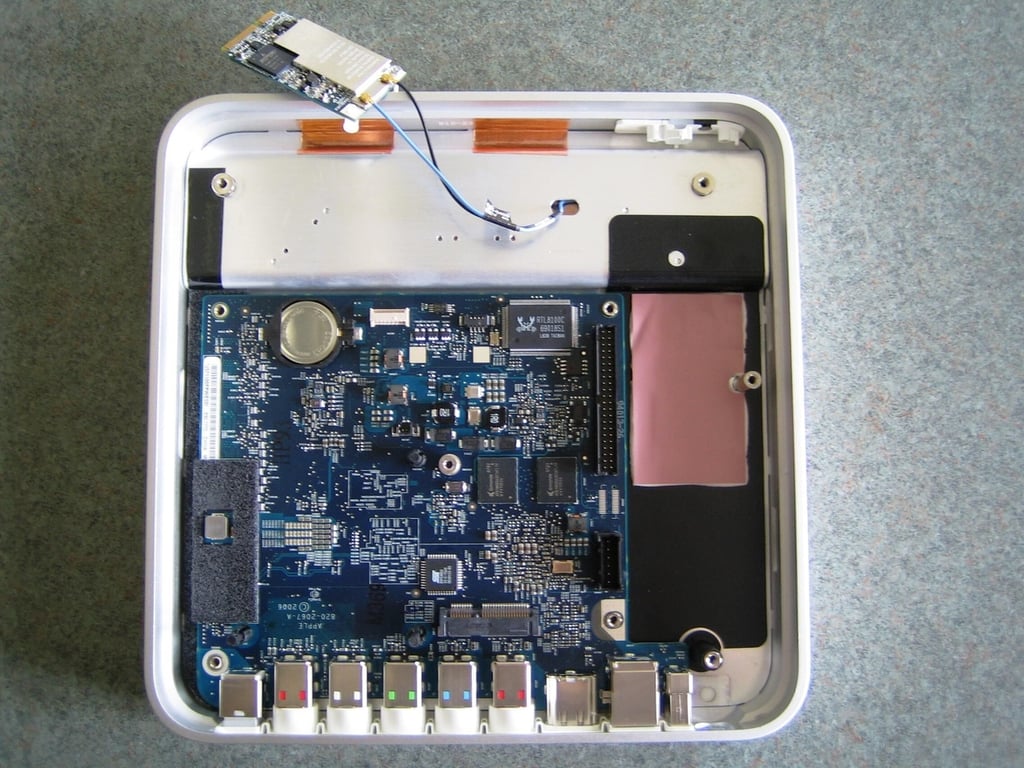
Photo by: Bill Detwiler / TechRepublic
Caption by: Bill Detwiler
With the brace removed, you can lift the main PCB out of the Apple TV case. Left from the front of the main board–tilting the board up to dislocate the ports from the side housing.
Photo by: Bill Detwiler / TechRepublic
Caption by: Bill Detwiler

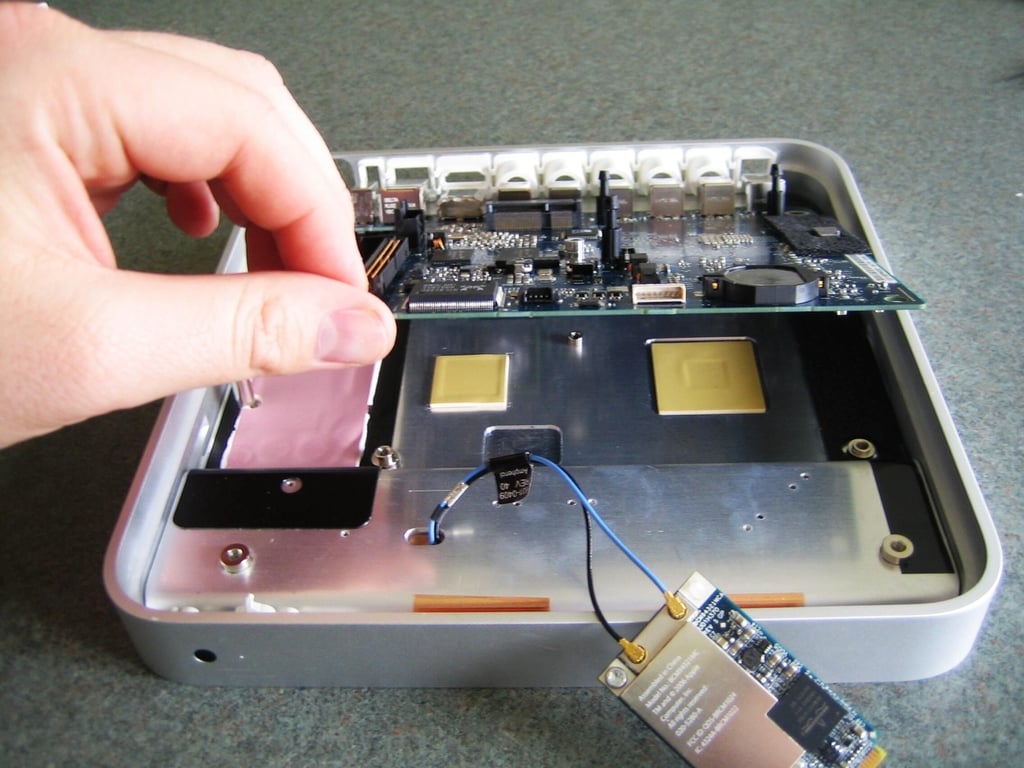
With the main PCB removed, the wireless card is the only component left.
Photo by: Bill Detwiler / TechRepublic
Caption by: Bill Detwiler
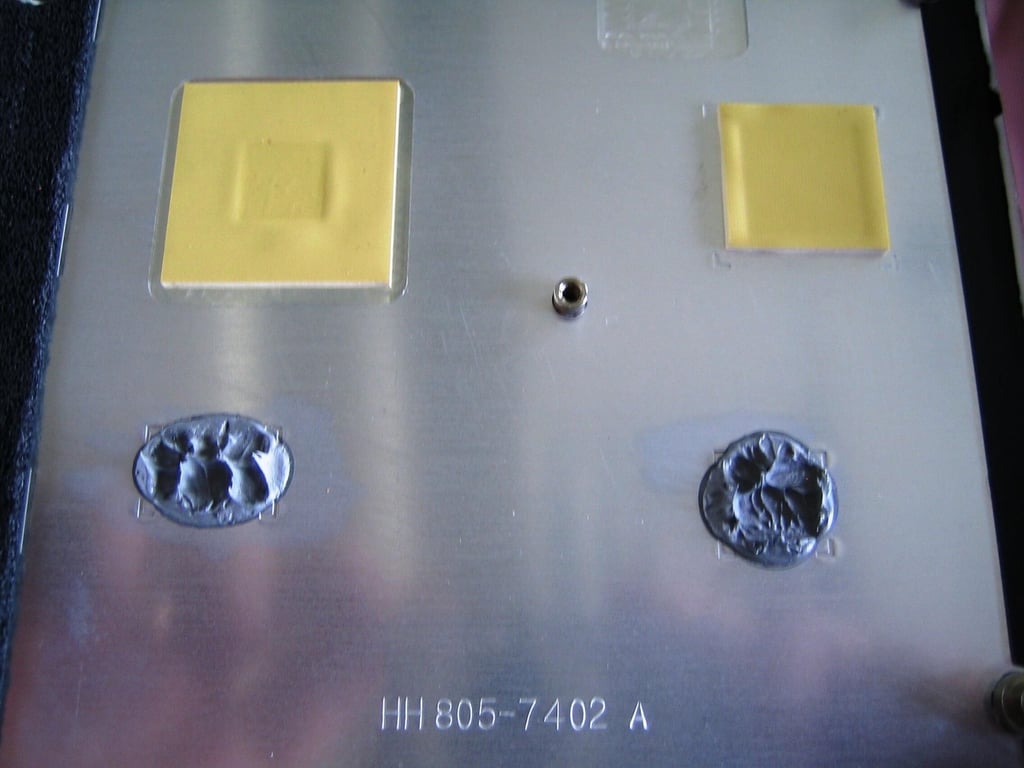
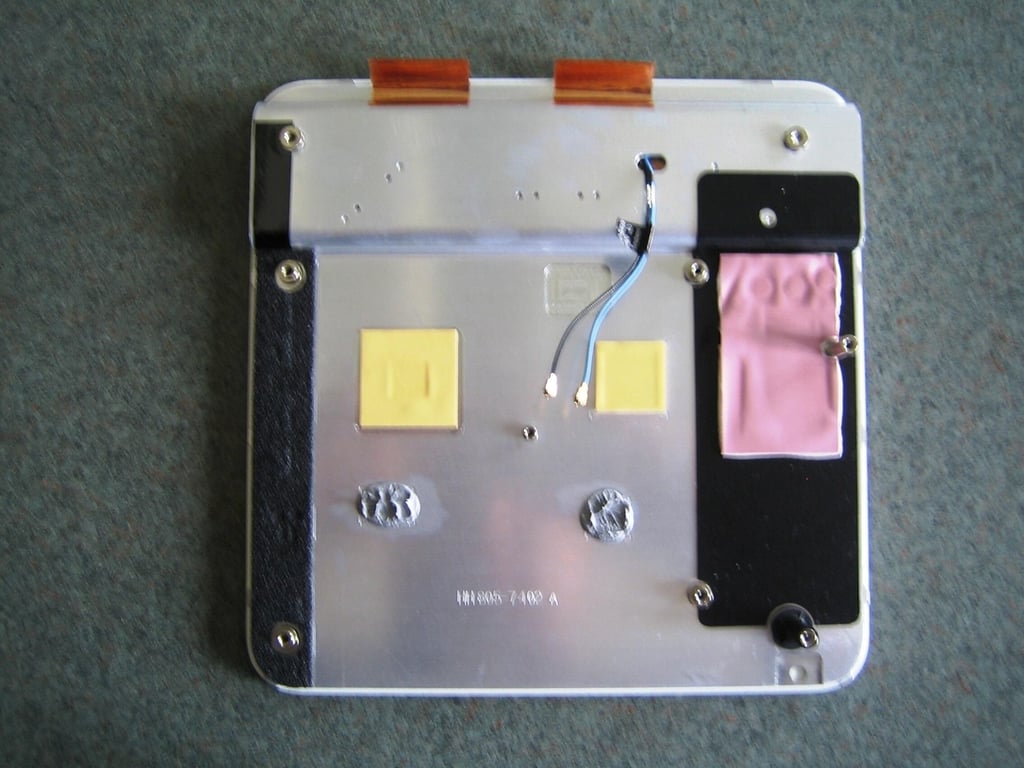
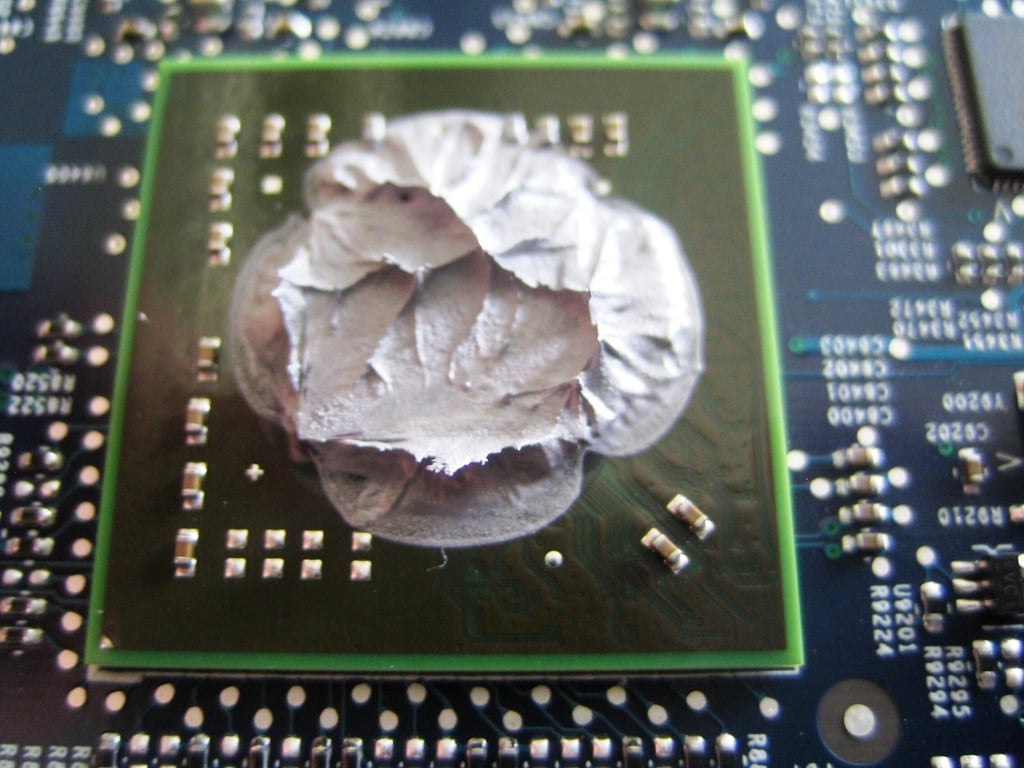
A metal plate is attached to the inside of the top cover. The main PCB and other internal components mount directly to this plate. The Apple TV’s CPU and GPU use this metal plate as a heatsink. This photo show the thermal paste that remained on the plate after lifting away the main PCB.
Unless you can replace it prior to reassembling the Apple TV, do not remove this paste.
Photo by: Bill Detwiler / TechRepublic
Caption by: Bill Detwiler
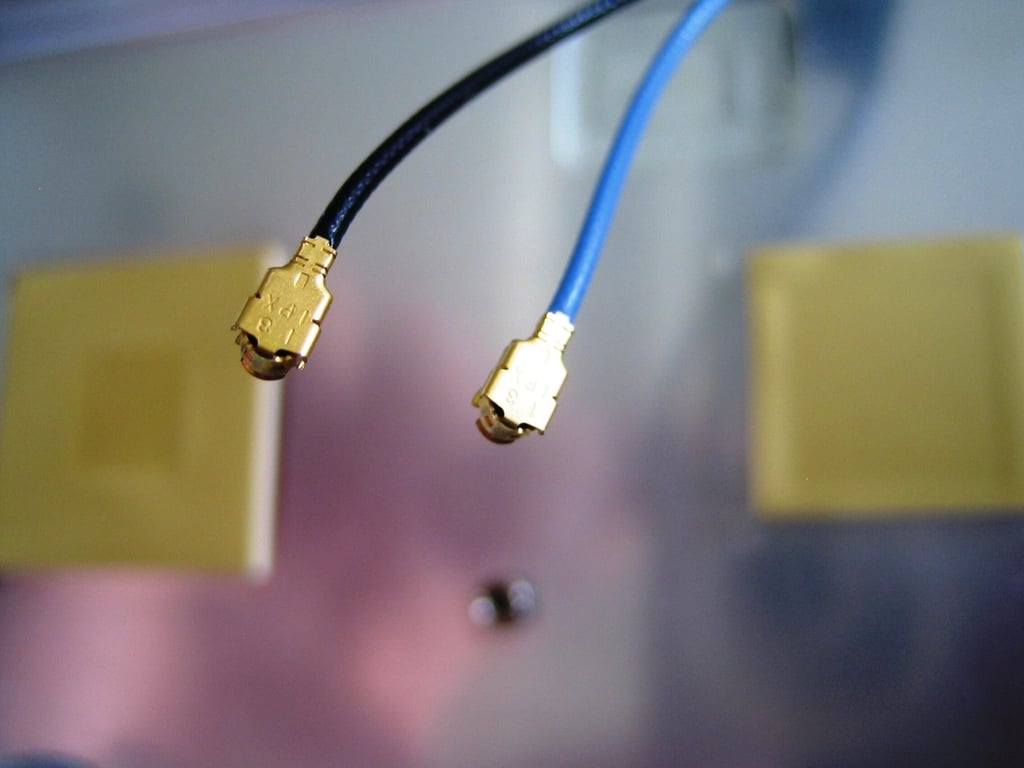
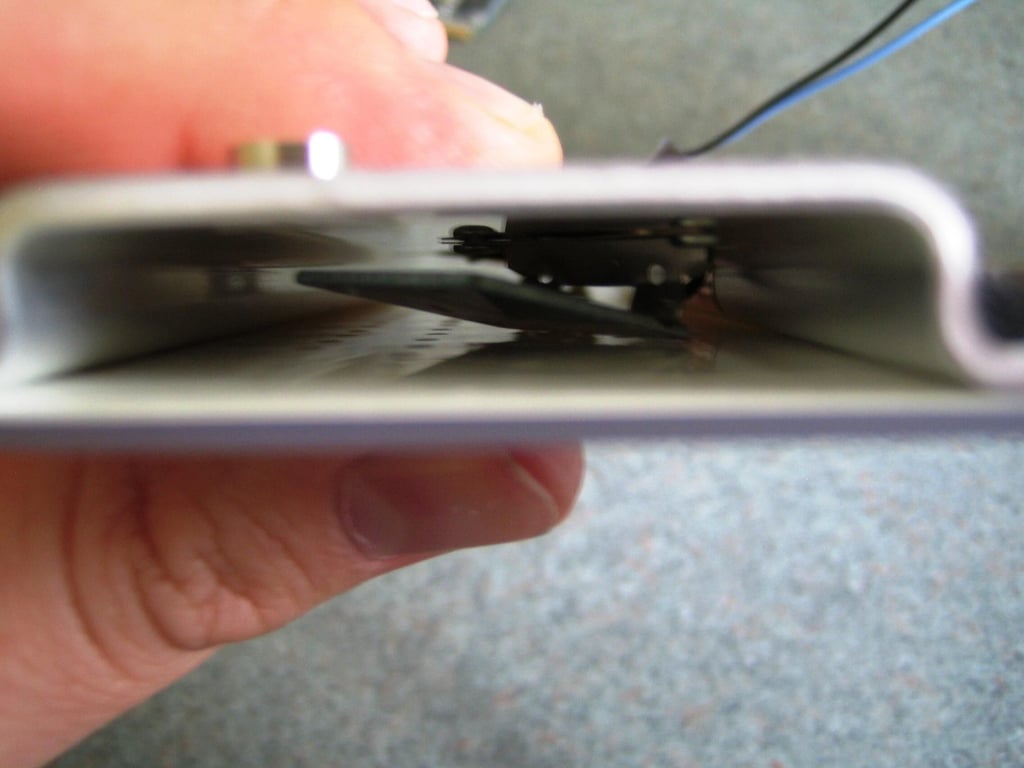
Take care when removing the antenna wires from the wireless card. The connectors are fragile.
Photo by: Bill Detwiler / TechRepublic
Caption by: Bill Detwiler
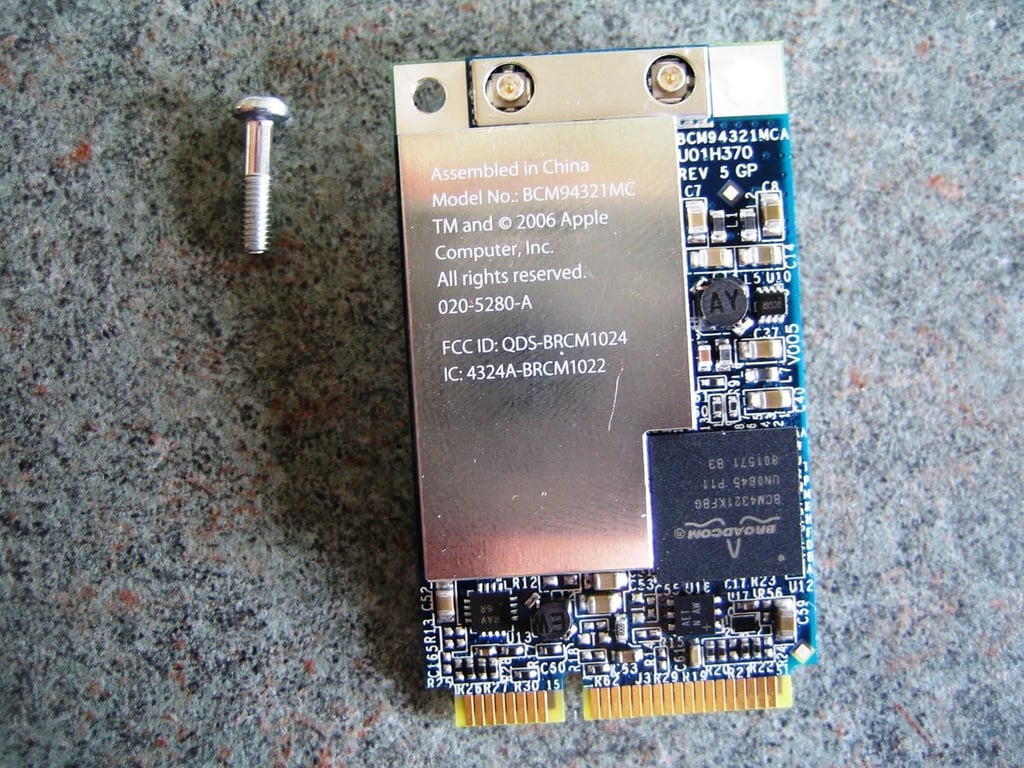
According to various reports, the Apple TV’s Broadcom Wi-Fi card is the same wireless card Apple uses in the Mac Pro. According to Broadcom’s Web site, “The BCM94321MC reference design enables manufacturers to incorporate draft-802.11n Wi-Fi capabilities into notebook PCs and other devices that support the new PCI Express bus architecture. The reference design integrates Broadcom’s new Intensi-fi solutions, including the Broadcom’s best-performing 802.11 radio (the BCM2055), and 2.4/5 GHz baseband and media access controller (the BCM4321).”
Photo by: Bill Detwiler / TechRepublic
Caption by: Bill Detwiler
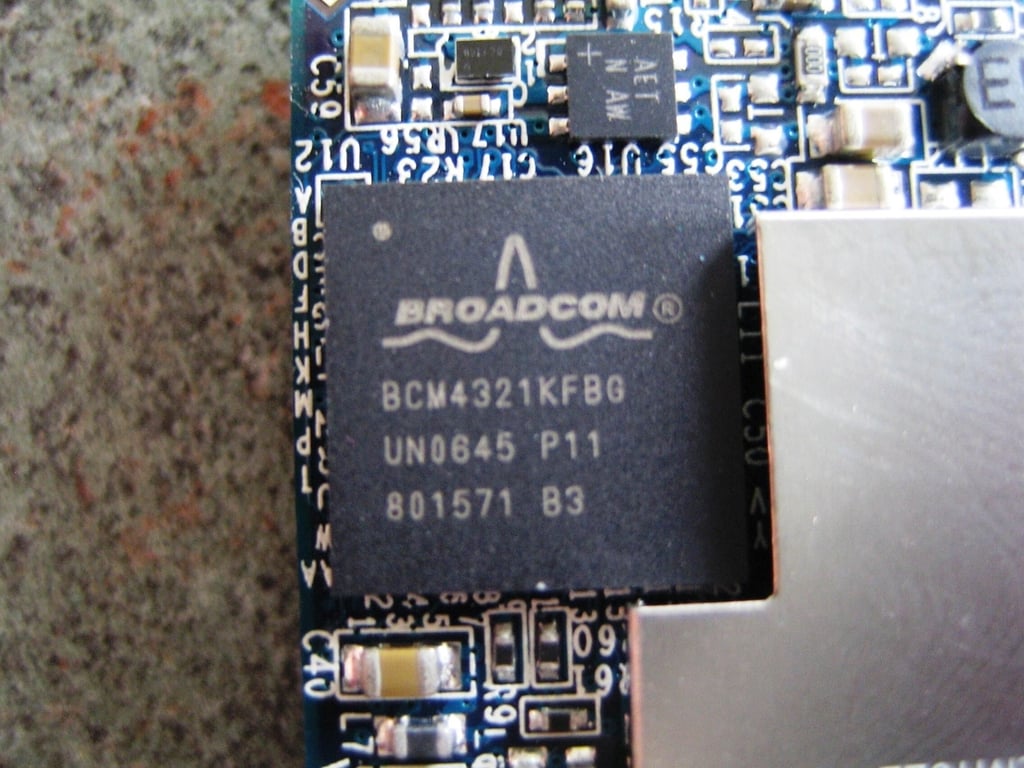
The BCM4321 2.4/5 GHz baseband and media access controller is used as part of Broadcom’s BCM94321MC Intensi-fi 2.4/5 GHz PCI Express Mini Card.
Photo by: Bill Detwiler / TechRepublic
Caption by: Bill Detwiler
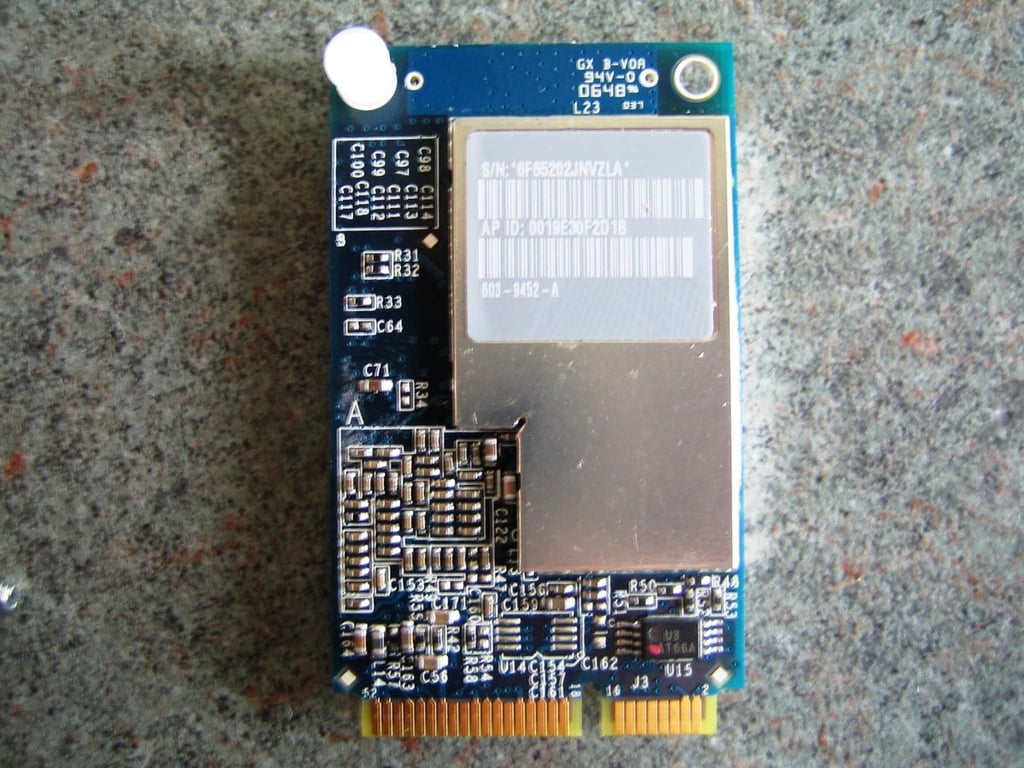
Photo by: Bill Detwiler / TechRepublic
Caption by: Bill Detwiler
Once the motherboard and other internal hardware are removed, you can lift the plastic side housing away from the top panel and metal plate.
Photo by: Bill Detwiler / TechRepublic
Caption by: Bill Detwiler
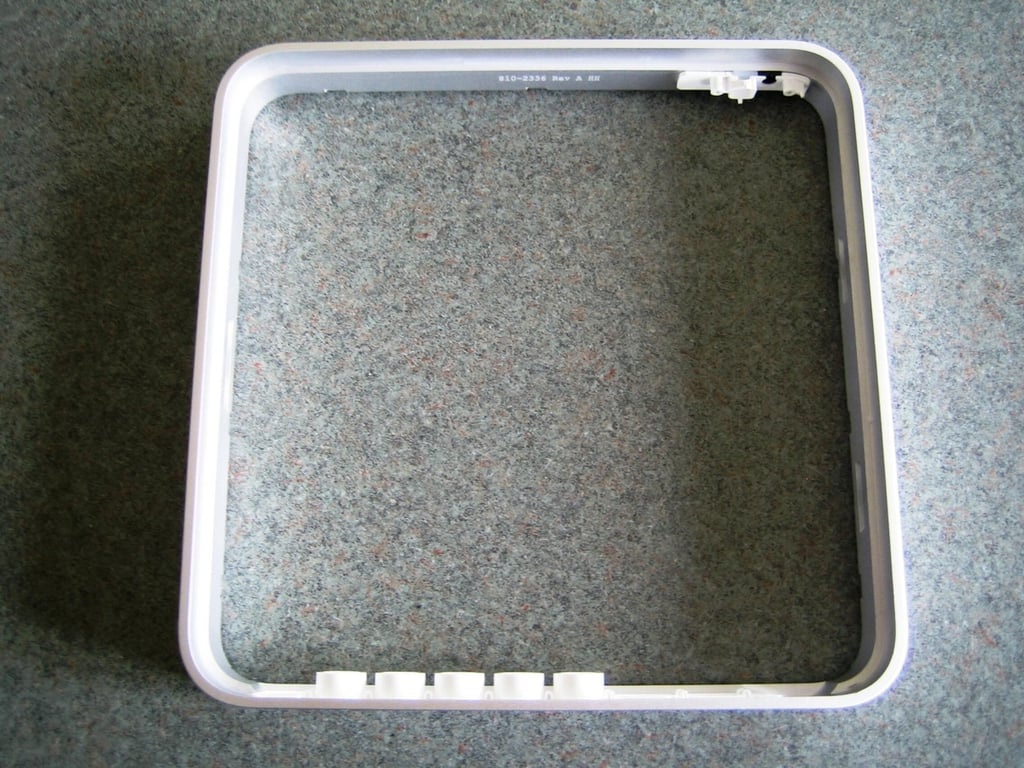
Photo by: Bill Detwiler / TechRepublic
Caption by: Bill Detwiler
The Apple TV’s plastic cover appears to be secured to an internal metal plate via glue. I attempted to separate the pieces, but risked breaking them in the process.
Photo by: Bill Detwiler / TechRepublic
Caption by: Bill Detwiler
The Apple TV’s two Wi-Fi antennas are sandwiched between the unit’s plastic cover and top metal plate.
Photo by: Bill Detwiler / TechRepublic
Caption by: Bill Detwiler
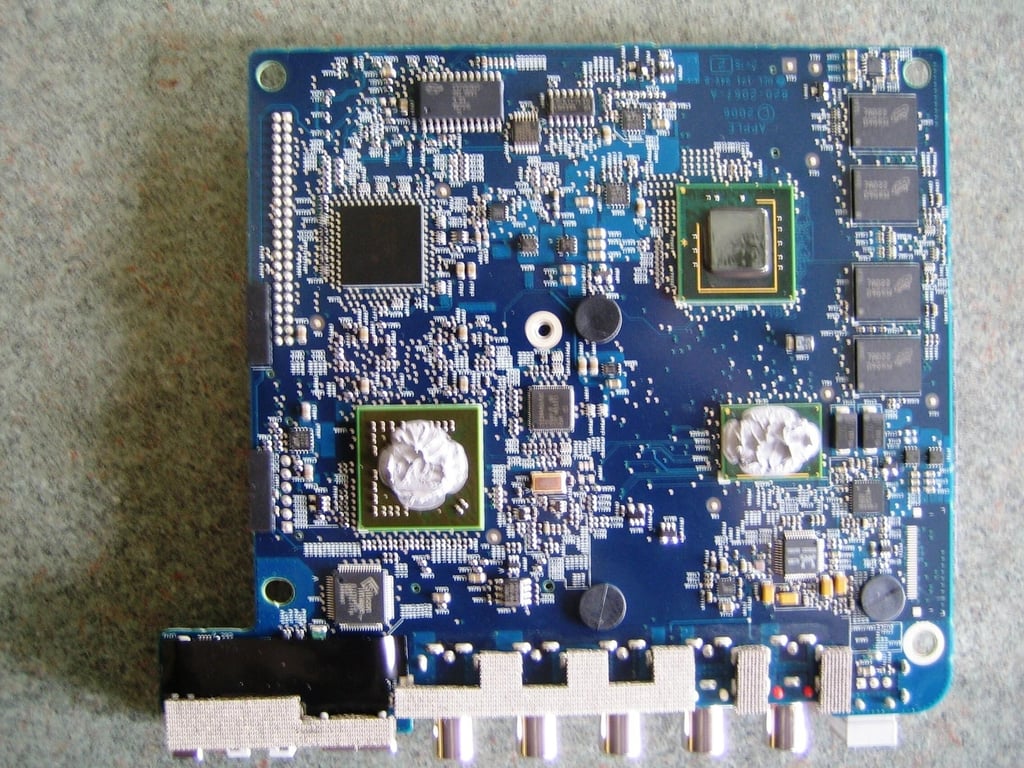
On top of the Apple TV’s main PCB, you’ll find the Intel Intel Mobile 945G Express Chipset, Intel CPU, NVIDIA Go 7300 GPU, 256MB main memory, Silicon Image SiI1930 – HDCP PanelLink Transmitter, and Realtex ALC885 audio codec.
Photo by: Bill Detwiler / TechRepublic
Caption by: Bill Detwiler
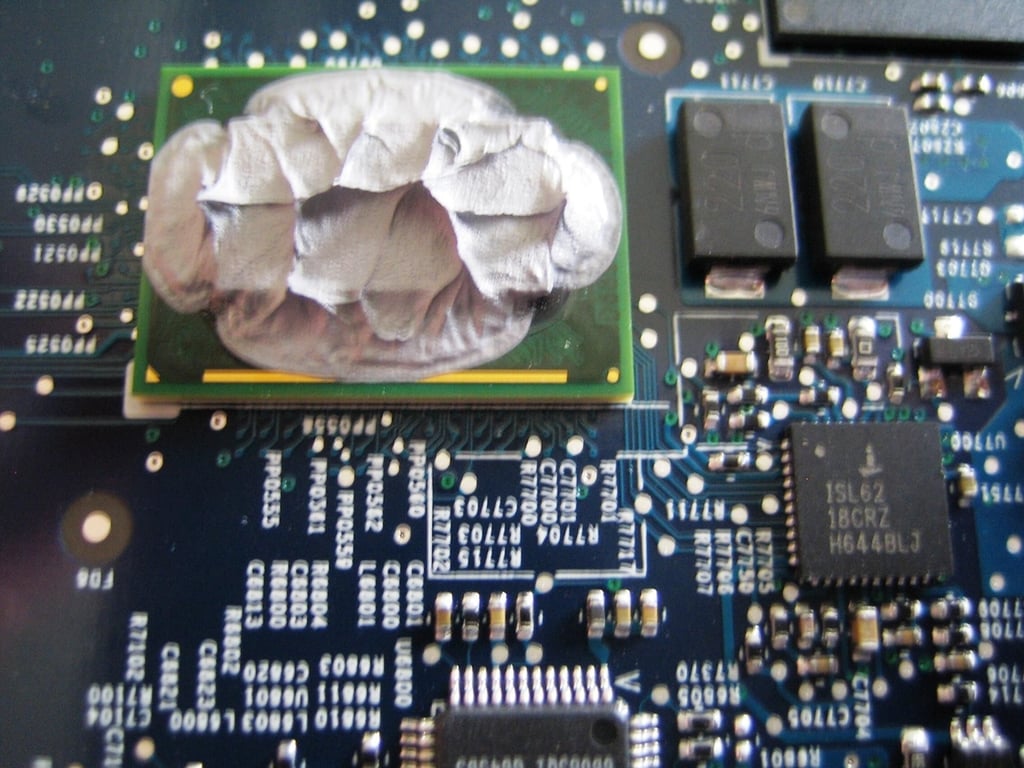
Hidden under all this thermal paste is the Apple TV’s Intel CPU. Unfortunately, neither Apple nor Intel has publicly announced the exact CPU used in the Apple TV. Various Internet reports speculate that the CPU is a an Ultra Low Voltage Pentium M based on the Dothan core, a Core 2 Duo Mobile variant, or a Pentium M-based “Crofton” CPU, based on SSE2 Dothan model 7645A966 0159.
Photo by: Bill Detwiler / TechRepublic
Caption by: Bill Detwiler
Under all this thermal paste rests a NVIDIA’s GeForce Go 7300 GPU. According to NVIDIA’s Web site, the 64-bit, PCI Express GeForce Go 7300 has a memory bandwidth of 5.6 GB/sec, fill rate of 1.4 Gpixels/sec, and a memory data rate of 700 MHz.
Photo by: Bill Detwiler / TechRepublic
Caption by: Bill Detwiler
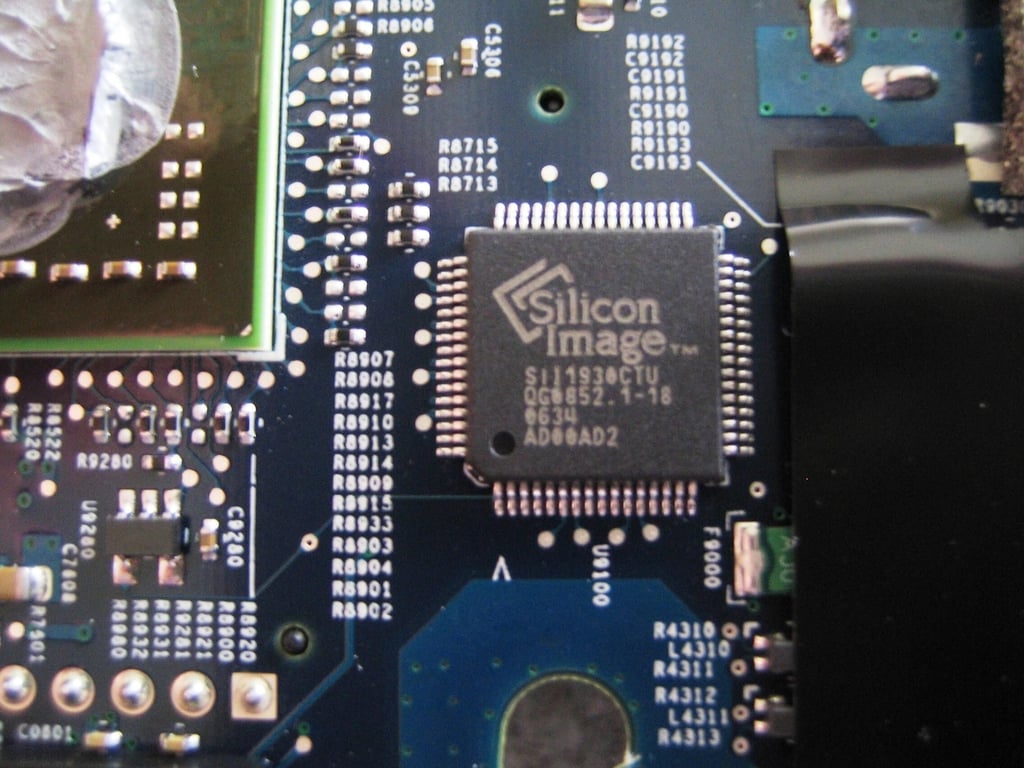
Judging from the chip’s markings, this is a Silicon Image SiI1930 – HDCP PanelLink Transmitter. According to Silicon Image’s Web site, “the SiI1930 features a Transition-Minimized Differential Signaling (TMDS) interface to the GPU. The SiI 1930 offers a fully compliant HDMI output capable of supporting video resolutions up to UXGA and 1080p with up to eight channels of 192kHz audio.”
Photo by: Bill Detwiler / TechRepublic
Caption by: Bill Detwiler
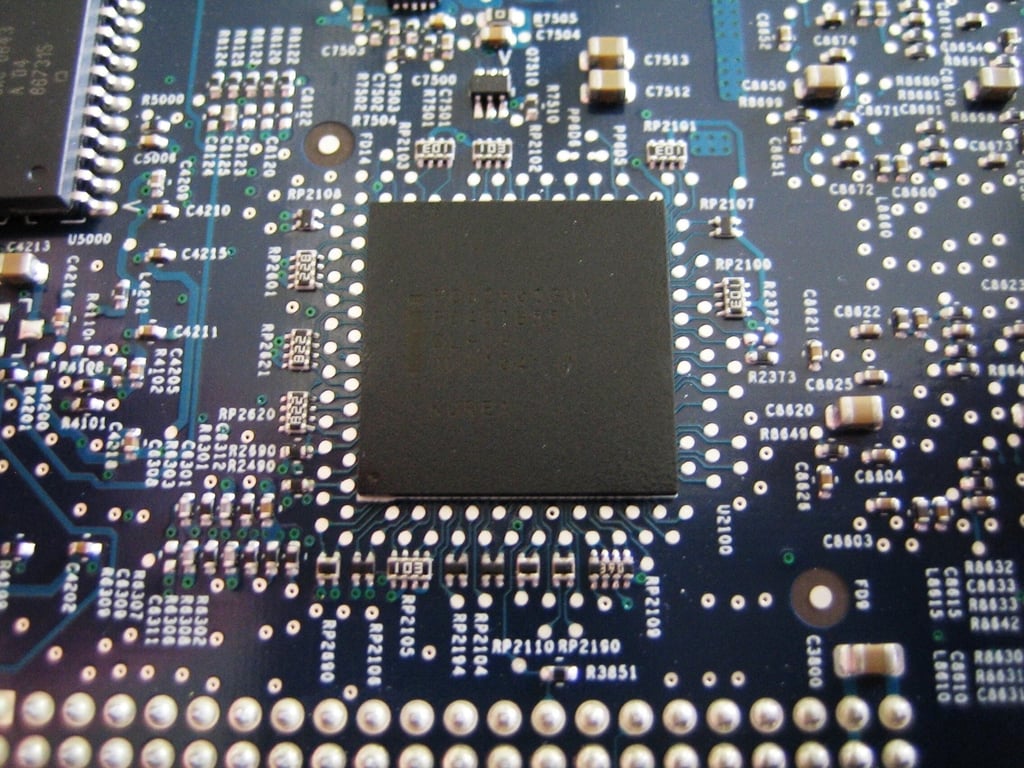
I wasn’t able to find any concrete information on this chip.
Photo by: Bill Detwiler / TechRepublic
Caption by: Bill Detwiler
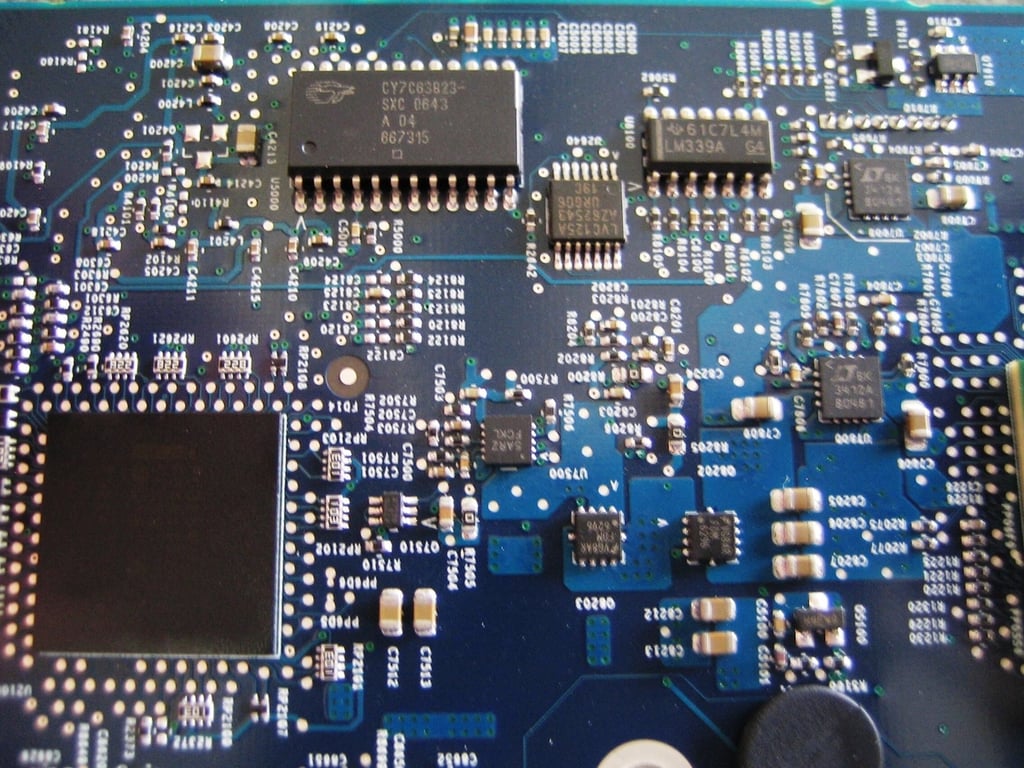
The large rectangular chip (top left) is the USB controller. The smaller rectangular chip (top right) is a Texas Instruments LM339A General Purpose Differential Comparator.
Photo by: Bill Detwiler / TechRepublic
Caption by: Bill Detwiler
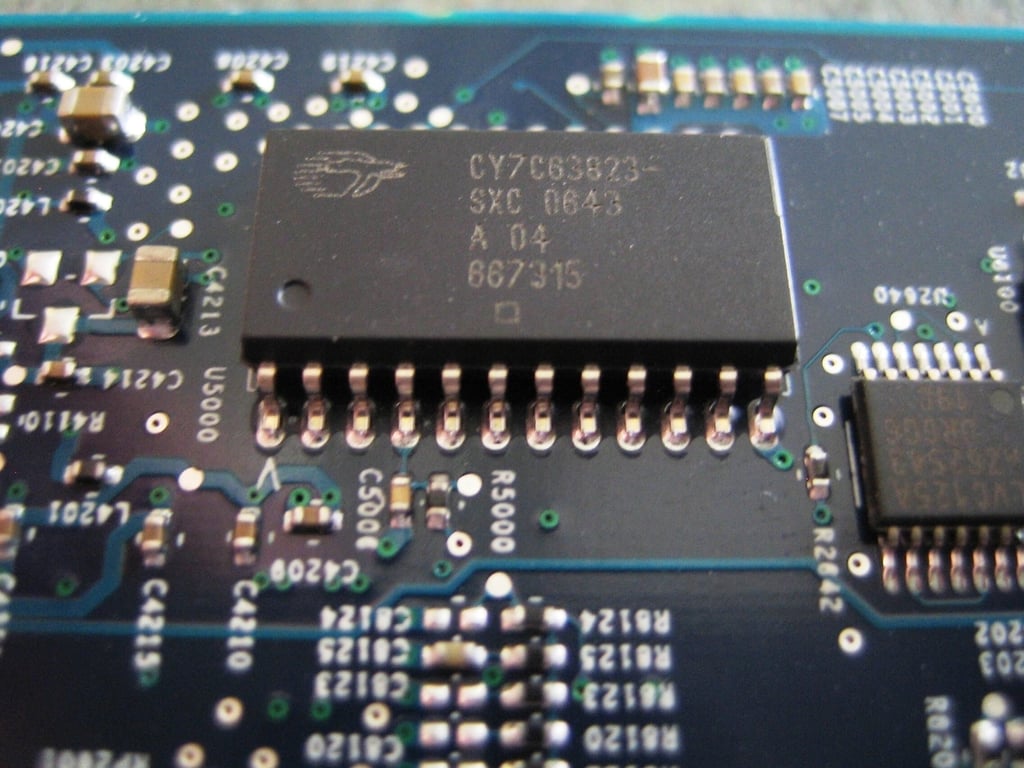
The Apple TV’s USB port is controlled by this Cypress Semiconductor Corporation CY7C63823 enCoRe(TM) II Low-Speed USB Peripheral Controller.
Photo by: Bill Detwiler / TechRepublic
Caption by: Bill Detwiler
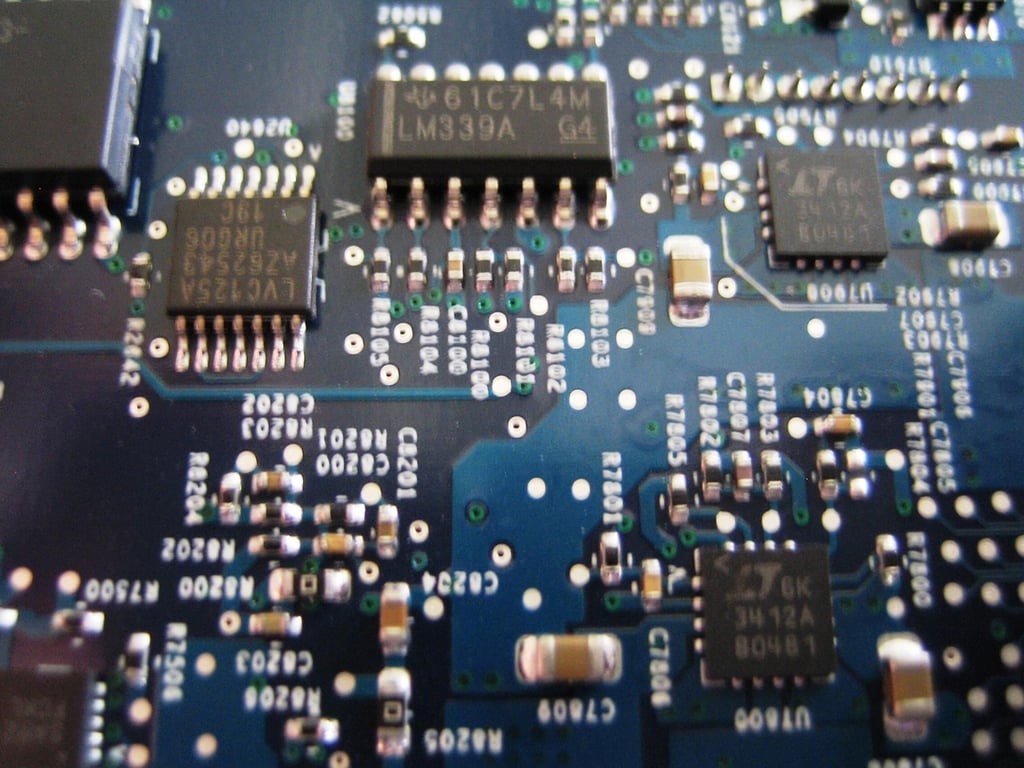
The rectangular chip marked 61C7L4M LM339A G4 (top center) appears to be a Texas Instruments LM339A General Purpose Differential Comparator. I wasn’t able to find any information on how the Apple TV uses this chip.
Photo by: Bill Detwiler / TechRepublic
Caption by: Bill Detwiler
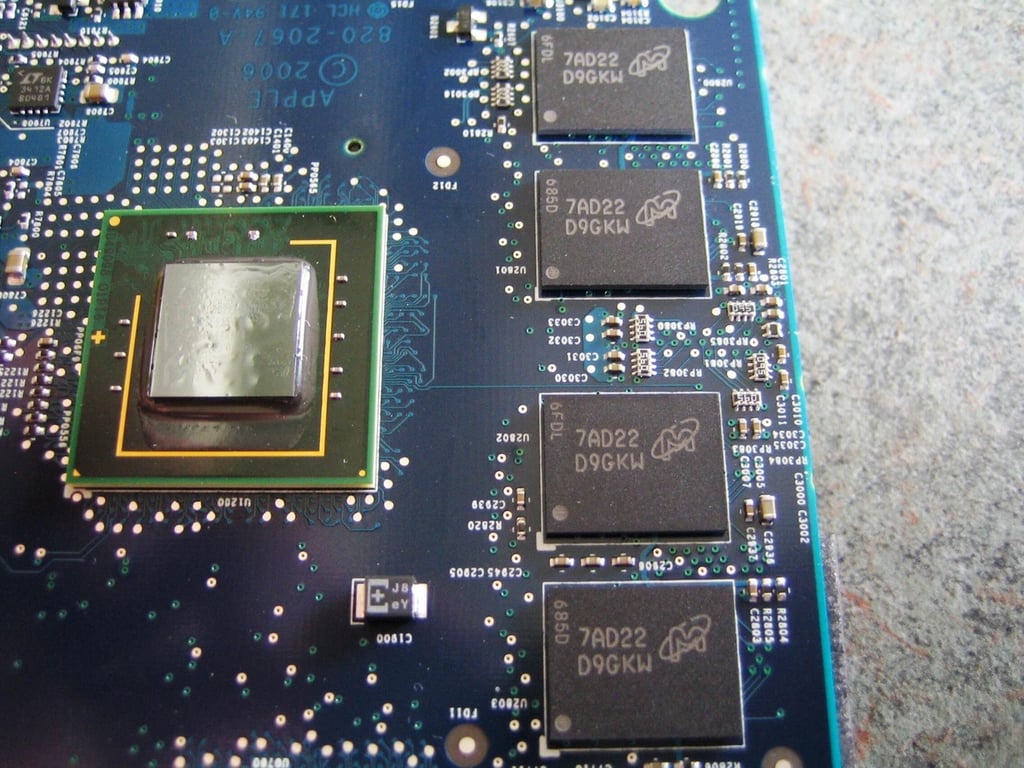
Apple appears to be using memory from various manufactures. Our unit contained four Micron 7AD22 D9GKW 64MB memory modules (256MB total main memory). I was unable to find any information about these chips on Micron’s Web site.
Other Apples TV galleries have shown both the same Micron chips and DDR2 memory modules from Nanya.
Photo by: Bill Detwiler / TechRepublic
Caption by: Bill Detwiler
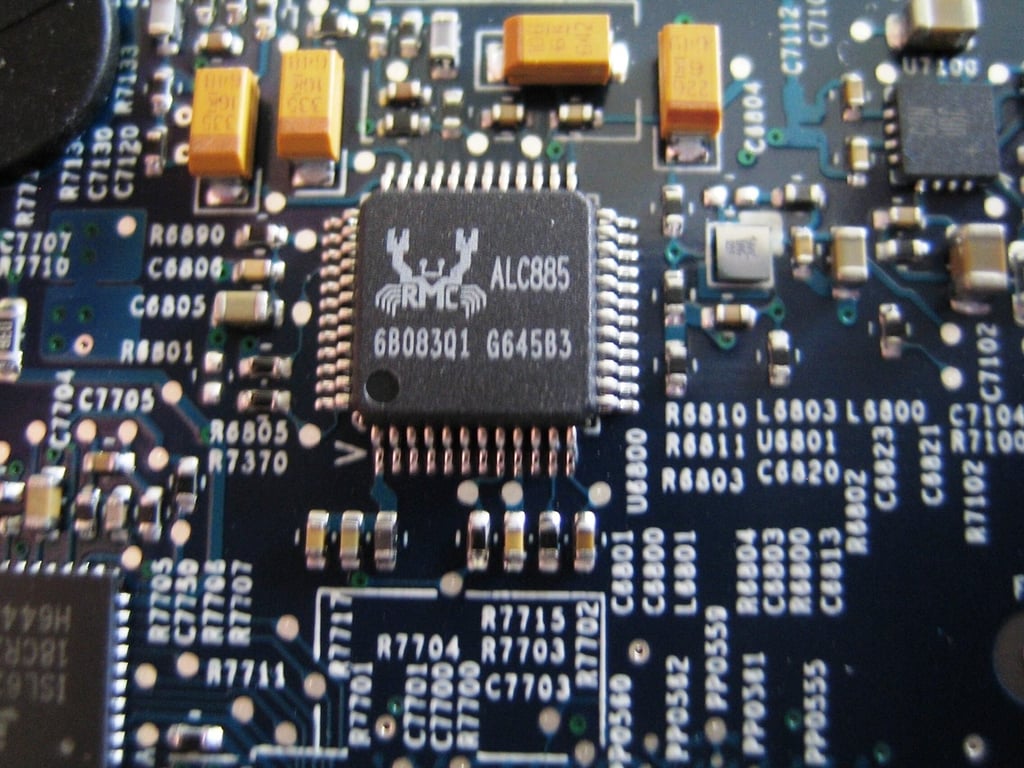
The Apple TV uses a Realtek ALC885 7.1 2 channel high definition audio codec.
Photo by: Bill Detwiler / TechRepublic
Caption by: Bill Detwiler

The large, square circuit (top center) is an Intersil ISL6218 Single Phase IMVP-IV Controller for the Intel Pentium M. I believe this controller and the surrounding circuits are part of the CPU’s power supply.
Photo by: Bill Detwiler / TechRepublic
Caption by: Bill Detwiler
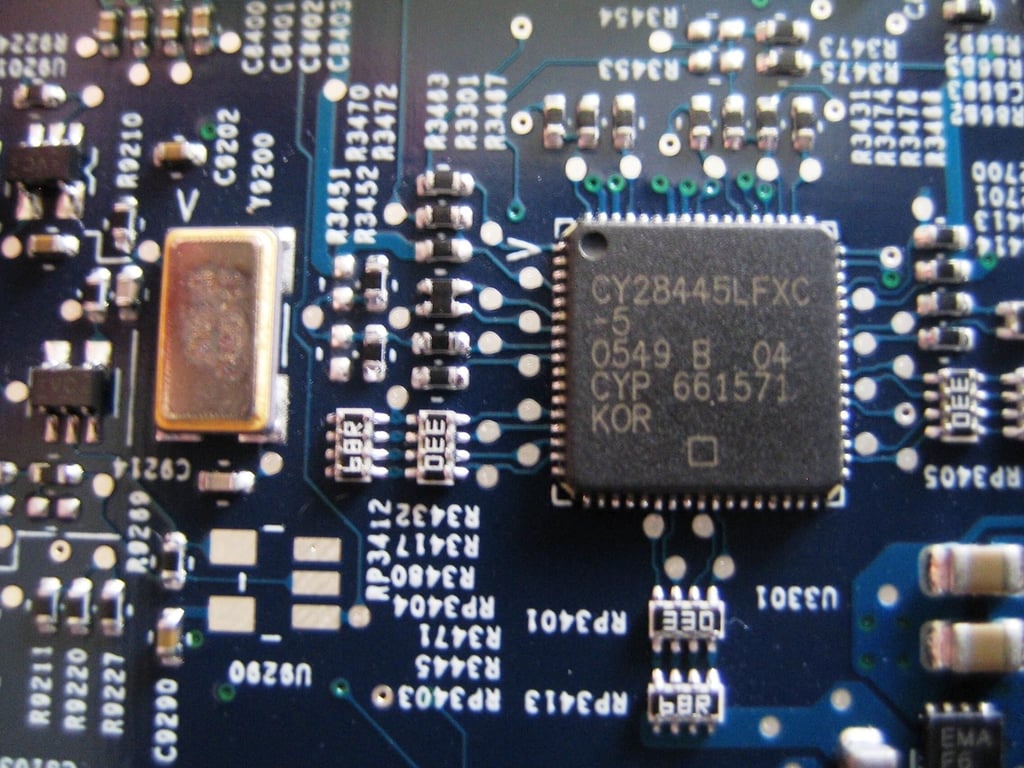
This Cypress Semiconductor Corporation CY28445LFXC Clock Generator–for Intel Core Duo CPU–is also used in the Intel Apple iMac.
Photo by: Bill Detwiler / TechRepublic
Caption by: Bill Detwiler
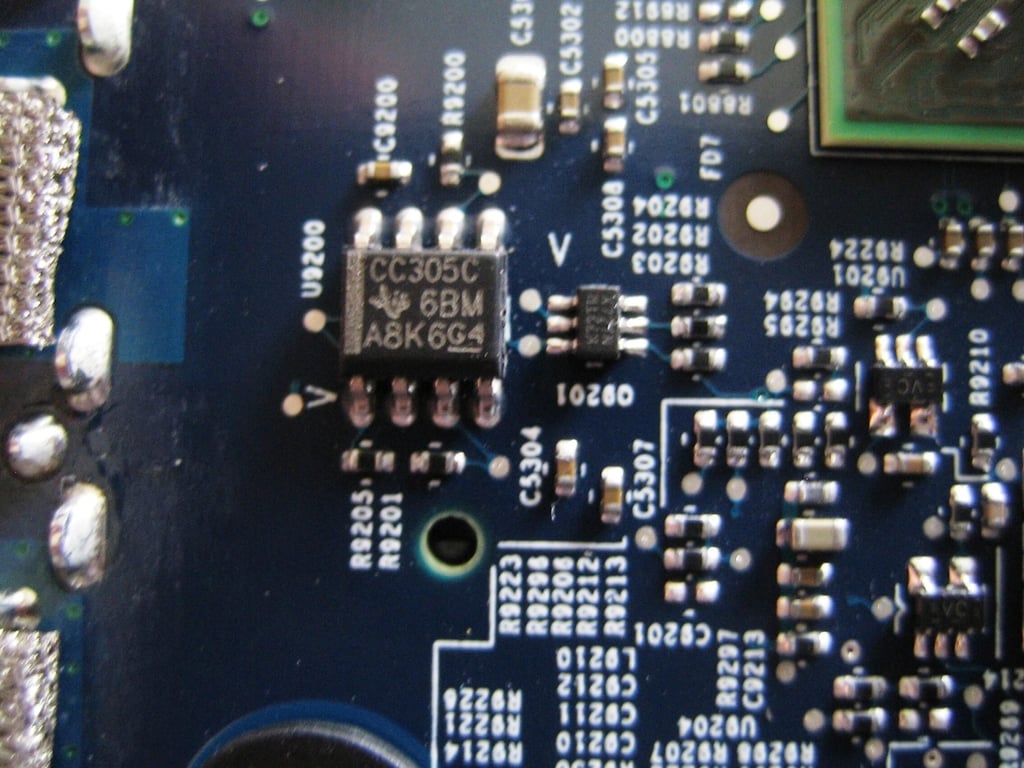
I was unable to find any information on this Texas Instruments circuit marked CC305C6BMA8K G4.
Photo by: Bill Detwiler / TechRepublic
Caption by: Bill Detwiler
On the bottom of the Apple TV’s main PCB, you’ll find the various connectors, system battery, Ethernet controller, video memory, and more.
Photo by: Bill Detwiler / TechRepublic
Caption by: Bill Detwiler
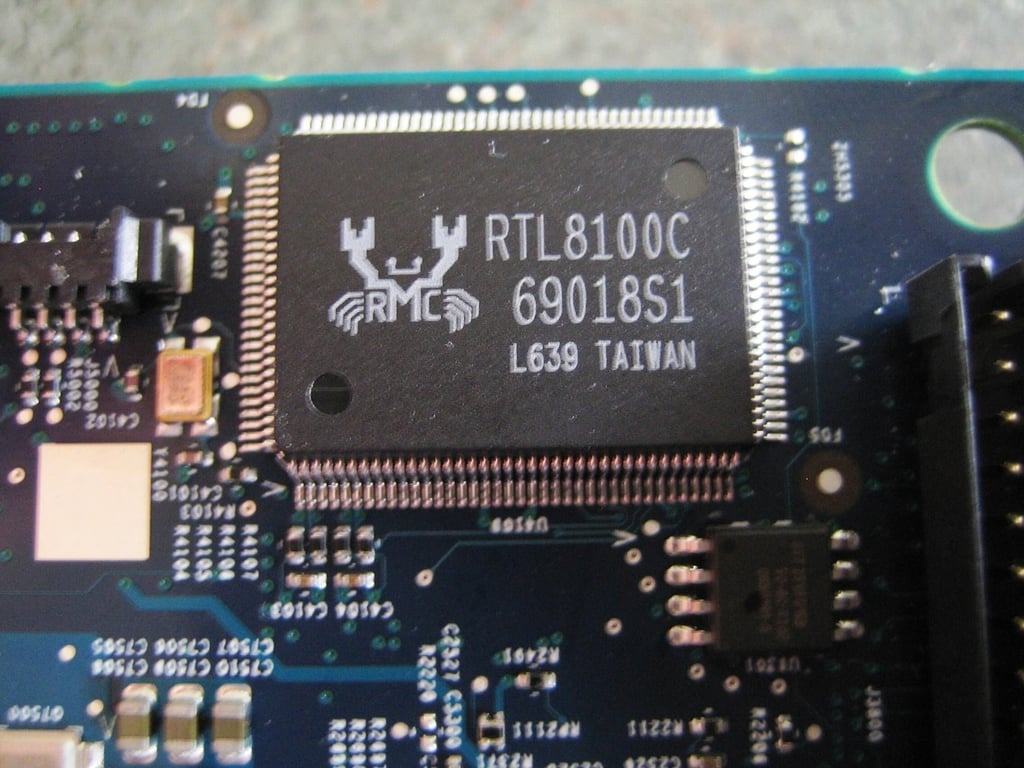
This Realtek RTL8100C PCI/Mini-PCI Single-Chip Fast Ethernet Controller drives the Apple TV’s 10/100 Ethernet port.
Photo by: Bill Detwiler / TechRepublic
Caption by: Bill Detwiler
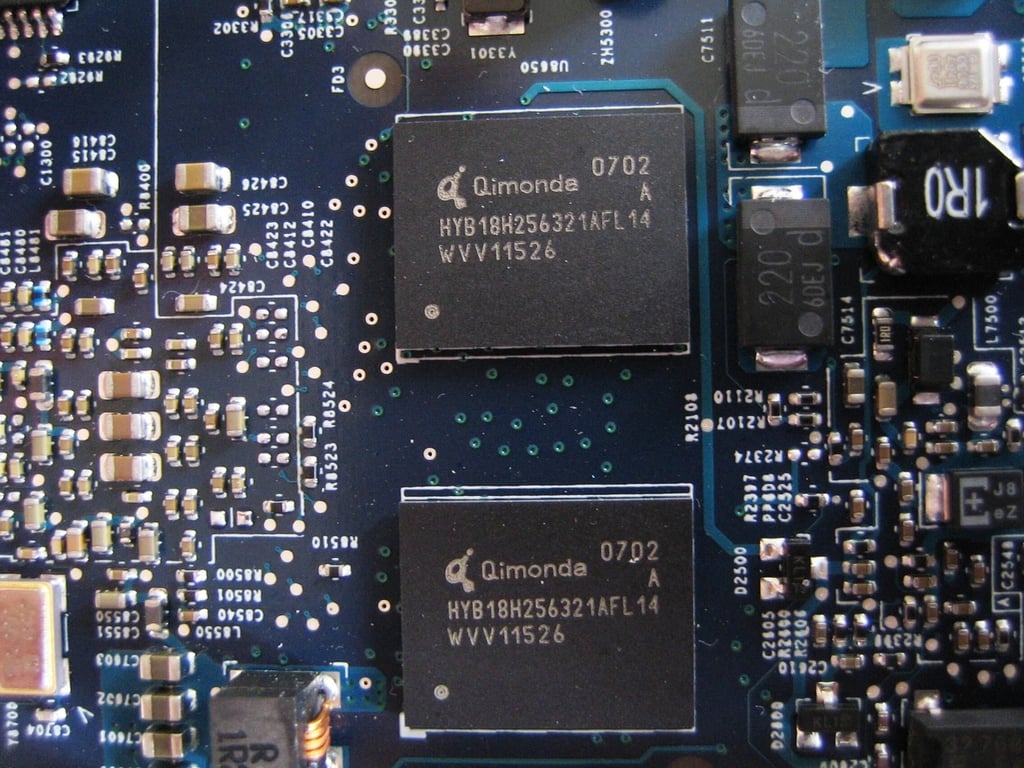
These two chips provide the Apple TV’s 64MB of video memory. According to Qimonda’s Web site, these two chips are either HYB18H256321AFL14 GDDR3 (256Mb, 8M x 32, 700 MHz, 1.8V) or HYB18H256321AF-14 (256Mb, 8Mx32, 700MHz, 2.0V).
Photo by: Bill Detwiler / TechRepublic
Caption by: Bill Detwiler
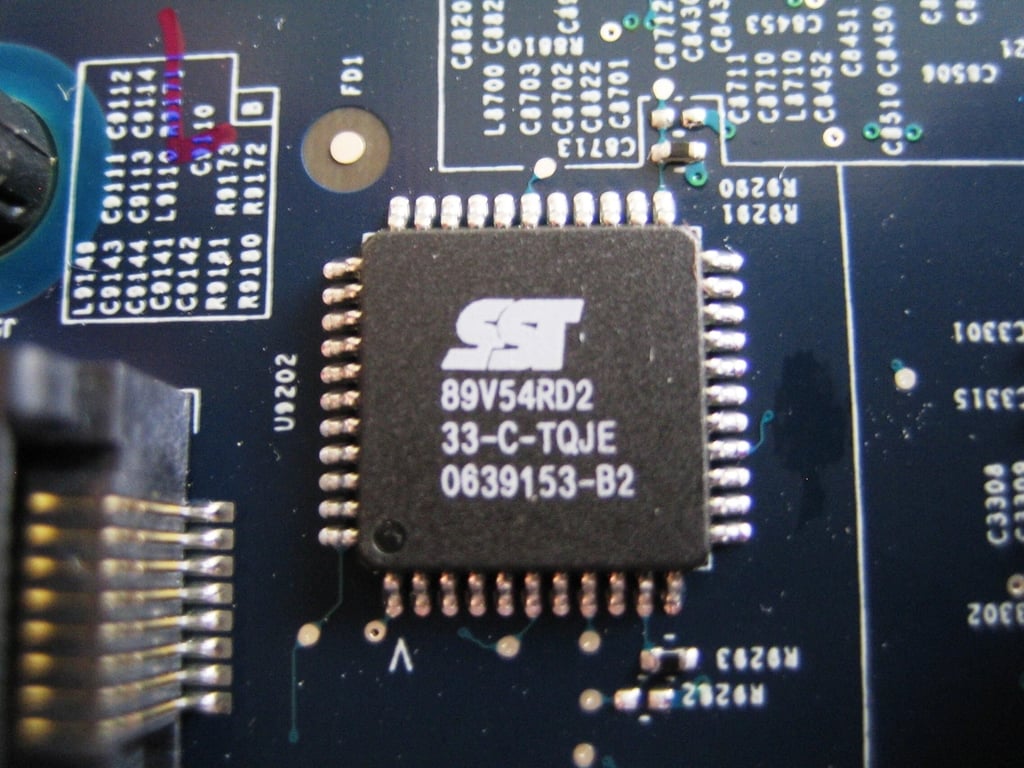
I wasn’t able to find any data on how the Apple TV uses this Silicon Storage Technology (SST) SST89V54RD2 FlashFlex MCU. You can find more details about this chip on SST’s Web site.
Photo by: Bill Detwiler / TechRepublic
Caption by: Bill Detwiler
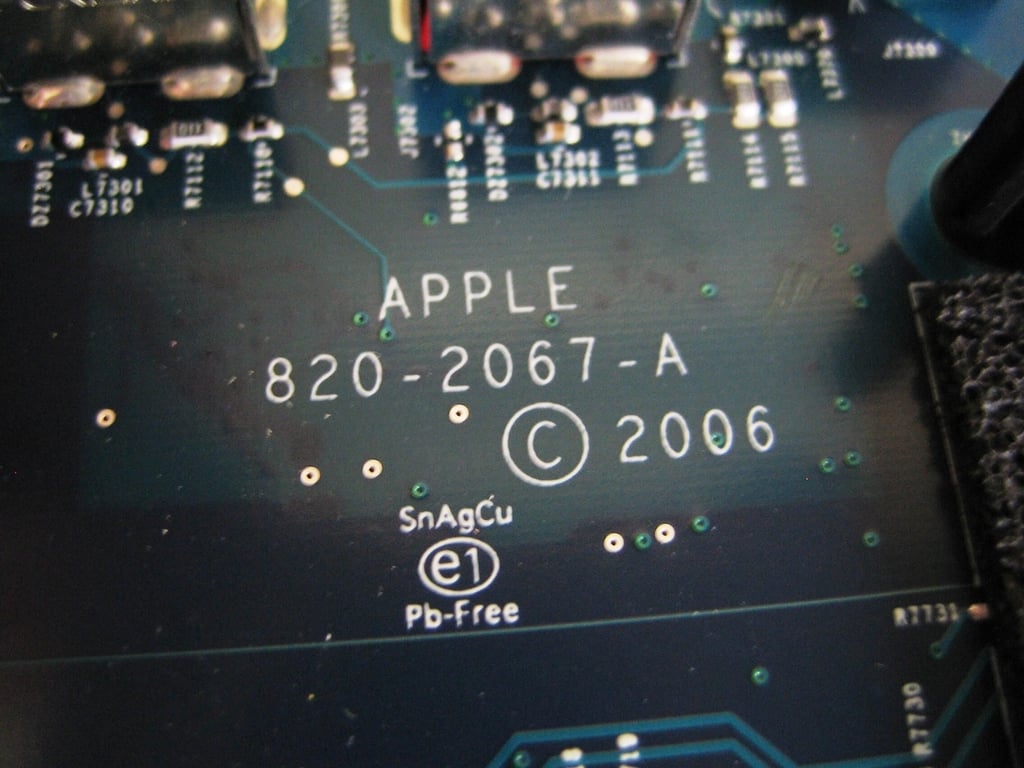
The Apple name is clearly printed on the Apple TV’s main PCB. Judging from the board’s 2006 copyright notation, the Apple TV has clearly been in the works for quite some time.
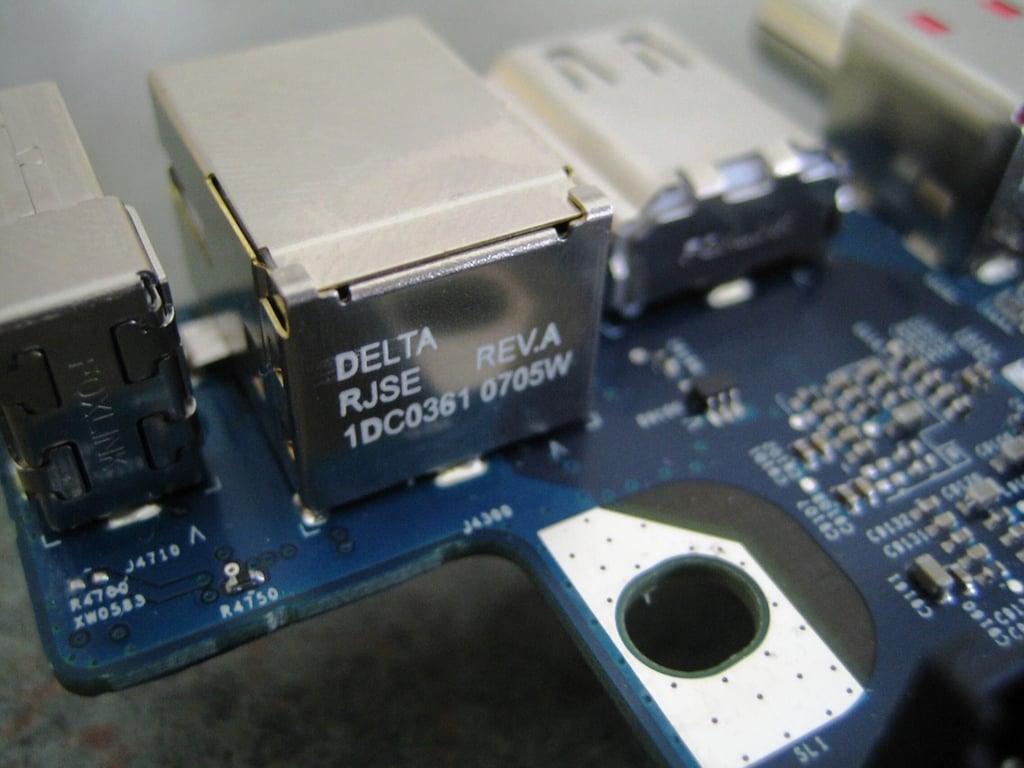
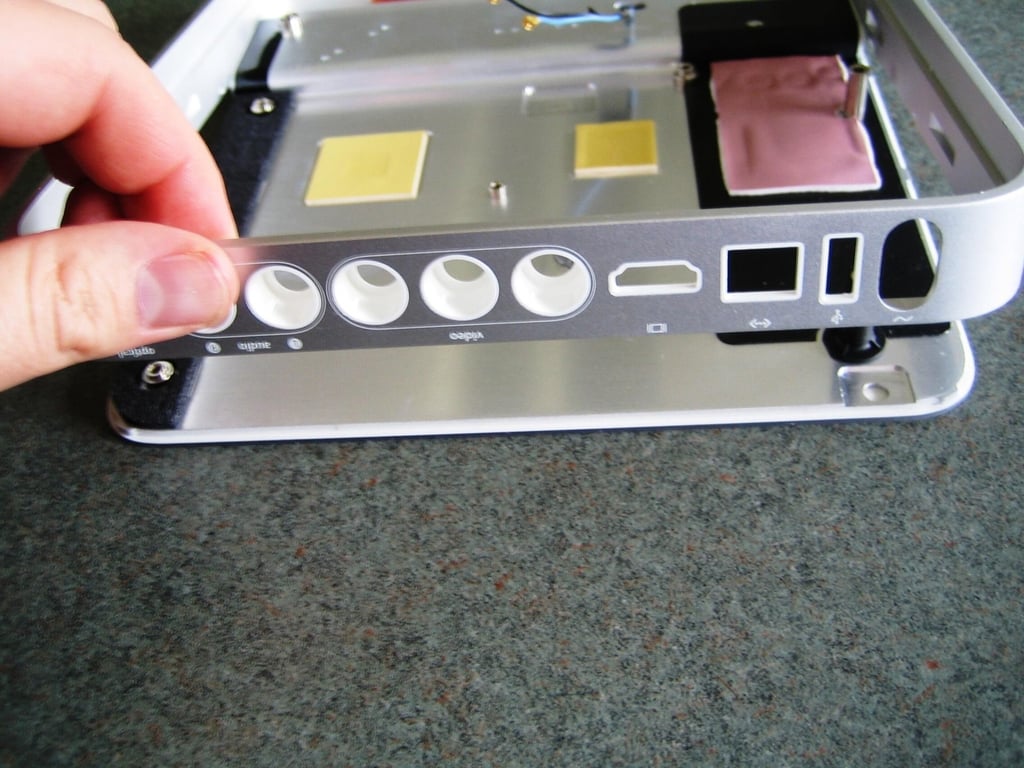
From left to right, the USB, Ethernet, and HDMI ports
Photo by: Bill Detwiler / TechRepublic
Caption by: Bill Detwiler
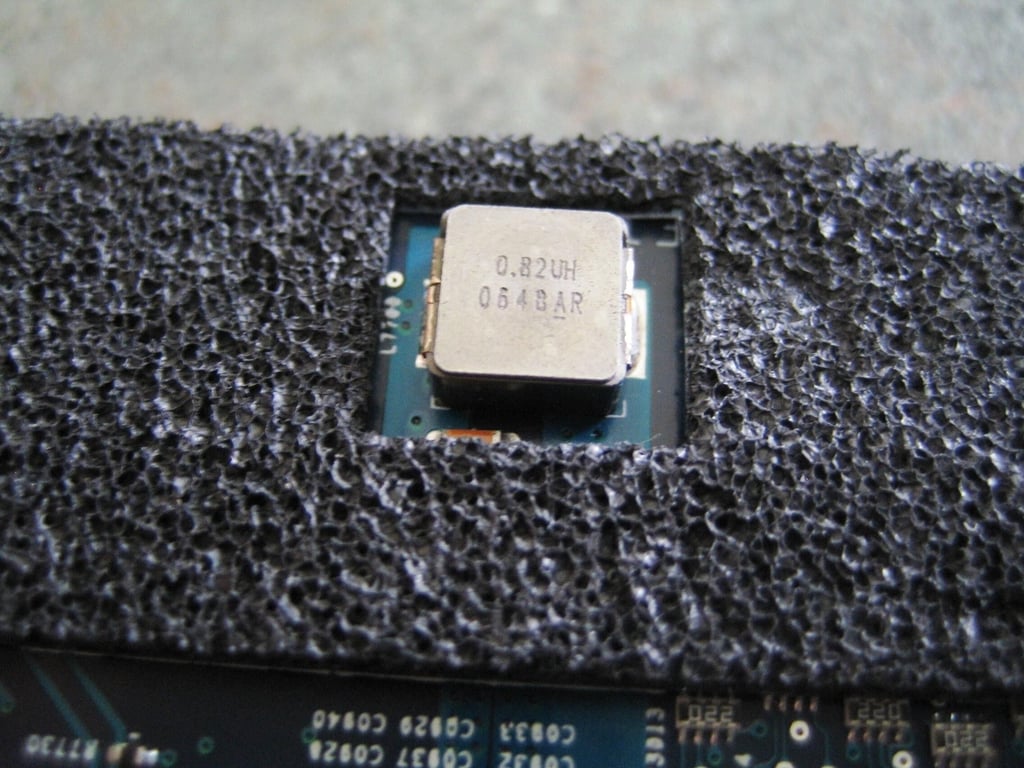
I was unable to find any information on this component.
Photo by: Bill Detwiler / TechRepublic
Caption by: Bill Detwiler
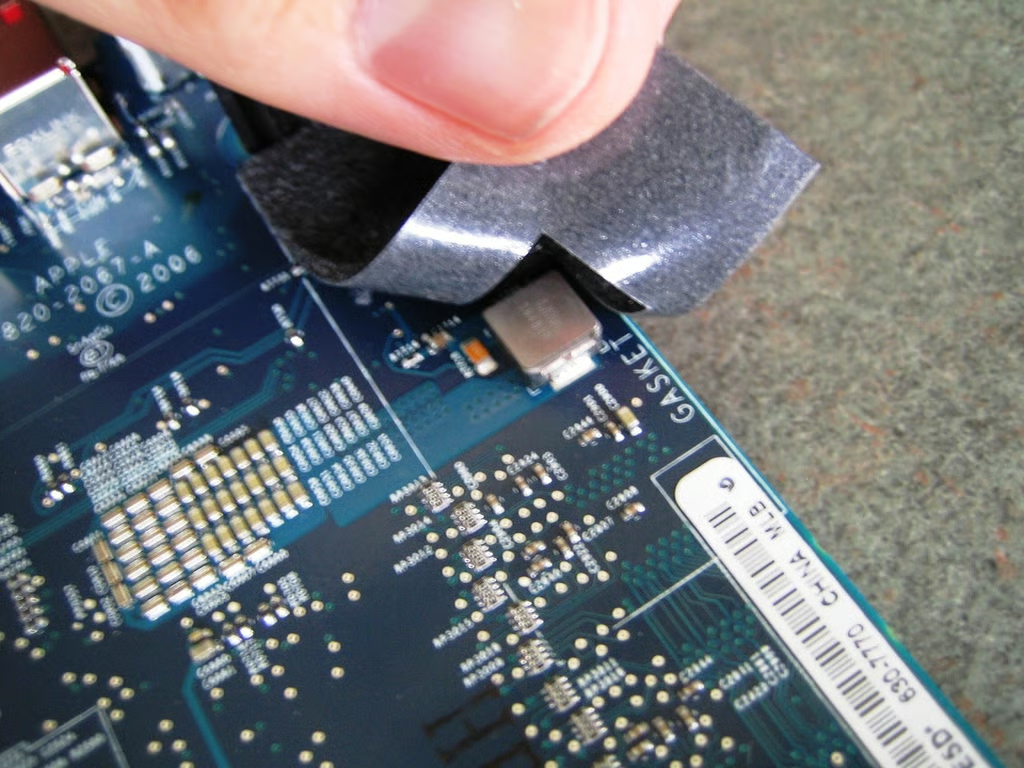
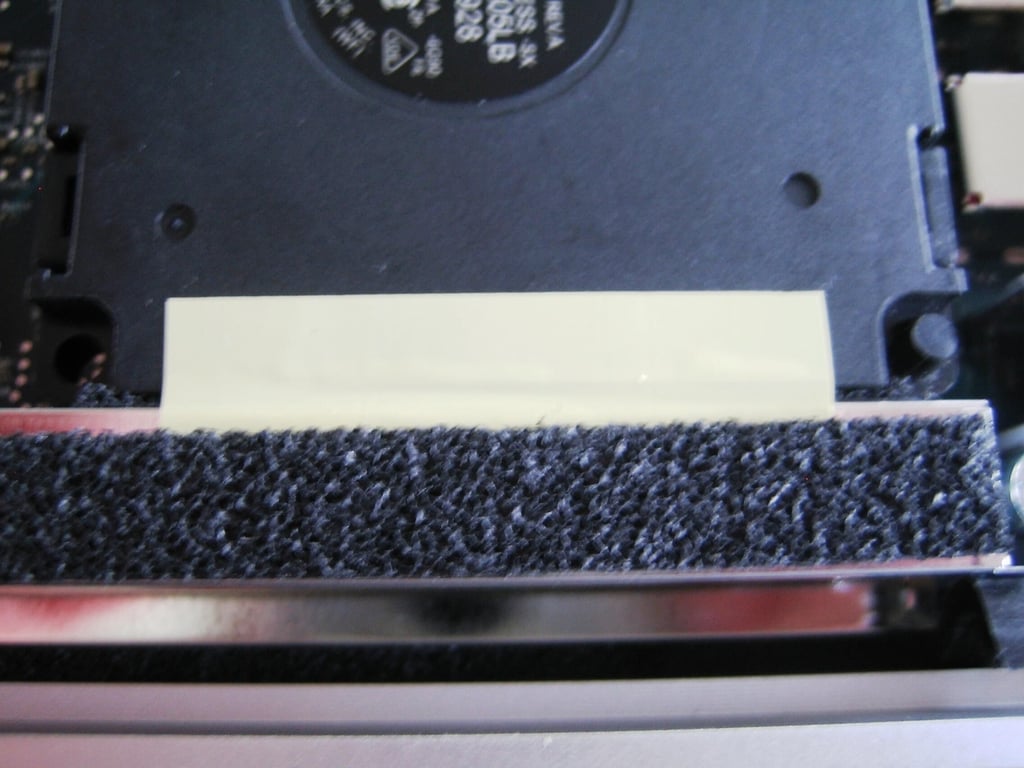
At least the main PCB tells me where I should return the gasket once I remove it.
Photo by: Bill Detwiler / TechRepublic
Caption by: Bill Detwiler

Overall, the Apple TV was extremely easy to disassemble. The unit uses no special security screws and the internal components are readily accessible. In the coming weeks, I’m going to try and install a bigger hard drive and even a different operating system. I’ll keep you up to date on how it goes.
Photo by: Bill Detwiler / TechRepublic
Caption by: Bill Detwiler
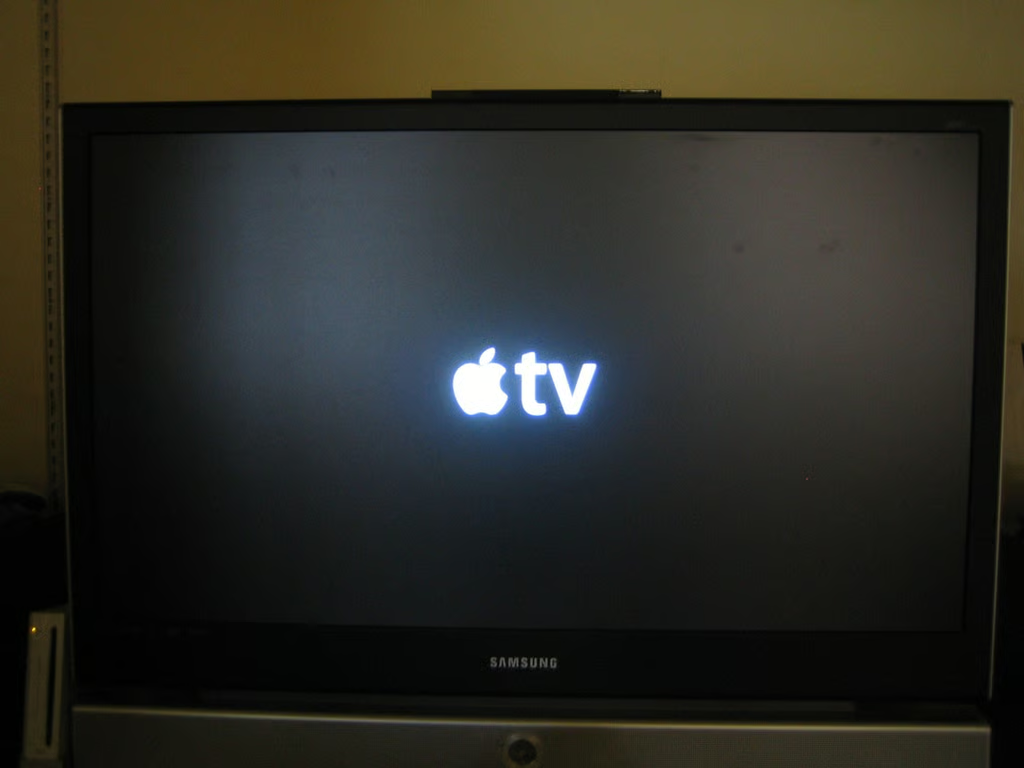
After being cracked open and reassembled, our Apple TV still functioned perfectly.
Photo by: Bill Detwiler / TechRepublic
Caption by: Bill Detwiler
Bill Detwiler is the Editor for Technical Content and Ecosystem at Celonis. He is the former Editor in Chief of TechRepublic and previous host of TechRepublic's Dynamic Developer podcast and Cracking Open, CNET and TechRepublic's popular online show. Previously, Bill was an IT manager in the social research and energy industries. He has bachelor's and master's degrees from the University of Louisville, where he has also lectured on computer crime and crime prevention.


