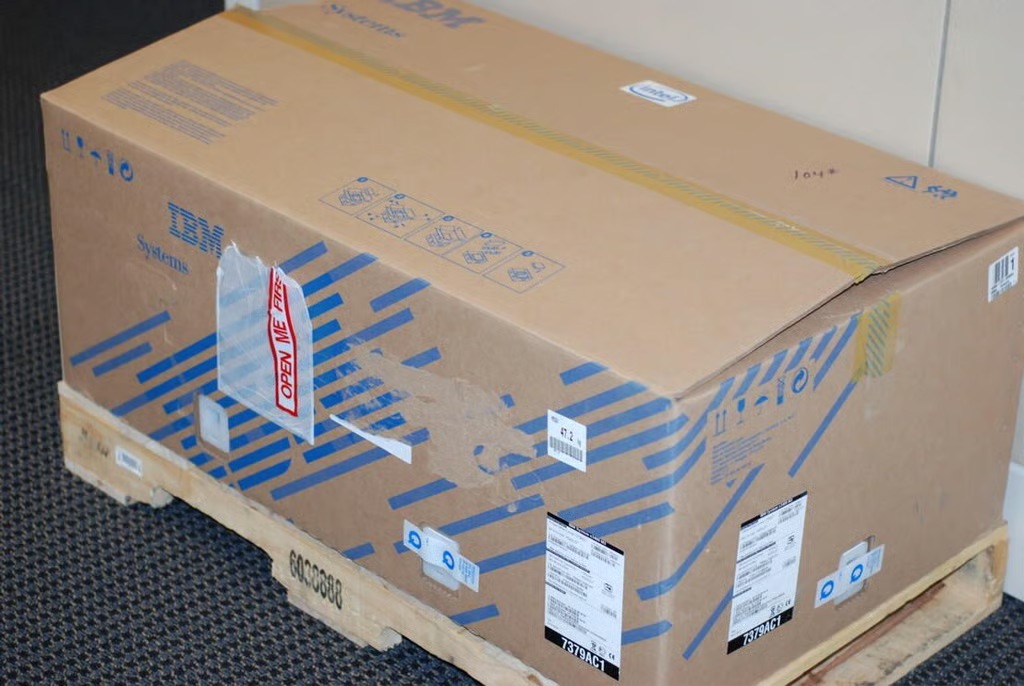
Our IBM System x3400 M3 test server arrived in a rather larger cardboard box with its own wooden pallet.
Photo credit: Bill Detwiler / TechRepublic
With the packing material removed, we get our first look at the IBM System x3400 M3 tower.
Photo credit: Bill Detwiler / TechRepublic
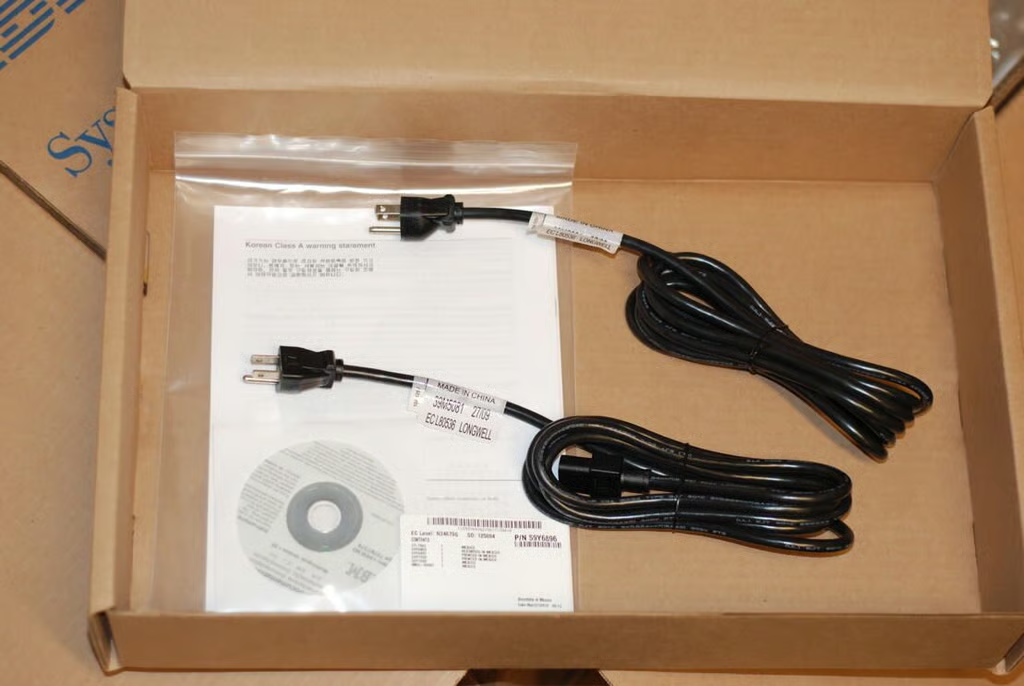
The IBM System x3400 M3 is shipped with a pair of power cables and the product documentation.
Photo credit: Bill Detwiler / TechRepublic

Unpacking the IBM System x3400 M3 server is best done with two people.
Photo credit: Bill Detwiler / TechRepublic
The IBM System x3400 M3 comes as either a tower or 5U rack by CTO or optional conversion kit. This tower version is 17.3 inches tall, 8.6 inches wide, 30.2 inches deep, and weighs between 59.7 and 83.4 pounds (depending on the configuration). This machine is significantly larger and heavier than your average desktop tower.
Photo credit: Bill Detwiler / TechRepublic
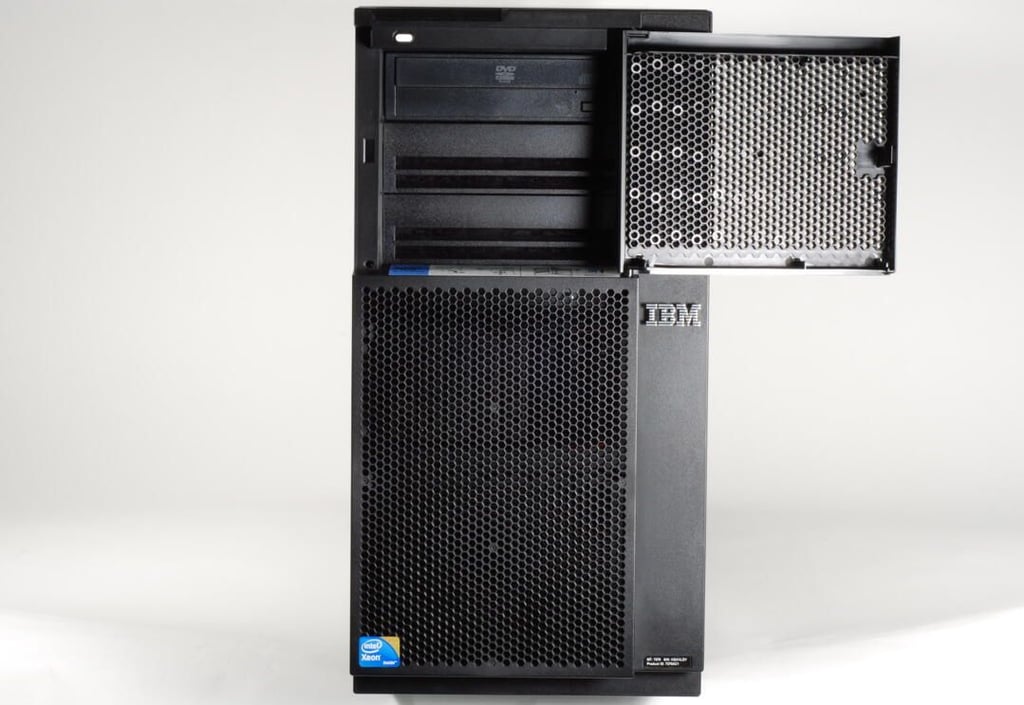
Behind the IBM System x3400 M3’s top drive cover is the optical drive and two additional 5.25″ drive bays. A small white power button is also located in the top-left corner.
Photo credit: Bill Detwiler / TechRepublic
Photo credit: Bill Detwiler / TechRepublic
Instructions for accessing various areas of the IBM System x3400 M3 (such as the media bays) are conveniently located on multiple case stickers.
Photo credit: Bill Detwiler / TechRepublic
Photo credit: Bill Detwiler / TechRepublic
The lock on the side panel prevents unauthorized individuals from accessing the hardware inside the case and the media bays.
Photo credit: Bill Detwiler / TechRepublic

Opening the drive covers reveals the hard drives.
Photo credit: Bill Detwiler / TechRepublic
Photo credit: Bill Detwiler / TechRepublic
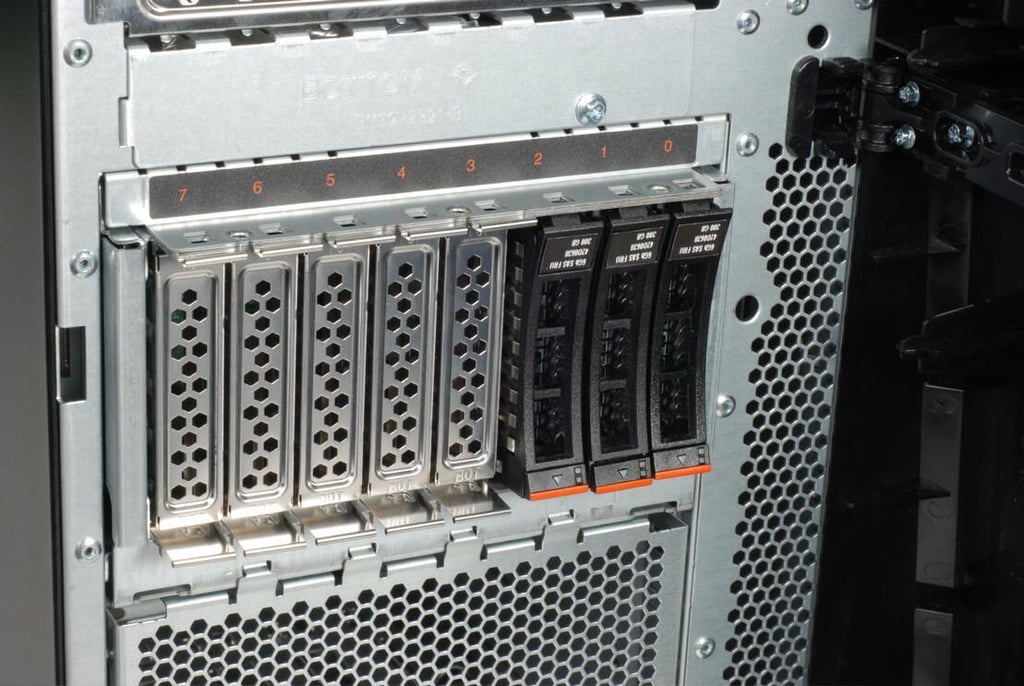
Standard IBM System x3400 M3 machines support either eight 2.5″ SAS drives, four 3.5″ SAS/SATA drives, or four solid-state 3.5″ SATA drives. Optional configurations are available with 16 2.5″ SAS or eight 3.5 SAS/SATA bays.
Photo credit: Bill Detwiler / TechRepublic
Drives are hot-swappable and removing them is as simple as lifting up this level and pulling the drive out. I’ll leave them in place for now.
Photo credit: Bill Detwiler / TechRepublic
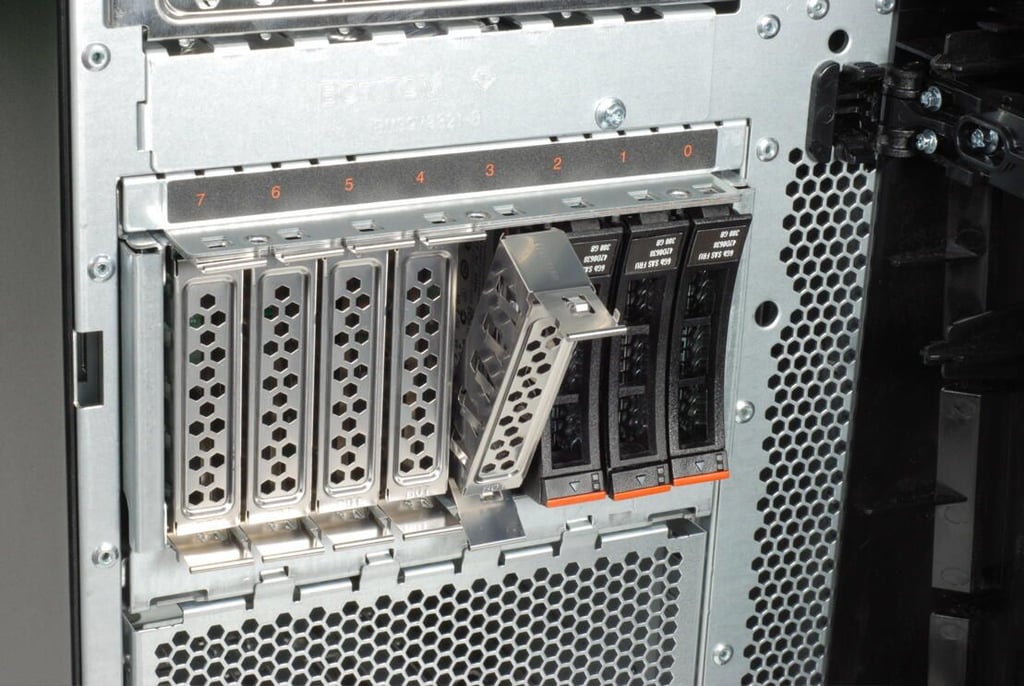
Photo credit: Bill Detwiler / TechRepublic
Photo credit: Bill Detwiler / TechRepublic
Photo credit: Bill Detwiler / TechRepublic
Photo credit: Bill Detwiler / TechRepublic
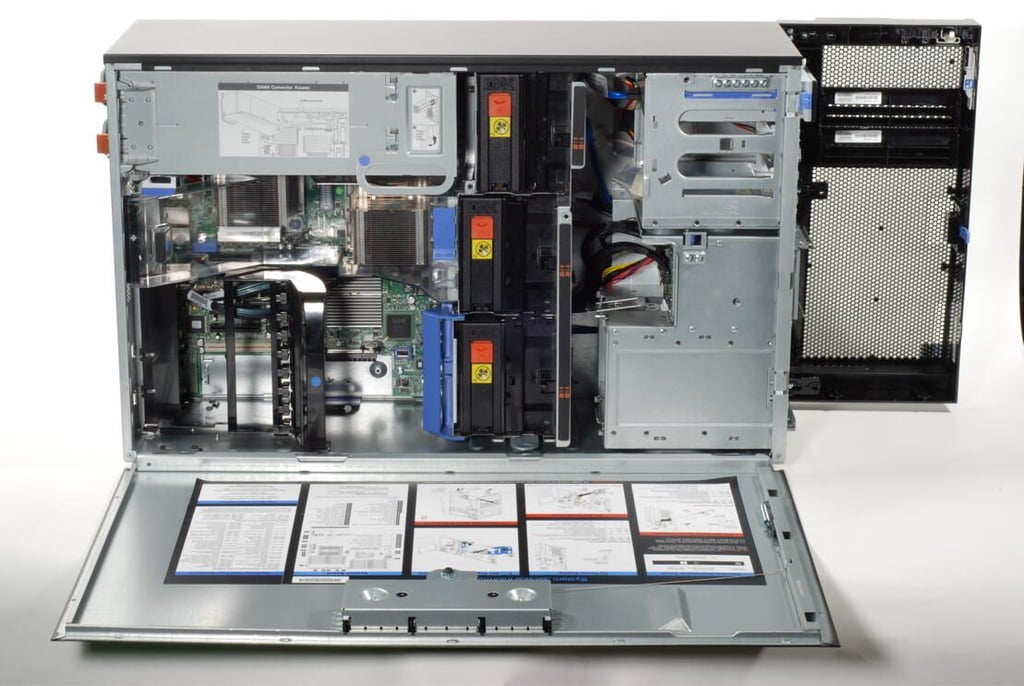
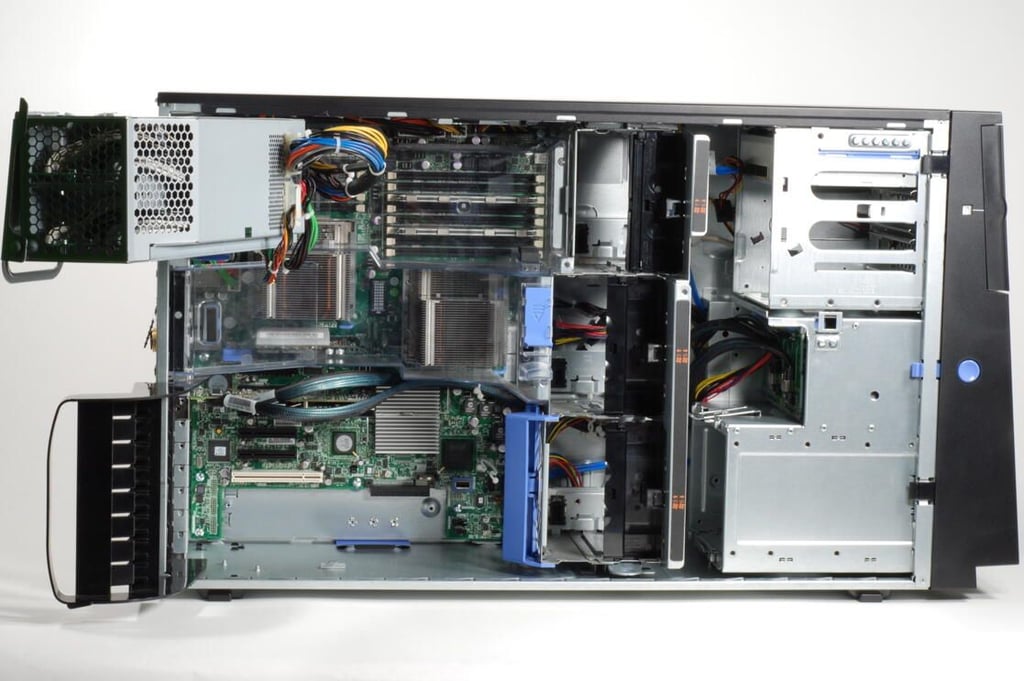
With the side panel open, we get our first look inside the IBM System x3400 M3. The M3’s case design allows for easy access to the system’s interior hardware.
Photo credit: Bill Detwiler / TechRepublic
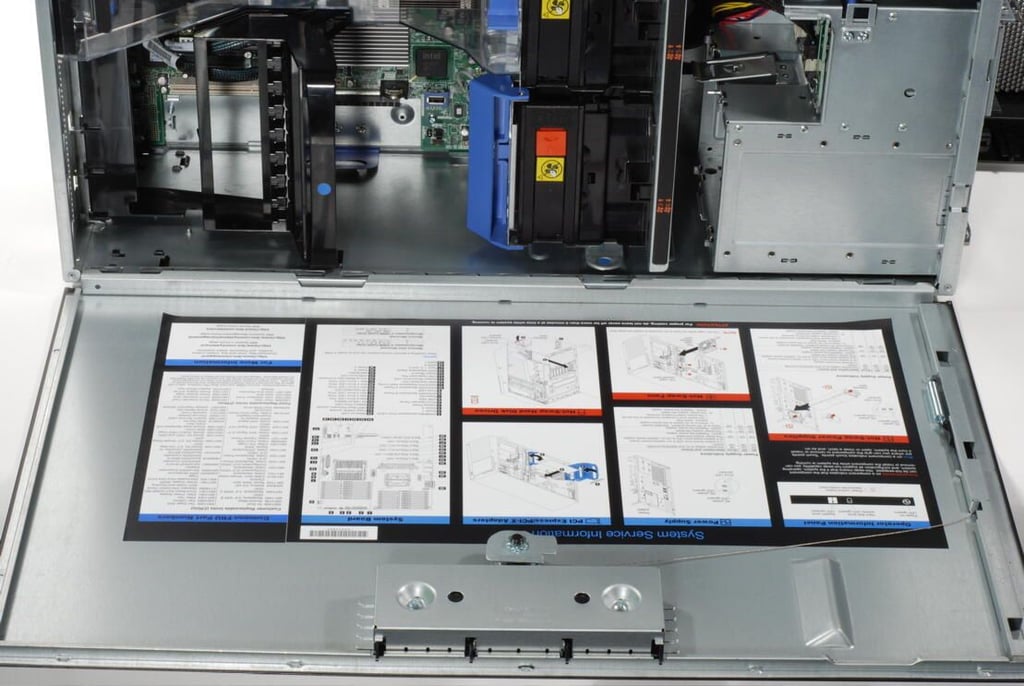
A large sticker with system service information is located on the inside of the IBM System x3400 M3’s removable side panel.
Photo credit: Bill Detwiler / TechRepublic
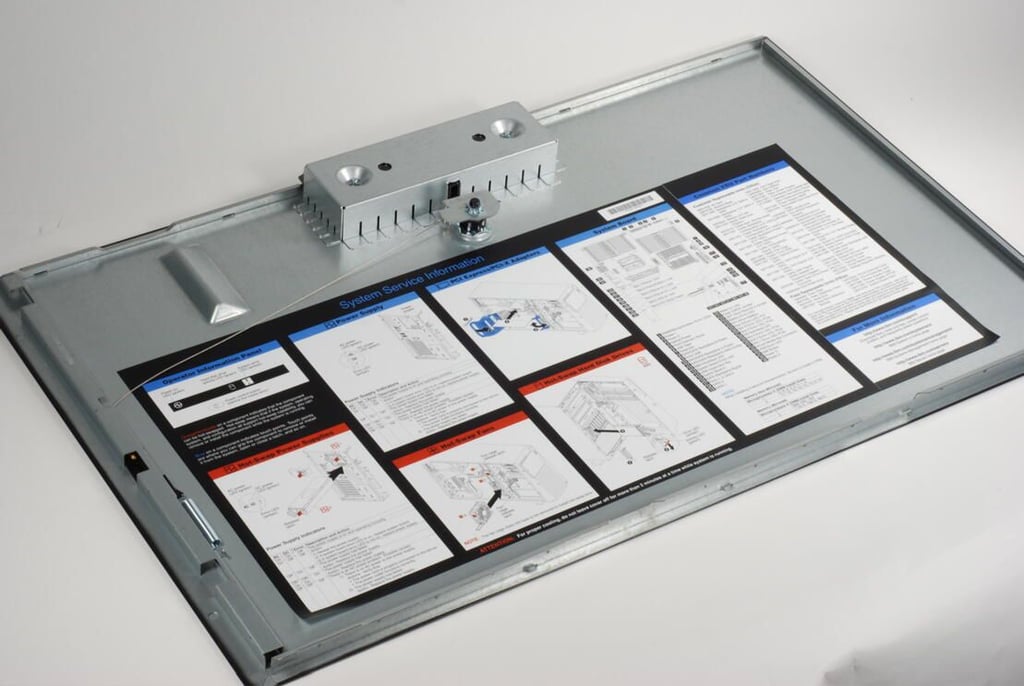
Photo credit: Bill Detwiler / TechRepublic
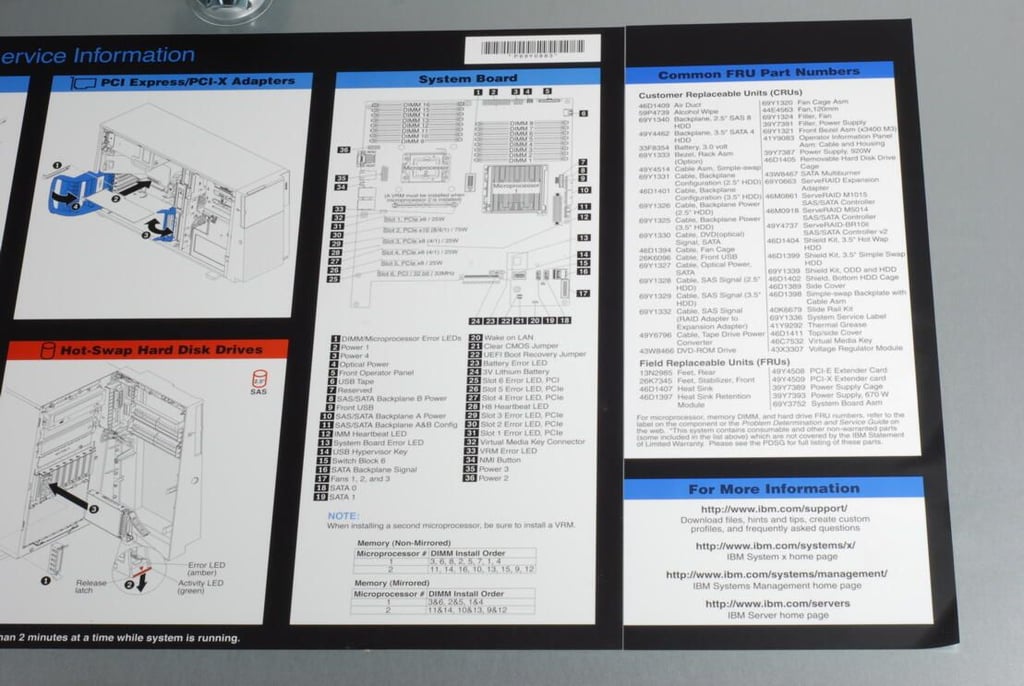
Photo credit: Bill Detwiler / TechRepublic
Our test system came with a single optical drive, but the IBM System x3400 M3 has two additional 5.25″ bays.
Photo credit: Bill Detwiler / TechRepublic
The back of the IBM System x3400 M3’s hard drive bays. Our test system was configured for eight, hot-swappable 2.5″ SAS drives.
Photo credit: Bill Detwiler / TechRepublic
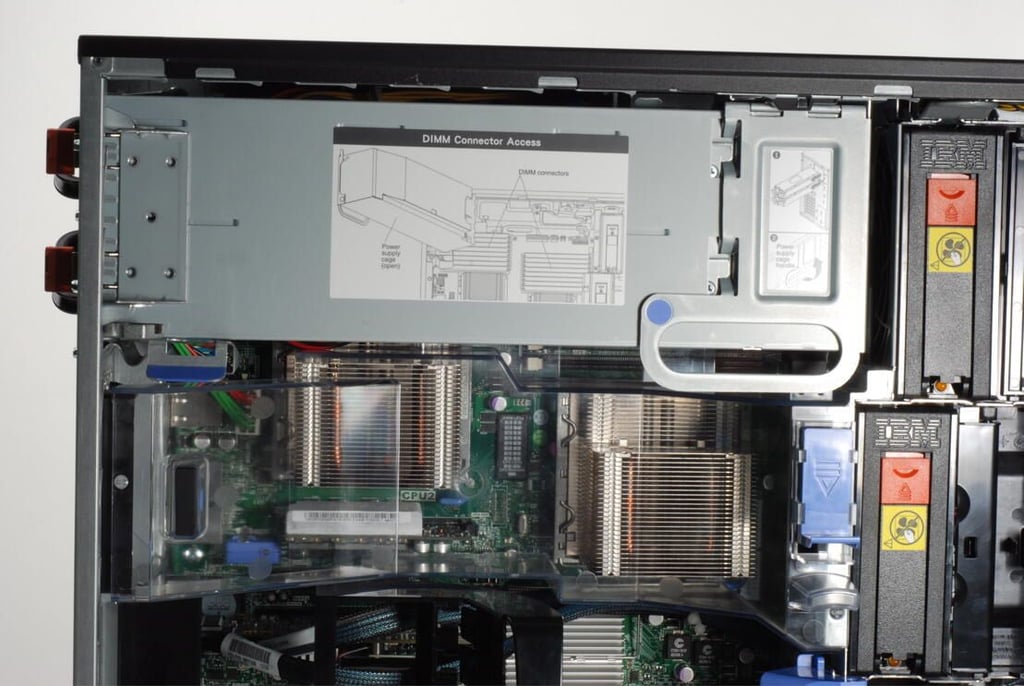
The IBM System x3400 M3 comes with either a fixed or hot-swappable power supply. Our test system had a pair of hot-swappable supplies.
The supplies were mounted in a large metal housing that swung out of the case allowing access to the first CPU, a second set of DIMM sockets, and various motherboard connections.
Photo credit: Bill Detwiler / TechRepublic
The IBM System x3400 M3 has space for a pair of CPUs and supports a variety of Intel units, including the 6-Core Intel Xeon (X56xx), 4-Core Intel Xeon (E56xx), 4-Core Intel Xeon (E55xx), and 2-Core Xeon (E55xx).
Photo credit: Bill Detwiler / TechRepublic
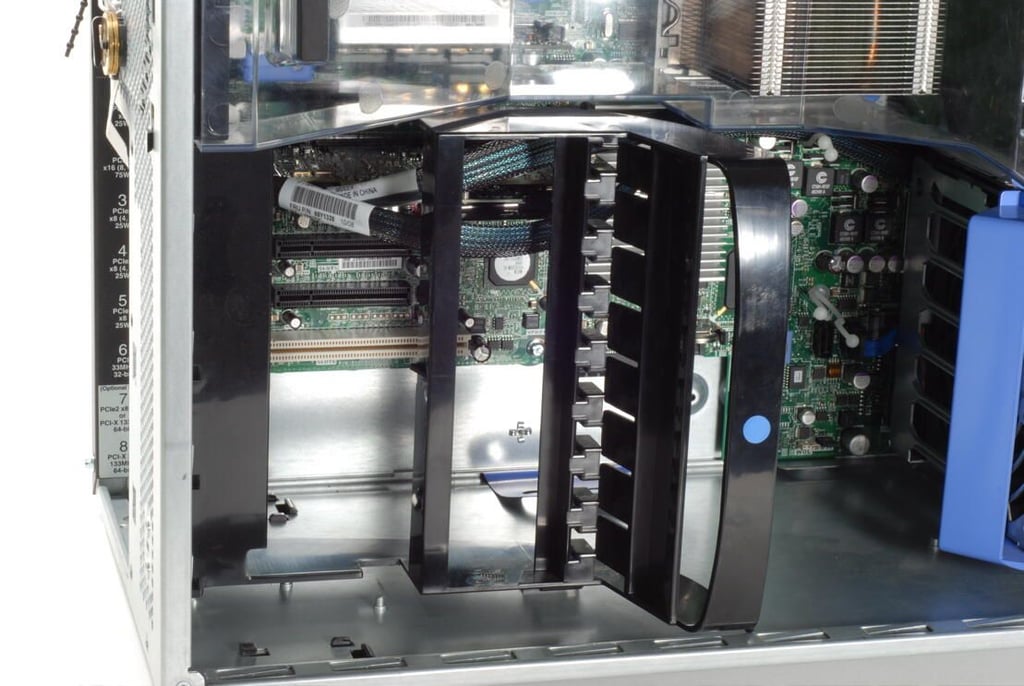
Photo credit: Bill Detwiler / TechRepublic
Photo credit: Bill Detwiler / TechRepublic

Photo credit: Bill Detwiler / TechRepublic
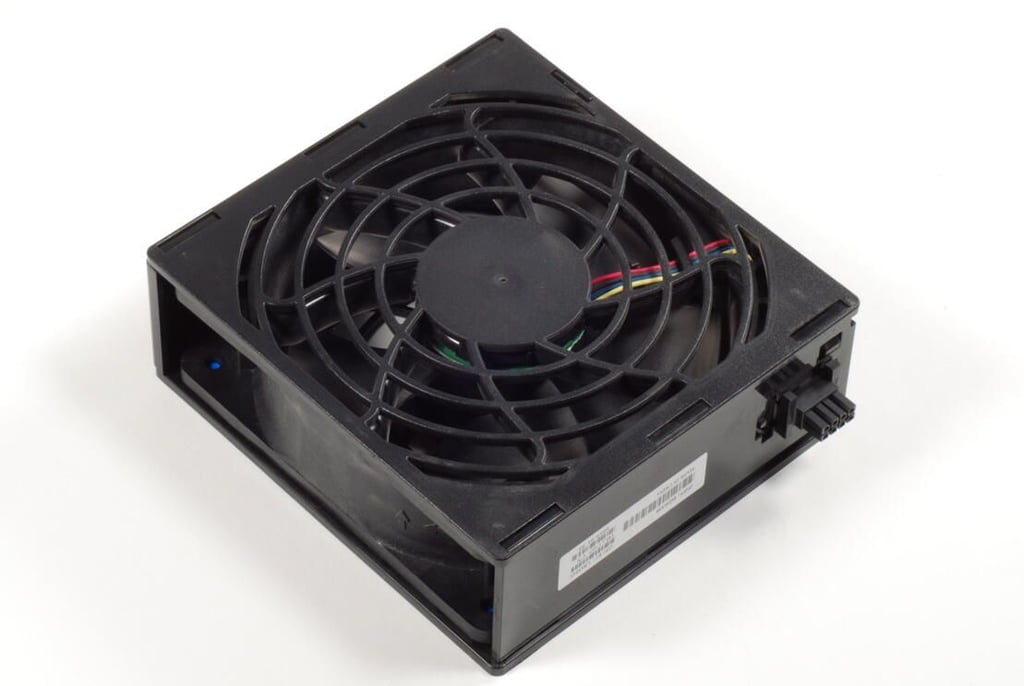
The IBM System x3400 M3 tower contains three of these large cooling fans.
Photo credit: Bill Detwiler / TechRepublic
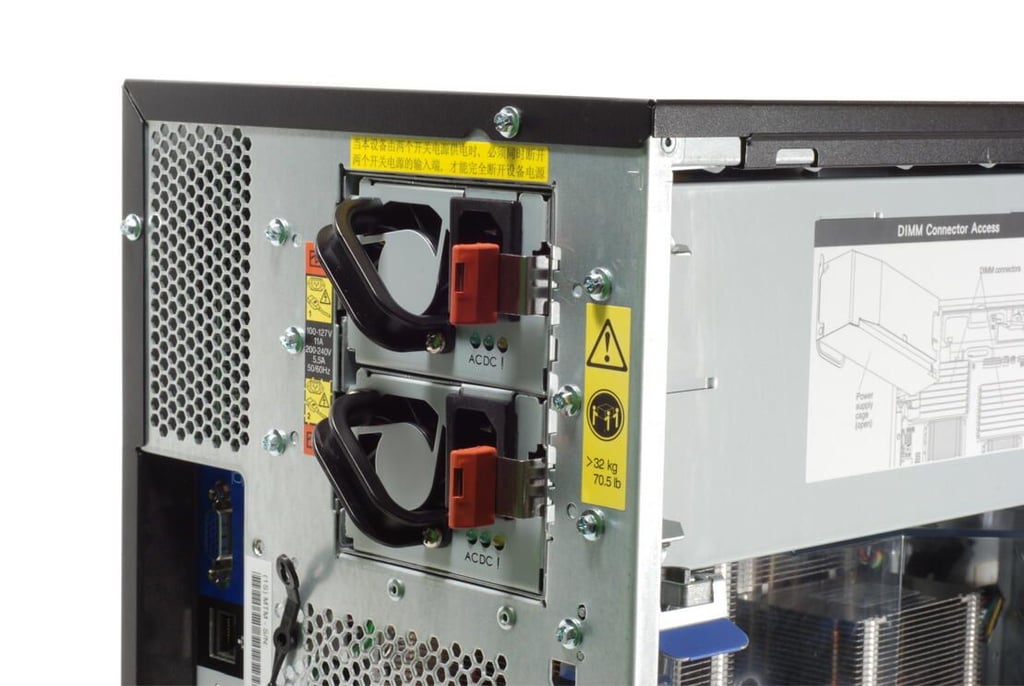
Our IBM System x3400 M3 test machine had a pair of hot-swappable power supplies.
Photo credit: Bill Detwiler / TechRepublic
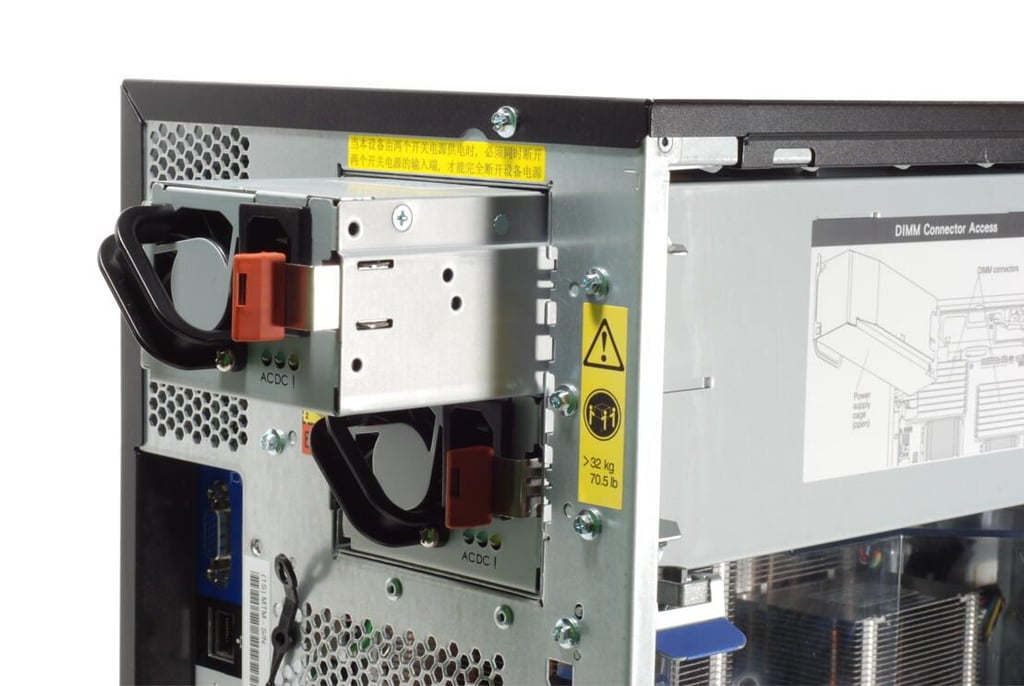
Photo credit: Bill Detwiler / TechRepublic
Photo credit: Bill Detwiler / TechRepublic
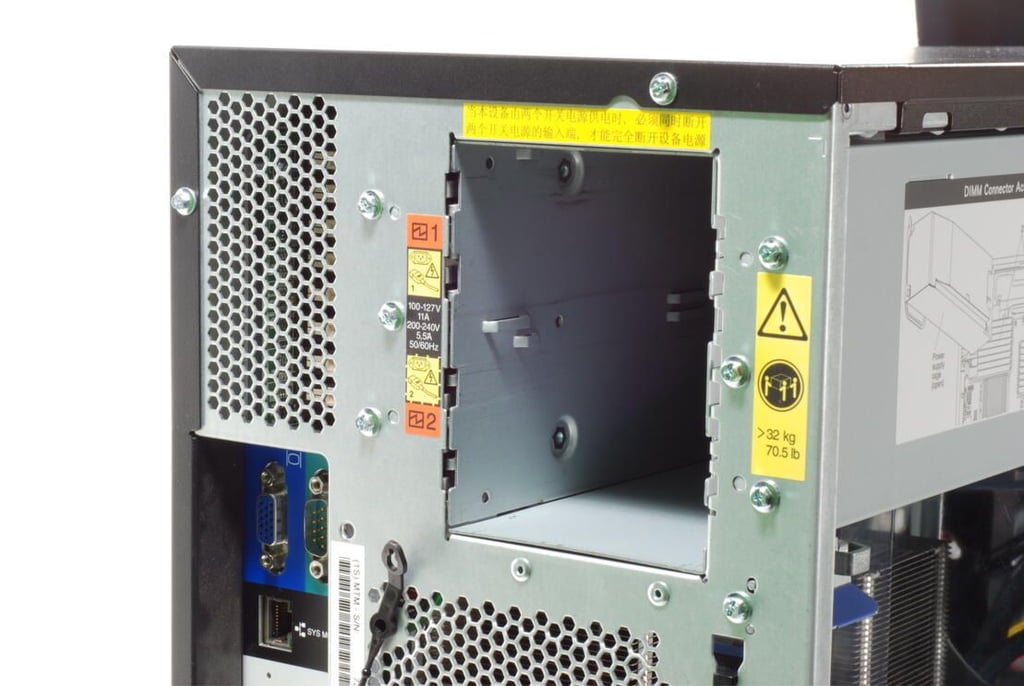
Photo credit: Bill Detwiler / TechRepublic
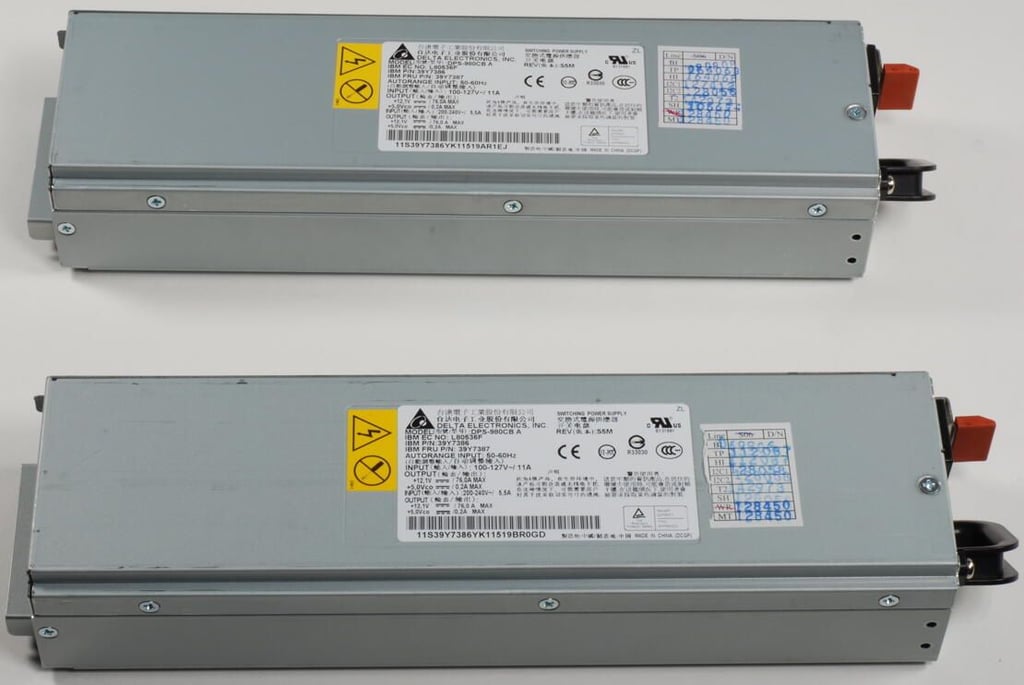
The IBM System x3400 M3 supports either 920W or 670W universal, autoswitching power supplies.
Photo credit: Bill Detwiler / TechRepublic
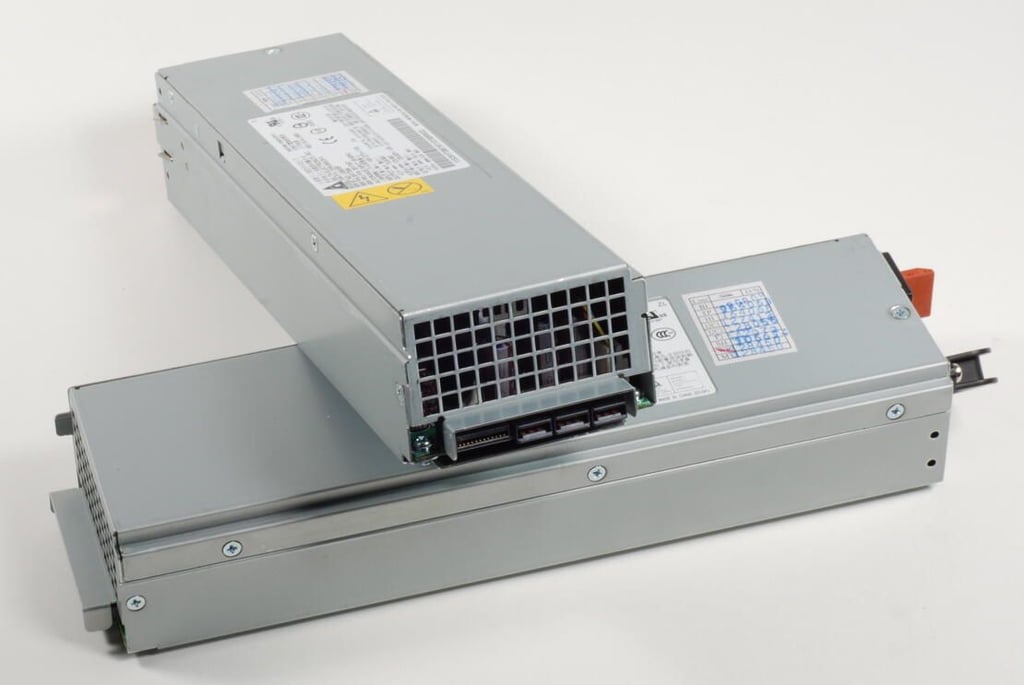
Photo credit: Bill Detwiler / TechRepublic
With the supplies removed, the supplies’ metal housing should swing out from the case.
Photo credit: Bill Detwiler / TechRepublic
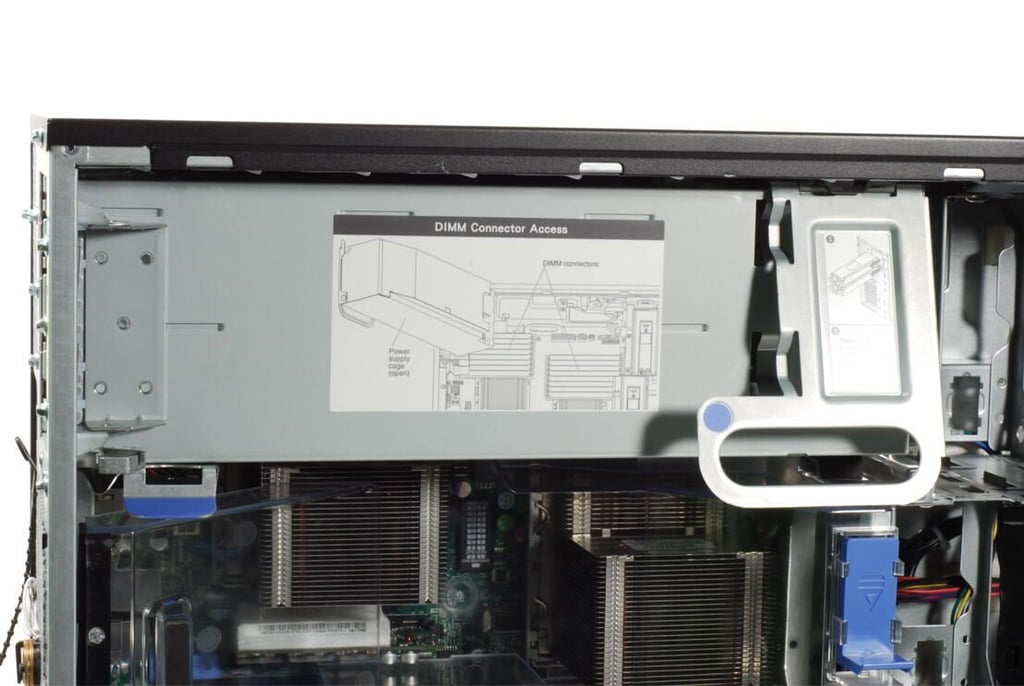
Photo credit: Bill Detwiler / TechRepublic
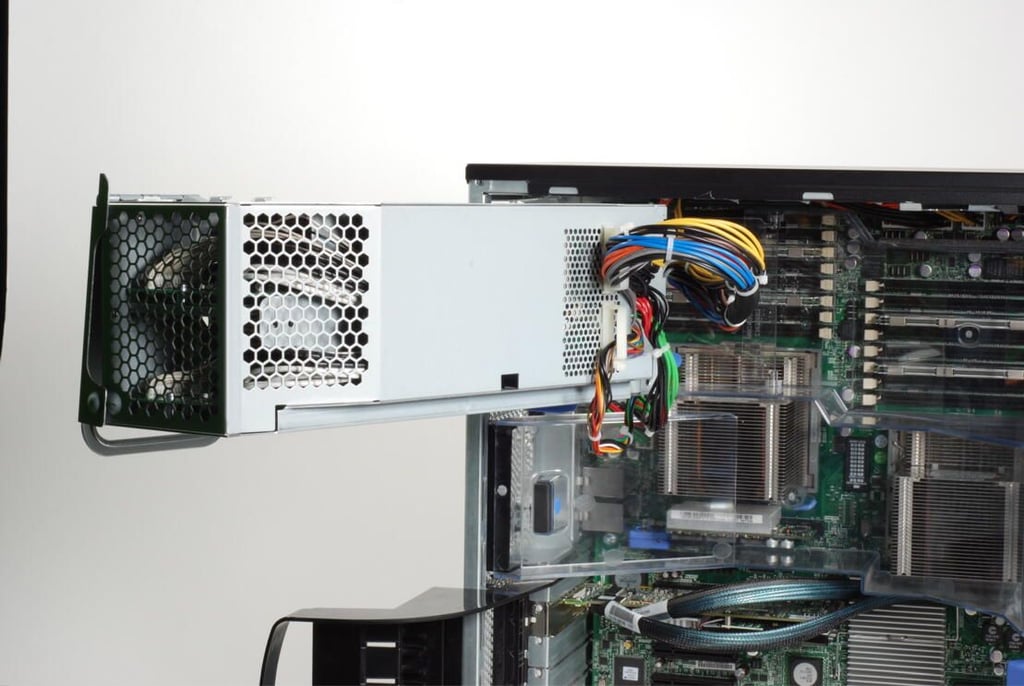
Photo credit: Bill Detwiler / TechRepublic
With the supply housing in the open position, we can see the clear plastic cover behind it.
Photo credit: Bill Detwiler / TechRepublic
We can now remove the clear plastic cover that sits behind the power supply housing.
Photo credit: Bill Detwiler / TechRepublic
This latch holds the clear plastic cover in place.
Photo credit: Bill Detwiler / TechRepublic

Photo credit: Bill Detwiler / TechRepublic

Photo credit: Bill Detwiler / TechRepublic
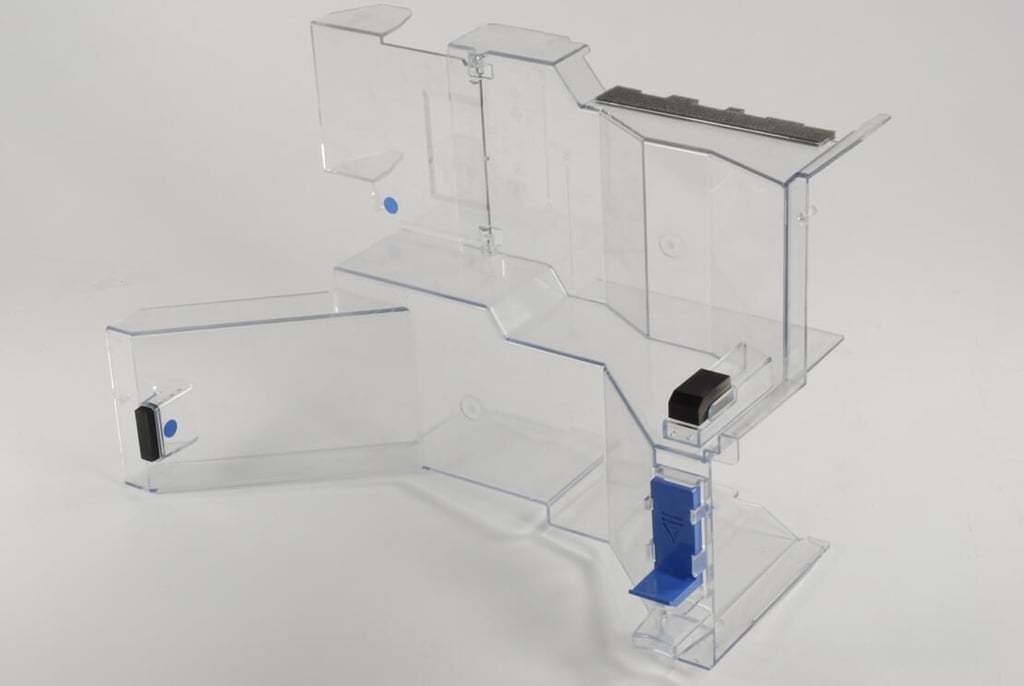
This clear plastic cover helps direct air flow to critical areas inside the IBM System x3400 M3.
Photo credit: Bill Detwiler / TechRepublic
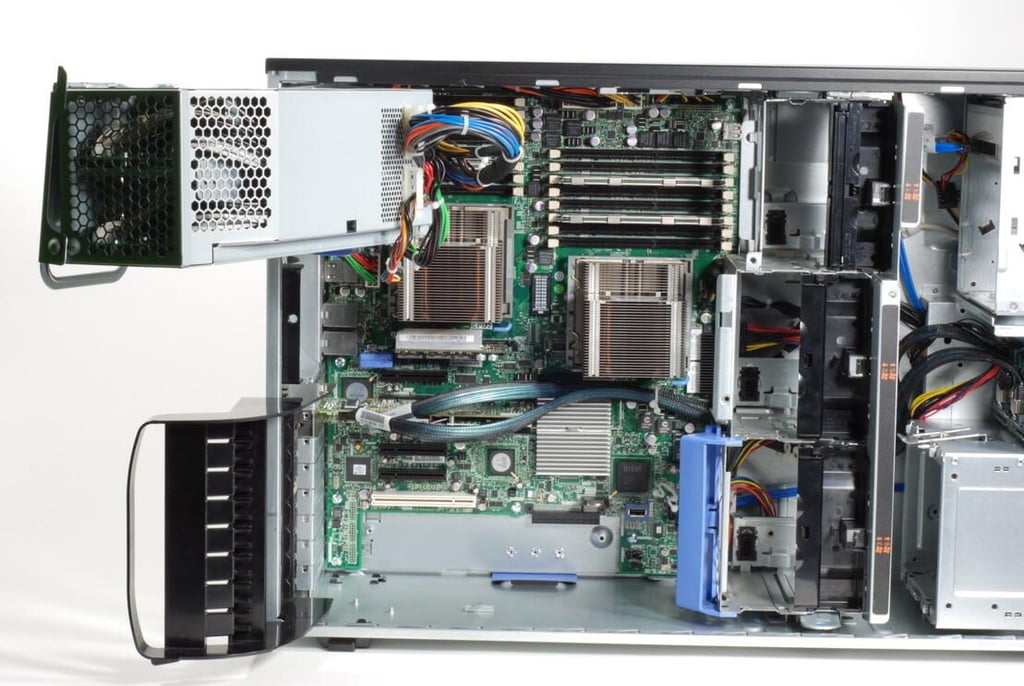
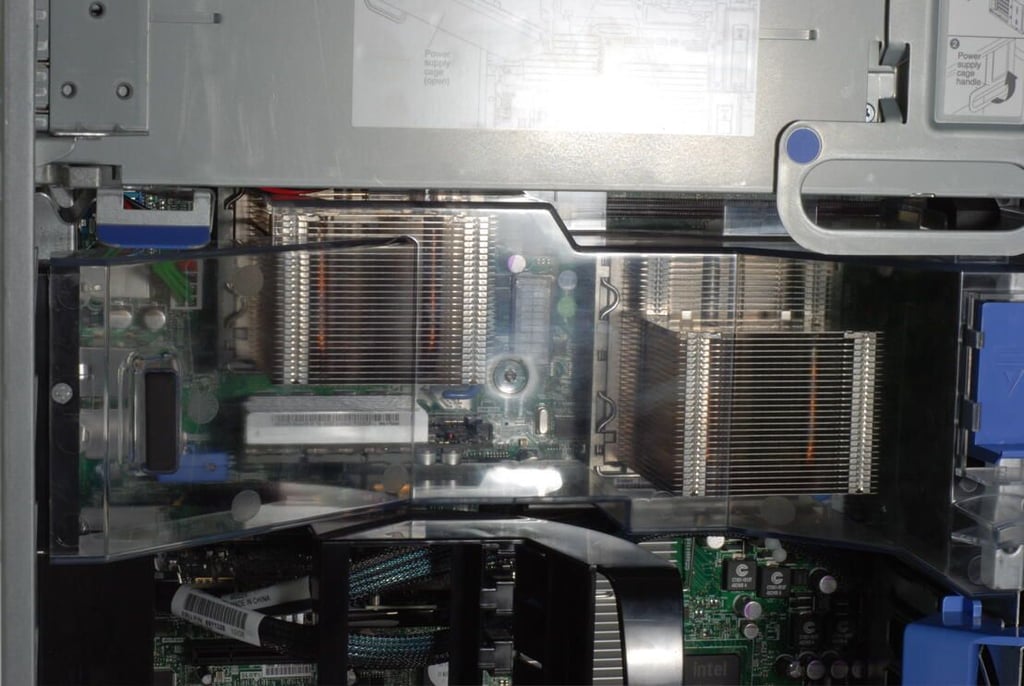
With the clear plastic cover removed, we get a much better view of the main system board, DIMM sockets, CPU heatsinks, and other internal components. Next, I’ll remove the large metal housing for the IBM System x3400 M3’s three cooling fans.
Photo credit: Bill Detwiler / TechRepublic
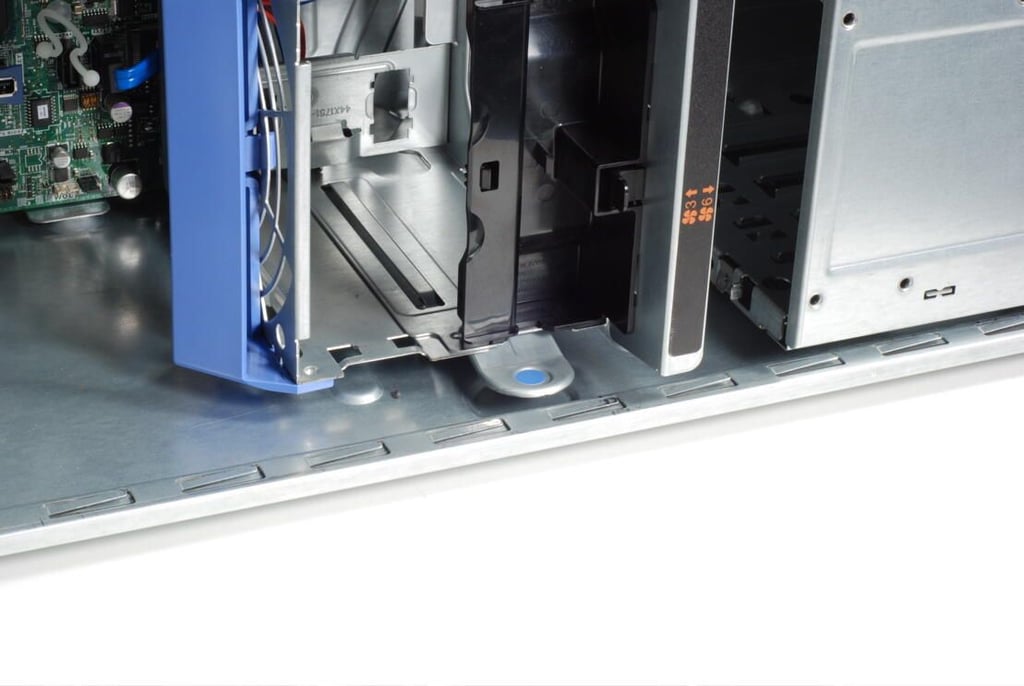
Photo credit: Bill Detwiler / TechRepublic

Photo credit: Bill Detwiler / TechRepublic
Photo credit: Bill Detwiler / TechRepublic
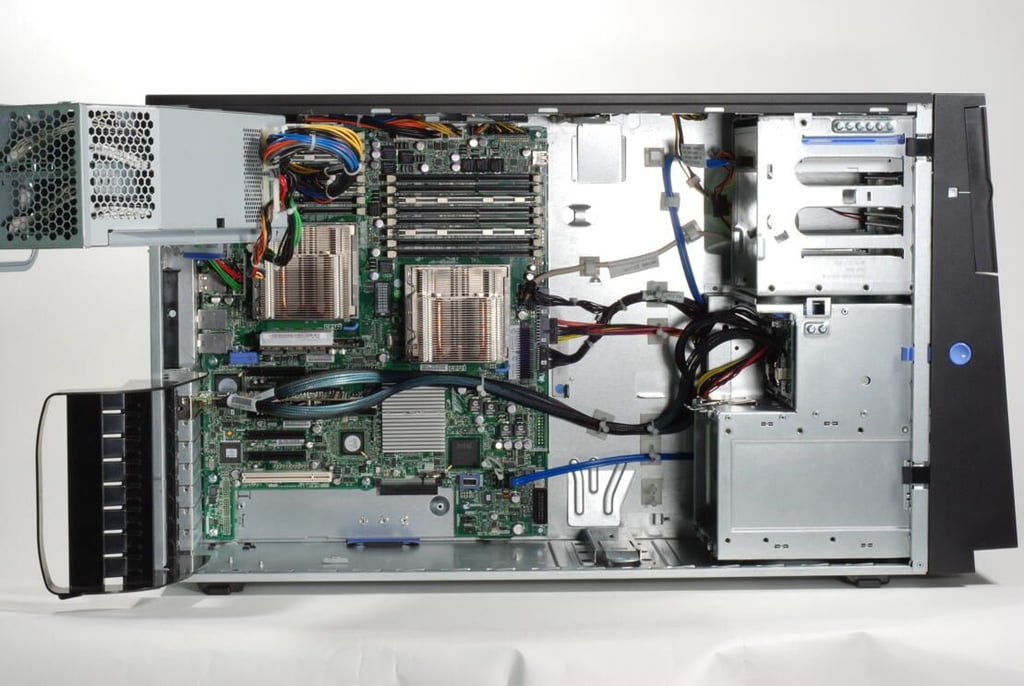
Photo credit: Bill Detwiler / TechRepublic
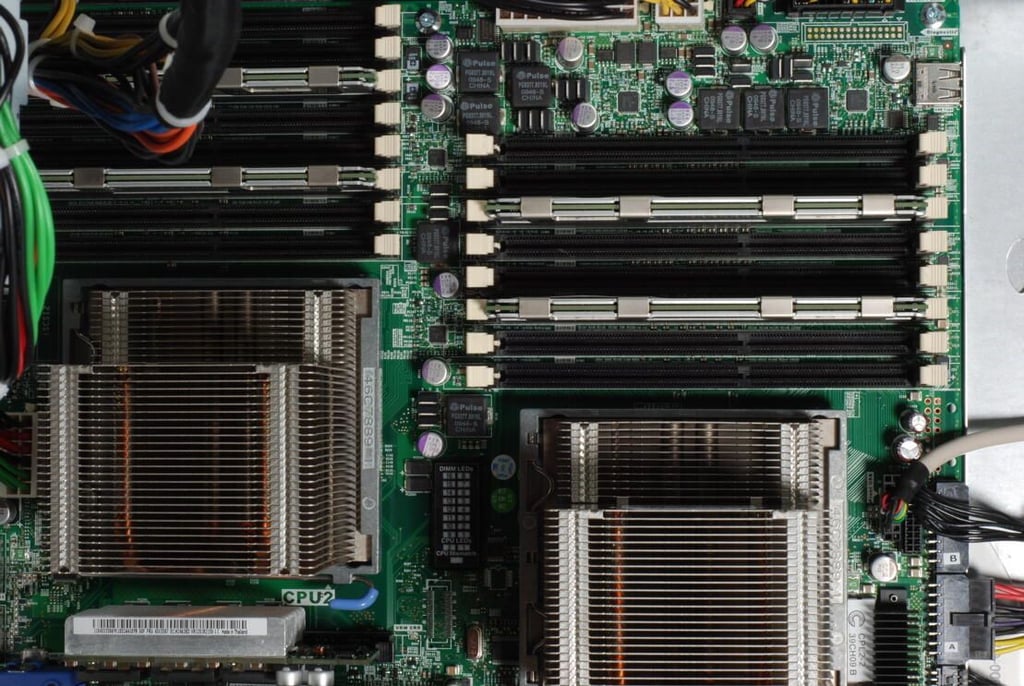
Photo credit: Bill Detwiler / TechRepublic
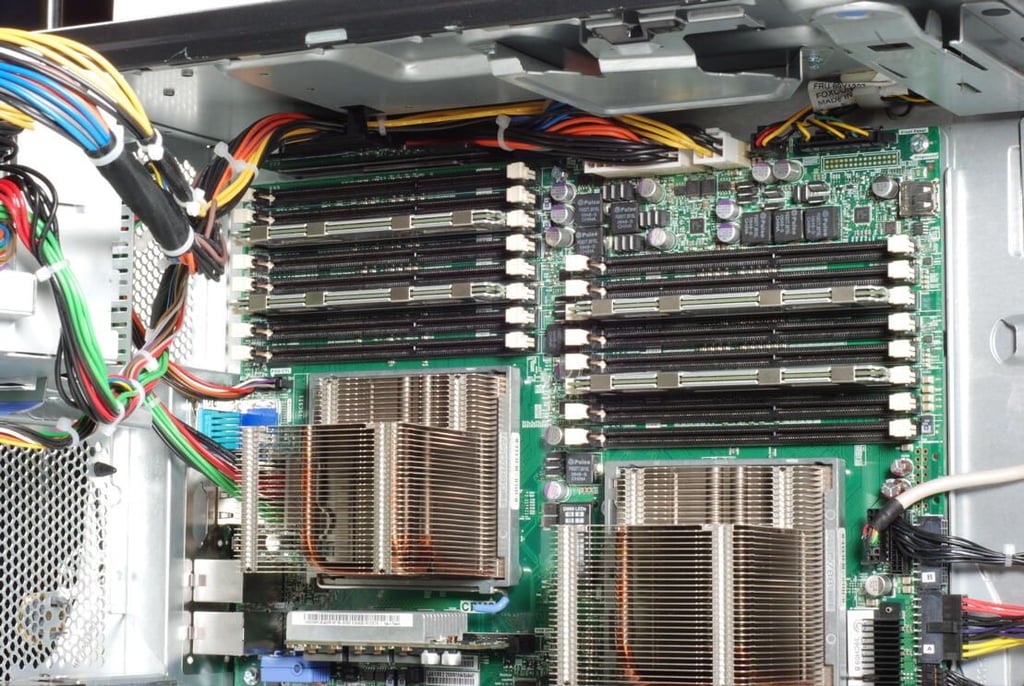
The IBM System x3400 M3 can support up to 128GB of RDIMM memory in 16 DIMM slots, or up to 24GB of UDIMM memory in 12 slots. Our test system had 16 slots.
Photo credit: Bill Detwiler / TechRepublic
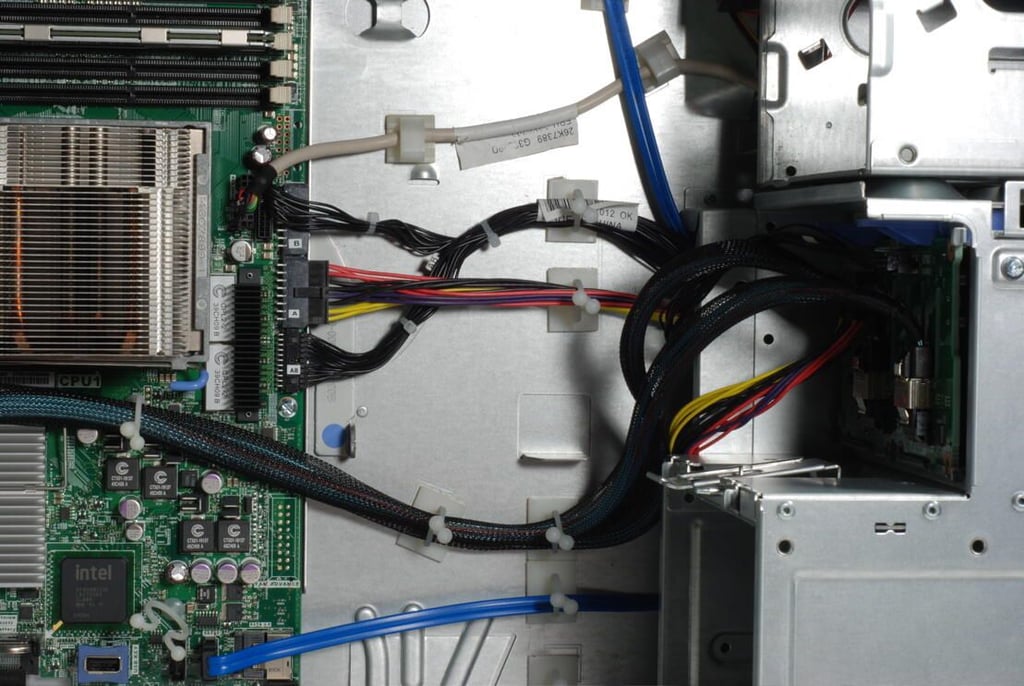
Cables for the optical drive, hard drives, and various other components.
Photo credit: Bill Detwiler / TechRepublic
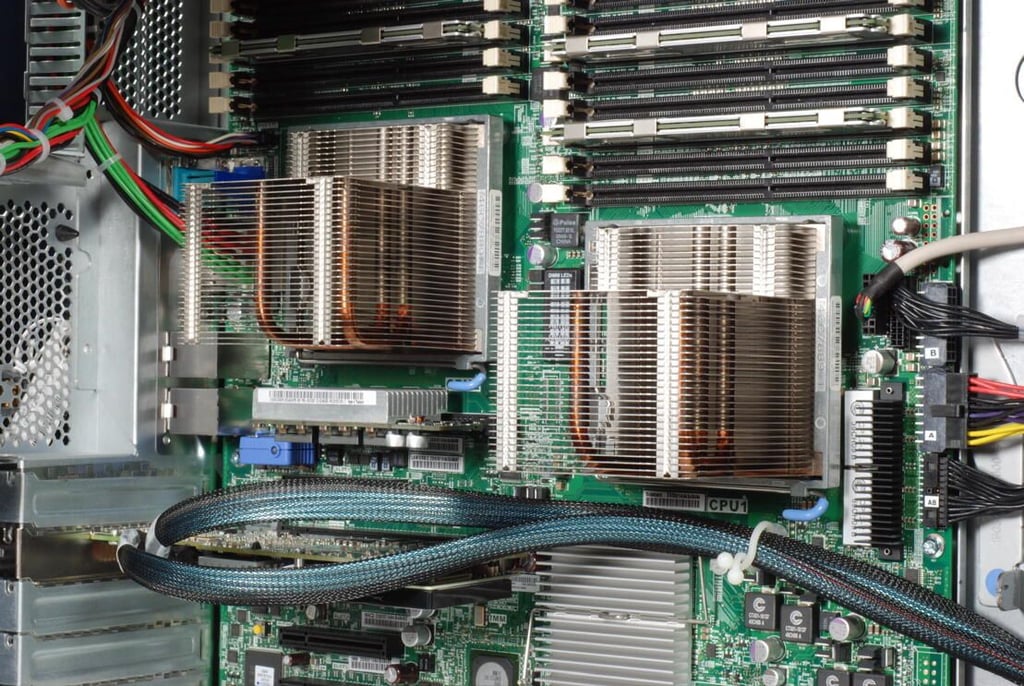
Photo credit: Bill Detwiler / TechRepublic
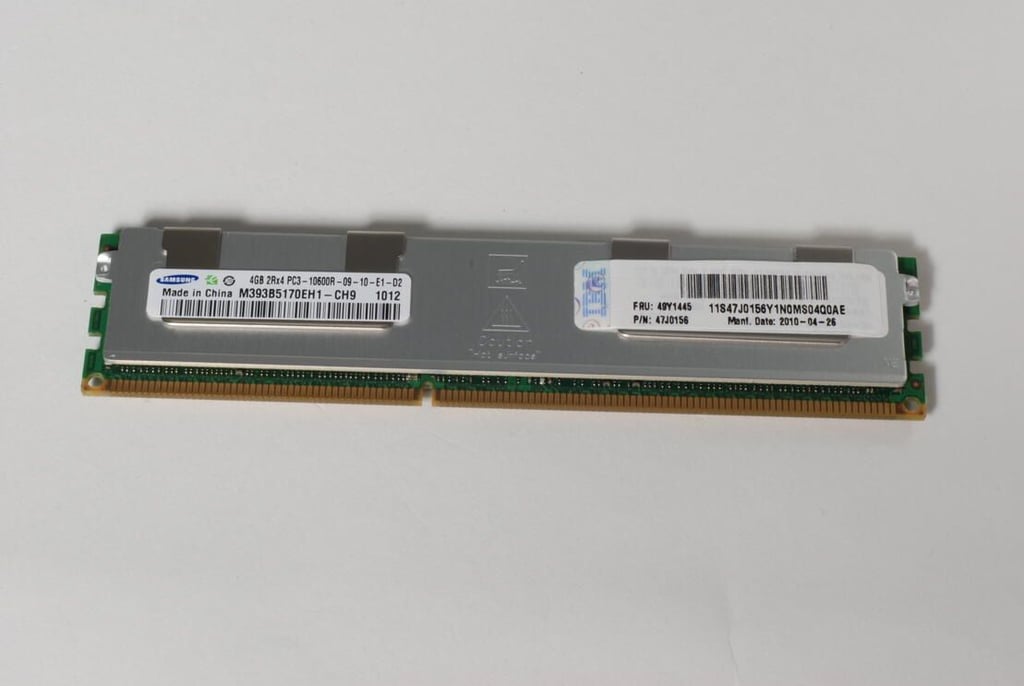
Photo credit: Bill Detwiler / TechRepublic
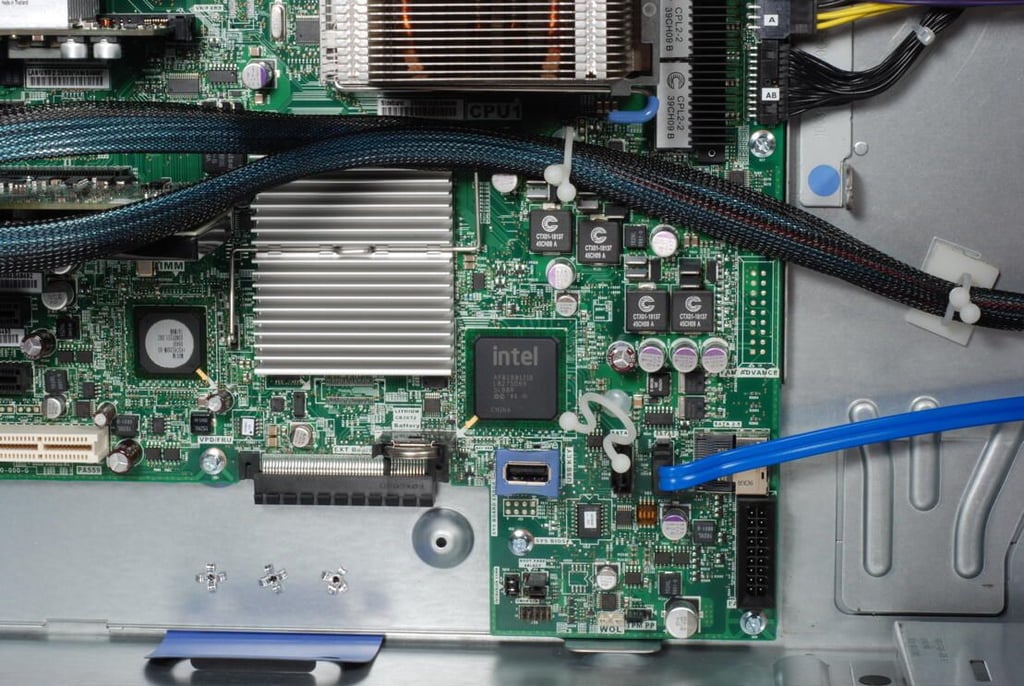
The IBM System x3400 M3 contains an embedded hypervisor–“a USB port on the motherboard, activated with an optional USB key for supporting VMware ESXi for virtualization.”
Photo credit: Bill Detwiler / TechRepublic
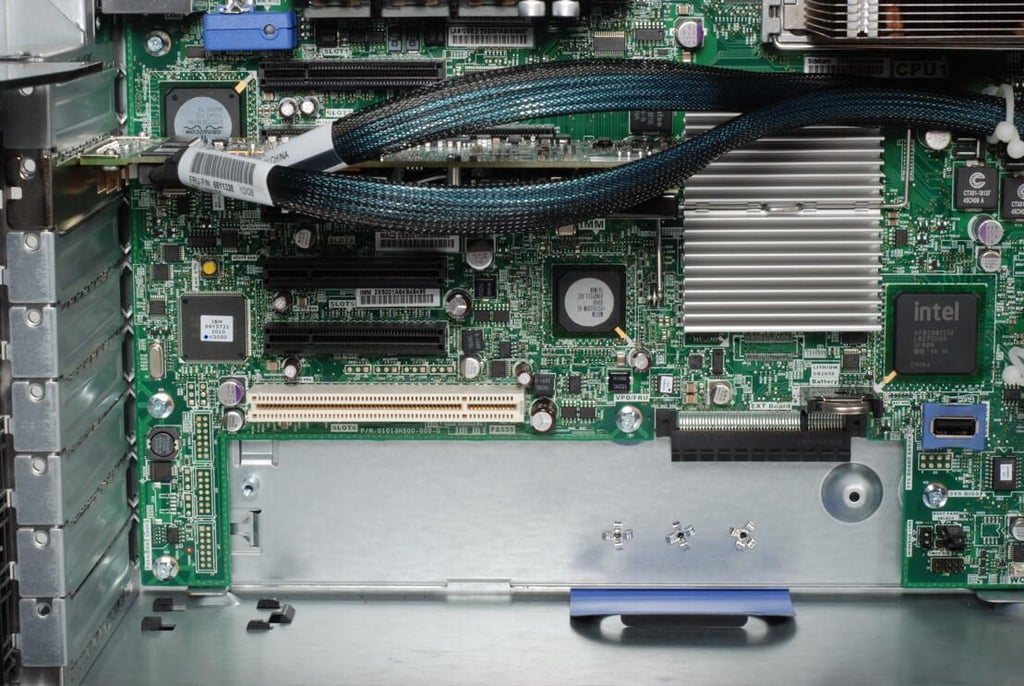
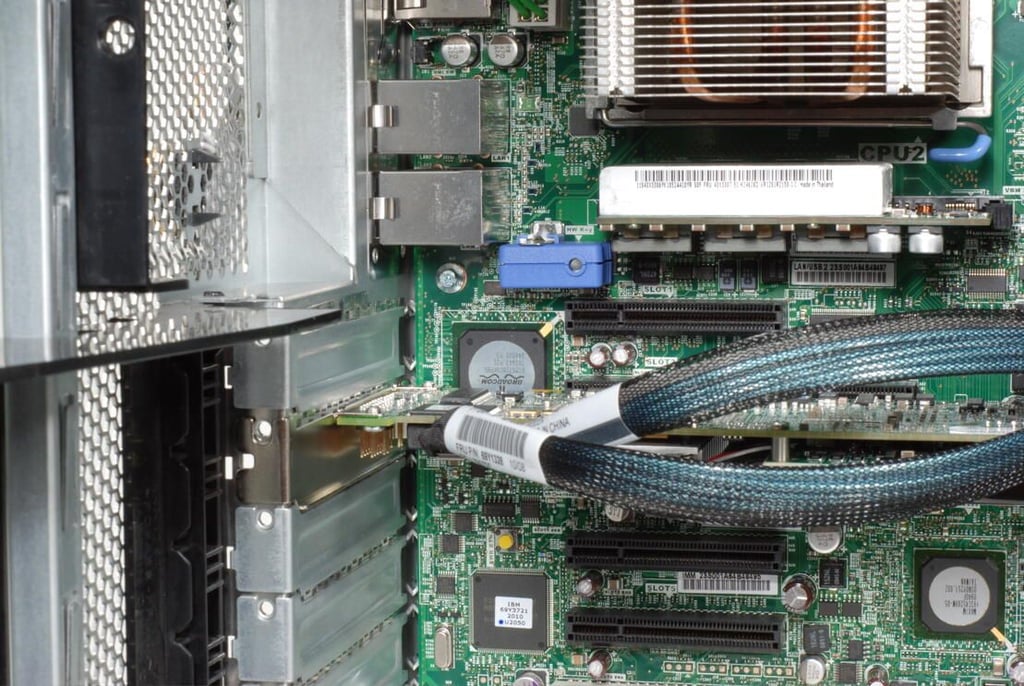
The IBM System x3400 M3 has six adapter slots standard–five PCIe Gen 2 slots and one legacy PCI slot.
Photo credit: Bill Detwiler / TechRepublic
One slot is used for the IBM ServeRAID SAS/SATA Controller.
Photo credit: Bill Detwiler / TechRepublic
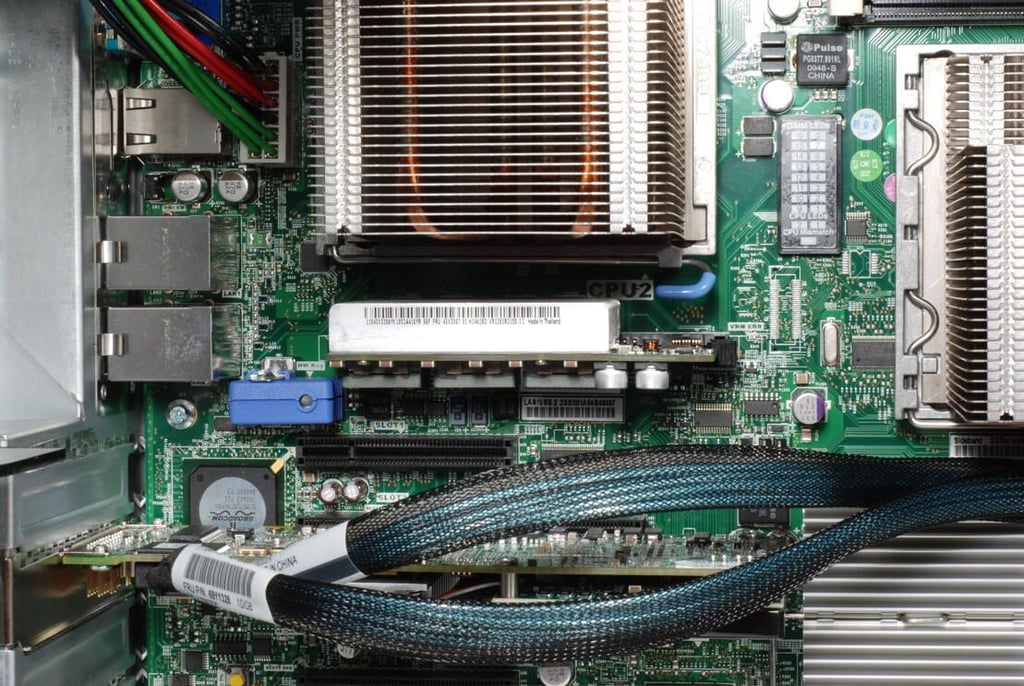
Photo credit: Bill Detwiler / TechRepublic
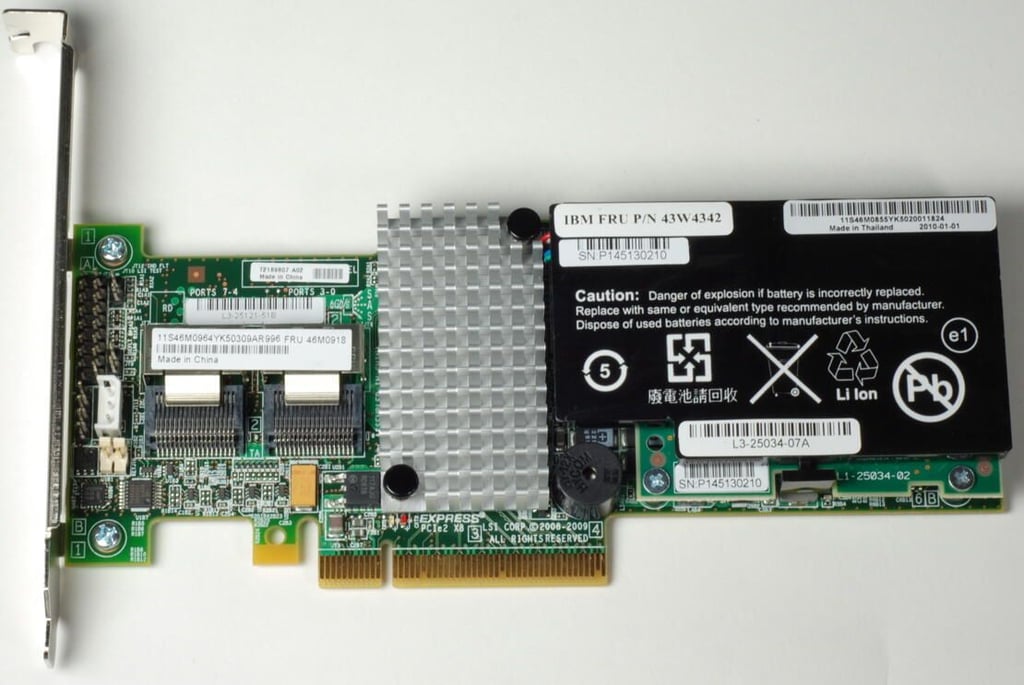
The optional IBM ServeRAID SAS/SATA Controller
Photo credit: Bill Detwiler / TechRepublic
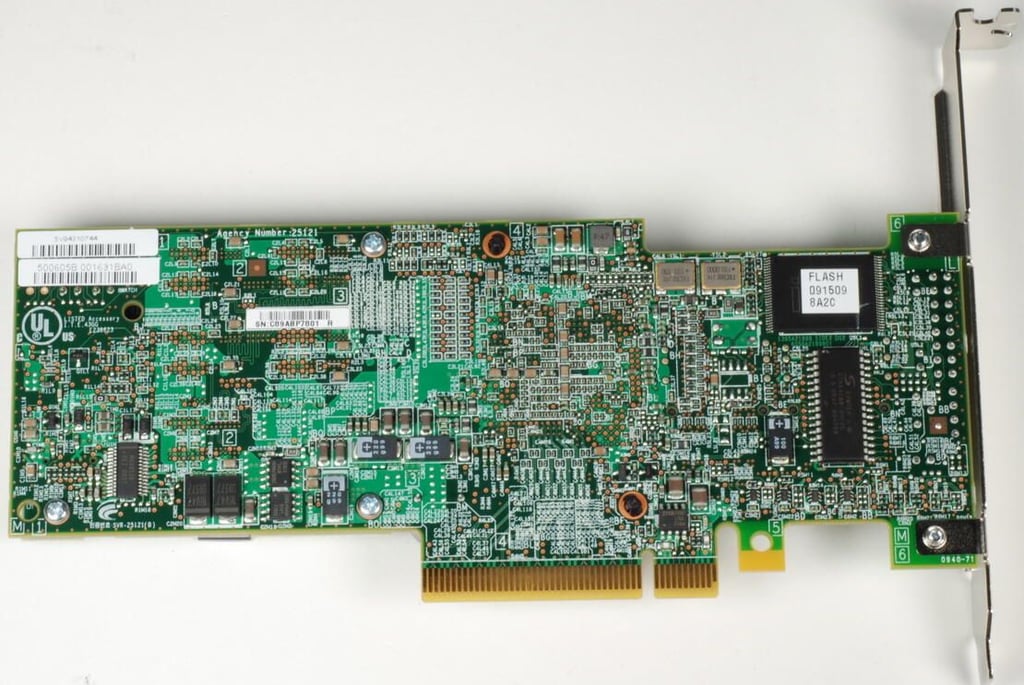
Photo credit: Bill Detwiler / TechRepublic

Photo credit: Bill Detwiler / TechRepublic
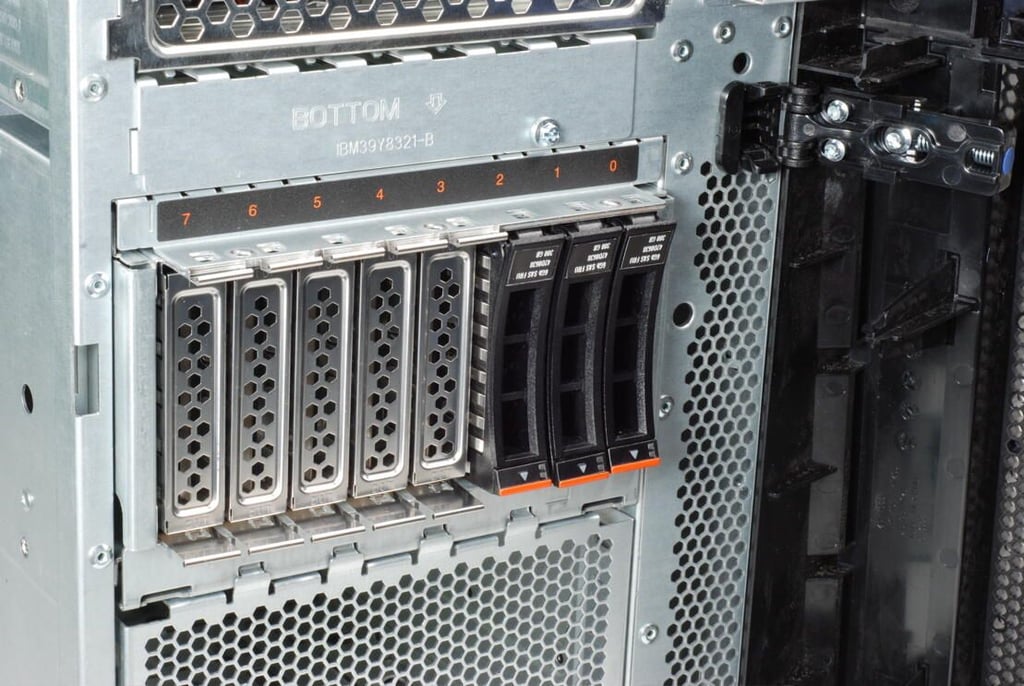
Photo credit: Bill Detwiler / TechRepublic
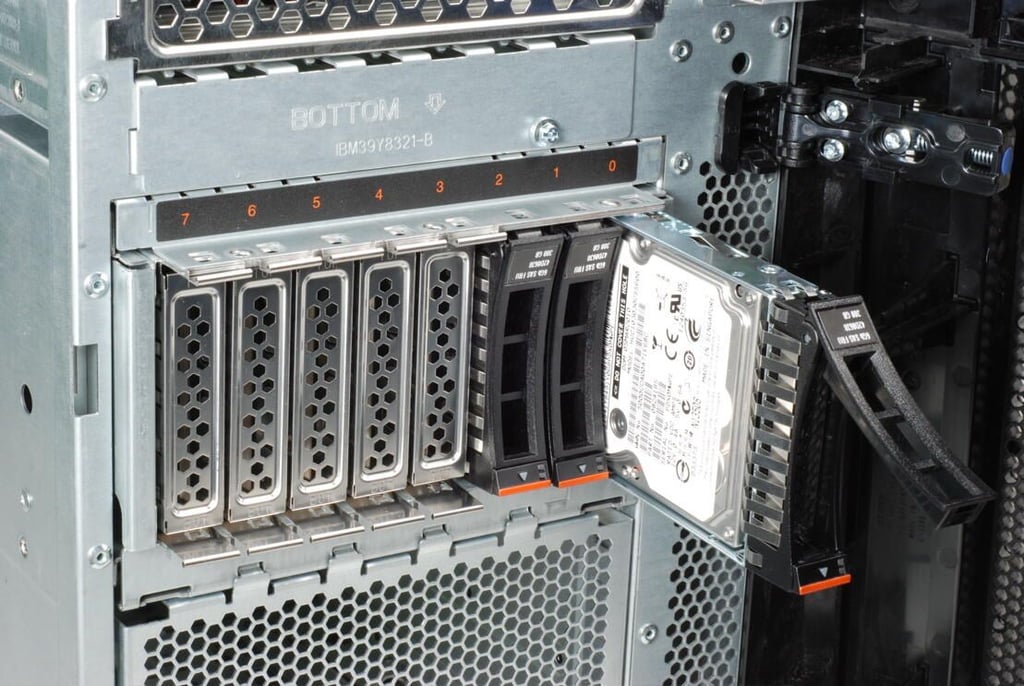
Photo credit: Bill Detwiler / TechRepublic
Our IBM System x3400 M3 came with three IBM System X 300GB 10,000 RPM SAS hard drives.
Photo credit: Bill Detwiler / TechRepublic
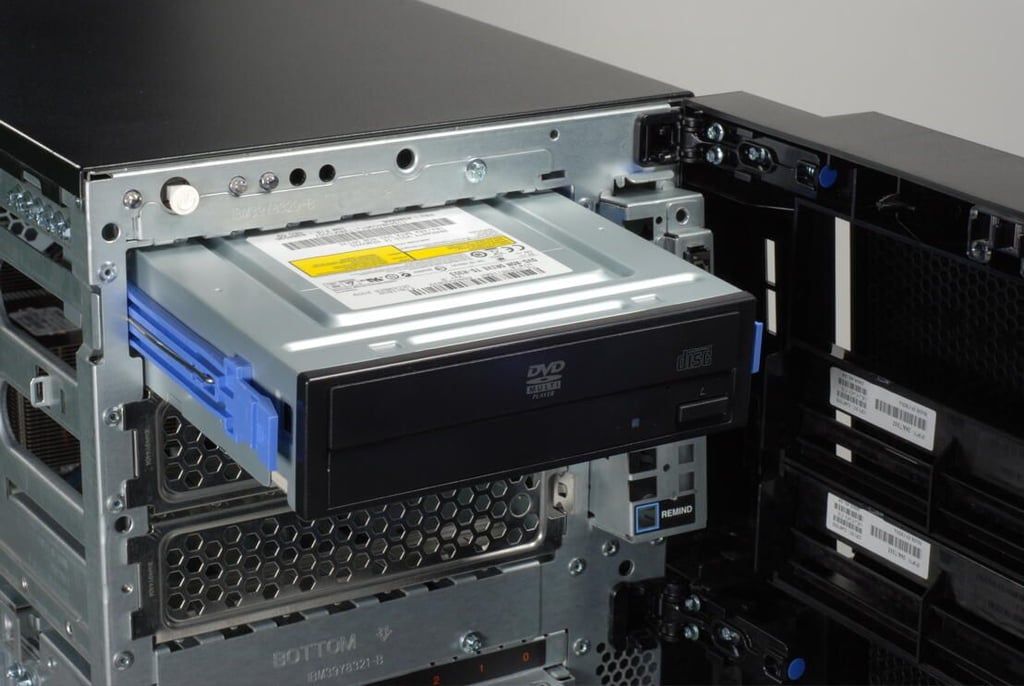
Photo credit: Bill Detwiler / TechRepublic
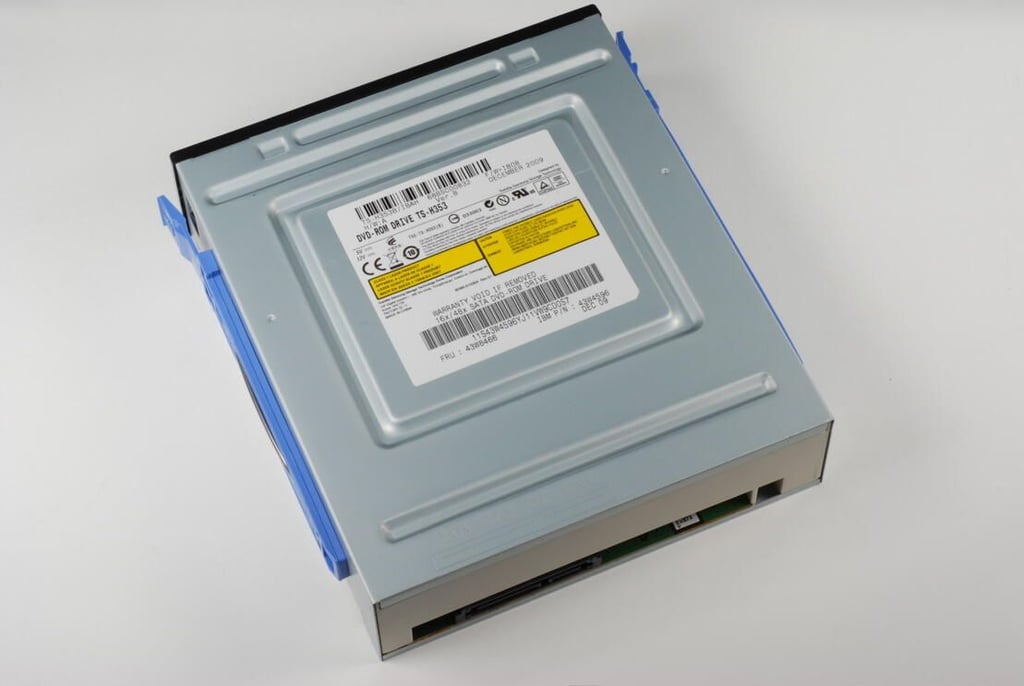
Photo credit: Bill Detwiler / TechRepublic
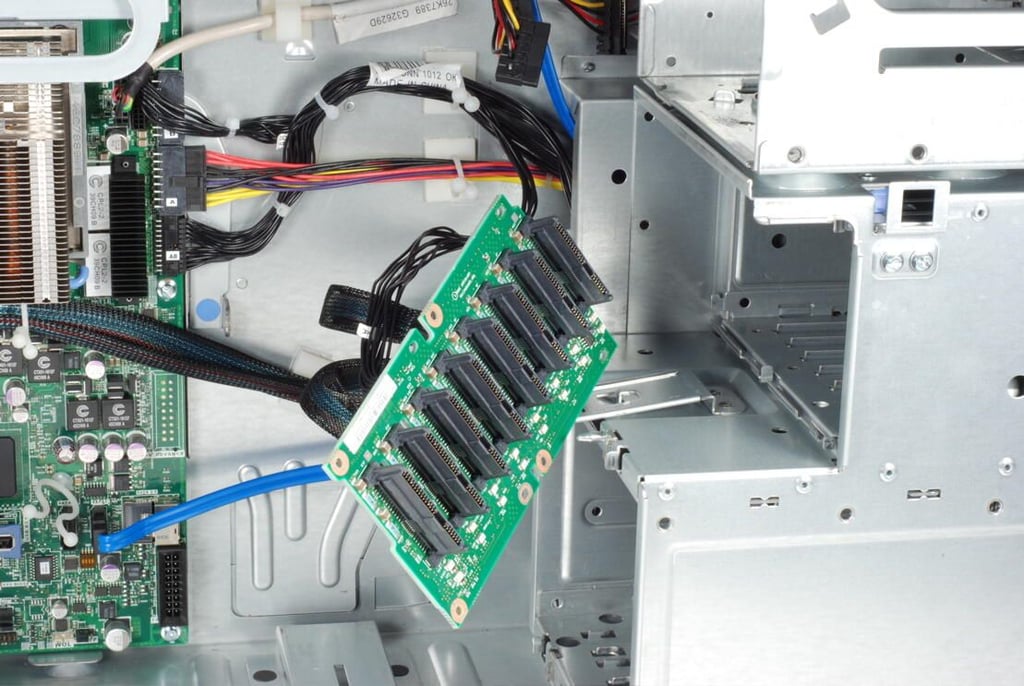
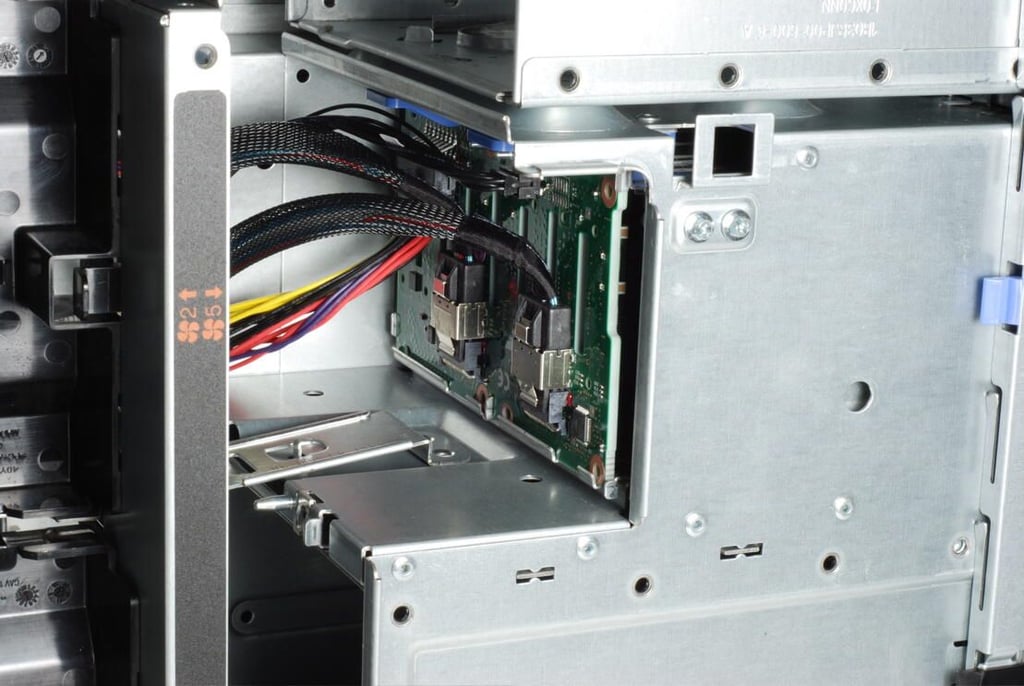
This circuit board contains the eight connectors for the 2.5″ SAS hard drives and connects to the IBM ServeRAID SAS/SATA Controller.
Photo credit: Bill Detwiler / TechRepublic
The IBM System x3400 M3’s main system board is mounted on a removable plate. Releasing this latch allows you to remove the plate.
Photo credit: Bill Detwiler / TechRepublic
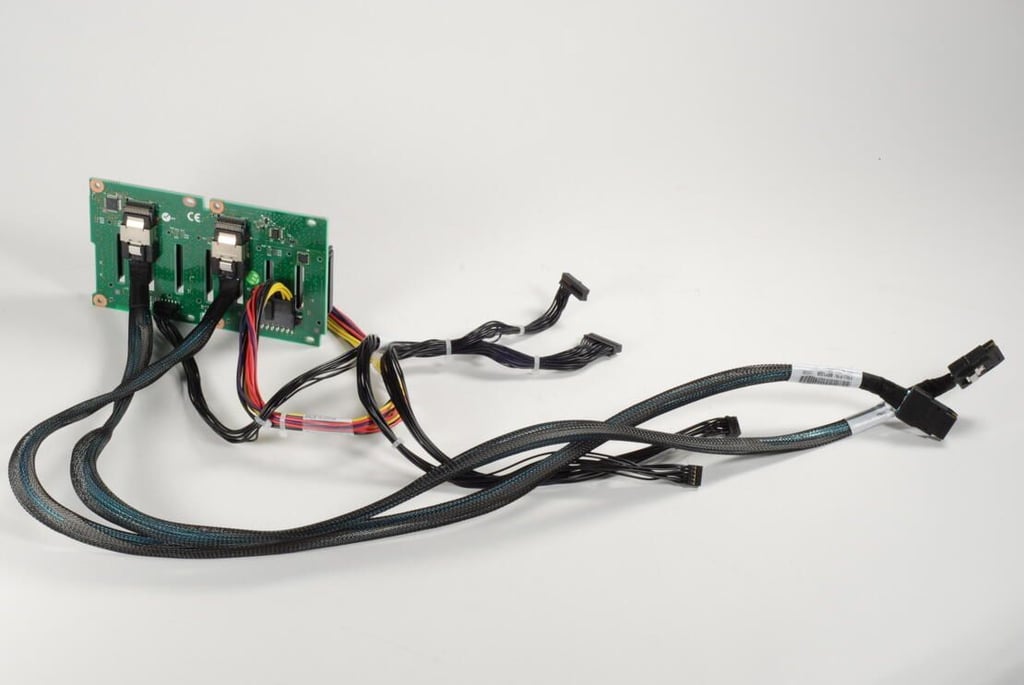
Photo credit: Bill Detwiler / TechRepublic
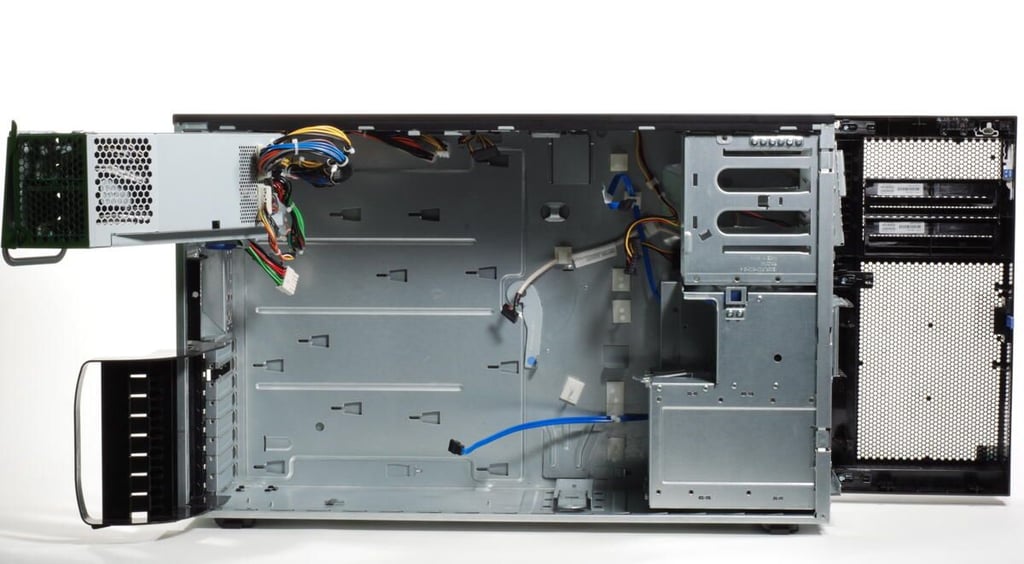
Photo credit: Bill Detwiler / TechRepublic
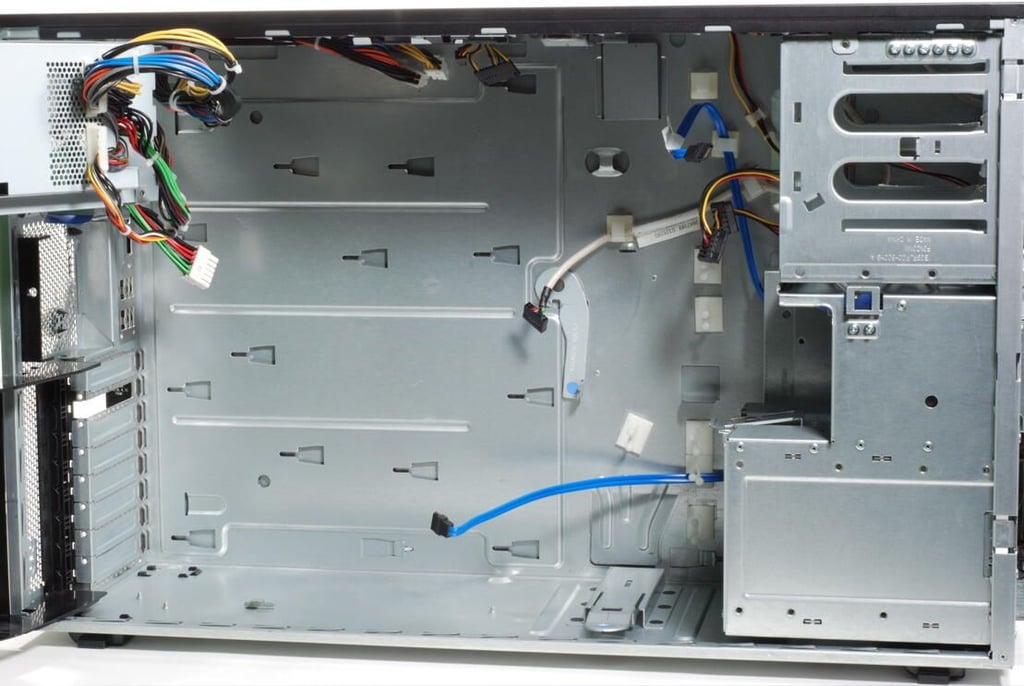
Photo credit: Bill Detwiler / TechRepublic
Photo credit: Bill Detwiler / TechRepublic
Photo credit: Bill Detwiler / TechRepublic
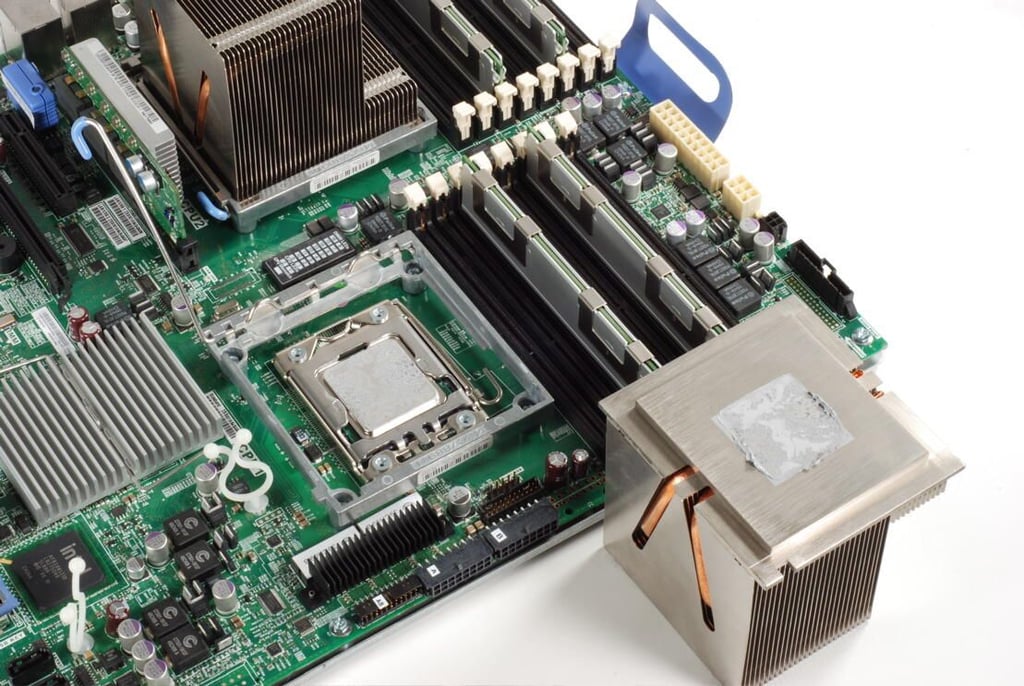
Photo credit: Bill Detwiler / TechRepublic
Bill Detwiler is the Editor for Technical Content and Ecosystem at Celonis. He is the former Editor in Chief of TechRepublic and previous host of TechRepublic's Dynamic Developer podcast and Cracking Open, CNET and TechRepublic's popular online show. Previously, Bill was an IT manager in the social research and energy industries. He has bachelor's and master's degrees from the University of Louisville, where he has also lectured on computer crime and crime prevention.


