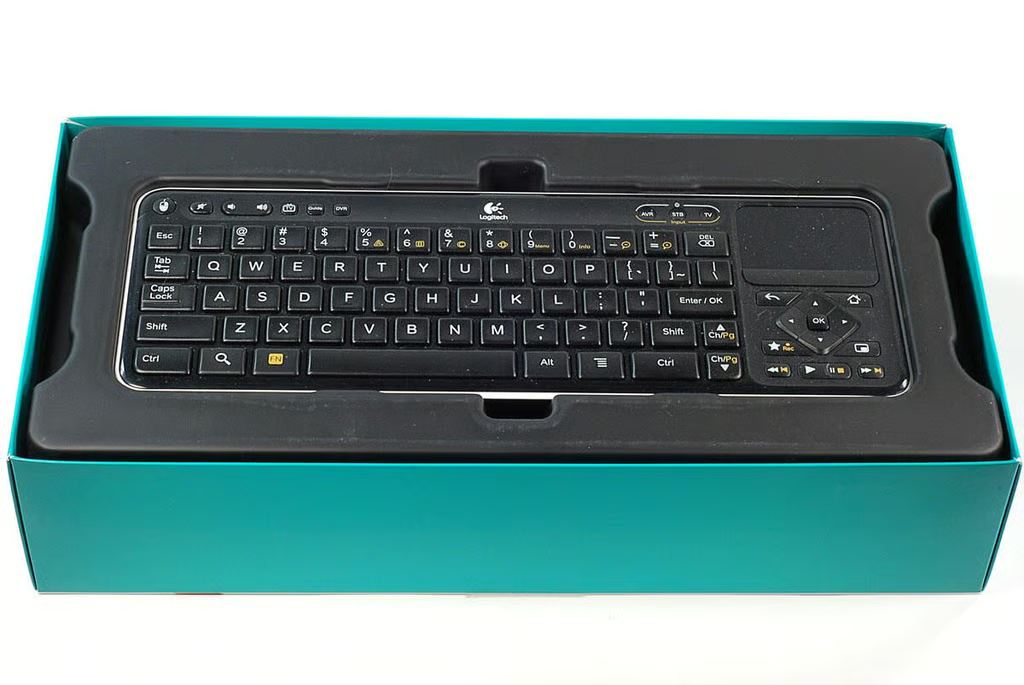
The Logitech Revue comes with a full-size, wireless keyboard that has a built-in directional control pad and multi-touch trackpad.
Photo by: Bill Detwiler / TechRepublic
Caption by: Bill Detwiler
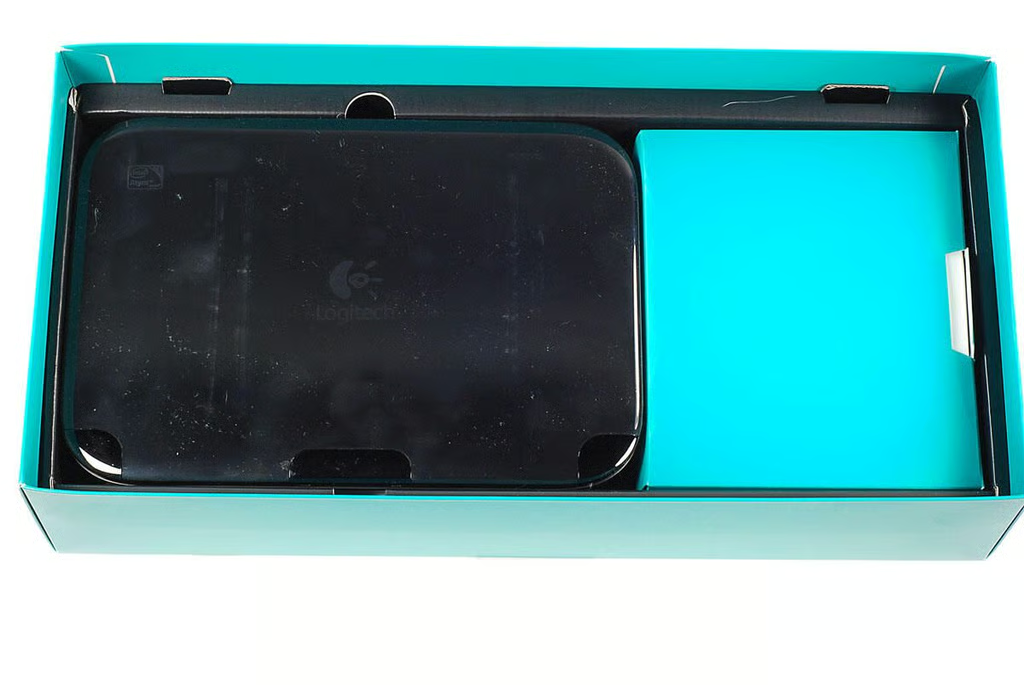
Under the keyboard are the device and cables (inside the box on the right).
Photo by: Bill Detwiler / TechRepublic
Caption by: Bill Detwiler
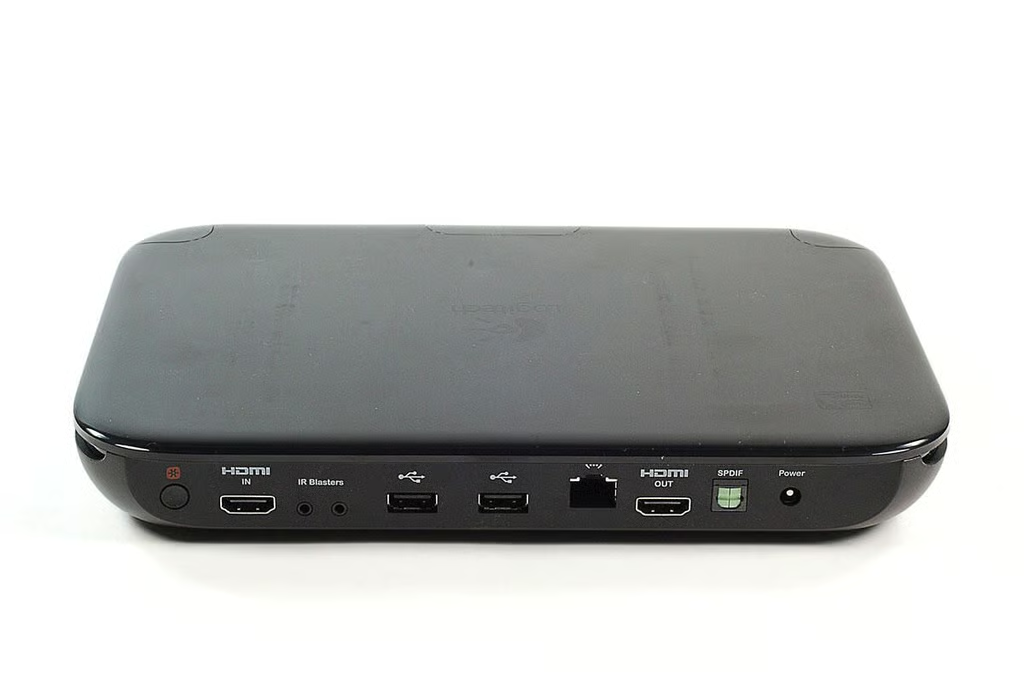
Along the back of the Logitech Revue are the Logitech Unifying button and ports. From left to right, you’ll find the Loitech Unifying technology button (which allows you to pair the device with other Logitech devices), HDMI in, IR blaster ports, two USB ports, Ethernet port, HDMI out, SPDIF port, and power connector.
Photo by: Bill Detwiler / TechRepublic
Caption by: Bill Detwiler
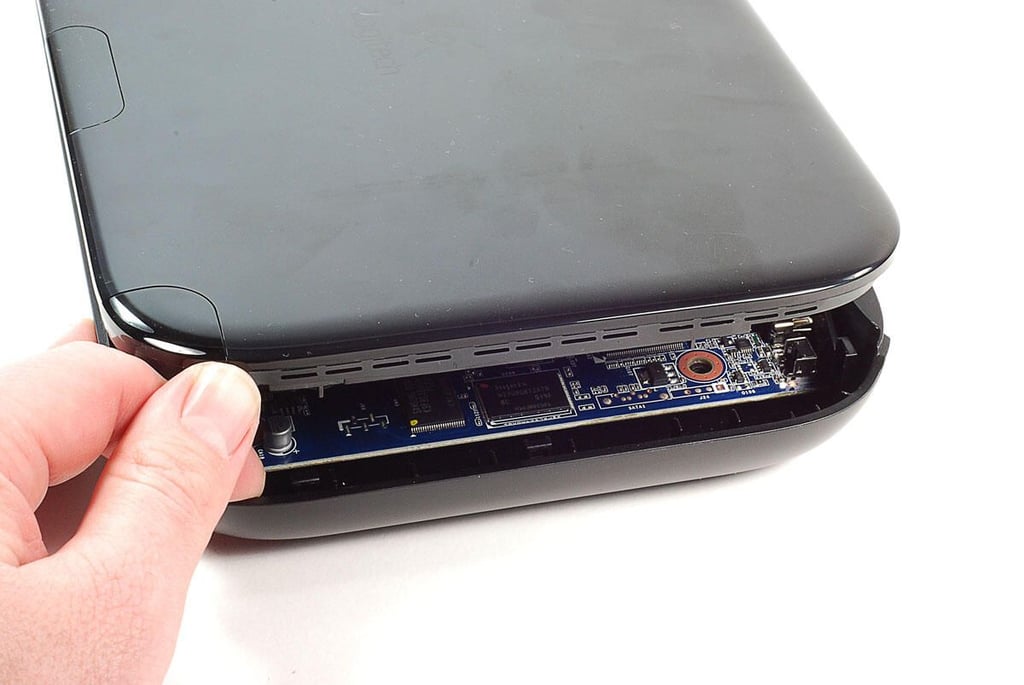
With the screws removed, you can use a small metal blade or plastic case opening tool to pop the top half loose from the bottom half.
Photo by: Bill Detwiler / TechRepublic
Caption by: Bill Detwiler
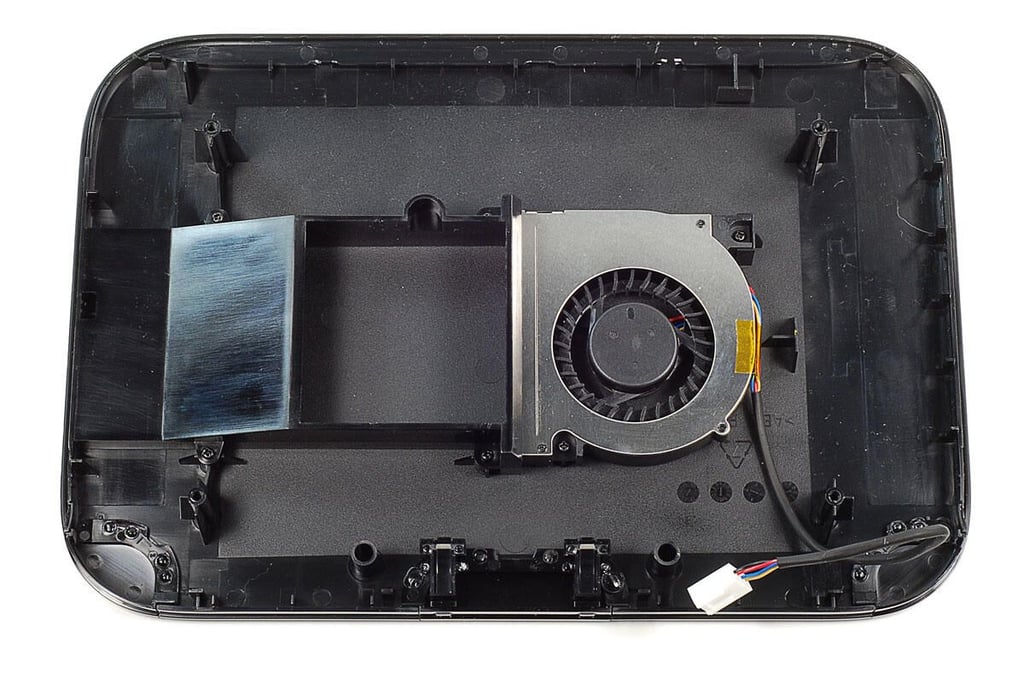
The Logitech Revue’s cooling fan and air duct are mounted to the underside of the case’s top half.
Photo by: Bill Detwiler / TechRepublic
Caption by: Bill Detwiler
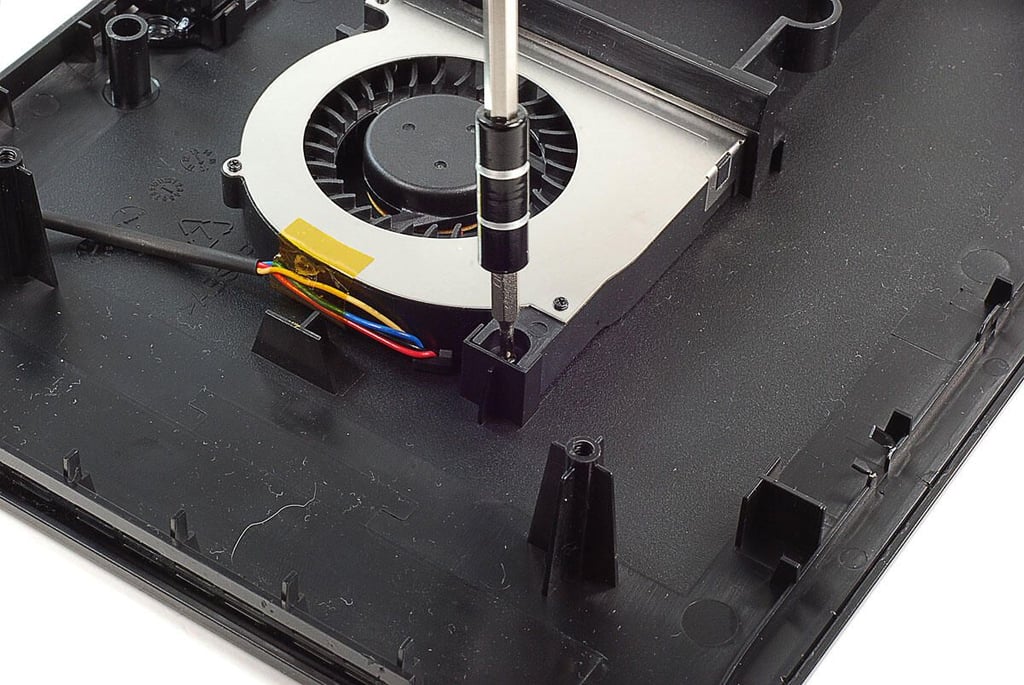
A pair of Phillips screws hold the fan in place. Four screws hold the air duct in place.
Photo by: Bill Detwiler / TechRepublic
Caption by: Bill Detwiler

Photo by: Bill Detwiler / TechRepublic
Caption by: Bill Detwiler
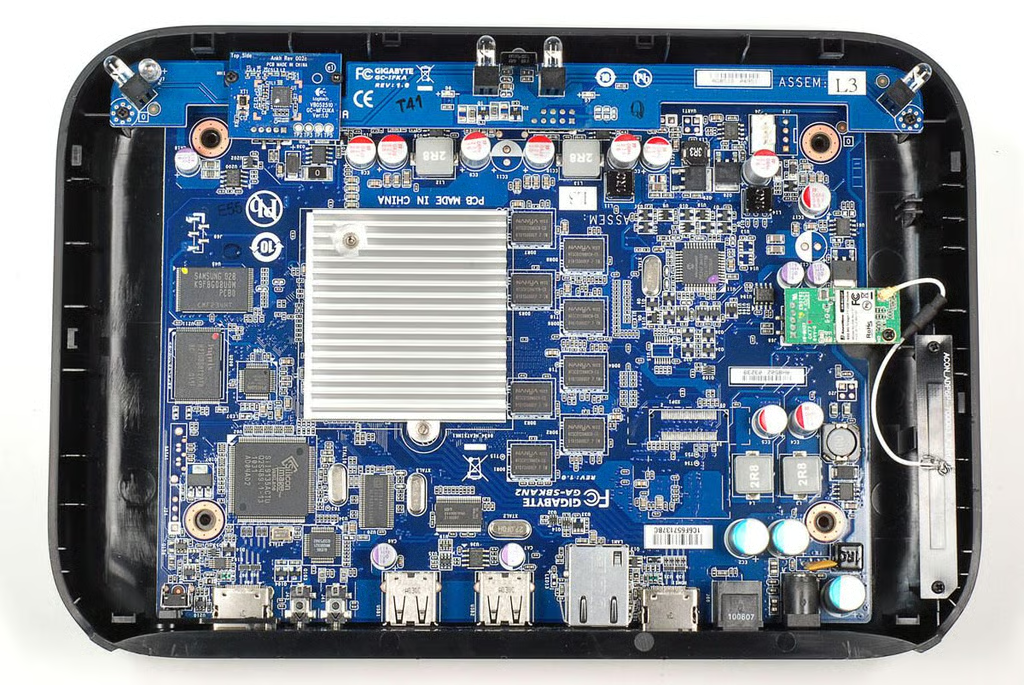
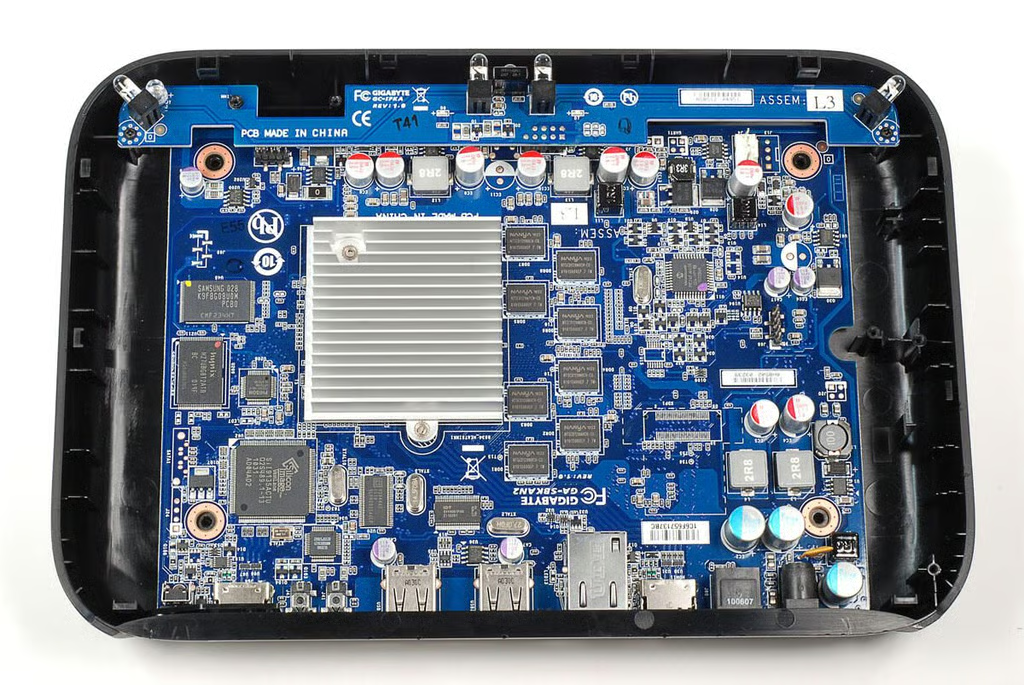
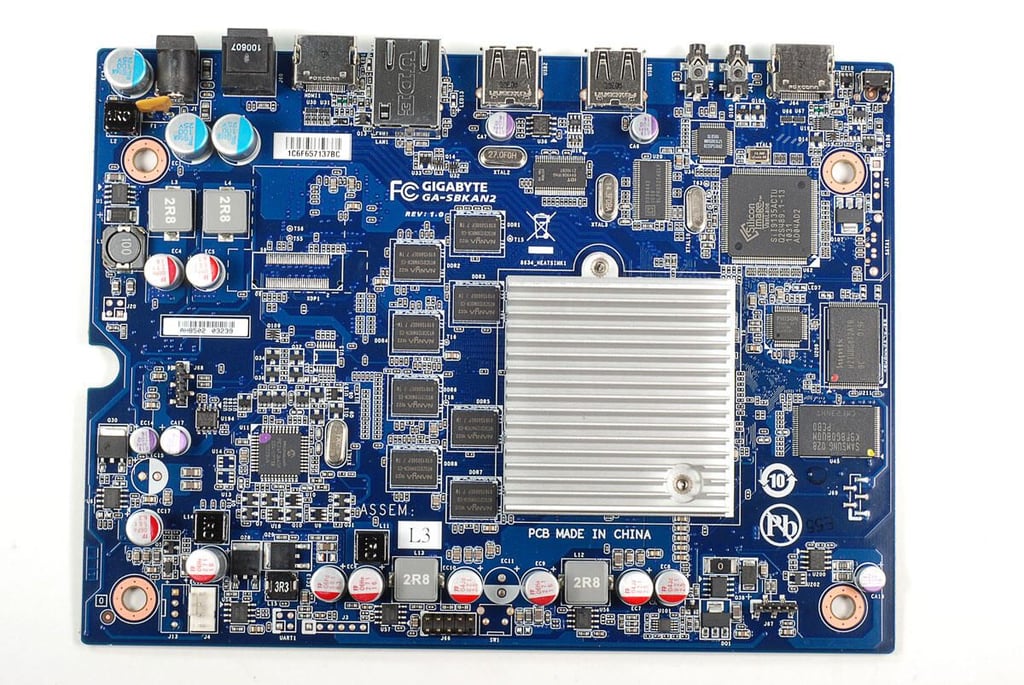
With the top half of the case completely removed, we can get a good look at the main components inside the Logitech Revue. There are four separate PCBs–the large motherboard, and three smaller, function-specific PCBs.
Photo by: Bill Detwiler / TechRepublic
Caption by: Bill Detwiler
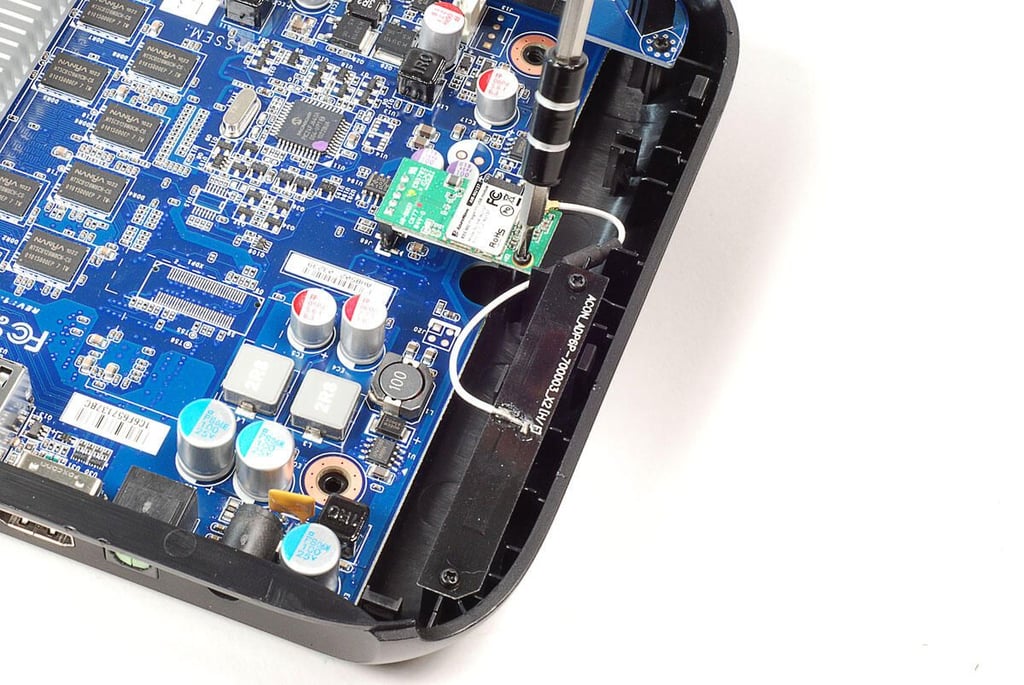
We’ll remove the AzureWave Wi-Fi card first. A single Phillips screws secures the card to the case.
Photo by: Bill Detwiler / TechRepublic
Caption by: Bill Detwiler
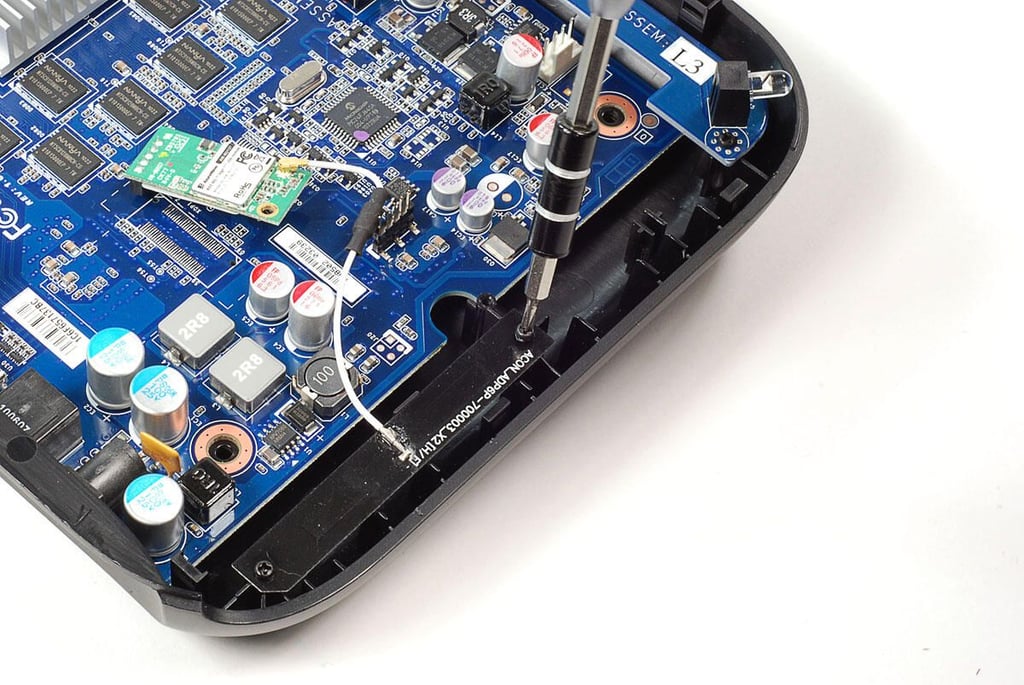
Two screws hold the Wi-Fi antenna to the plastic case.
Photo by: Bill Detwiler / TechRepublic
Caption by: Bill Detwiler
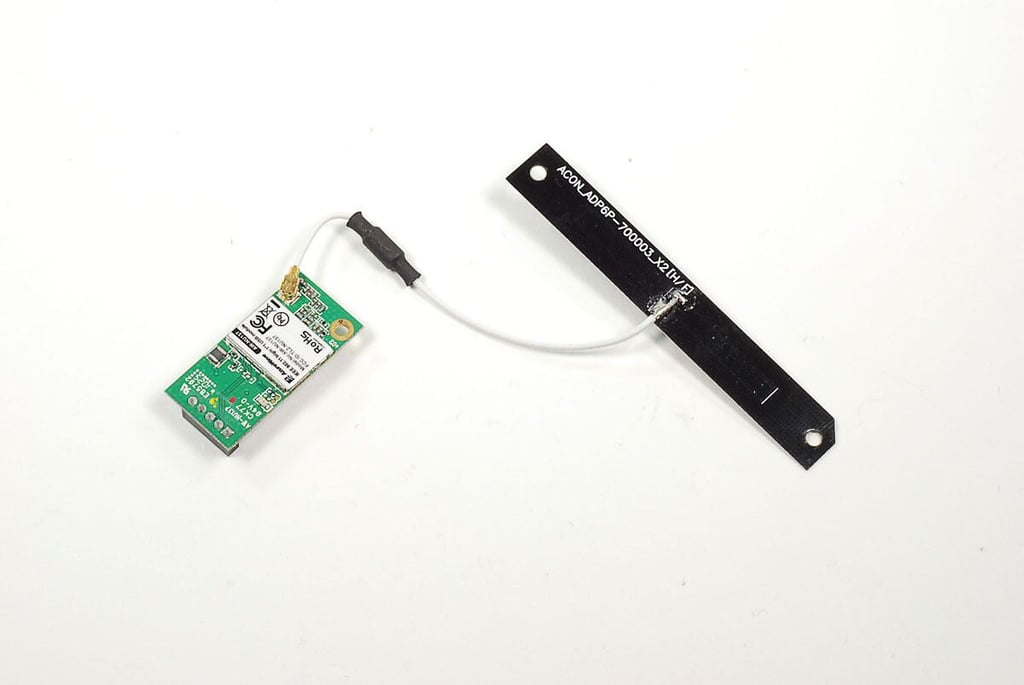
With the their screws removed, you can detach the AzureWave Wi-Fi card from the motherboard and the antenna from the case.
Photo by: Bill Detwiler / TechRepublic
Caption by: Bill Detwiler
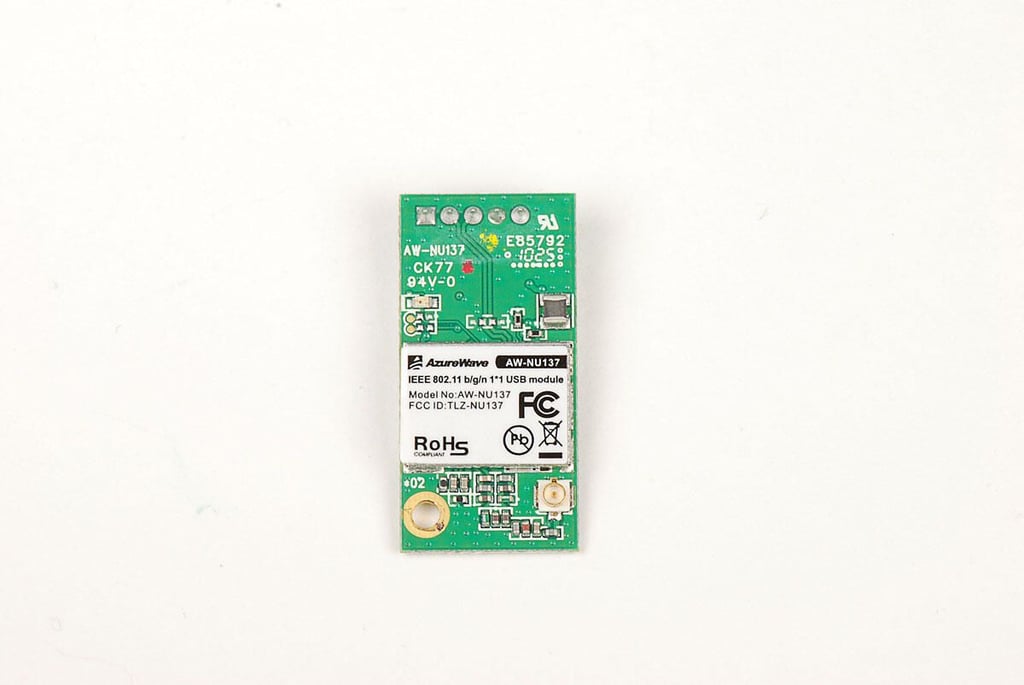
The Logitech Revue has an AzureWave AW-NU137 802.11 b/g/n Wi-Fi card.
Photo by: Bill Detwiler / TechRepublic
Caption by: Bill Detwiler
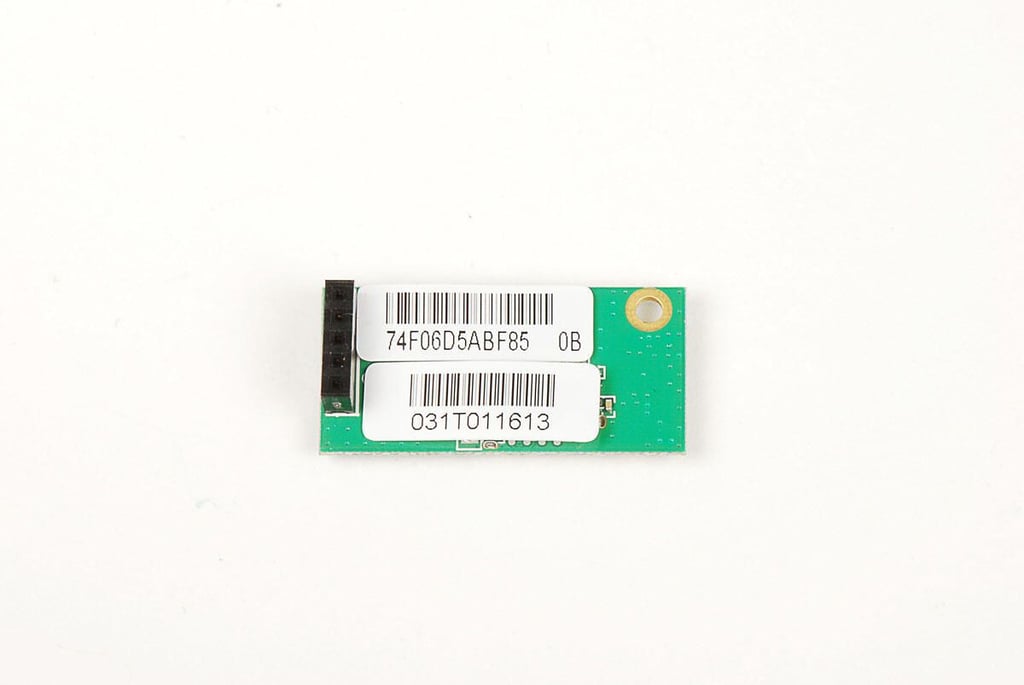
Two stickers cover the chips on the underside of the AzureWave Wi-Fi card.
Photo by: Bill Detwiler / TechRepublic
Caption by: Bill Detwiler
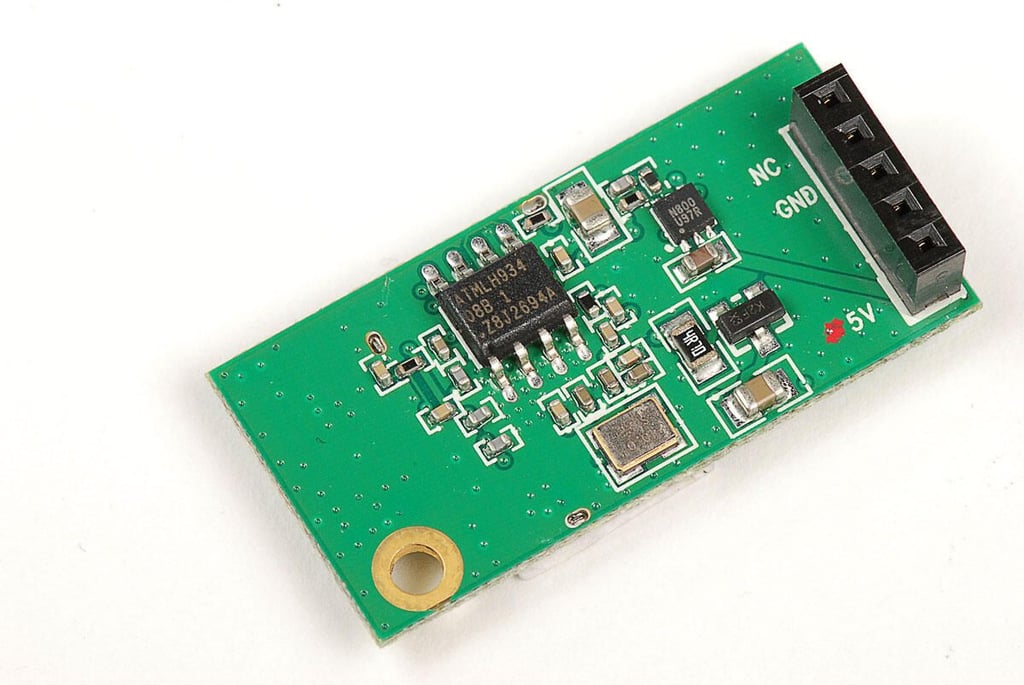
On the back of the AzureWave AW-NU137 card is an Atmel H934 IC
Photo by: Bill Detwiler / TechRepublic
Caption by: Bill Detwiler
Two PCBs are located at the front of the Logitech Revue. A small square board that contains the RF transceiver and a longer PCB with the IR LEDs.
Photo by: Bill Detwiler / TechRepublic
Caption by: Bill Detwiler
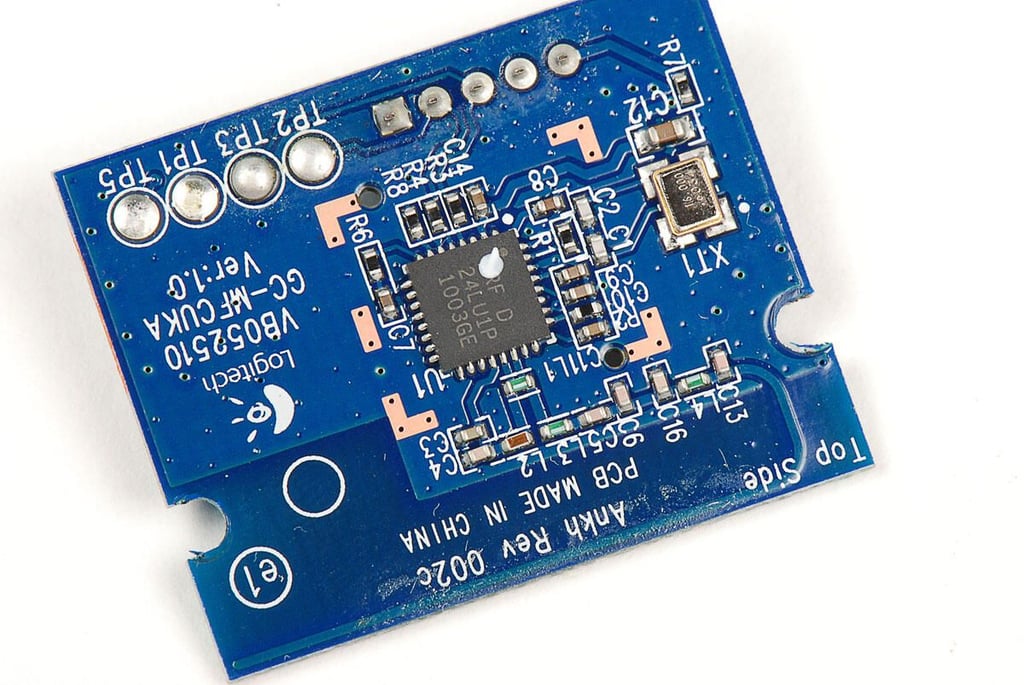
The smaller board contains a Nordic Semiconductor nRF24L01 RF transceiver.
Photo by: Bill Detwiler / TechRepublic
Caption by: Bill Detwiler
Photo by: Bill Detwiler / TechRepublic
Caption by: Bill Detwiler
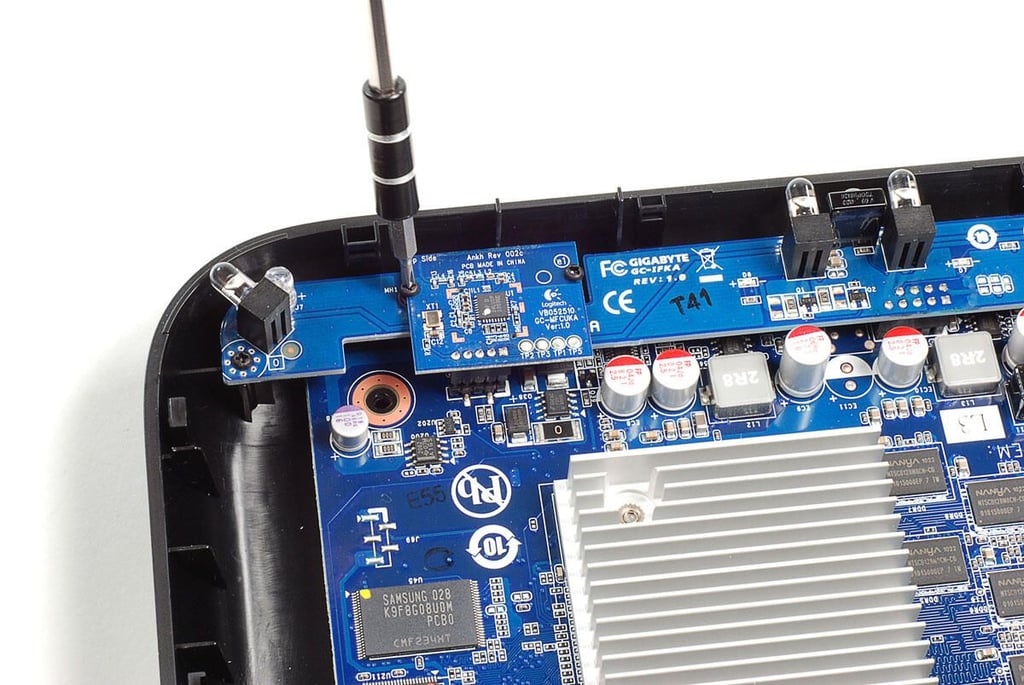
Next, we’ll remove the longer IR board.
Photo by: Bill Detwiler / TechRepublic
Caption by: Bill Detwiler
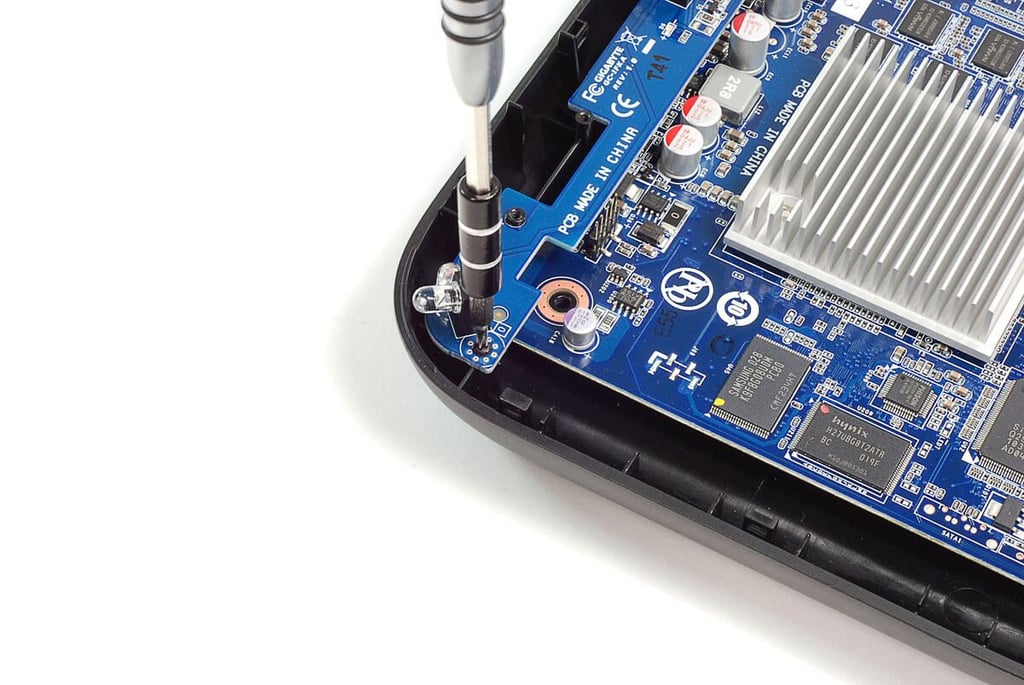
Like the other PCBs, the IR board is secured to the Logitech Revues case with Phillips screws.
Photo by: Bill Detwiler / TechRepublic
Caption by: Bill Detwiler
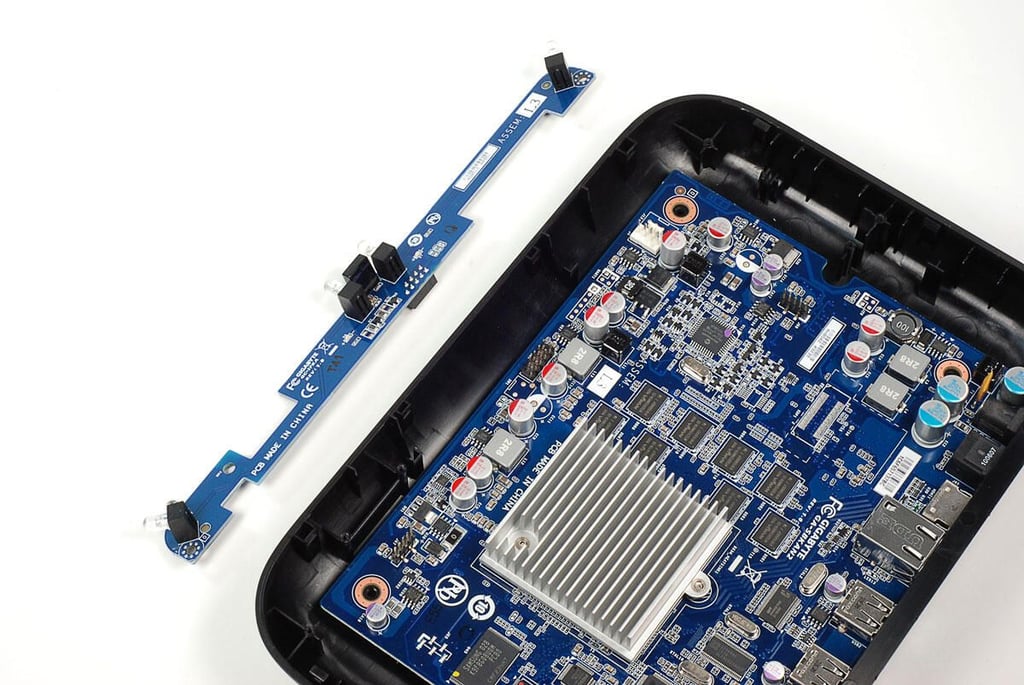
Photo by: Bill Detwiler / TechRepublic
Caption by: Bill Detwiler
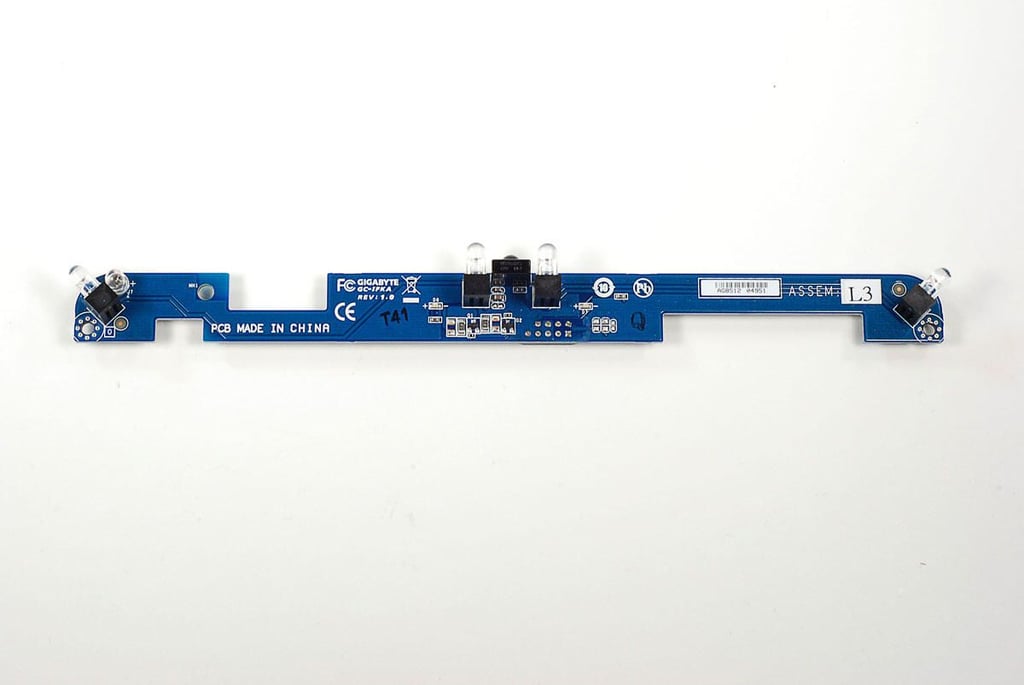
The IR board has four IR LEDs.
Photo by: Bill Detwiler / TechRepublic
Caption by: Bill Detwiler
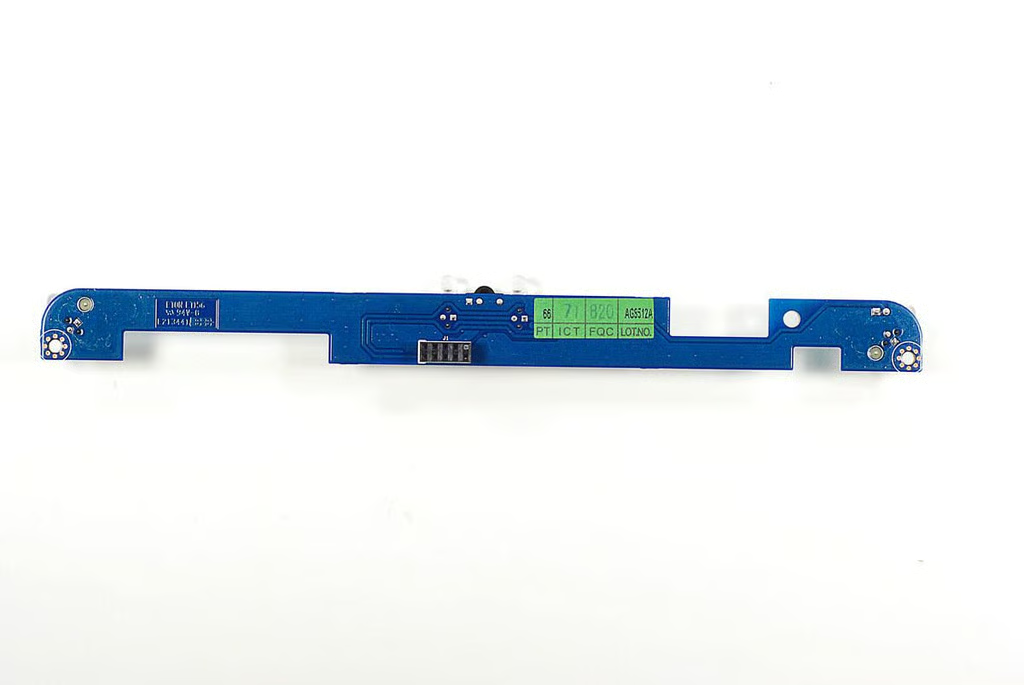
Photo by: Bill Detwiler / TechRepublic
Caption by: Bill Detwiler
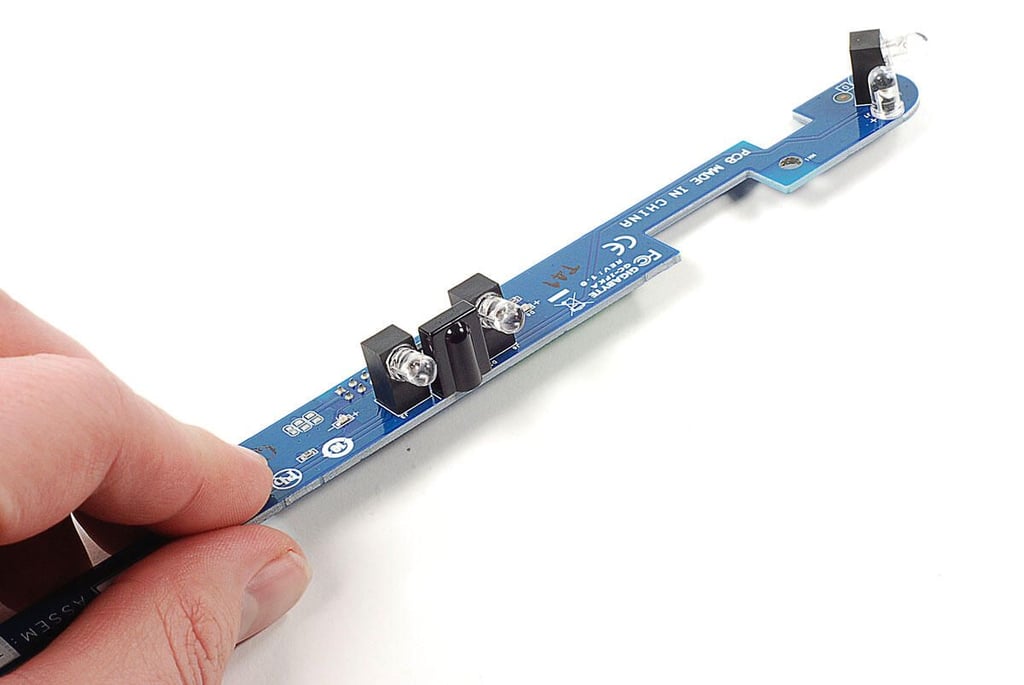
Photo by: Bill Detwiler / TechRepublic
Caption by: Bill Detwiler

Markings on the IR and main PCBs indicate that GIGABYTE made both boards.
Photo by: Bill Detwiler / TechRepublic
Caption by: Bill Detwiler
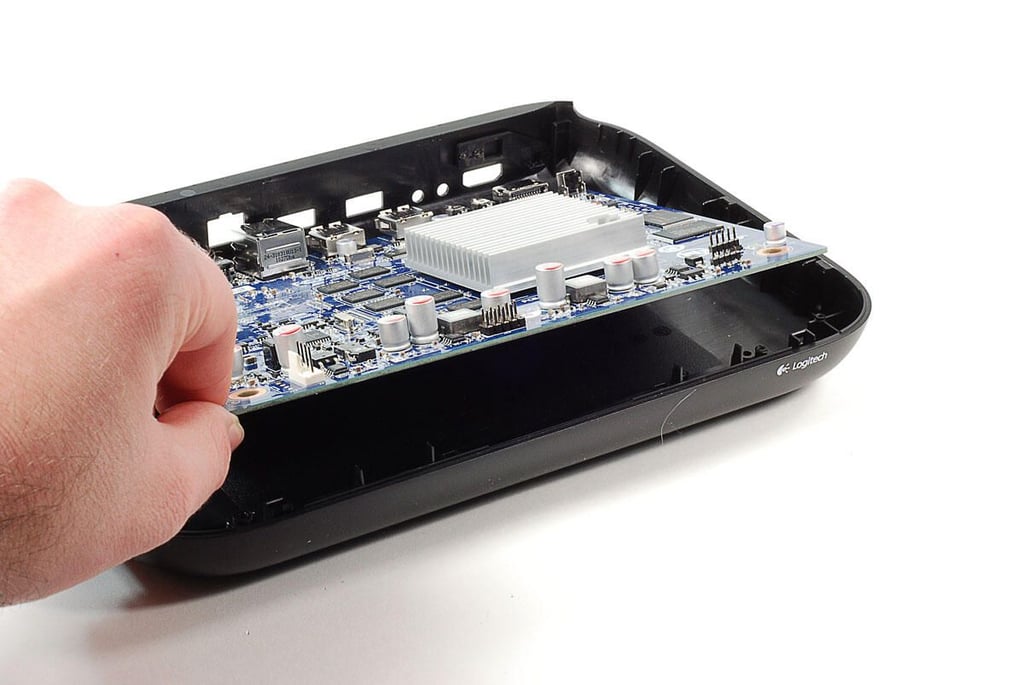
With the Wi-Fi, RF, and IR boards removed, we can lift the Logitech Revue’s main PCB away from the case.
Photo by: Bill Detwiler / TechRepublic
Caption by: Bill Detwiler
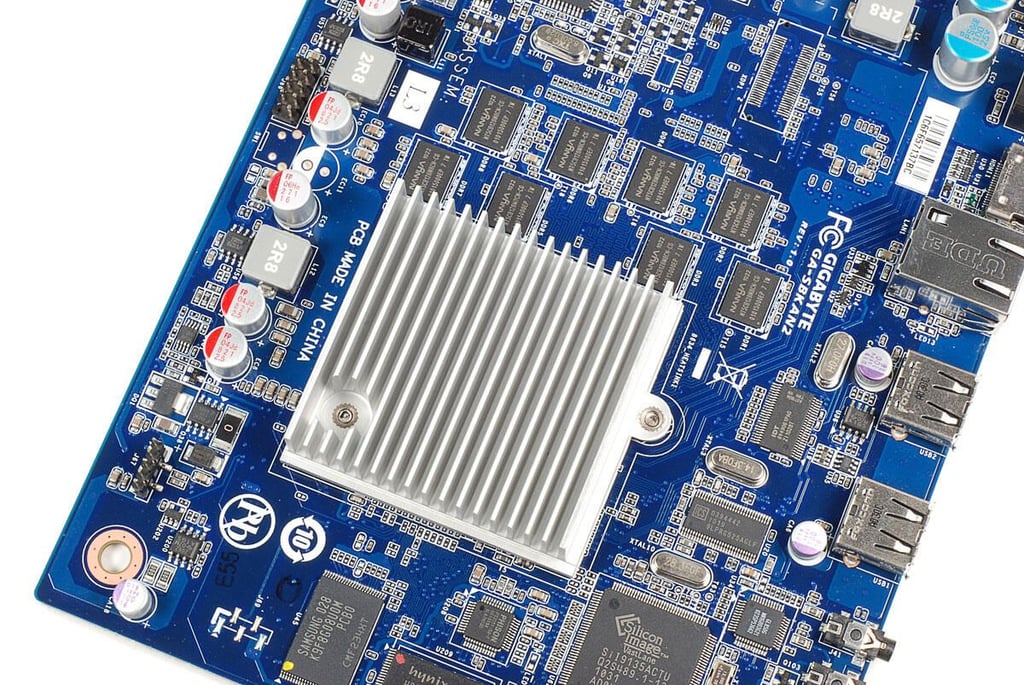
Before we look at each of the chips on the main PCB, we’ll remove the CPU’s heatsink.
Photo by: Bill Detwiler / TechRepublic
Caption by: Bill Detwiler
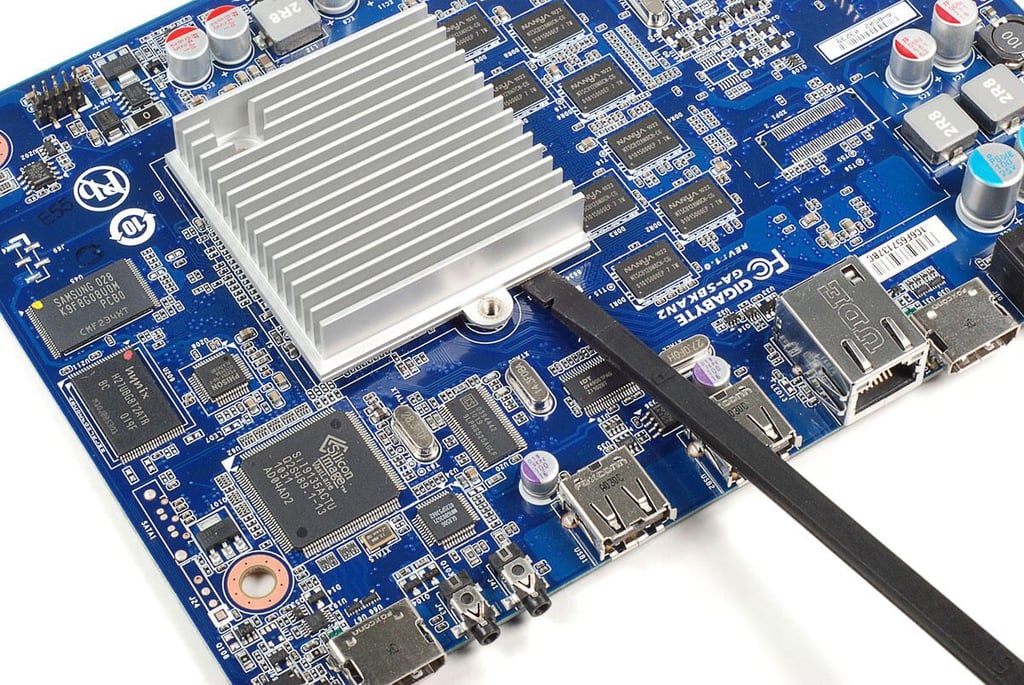
The CPU heatsink is held in place with two Phillips screws.
Photo by: Bill Detwiler / TechRepublic
Caption by: Bill Detwiler
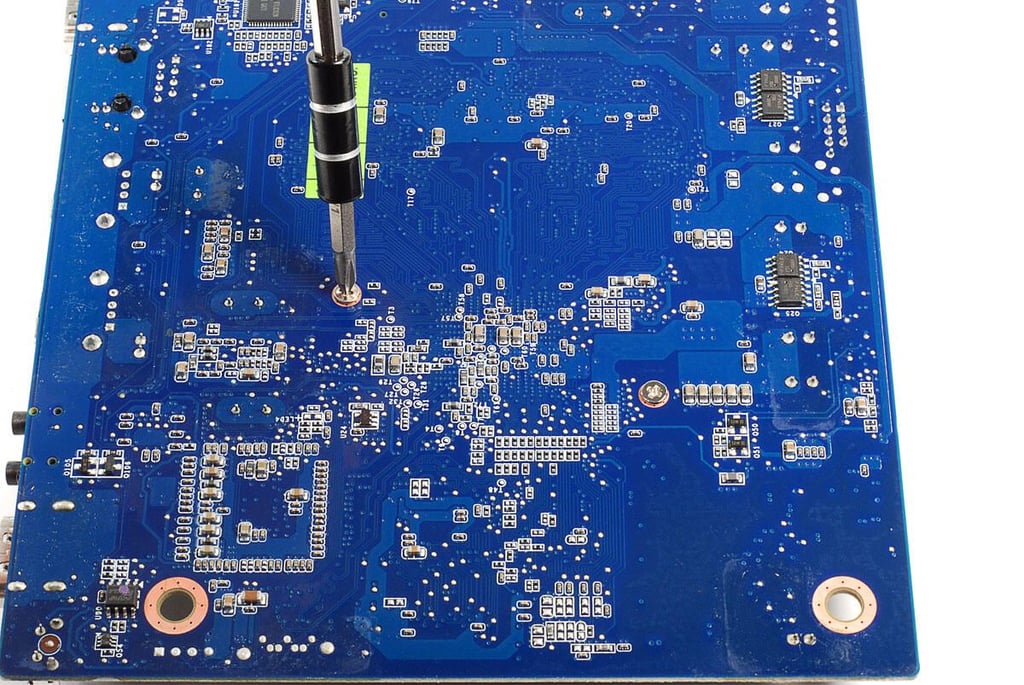
The head of each heatsink screws is accessible from the underside of the main PCB.
Photo by: Bill Detwiler / TechRepublic
Caption by: Bill Detwiler
With its two screws removed, you can pop loose the CPU heatsink. I used a plastic spudger to gently pry up on the heatsink.
Photo by: Bill Detwiler / TechRepublic
Caption by: Bill Detwiler
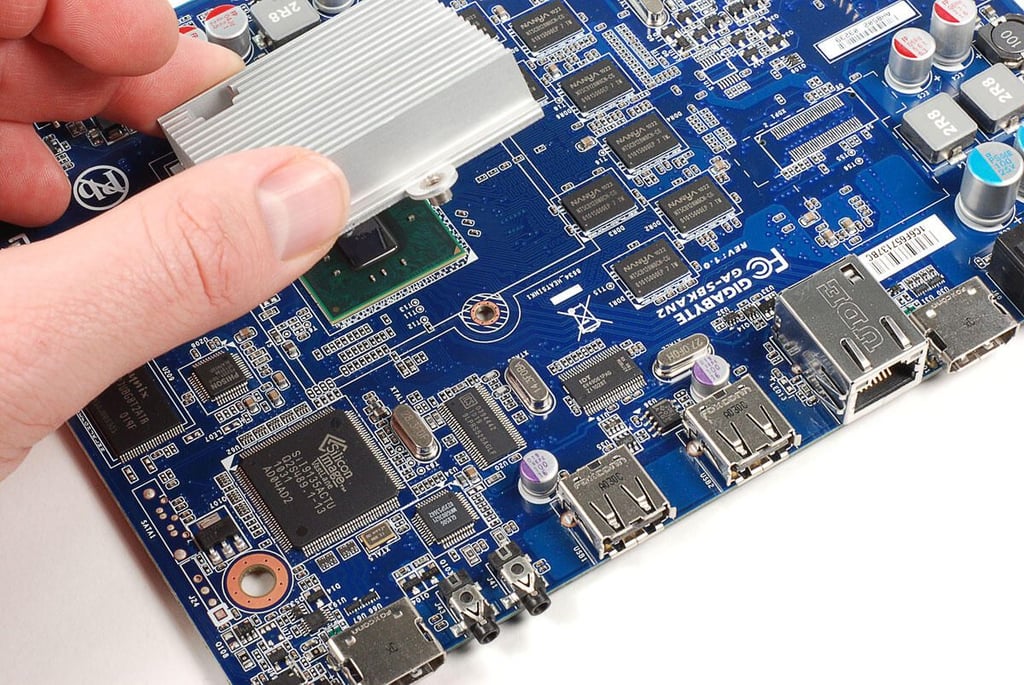
Photo by: Bill Detwiler / TechRepublic
Caption by: Bill Detwiler
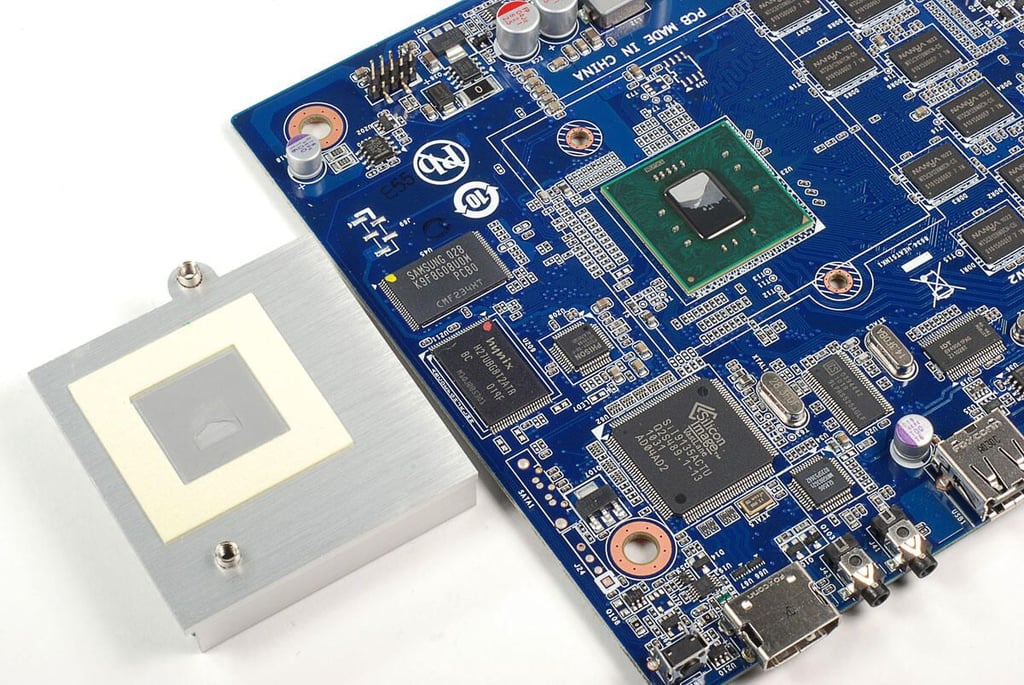
Photo by: Bill Detwiler / TechRepublic
Caption by: Bill Detwiler
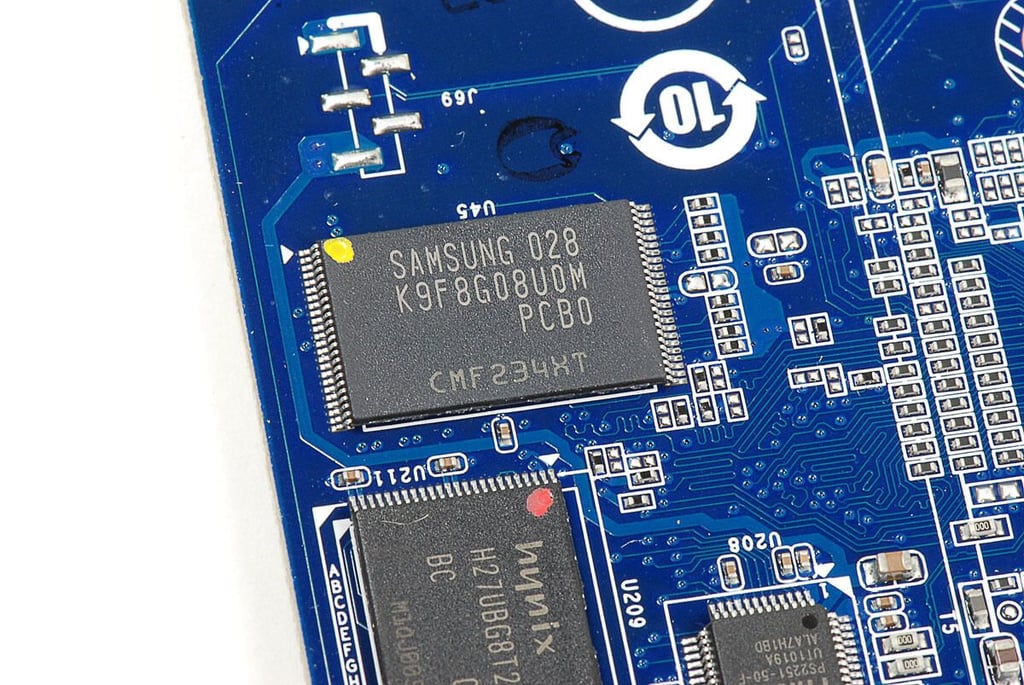
Photo by: Bill Detwiler / TechRepublic
Caption by: Bill Detwiler
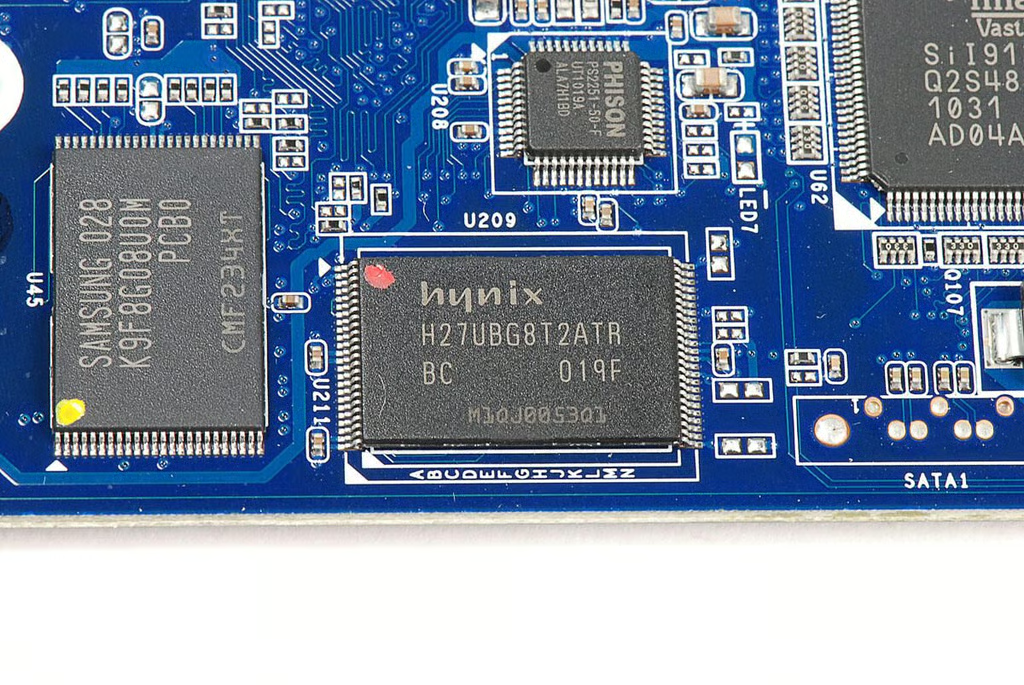
Photo by: Bill Detwiler / TechRepublic
Caption by: Bill Detwiler
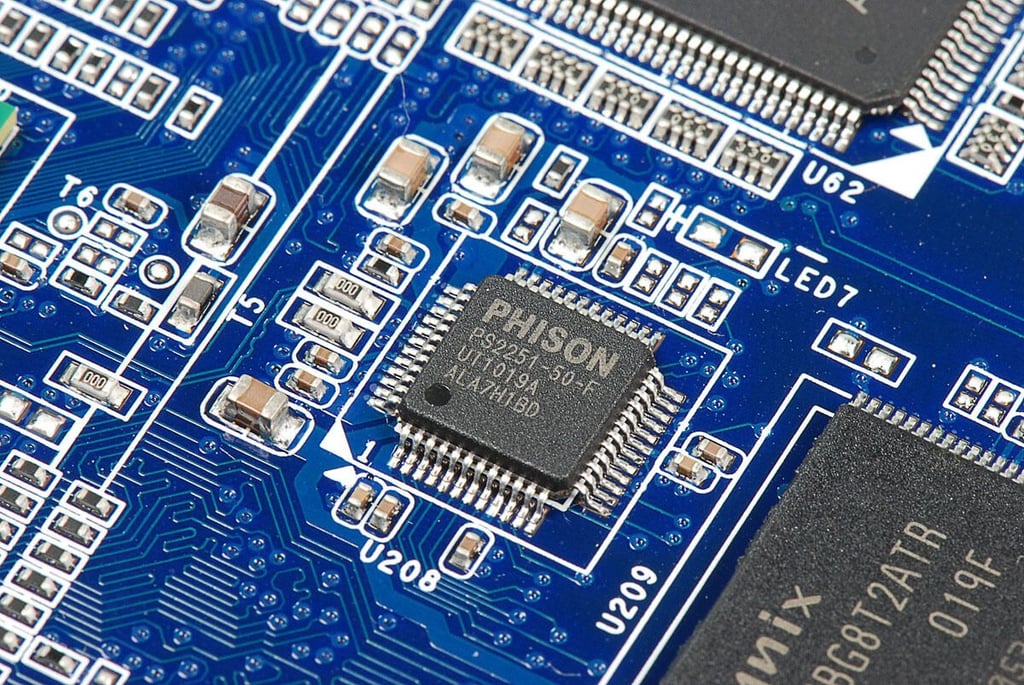
PHISON PS2251-50 USB-to-Flash micro-controller
Photo by: Bill Detwiler / TechRepublic
Caption by: Bill Detwiler
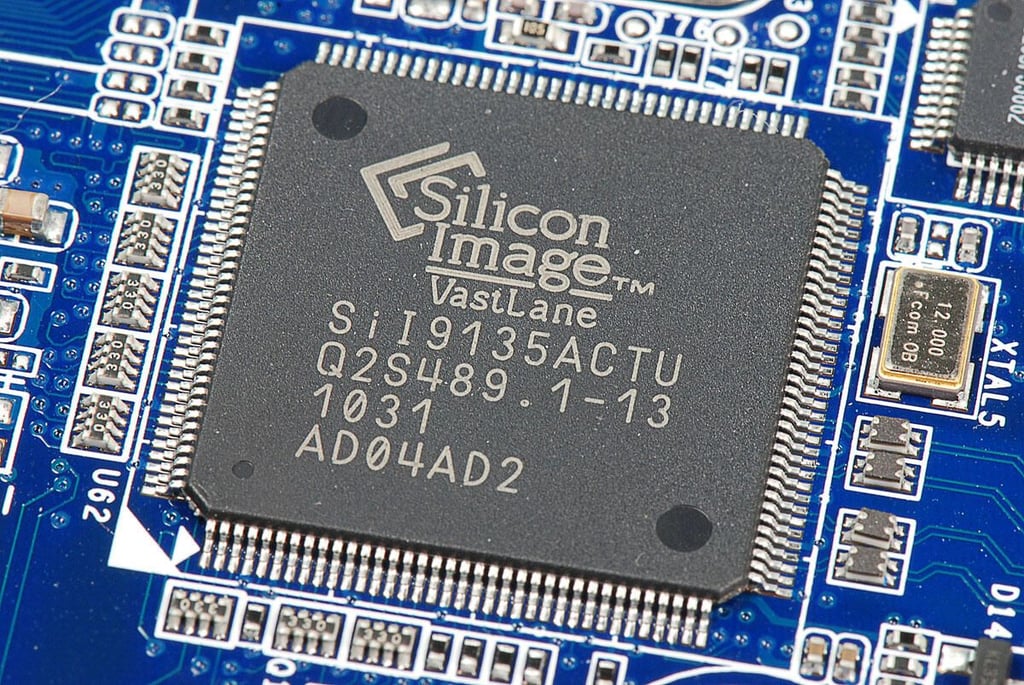
Silicon Image SiI9135 HDMI 1.3 Receiver
Photo by: Bill Detwiler / TechRepublic
Caption by: Bill Detwiler
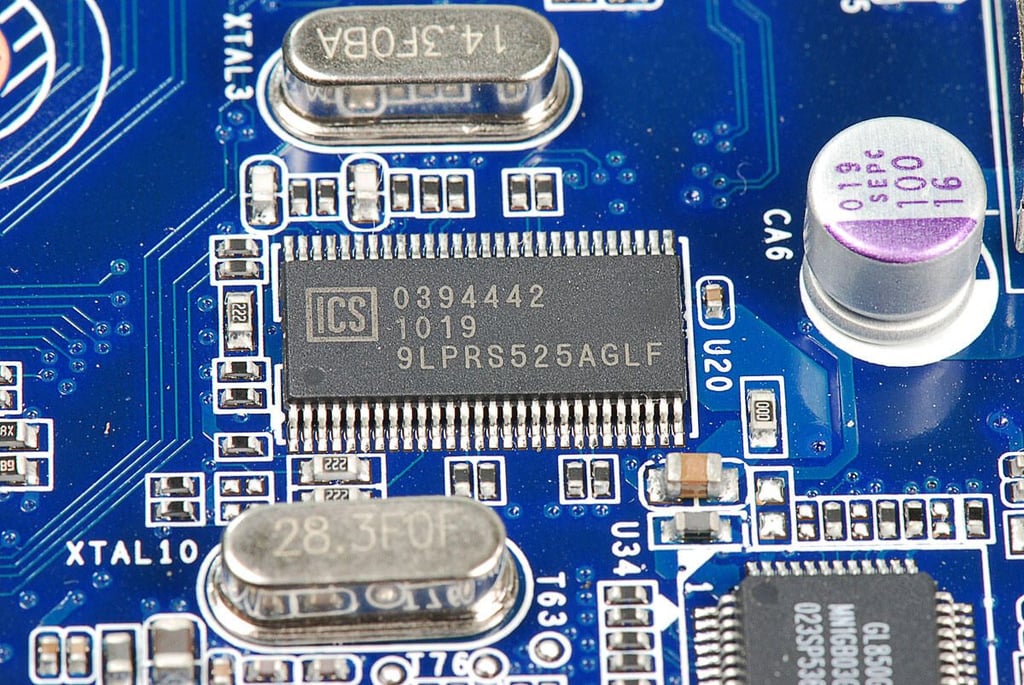
Integrated Devices Technology (IDT) 9LPRS525AGLF Motherboard clock
Photo by: Bill Detwiler / TechRepublic
Caption by: Bill Detwiler
Photo by: Bill Detwiler / TechRepublic
Caption by: Bill Detwiler
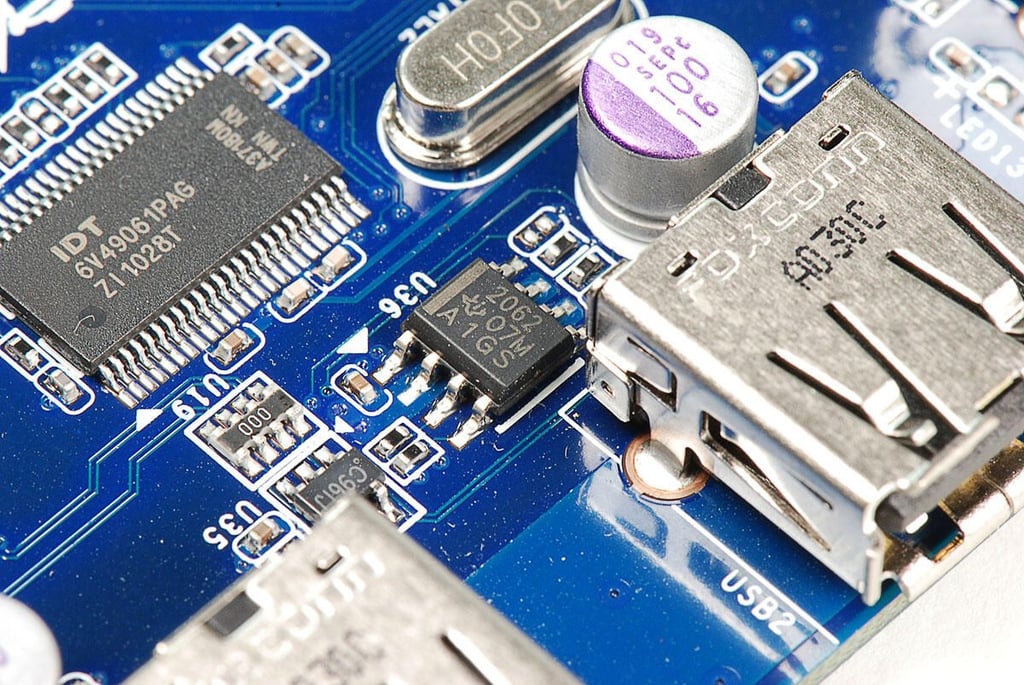
Texas Instruments TPS2062 power-distribution switch
Photo by: Bill Detwiler / TechRepublic
Caption by: Bill Detwiler
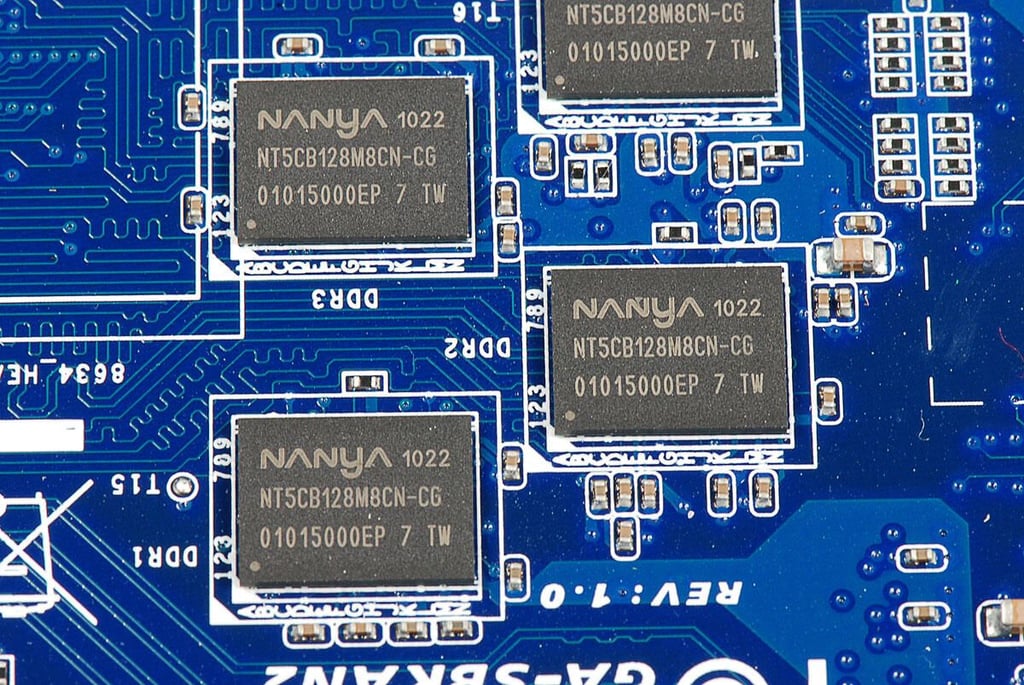
The Logitech Revue has eight Nanya NT5CB128M8CN-CG 1 GB DDR3 SDRAM chips.
Photo by: Bill Detwiler / TechRepublic
Caption by: Bill Detwiler
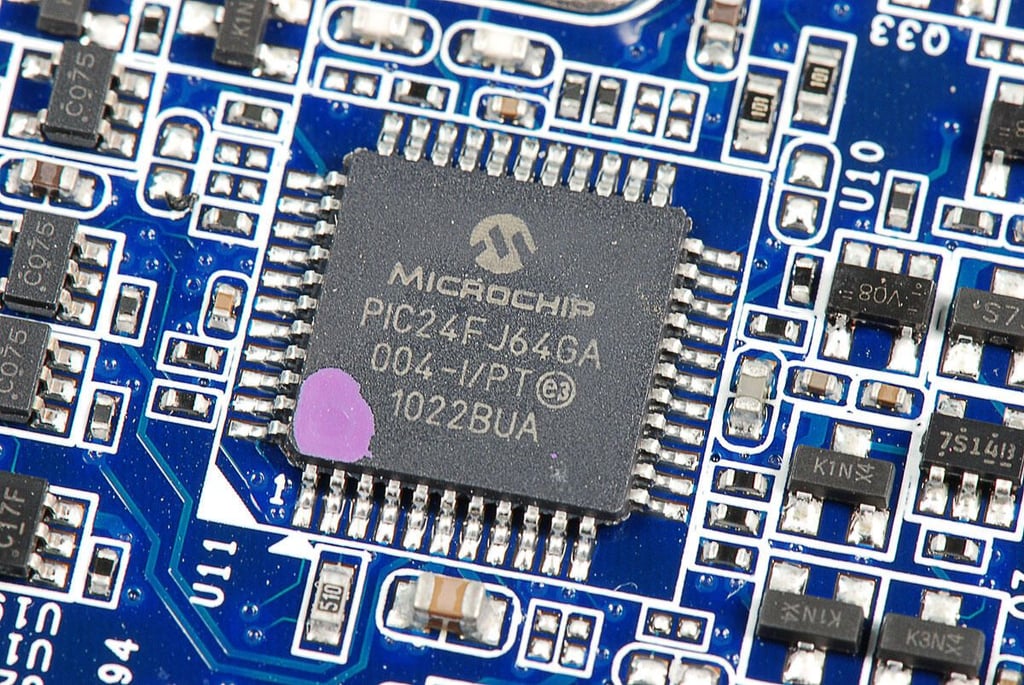
Microchip PIC24FJ64GA004 16-bit microcontroller
Photo by: Bill Detwiler / TechRepublic
Caption by: Bill Detwiler
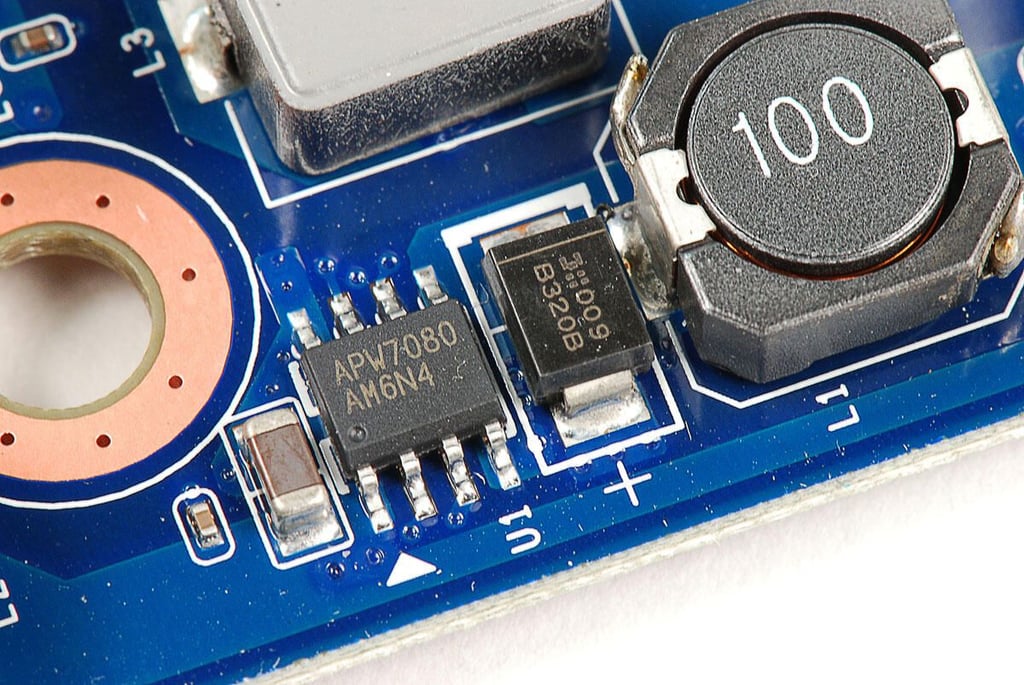
Anpec Electronics APW7080 3A, asynchronous, step-down DC-DC converter with integrated Power Switch
Photo by: Bill Detwiler / TechRepublic
Caption by: Bill Detwiler
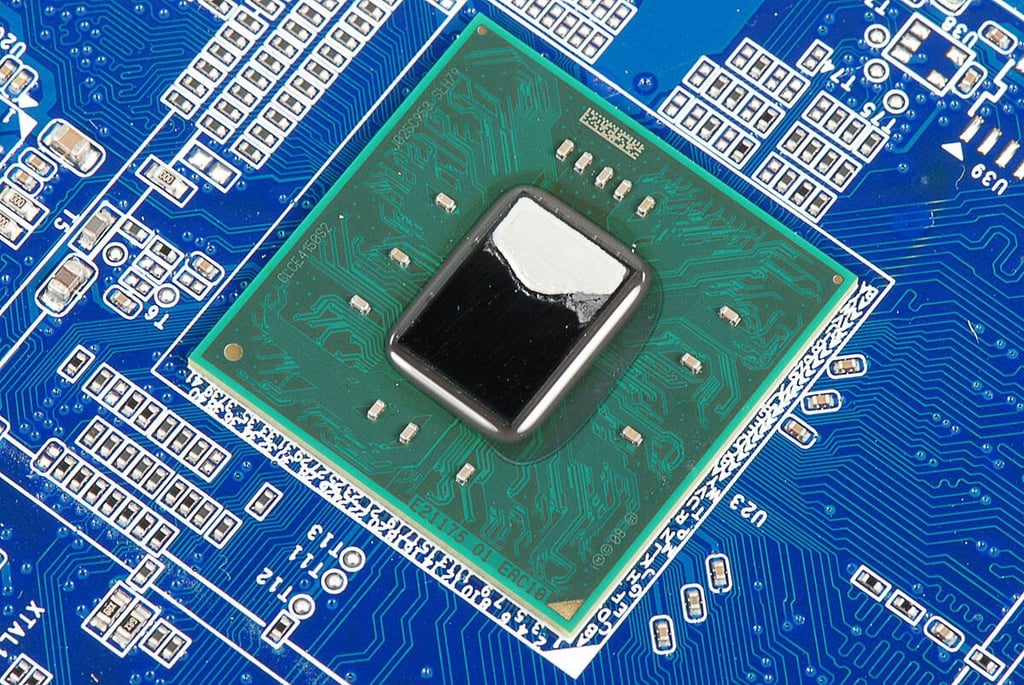
Intel Atom CE4150 1.2 GHz processor
Photo by: Bill Detwiler / TechRepublic
Caption by: Bill Detwiler
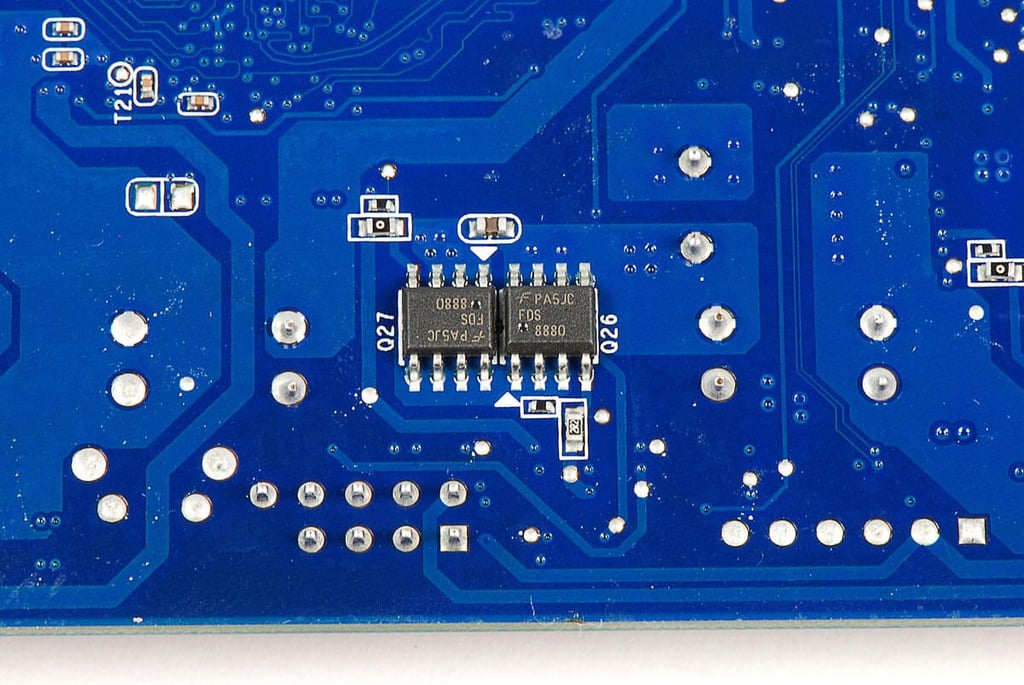
Fairchild Semiconductor FDS8880 30V N-Channel PowerTrench MOSFET
Photo by: Bill Detwiler / TechRepublic
Caption by: Bill Detwiler
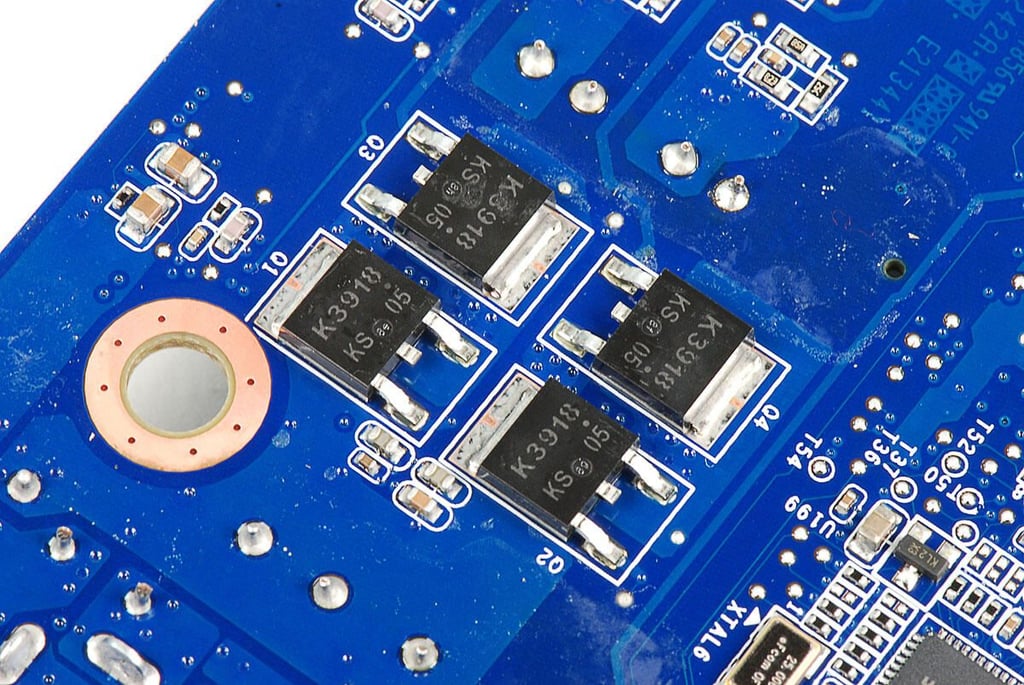
Photo by: Bill Detwiler / TechRepublic
Caption by: Bill Detwiler
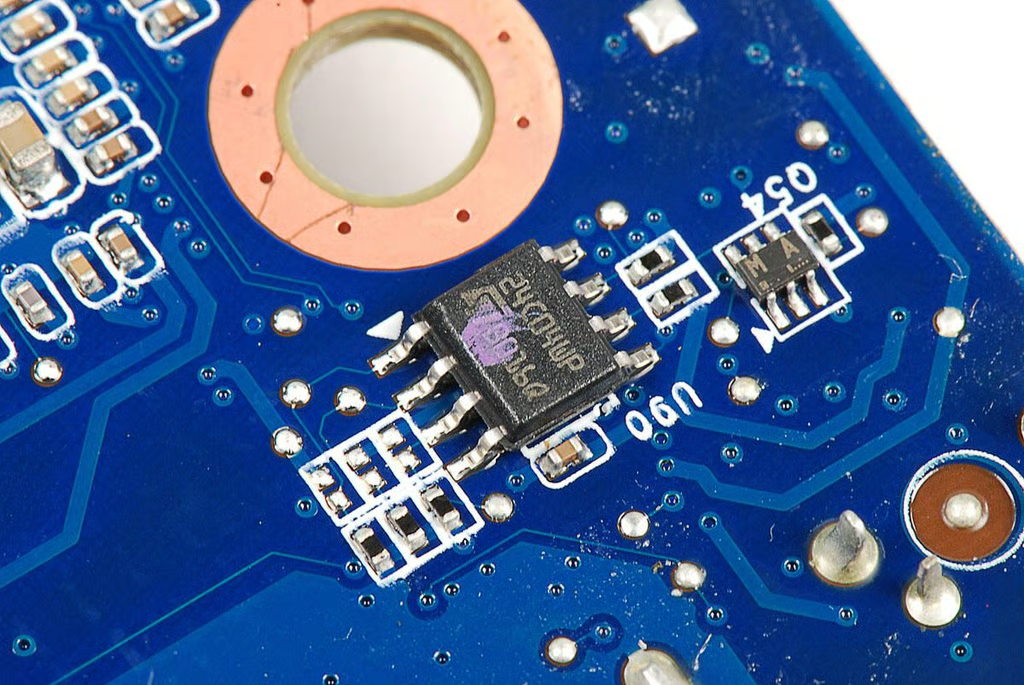
Photo by: Bill Detwiler / TechRepublic
Caption by: Bill Detwiler
Bill Detwiler is the Editor for Technical Content and Ecosystem at Celonis. He is the former Editor in Chief of TechRepublic and previous host of TechRepublic's Dynamic Developer podcast and Cracking Open, CNET and TechRepublic's popular online show. Previously, Bill was an IT manager in the social research and energy industries. He has bachelor's and master's degrees from the University of Louisville, where he has also lectured on computer crime and crime prevention.


