Server virtualization allows organizations to maximizing their hardware resources by running multiple virtual machines on a single physical machine. This screenshot gallery shows the toolkit in action. Check out Joshua Hoskins’ The Right Tool for the Job? blog post, to learn how his IT department migrated its physical server to virtual servers using the Microsoft’s Virtual Server Migration Toolkit (VSMT).
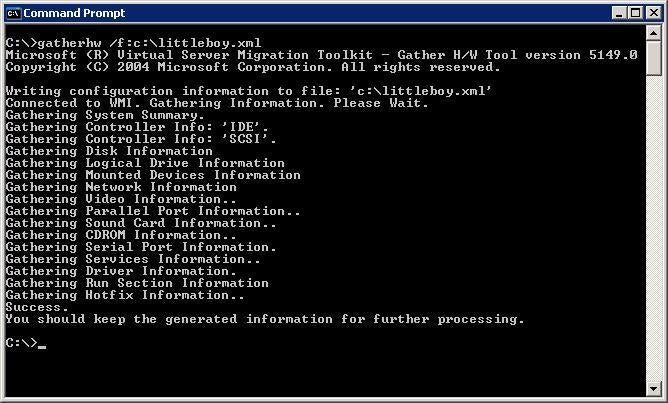
The first step in the migration process is the creation an XML file of the hardware in the physical computer. That is done with command line tool GATHERHW.
Submitted by Joshua Hoskins
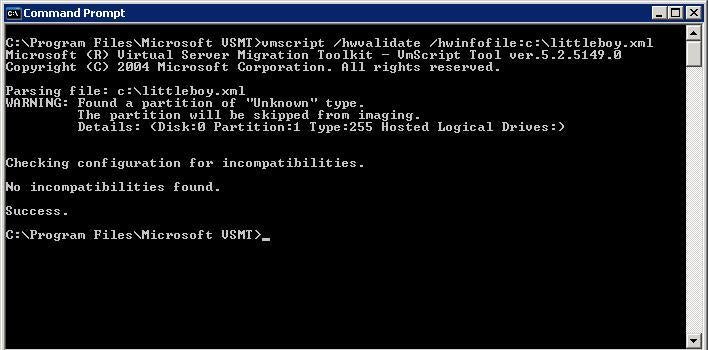
After creating the XML file with hardware information, you must then validate the file against Virtual Server. This step will tell you if you need to load any additional software. You run the vmscript command with the /hwvalidate switch.
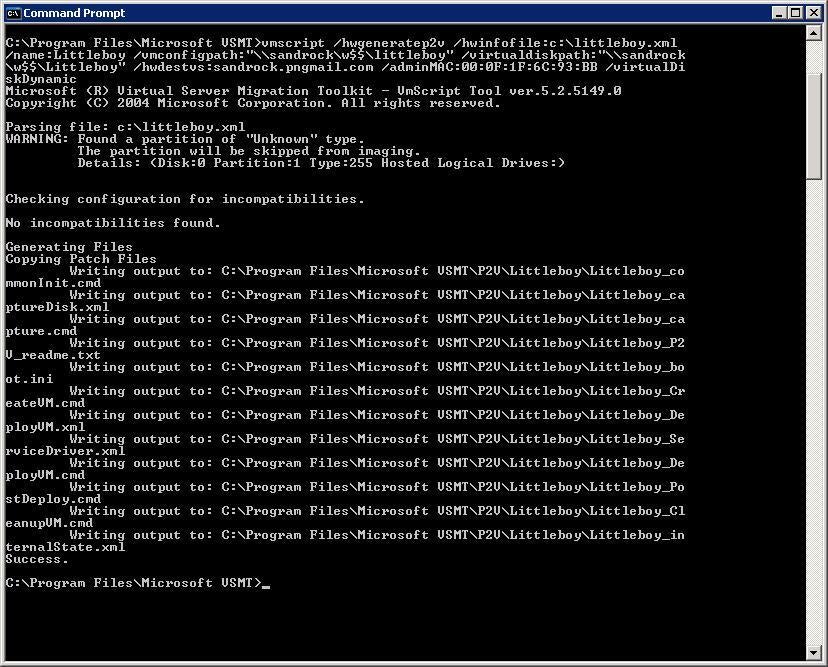
You will then to create a series of scripts necessary to perform the capture and creation of the virtual machine. This is another vmscript command, but this one has a long series of switches behind it. You must be very careful when working on the syntax for this command, as it factors heavily in the creation of your virtual machine.
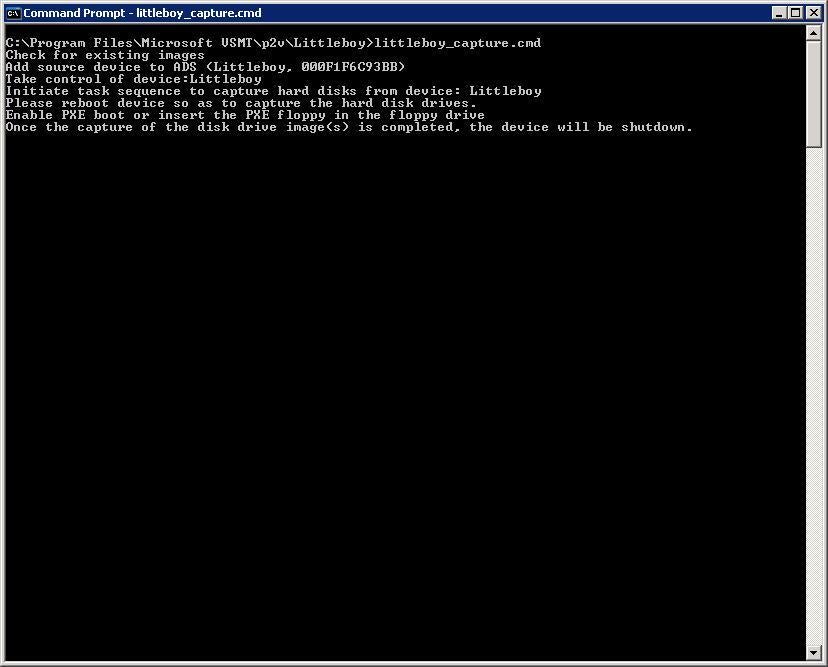
At this point you will run \u00efurcename\u00fcapture.cmd. This step will create a PXE boot source for the physical computer, take control of the device in ADS (Automated Deployment Services), and begin the series of jobs necessary in ADS to complete taking the image.
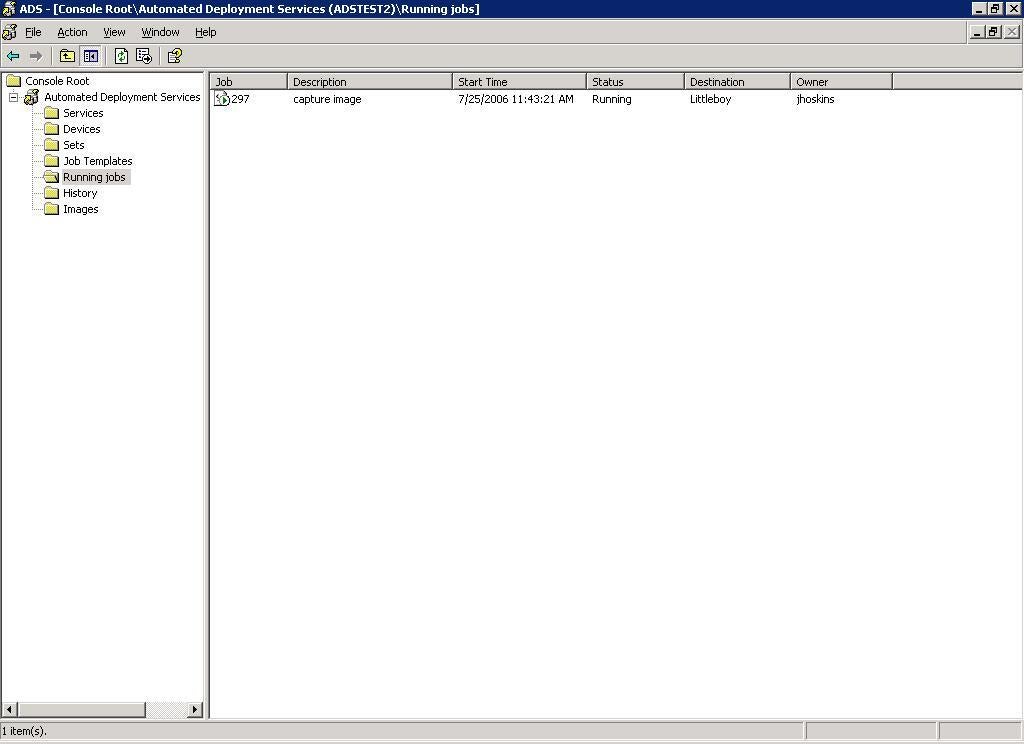
You will be able to monitor the progress of the job in ADS via the Running Jobs tab.

You can also view the progress (in 10 percent increments), and all the steps taking place within the job by double clicking on the job itself.
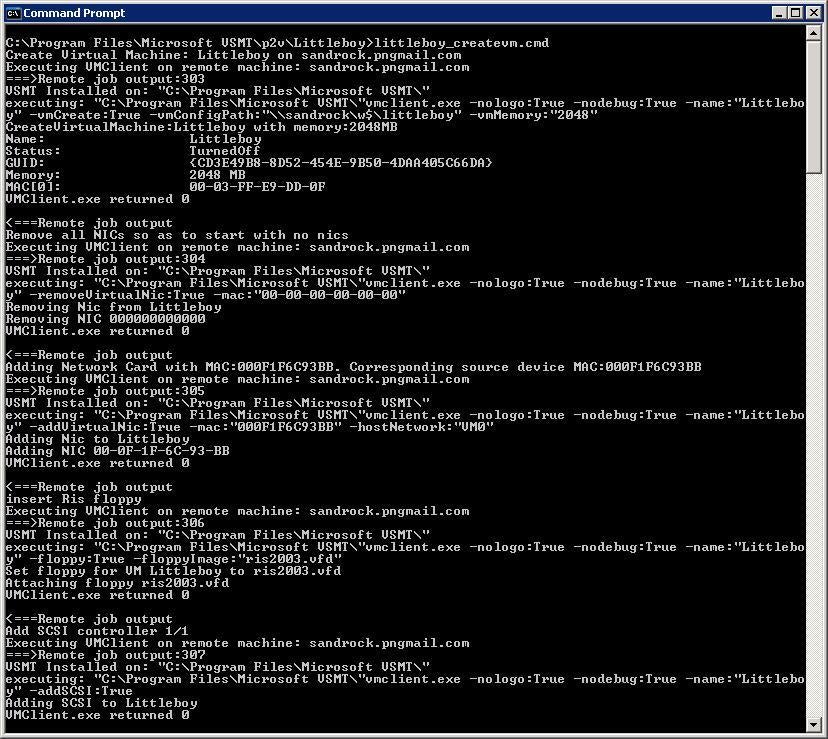
You will then run \u00efurcename\u00fcreatevm.cmd to create the virtual machine on the destination virtual server.
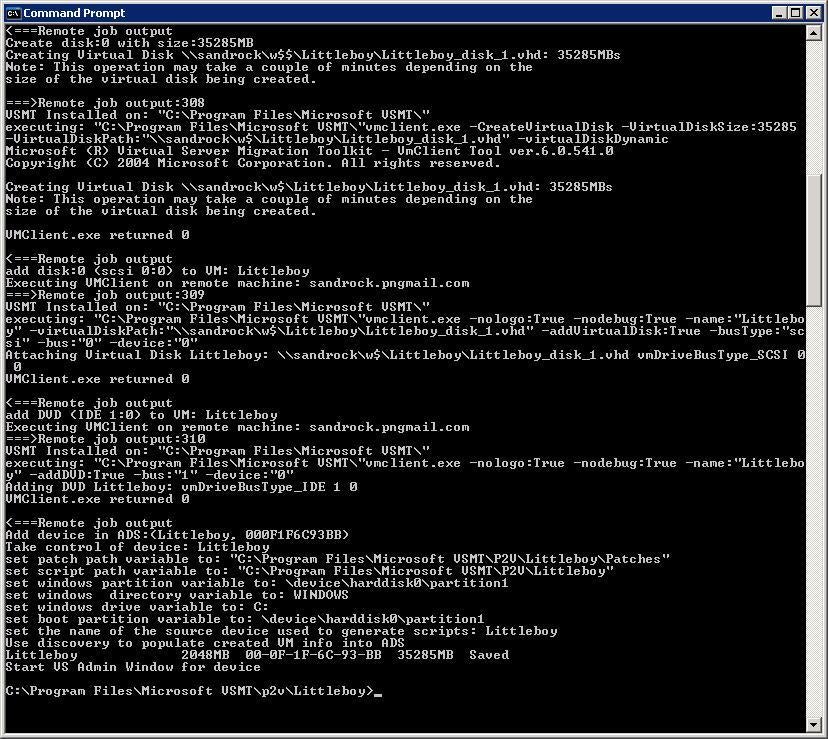
This is the second part of the creation output.
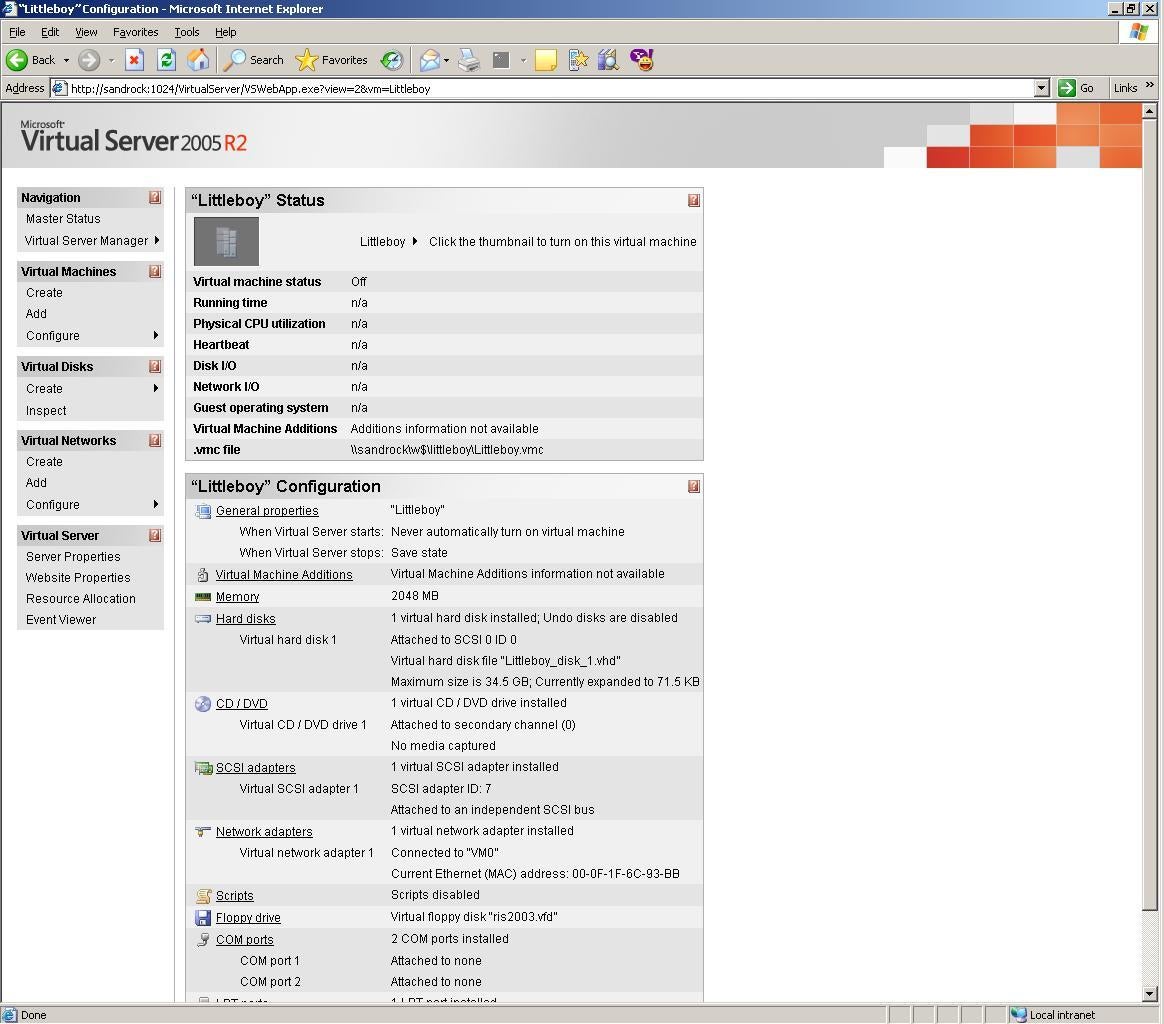
This is the virtual machine that was created with the createvm script. Do not turn on the virtual machine at this point. It will be turned on in the next step.

At this point you will deploy the image you created to your virtual machine. This is done with the \u00efurcename\u00fdeployvm.cmd. This will create all of the necessary jobs within ADS, verify the proper boot floppy in the virtual machine, boot the virtual machine, and run the processes through ADS to deploy the image.
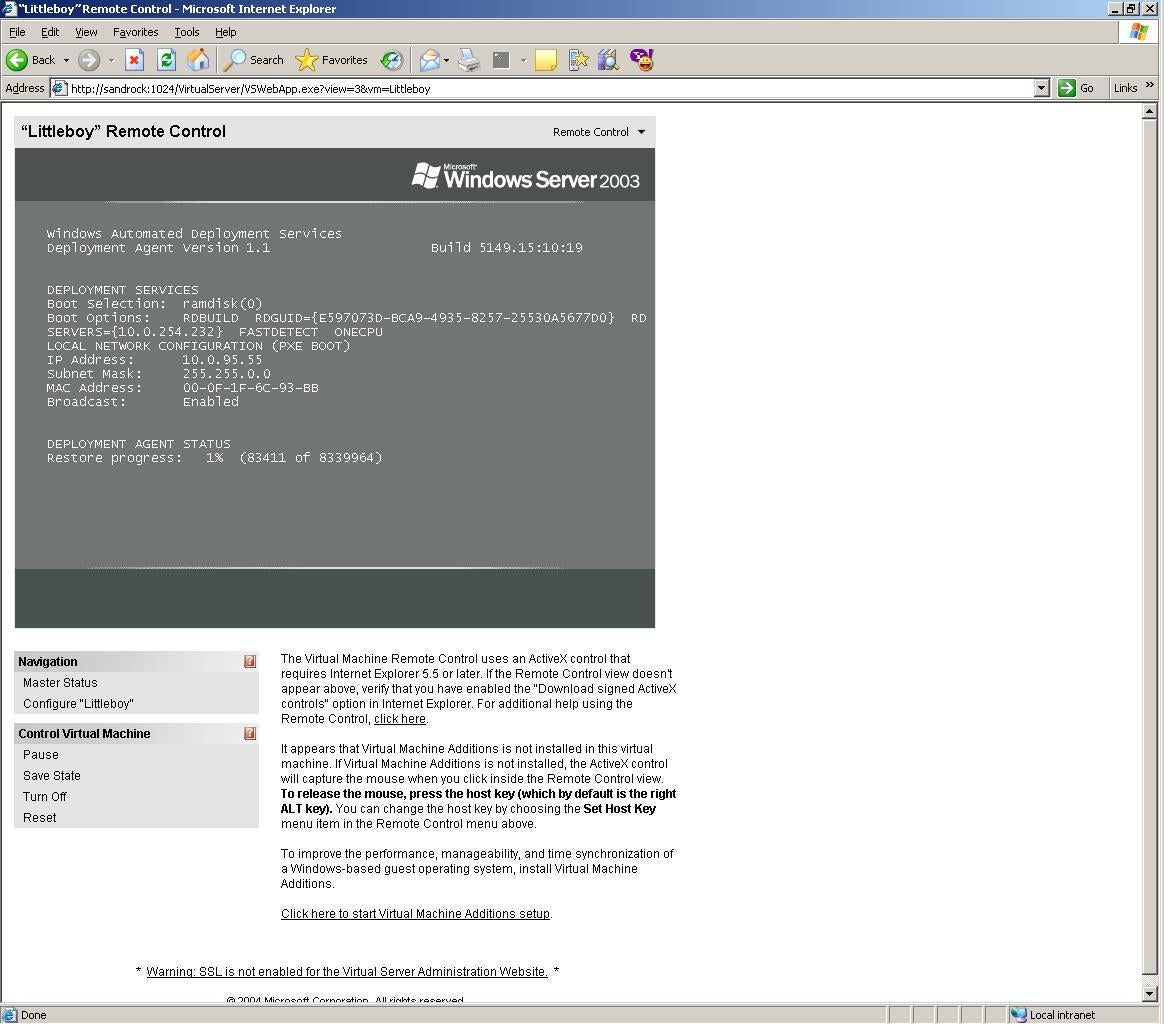
You will be able to monitor the progress of the deployment through ADS (in 10 percent increments) or on the screen of the virtual server itself.
Bill Detwiler is the Editor for Technical Content and Ecosystem at Celonis. He is the former Editor in Chief of TechRepublic and previous host of TechRepublic's Dynamic Developer podcast and Cracking Open, CNET and TechRepublic's popular online show. Previously, Bill was an IT manager in the social research and energy industries. He has bachelor's and master's degrees from the University of Louisville, where he has also lectured on computer crime and crime prevention.
