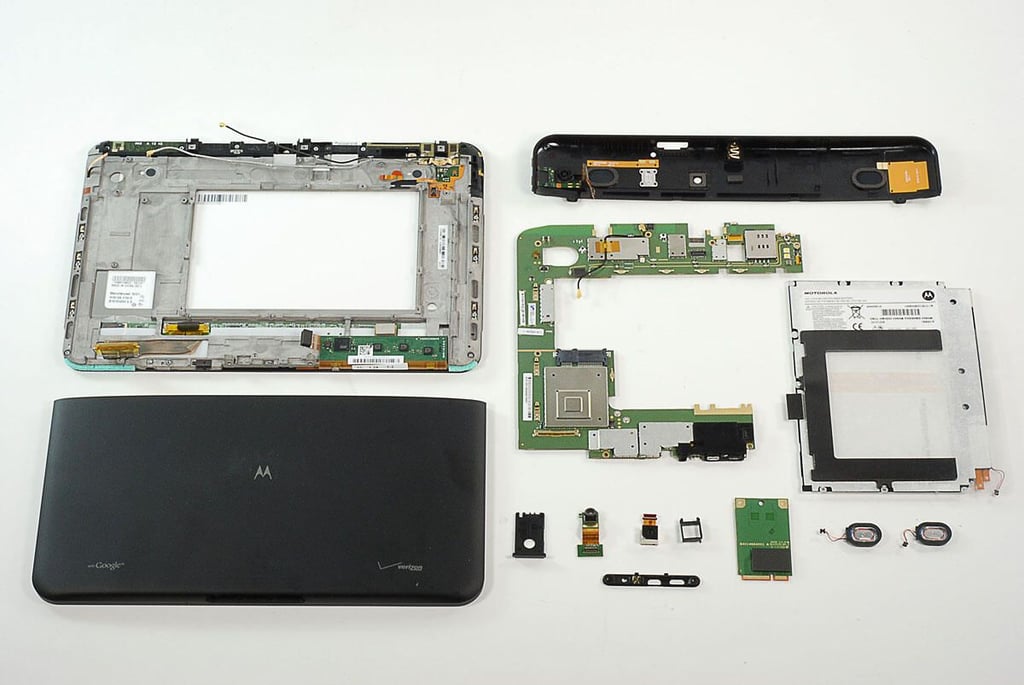
\n\tFor the past year, the Apple iPad has been the king of the tablet/slate PC market. Motorola is seeking to unseat the iPad with the XOOM, a 10.1-inch tablet with impressive hardware from tech heavyweights like Nvidia, Toshiba, Samsung, Texas Instruments, Broadcom, Qualcomm, Hynix, and more. Follow along as he crack open the Motorola XOOM in this TR Dojo Teardown gallery.
\n\t
\n\tPhoto by: Bill Detwiler / TechRepublic
\n\tCaption by: Bill Detwiler
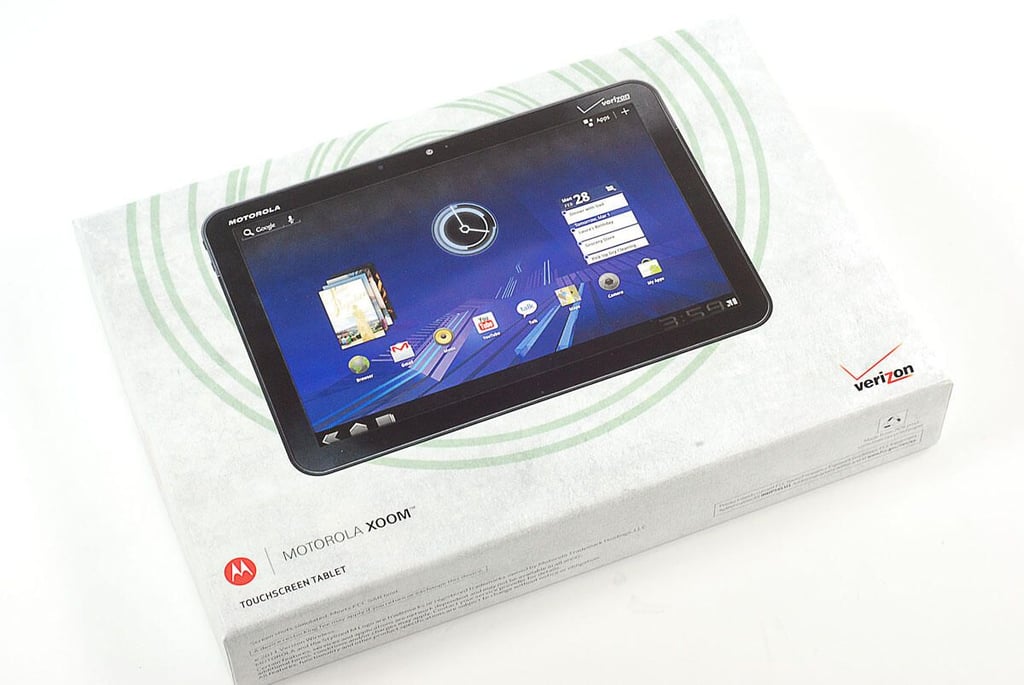
\n\tAs of this writing, the Motorola XOOM is available in the U.S. for $599 (with a 2-yr contract from Verizon) or $799 (with no contract). It runs Google’s Android 3.0 (Honeycomb) operating system. The first XOOMs are 3G models, but Verizon plans to offer an LTE 4G upgrade. Once we begin dissecting the device, you’ll see how.
\n
\n\tPhoto by: Bill Detwiler / TechRepublic
\n\tCaption by: Bill Detwiler
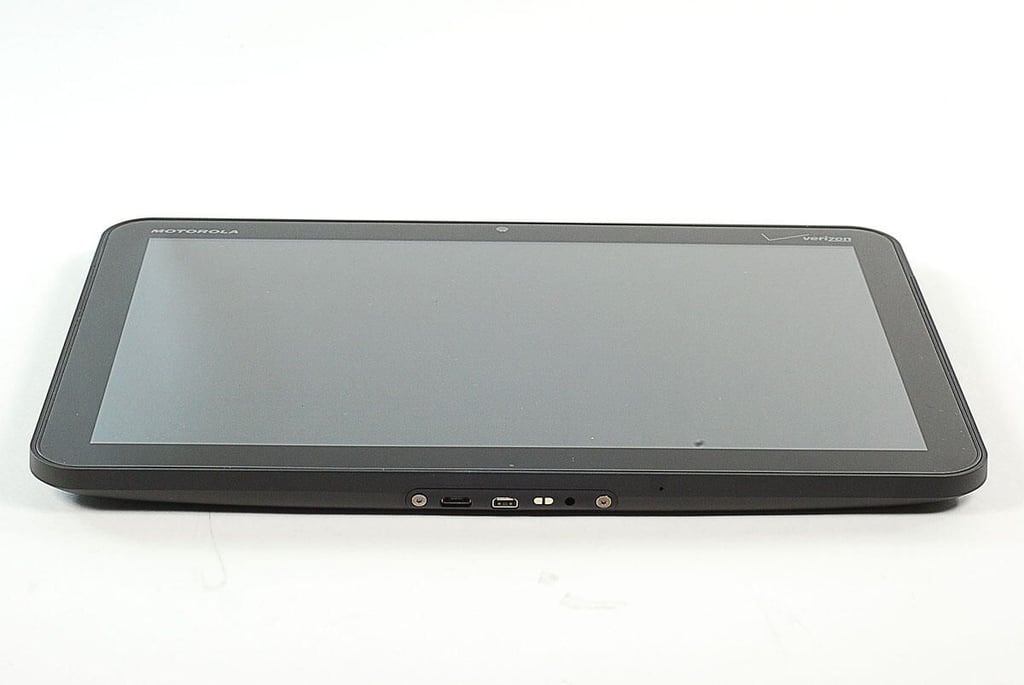
\n\tThe Motorola XOOM weighs 1.6 lbs. and measures 9.8 x 6.6 x 0.5 inches.
\n\t
\n\tPhoto by: Bill Detwiler / TechRepublic
\n\tCaption by: Bill Detwiler
\n\tPhoto by: Bill Detwiler / TechRepublic
\n\tCaption by: Bill Detwiler

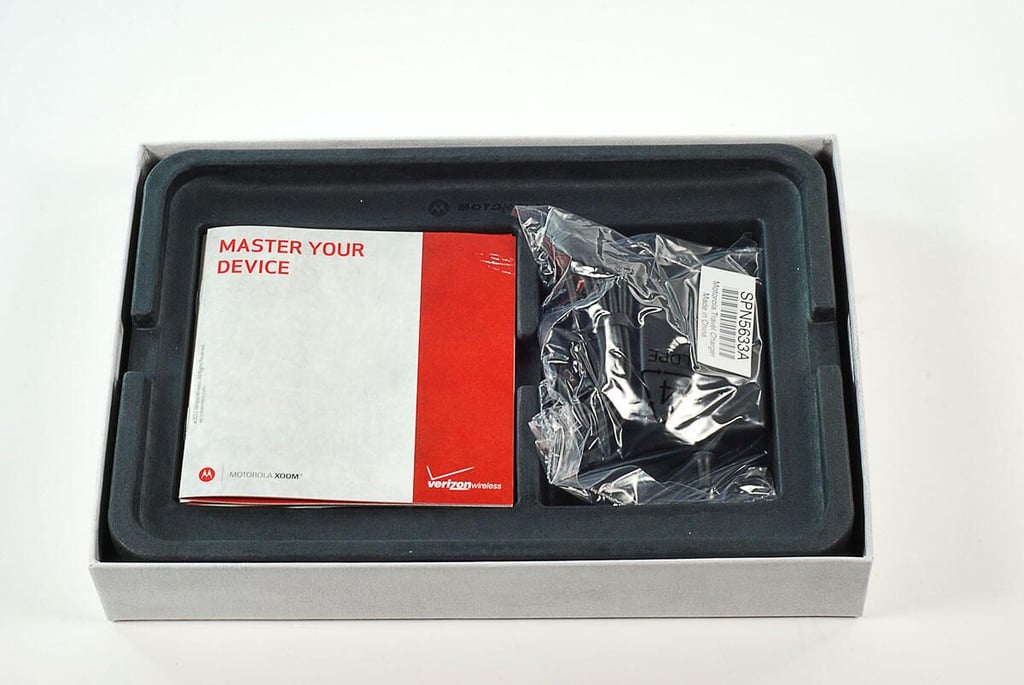
\n\tInside the box, we find the Motorola XOOM tablet, USB cable, power adapter, and product documentation.
\n
\n\tPhoto by: Bill Detwiler / TechRepublic
\n\tCaption by: Bill Detwiler
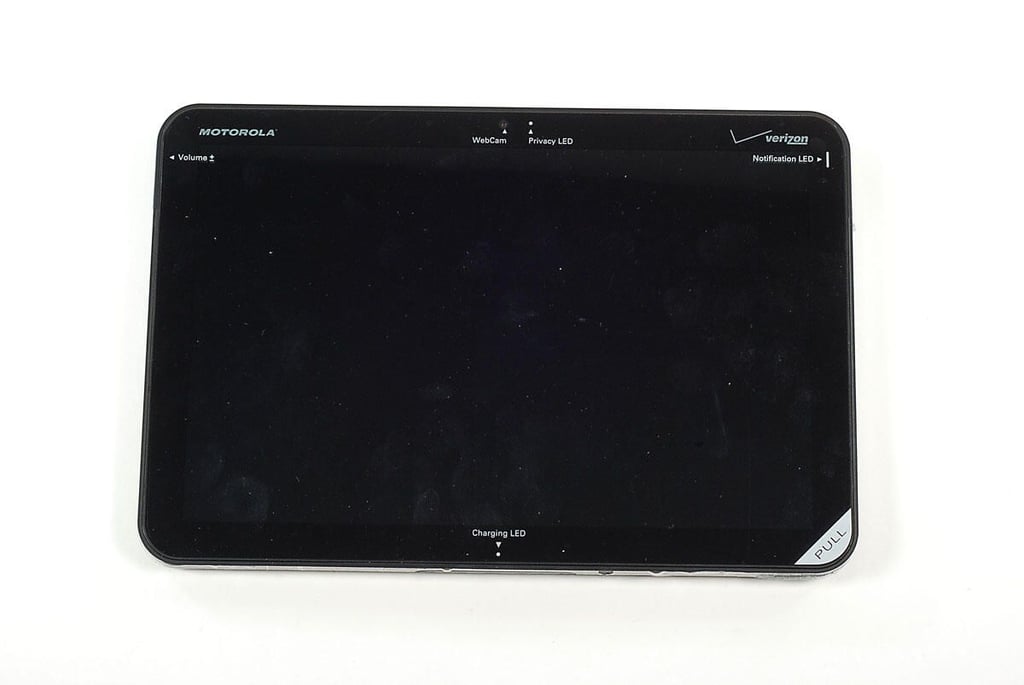
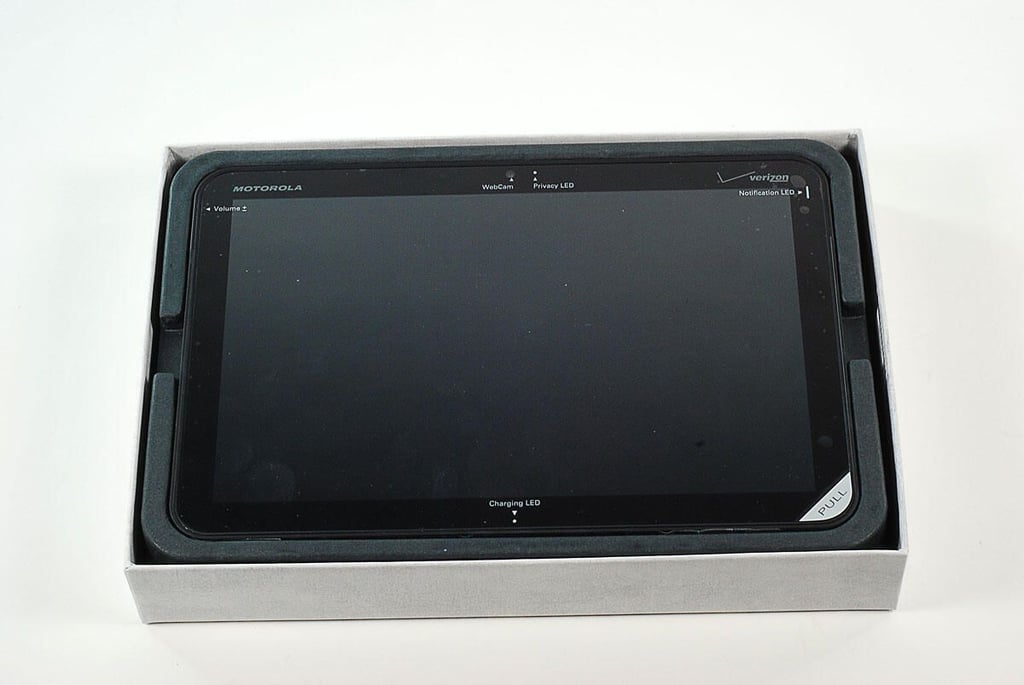
\n\tThe Motorola XOOM has a 10.1-inch, touch-sensitive display. The clear plastic film that protects the screen also tells you where important components (such as the volume buttons and Webcam) are located.
\n
\n\tPhoto by: Bill Detwiler / TechRepublic
\n\tCaption by: Bill Detwiler
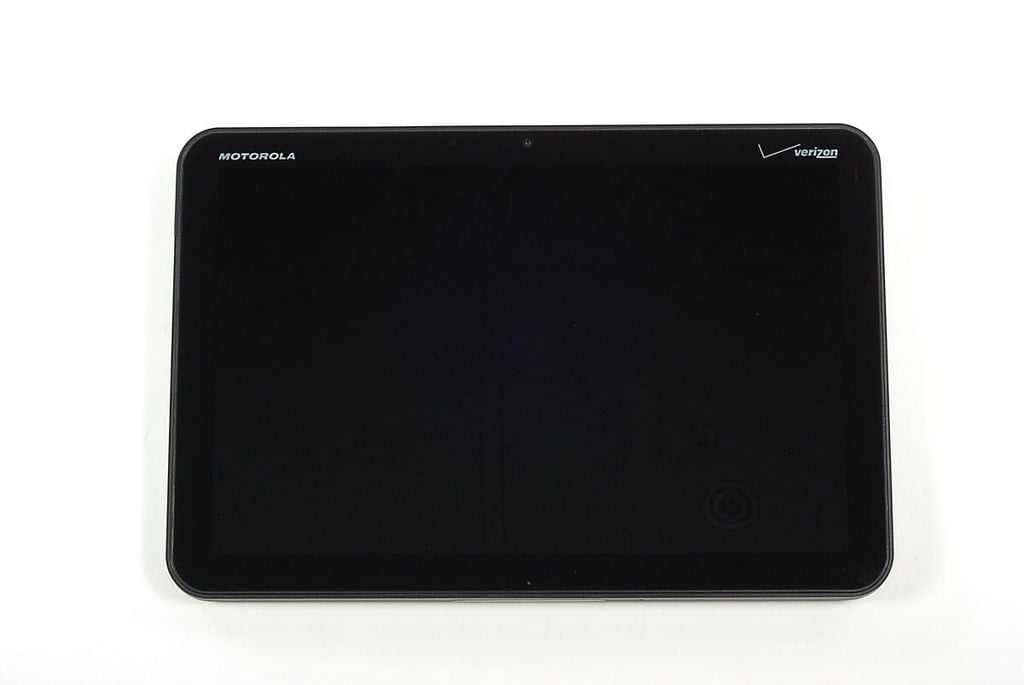
\n\tThe Motorola XOOM has a 10.1-inch WXGA display that supports a 1280 x 800 resolution. On the front of the device, you’ll find the 2MP Webcam, Webcam indicator LED, notification LED, and charging LED.
\n
\n\tPhoto by: Bill Detwiler / TechRepublic
\n\tCaption by: Bill Detwiler
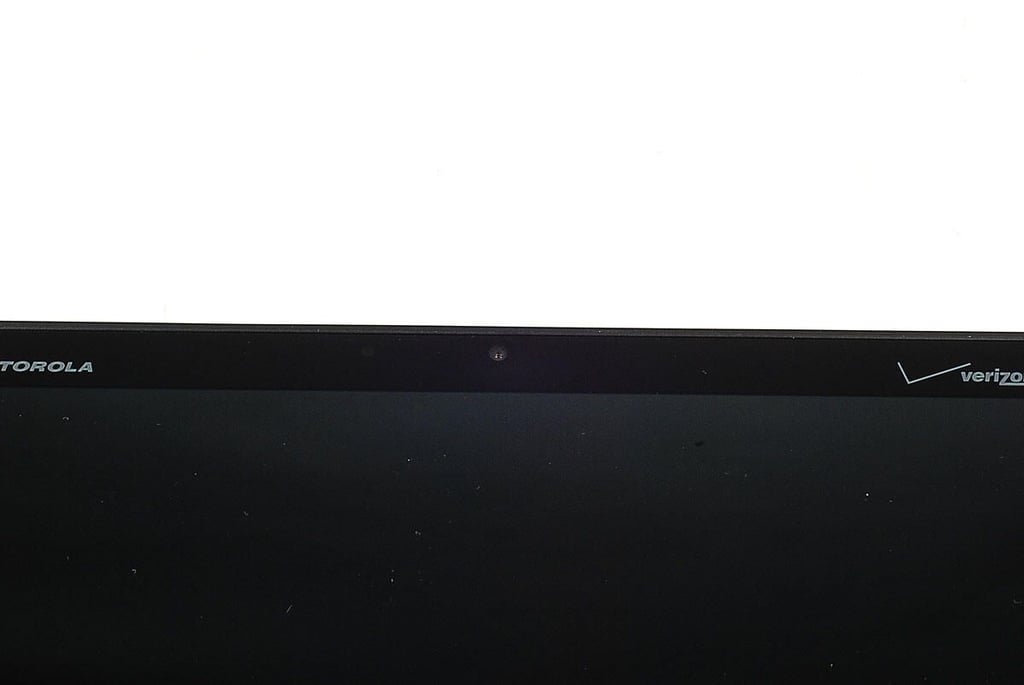
\n\tHere’s a closer look at the Motorola XOOM’s 5MP, front-facing Webcam and associated indicator LED.
\n
\n\tPhoto by: Bill Detwiler / TechRepublic
\n\tCaption by: Bill Detwiler
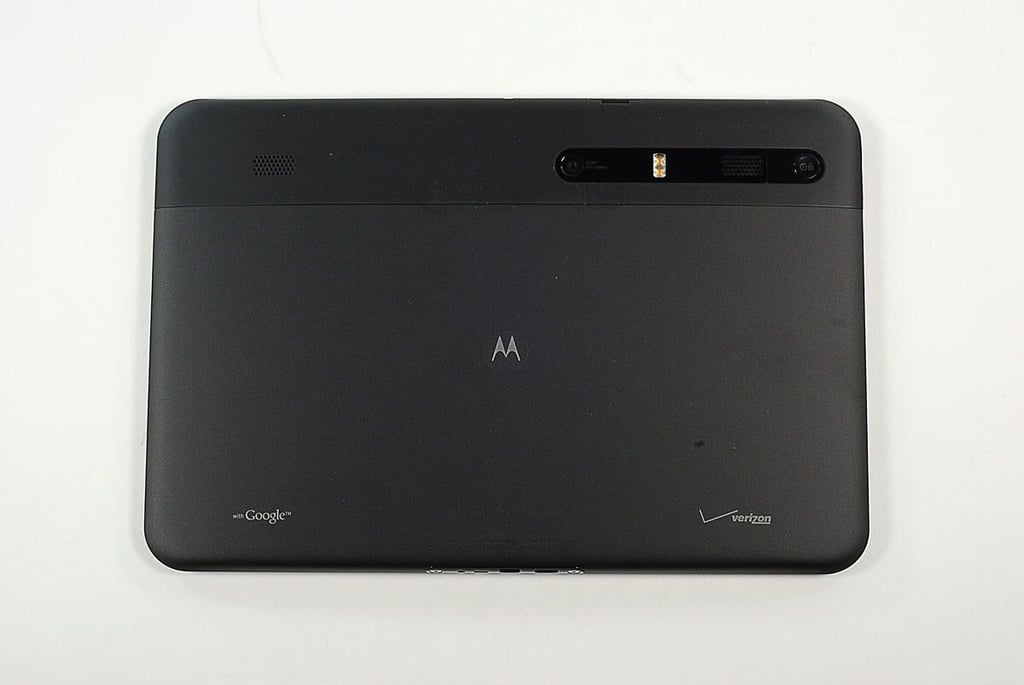
\n\tOn the back of the Motorola XOOM are the external speakers, 5MP rear-facing camera, camera flash, and power/lock button.
\n
\n\tPhoto by: Bill Detwiler / TechRepublic
\n\tCaption by: Bill Detwiler
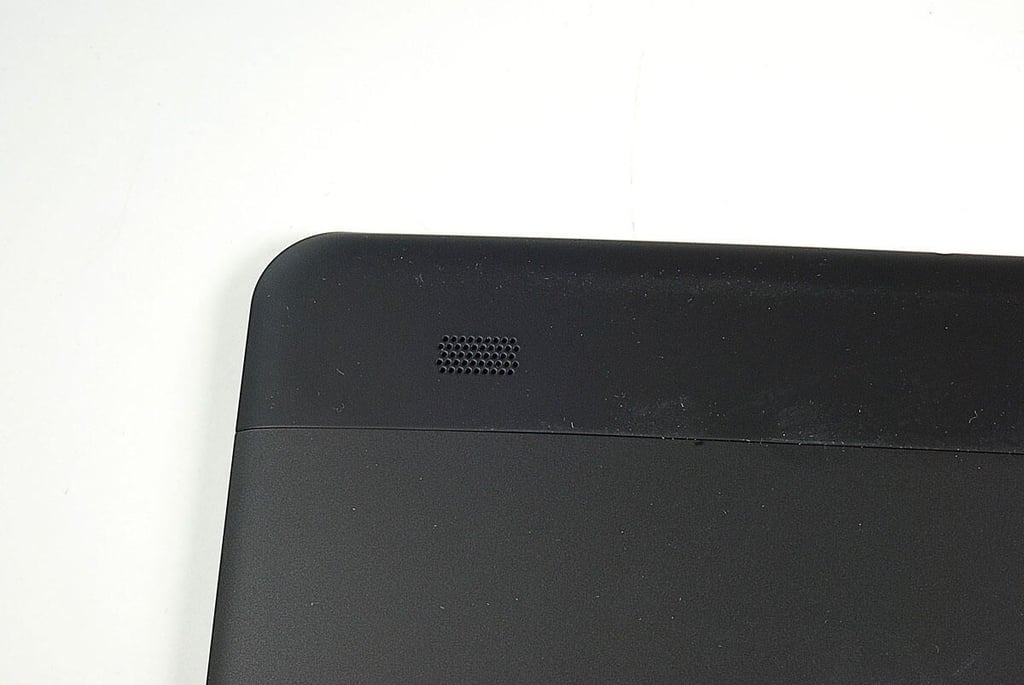
\n\tHere’s a closer look at the Motorola XOOM’s external speaker.
\n
\n\tPhoto by: Bill Detwiler / TechRepublic
\n\tCaption by: Bill Detwiler
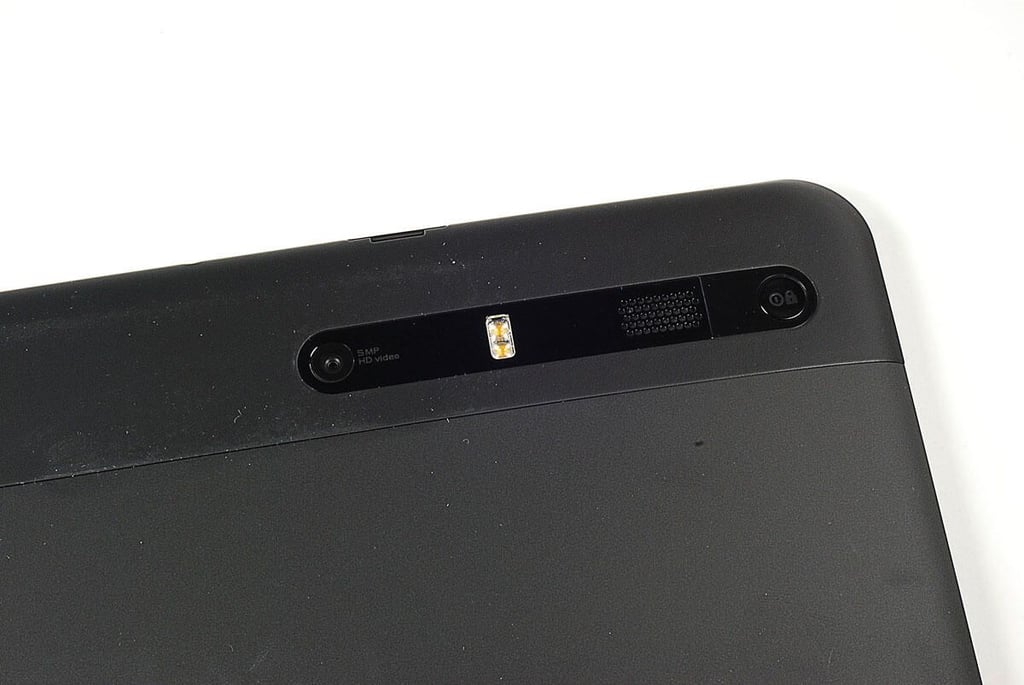
\n\tHere’s a closer look at the Motorola XOOM’s 5MP rear-facing camera, camera flash, left-side external speaker, and power/lock button.
\n
\n\tPhoto by: Bill Detwiler / TechRepublic
\n\tCaption by: Bill Detwiler

\n\tThe Motorola XOOM has a single opening for the device’s microSD card and SIM card slots. Both slots are filled with dummy cards made of clear plastic. According to Motorola documentation, neither can currently be used. The SIM slot will be used once the device is upgraded to LTE 4G and the microSD slot will be activated with a future software update.
\n
\n\tPhoto by: Bill Detwiler / TechRepublic
\n\tCaption by: Bill Detwiler
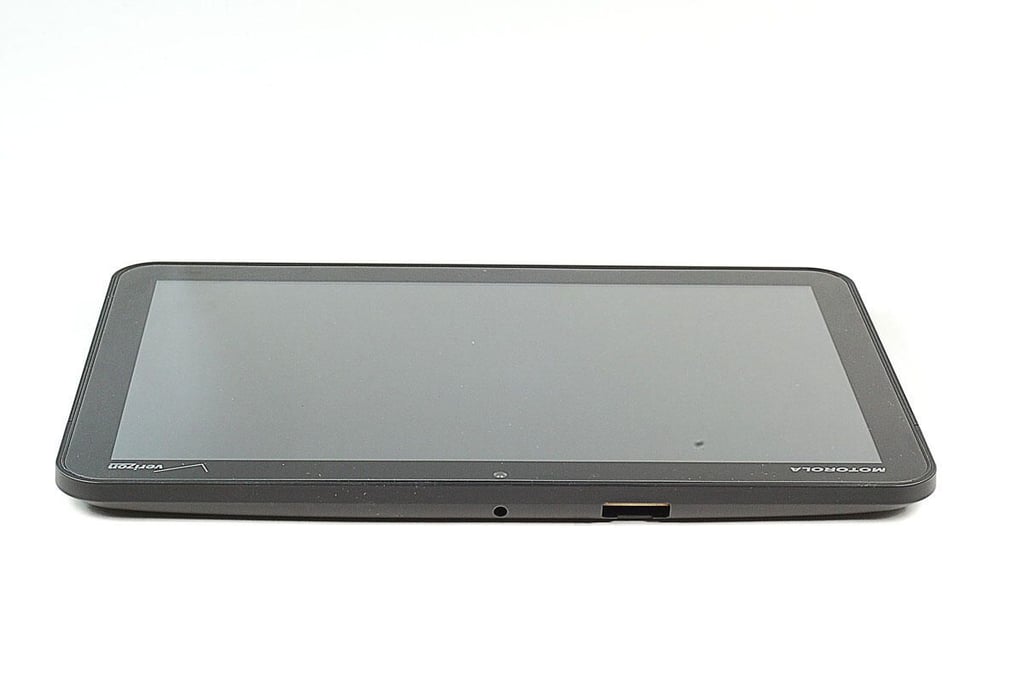
\n\tIn addition to the SIM card and microSD card slots, the Motorola XOOM’s headphone jack is located along the top edge.
\n
\n\tPhoto by: Bill Detwiler / TechRepublic
\n\tCaption by: Bill Detwiler
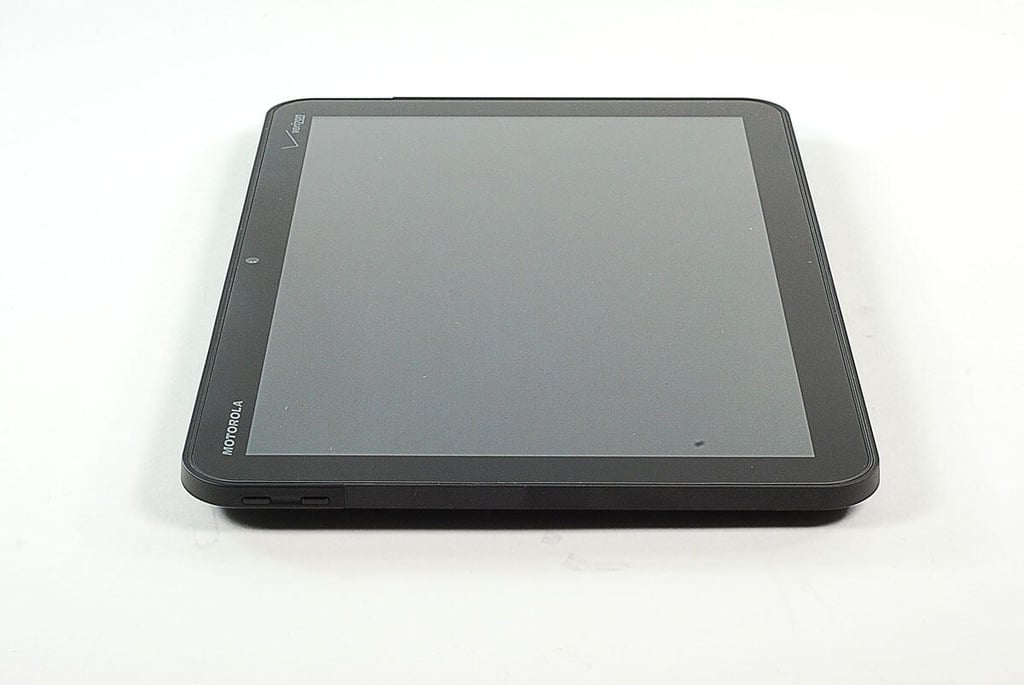
\n\tAlong the left Motorola XOOM’s left edge are the volume up and down buttons.
\n
\n\tPhoto by: Bill Detwiler / TechRepublic
\n\tCaption by: Bill Detwiler
\n\tAlong the Motorola XOOM’s bottom edge are the Micro USB port, HDMI port, and power adapater port. There are also two Torx T5 screws, which we’ll need to remove in just a moment.
\n
\n\tPhoto by: Bill Detwiler / TechRepublic
\n\tCaption by: Bill Detwiler
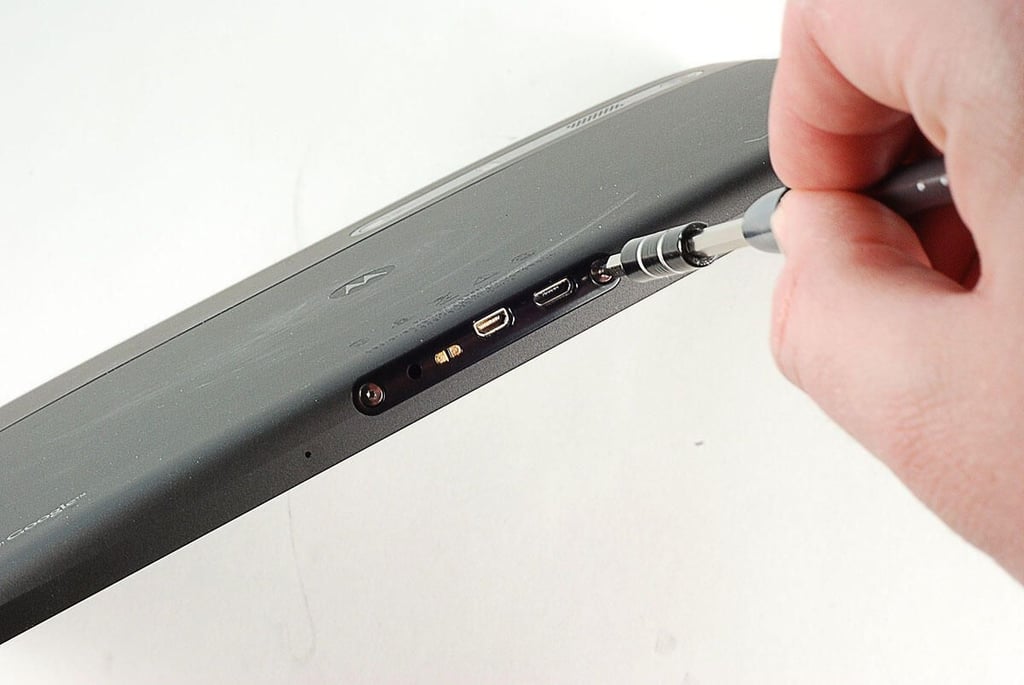
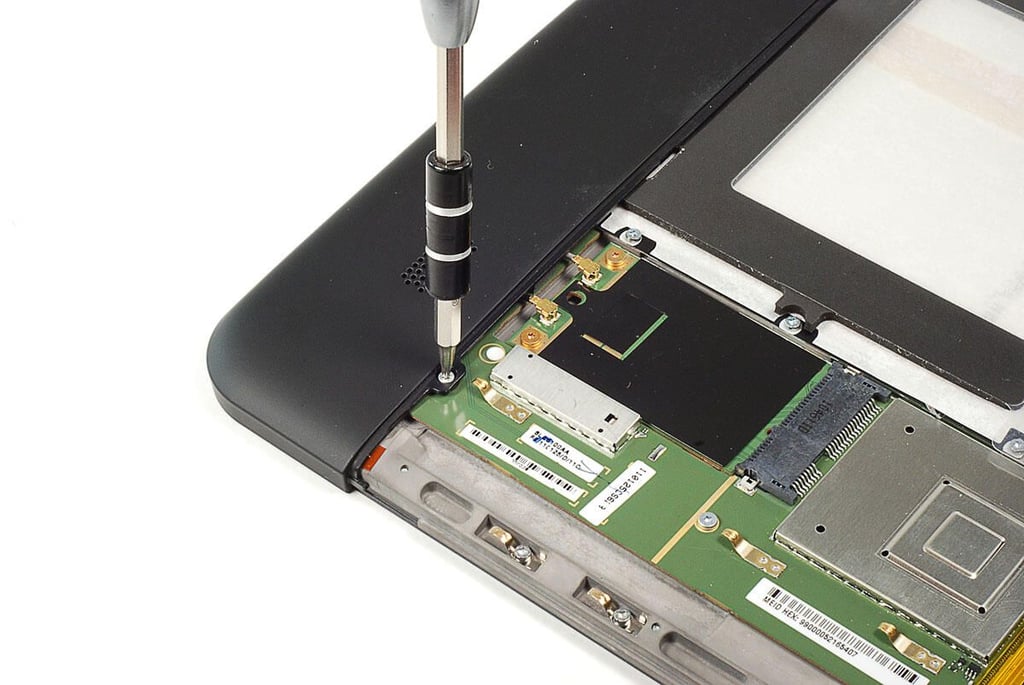
\n\tThe first step in opening the Motorola XOOM is removing the two Torx T5 screws located along the bottom edge. Luckily Motorola didn’t use any security screws–like the annoying pentalobe screws Apple is using on several devices.
\n
\n\tPhoto by: Bill Detwiler / TechRepublic
\n\tCaption by: Bill Detwiler
\n\tPhoto by: Bill Detwiler / TechRepublic
\n\tCaption by: Bill Detwiler
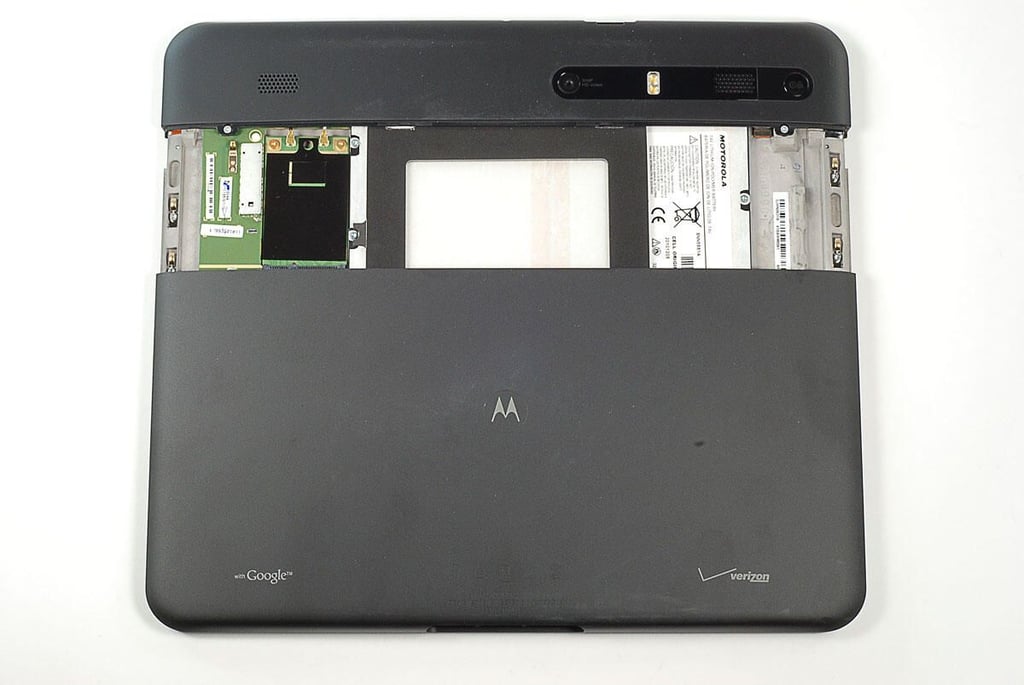
\n\tWith the two external case screws removed, you can slide the back cover down about two inches. Internal catches prevent the cover from sliding completely off.
\n
\n\tPhoto by: Bill Detwiler / TechRepublic
\n\tCaption by: Bill Detwiler
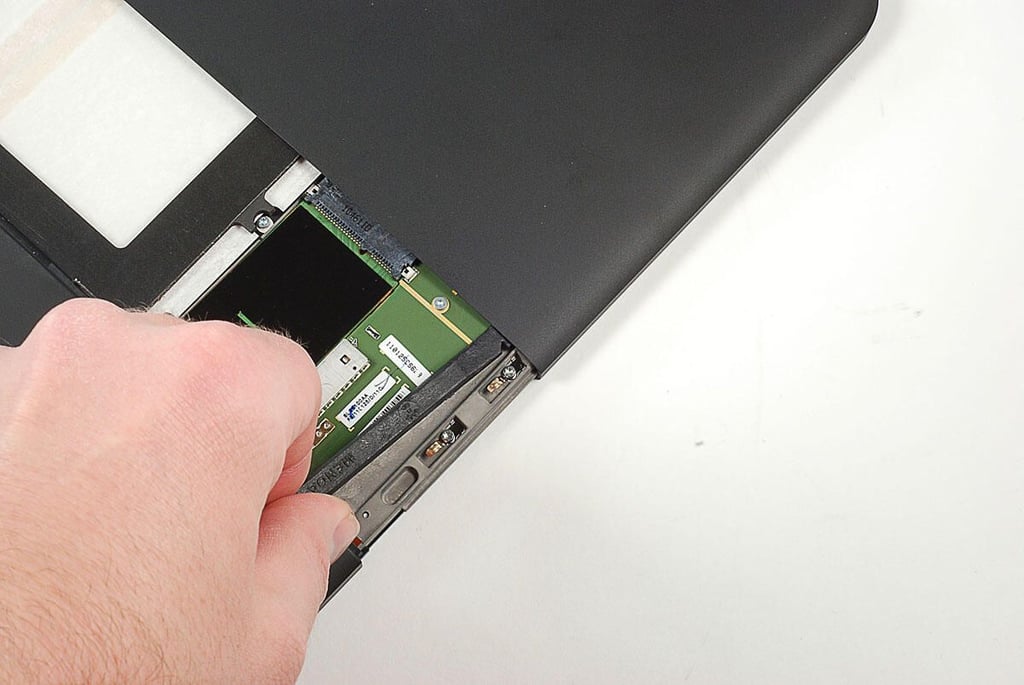
\n\tUsing a plastic spudger or thin metal blade, you can release the internal catches the prevent the back cover from sliding all the way off.
\n
\n\tPhoto by: Bill Detwiler / TechRepublic
\n\tCaption by: Bill Detwiler
\n\tOnce the internal catches are released, you can slide the back cover away from the Motorola XOOM internal frame.
\n
\n\tPhoto by: Bill Detwiler / TechRepublic
\n\tCaption by: Bill Detwiler
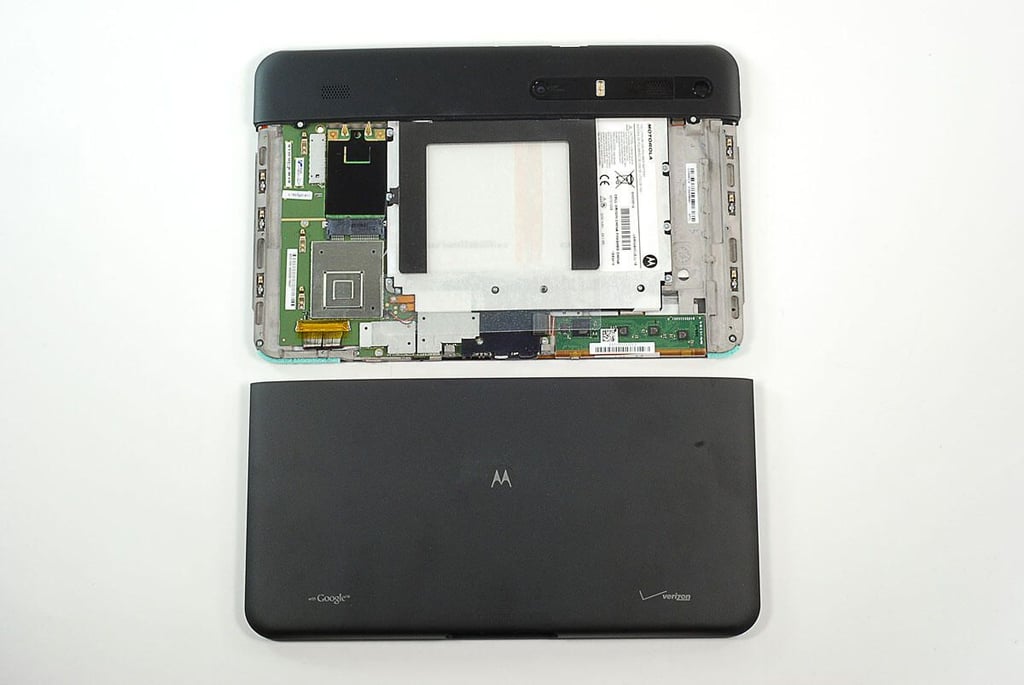
\n\tWith the back cover removed, we get our first look inside the Motorola XOOM. We can already see the large battery and part of the main PCB.
\n
\n\tPhoto by: Bill Detwiler / TechRepublic
\n\tCaption by: Bill Detwiler
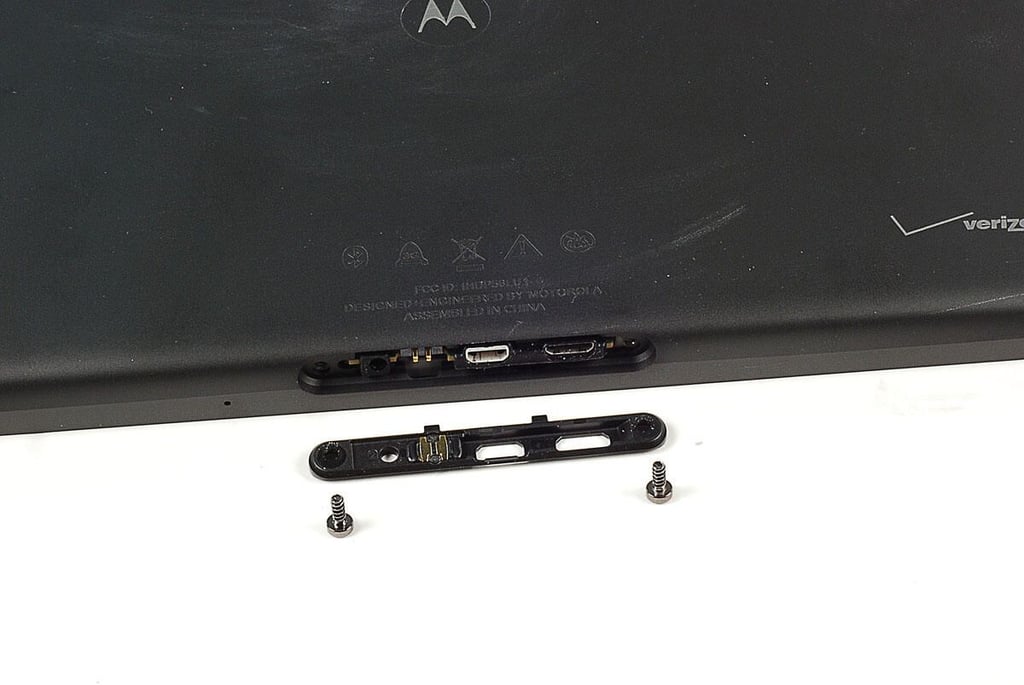
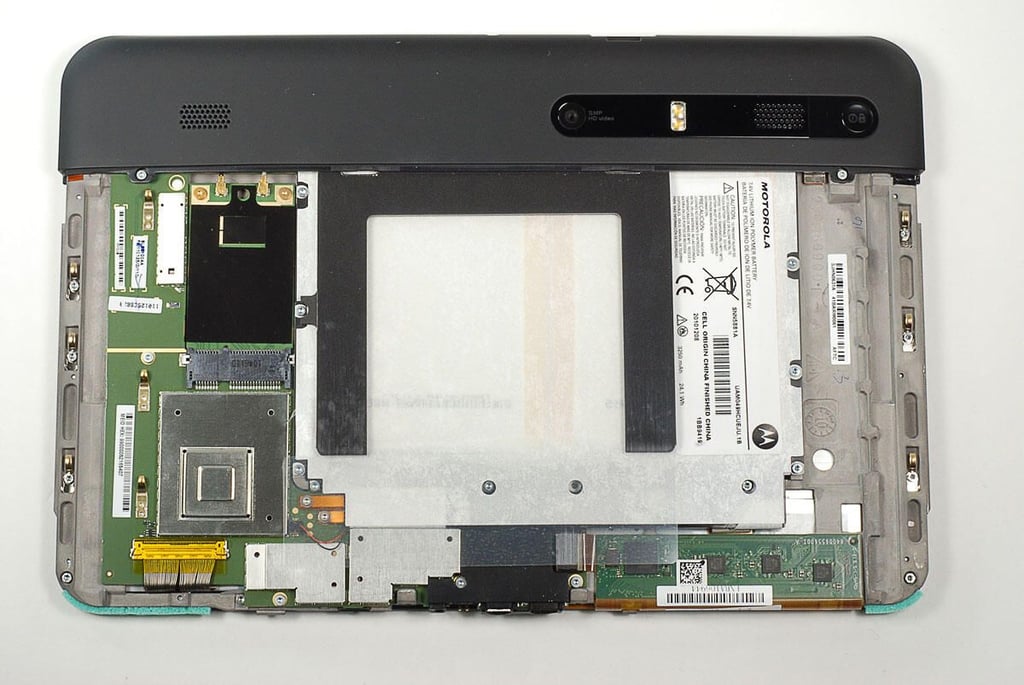
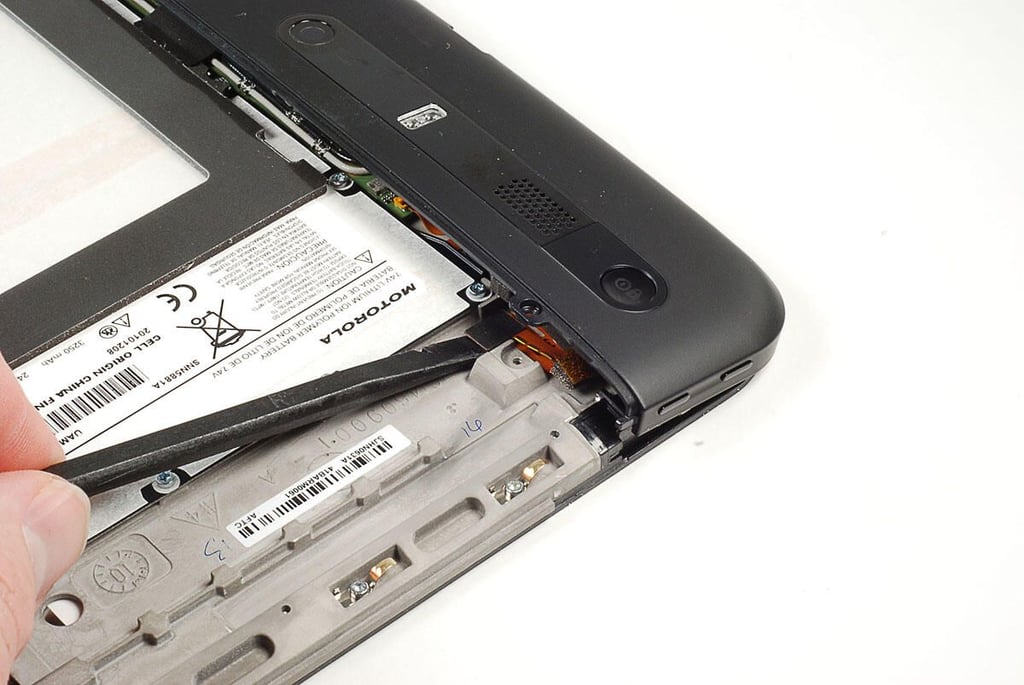
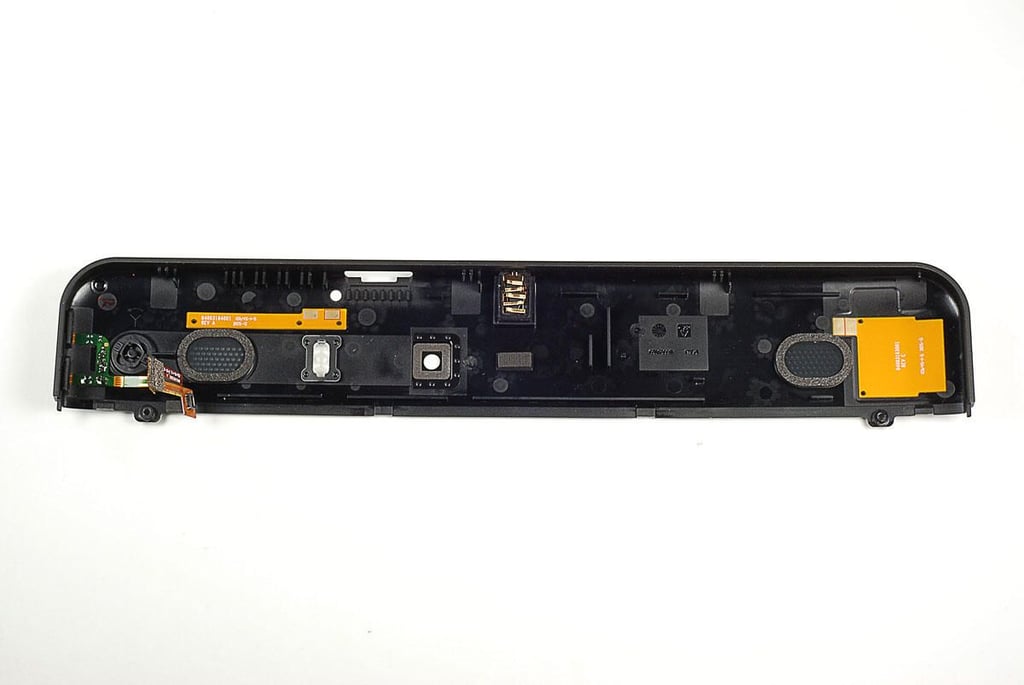
\n\tWith the back, metal cover removed, we’ll turn our attention to the plastic cover that protects the rear-facing camera, speakers, flash, and power/lock button. Two Torx screws hold this plastic strip in place.
\n
\n\tPhoto by: Bill Detwiler / TechRepublic
\n\tCaption by: Bill Detwiler
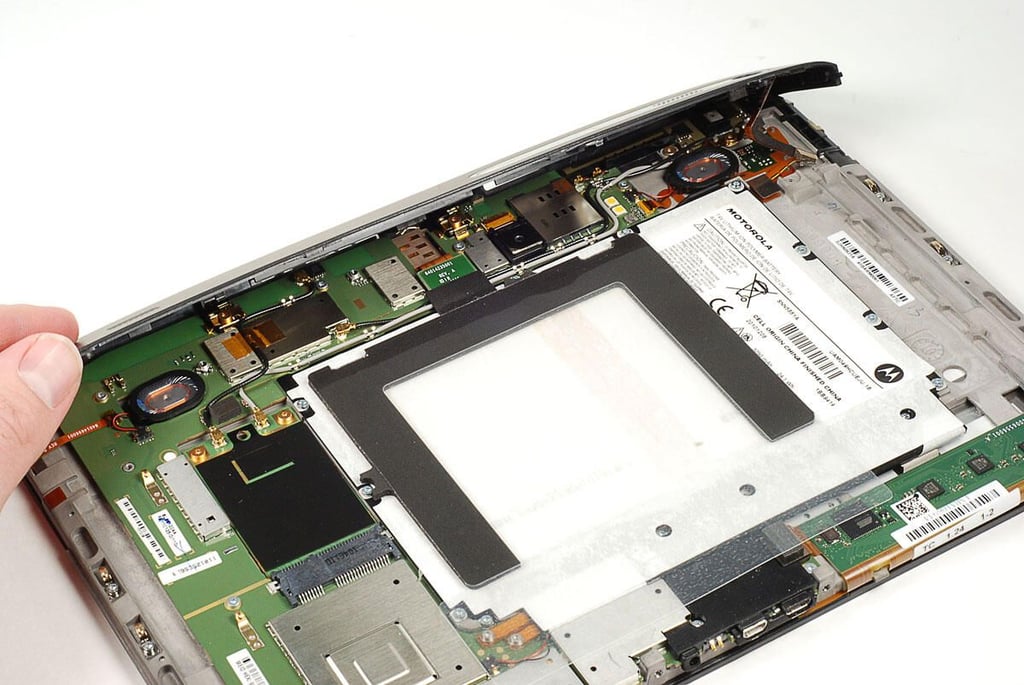
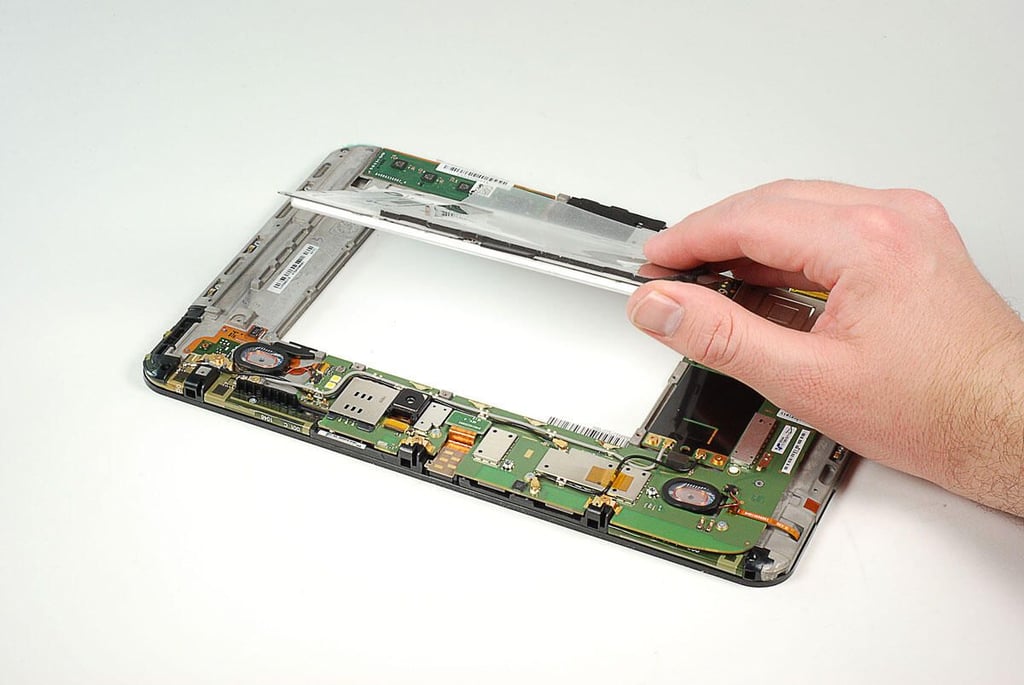
\n\tEven with its two screws removed, you can’t lift the plastic cover away from the Motorola XOOM’s internal frame just yet. A thin ribbon cable for the volume up and down buttons (right side) still connects the cover to the main PCB.
\n
\n\tPhoto by: Bill Detwiler / TechRepublic
\n\tCaption by: Bill Detwiler
\n\tUsing a plastic spudger, I disconnected the volume buttons’ ribbon cable from Motorola XOOM’s the main PCB.
\n
\n\tPhoto by: Bill Detwiler / TechRepublic
\n\tCaption by: Bill Detwiler
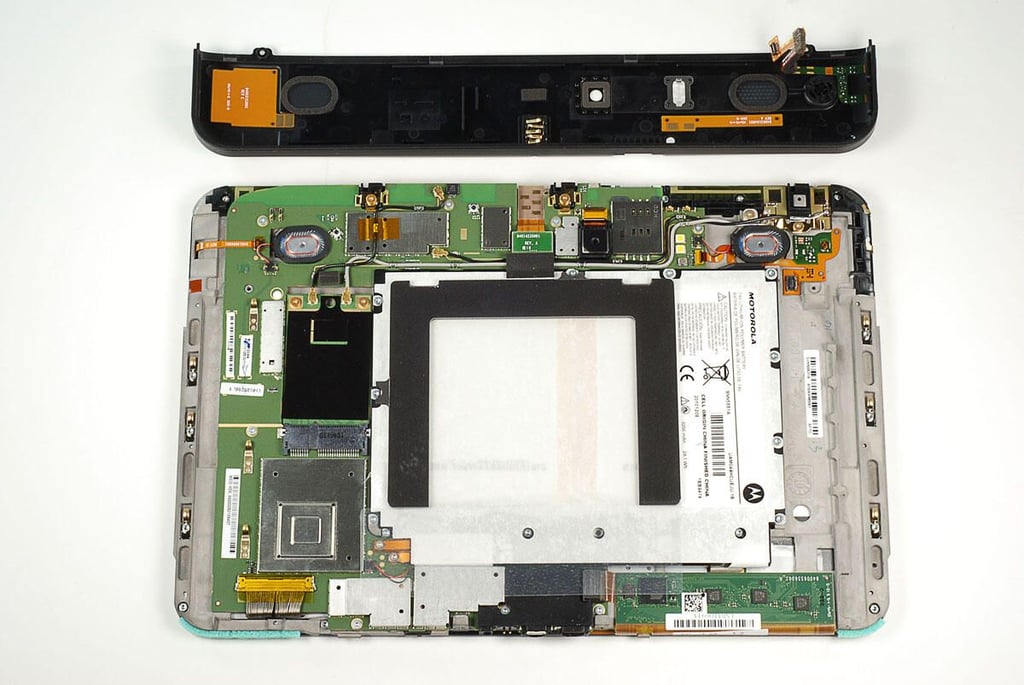
\n\tWith the thin plastic cover removed, the Motorola XOOM’s main PCB is completely exposed.
\n
\n\tPhoto by: Bill Detwiler / TechRepublic
\n\tCaption by: Bill Detwiler
\n\tPhoto by: Bill Detwiler / TechRepublic
\n\tCaption by: Bill Detwiler
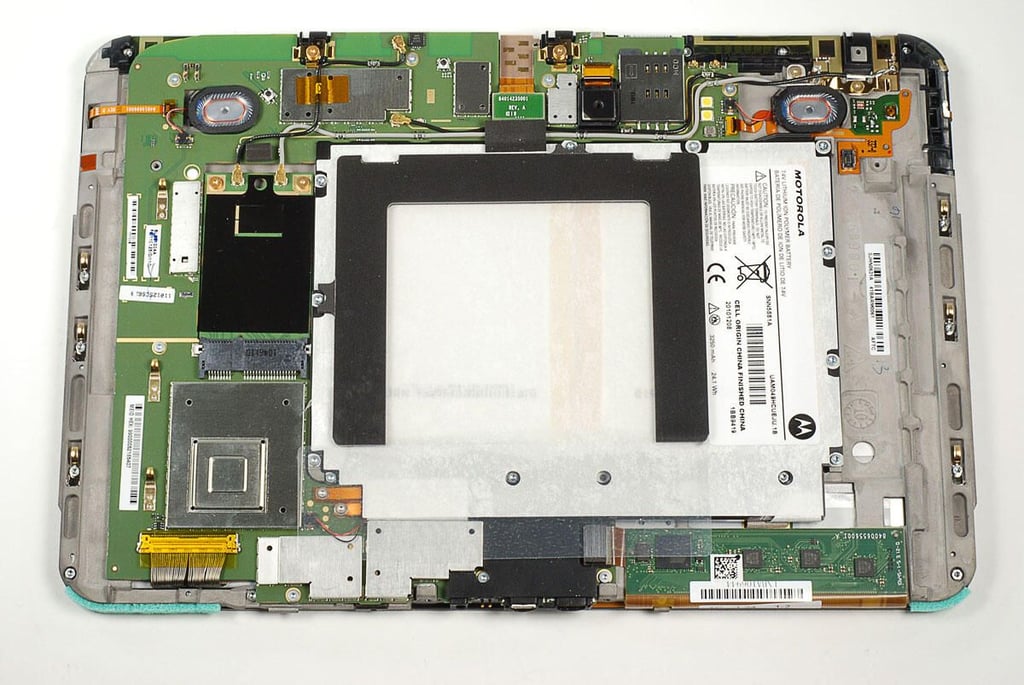
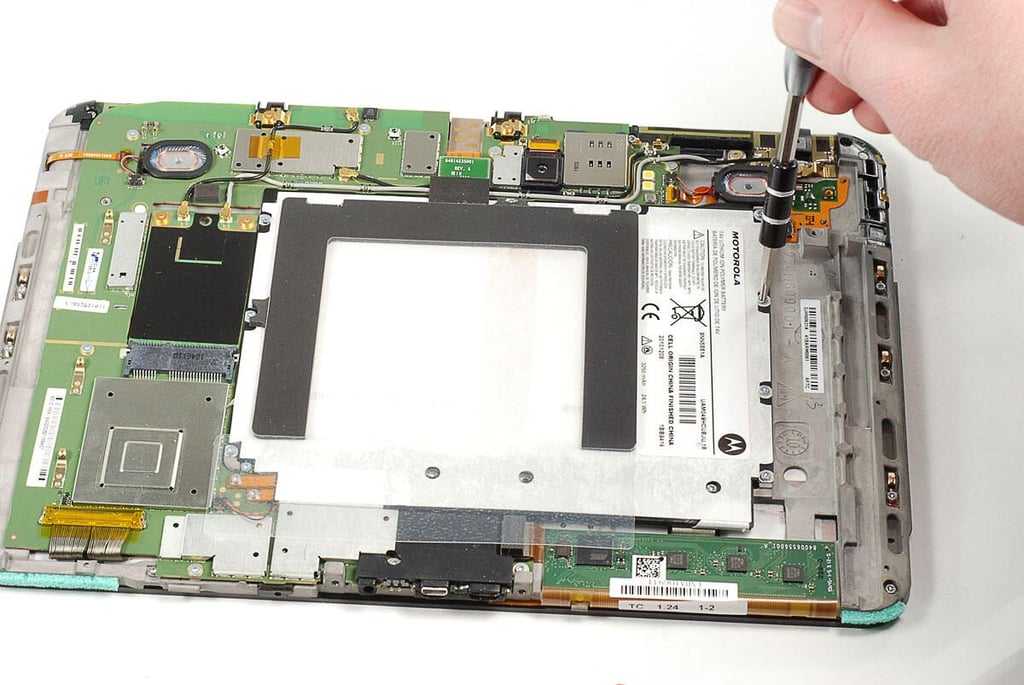
\n\tThe battery is held to the Motorola XOOM’s internal frame with 12 Torx T6 screws.
\n
\n\tPhoto by: Bill Detwiler / TechRepublic
\n\tCaption by: Bill Detwiler
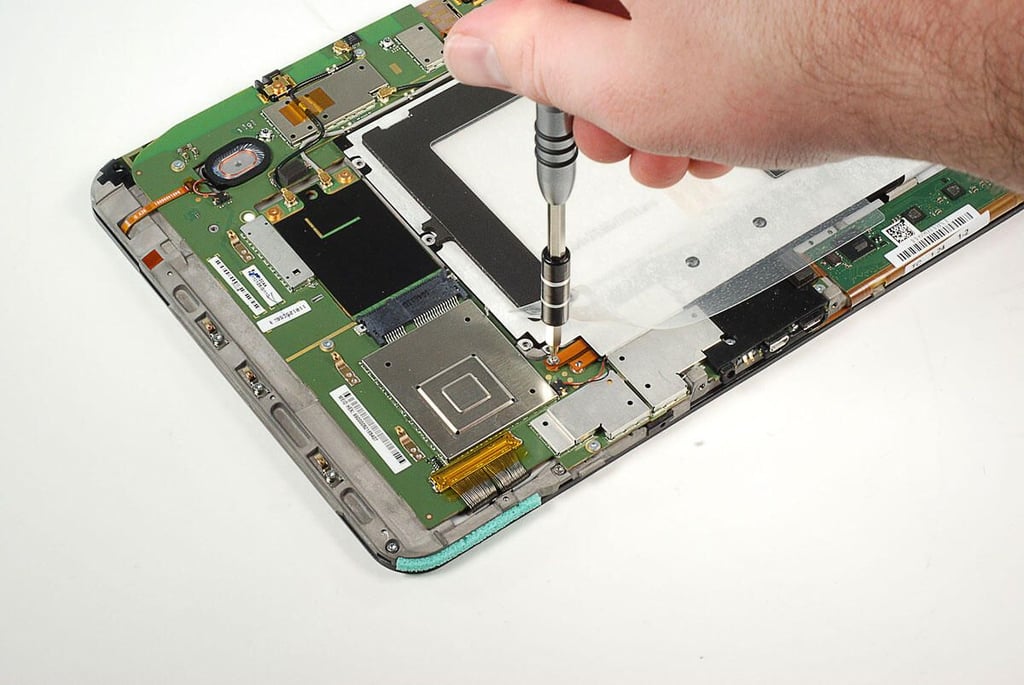
\n\tThere are another two Torx T5 screws holding the battery connector to the main PCB.
\n
\n\tPhoto by: Bill Detwiler / TechRepublic
\n\tCaption by: Bill Detwiler
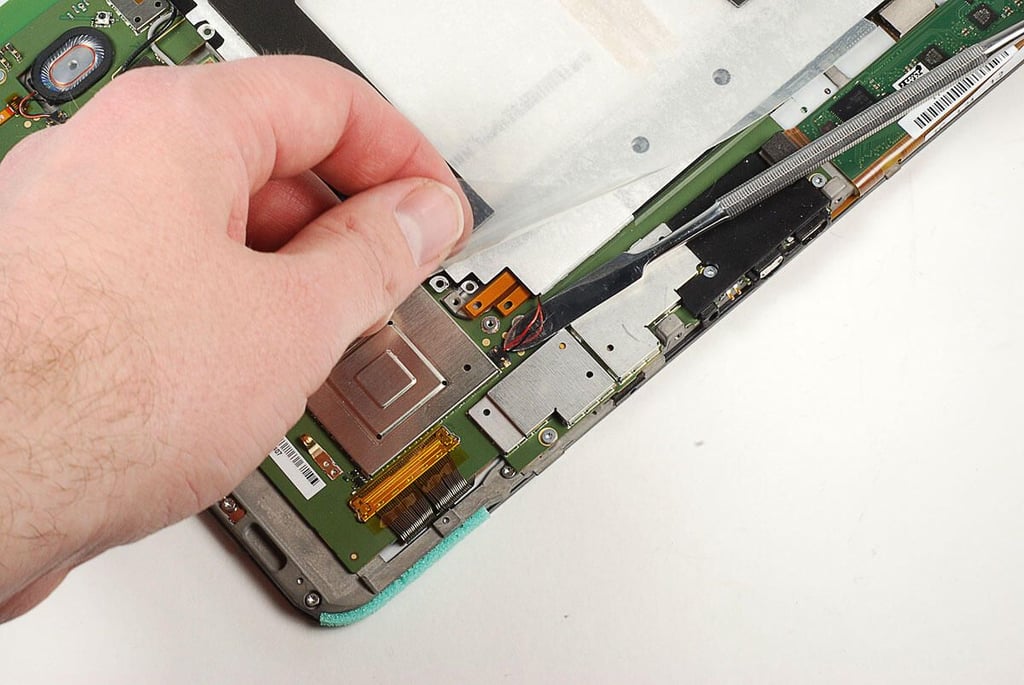
\n\tBefore removing the Motorola XOOM’s battery, you’ll also need to detach this tiny connector, which is attached to a pair of very thin red and black wires.
\n
\n\tPhoto by: Bill Detwiler / TechRepublic
\n\tCaption by: Bill Detwiler
\n\tWith all the screws removed and the connectors detached, you can lift the Motorola XOOM’s battery away from the internal frame.
\n
\n\tPhoto by: Bill Detwiler / TechRepublic
\n\tCaption by: Bill Detwiler
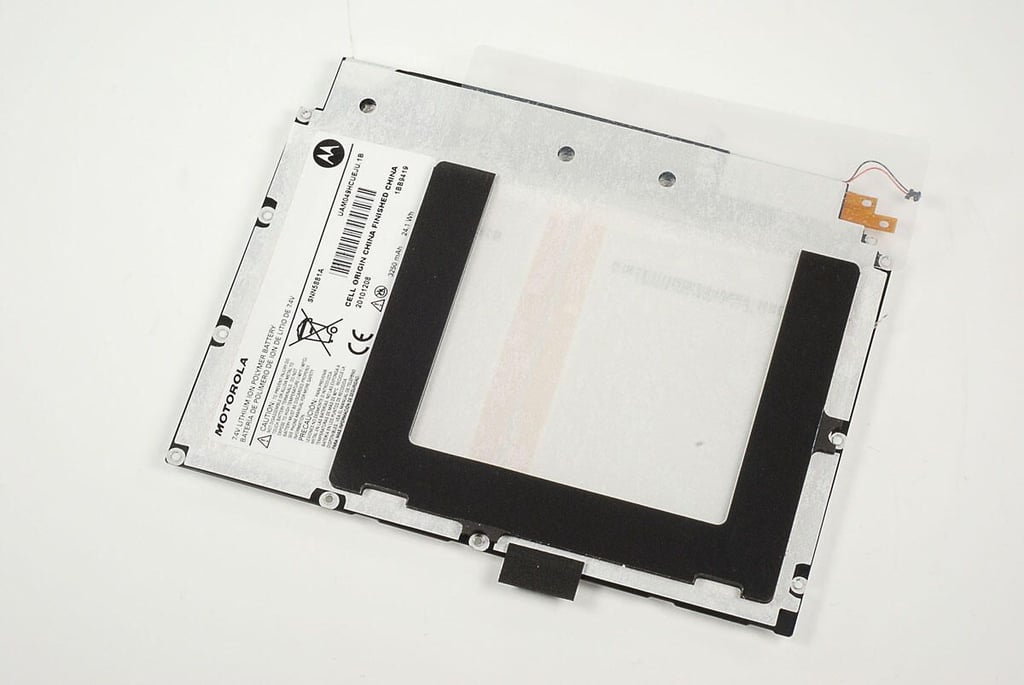
\n\tThe Motorola XOOM has a 7.4V 3250 mAh 24.1 Wh Li-ion battery.
\n
\n\tPhoto by: Bill Detwiler / TechRepublic
\n\tCaption by: Bill Detwiler
\n\tPhoto by: Bill Detwiler / TechRepublic
\n\tCaption by: Bill Detwiler
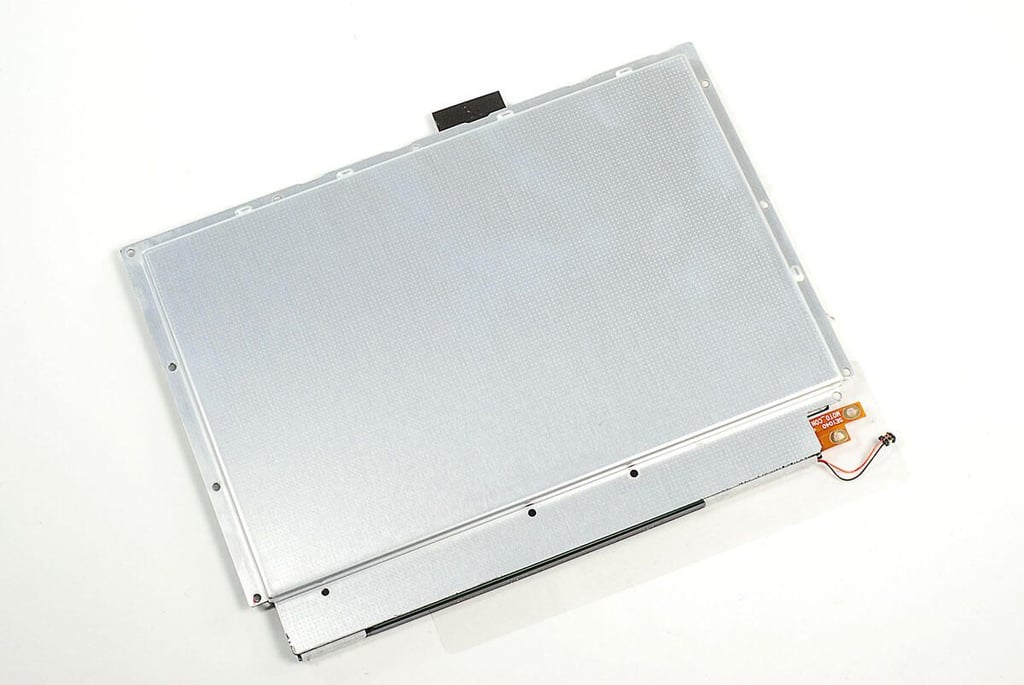
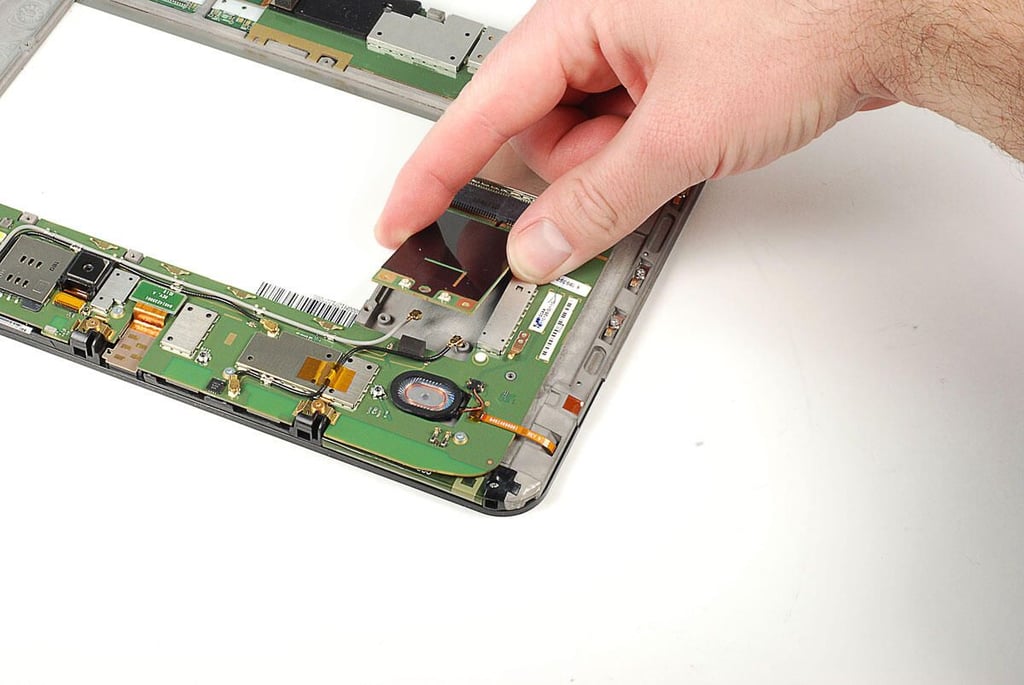
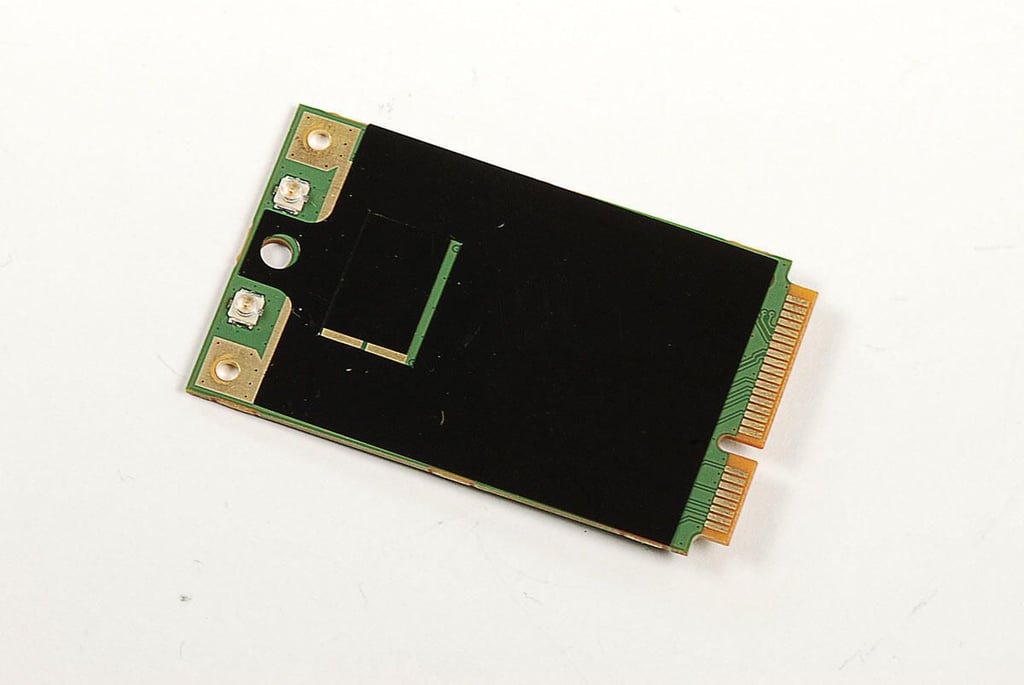
\n\tWith the battery removed, we’ll turn our attached to a small card witout any chips. This appears to a placeholder card for the LTE 4G upgrade that Verizon is promising for the Motorola XOOM.
\n
\n\tPhoto by: Bill Detwiler / TechRepublic
\n\tCaption by: Bill Detwiler

\n\tThe LTE 4G placeholder card is held in place with a pair of Torx T5 screws. two antenna wires are also connected to the card.
\n
\n\tPhoto by: Bill Detwiler / TechRepublic
\n\tCaption by: Bill Detwiler
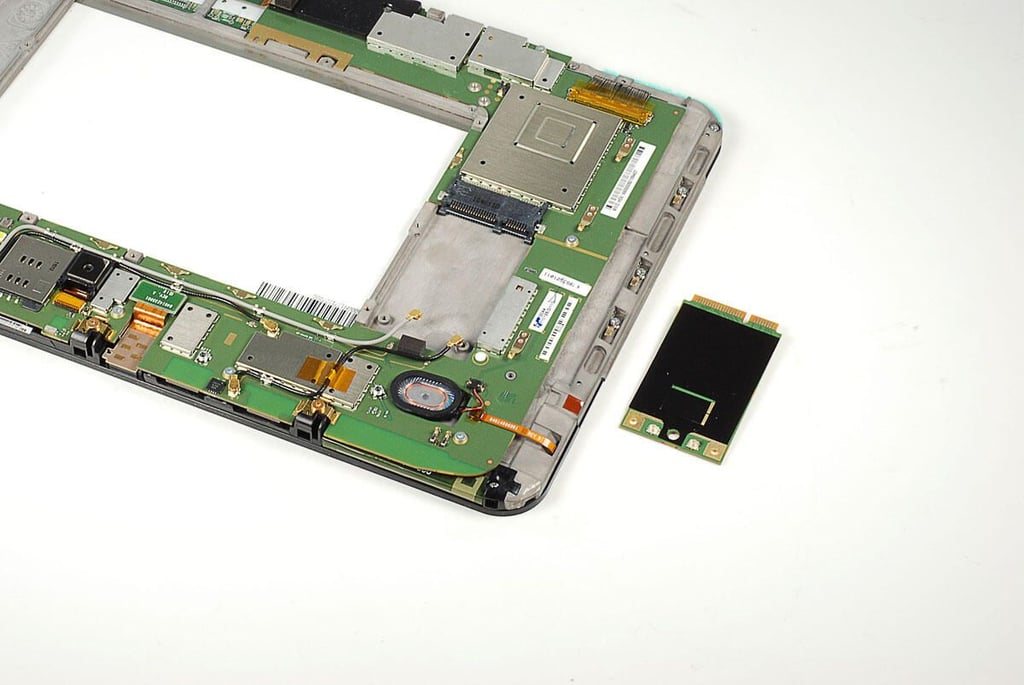
\n\tWith the screws removed and the wires disconnected, you can lift the placeholder card away from the metal frame.
\n
\n\tPhoto by: Bill Detwiler / TechRepublic
\n\tCaption by: Bill Detwiler
\n\tPhoto by: Bill Detwiler / TechRepublic
\n\tCaption by: Bill Detwiler
\n\tPhoto by: Bill Detwiler / TechRepublic
\n\tCaption by: Bill Detwiler
\n\tPhoto by: Bill Detwiler / TechRepublic
\n\tCaption by: Bill Detwiler
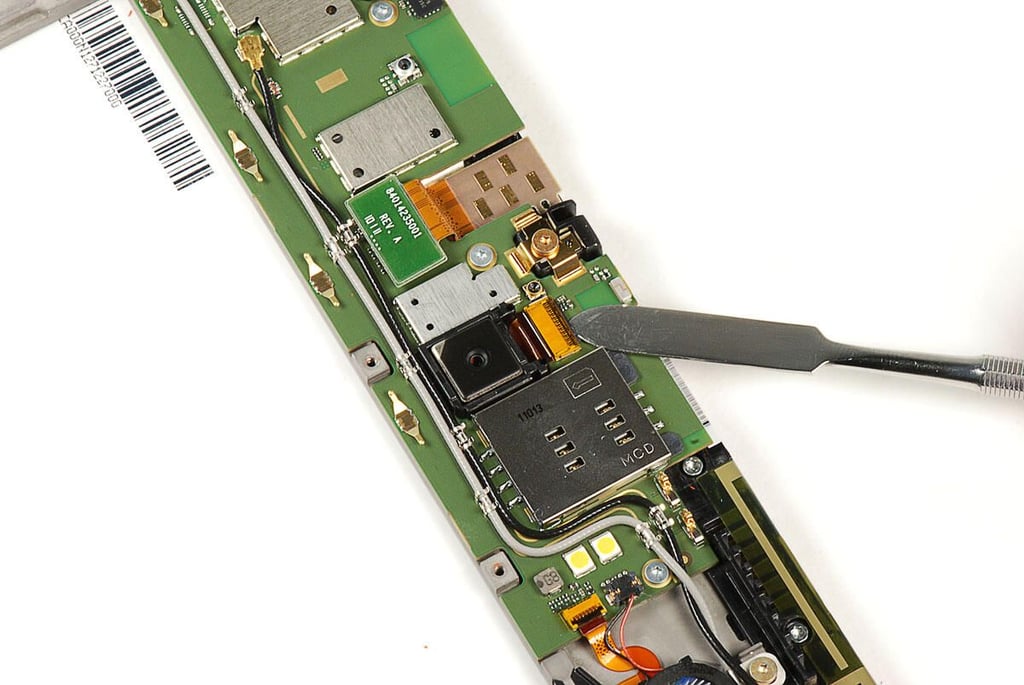
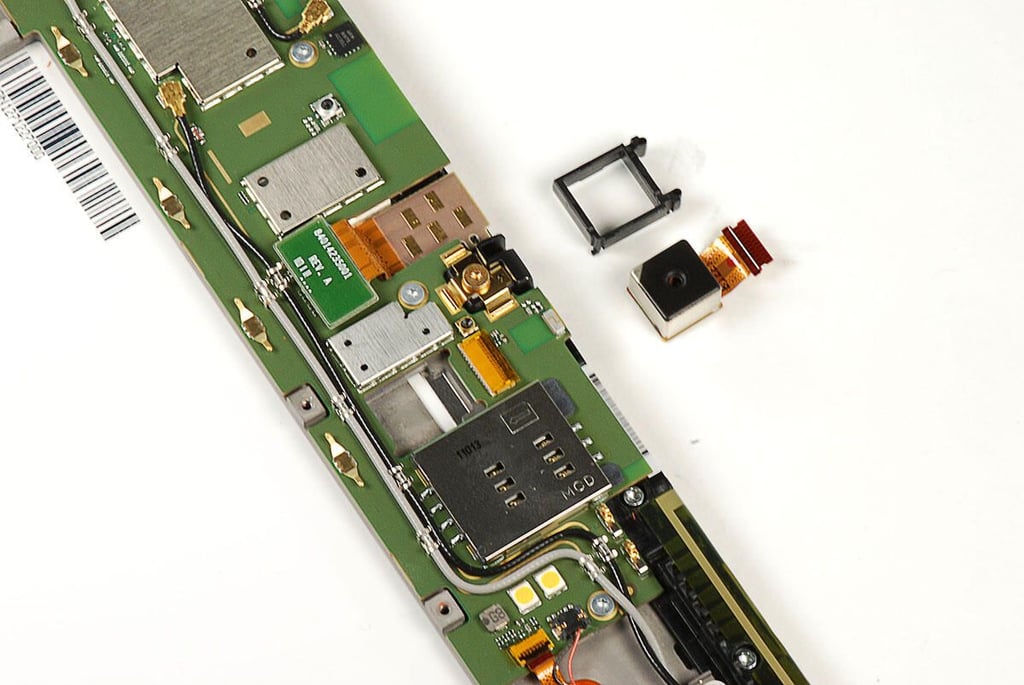
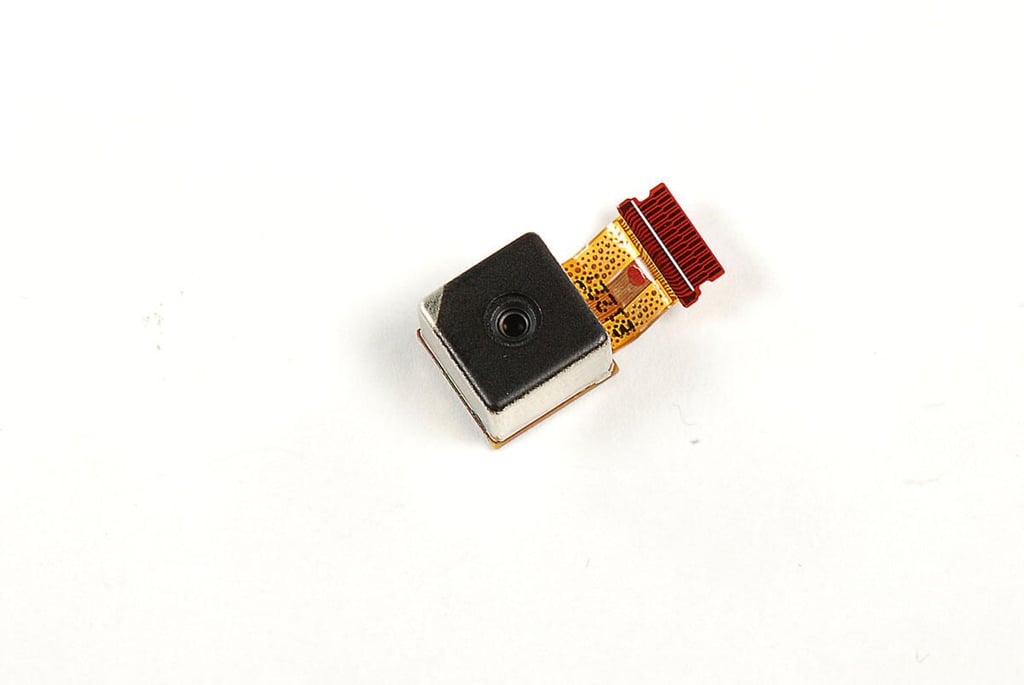
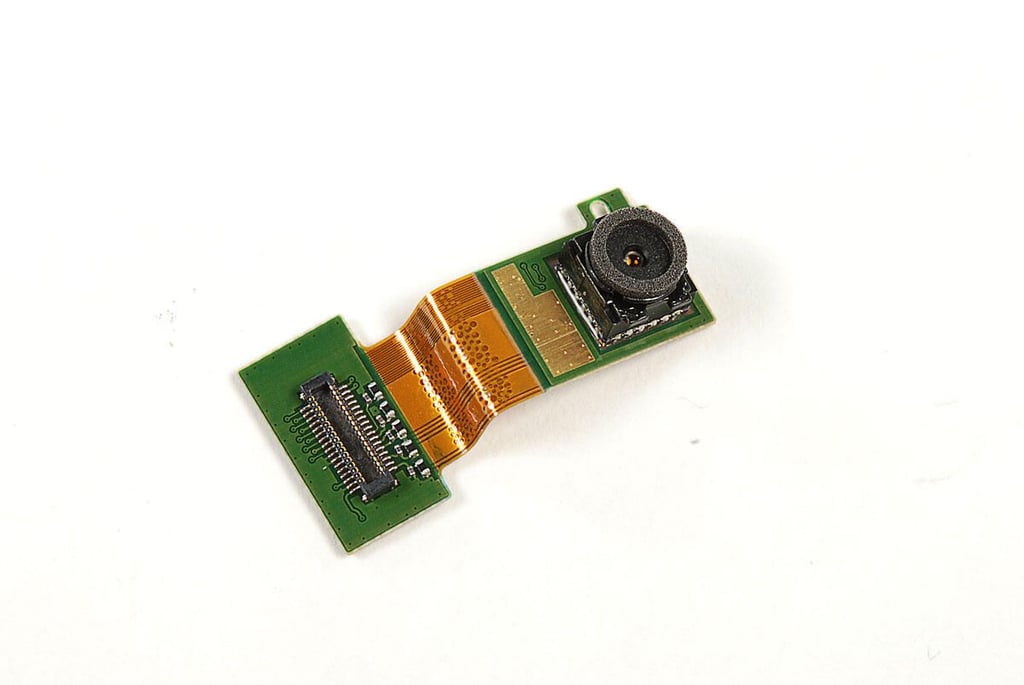
\n\tWe’ll turn our attention to the cameras next. First, we’ll remove the rear-facing 5MP camera. It is connected to the Motorola XOOM’s main PCB via a black plastic spacer and very thin ribbon cable.
\n
\n\tPhoto by: Bill Detwiler / TechRepublic
\n\tCaption by: Bill Detwiler
\n\tPhoto by: Bill Detwiler / TechRepublic
\n\tCaption by: Bill Detwiler
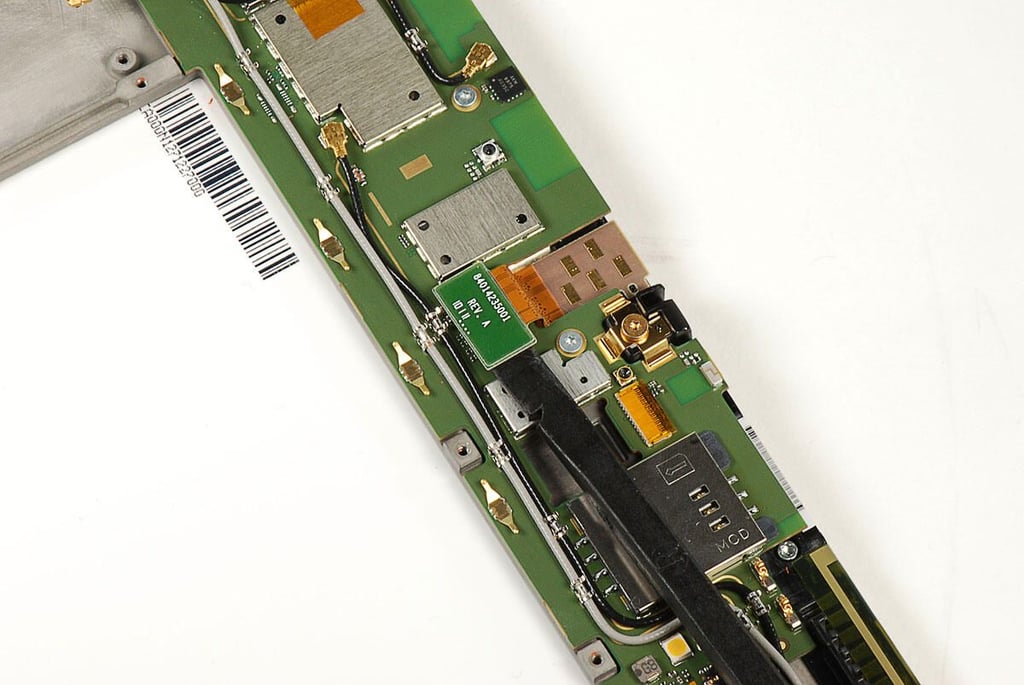
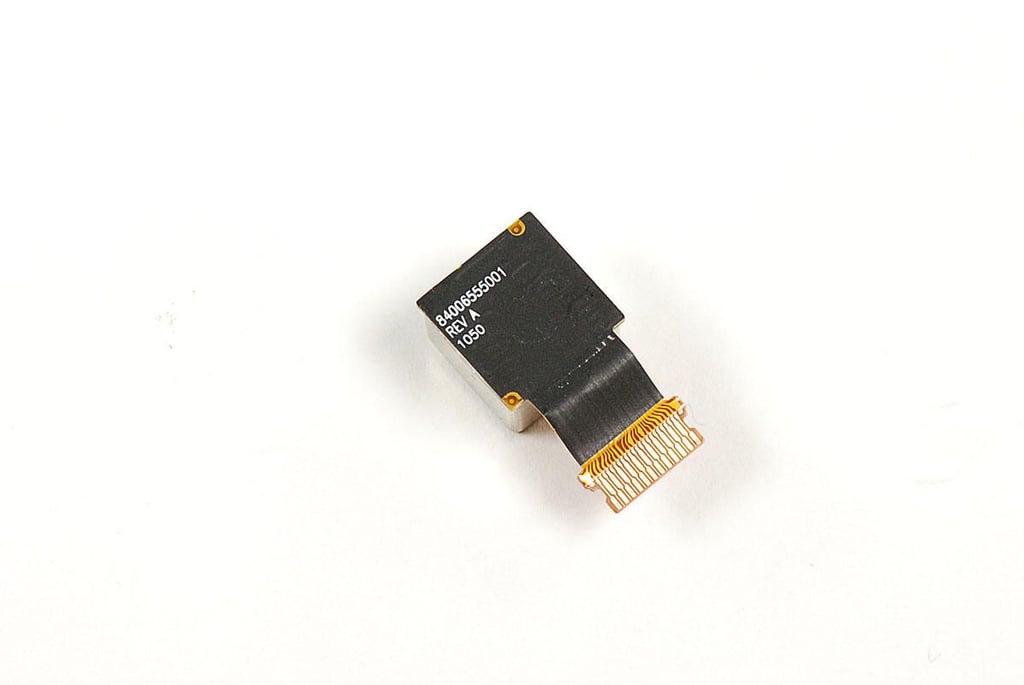
\n\tAfter removing the Motorola XOOM’s 5MP rear-facing camera, we’ll disconnect the 2MP front0facing Webcam.
\n
\n\tPhoto by: Bill Detwiler / TechRepublic
\n\tCaption by: Bill Detwiler

\n\tPhoto by: Bill Detwiler / TechRepublic
\n\tCaption by: Bill Detwiler
\n\tPhoto by: Bill Detwiler / TechRepublic
\n\tCaption by: Bill Detwiler
\n\tPhoto by: Bill Detwiler / TechRepublic
\n\tCaption by: Bill Detwiler
\n\tPhoto by: Bill Detwiler / TechRepublic
\n\tCaption by: Bill Detwiler

\n\tPhoto by: Bill Detwiler / TechRepublic
\n\tCaption by: Bill Detwiler
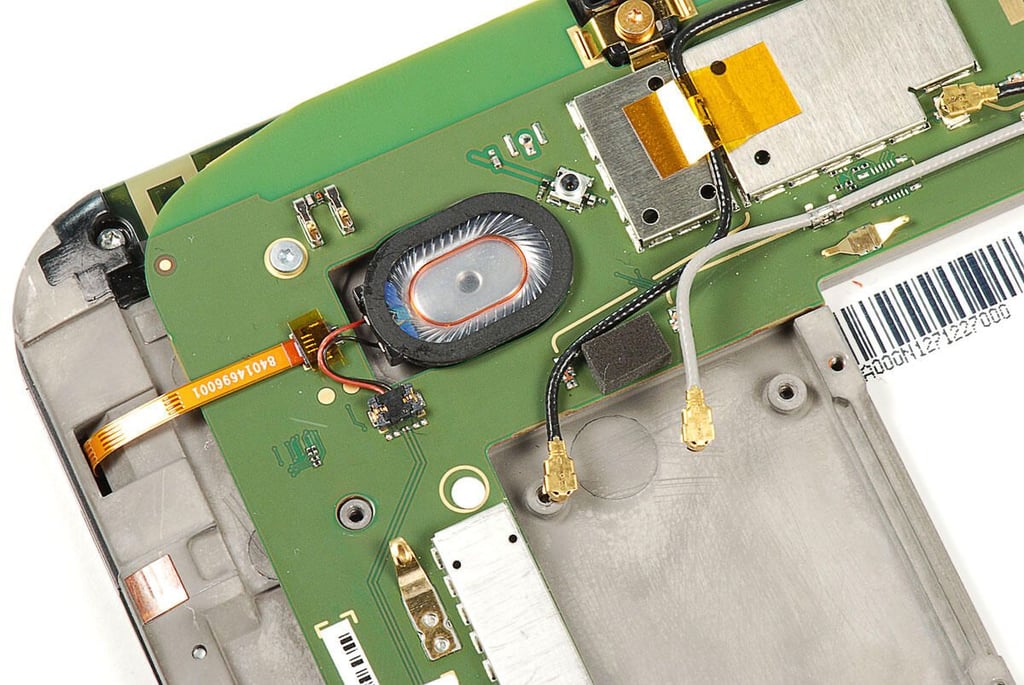
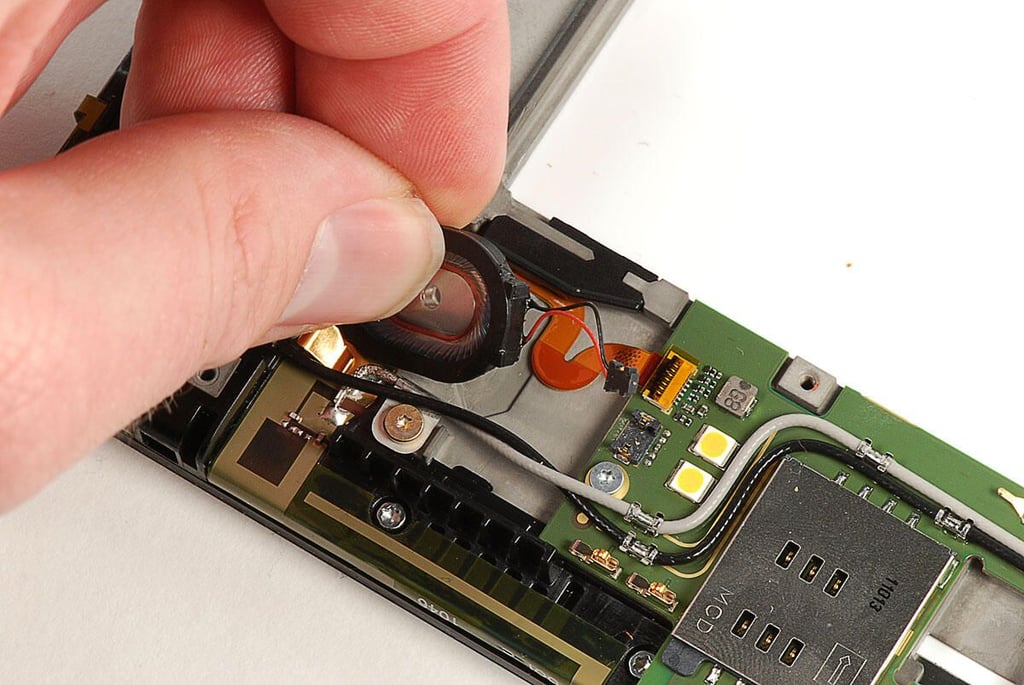
\n\tNext, we’ll remove the Motorola XOOM’s external speakers. Each speaker is connected to the main PCB with a small, black connector.
\n
\n\tPhoto by: Bill Detwiler / TechRepublic
\n\tCaption by: Bill Detwiler
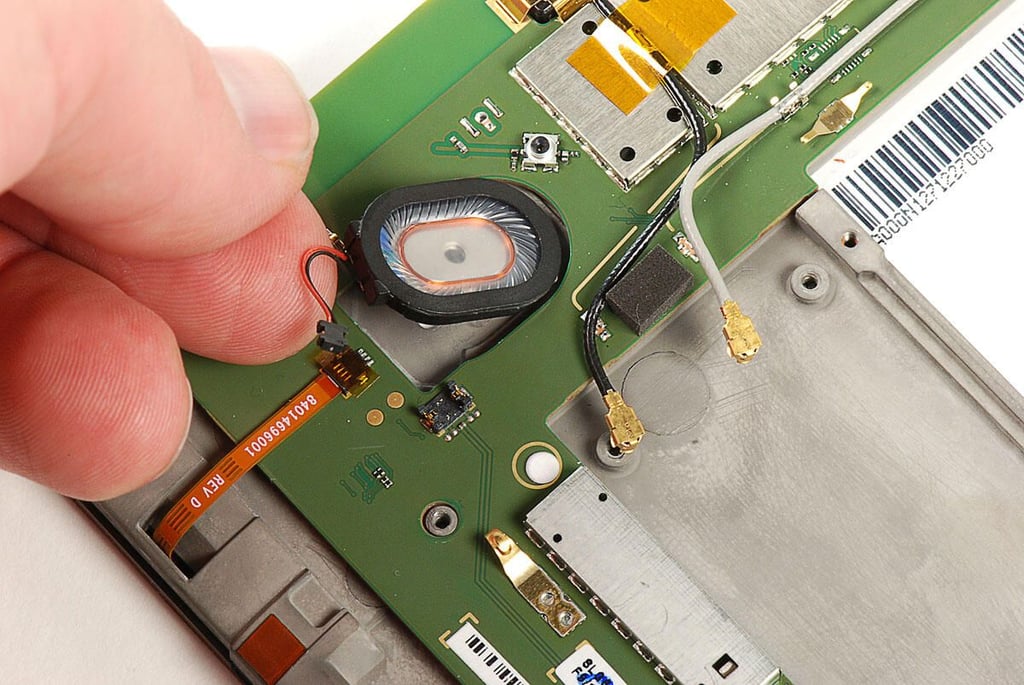
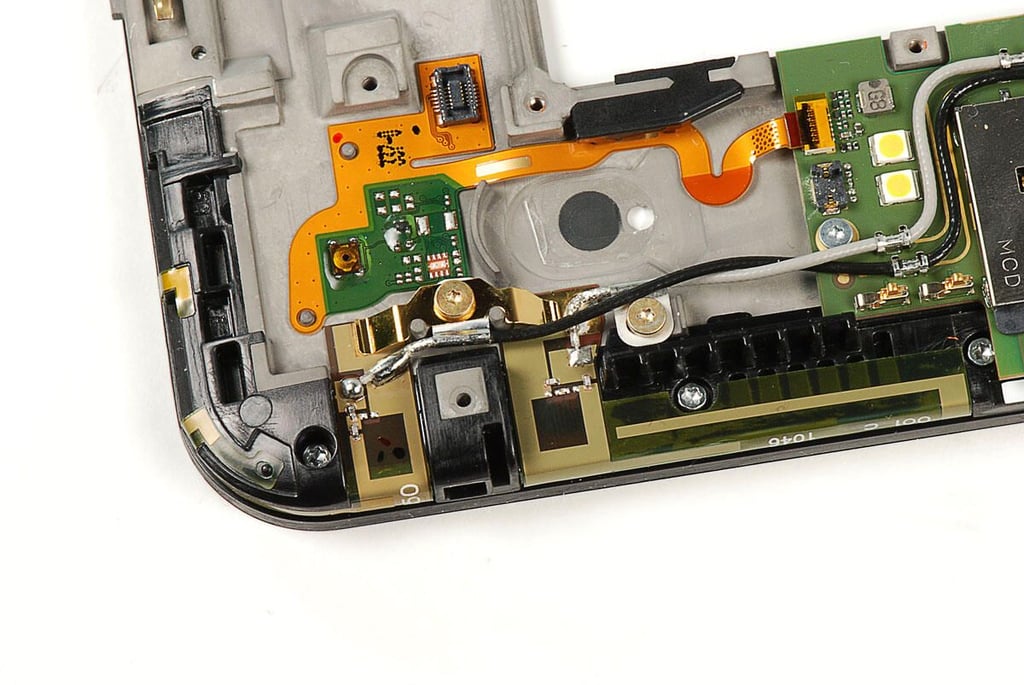
\n\tWith the speaker’s connector detached, you can lift the speaker away from the Motorola XOOM’s metal frame.
\n
\n\tPhoto by: Bill Detwiler / TechRepublic
\n\tCaption by: Bill Detwiler
\n\tA thin adhesive film holds the speaker to the frame, but you sould be able to remove the speaker without completely removing the film.
\n
\n\tPhoto by: Bill Detwiler / TechRepublic
\n\tCaption by: Bill Detwiler
\n\tTo remove the Motorola XOOM’s right-side speaker, use the the same process as on the left.
\n
\n\tPhoto by: Bill Detwiler / TechRepublic
\n\tCaption by: Bill Detwiler
\n\tPhoto by: Bill Detwiler / TechRepublic
\n\tCaption by: Bill Detwiler
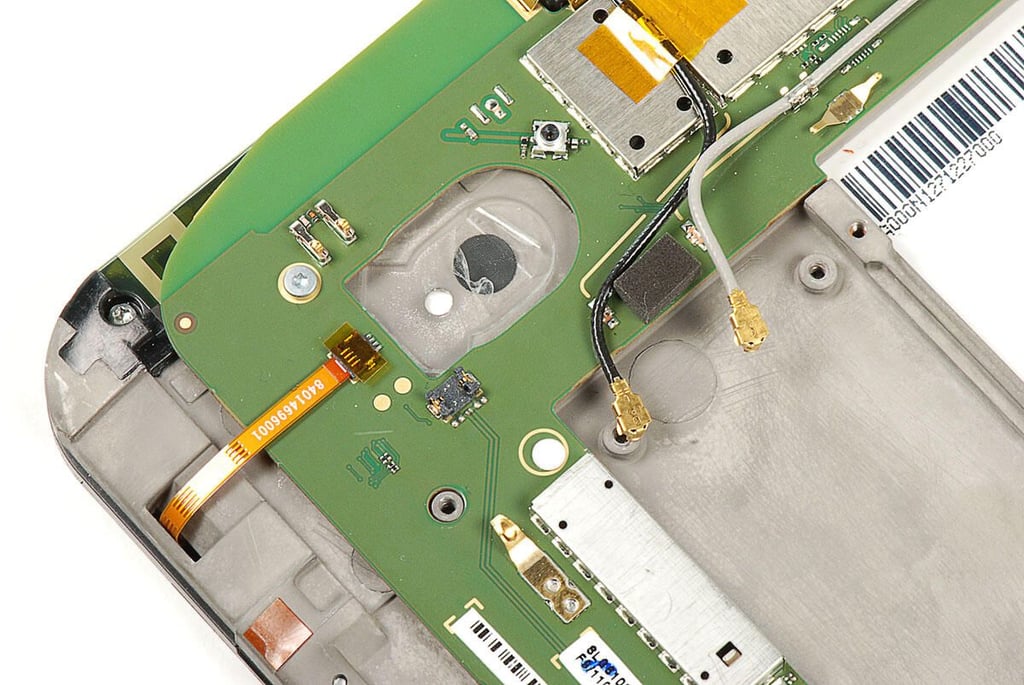
\n\tBefore we can remove the Motorola XOOM’s main PCB, we’ll need to disconnect the antenna wires that run allong the top edge.
\n
\n\tPhoto by: Bill Detwiler / TechRepublic
\n\tCaption by: Bill Detwiler
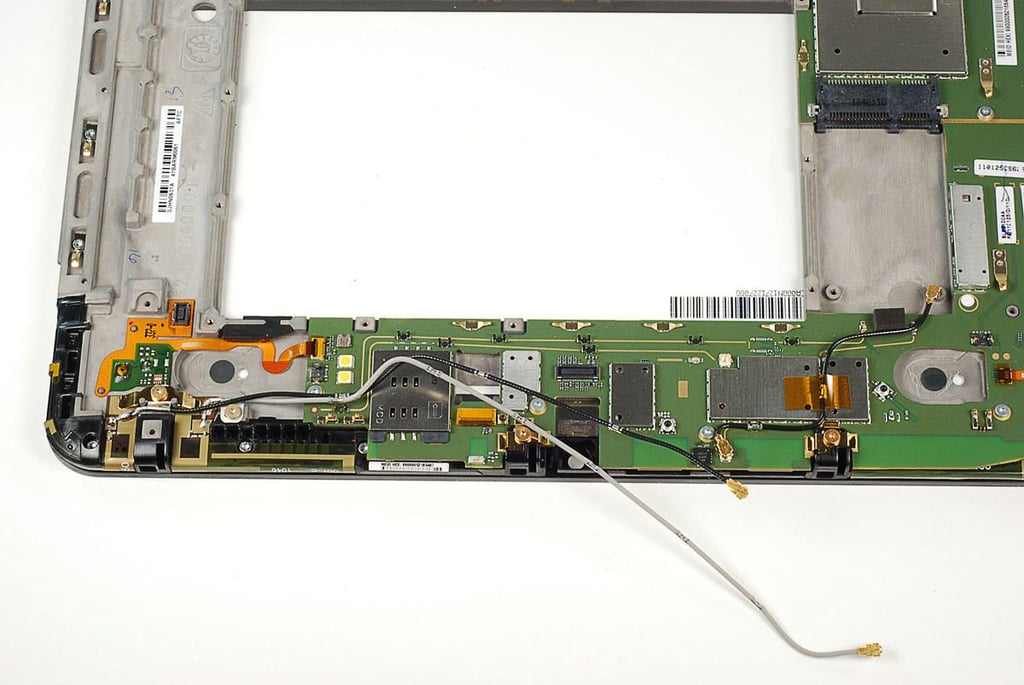
\n\tThe Motorola XOOM’s antenna wires are held to the main PCB with metal clips. You can easily pull the wires out of the clips and away from the circuit boad. The wires will remain soldered to a contact plate attached to touchscreen’s bezel.
\n
\n\tPhoto by: Bill Detwiler / TechRepublic
\n\tCaption by: Bill Detwiler
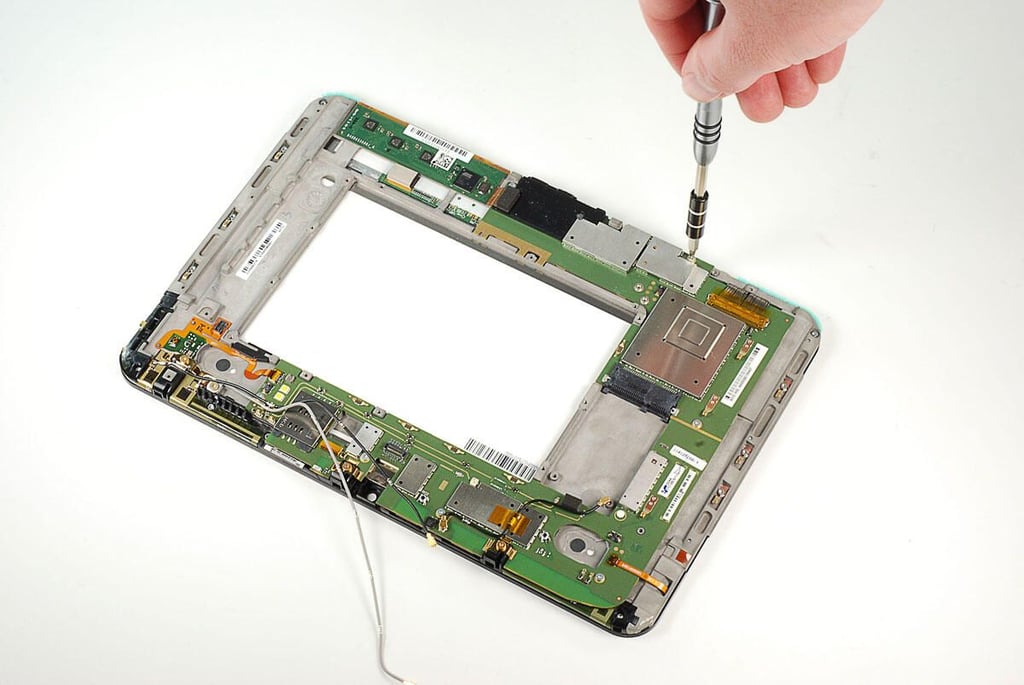
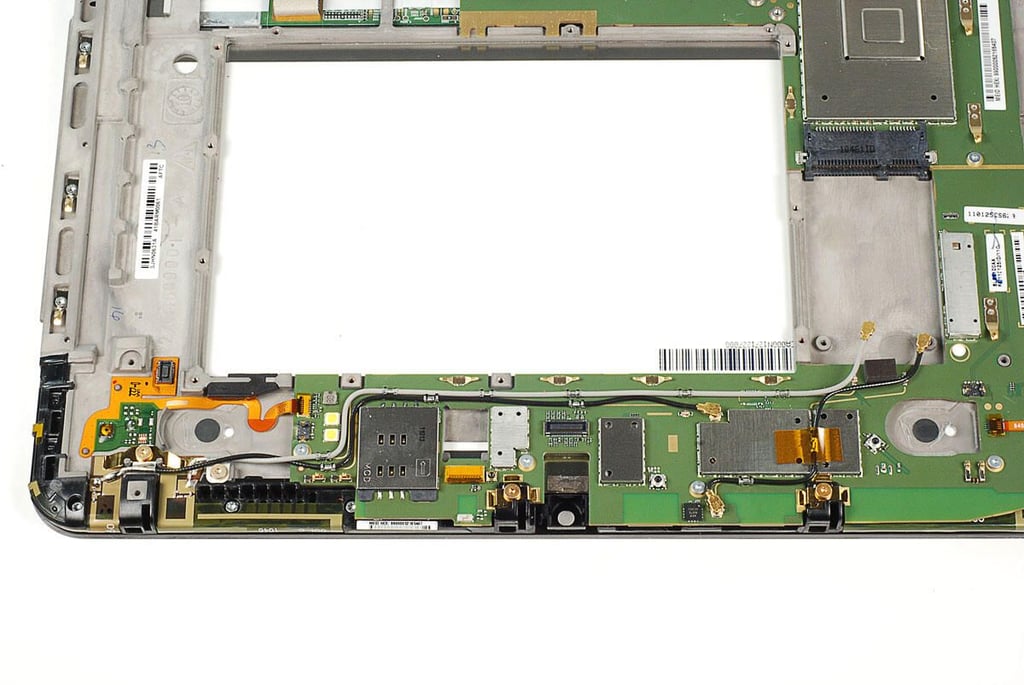
\n\tWith the placeholder LTE 4G card, speakers, and antenna wires, removed, we can begin removing the screws that hold the Motorola XOOM’s main PCB in place.
\n
\n\tPhoto by: Bill Detwiler / TechRepublic
\n\tCaption by: Bill Detwiler
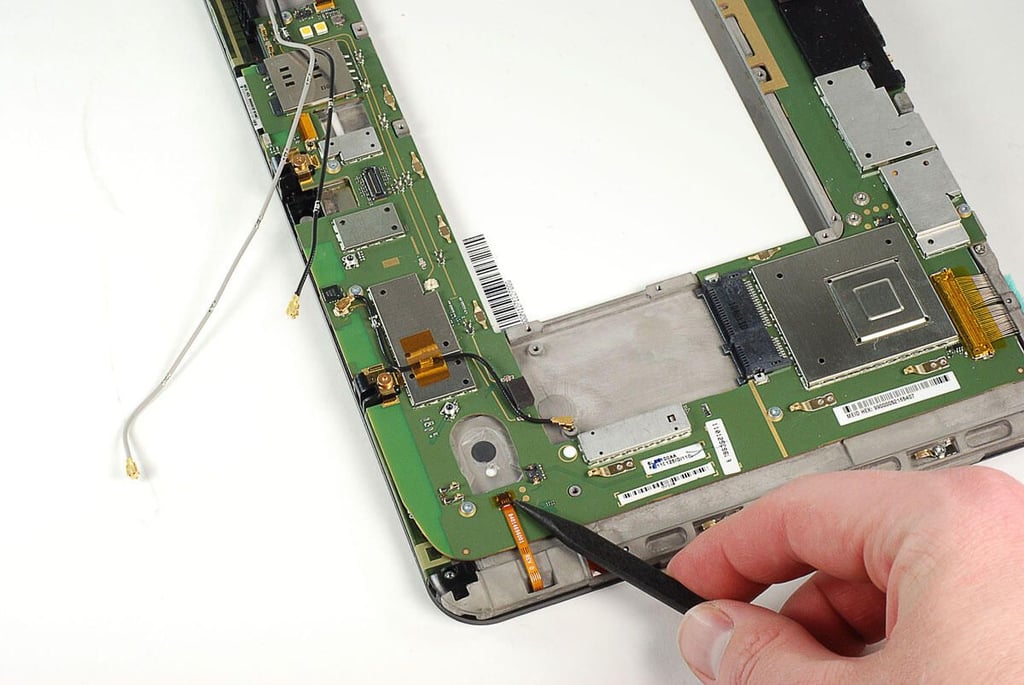
\n\tAfter removing all the main PCB’s screws. You’ll also need to detach several cables.
\n
\n\tPhoto by: Bill Detwiler / TechRepublic
\n\tCaption by: Bill Detwiler
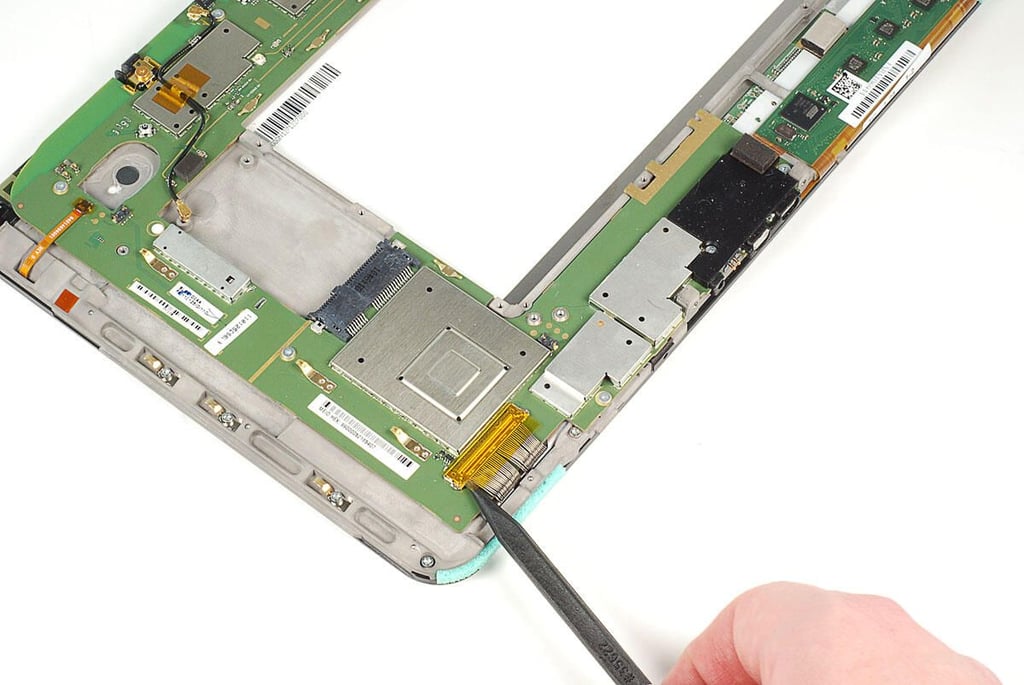
\n\tYou’ll also need to detach larger cables, such as this one for the Motorola XOOM’s display.
\n
\n\tPhoto by: Bill Detwiler / TechRepublic
\n\tCaption by: Bill Detwiler

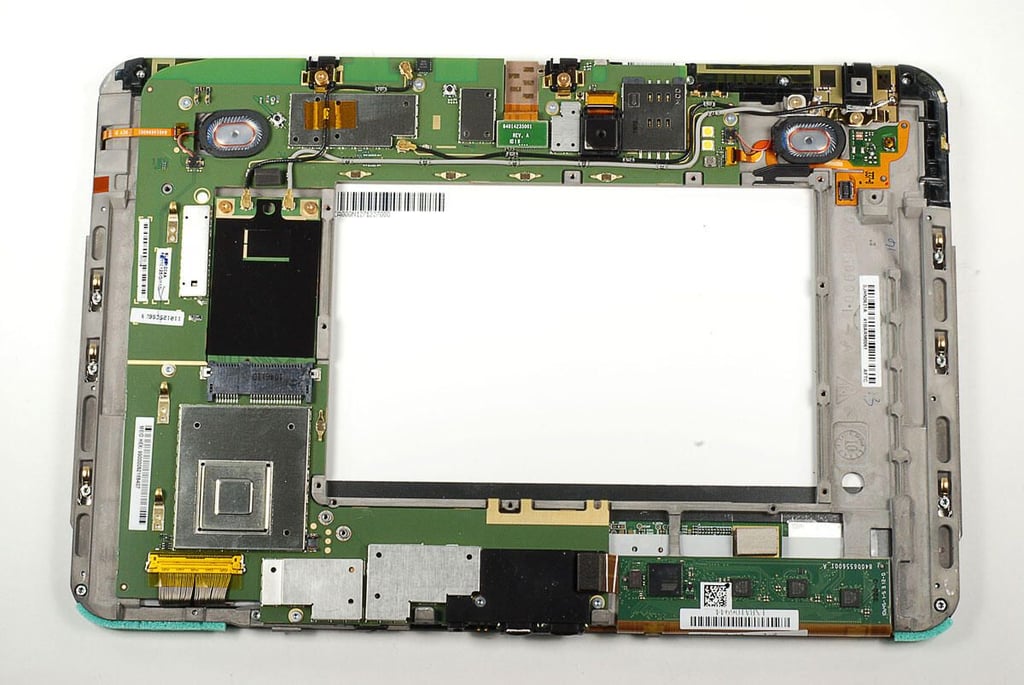
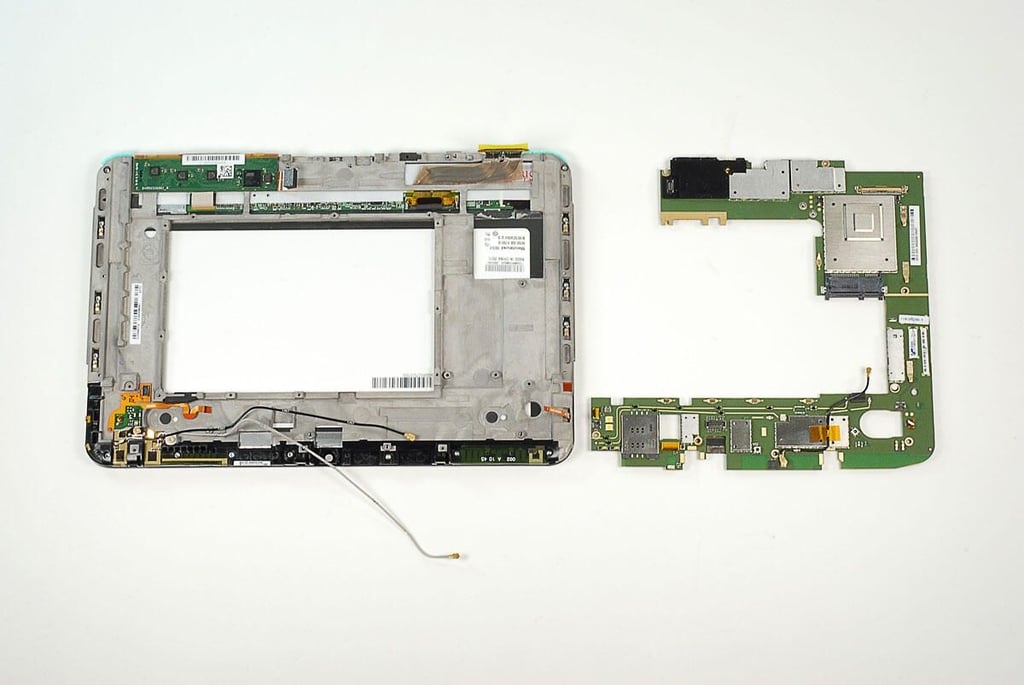
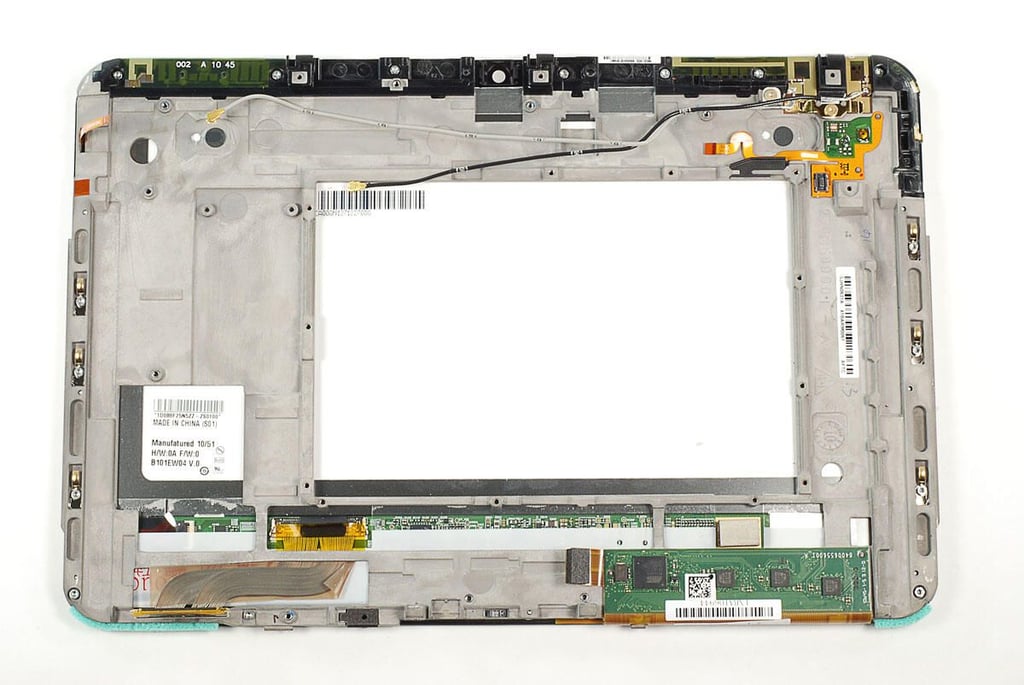
\n\tWith all the screws and cables removed, you can lift the Motorola XOOM’s main PCB away from the internal metal frame.
\n
\n\tPhoto by: Bill Detwiler / TechRepublic
\n\tCaption by: Bill Detwiler
\n\tPhoto by: Bill Detwiler / TechRepublic
\n\tCaption by: Bill Detwiler
\n\tMore than a dozen screws and adhesive hold the Motorola XOOM’s front panel to the metal frame and display. As you can see the touchscreen’s controller chips without removing it from the display assembly, I decided to leave it in place. I want to put this unit back together in complete working order.
\n
\n\tPhoto by: Bill Detwiler / TechRepublic
\n\tCaption by: Bill Detwiler
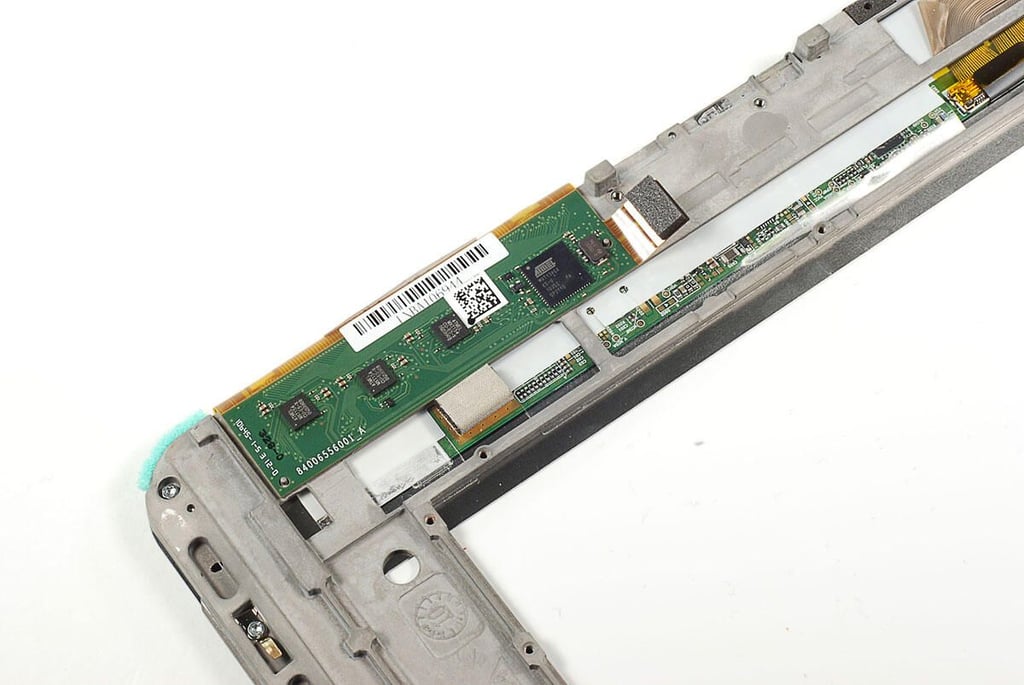
\n\tThe Motorola XOOM’s touchscreen uses an Atmel mXT1386 controller with markings MXT1386X ES-U 1035I TH 0P2110.
\n
\n\tPhoto by: Bill Detwiler / TechRepublic
\n\tCaption by: Bill Detwiler

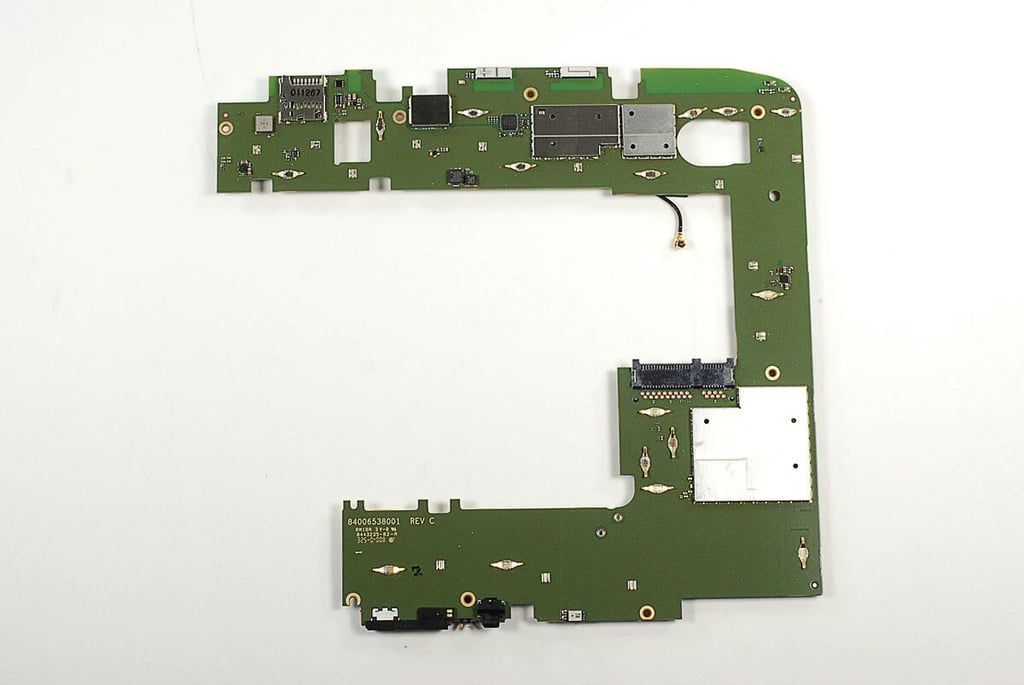
\n\tLooking at the top of the Motorola XOOM’s main PCB we can’t see any of the chips. They’re all hidden beneath metal shields, and unfortunately the shields are soldered to the PCB. As I want to reassemble with XOOM in working order, I’m not going to risk damaging the chips or their contacts by cutting the shields loose.
\n
\n\tLuckly, our friends over at iFixit did go through the painstaking process of removing the shields. So, we know that hidden under the shields are an Nvidia Tegra T2 dual-core CPU, Broadcom AGPS, Broadcom Wi-Fi, Bluetooth 2.1, and FM Tuner, Qualcomm HSPA+ chip and Samsung DRAM module.
\n
\n\tFor a closer look at the chips, check out iFixit.
\n
\n\tPhoto by: Bill Detwiler / TechRepublic
\n\tCaption by: Bill Detwiler
\n\tJust like the shields on the front of the main PCB, those on the back are soldered in place. Again, iFixit comes to the recue. Under these shields, there are chips from Qualcomm, Atmel, Toshiba, and ST Ericsson.
\n
\n\tPhoto by: Bill Detwiler / TechRepublic
\n\tCaption by: Bill Detwiler

\n\tOverall the Motorola XOOM was very easy to disassemble. It has standard Torx T6 and T5 screws. The XOOM also feels like a sturdy and well constructed tablet. And, it should be for $800. Unfortunately, it’s unlikely that you’ll be able to get spare parts for XOOM anytime soon.
\n
\n\tPhoto by: Bill Detwiler / TechRepublic
\n\tCaption by: Bill Detwiler
Bill Detwiler is the Editor for Technical Content and Ecosystem at Celonis. He is the former Editor in Chief of TechRepublic and previous host of TechRepublic's Dynamic Developer podcast and Cracking Open, CNET and TechRepublic's popular online show. Previously, Bill was an IT manager in the social research and energy industries. He has bachelor's and master's degrees from the University of Louisville, where he has also lectured on computer crime and crime prevention.


