The Sprint version of the Samsung Galaxy Tab went on sale in the US on November 14. It’s priced at $399 (US) with a 2-year contract and one of two data plans–$29 a month (2GB cap) or $59 a month (5GB cap).
Follow along as I crack open the Galaxy Tab for a look at the hardware inside.
Photo by: Bill Detwiler / TechRepublic
Caption by: Bill Detwiler
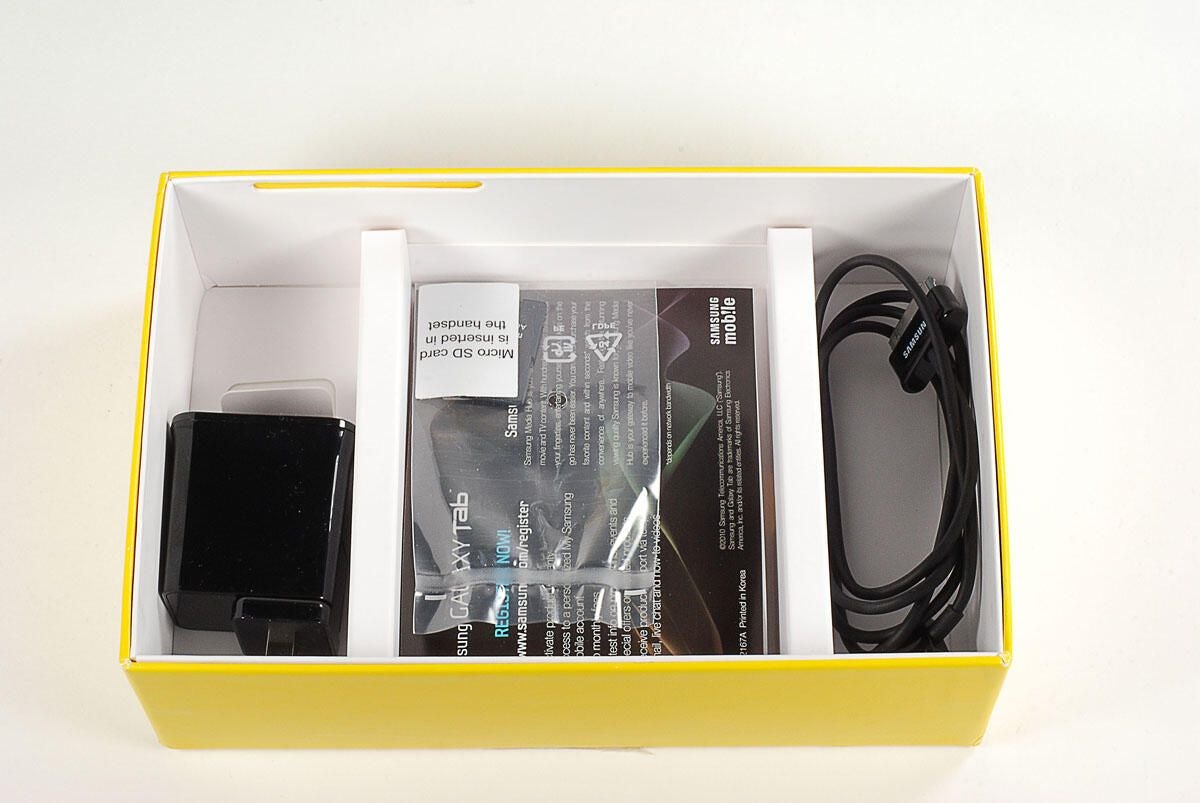
Included with Sprint’s version of the Galaxy Tab is the power adapter, USB data/charging cable, and a 16 GB microSD card.
Photo by: Bill Detwiler / TechRepublic
Caption by: Bill Detwiler
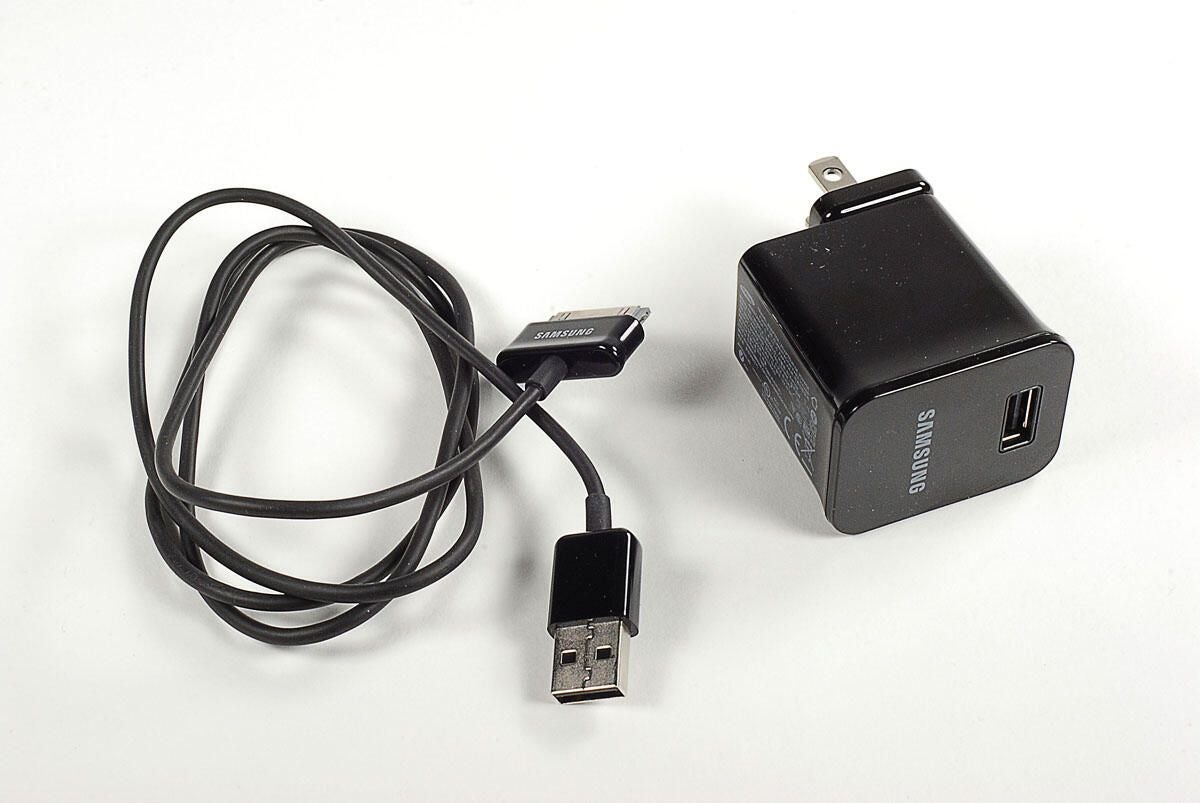
Photo by: Bill Detwiler / TechRepublic
Caption by: Bill Detwiler
On the back of the Galaxy Tab are the rear-facing 3.2 MP camera and flash.
Photo by: Bill Detwiler / TechRepublic
Caption by: Bill Detwiler
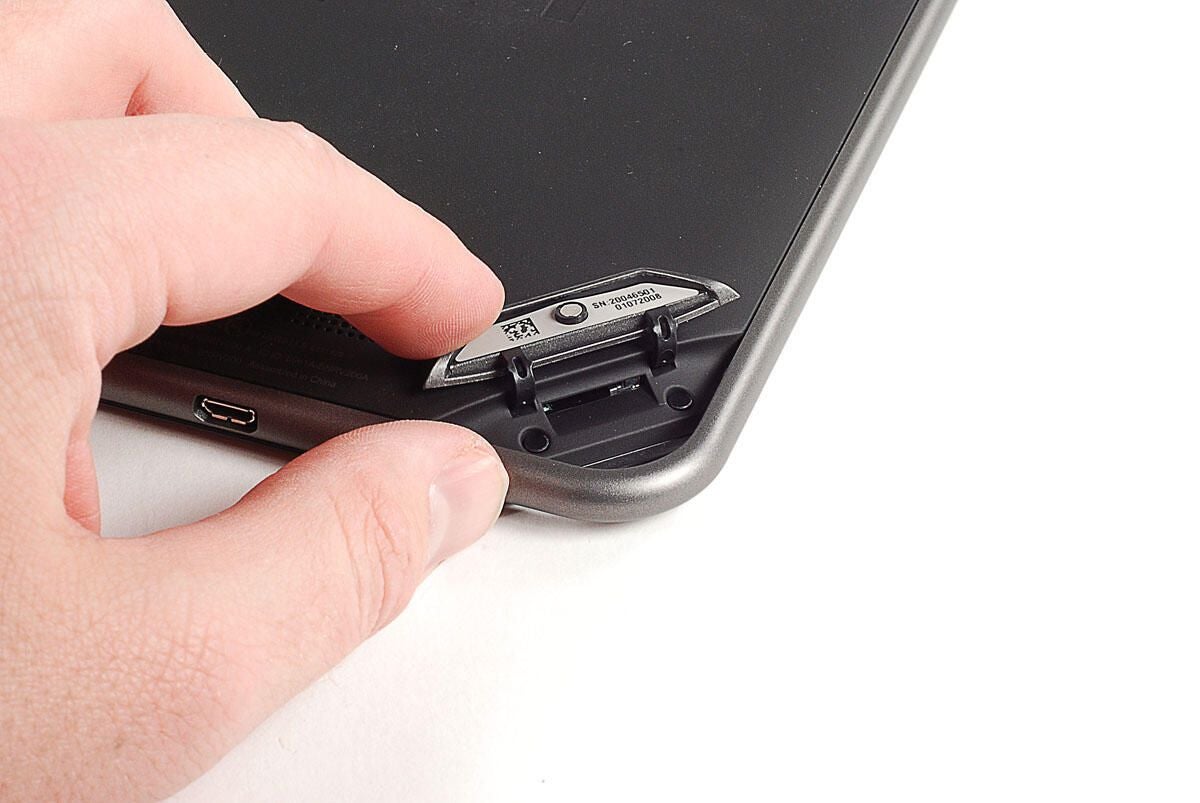
Two tri-wing screws are hidden behind small plastic circles, which are held on with adhesive tape. You’ll need to remove both screws before separating the Tab’s plastic shell from the display assembly.
Photo by: Bill Detwiler / TechRepublic
Caption by: Bill Detwiler
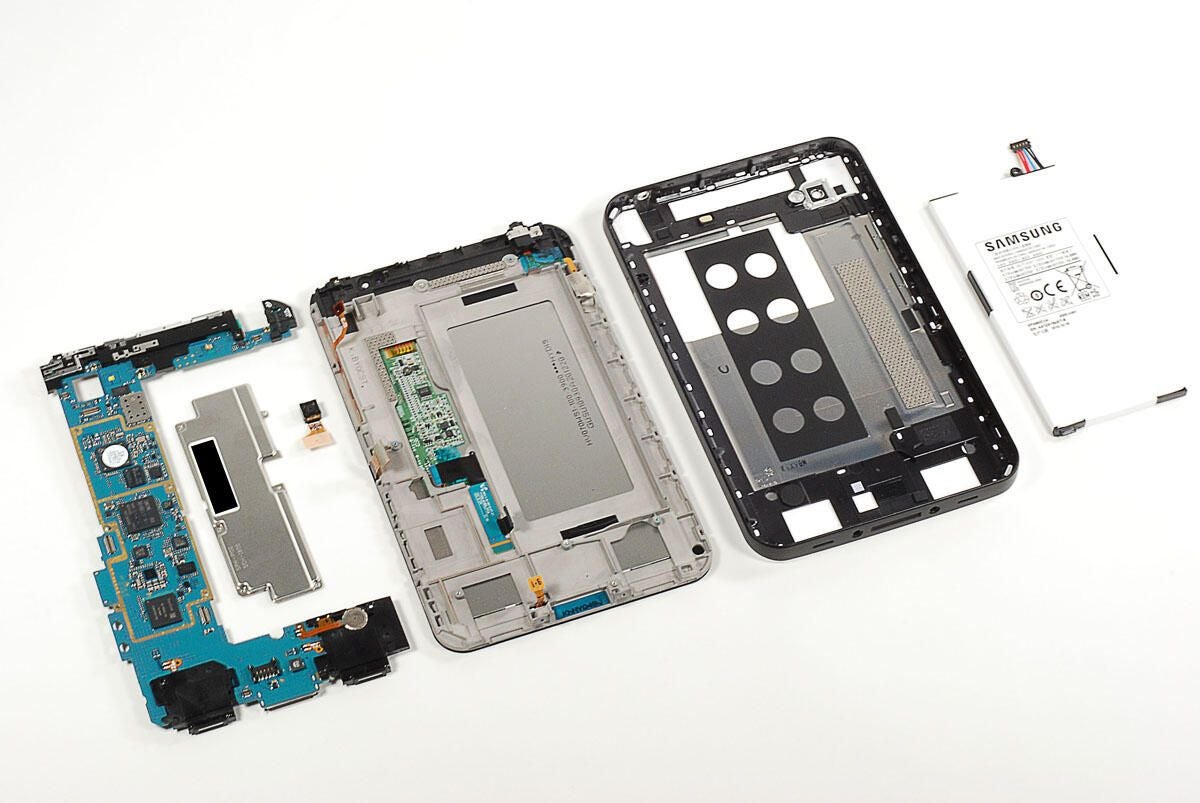
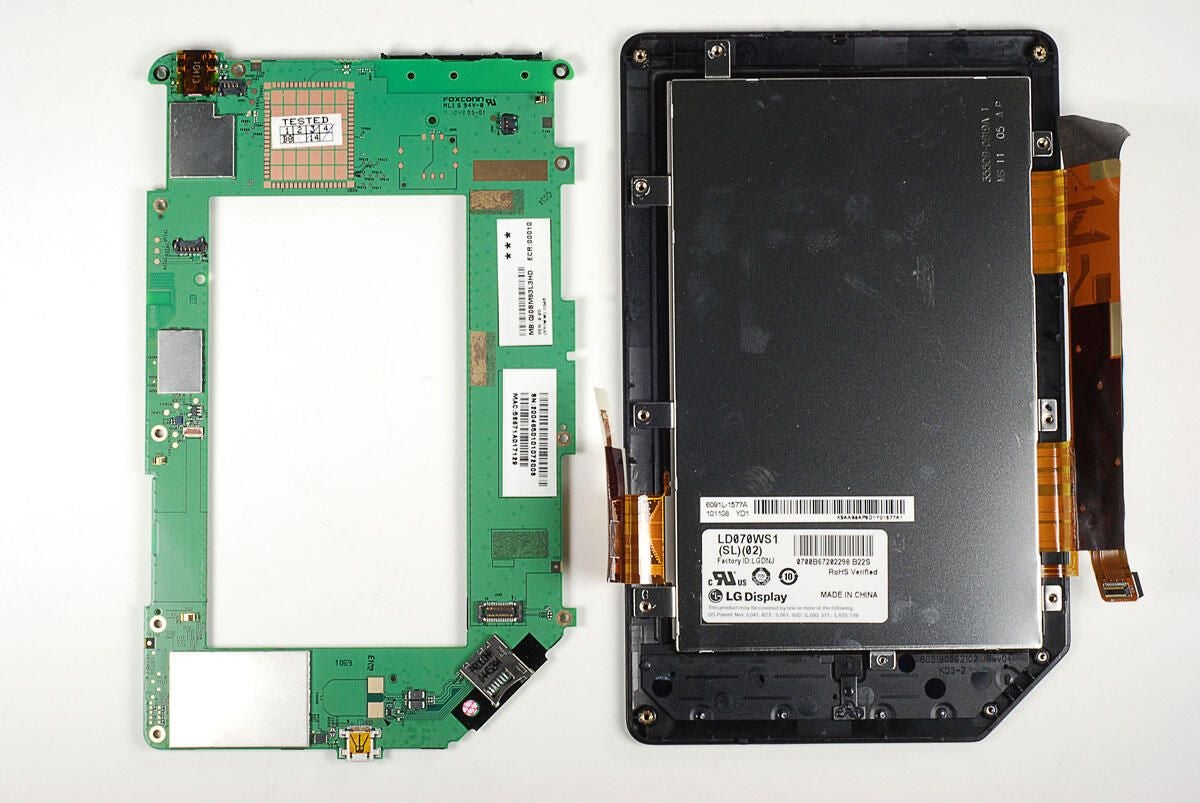
There’s not much to see inside the Galaxy Tab’s plastic case. All the internal hardware is mounted to the display assembly and frame.
Photo by: Bill Detwiler / TechRepublic
Caption by: Bill Detwiler

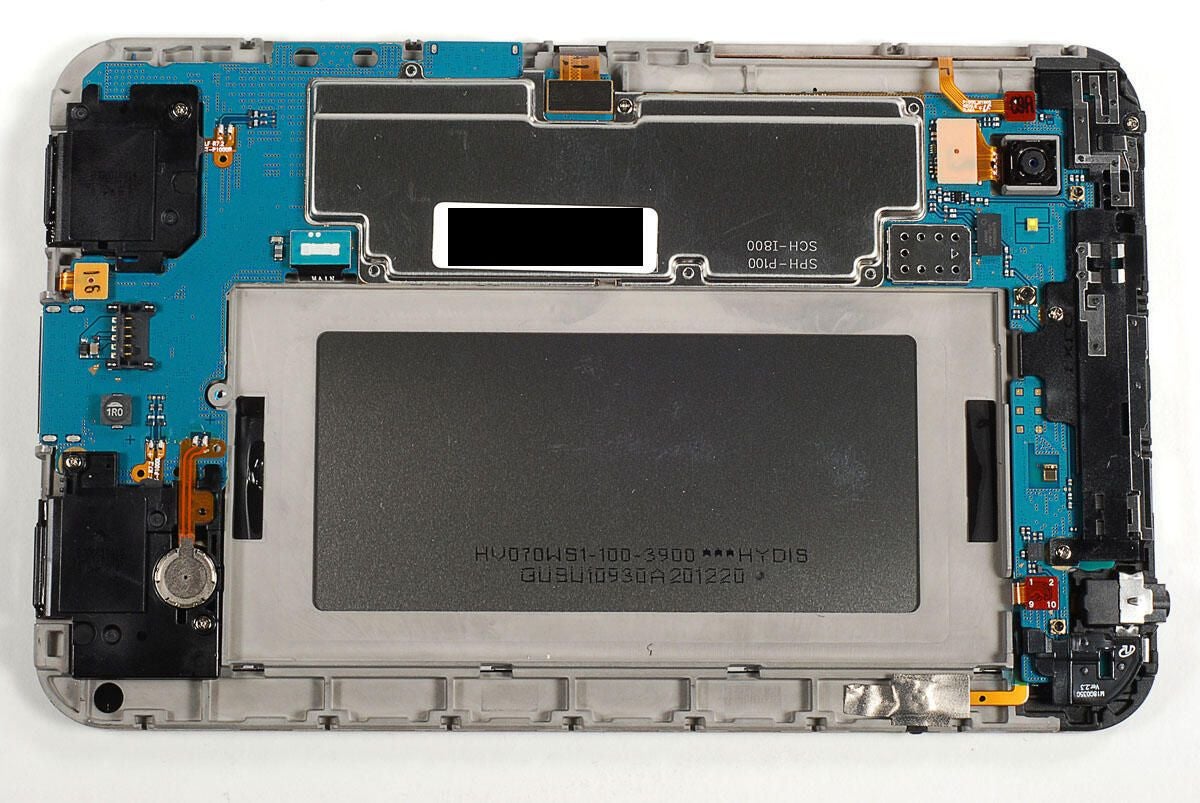
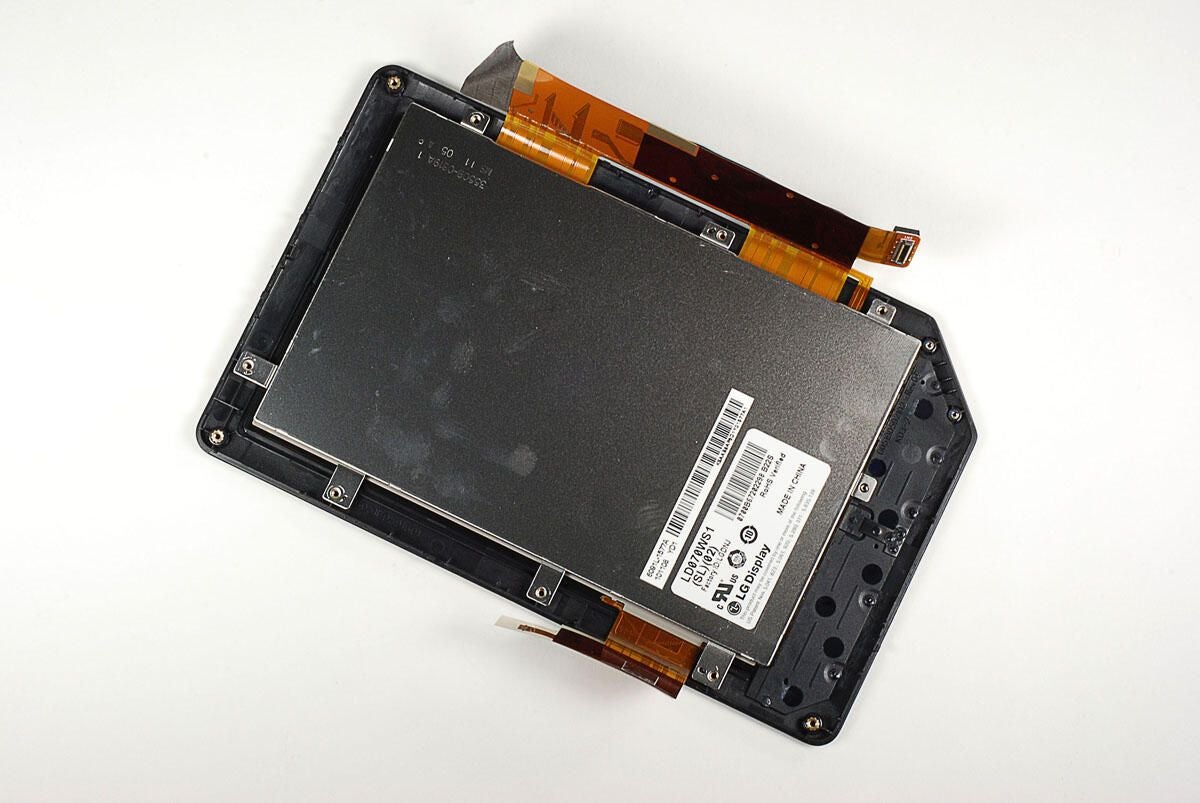
Flipping the display assembly over, we get our first look at the hardware the makes the Galaxy Tab run. As on the iPad, the Tab’s battery takes up much of the device’s internal space.
Photo by: Bill Detwiler / TechRepublic
Caption by: Bill Detwiler
The battery is held in place with a single Phillips screw.
Photo by: Bill Detwiler / TechRepublic
Caption by: Bill Detwiler
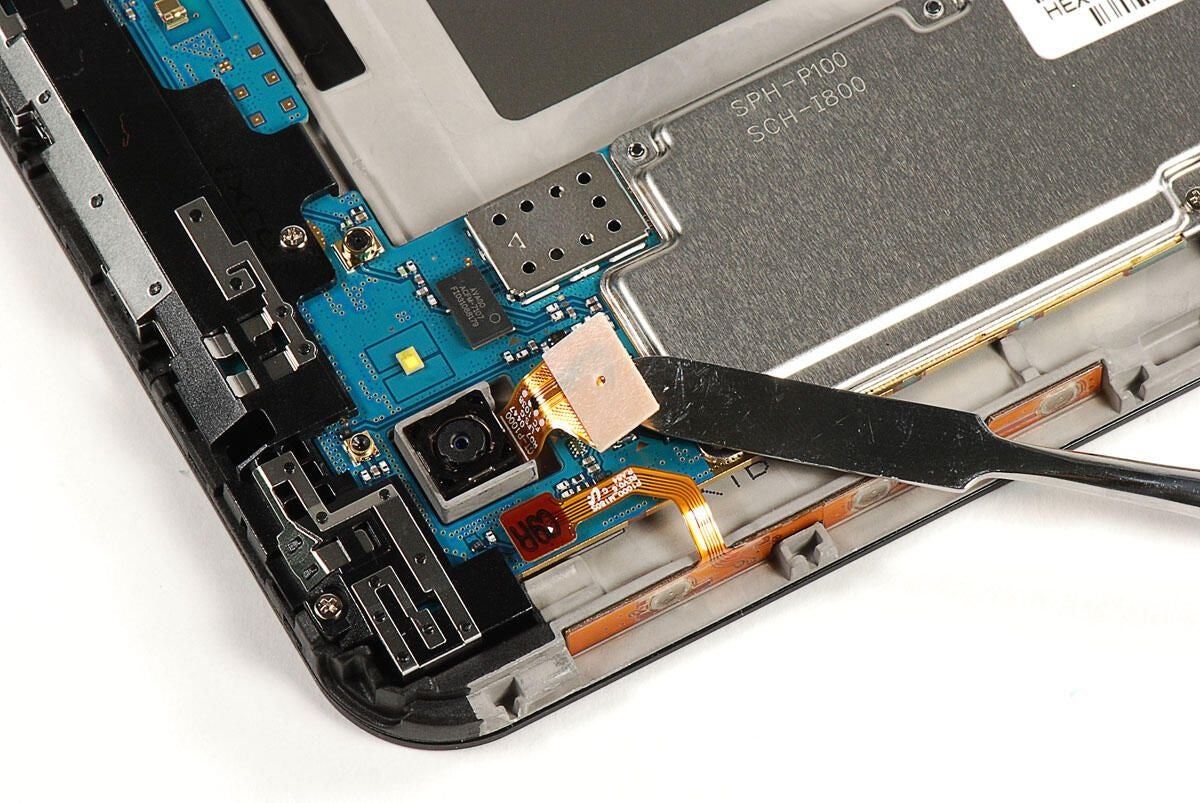
Next, we’ll turn our attention to the 3.2 MP rear-facing camera. To remove it, I popped loose its connector and gently lifted it away from the display assembly and frame.
Photo by: Bill Detwiler / TechRepublic
Caption by: Bill Detwiler
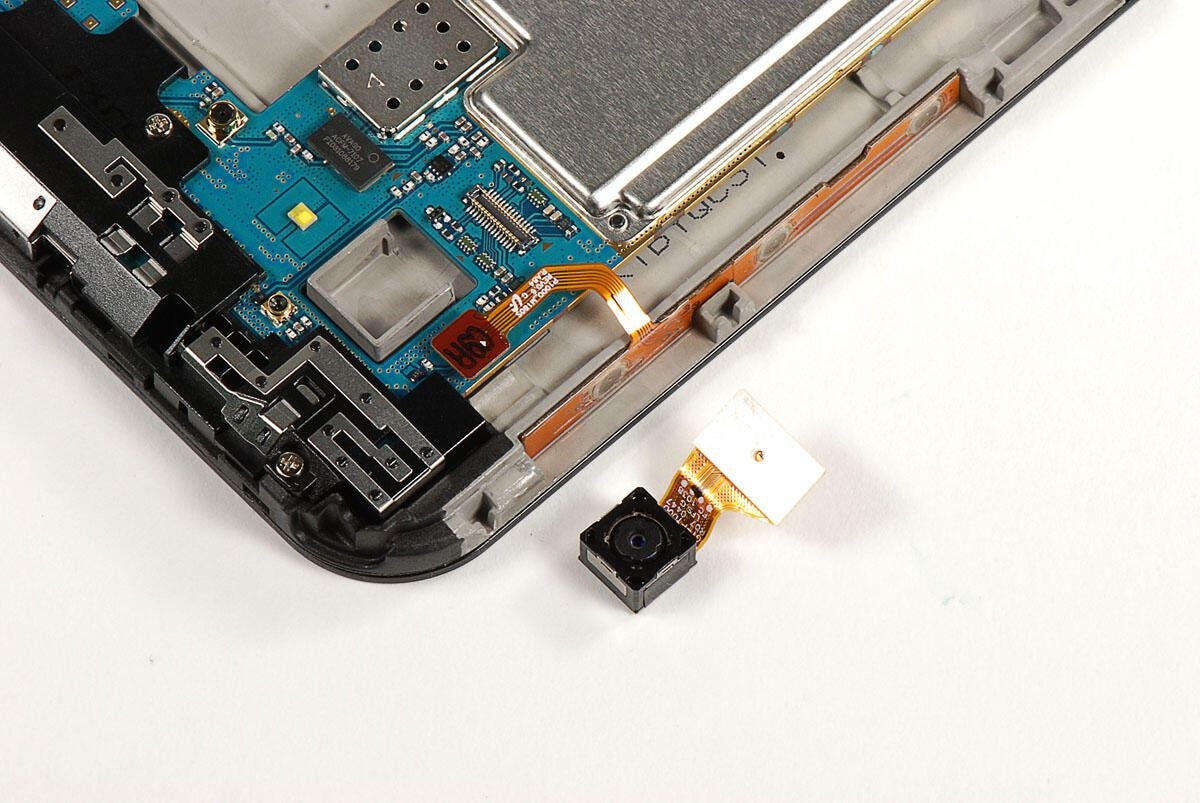
Photo by: Bill Detwiler / TechRepublic
Caption by: Bill Detwiler

Photo by: Bill Detwiler / TechRepublic
Caption by: Bill Detwiler
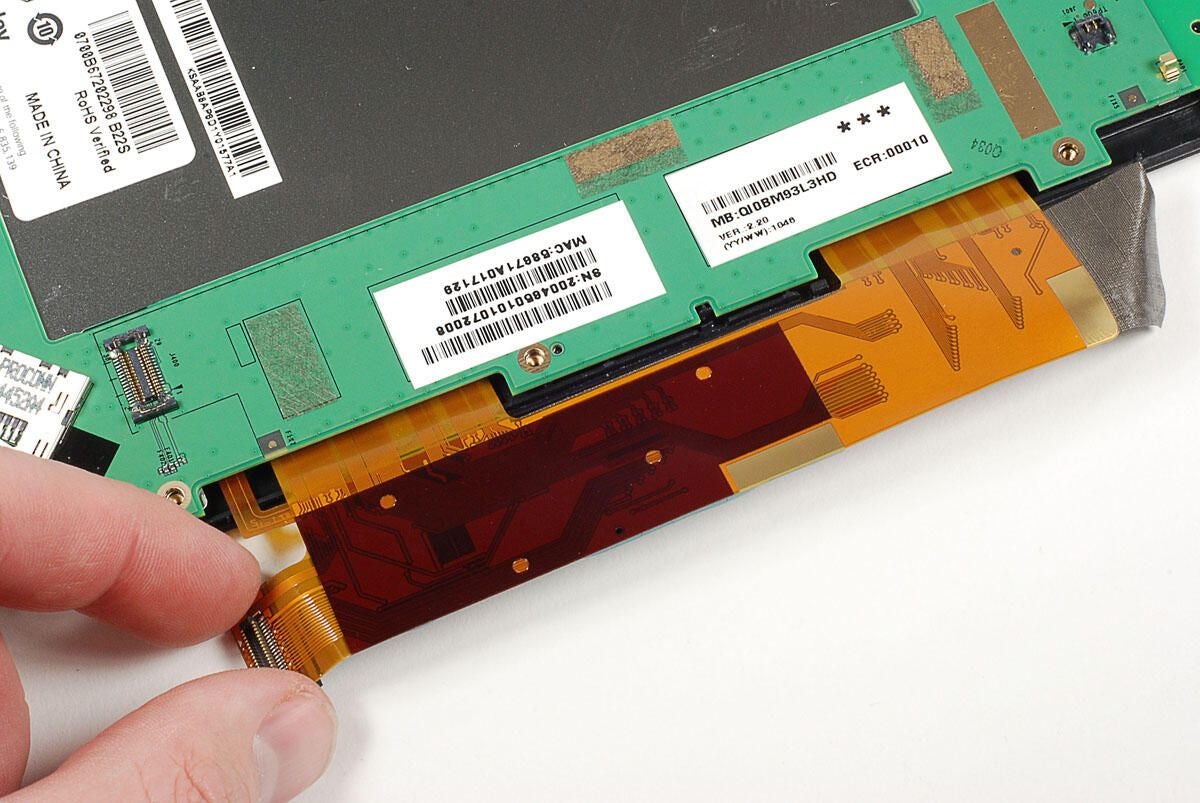
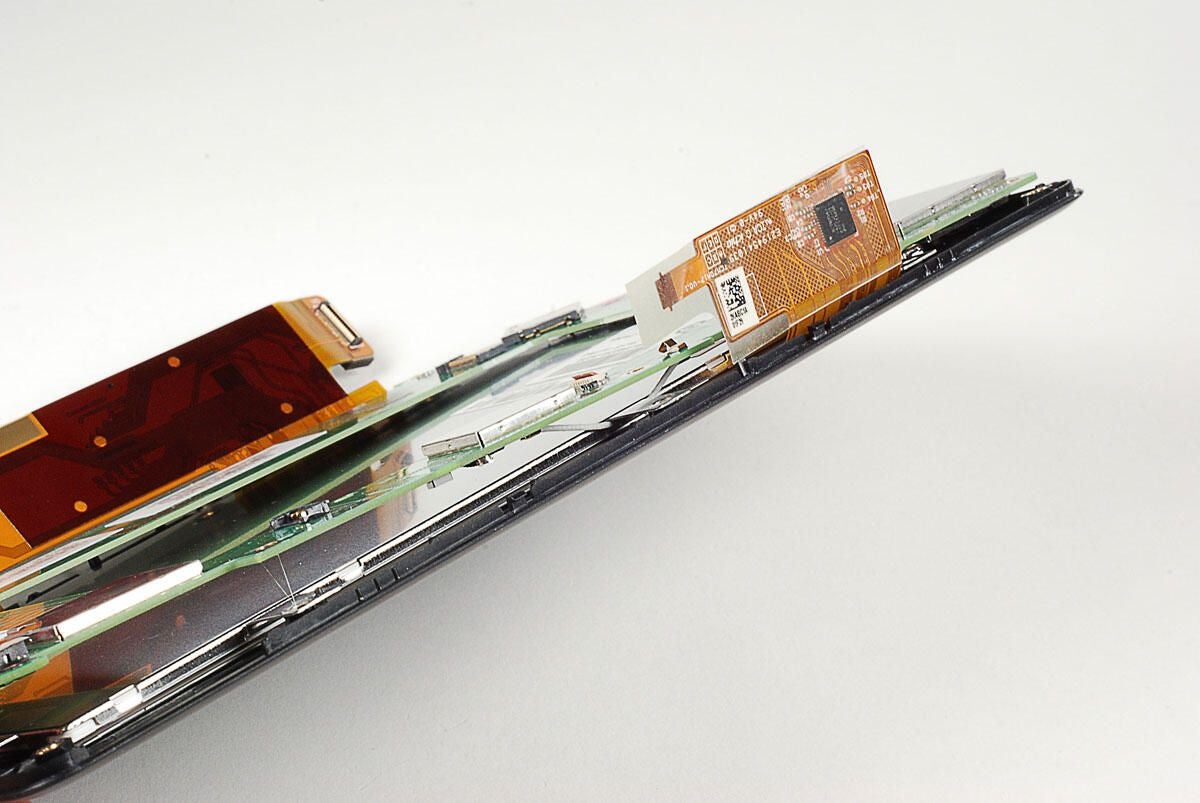
Before lifting the main PCB away from the display assembly and frame, we’ll need to disconnect five separate connectors.
Photo by: Bill Detwiler / TechRepublic
Caption by: Bill Detwiler
We’ll disconnect the headphone/microphone jack first.
Photo by: Bill Detwiler / TechRepublic
Caption by: Bill Detwiler
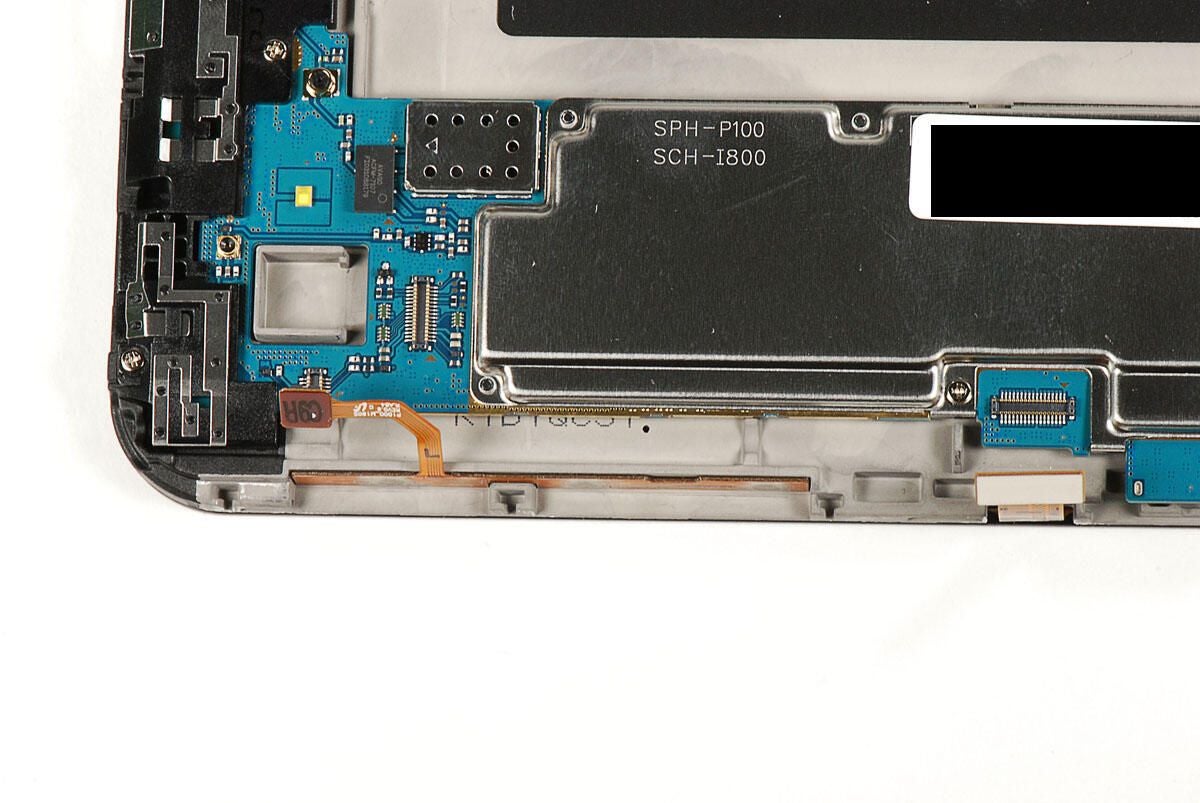
Next, we’ll remove the volume control connector (left) and touchscreen connector (right).
Photo by: Bill Detwiler / TechRepublic
Caption by: Bill Detwiler

Now detach the connector for the LED for the front control buttons.
Photo by: Bill Detwiler / TechRepublic
Caption by: Bill Detwiler
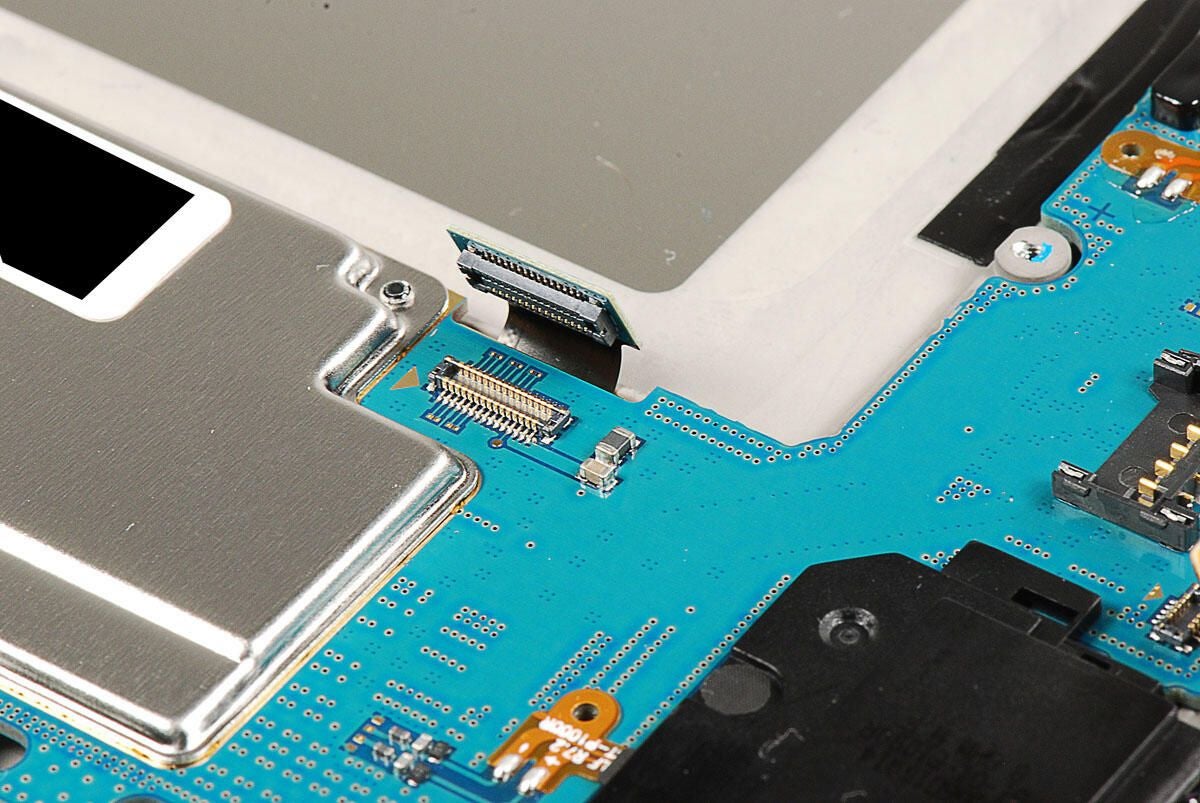
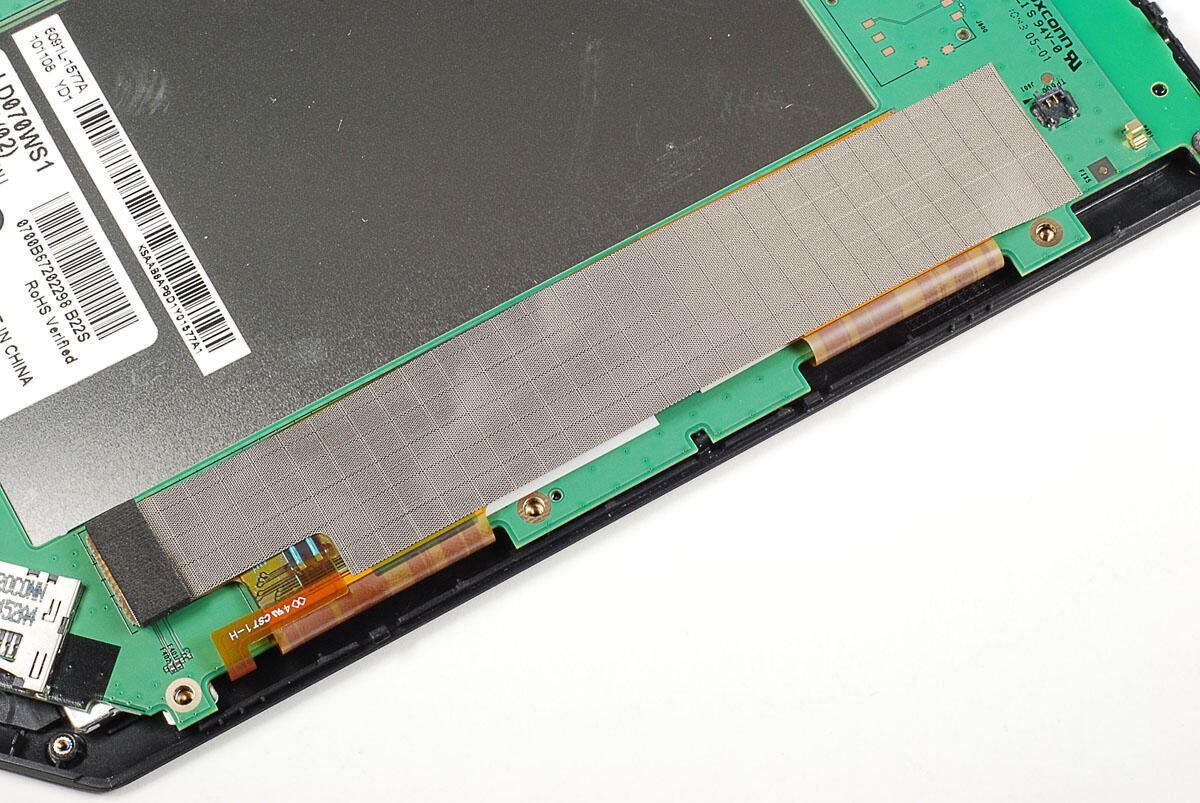
Lastly, detach the connector for the display screen.
Photo by: Bill Detwiler / TechRepublic
Caption by: Bill Detwiler
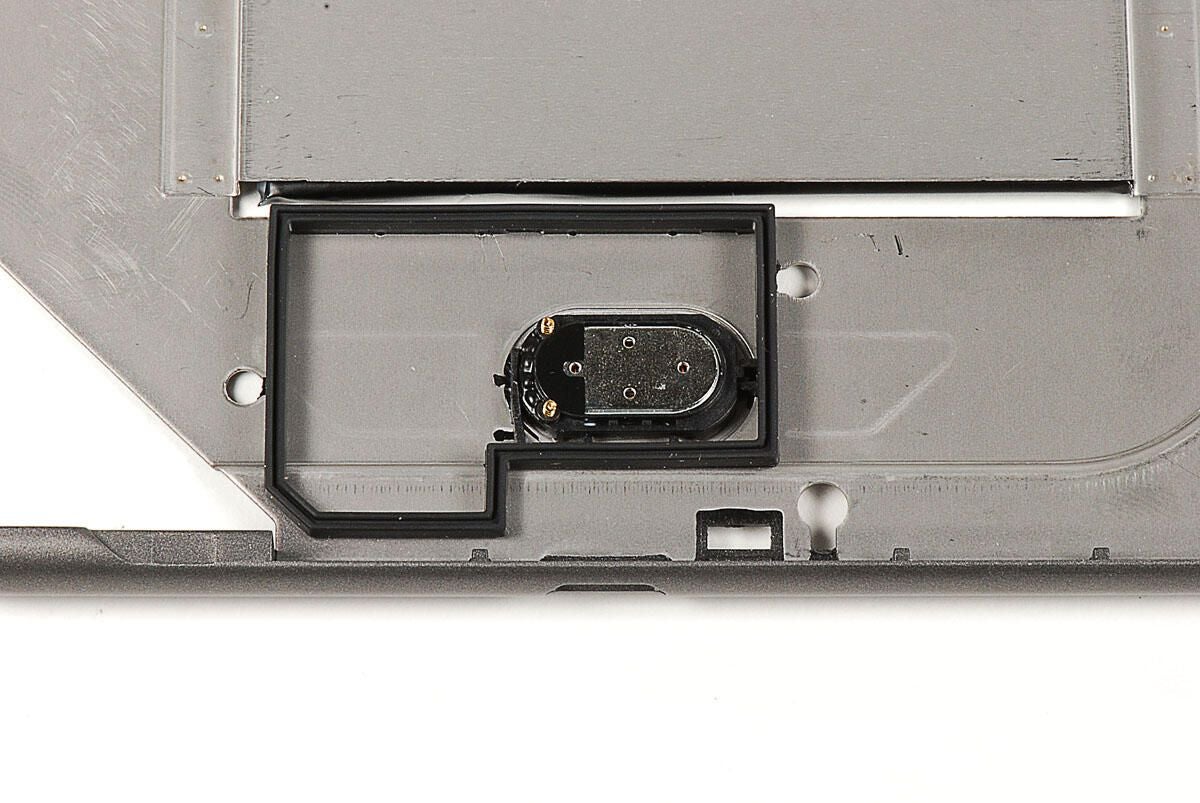
Photo by: Bill Detwiler / TechRepublic
Caption by: Bill Detwiler
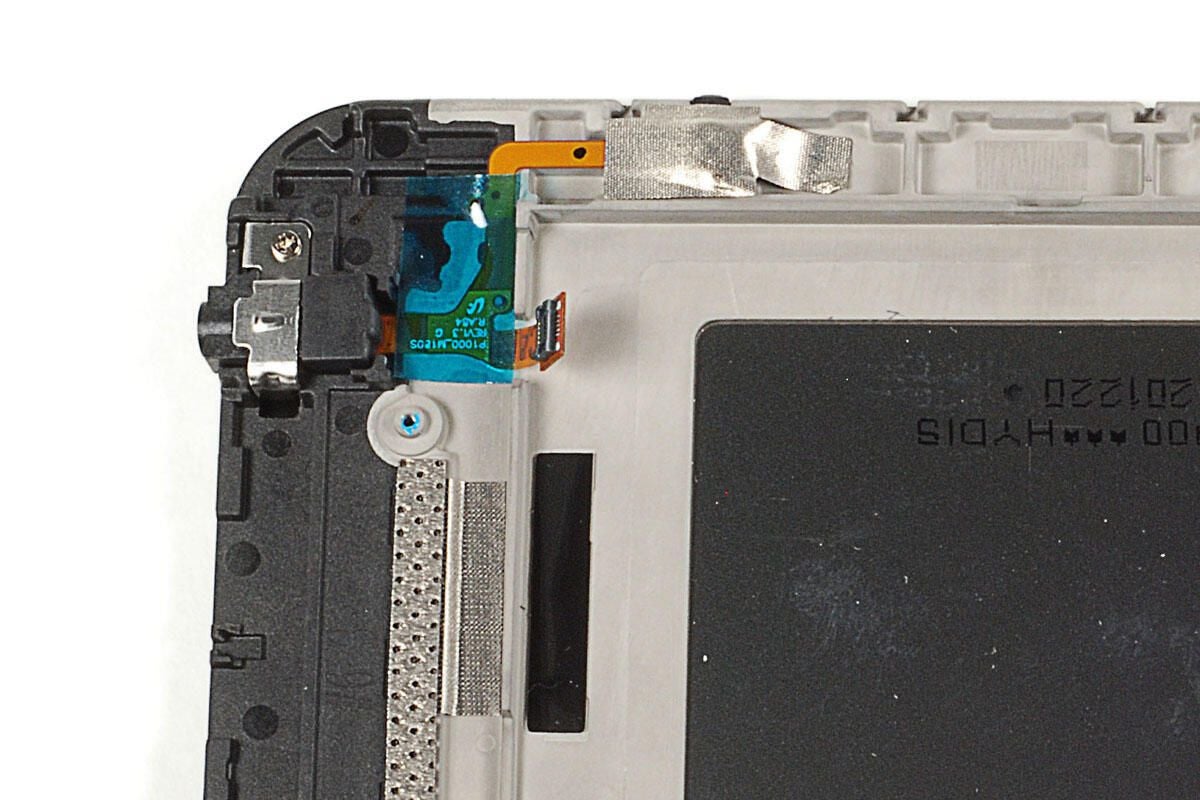
The headphone/microphone jack assembly is held in place with a single Phillips screws and two pieces of tape. The translucent blue/green tape was extremely sticky, and I feared removing it would damage the thin ribbon cable underneath. As I want this Galaxy Tab to go back together in perfect working order, I’m going to leave the jack in place.
Photo by: Bill Detwiler / TechRepublic
Caption by: Bill Detwiler
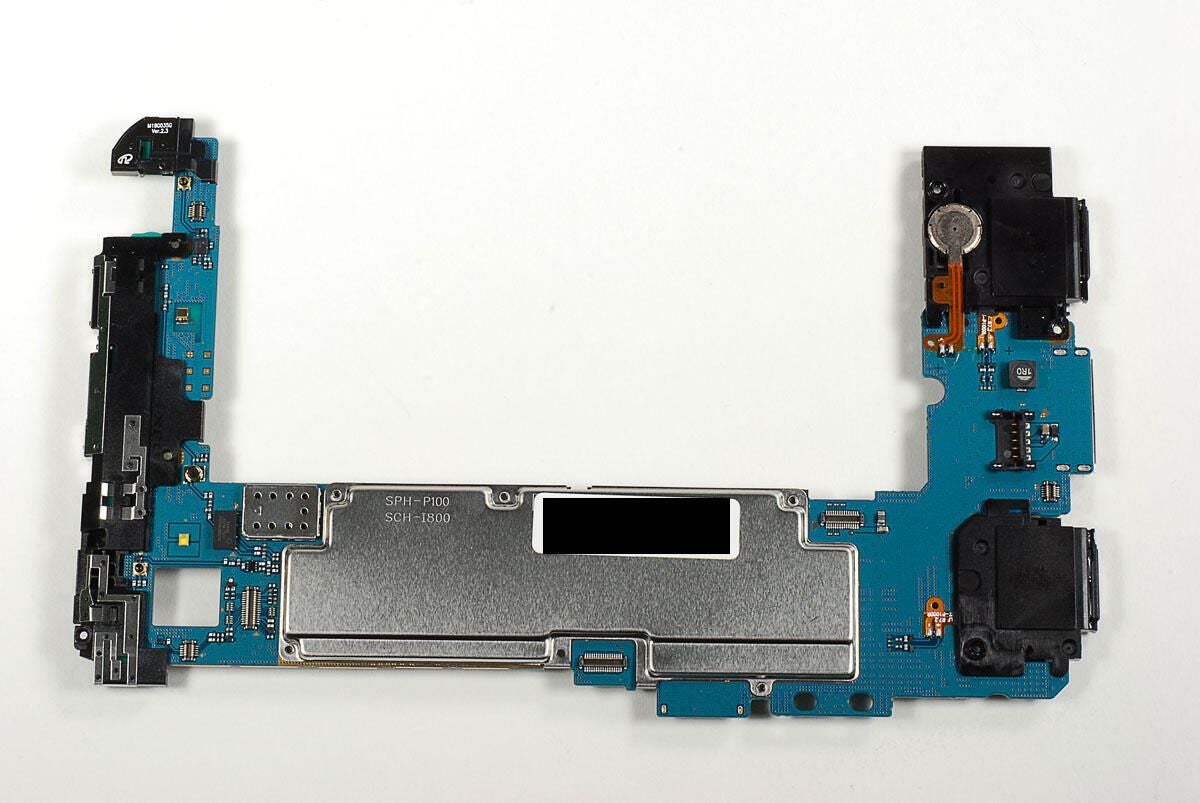
On the left side of the main PCB is the front-facing camera assembly. A large EMi shield covers most of the chips in the center. And along the right side, we find the two internal speakers, the power/accessory jack, and what appears to be the system battery.
Photo by: Bill Detwiler / TechRepublic
Caption by: Bill Detwiler
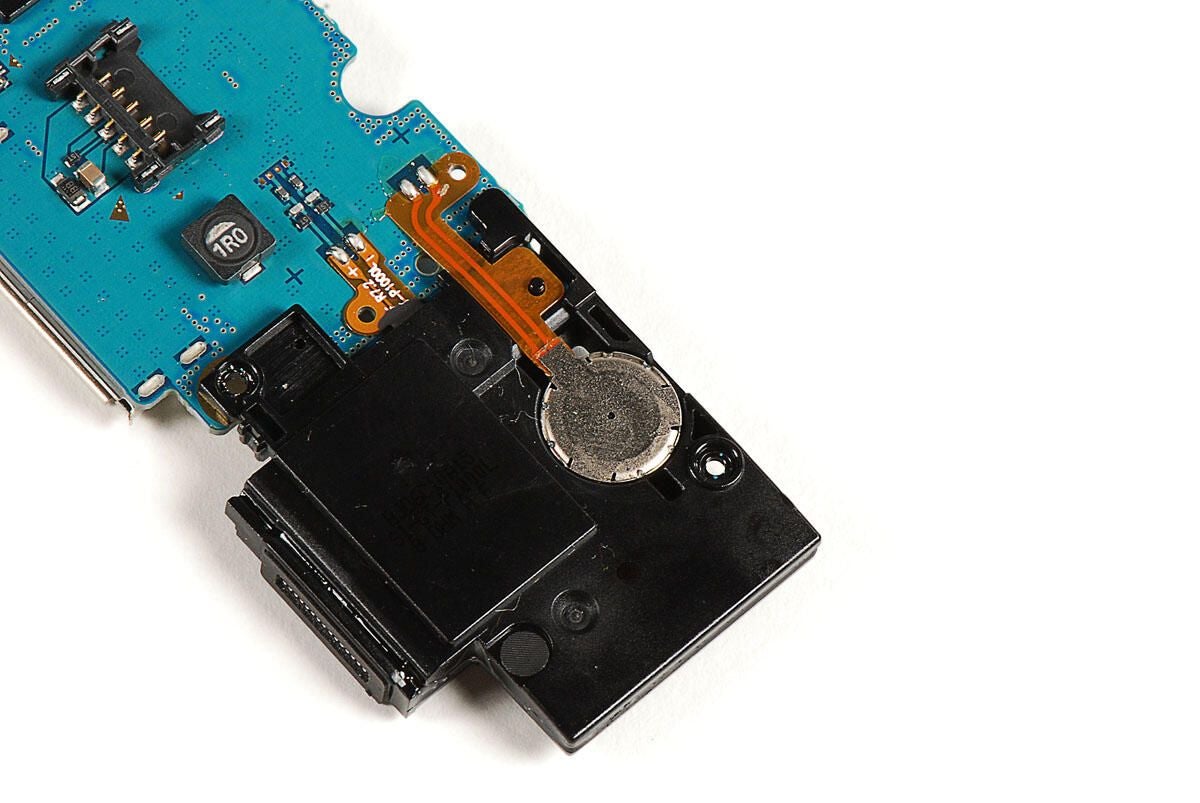
Photo by: Bill Detwiler / TechRepublic
Caption by: Bill Detwiler
Unlike any other mobile device I’ve dissected, the Galaxy Tab’s EMI shield is attached to the main PCB with five Phillips screws.
Photo by: Bill Detwiler / TechRepublic
Caption by: Bill Detwiler
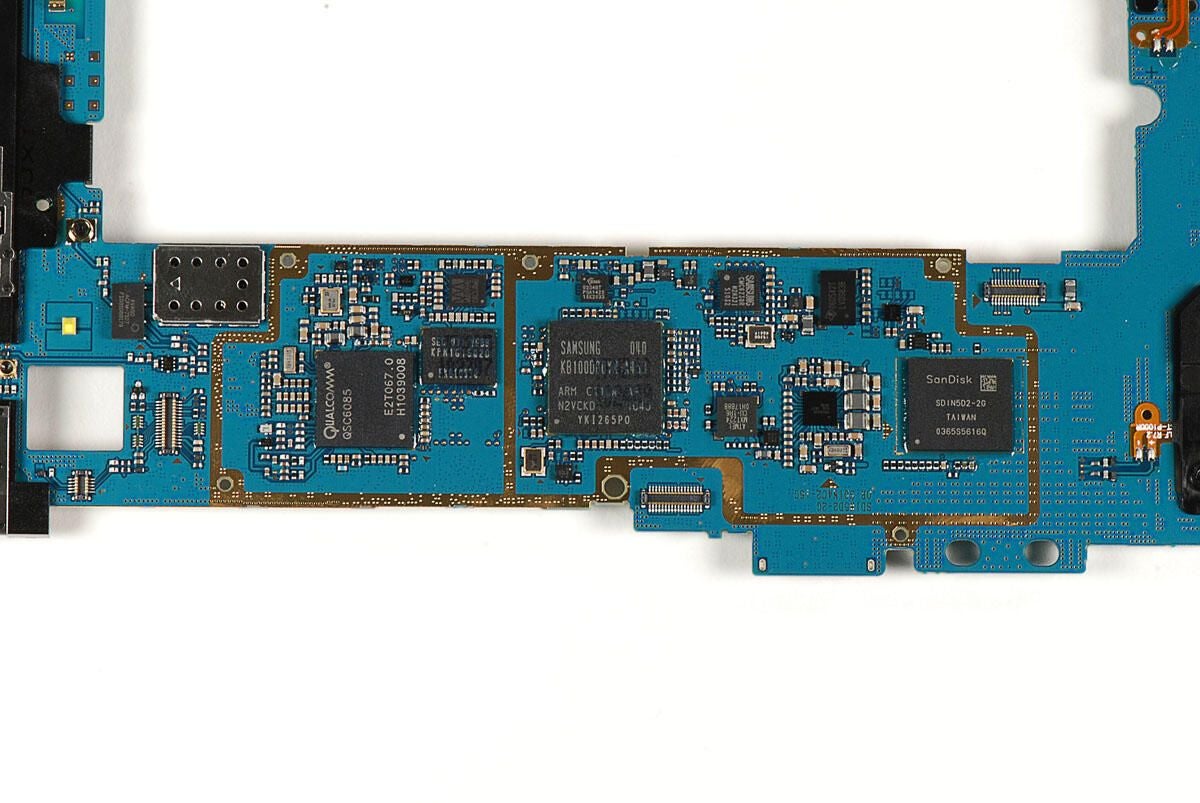
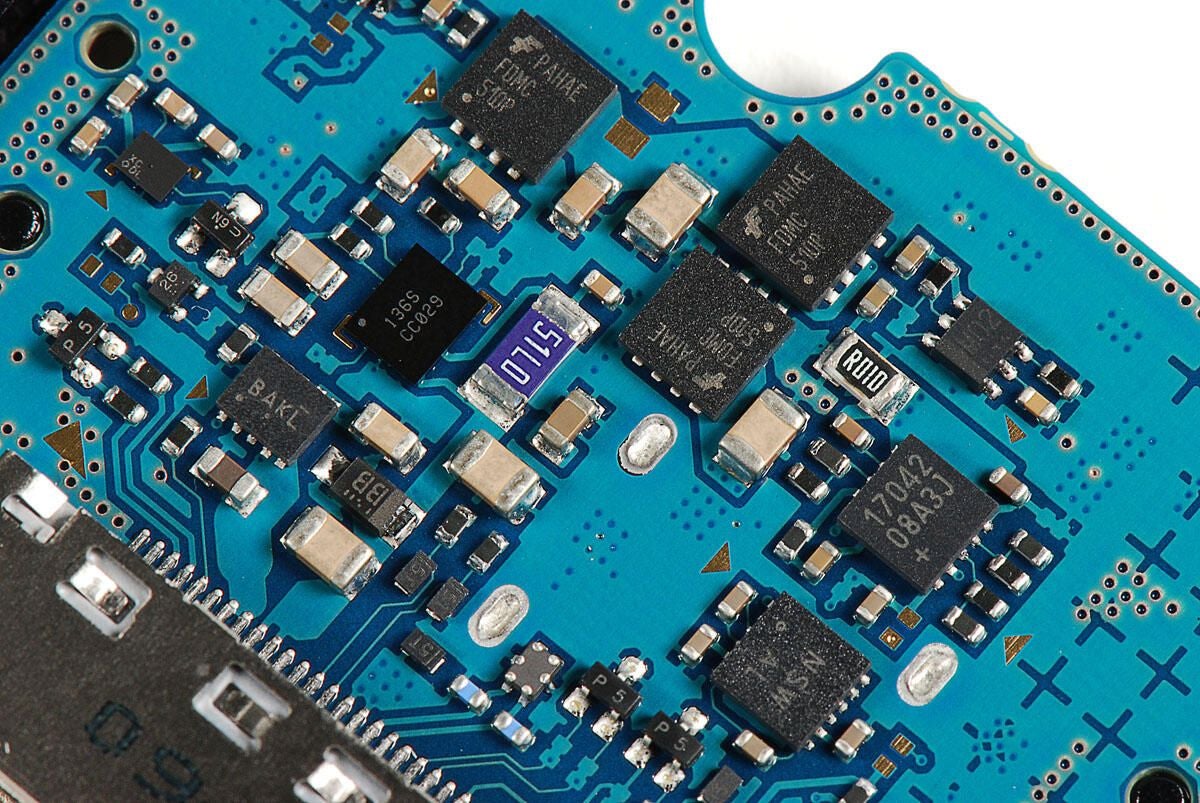
There’s quite a few chips located under the EMI shield. Let’s take a closer look at each of them.
Photo by: Bill Detwiler / TechRepublic
Caption by: Bill Detwiler
AVAGO ACFM-7107 PCS/Cellular Band Quadplexer
Photo by: Bill Detwiler / TechRepublic
Caption by: Bill Detwiler
2712 OXNGLB
Photo by: Bill Detwiler / TechRepublic
Caption by: Bill Detwiler
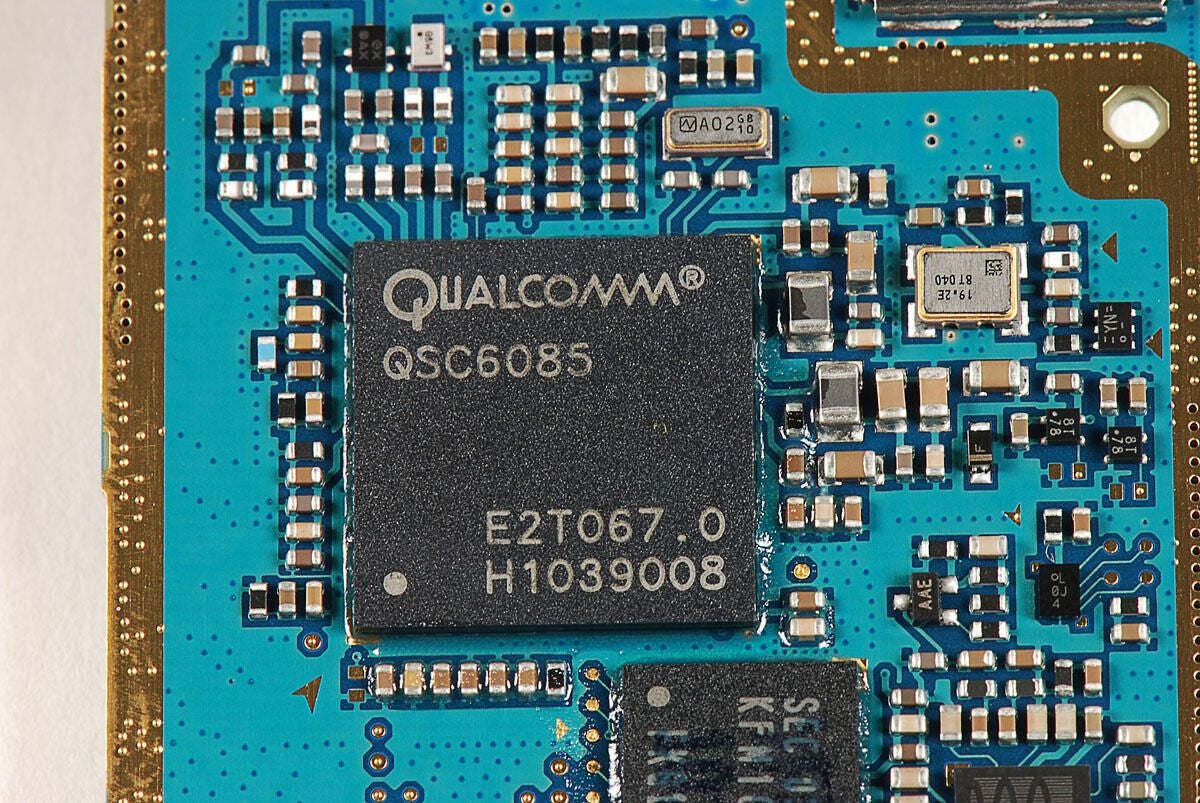
The Sprint version of the Galaxy Tab has a Qualcomm QSC6085 chip, which provides support for EV-DO Rev. A, EV-DO Rel. 0, and CDMA2000.
Photo by: Bill Detwiler / TechRepublic
Caption by: Bill Detwiler
Samsung KFM1G16Q2D OneNAND flash memory
Photo by: Bill Detwiler / TechRepublic
Caption by: Bill Detwiler
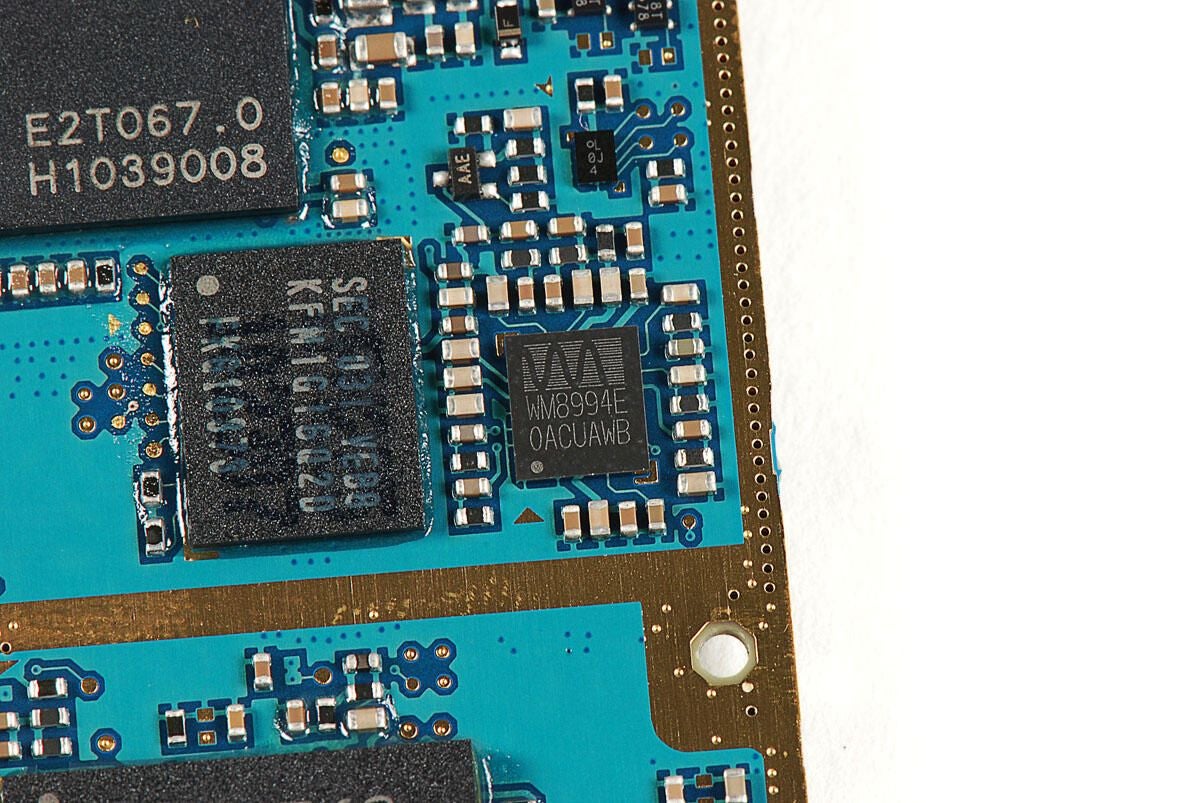
Wolfson Microelectronics WM8994E (Audio Codec)
Photo by: Bill Detwiler / TechRepublic
Caption by: Bill Detwiler
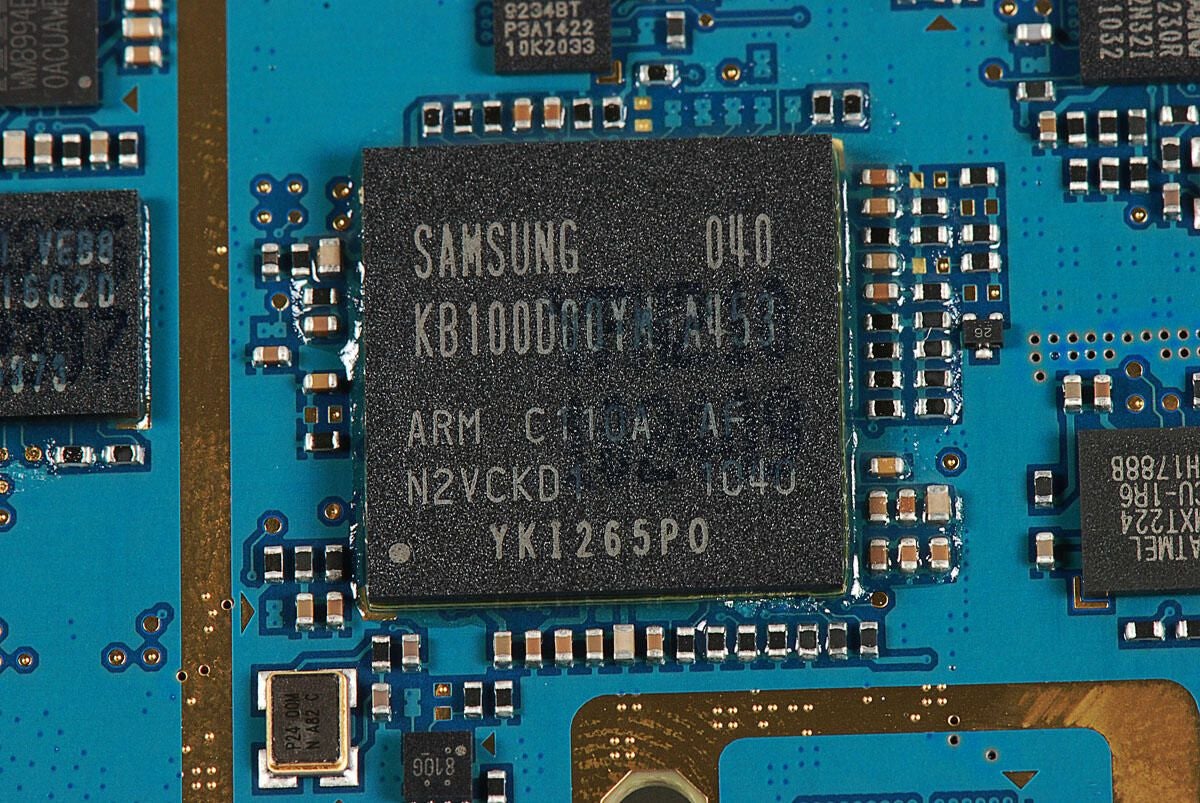
Samsung ARM Cortex 8 1.0 GHz CPU (KB100D0YM A453)
Photo by: Bill Detwiler / TechRepublic
Caption by: Bill Detwiler
SD4G 9234BT P3A1422 10K2033
Photo by: Bill Detwiler / TechRepublic
Caption by: Bill Detwiler
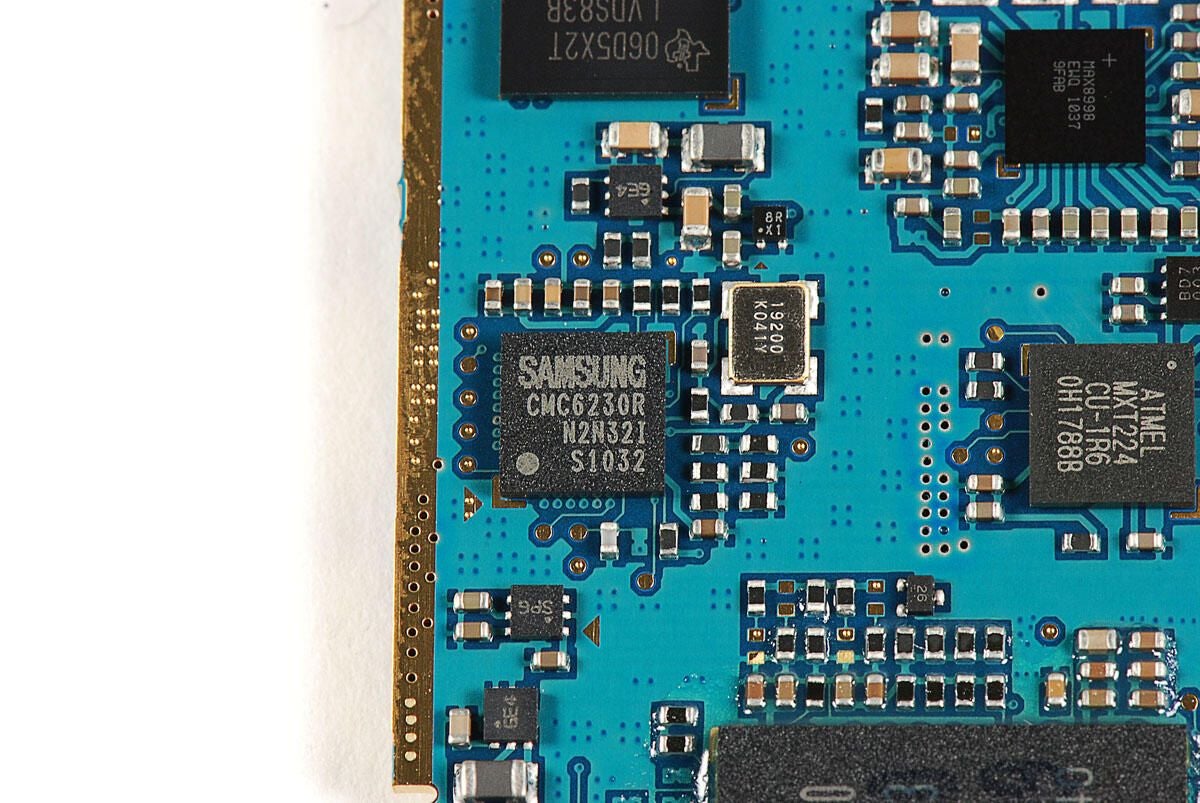
Samsung CMC6230R N2N321 S1032
Photo by: Bill Detwiler / TechRepublic
Caption by: Bill Detwiler
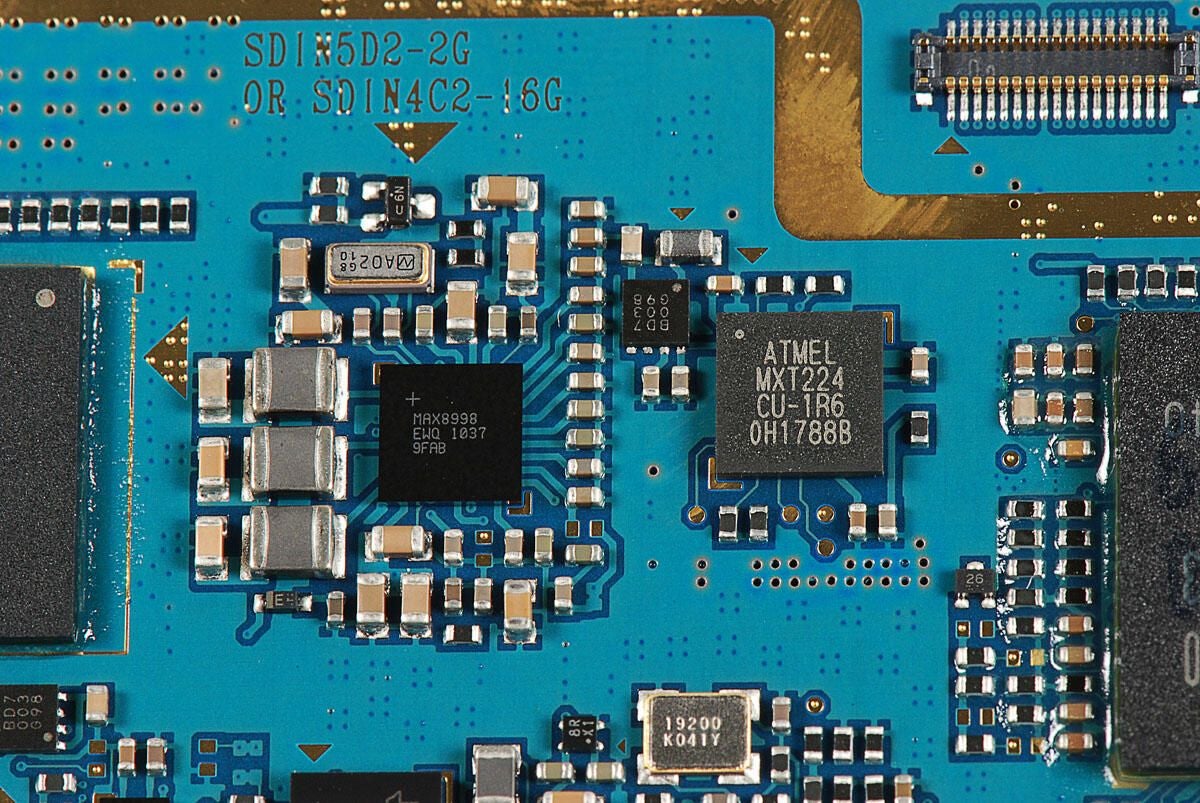
Atmel MXT224 touchscreen controller (right) and Atmel MXT224 touchscreen controller and MAX8998 EWQ 1037 9FAB (left)
Photo by: Bill Detwiler / TechRepublic
Caption by: Bill Detwiler
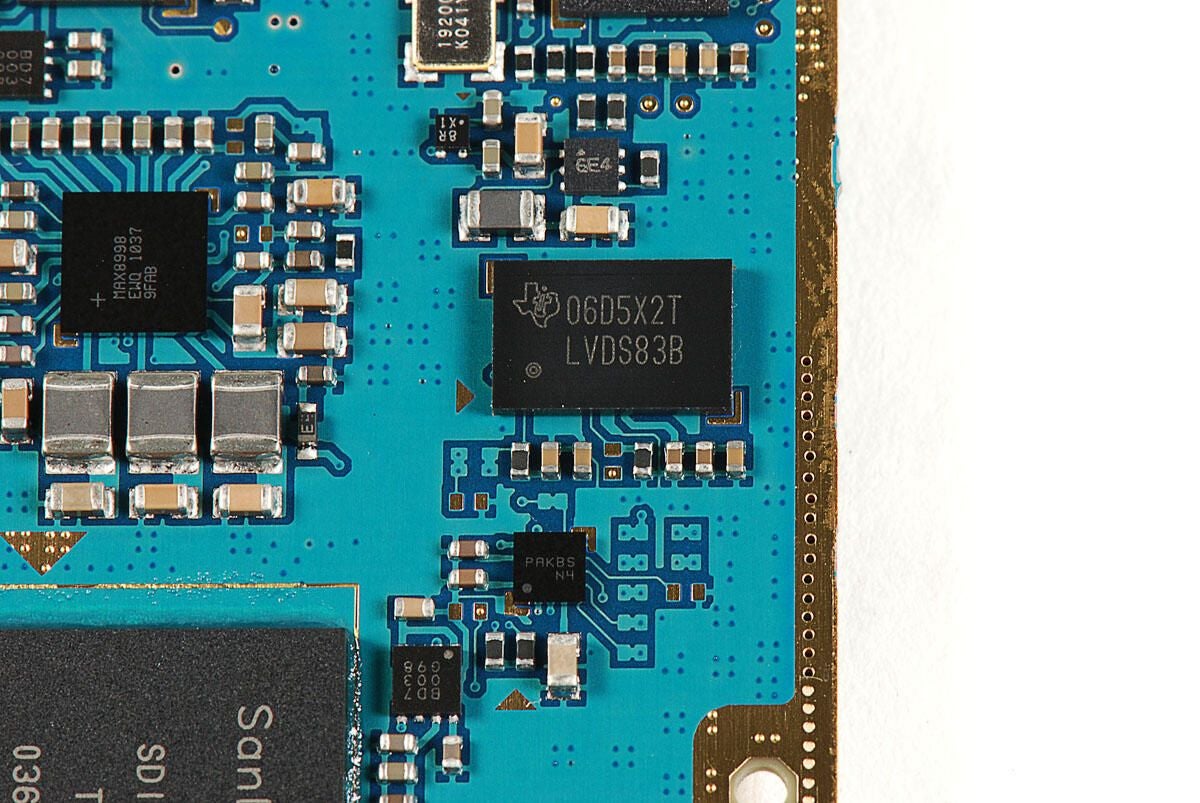
Texas Instruments 06D5X2T LVDS838
Photo by: Bill Detwiler / TechRepublic
Caption by: Bill Detwiler
SanDisk SDIN5D2-2G NAND Flash
Photo by: Bill Detwiler / TechRepublic
Caption by: Bill Detwiler
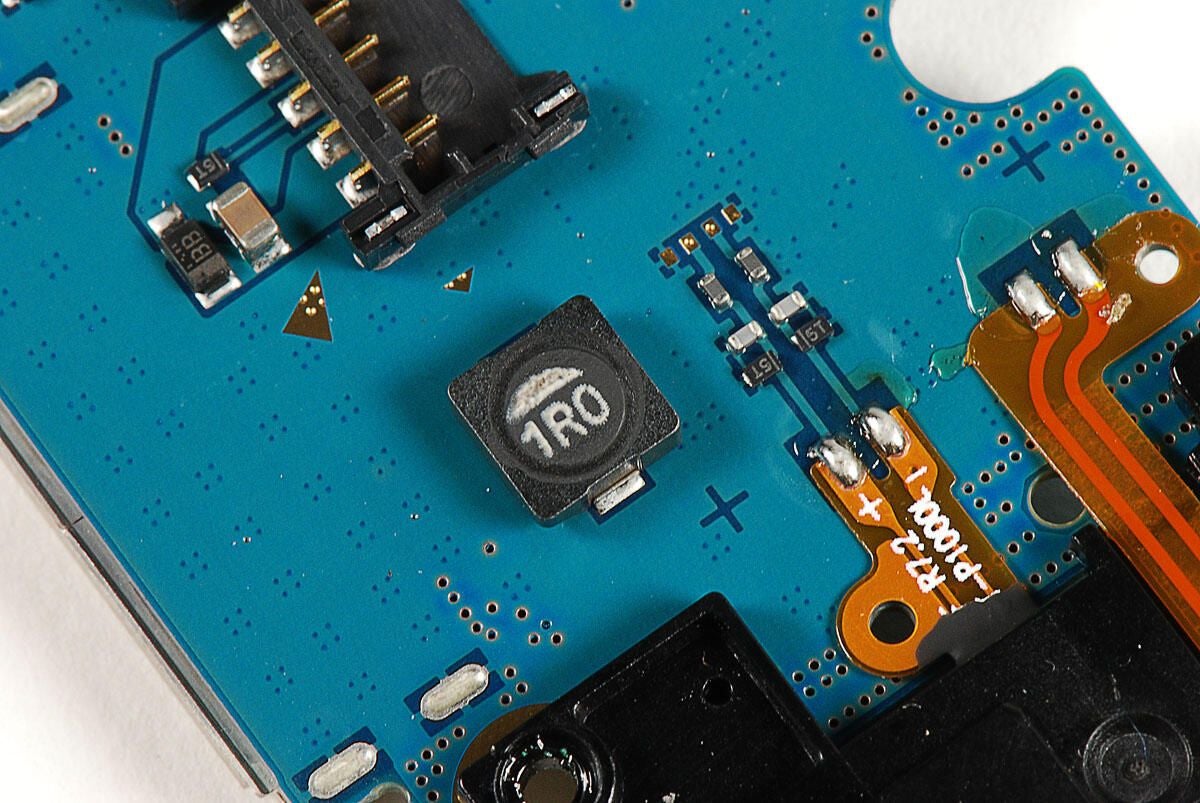
1R0 Resistor
Photo by: Bill Detwiler / TechRepublic
Caption by: Bill Detwiler
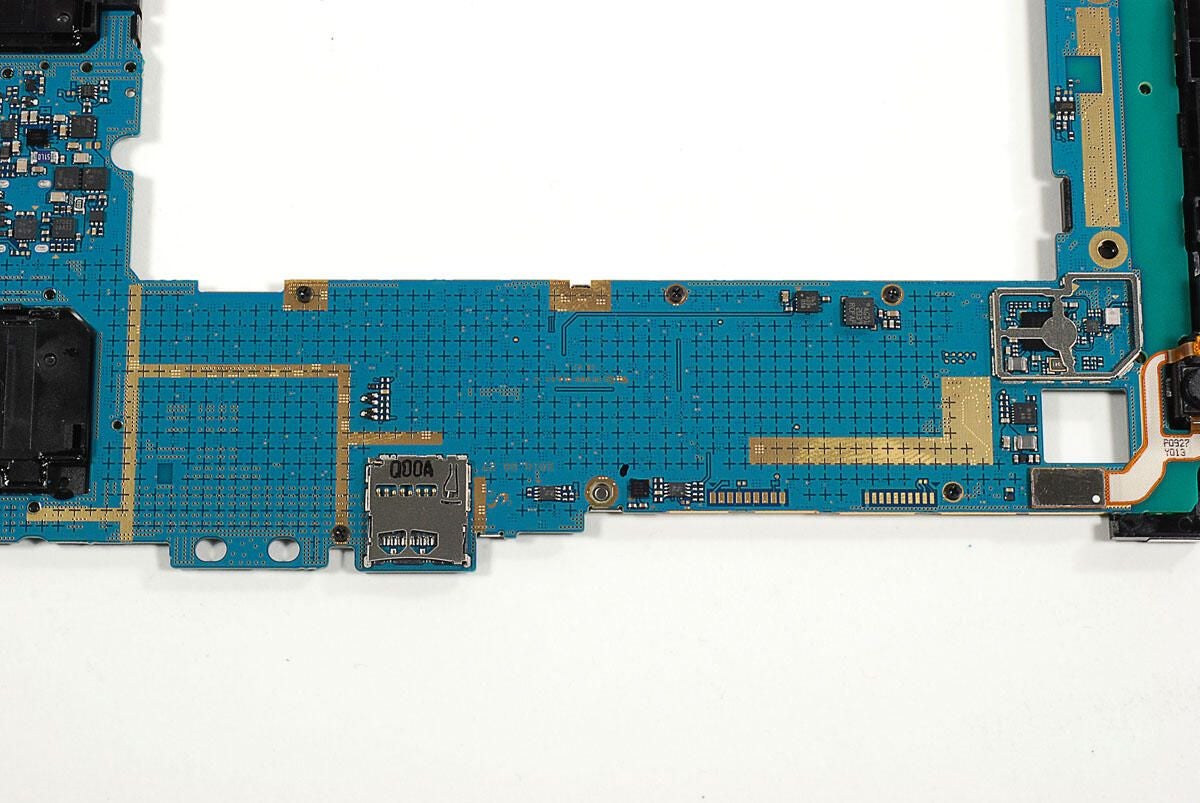
Collection of chips on the back of the main PCB
Photo by: Bill Detwiler / TechRepublic
Caption by: Bill Detwiler
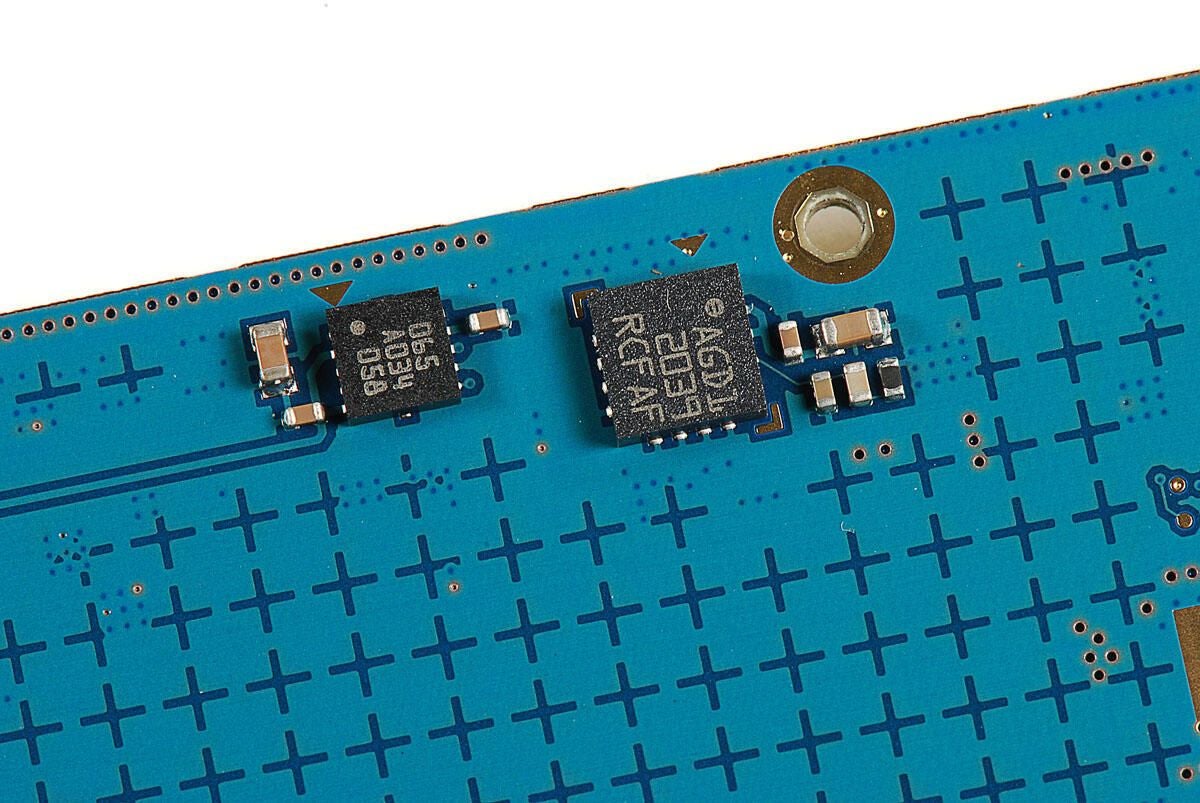
AGD1 2039 RCF AF
Photo by: Bill Detwiler / TechRepublic
Caption by: Bill Detwiler
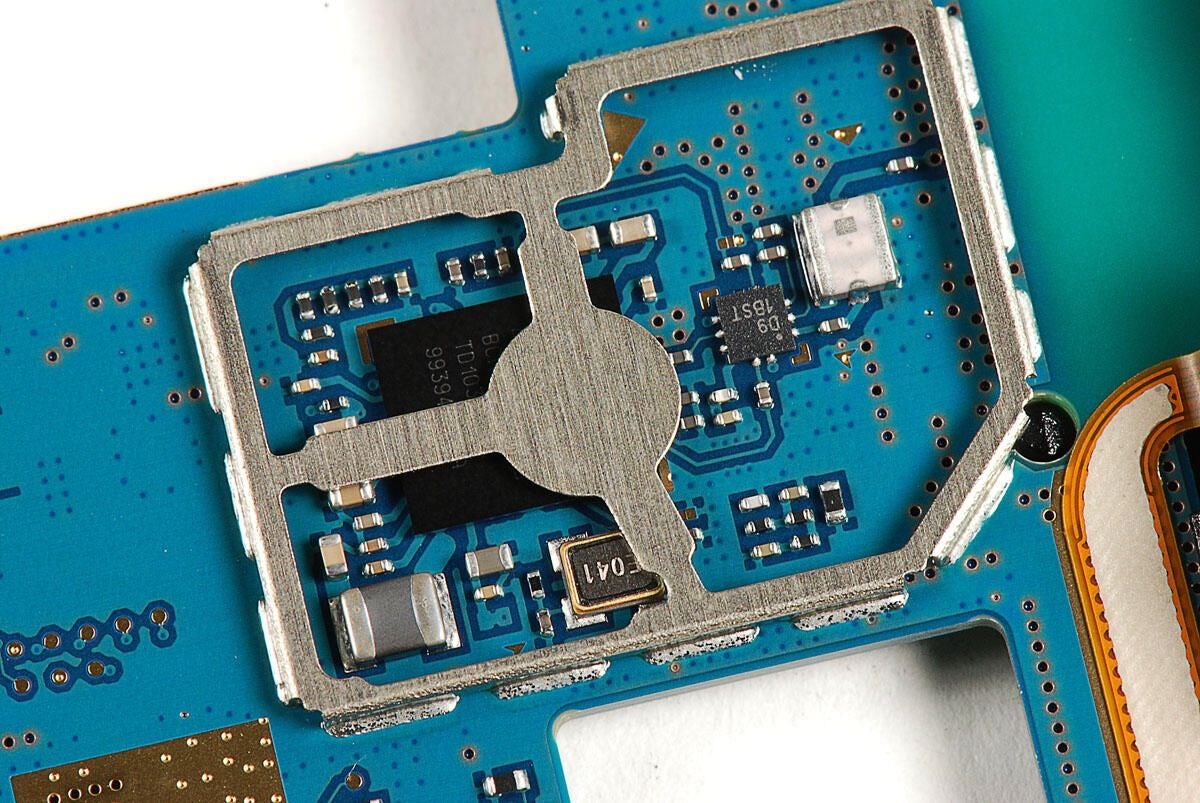
Broadcom BCM4329 (Bluetooth/FM/WLAN)
Photo by: Bill Detwiler / TechRepublic
Caption by: Bill Detwiler
Bill Detwiler is the Editor for Technical Content and Ecosystem at Celonis. He is the former Editor in Chief of TechRepublic and previous host of TechRepublic's Dynamic Developer podcast and Cracking Open, CNET and TechRepublic's popular online show. Previously, Bill was an IT manager in the social research and energy industries. He has bachelor's and master's degrees from the University of Louisville, where he has also lectured on computer crime and crime prevention.
