\n\tFile History is a new feature in Windows 8 that works like a combination of Previous Versions and Windows Backup and Restore. File History continuously monitors files stored in Libraries, Desktop, Favorites, and Contacts folders and when it detects changes in any file it then makes a backup copy to another location – such as an external hard disk or a network drive.
\n
\n\tIn this edition of the Windows Desktop Report, I’ll show you how File History works.
\n
\n\tThis Slideshow is also available as a TechRepublic Windows and Office Blog post.
\n
\n
\n
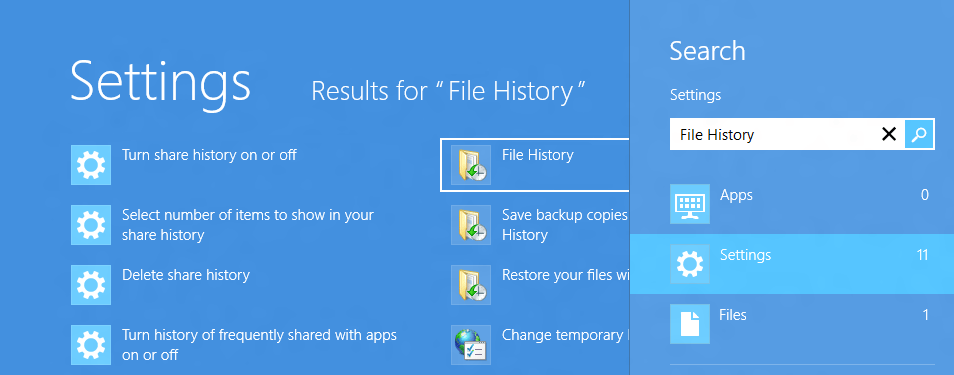
\n\tLaunching File History in Windows 8 is easy. Just press the [Windows] key, type File History while on the Start Screen, select Settings, and click File History, as illustrated.
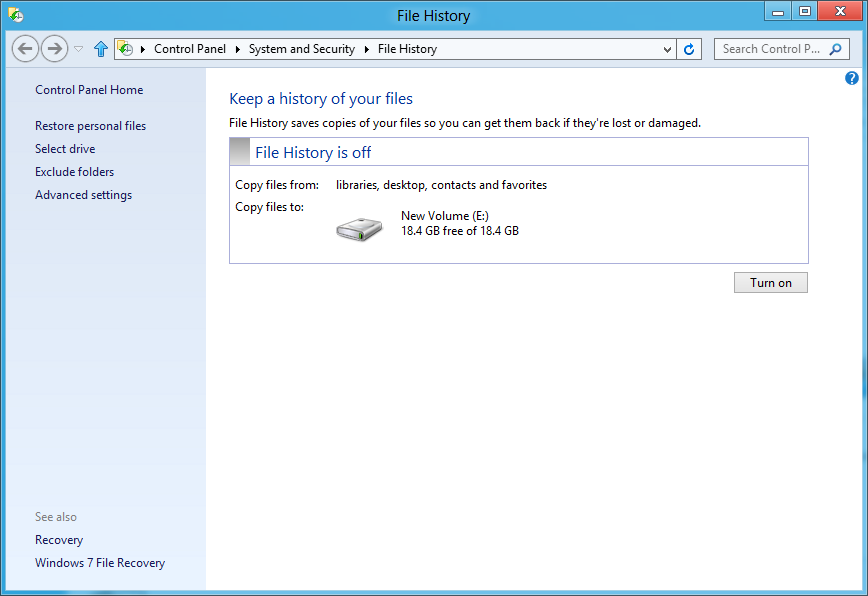
\n\tOnce you connect an external drive to the Windows 8 system, File History recognizes the drive as a potential storage location. However, File History doesn’t automatically turn on.
\n\tTo begin using File History, click the Turn on button. As soon as you do, File History begins making copies of all the files your Libraries (Documents, Music, Pictures, and Videos), as well as files in Contacts, Favorites, and on your Desktop. It will not allow you to select folders in other locations – if you have other files that you want File History to keep track of, you can add them to one of your existing libraries or create a new library.
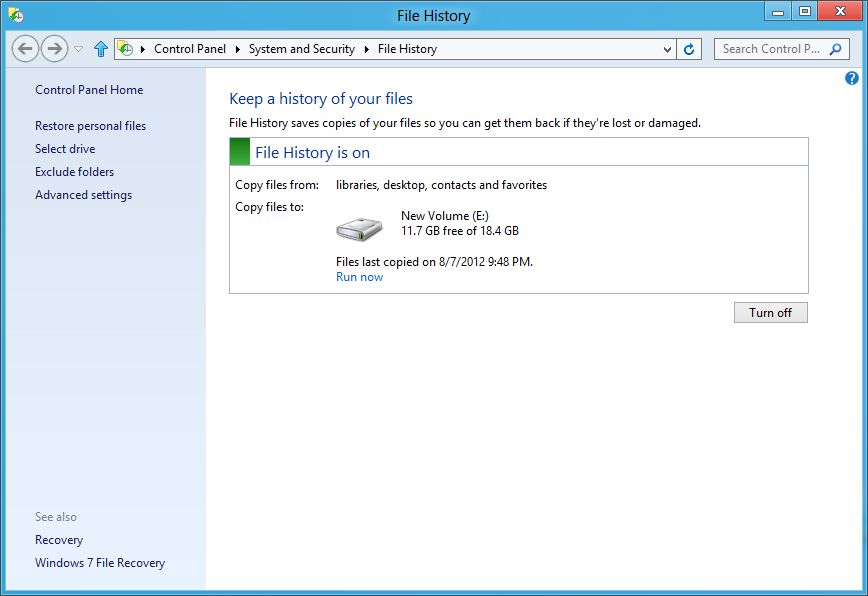
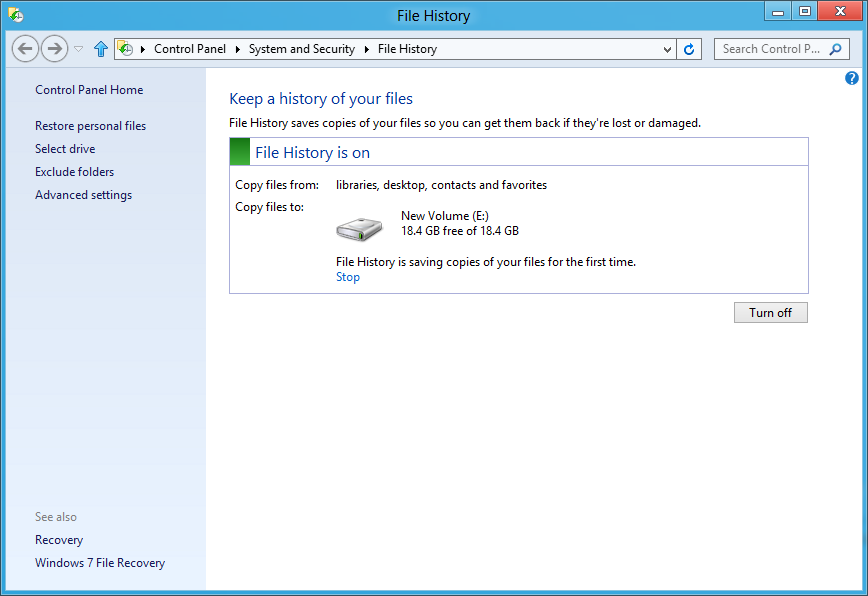
\n\tAs soon as File History is done backing up your files, it displays a date and time stamp, so you’ll know how current the backup is. You’ll also see how much disk space is still available.
\n
\n\tOnce you have File History up and running it is ready to begin protecting your data. By default, every hour File History will go to work and create backup copies of any file that has changed since the last backup. File History takes advantage of a feature of the NTFS file system, called the Change Journal.
\n
\n\tEssentially, when any change is made to a file or folder on your hard disk, the change journal is updated with a description of the change and the name of the file or folder. So, in order to determine which files need to be backed up, File History simply consults the NTFS change journal, discovers which files or folders have changed, and backs them up. Using the change journal is fast and efficient and won’t suck up tons of system resources like running a conventional backup routine does.
\n
\n\tFile History has some other cool features up its sleeve as well. If the device configured as the backup location becomes unavailable, such as when a USB cable is disconnected or network goes down for maintenance, File History will continue to do its job by saving the copies to a cache on the local drive. Once the backup location becomes available again, the cached contents are transferred to the backup location and removed from the local drive.
\n
\n\tIn addition, File History is sensitive to resource utilization. In other words, if File History is running and some other task needs the same system resources, File History will automatically back off and go into an idle state as it waits for the other task to finish before it resumes.
\n
\n\tFile History is also aware of activity related to mobile computing such as running on AC or battery power or when the system goes into Sleep mode and will adjust accordingly so as not to interfere with power saving features.
\n
\n
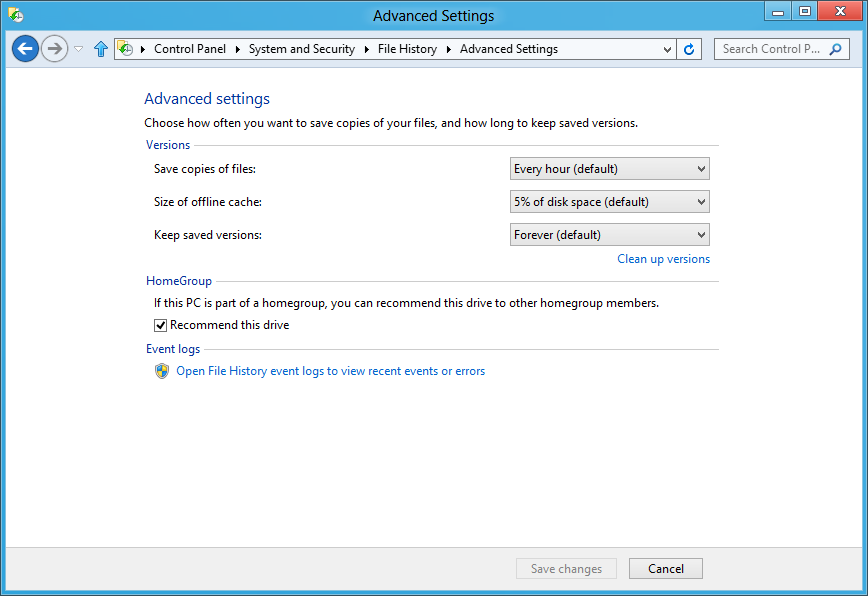
\n\tAs I mentioned, File History will scan through the change journal every hour and back up changed files. However, you can change that frequency as well as adjust other settings. Select the Advanced setting in the Task pane on the left side of the main window. In the Advanced Settings window, you can use the drop down menus to change the various settings.
\n
\n\tYou can change the frequency that File History will check for changes and make backups from 10 minutes to 24 hours. You can change the size of the offline cache from 5% to 20% of disk space and you can change the length of time that File History will keep saved versions of changed files from one month to forever or until space is needed.

\n\tYou’ll also notice that if the Windows 8 system is connected to a Homegroup, the external drive can be shared over the network to other Windows 8 systems for use with File History. If File History encounters any problems, it will create records in the File History event logs, which as you can see are easily accessible from the Advanced Settings window
\n
\n\tIf you return to the main window and select Exclude folders, you can choose certain folders that you don’t want File History to monitor. If you want to select a different backup device, you can choose Select drive and choose another external drive or a network location. Both these options are shown.
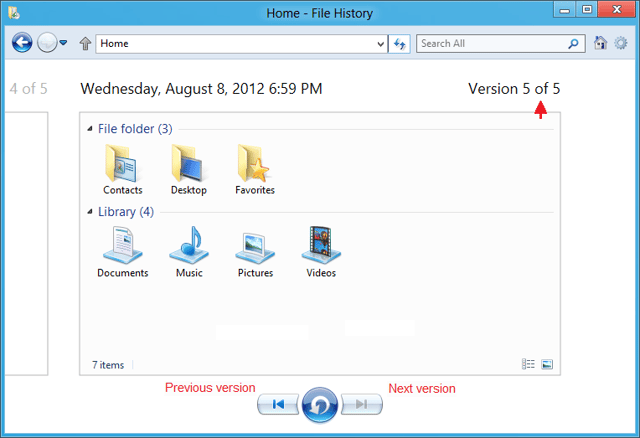
\n\tFor the sake of showing a detailed example, let’s suppose that you launch the restore operation from the File History window with the goal of restoring a single file. When you do, you’ll see a window like the one shown. Here you’ll see all of the folders in the backup and can drill down to any folder containing the file or files that you want to restore.

My first computer was a Kaypro 16 \"luggable\" running MS-DOS 2.11 which I obtained while studying computer science in 1986. After two years, I discovered that I had a knack for writing documentation and shifted my focus over to technical writing.


