In a previous blog post, I described how to use the Microsoft Windows 7 Disk Management tool to shrink an existing hard drive volume: Quick Tip: Shrink a hard drive volume in Windows 7. Once you have shrunk a volume you can then establish a new partition on the newly empty space and create a new logical hard drive for your Windows operating system. Here are the steps to make that happen.
Disk Management
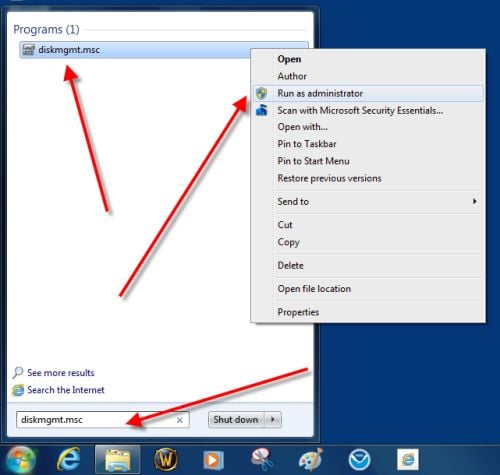
As in the previous post, the first step is to start the Windows 7 Disk Management tool with elevated administrative rights. Click the Start Menu Button and type diskmgmt.msc into the search box and then right-click the diskmgmt.msc entry to get to the Run as administrator item in the context menu as shown.
This gallery is also available as a TechRepublic blog post and download. Image created by Mark Kaelin for TechRepublic.
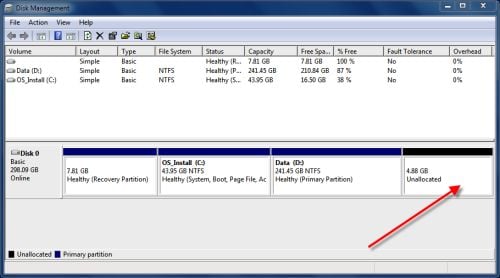
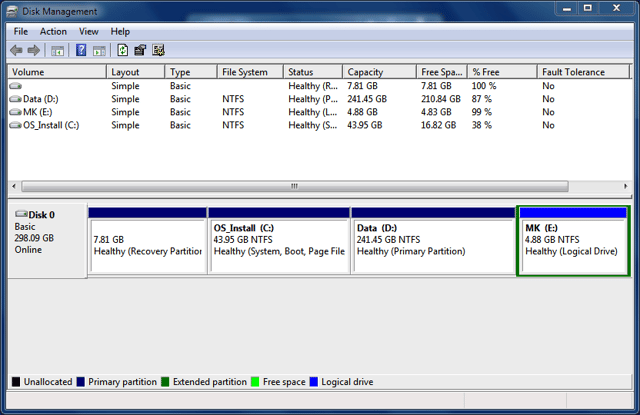
Clicking Run as administrator will load the Disk Management Tool, which will look something like this screenshot. As you can see we have some empty space to work with after shrinking the volume previously.
This gallery is also available as a TechRepublic blog post and download. Image created by Mark Kaelin for TechRepublic.
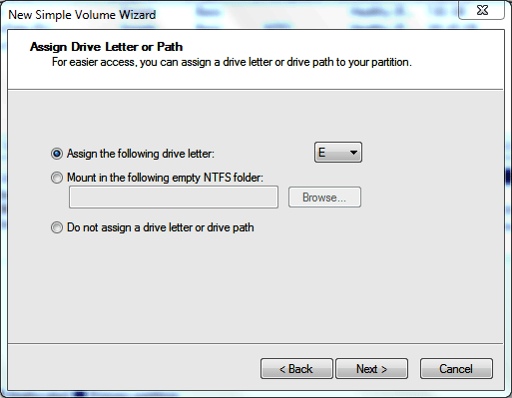
On the next screen in the wizard you are asked to assign a drive letter or path to the new volume. You have three choices:
We’ll just stick with the default and make a new drive E.
This gallery is also available as a TechRepublic blog post and download. Image created by Mark Kaelin for TechRepublic.
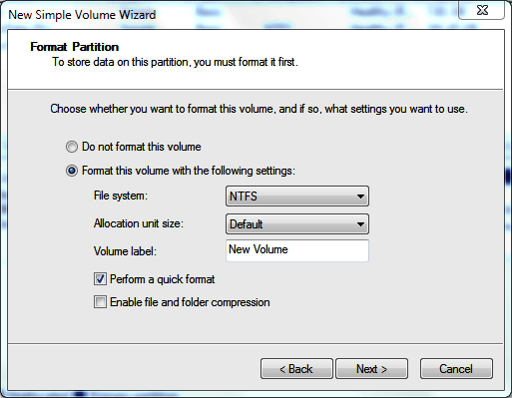
The screen in the wizard deals with formatting our new drive. In general, you should choose to format this drive under the NTFS file system; however, you can also choose to use FAT32. The other default setting should be used unless you know have a specific reason to change the allocation size.
You should give your new drive a label to help you distinguish the new drive from other drives on your system and a quick format will take less time but it will not find and mark bad sectors on your drive which could cause problems later.
NTFS drives have built-in compression systems that are essentially seamless to users and can be a good choice if storage space is a premium.
This gallery is also available as a TechRepublic blog post and download. Image created by Mark Kaelin for TechRepublic.
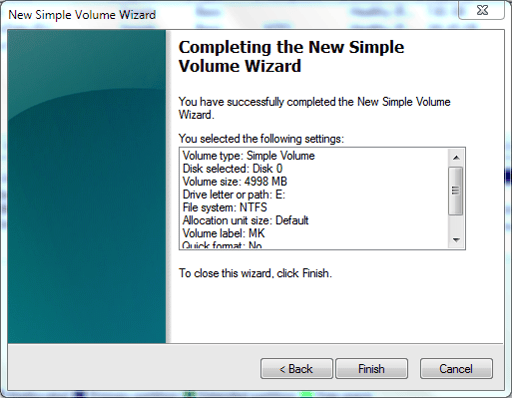
The last screen in the wizard gives you a summary of your choices and gives you the chance to step back and make changes. When you are satisfied with your choices, click the Finished button.
This gallery is also available as a TechRepublic blog post and download. Image created by Mark Kaelin for TechRepublic.

Mark W. Kaelin has been writing and editing stories about the information technology industry, software, hardware, gaming, finance, accounting, and technology geekdom for more than 30 years.


