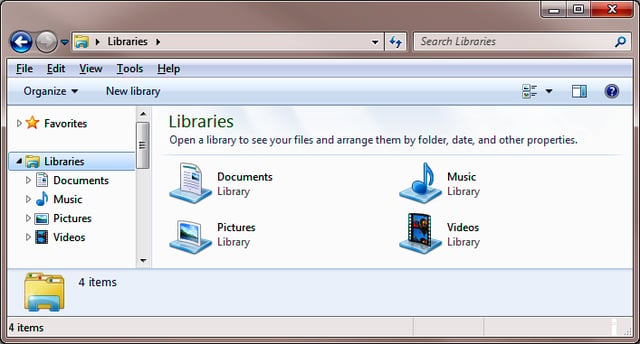
\n\tBy default Microsoft Windows 7 provides you with four Libraries: Documents, Music, Pictures and Videos.
\n
\n\tYou can think of the Libraries technology in Windows 7 as collection points for files of a certain type that can exist in any number of locations. By default, Windows 7 configures the Libraries on a system to display files from your local system. For example, the Documents Library displays files from the My Documents and Public Documents folders on your system. However, you can easily add other locations.
\n
\n\tFor example, you can customize the Documents Library on a Windows 7 system to display all the documents on an external hard disk, on your team members’ My Documents folder, as well as on your company’s file server. Now, instead of having to manually troll all over the network to track down files, all you have to do is just go to your local Documents library and everything that you could ever need is right there.
\n
\n\tIn addition to adding folders to one of the existing Libraries, you can create your own Libraries with narrower focus and add specific folders to your libraries.
\n
\n\tIn this gallery edition of the Windows Desktop Report, I’ll show you how to create your own Libraries in Windows 7. As I do, I’ll discuss Libraries in more detail.
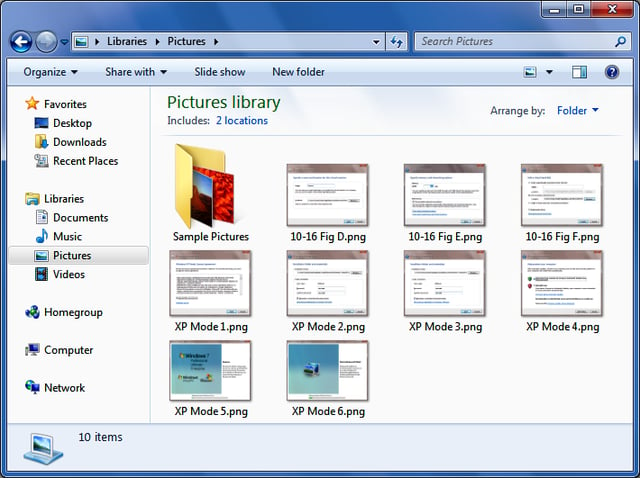
\n\tTo begin, when you open a Library, you’ll see a header that tells you how many locations that Library is currently configured to monitor. For example, the Pictures Library is by default configured to collect files from two locations.

\n\tWhen you click on that link, you’ll see the Pictures Library Locations dialog box. As you can see, the two default locations come from the Pictures folders in my user account and the Public account. You’ll use the Library Locations dialog box to add and remove locations, as well as keep tabs on which locations are in the Library. (Each of the other three Libraries has a similar Library Locations dialog box.)
\n
\n\tWhen you click the Add button, you’ll see a standard browse dialog box called Include Folder in Pictures where you can add folders from any location to which you have access.
\n
\n\tCreating your own Libraries is easy; access the Libraries folder and click the New Library button on the Command Bar. You can see that button in Figure A. As soon as the new Library is created, you can assign it a name. Let’s suppose that you want to create a new Library to keep track of all the documents related to a new project that you and your team are working on called the Ideas Project.
\n
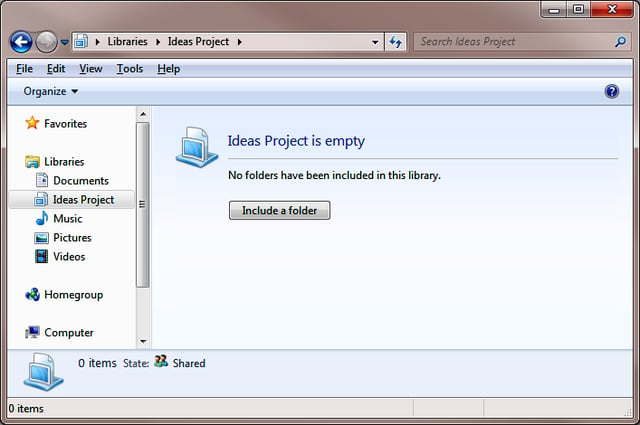
\n\tTo continue, just click on the new Library, when you do, you will see that it is empty and can begin adding folder locations by clicking the Include a folder button. When you do, you’ll see a standard browse folder and you can select the folder that you want to include.
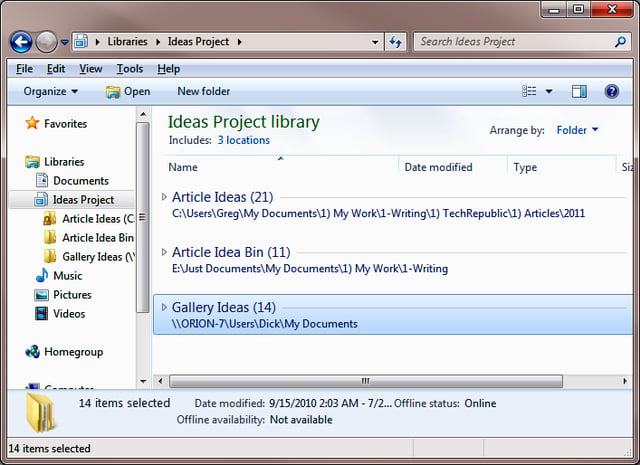
\n\tTo add additional folders, click the locations link to access a Library Locations dialog box like the one shown above. As you can see, I have added three folders from three different locations to the Ideas Project Library on my system. Now, whenever I need to find documents related to the Ideas Project, I will be able to find them easily without having to rummage around multiple locations.

My first computer was a Kaypro 16 \"luggable\" running MS-DOS 2.11 which I obtained while studying computer science in 1986. After two years, I discovered that I had a knack for writing documentation and shifted my focus over to technical writing.


