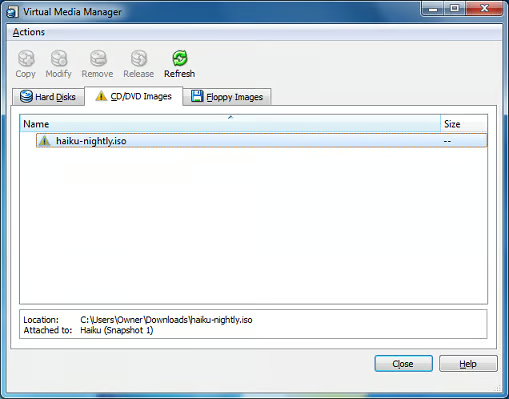
\n\tClicking the “Check” button takes you to the Virtual Media Manager dialog box, and under the CD/DVD Images tab, you discover that, despite your efforts to remove the recently deleted ISO from the list, the “Remove” button is greyed out and unable to be used. In other words, you can’t exactly resolve this issue right off the bat.
\n
\n\tImages by Matthew Nawrocki for TechRepublic.
\n\tThe reason for this anomaly is because the disc image is mounted within a VM and is being recognized by a snapshot. Until this snapshot is removed with the associated VM, the discrepancy refuses to clear and you are unable to remove the ISO file from the images list. Here is a recommended procedure to quickly resolve this issue. This guide also applies to floppy and hard disk images as well.
\n
\n
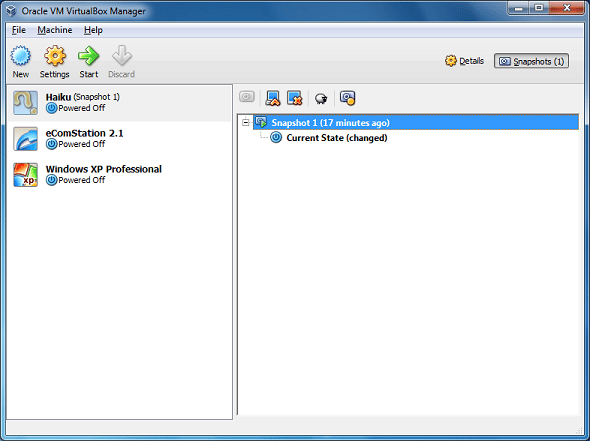
\n\tFirst, click the name of the virtual machine that used the ISO file in question, click the “Snapshots” button on the right-hand side and then restore the snapshot you recently created by clicking the snapshot name and pressing Ctrl+Shift+R. When prompted, uncheck the checkbox for “Create a snapshot of the current machine state” before clicking the “Restore” button.
\n
\n\tImages by Matthew Nawrocki for TechRepublic.
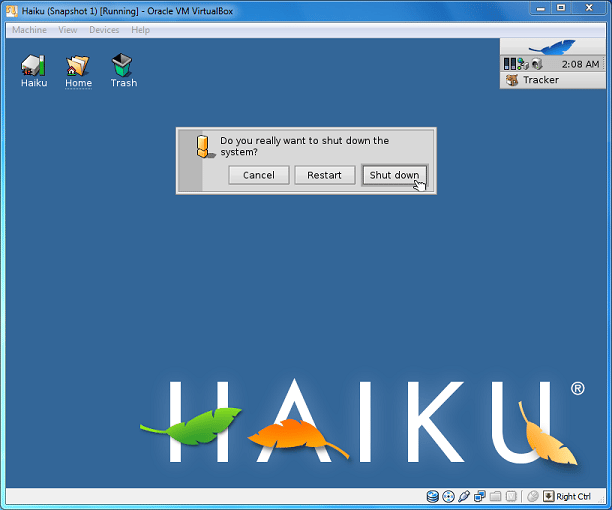
\n\tOnce the guest operating system is restored and actively running, ensure that no open documents or other applications are open, and then proceed to shut down the virtual machine normally via the guest operating system’s shut down menu or button.
\n
\n\tImages by Matthew Nawrocki for TechRepublic.
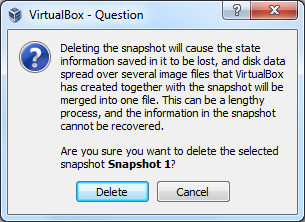
\n\tAfter the guest environment closes out and exits gracefully, return to the virtual machine snapshots area, select the snapshot in question, and then press Ctrl+Shift+D. A dialog box will appear, asking you to confirm your action. Press “Delete” to finish the job once and for all.
\n
\n\tImages by Matthew Nawrocki for TechRepublic.
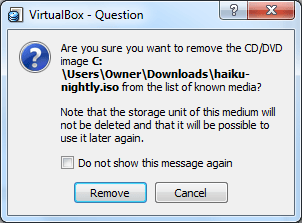
\n\tNow, return to the Virtual Media Manager by pressing Ctrl+D, select the CD/DVD Images tab once more, then select the missing image file within the list and click the “Remove” button at the top of the window. When prompted to confirm, click “Remove” to delete the image listing.
\n
\n\tAnd there you have it. VirtualBox will no longer nag you about an image file in Virtual Media Manager that you deleted. If anyone has any other interesting tricks for dealing with image files in VirtualBox, please opine in the comments section below.
\n
\n
\n\t
\n\t
\n
\n
\n\tImages by Matthew Nawrocki for TechRepublic.


