\n\tThis slideshow is also available as a post in the TechRepublic Windows and Office Blog.
\n
\n\tThe other day I was discussing with a friend the benefits of dual-booting Windows 8 using a VHD (Virtual Hard Disk) as I wrote about in the article Dual-boot Windows 7 and Windows 8 using a VHD. My friend has Windows 7 Home Premium installed on his computer and was saying that he would give anything for a way to add the Bootable VHD feature to his system so that he could experiment with Windows 8 and keep his Windows 7 setup intact. (As you know, the ability to boot from VHD is only available in Windows 7 Ultimate and Windows 7 Enterprise.)
\n
\n\tWhen I told him that there was a way he could do so, he was all ears. When told him that it would cost him about $140, he was still open to the idea saying that if it would allow him to install Windows 8 on a VHD, it would be worth it.
\n
\n\tI then explained how he could purchase a Windows 7 Anytime Upgrade key that would allow him to easily upgrade his Windows 7 Home Premium system to Windows 7 Ultimate. A half hour later we were standing in line at the local Best Buy purchasing a Windows 7 Anytime Upgrade key.
\n
\n\tThe upgrade went very smooth and soon my friend was installing Windows 8 to a VHD. After we were finished, I figured that there were probably other folks out there that would be interested in learning more about using Windows 7 Anytime Upgrade to be able to install Windows 8 on a bootable VHD. As such, in this article, I’ll walk you step by step thru the entire procedure of using Windows 7 Anytime Upgrade to upgrade a Windows 7 Home Premium system to Windows 7 Ultimate.
\n
\n
\n
\n\tEven though the Upgrade will not alter any of your data or other configuration settings, I recommend that the first thing that you’ll want to do is create a System Image from within Windows 7’s Backup and Restore. When you do, you’ll end up with a complete image of your hard disk. That way, if anything out of the ordinary were to occur as you follow the steps for performing the Windows Anytime Upgrade, you will be able to return to your current configuration.
\n
\n\tFurthermore, I recommend that you also create a separate backup of your data. Maybe just make copies of all your data files on CD/DVD or on an external hard disk. While it may sound like overkill, having an extra backup will give you peace of mind.
\n
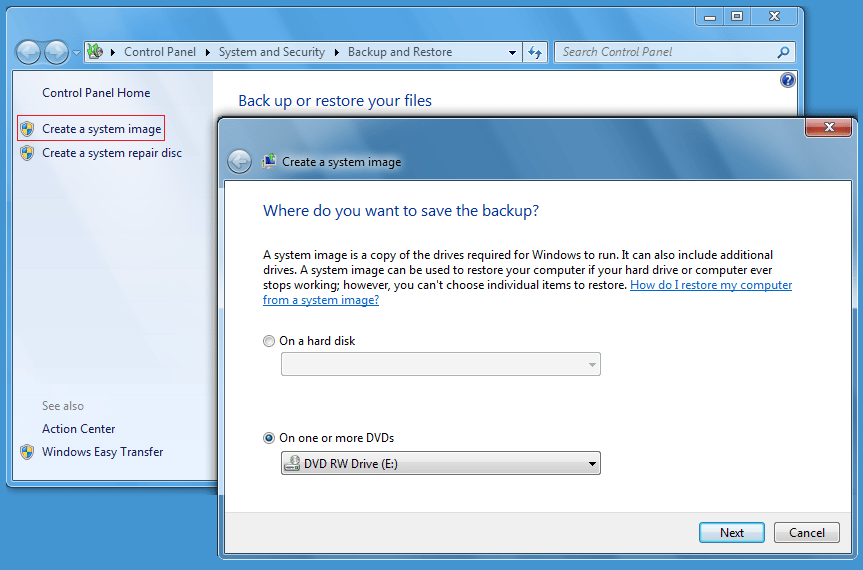
\n\tTo create a system image, you’ll need to have a CD-RW/DVD-RW drive, an external hard disk, or access to a network drive. To access Backup and Restore, click the Start button, type Backup in the Search box, and press [Enter] when Backup and Restore appears in the result pane.
\n
\n\tOnce you have Backup and Restore up, select the Create a System Image option and choose your backup location. As you can see, I used a DVD-RW drive on my system.
\n
\n\tImages by Greg Shultz for TechRepublic.
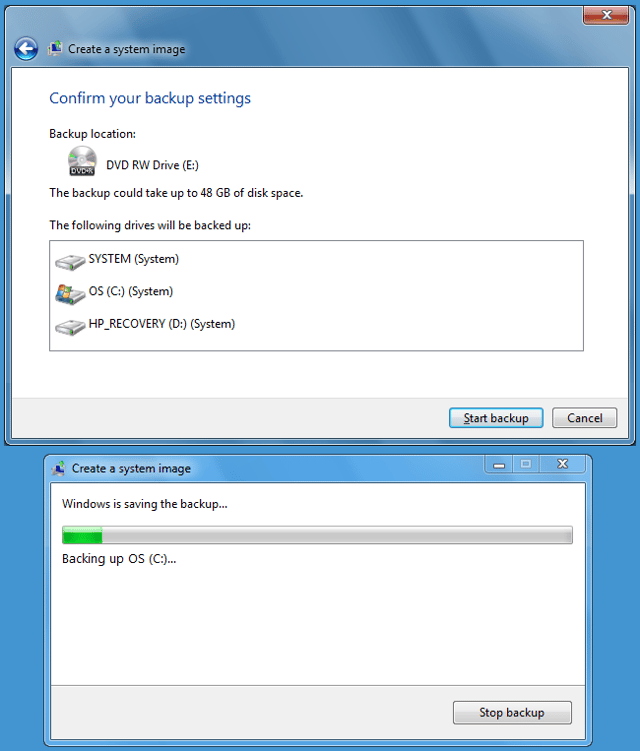
\n\tOn my test system all the partitions on the drive are selected by default. To initiate the operation, just click Start backup. On my test system with a 500GB hard disk, it took over an hour and required eight DVDs.
\n
\n\tImages by Greg Shultz for TechRepublic.
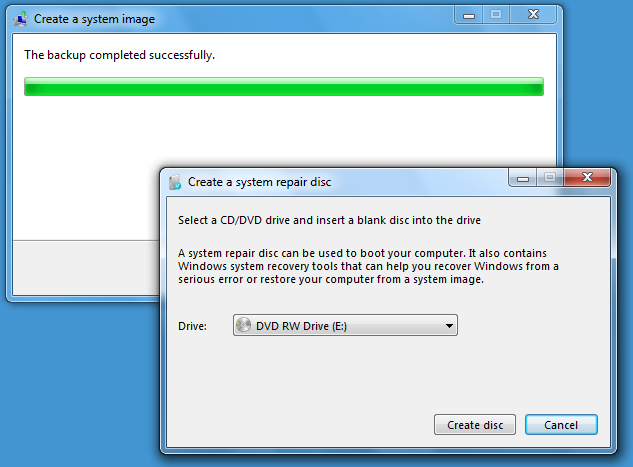
\n\tWhen the System Image is complete, you’ll be prompted to create a System Repair disc. This is the disc that you will use to boot your system and restore your system image in the event that you need it.
\n
\n\tImages by Greg Shultz for TechRepublic.

\n\tAs soon as the System Image is complete and before you begin the Windows Anytime Upgrade procedure, I recommend that you reboot your system to make sure that you have a clean slate.
\n
\n
\n\tYou can purchase a Windows Anytime Upgrade key right from within Windows 7, you can get one from an online store such as Amazon, or you can get one from a local store such as Best Buy. To purchase Windows Anytime Upgrade key from within Windows 7, click the Start button and type Anytime in the Start search box. When you see Windows Anytime Upgrade appear in the results, press [Enter]. You’ll then see the Windows Anytime Upgrade window. (Note that in the upper right corner of the window, it shows that on my test system I am currently running Windows 7 Home Premium.)
\n
\n\tImages by Greg Shultz for TechRepublic.
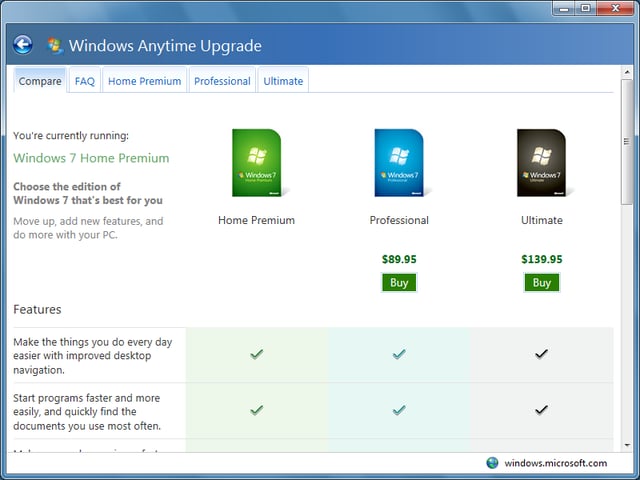
\n\tWhen you click the Go online button, you’ll see the next Windows Anytime Upgrade window and you will click the Buy button under the Ultimate heading. Once you work through the steps, you’ll instantly receive the Windows Anytime Upgrade key and the upgrade will begin immediately. (Don’t worry, you will have the opportunity to print out a receipt and a copy of the receipt will be sent to you via email.)
\n
\n\tImages by Greg Shultz for TechRepublic.
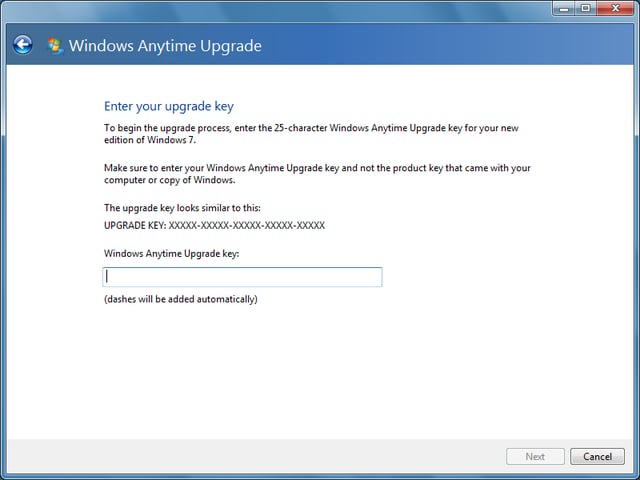
\n\tIf you purchase a retail copy of Windows Anytime Upgrade, you’ll actually get a 25 character alphanumeric key. To use the key, follow the instructions to access the Windows Anytime Upgrade window shown before. You’ll then click the Enter an upgrade key button. When you do, you’ll see the window and will be prompted to enter the key.
\n
\n\tImages by Greg Shultz for TechRepublic.
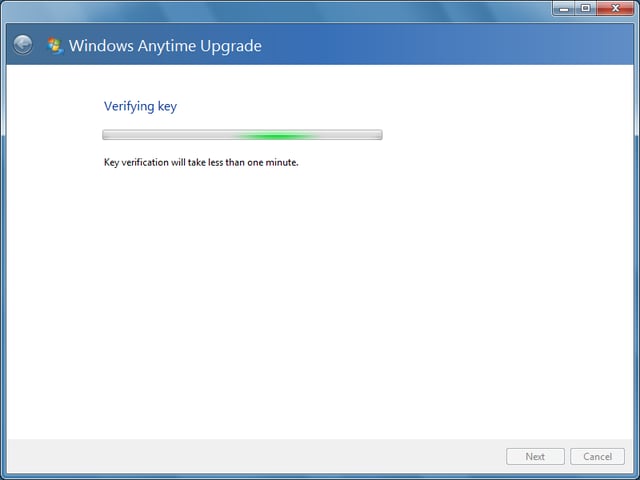
\n\tAfter you enter the key and click Next, Windows Anytime Upgrade will verify that the key that you entered is valid. It takes just a few seconds to complete this step.
\n
\n\tImages by Greg Shultz for TechRepublic.
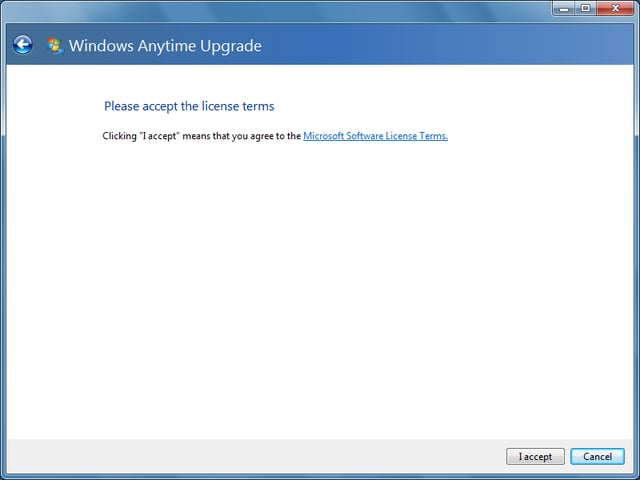
\n\tYou’ll then be prompted to accept the license terms for the upgrade. If you want all the details, just click the Microsoft Software License Terms link.
\n
\n\tImages by Greg Shultz for TechRepublic.
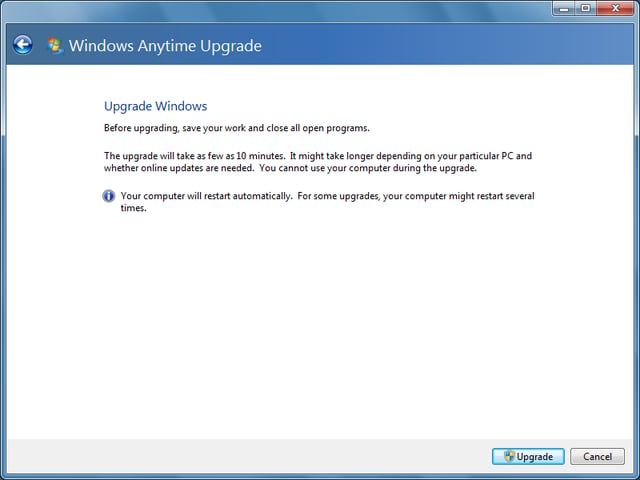
\n\tAs soon as you click the I accept button, you’ll see the next screen which prompts you to make sure all of your open programs are closed. To begin the procedure, just click the Upgrade button.
\n
\n\tImages by Greg Shultz for TechRepublic.
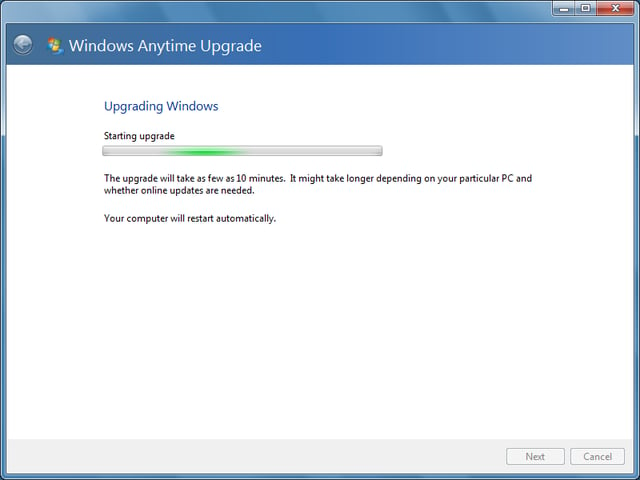
\n\tOnce the Upgrade begins, it will take anywhere from 10 to 20 minutes depending on whether updates are needed. On my example system, only one update was needed.
\n
\n\tImages by Greg Shultz for TechRepublic.
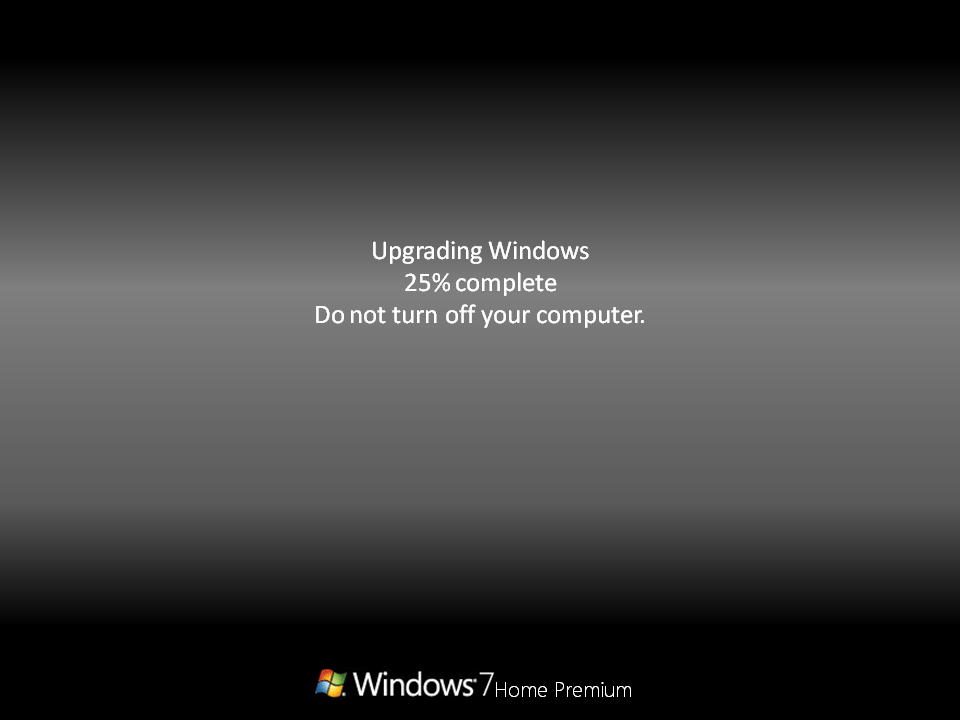
\n\tDuring the Upgrade your system will reboot several times. I noticed that after the first reboot, you’ll see a screen like the one shown, which shows that at this point the operating system is still Windows 7 Home Premium.
\n
\n\tImages by Greg Shultz for TechRepublic.

\n\tHowever, after the second reboot, you’ll see that the screen is showing that the operating system is now Windows 7 Ultimate.
\n
\n\tImages by Greg Shultz for TechRepublic.
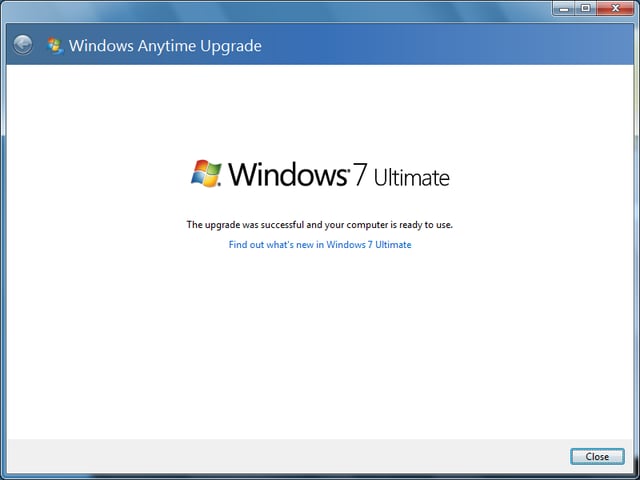
\n\tAfter the upgrade’s final reboot, you’ll see that the Logon screen now shows the operating system as Windows 7 Ultimate. When you log on for the first time, you’ll see the last screen in the Windows Anytime Upgrade procedure. To complete the operation, just click Close.
\n
\n\tAt this point, you can read my article Dual-boot Windows 7 and Windows 8 using a VHD and take advantage of the Bootable VHD feature in Windows 7 Ultimate.
\n
\n\tImages by Greg Shultz for TechRepublic.

My first computer was a Kaypro 16 \"luggable\" running MS-DOS 2.11 which I obtained while studying computer science in 1986. After two years, I discovered that I had a knack for writing documentation and shifted my focus over to technical writing.


