\n\tBy Tim Lange
\n
\n\tA Google Apps domain provides administrators the ability to assign users permissions to manage different aspects of the domain. This is useful for delegating responsibility. There are five system roles predefined, but Google Apps offers the flexibility of creating custom roles to define specific privileges.
\n
\n
\n\tThis slideshow is also available as a post in the Google in the Enterprise Blog.
\n
\n
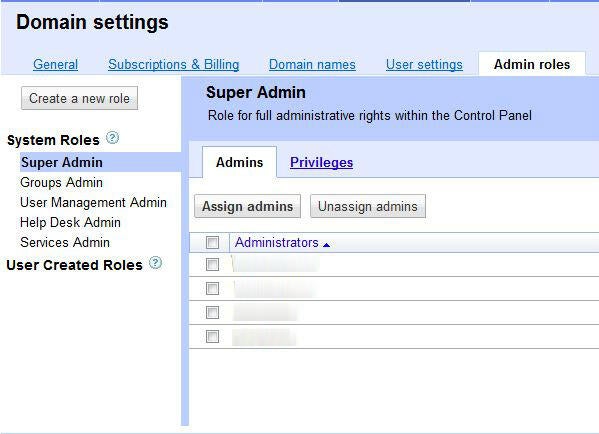
\n\tTo get started, log into the Control Panel and go to Domain Settings and then Admin Roles. On the left will be the five System Roles: Super Admin, Groups Admin, User Management Admin, Help Desk Admin, and Services Admin. Below that will be any User Created Roles.
\n
\n\tAll images created by Tim Lange for TechRepublic.
\n\tThe System Roles are defined as the following:
\n
\n\t
\n\t
\n\t
\n\t
\n
\n
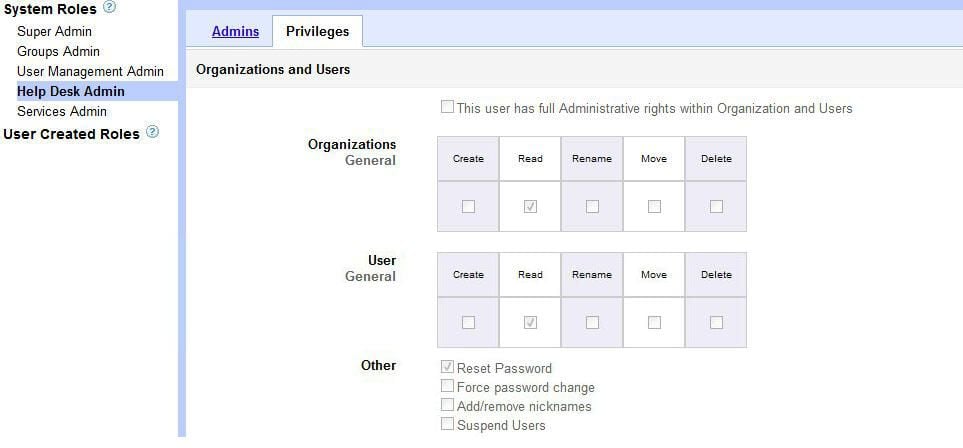
\n\tTo view the specific permissions for any System Role click on the role and then click on the Privileges tab. For example, the Help Desk Admin role only has permissions checked for reading the organization, reading the user, and resetting user passwords.
\n
\n\tAll images created by Tim Lange for TechRepublic.
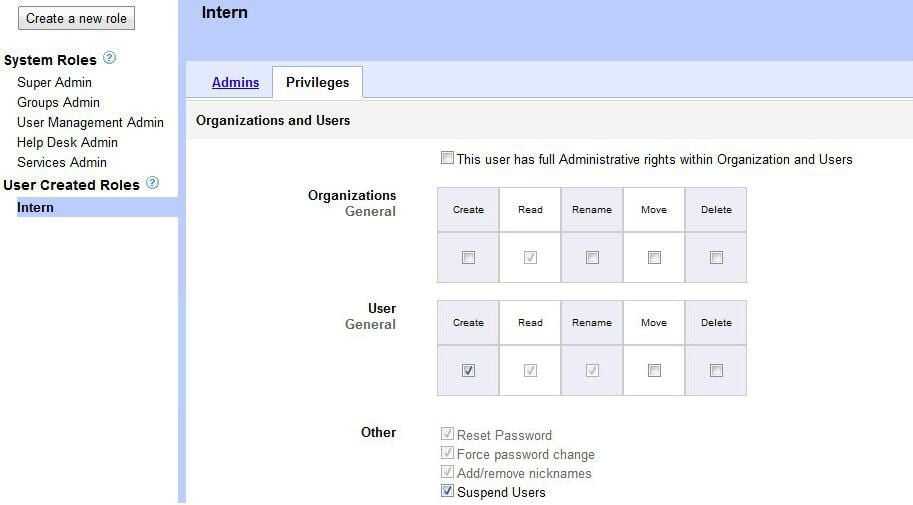
\n\tUser Created Roles are those roles created to have custom permissions. For example, say an intern was hired to help with menial help desk tasks such as account creation for new hires and account suspensions for terminations.
\n
\n\tTo create that role of “Intern”, click on the ‘Create a New Role’ button right above the System Roles then type a name for the role and click ‘Create’. Checking the box for “Create” under ‘User’ automatically checks the boxes for “Read” under ‘Organization’, “Read” and “Rename” under ‘User’, and under ‘Other’ “Reset Password”, “Force password change”, and “Add/remove nicknames”. Additionally, put a check in the box for “Suspend Users”. Once that is complete, click ‘Save Changes’ and the Intern role is created.
\n
\n\tAll images created by Tim Lange for TechRepublic.
\n\tUser Created Roles can be edited and deleted. To change the name of the role, click the role and then click ‘More actions’ and ‘Edit role’. Update the name and/or the description and click ‘Save Changes’. Editing permissions is very easy too. Click on the Privileges tab and check or uncheck permissions. Update the role by clicking ‘Save Changes’. To delete the role, click ‘More actions’ and ‘Delete role’. A warning appears that users assigned to the role will lose privileges and possibly access to the Control Panel entirely. Check the box and click ‘Delete role’ to get rid of it.
\n
\n
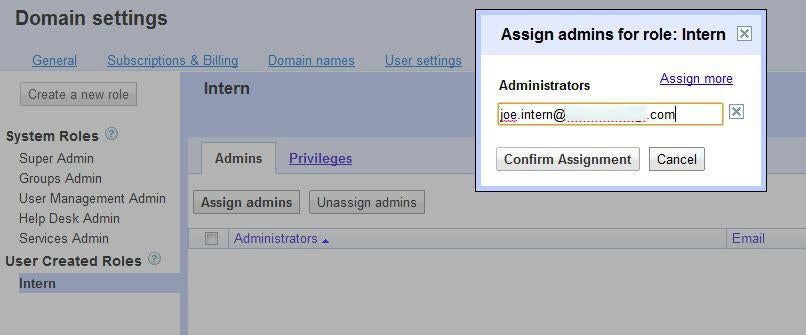
\n\tAssigning users to roles is very simple. Click the role that is to be assigned and click the ‘Assign Admins’ buttons. Type the name of the user and then click ‘Confirm Assignment’. It is also possible to assign more than one user at a time by clicking the ‘Assign More’ link.
\n
\n\tAll images created by Tim Lange for TechRepublic.
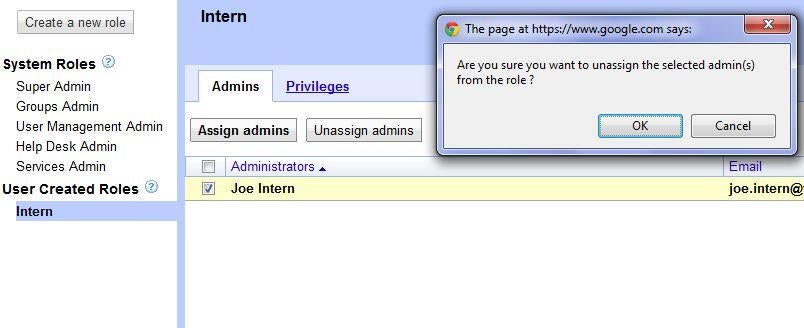
\n\tUn-assigning a user is easy as well. Select the user in the role to be unassigned and then click ‘Un-assign admins’. A confirmation box will appear and click ‘OK’ to remove the user from the role.
\n
\n\tAll images created by Tim Lange for TechRepublic.
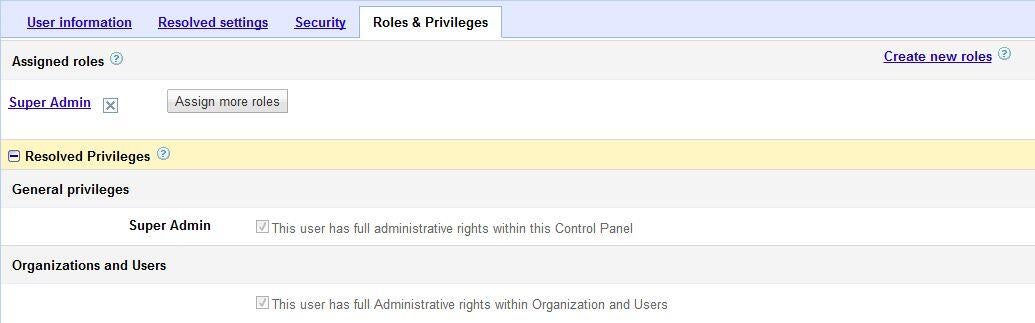
\n\tRoles can also be assigned in a user’s account under Organization & Users. To do so, go to a user’s account and click on the ‘Roles & Privileges’ tab. Here the assigned roles are listed and the privileges can be examined.
\n
\n\tAll images created by Tim Lange for TechRepublic.
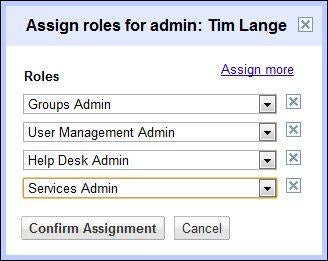
\n\tAdditional roles can be assigned right here. Click ‘Assign more roles’. Select the role to assign and to add more than one role click ‘Assign More’. Once the roles have been selected, click ‘Confirm Assignment’ and the user account will update with the new roles.
\n
\n\tTo un-assign roles in the user account, click on the ‘X’ next to that role and confirm it. The account updates immediately.
\n
\n\tAll images created by Tim Lange for TechRepublic.


