Microsoft Windows 7 provides several tools for managing the configuration of your computer and the various parts of your operating system. There are times where you will want to shrink the amount of allocated space on your hard drive, referred to as a volume, to make room for another partition. In the not so distant past you would have used a third-party tool for this task, but with the Windows 7 Disk Management Tool the utility you require is part of the operating system.
Shrink a volume
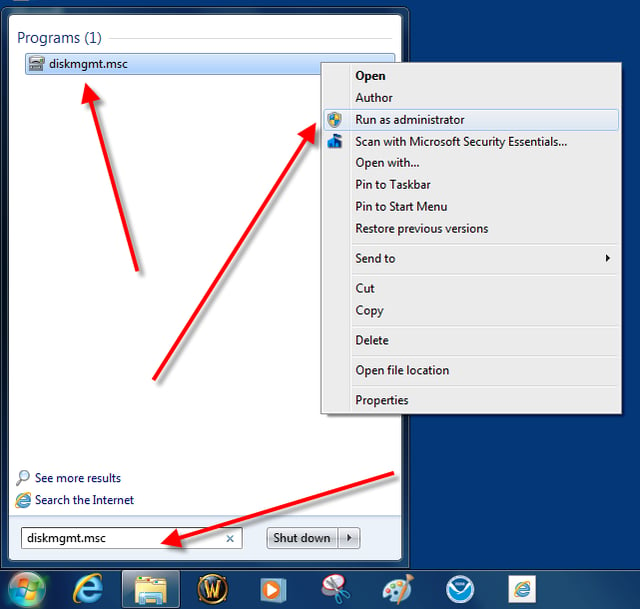
The first step is to start the Disk Management tool with elevated administrative rights. Click the Start Menu Button and type diskmgmt.msc into the search box and then right-click the diskmgmt.msc entry to get to the Run as administrator item in the context menu as shown.
This gallery is also available as a TechRepublic blog post and download. Image created by Mark Kaelin for TechRepublic.
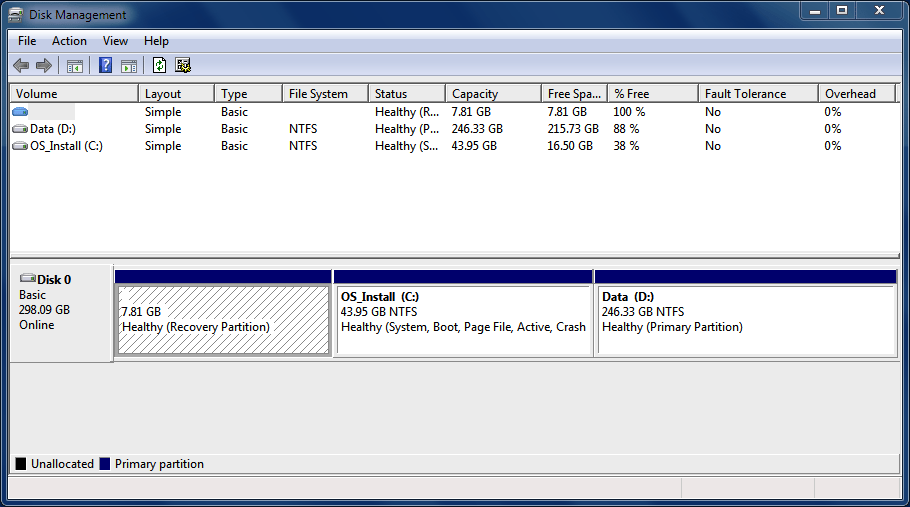
As you can see, I have a recover disk on my test machine in addition to an Operating System partition and a Data partition. In general, you would want to shrink a non-operating system volume, so we will shrink the Data partition (D:).
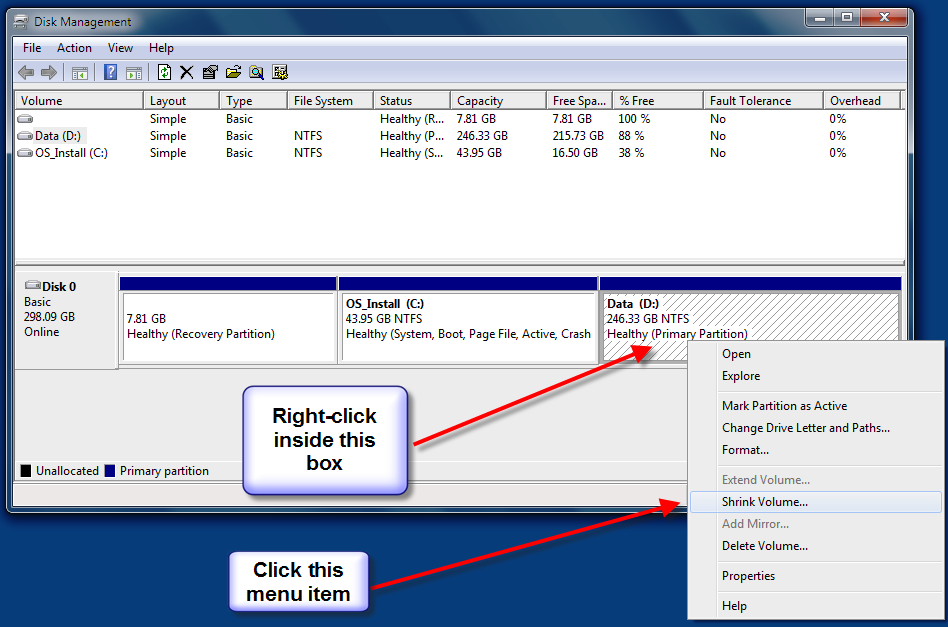
Right-click the drive you want to shrink (D: in our example) and navigate to the Shrink Volume menu item as shown.
This gallery is also available as a TechRepublic blog post and download. Image created by Mark Kaelin for TechRepublic.
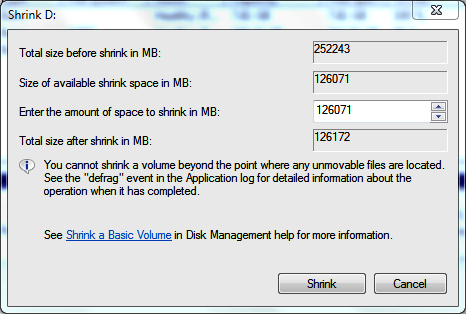
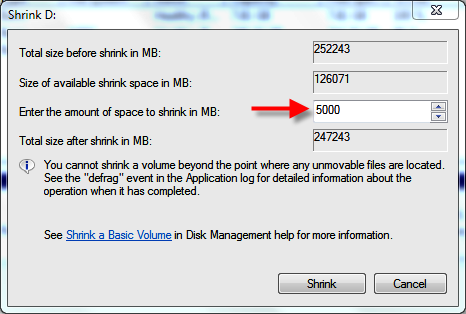
The number you can change on this screen is “Enter the amount of space to shrink in MB” box. I am shrinking drive D by 5000MB (5GB) as you can see. Click the Shrink button when you are ready.
This gallery is also available as a TechRepublic blog post and download. Image created by Mark Kaelin for TechRepublic.
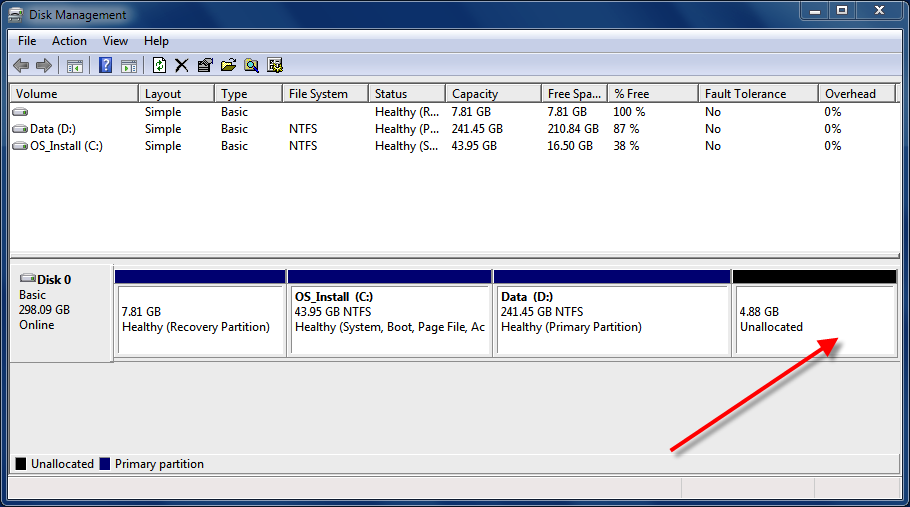
When the process is complete you will have a new Unallocated partition. The actual size will be less than what you asked for as their will be some space taken up by the Windows file system.
This gallery is also available as a TechRepublic blog post and download. Image created by Mark Kaelin for TechRepublic.

Mark W. Kaelin has been writing and editing stories about the information technology industry, software, hardware, gaming, finance, accounting, and technology geekdom for more than 30 years.


