The ZOTAC ZBOX HD-ID11 is a bare-bones, mini-PC that retails for around $250 (US). It’s available from several online retailers, including Amazon and Newegg. Depending on who you buy it from and which configuration you choose, it will likely ship without a hard drive or RAM. And, it definitely won’t come with an operating system.
Let’s take a look at the hardware inside this remarkably thin system.
Photo by: Bill Detwiler / TechRepublic
Caption by: Bill Detwiler
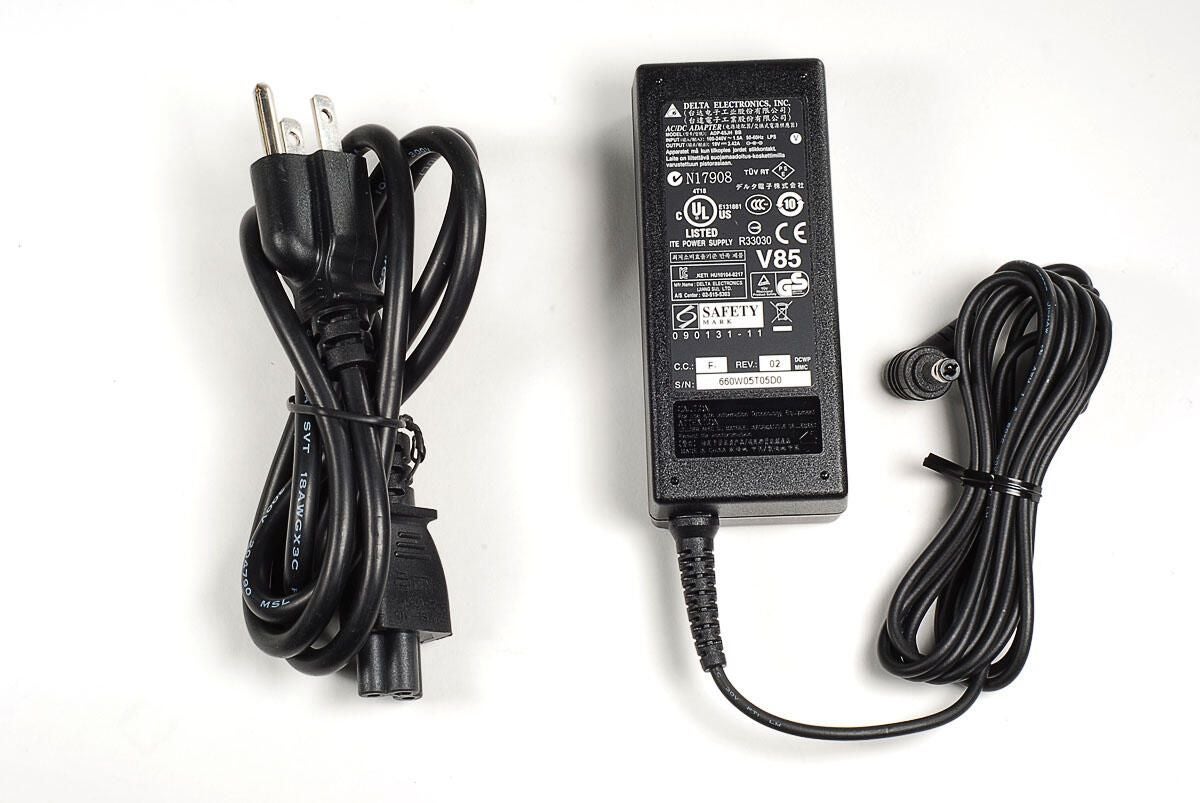
The ZBOX HD-ID11 uses an external 19V power supply.
Photo by: Bill Detwiler / TechRepublic
Caption by: Bill Detwiler
This removable plastic stand allows you to position the ZBOX HD-ID11 vertically.
Photo by: Bill Detwiler / TechRepublic
Caption by: Bill Detwiler
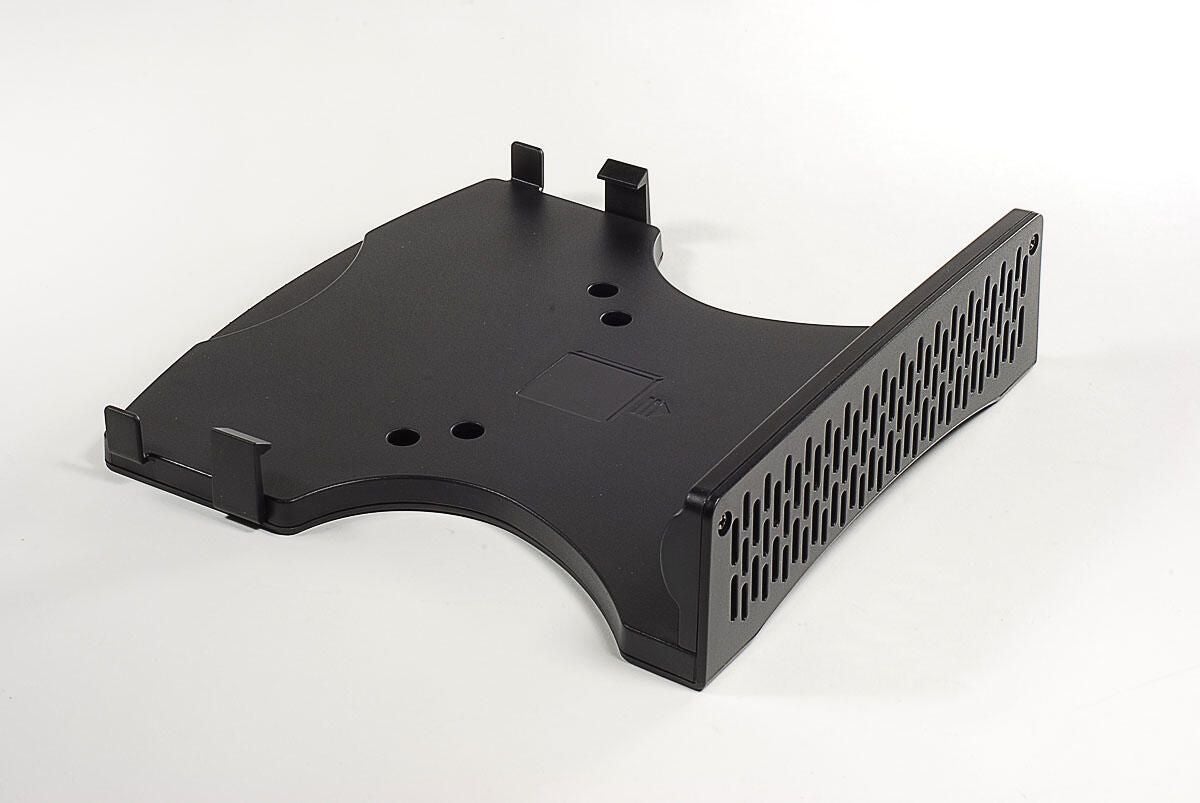
Using this removable mount and the included mounting screws, you could affix the ZBOX HD-ID11 to the back of a monitor or television.
Photo by: Bill Detwiler / TechRepublic
Caption by: Bill Detwiler
The shinny, black panels on either side of the ZBOX’s case look great, but they are fingerprint magnets.
Photo by: Bill Detwiler / TechRepublic
Caption by: Bill Detwiler
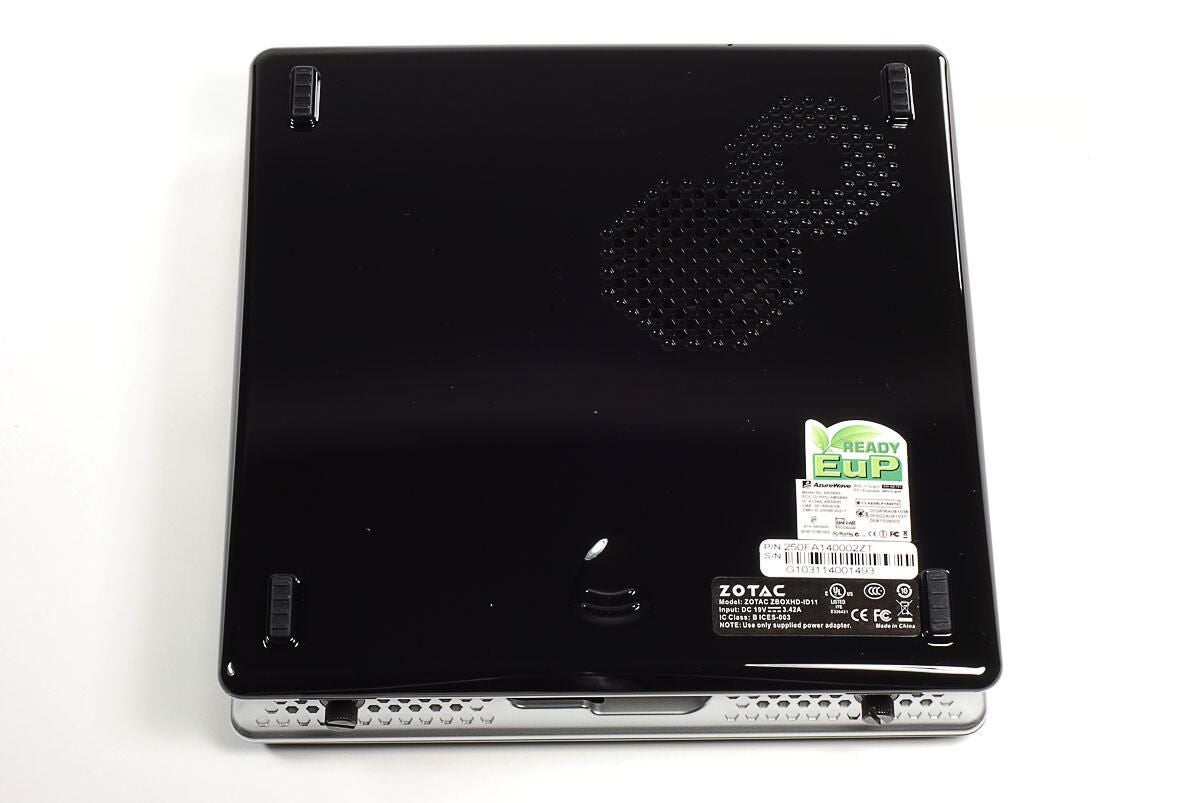
Four rubber feet are located on the bottom panel of the ZBOX’s case–for use when the device sits flat. There is also an octagonal air intake vent.
Photo by: Bill Detwiler / TechRepublic
Caption by: Bill Detwiler

Along the top edge of the case is an exhaust vent for the ZBOX’s cooling fan and a USB port.
Photo by: Bill Detwiler / TechRepublic
Caption by: Bill Detwiler
Along the bottom edge are more air intake vents, two thumbscrews, and a slot for the vertical stand.
Photo by: Bill Detwiler / TechRepublic
Caption by: Bill Detwiler
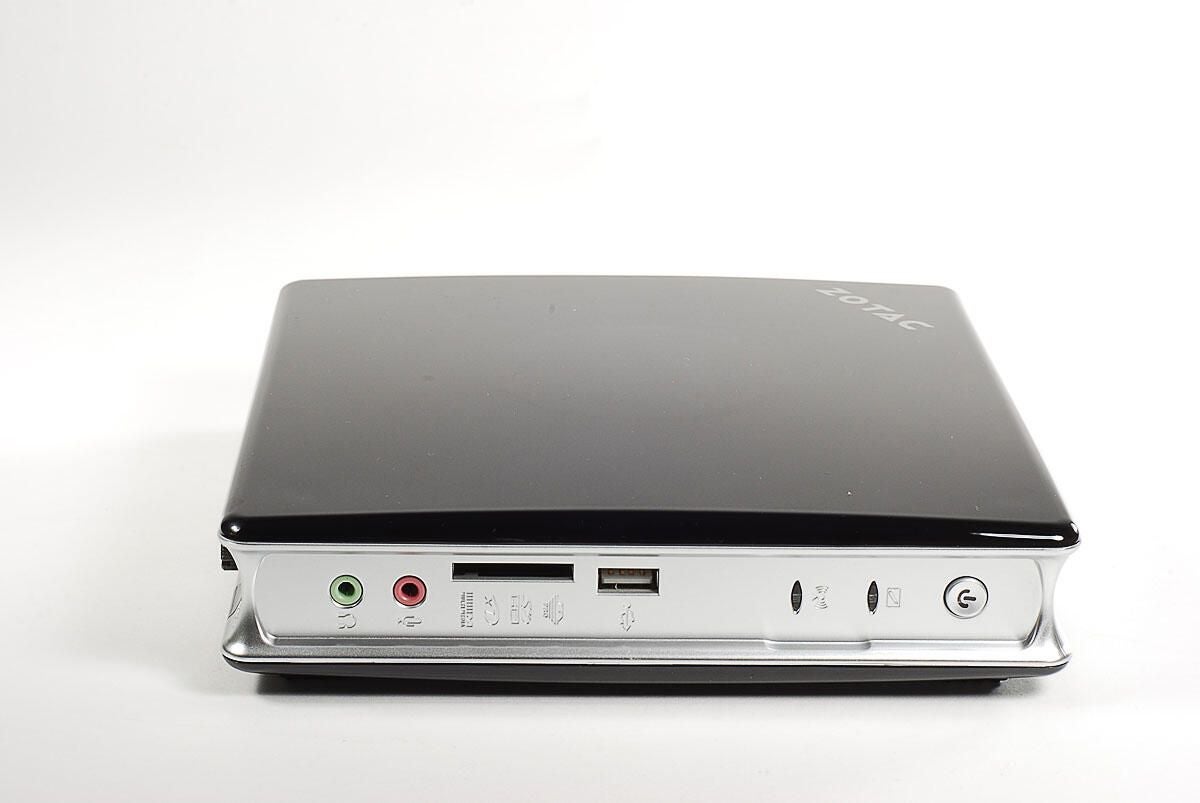
Along the front edge of the ZBOX HD-ID11 are the headphone jack, microphone jack, multimedia card slot, USB port, indicator lights, and power button.
Photo by: Bill Detwiler / TechRepublic
Caption by: Bill Detwiler
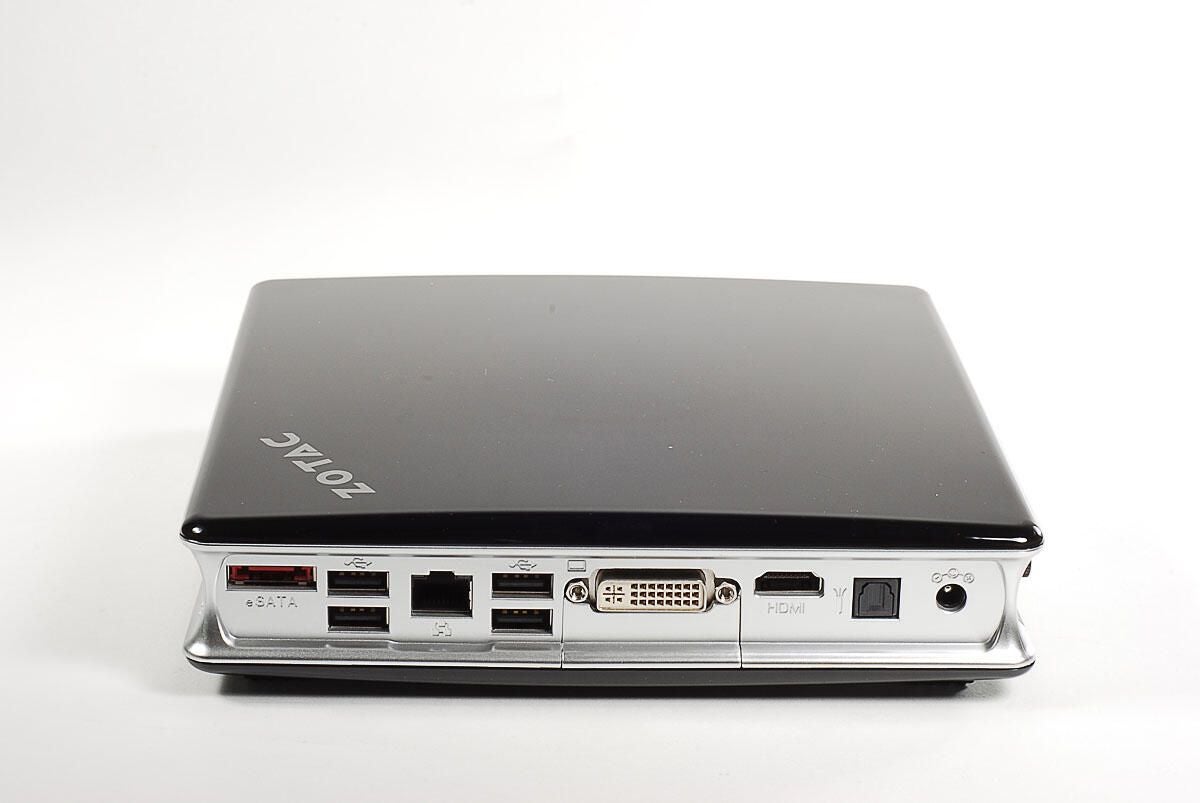
Along the back edge of the ZBOX HD-ID11 are an eSATA port, four USB ports, Ethernet port, DVI port, HDMI port, optical audio port, power connector.
Photo by: Bill Detwiler / TechRepublic
Caption by: Bill Detwiler
Photo by: Bill Detwiler / TechRepublic
Caption by: Bill Detwiler
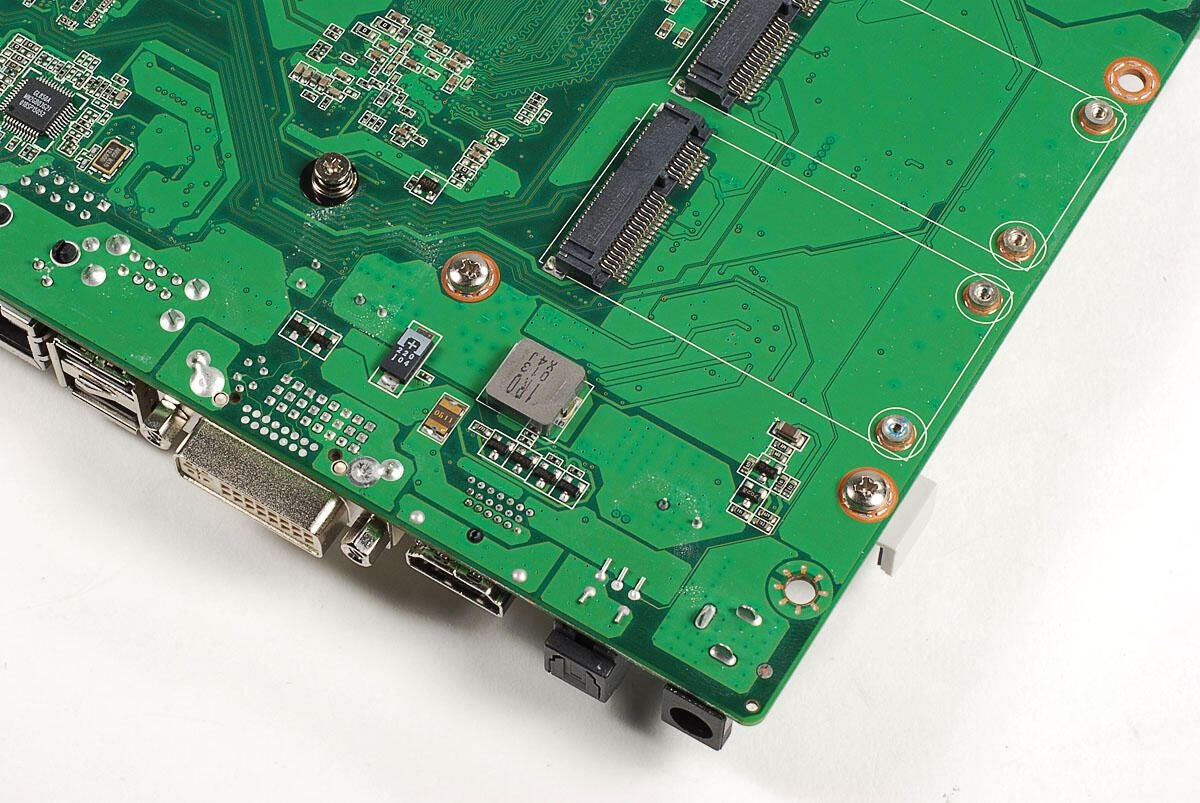
Two external thumbscrews hold the bottom/back panel in place.
Photo by: Bill Detwiler / TechRepublic
Caption by: Bill Detwiler

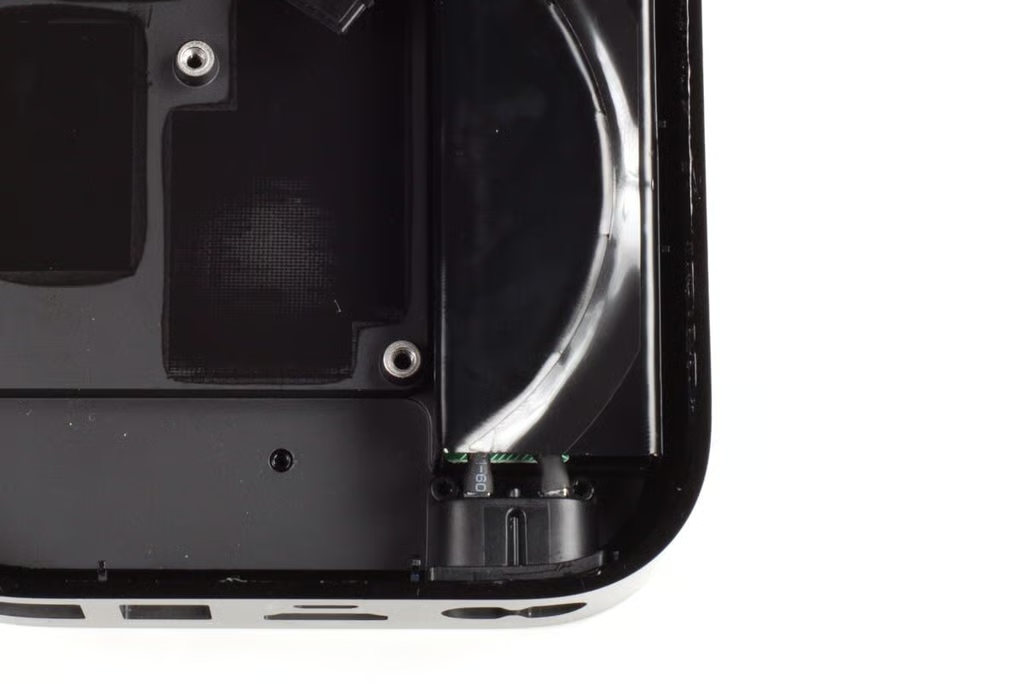
A small piece of plastic sits below the DVI port and can come loose once the bottom panel is removed.
Photo by: Bill Detwiler / TechRepublic
Caption by: Bill Detwiler
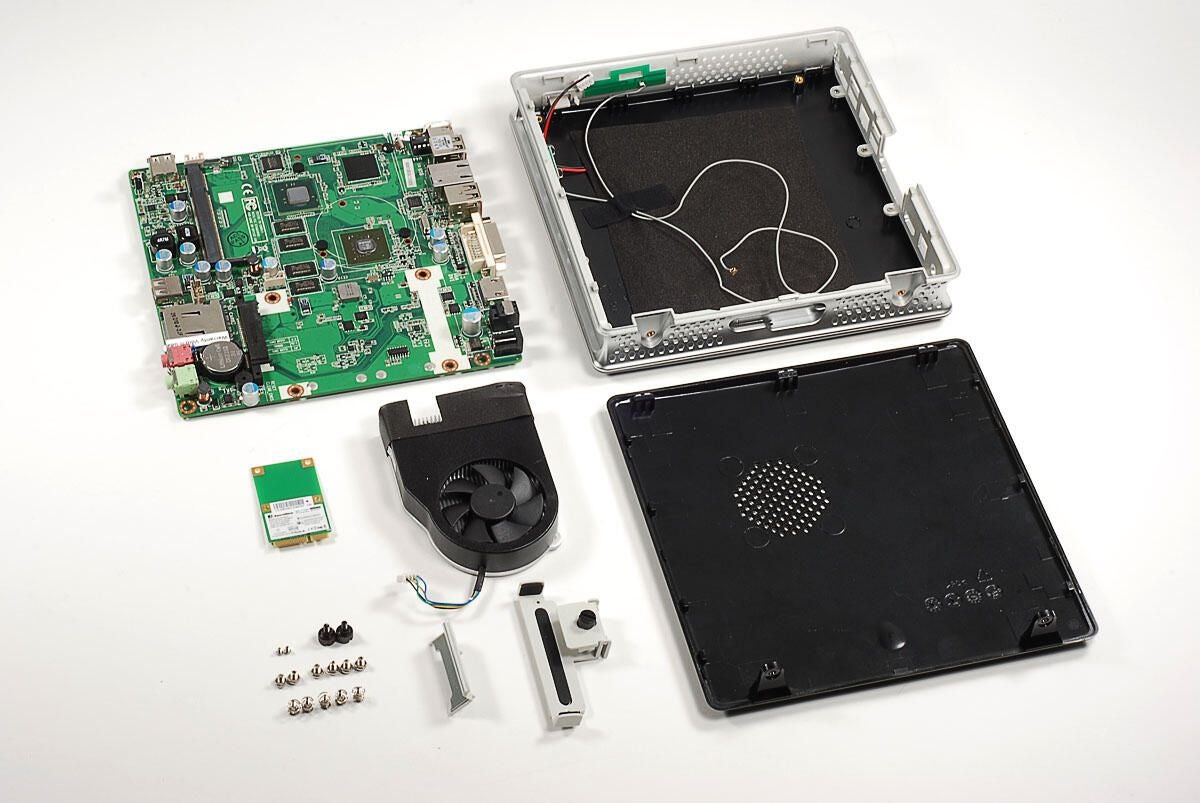
Although ZOTAC designed the ZBOX HD-ID11 to be opened, otherwise you couldn’t install the hard drive or RAM, they don’t want you removing the motherboard from the case. This “Warranty void if removed” stickers won’t last long as it’s hiding one of the motherboard screws.
Photo by: Bill Detwiler / TechRepublic
Caption by: Bill Detwiler
Two thin gray wires connect the antenna to the wireless card. Be careful not to tear them when removing the motherboard.
Photo by: Bill Detwiler / TechRepublic
Caption by: Bill Detwiler
Photo by: Bill Detwiler / TechRepublic
Caption by: Bill Detwiler
Photo by: Bill Detwiler / TechRepublic
Caption by: Bill Detwiler
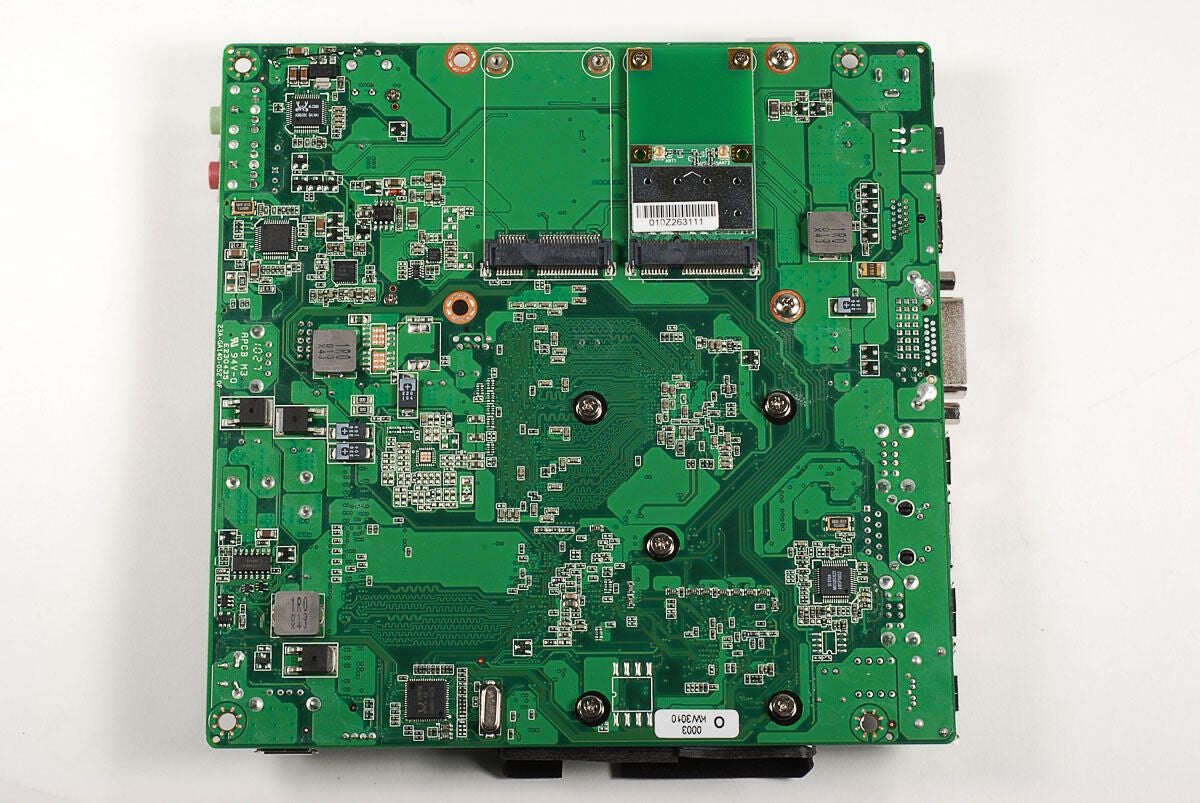
Photo by: Bill Detwiler / TechRepublic
Caption by: Bill Detwiler
We’ll need to disconnect the two antenna cables from the ZBOX’s wireless card.
Photo by: Bill Detwiler / TechRepublic
Caption by: Bill Detwiler

Two Phillips #0 screws hold the wireless card to the motherboard.
Photo by: Bill Detwiler / TechRepublic
Caption by: Bill Detwiler
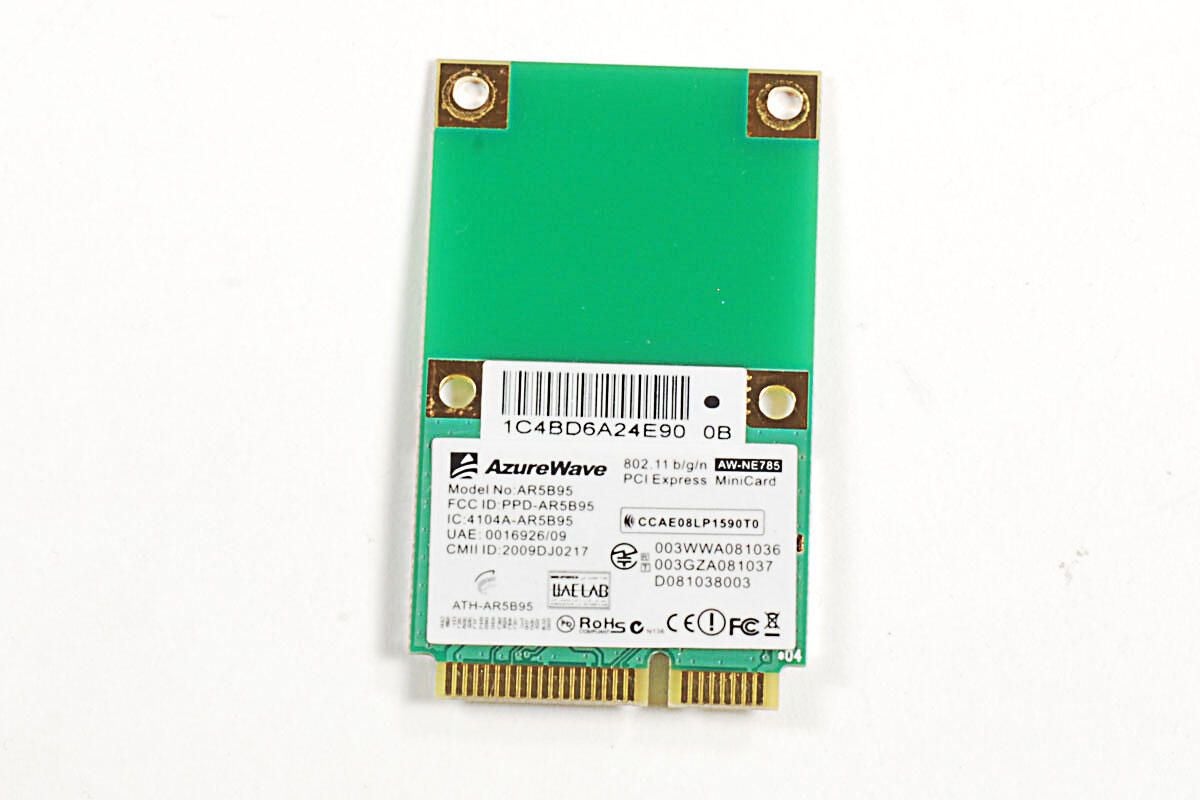
The ZOTAC ZBOX HD-ID11 uses an AzureWAVe 802.11 n/g/b Wireless Mini PCI-Express Module.
Photo by: Bill Detwiler / TechRepublic
Caption by: Bill Detwiler
Photo by: Bill Detwiler / TechRepublic
Caption by: Bill Detwiler
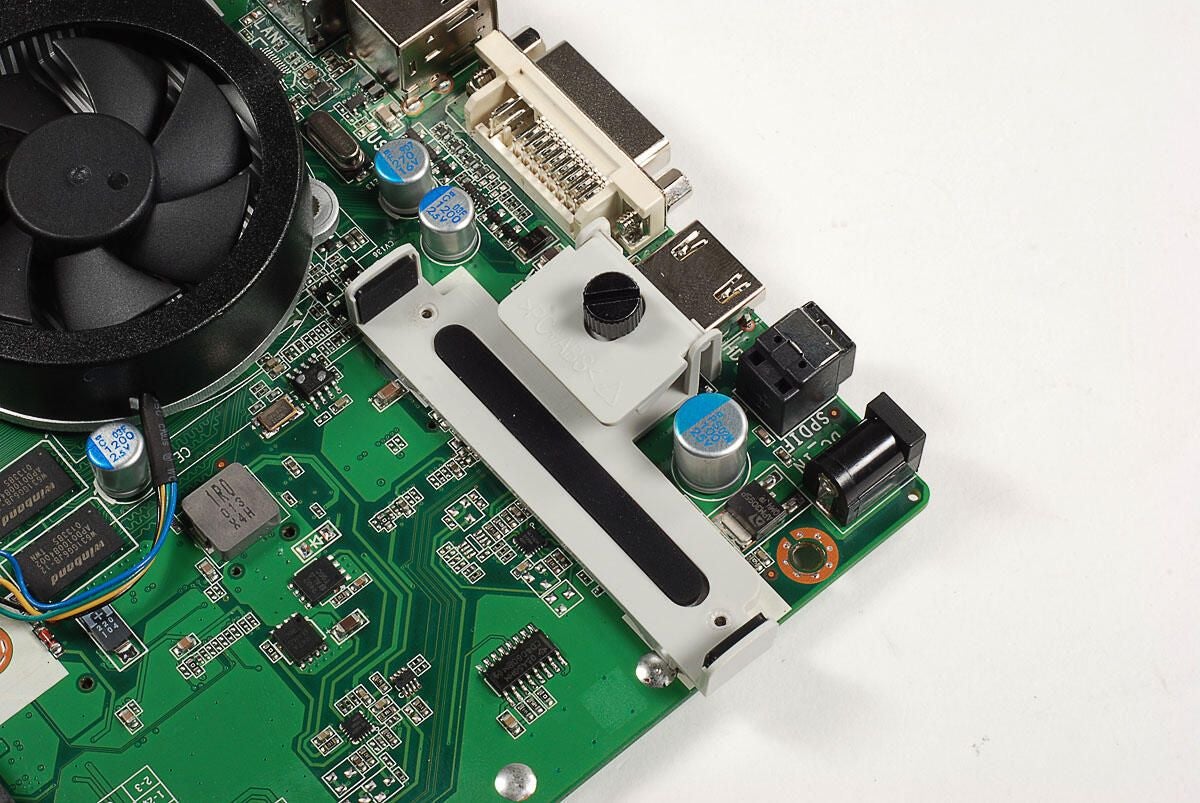
A plastic clamp can be tightened with this thumbscrew to hold the hard drive in place.
Photo by: Bill Detwiler / TechRepublic
Caption by: Bill Detwiler
Two Philips #1 screws hold the hard drive clamp to the motherboard.
Photo by: Bill Detwiler / TechRepublic
Caption by: Bill Detwiler
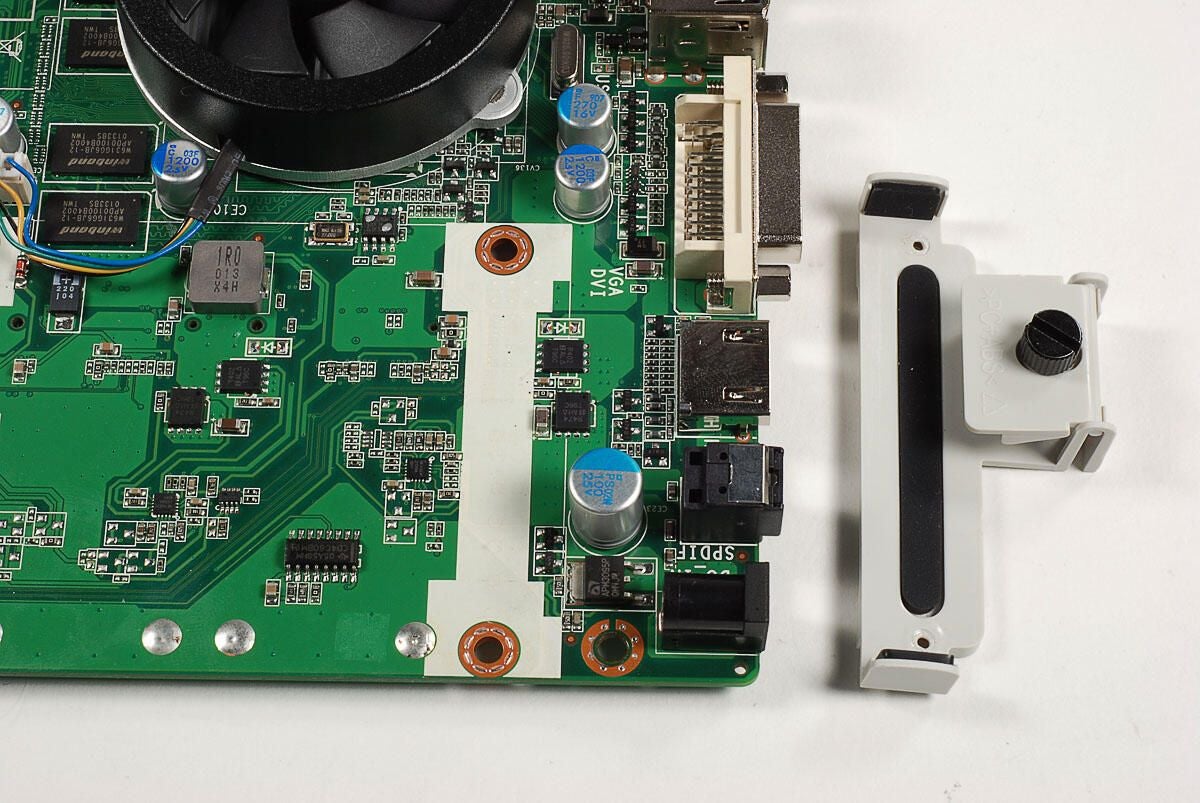
With the screws removed, the clamp comes free from the motherboard.
Photo by: Bill Detwiler / TechRepublic
Caption by: Bill Detwiler
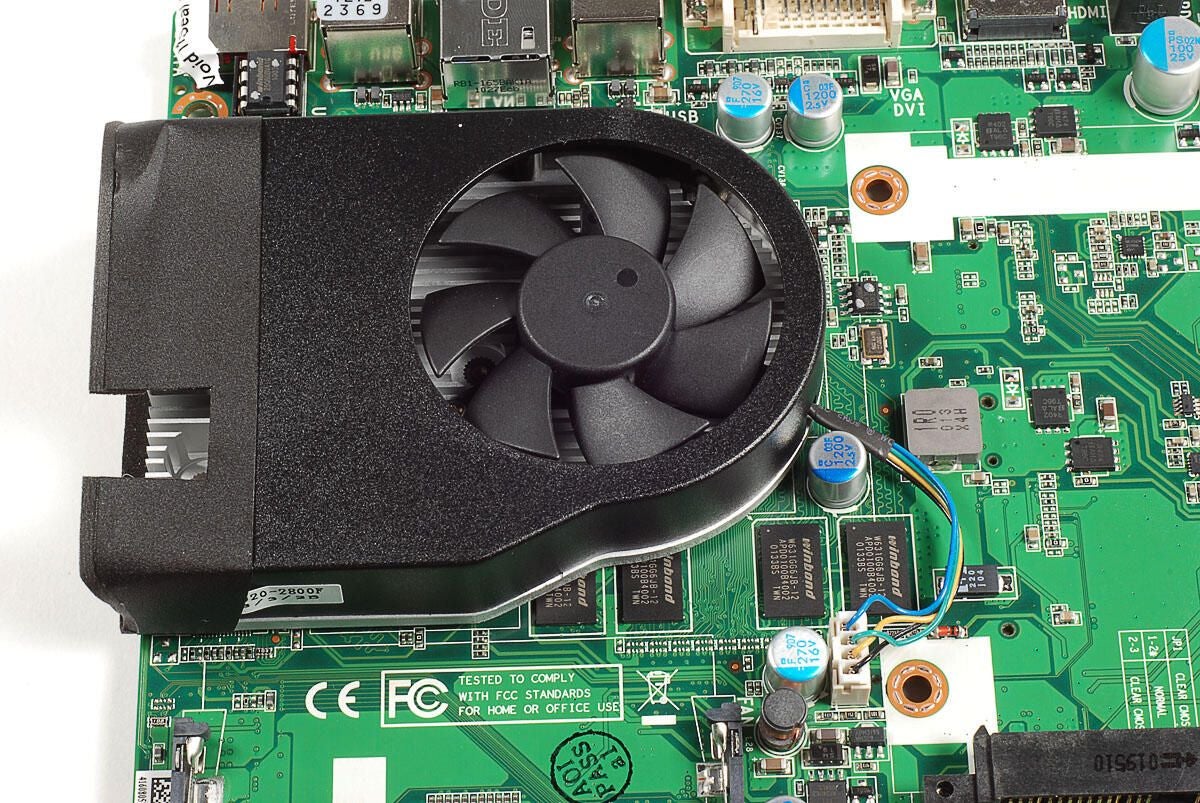
We’ll need to remove the cooling fan and heat sink to see the CPU and GPU beneath.
Photo by: Bill Detwiler / TechRepublic
Caption by: Bill Detwiler
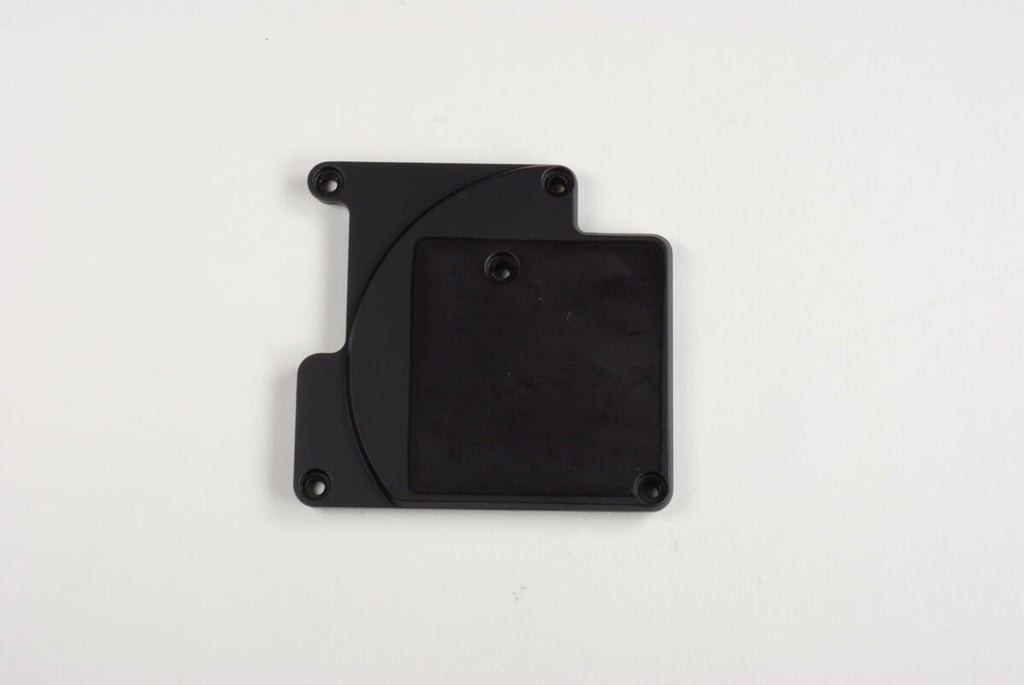
Five, spring-loaded Phillips screws hold the cooling fan and heat sink in place.
Photo by: Bill Detwiler / TechRepublic
Caption by: Bill Detwiler
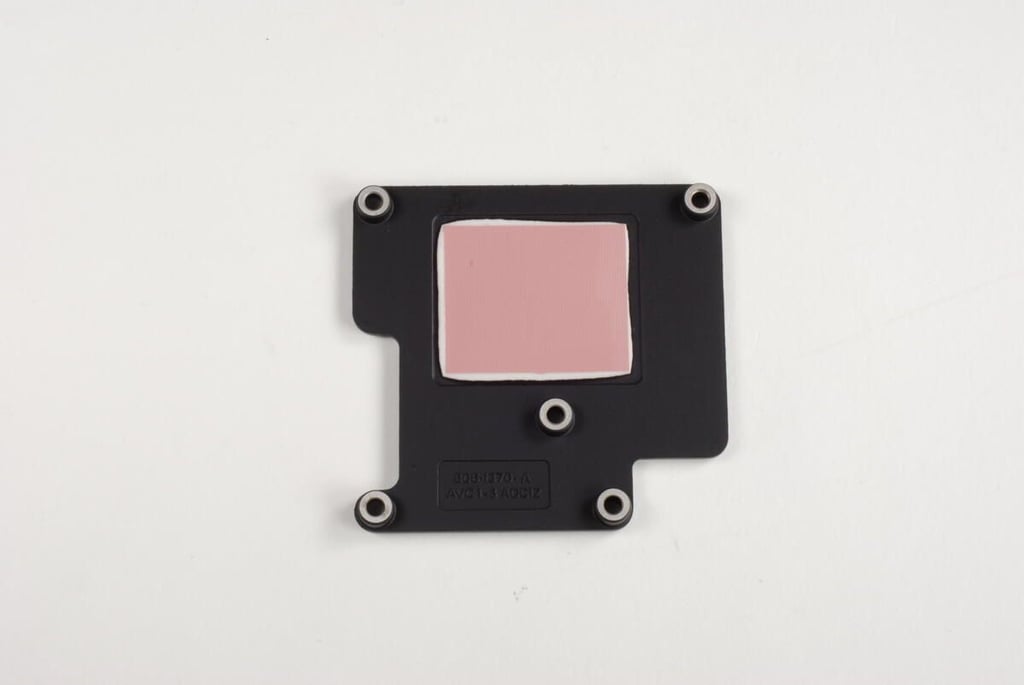
Photo by: Bill Detwiler / TechRepublic
Caption by: Bill Detwiler

Along the bottom of the heat sink is a thermal pad for the CPU and some residual thermal paste for the GPU and a second Intel chip.
Photo by: Bill Detwiler / TechRepublic
Caption by: Bill Detwiler
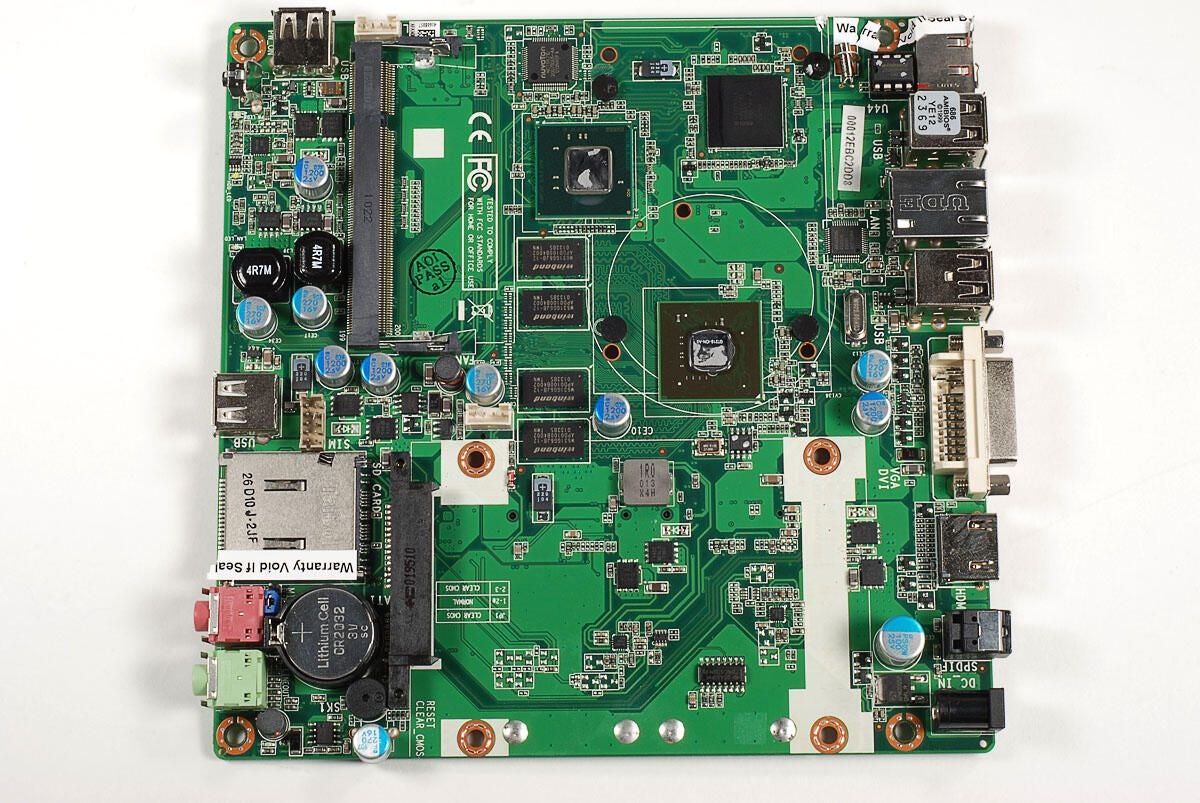
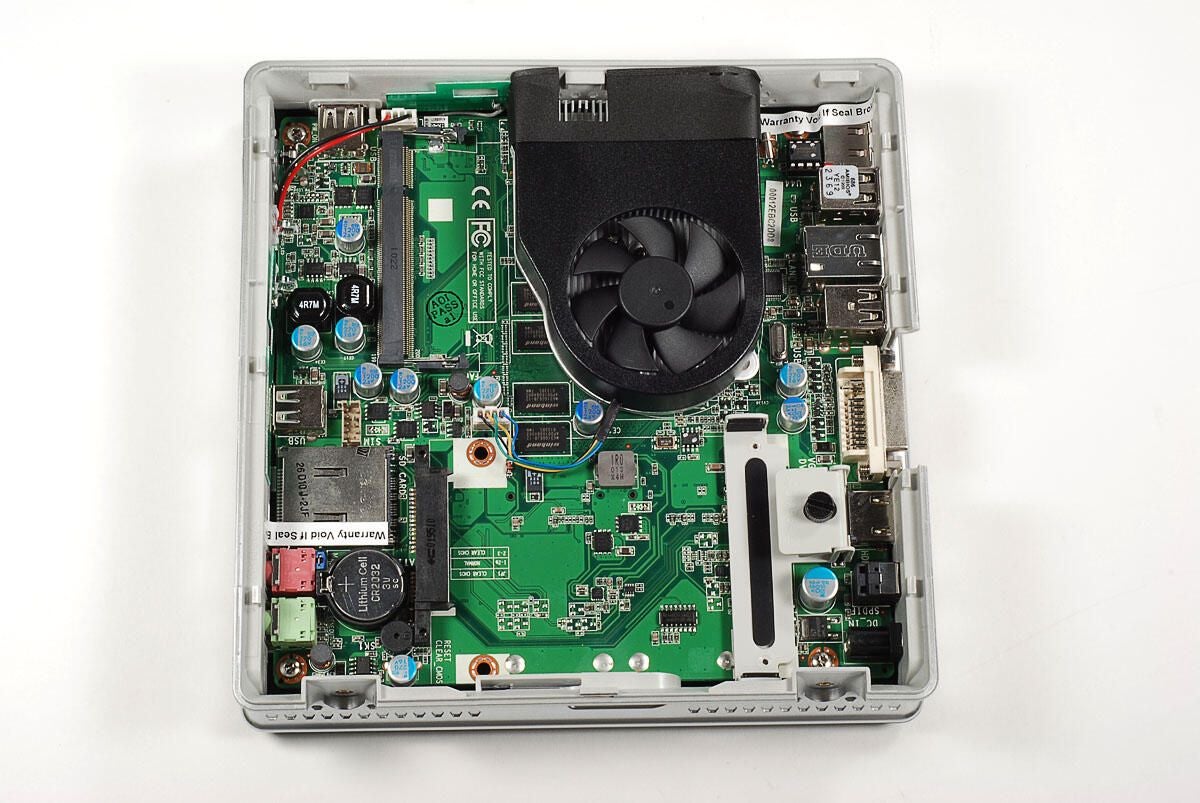
with the cooling fan and heat sink removed, we get our first look at the three large chips beneath.
Photo by: Bill Detwiler / TechRepublic
Caption by: Bill Detwiler
Photo by: Bill Detwiler / TechRepublic
Caption by: Bill Detwiler

Genesys Logic GL850A Low Power USB 2.0 Hub Controller
Photo by: Bill Detwiler / TechRepublic
Caption by: Bill Detwiler
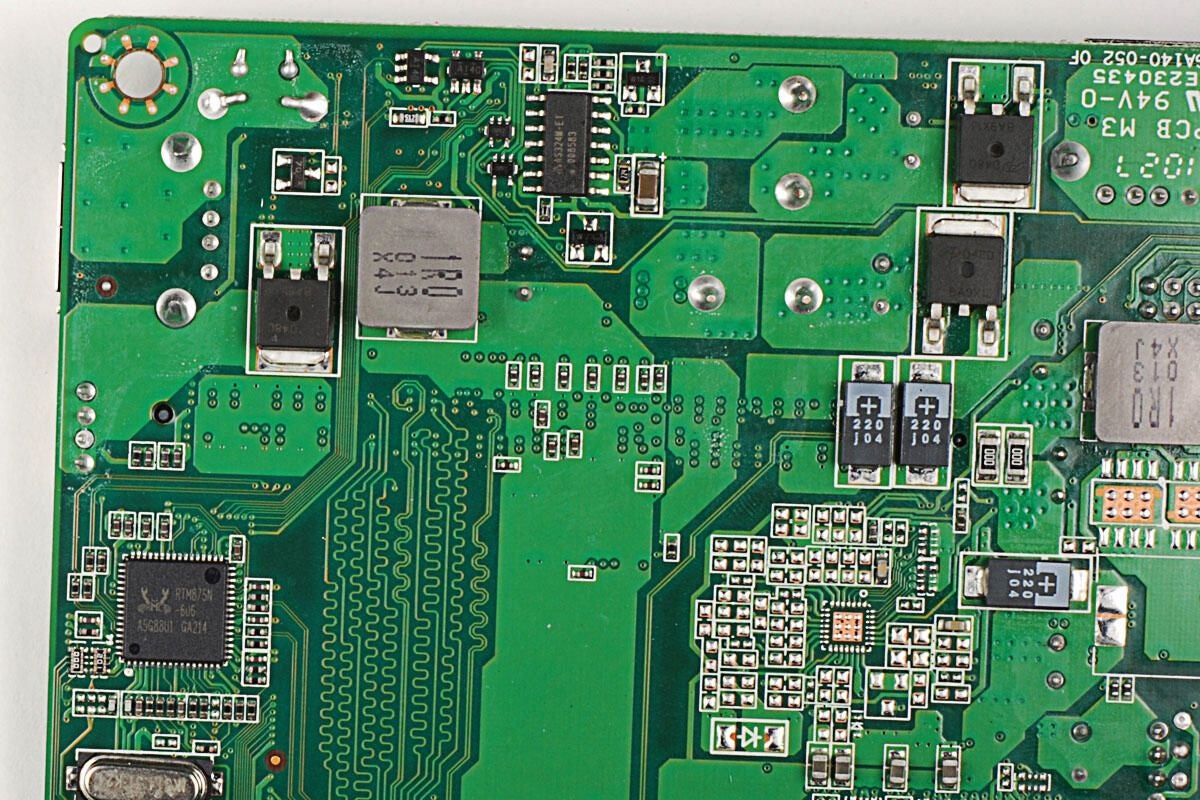
Although I was unable to find a data sheet for this chip (markings RTM875N-606) on Realtek’s site, it is likely a clock generator.
Photo by: Bill Detwiler / TechRepublic
Caption by: Bill Detwiler
The ZBOX HD-ID11 uses a Realtek ALC888 7.1+2 Channel High Definition Audio Codec and Realtek RTS5158E chip, which is likely the controller for the multimedia card reader.
Photo by: Bill Detwiler / TechRepublic
Caption by: Bill Detwiler
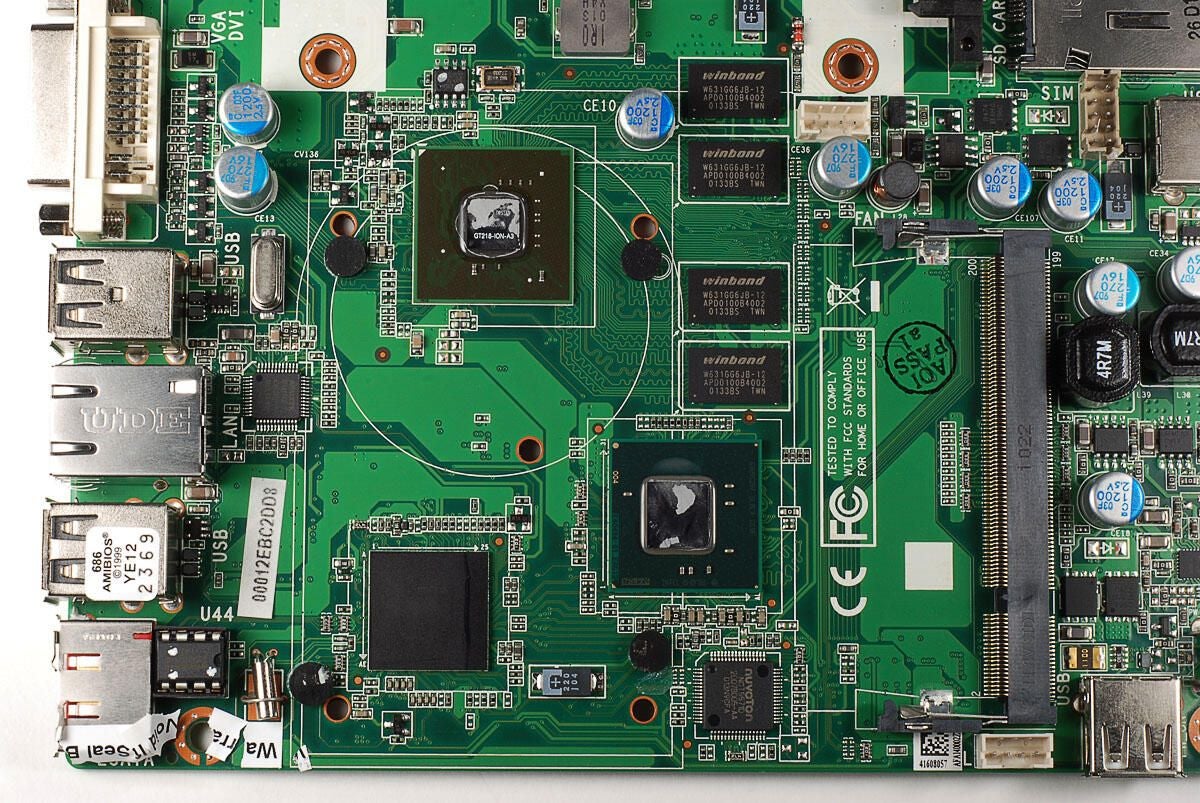
The ZOTAC ZBOX HD-ID11 has four Winbond W631GG6JB-12 Graphics DRAM chips.
Photo by: Bill Detwiler / TechRepublic
Caption by: Bill Detwiler

According to Nuvoton documentation, the NCT5571D LPC Super I/O integrated circuit “supports serial port interface, PS/2 interface, GPIO, hardware monitoring functions, Intel PECI and AMD SB-TSI.”
Photo by: Bill Detwiler / TechRepublic
Caption by: Bill Detwiler
Our ZBOX HD-ID11 has an Intel NM10 Express chipset, that consists of a Pinetail Atom D510 1.66 GHz Dual Core CPU (shown here) and a southbridge chip (shown in the next photo).
Photo by: Bill Detwiler / TechRepublic
Caption by: Bill Detwiler
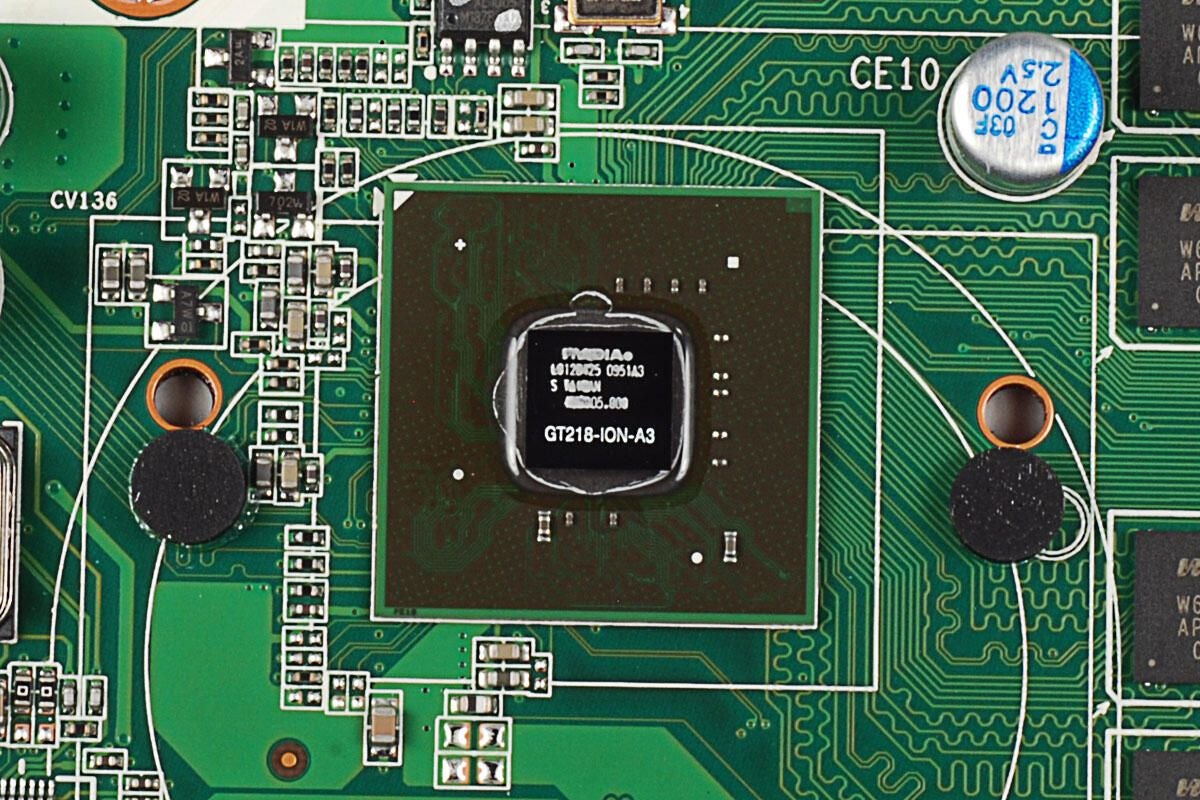
Our ZBOX HD-ID11 has an NVIDIA ION 2 (GT218-ION-A3) GPU.
Photo by: Bill Detwiler / TechRepublic
Caption by: Bill Detwiler
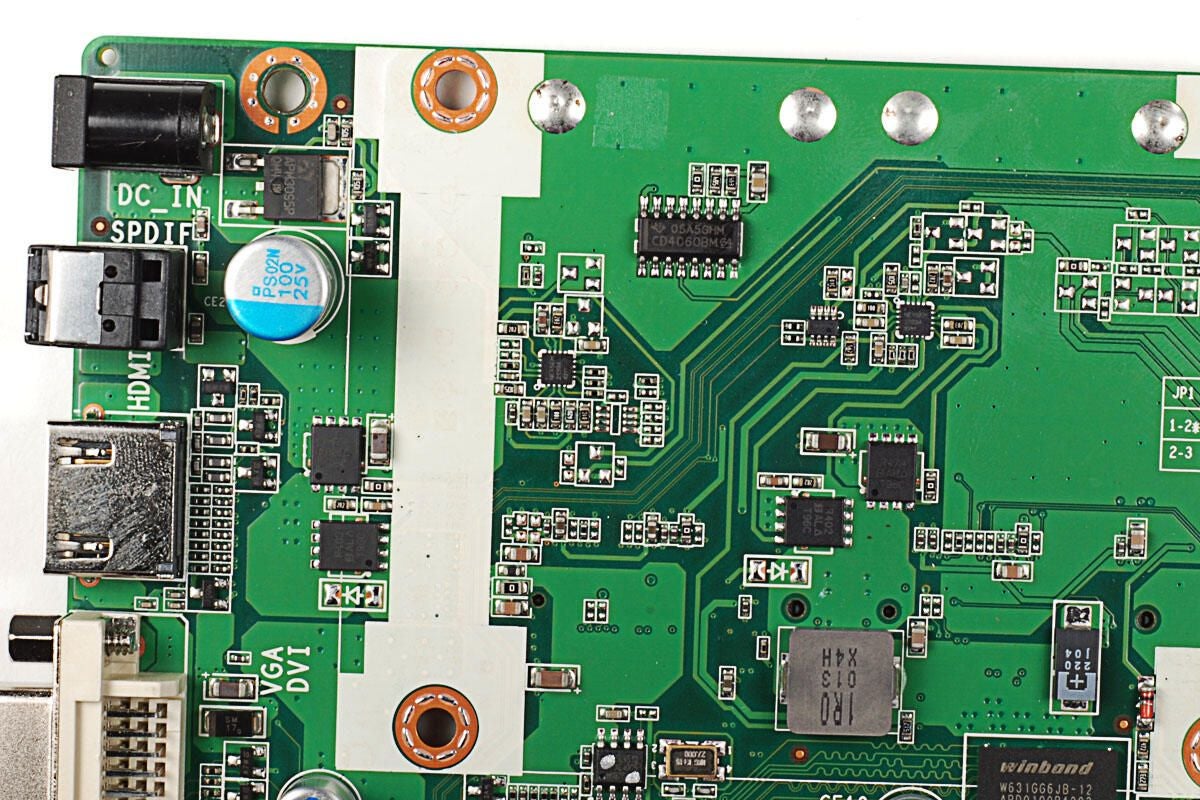
This Texas Instruments chip with markings 05A5GHM CD4060BM G4 is likely a CMOS 14-Stage Ripple-Carry Binary Counter/Divider and Oscillator.
Photo by: Bill Detwiler / TechRepublic
Caption by: Bill Detwiler
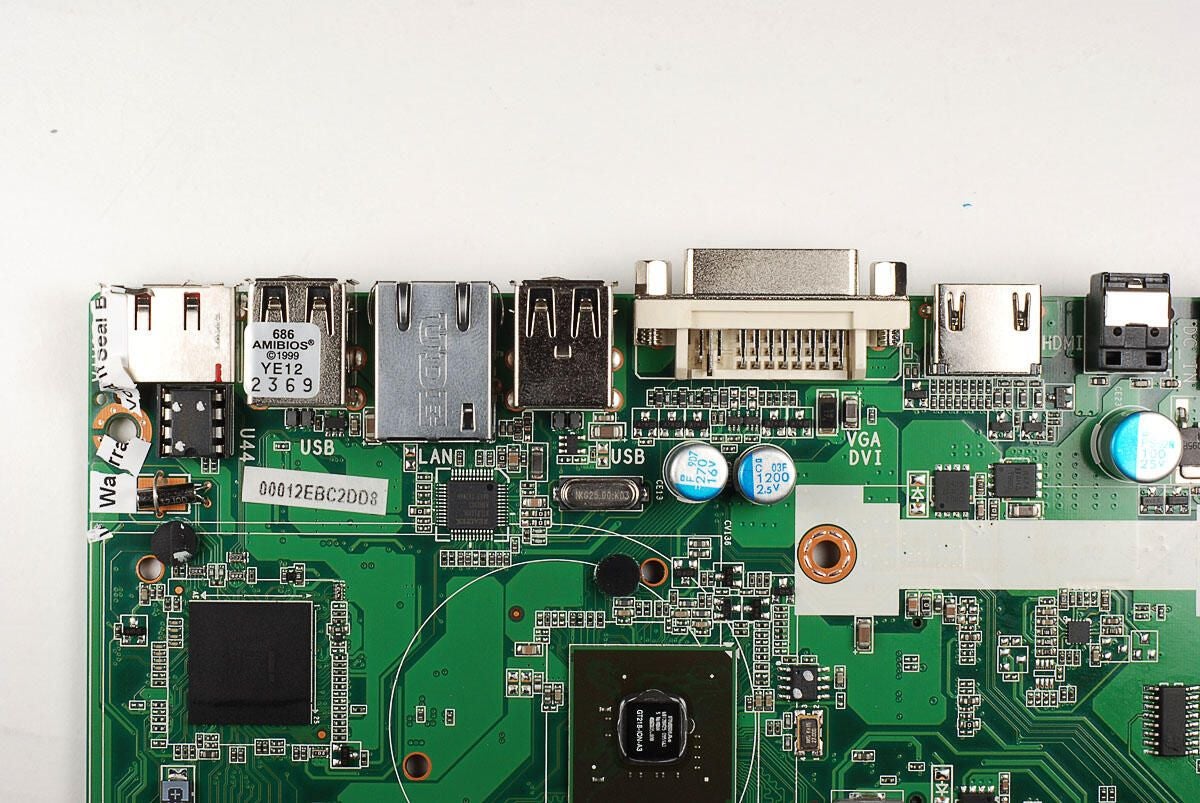
Just below the Ethernet jack (shown in this photo with the markings “UDE” ) is the Realtek RTL8111D(L) Integrated Gigabit Ethernet Controller for PCI Express Applications.
Photo by: Bill Detwiler / TechRepublic
Caption by: Bill Detwiler
Bill Detwiler is the Editor for Technical Content and Ecosystem at Celonis. He is the former Editor in Chief of TechRepublic and previous host of TechRepublic's Dynamic Developer podcast and Cracking Open, CNET and TechRepublic's popular online show. Previously, Bill was an IT manager in the social research and energy industries. He has bachelor's and master's degrees from the University of Louisville, where he has also lectured on computer crime and crime prevention.


