
This\r\ngallery is also available as a TechRepublic article.
I recently\r\nreceived an email message from a reader who had installed Windows XP in a\r\nClient Hyper-V virtual machine on a Windows 8 desktop machine and now wanted to\r\ndo the same on her tablet PC running Windows 8. However, the tablet did not\r\nhave an optical disc drive and she wondered what would be the best way to solve\r\nthe problem.
\r\n\r\n
As you know, one\r\nof the new features in Windows 8 is the ability to natively open and view ISO\r\nand VHD files right from File Explorer. I showed you the VHD feature in a\r\nrecent article, Restore individual files from a System Image in Windows 8, but I have not really examined the ISO\r\nprocess in any detail; however, it is just as slick and will solve half of the\r\nproblem. The other half of the problem can also be solved by using a simple\r\nthird-party tool called ISO Recorder.
\r\n\r\n
Thus, I told the\r\nreader that she could create an ISO file of her Windows XP CD, copy that ISO\r\nfile to the tablet, and then use it to install XP in a Client Hyper-V virtual\r\nmachine
\r\n\r\n
In this article,\r\nI’ll show you how to use ISO Recorder to create an ISO. As I do, I’ll show you\r\nhow Windows 8’s native ISO reader works.
\r\n\r\n
Images by Greg Shultz for TechRepublic
\r\n\r\n
ISO Recorder is a\r\nsimple Power Tool-like utility created by Alex Feinman for Windows 7 that works\r\nperfectly in Windows 8. It doesn’t come with a lot of bells and whistles, but\r\ndoes the job of creating ISO files very efficiently. In addition to creating an\r\nISO file from optical discs, ISO Recorder will allow you to create ISO files\r\nfrom folders.
\r\n\r\n
When you arrive\r\nat the ISO Recorder download page, you’ll see that the Windows 7 edition of ISO Recorder is labeled version\r\n3.1 and that there are downloads for both 32-bit ad 64-bit.
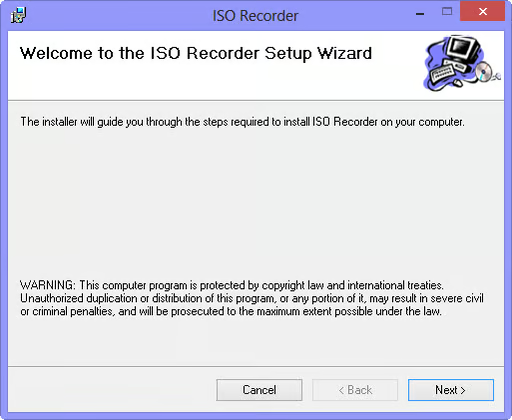
\r\n\r\nOnce\r\nyou download the MSI installation file, just launch it and follow along with\r\nthe ISO Recorder Setup Wizard, shown in Figure\r\nA.
\r\n\r\n
Images by Greg Shultz for TechRepublic
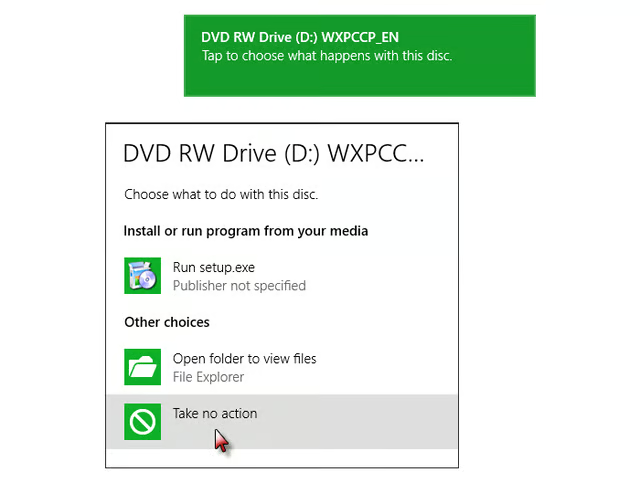
\r\n\r\nAfter\r\nISO Recorder is installed in Windows 8, insert your Windows XP CD into the\r\noptical drive. When the toast appears in the upper right corner, click it and\r\nthen select the Take No Action choice, as shown in Figure B.
\r\n\r\n
Images by Greg Shultz for TechRepublic
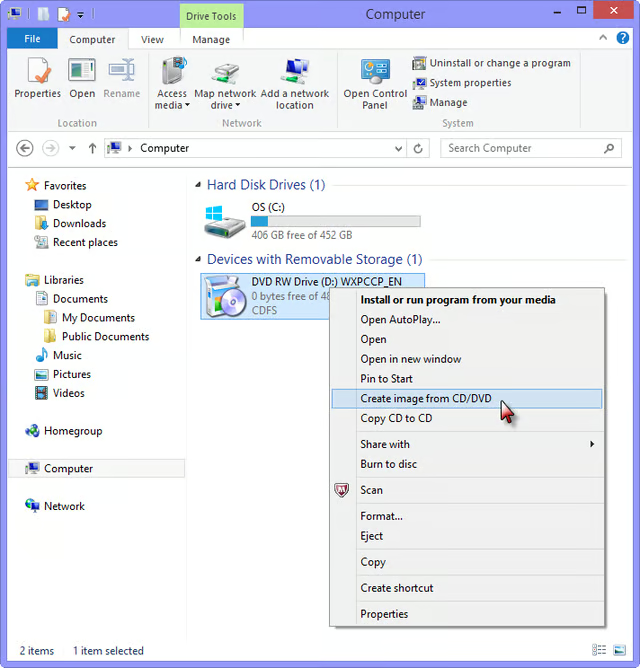
Now, launch Computer, right click on the optical disc\r\ndrive and select the Create Image from CD/DVD command that now appears on the\r\ncontext menu, as shown in Figure C.
\r\n\r\n
Images by Greg Shultz for TechRepublic
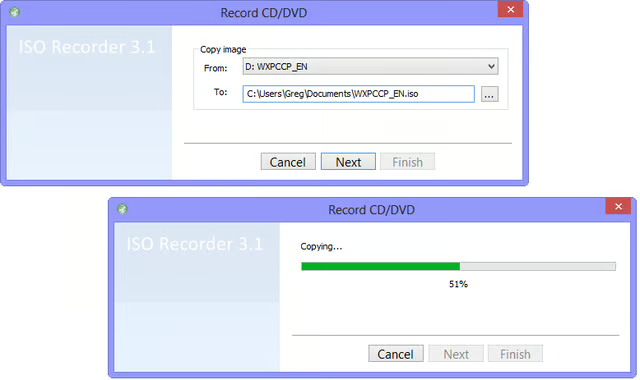
In a moment, you’ll see the opening screen of ISO\r\nRecorder showing the source and destination. You can specify a different\r\ndestination if you wish or just click Next. Once the operation is under way,\r\nyou’ll see a progress bar that will keep you apprised of operation. This\r\nprocess is illustrated in Figure D.
\r\n\r\n
Images by Greg Shultz for TechRepublic
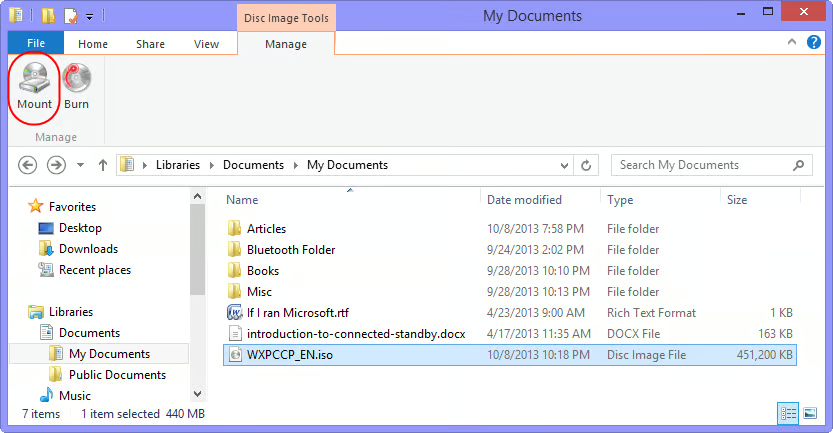
\r\n\r\nOnce\r\nyou have created an ISO file, mounting it in Windows 8 is easy. To begin,\r\nlaunch File Explorer, access the location, and then select the ISO file. When\r\nyou do, you’ll see the Disc Image Tools – Manage tab appear in File Explorer\r\nand will select it. You’ll then select the Mount button, as shown in Figure E.
\r\n\r\n
Images by Greg Shultz for TechRepublic
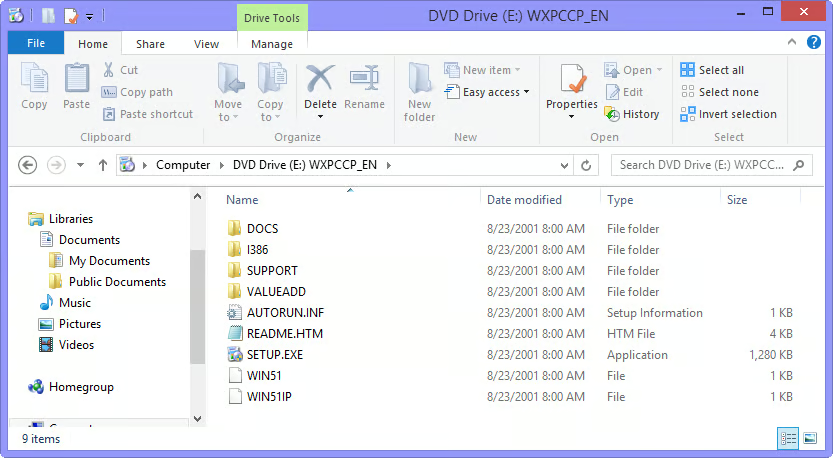
As soon as you\r\ndo, Windows 8 will mount the ISO file and assign it a drive letter. At this\r\npoint, you’ll essentially have a virtual optical disc drive and you’ll see the\r\ncontents from the Windows XP CD, as shown in Figure F.
\r\n\r\n
Images by Greg Shultz for TechRepublic
\r\n\r\n
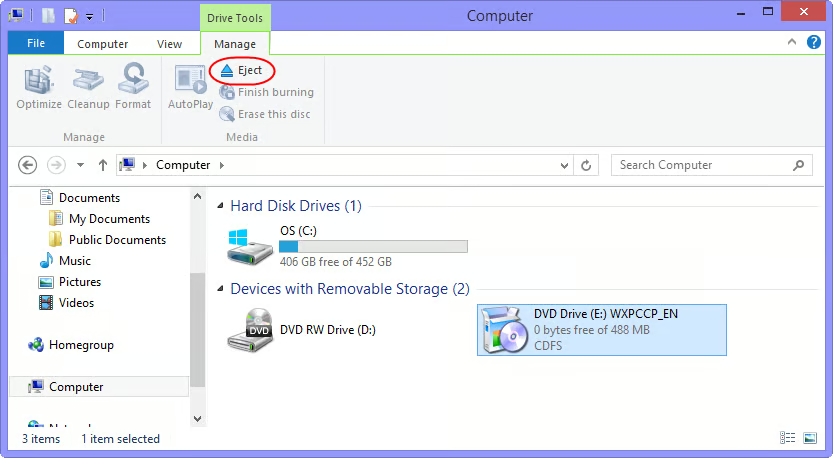
When you are\r\nfinished using the ISO file you’ll dismount it using the\r\nEject command. To do so, launch Computer and select your virtual optical disc\r\ndrive. When you select the Disc Image Tools – Manage tab, you can just click\r\nthe Eject button, as shown in Figure G.
\r\n\r\n
\r\n\r\nAre\r\nyou planning to create a Windows XP virtual machine in Windows 8 Client Hyper-V?\r\nIf so, will you use the technique shown in this article? As always, if you have\r\ncomments or information to share about this topic, please take a moment to drop\r\nby the TechRepublic Community Forums and let us hear from you.
\r\n\r\n
Images by Greg Shultz for TechRepublic

My first computer was a Kaypro 16 \"luggable\" running MS-DOS 2.11 which I obtained while studying computer science in 1986. After two years, I discovered that I had a knack for writing documentation and shifted my focus over to technical writing.


