This\r\ngallery is also available as a TechRepublic article.
If you are using Windows XP and regularly backup your data\r\nto an external hard disk using Windows\r\nXP’s Backup Utility, chances are that you imagined that when it was time to\r\nmove to a new Windows 8 computer, you would simply restore your backup into the\r\nnew operating system. Or maybe you have found yourself with a completely dead\r\nWindows XP computer and all you have left is your trusty external hard disk\r\ncontaining a recent backup created with Windows XP’s Backup Utility.
\r\n\r\n
Regardless of your situation, you will not be happy to learn\r\nthat Windows 8’s backup and restore tools are completely different from the\r\nBackup Utility that came with Windows XP and as such the backup files are\r\nincompatible. You’ll also not be happy to learn that while Microsoft provided\r\nsupplemental utilities that were designed to allow you to restore a Windows XP\r\nbackup in Windows Vista and for Windows 7; they haven’t done so for Windows 8.\r\nAnd, to add insult to injury, neither of the previous supplemental utilities\r\nwill work in Windows 8.
\r\n\r\n
Fortunately, you will be very happy to learn there’s a way\r\nthat you can make Windows XP’s Backup Utility run in Windows 8. Of course, I\r\nwouldn’t recommend using it on a regular basis, but this technique works perfectly\r\nfine to restore a Windows XP backup in Windows 8.
\r\n\r\n
In this article, I’ll show you how to get Windows XP’s\r\nBackup Utility to run in Windows 8. I’ll then walk you through a restore\r\noperation and pass along some pointers as I do.
\r\n\r\nCredit: Images by Greg Shultz for TechRepublic
\r\n\r\n
You may have noticed that I specifically mentioned restoring\r\ndata from an external hard disk. The\r\nreason that I did is because Windows 8, like Windows 7, no longer includes the Removable\r\nStorage Manager, which is required to restore a backup that was saved on tape. As\r\nsuch, if you need to restore a Windows XP backup that was saved on tape; you\r\nwill need to restore it on a computer running Windows XP or Windows Vista.
\r\n\r\n
\r\n\r\n
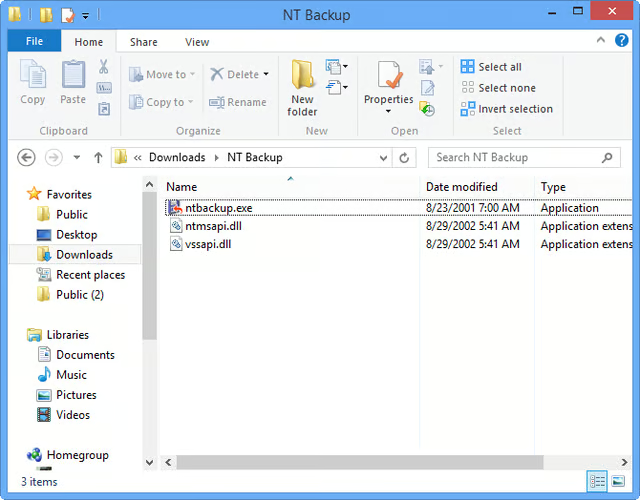
Getting Windows XP’s Backup Utility to run in Windows 8 is\r\nactually very easy once you know how. As it turns out, Windows XP’s Backup\r\nUtility only needs three files to run:
\r\n\r\n
\r\n
\r\n
\r\n
\r\n\r\n
Of course, ntbackup.exe is the utility’s executable file, ntmsapi.dll\r\nis the Removable Storage Public Interfaces DLL file, and vssapi.dll is the\r\nMicrosoft Volume Shadow Copy Requestor/Writer Services API DLL file. (Even\r\nthough the Removable Storage Public Interfaces DLL file is required, you still\r\ncan’t restore from a tape drive in Windows 8.)
\r\n\r\nIf you still have access to\r\na Windows XP system, you can simply copy these three files from the C:\\Windows\\System32\r\nfolder onto a flash drive. If you don’t have access to a Windows XP system,\r\nyou’ll discover that some enterprising users on Web have made these files\r\navailable for download; just Google nt5backup.cab. The .cab file functions just\r\nlike a .zip file, so all you have to do is extract the three required files.\r\nFor example, I extracted the three files to a folder I created called NT\r\nBackup, as shown in Figure A.
\r\n\r\nCredit: Images by Greg Shultz for TechRepublic
\r\n\r\n
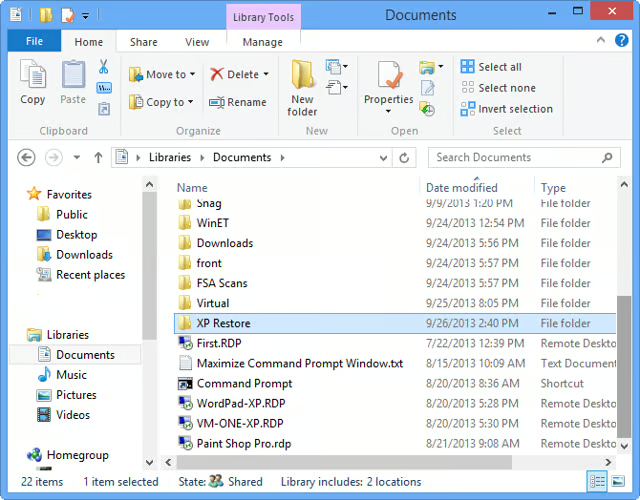
When you are using Windows XP’s Backup Utility to restore\r\nfiles into Windows 8, you need to be aware that you are forcing old technology\r\nto work in a new operating system and will need to take some precautions along\r\nthe way. The first precaution is not to attempt to restore files into their\r\noriginal location. For example, you won’t want to restore Windows XP’s My\r\nDocuments into Windows 8’s Documents due to differences in naming, permissions,\r\nvolume mount points, etcetera. Instead, you will want to create a folder in\r\nyour Windows 8 system and then restore your XP files into that folder. You can\r\nthen redistribute them into the proper Windows 8 folders later.
\r\n\r\nFor my example, I created a\r\nfolder called XP Restore in my Documents folder, as shown in Figure B.
\r\n\r\nCredit: Images by Greg Shultz for TechRepublic
\r\n\r\n
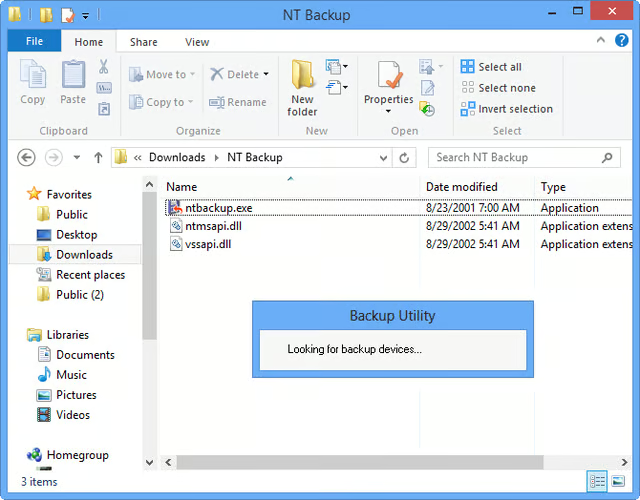
To get started, go to the folder to which you copied the three\r\nfiles and run the ntbackup.exe file. When you do, the Backup Utility will begin\r\nlooking for backup devices, as shown in Figure C.
\r\n\r\nCredit: Images by Greg Shultz for TechRepublic
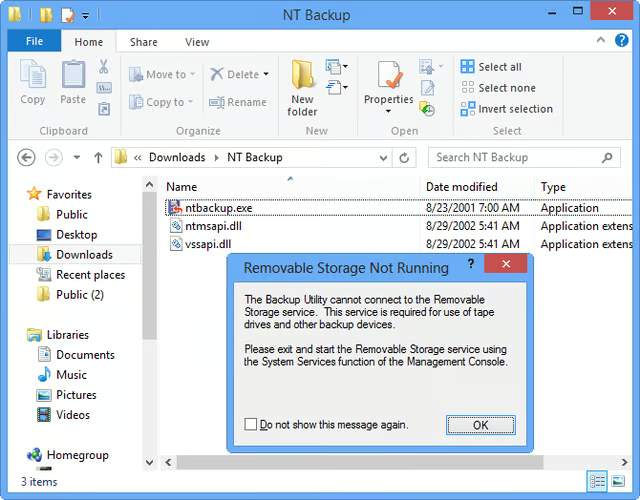
In\r\na moment, the Backup Utility will display a message box, as shown in Figure D,\r\ninforming you that it cannot connect to the Removable Storage service. As I\r\nmentioned earlier, Windows 8, doesn’t include the Removable Storage Manager,\r\nwhich is required to restore a backup that was saved on tape. Fortunately, this\r\nisn’t a showstopper and you can just click OK to bypass the message.
\r\n\r\nCredit: Images by Greg Shultz for TechRepublic
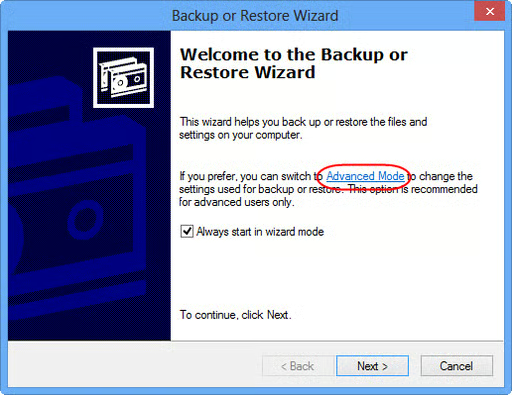
You\r\nthen see the first screen in the Backup and Restore Wizard, as shown in Figure\r\nE. While you can use the wizard to run the restore operation, you can save\r\nyourself some steps by selecting Advanced Mode.
\r\n\r\nCredit: Images by Greg Shultz for TechRepublic
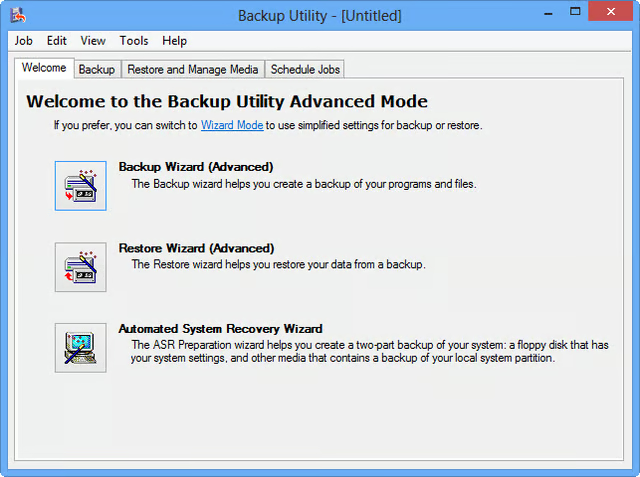
When\r\nyou see the main Backup Utility screen, shown in Figure F, you’ll want to\r\nselect the Restore and Manage Media tab.
\r\n\r\nCredit: Images by Greg Shultz for TechRepublic
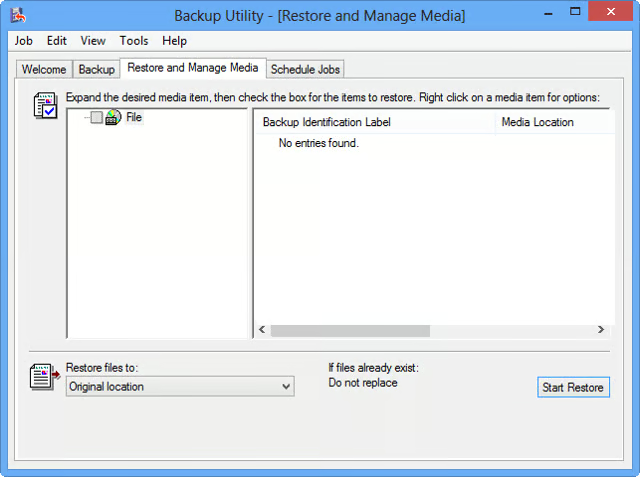
Once\r\nyou access the Restore and Manage Media tab, as shown in Figure G, you’ll see\r\nthe controls that you will need to configure and use to perform the restore\r\noperation.
\r\n\r\nCredit: Images by Greg Shultz for TechRepublic
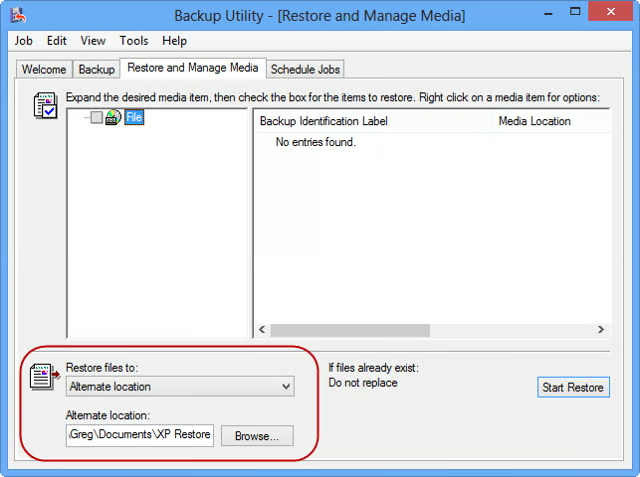
The\r\nfirst setting that you will need to change is the Restore files to setting.\r\nYou’ll need to select Alternate location from the drop down and then use the\r\nBrowse button to select the receiving folder that you created earlier. As you\r\ncan see in Figure H, I selected the\r\nXP Restore folder that I created.
\r\n\r\nCredit: Images by Greg Shultz for TechRepublic
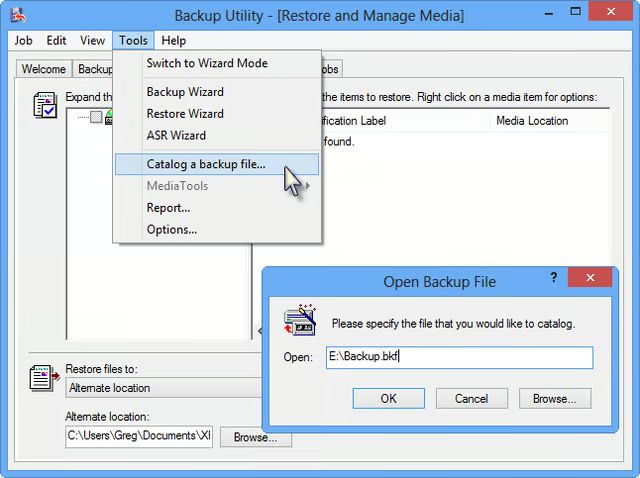
Now\r\nyou will need to locate and select the backup file. To do so, pull down the\r\nTools menu and select the Catalog a backup file command. When you see the Open\r\nBackup File dialog box, click the browse button and locate your backup file. As\r\nyou can see in Figure I, I have selected my Backup.bkf file on the external\r\nhard disk assigned to drive E.
\r\n\r\nCredit: Images by Greg Shultz for TechRepublic
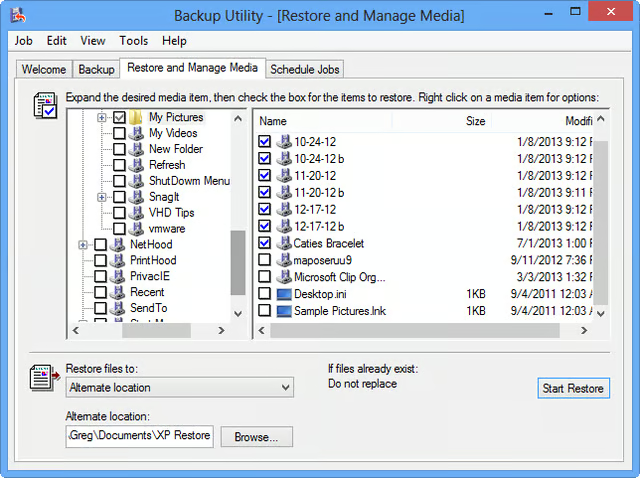
Once\r\nyou select your backup file, it will appear in the Backup Utility. If you don’t\r\nwant to restore everything, you can expand the tree and then you can pick and\r\nchoose individual files, as shown in Figure J.
\r\n\r\nCredit: Images by Greg Shultz for TechRepublic
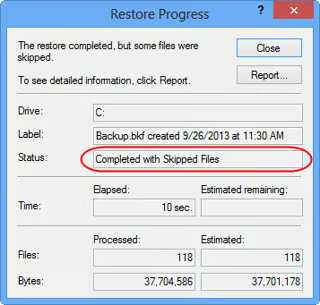
Once\r\nyou are satisfied with your configuration settings, just click the Start\r\nRestore button. When you do, you’ll be prompted to confirm the restore\r\noperation and can just select OK to begin. Once the restore operation is\r\ncomplete, you’ll notice that the Status indicates that the operation was\r\nCompleted with Skipped Files, as shown in Figure K.
\r\n\r\nCredit: Images by Greg Shultz for TechRepublic
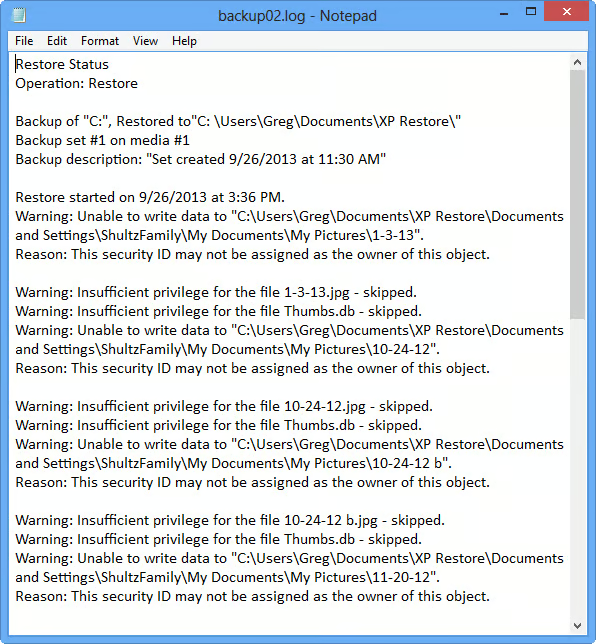
If you then click the Report button, you’ll notice that the\r\nlog indicates that every file was skipped due to insufficient privileges, as\r\nshown in Figure L. However, when you check the receiving folder that you\r\ncreated, you’ll find that every file has indeed been restored properly. You can\r\nwrite this off as a side effect of running a Windows XP program in Windows 8.
\r\n\r\n
The report indicates that none of the files were restored.
\r\n\r\n
To complete the operation, just close the Backup Utility.
\r\n\r\n
\r\n\r\n
If you encounter a corrupt backup file or prefer to use a\r\nmore full featured restore program to restore a Windows XP backup in Windows 8,\r\nthen you might want to investigate the BKF\r\nRepair Tool from SysTools. While this tool is primarily designed to recover\r\nand repair BKF files so that you can restore them, it is compatible with\r\nWindows 8 and can be used to perform a normal restore operation. You can\r\ndownload a free demo that will allow you to test its validity – you can access\r\nand see your files but you can’t actually restore them. If you like what you\r\nsee and want to use the BKF Restore Tool to actually restore your Windows XP\r\nbackup to your Windows 8 system, you will need to purchase the\r\nprogram.
\r\n\r\n
\r\n\r\n
Are you planning on restoring a Windows XP backup in Windows\r\n8? If so, will you use the technique shown in this article? As always, if you\r\nhave comments or information to share about this topic, please take a moment to\r\ndrop by the TechRepublic Community Forums and let us hear from you.
\r\n\r\nCredit: Images by Greg Shultz for TechRepublic

My first computer was a Kaypro 16 \"luggable\" running MS-DOS 2.11 which I obtained while studying computer science in 1986. After two years, I discovered that I had a knack for writing documentation and shifted my focus over to technical writing.


