Google is always experimenting with new features for Chrome OS. Recently they released yet another one of those test features, available only on the Dev build of Chrome OS, that allows you to set and use a PIN unlock code for the lock screen (NOTE: This only works for the lock screen and not the sign in screen).
Why would you want to enable a PIN for your unlock screen? Ease of use. There are times when you’re in and out of your Chromebook throughout the day and you don’t want to have to constantly enter that challenging password. To get around this, and still retain a modicum of security, you can enable a four digit PIN code for easier entry. How do you do this? Let’s find out.
A word of warning
At the moment, this setup only works on the developer build of Chrome OS. If you want to play around with the PIN unlock, you must change to that channel. If you’re willing to run the dev channel, here’s how to switch:
- On your Chromebook, open up Settings
- At the top of the Settings window, click About Chrome OS
- Click More info
- Click Change channel
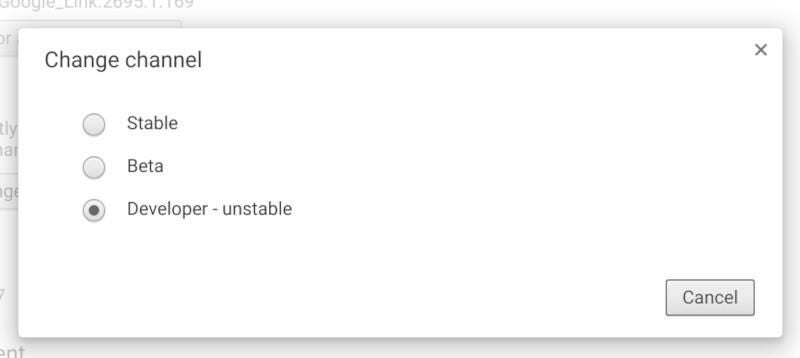
- From the popup (Figure A), select Developer – unstable
- When prompted, click Change Channel
- Allow the device to be updated (depending upon your network connection, this could take some time)
- When prompted click Restart
Figure A

Changing the Chrome OS channel.
Enabling the PIN option
The PIN option isn’t enabled by default. In order to enable it, follow these steps:
- Open up Chrome on your Chromebook
- Type chrome://flags/#quick-unlock-pin in the address bar
- Hit the Enter key
- Select Enabled from the drop-down
- When prompted, click the RESTART NOW button
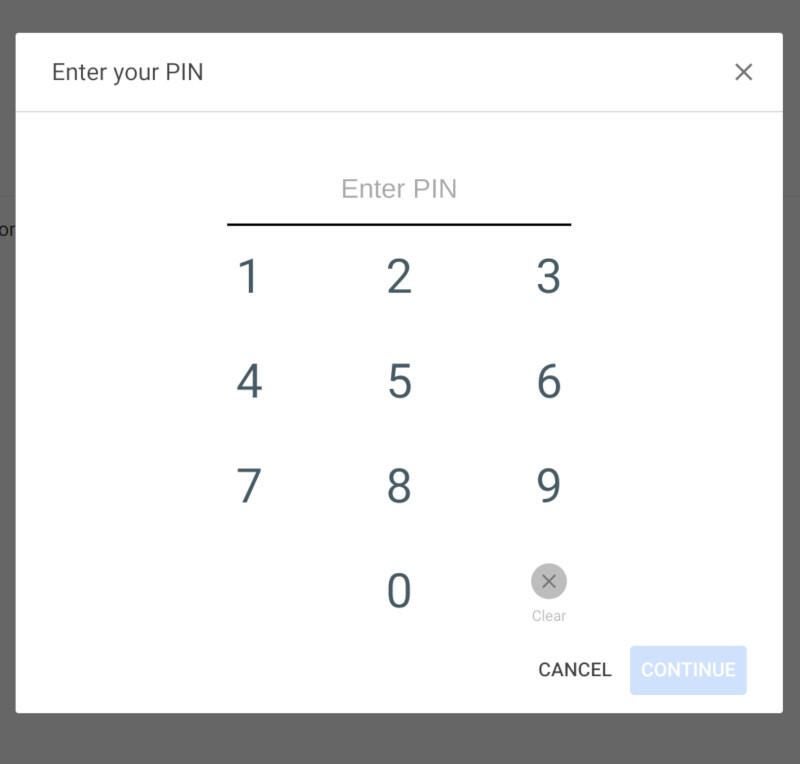
Once the machine reboots, open up Chrome and type chrome://md-settings/. In the Material Design settings window, click on Screen lock (under People). Type your user password and click CONFIRM. In the new window, select PIN or password and then click CONFIGURE PIN. Enter the PIN you want to use (Figure B) and confirm it.
Figure B

Entering the PIN to be used for unlocking your Chromebook.
Finally, reboot your machine one last time.
Using the PIN
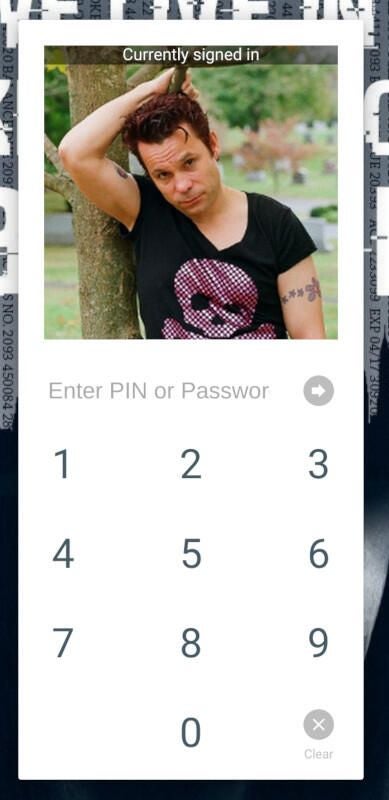
As I mentioned, the PIN unlock is only used for locking your screen (and not signing into the machine). If you hit the Search button and the l key at the same time, the screen will lock and display the PIN pad (Figure C). Enter your newly created PIN and, viola!, you’re back in business.
Figure C

The PIN unlock screen in action.
Keep it safe
The PIN option is no substitute for a very strong password. But when you’re at work, going in and out of your desktop (and don’t want to leave it wide open for everyone to see when you’re not at your desk), and you don’t want to constantly enter that 10-, 12-, 16-digit password (remember, I said strong), your best bet is to switch to the developer channel and enable the PIN option. This setup will make your daily grind a bit more efficient, yet still keep your data safe from prying eyes.