Your data center is running like a well-oiled machine. One reason for that smooth functionality is that you have the help of virtual machines (VMs), thanks to VirtualBox. But what happens when you want to spin one of those VMs away from their current hosting server?
Say you have a web server, an email server, a database server, a Docker server, and a Nextcloud server all running on the same machine (by way of the same VirtualBox installation) and you want to move the Nextcloud server to either another data center or to a more powerful host. You might be inclined to copy the VM files from one host to the next, but that would be the wrong method. Instead, you should export the VM as an appliance, move the appliance to the new host, and then import the appliance.
How do you export a VM as an appliance? I’ll walk you through the process.
SEE: Quick glossary: Virtualization (Tech Pro Research)
How to export a VM to an appliance
In order to export an appliance, your VM must be powered down. If the machine is in a Saved state, it will not export.
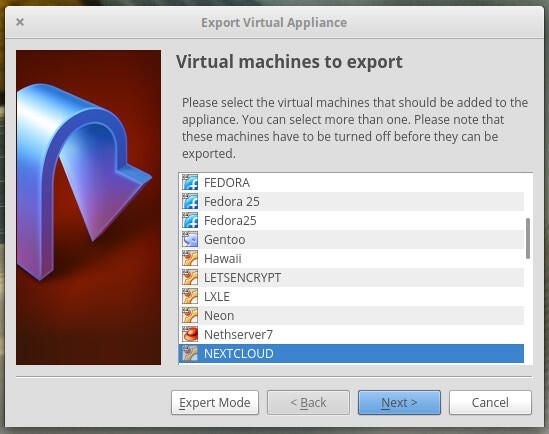
Once the VM in question is powered down, go to the VirtualBox main window and click File | Export Appliance. In the resulting window, locate and select the VM to be exported and click Next (Figure A).
Figure A

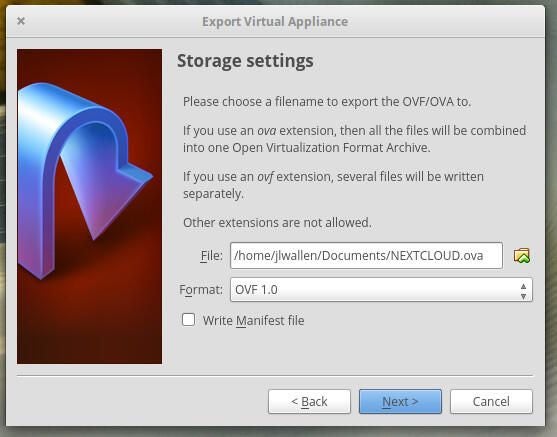
In the next window, select the location to hold the exported appliance file as well as format of the appliance (Figure B). By default, the file will be saved with an .ova extension, which is good because it will save the appliance as a single file; if you save the file with an .ovf extension, the appliance will be saved as separate files. In other words, stick with the default .ova extension–you can select between OVF 0.9, OVF 1.0, and OVF 2.0. The default is OVF 1.0, and it usually works fine.
After you name the appliance and select the format, click Next.
Figure B

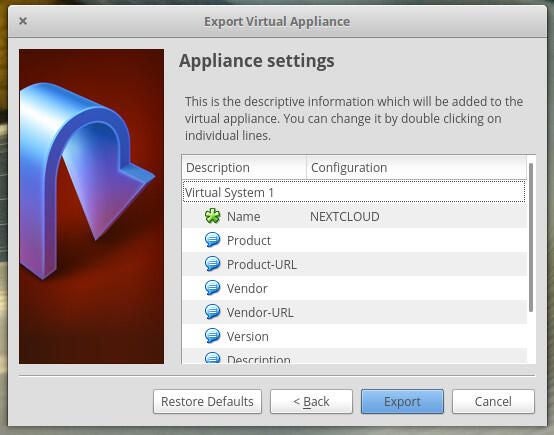
In the final screen, review your settings and then click Export to start the process (Figure C).
Figure C

The process takes awhile; for instance, to export my Nextcloud appliance, the process took approximately 10 minutes. When the export completes, you will find an .ova file that you can move to the new host machine, import, and then enjoy the VM on its new host.
How to import a VM to an appliance
- Move the exported .ova file to the new host server.
- Open VirtualBox.
- Click File | Import Appliance.
- Locate the .ova file.
- Click Next.
- Review the Appliance settings.
- Click Import.
When the import completes (this process takes significantly less time than exporting), the VM is ready to start up and use.
An easy way to move VMs
Exporting VMs to appliances is one of the easiest and most reliable ways to move guests from host to host; in fact, this method should be considered the only method of migrating your VMs from host to host. Give this task a try, and see if your VMs aren’t happy living in their new home.
