


When your data center depends upon virtualization, you might well be employing a number of tools to make that so. You may also be using numerous machines to serve up those guest platforms. When, for whatever reason, you are faced with moving a virtual machine from one machine to another, it is important to know how to do that in different ways. Recently I illustrated how easy it is to export and import VirtualBox machines from within the app GUI. This time around, however, I’m going to illustrate how this process can be achieved from the command line. This will come in handy when you’re dealing with a headless server or a server without a GUI frontend.
The process of both exporting and importing virtual machines in VirtualBox is handled with the vboxmanage command. Let me walk you through the process.
Exporting a virtual appliance
We will be exporting our virtual machine to the Open Virtual Appliance (.ova) format. One of the reasons we do this is because it combines the virtual machine into a single file, which can then be transferred from machine to machine with ease. Before we do export an appliance, we have to see a listing of our current virtual machines. To do this, open up a terminal window (or log into your headless/GUI-less server) and issue the command:
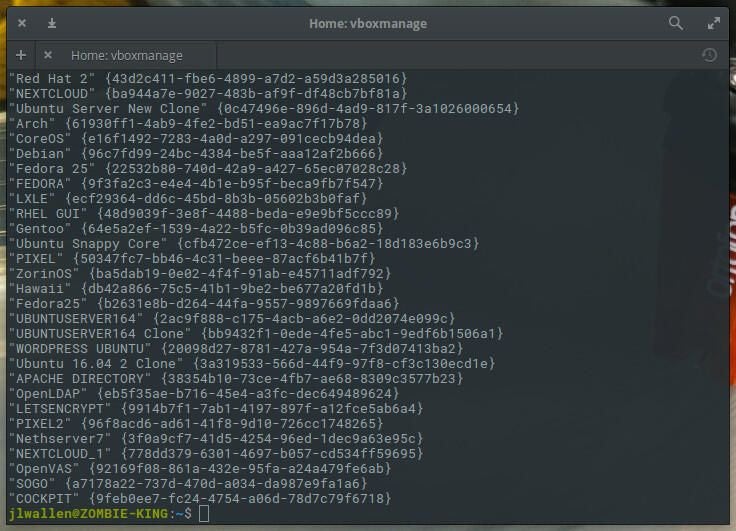
vboxmanage list vms
The above command will list out all of your virtual machines (Figure A).
Figure A
Locate the virtual machine you want to export (I’ll demonstrate with UBUNTUSERVER164 and name the appliance ubuntu_server_new) and then run the export command like so:
vboxmanage export UBUNTUSERVER164 -o ubuntu_server_new.ova
Once you issue the above command, the export process will begin. Depending upon the size of the virtual machine to be exported, this will take considerable time; so head off and take care of another administrative task.
Importing virtual appliance
Once your .ova file has exported, relocate it to the new hosting server. On the new server, open a terminal and import that virtual appliance with the command:
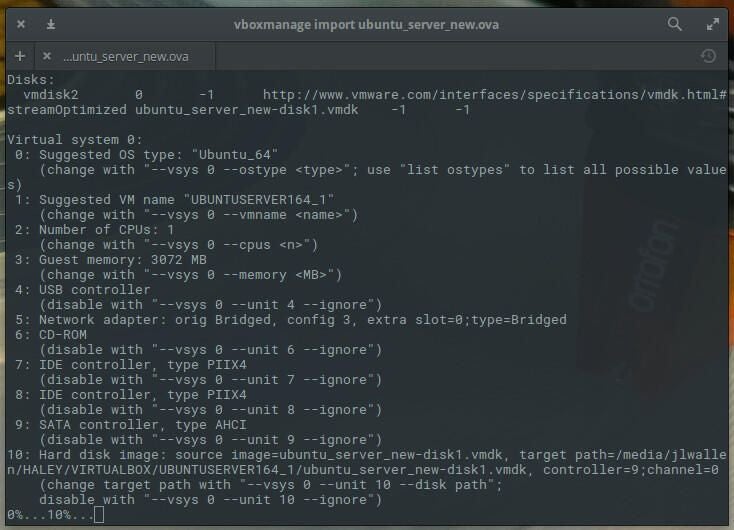
vboxmanage import ubuntu_server_new.ova
When you issue the command, you will immediately be presented with the settings of that virtual appliance (Figure B) and the import will begin.
Figure B
The importing process will not take nearly as long as the exporting. Once the import completes, the Virtual Machine is good to go; fire it up and it’s ready to serve.
Who needs a GUI?
Don’t let working with a GUI-less or headless server stop you from getting the most out of VirtualBox. With the help of the vboxmanage command, you can do much more than you might think.