


In this tutorial, I’ll show you how to create Outlook appointments from a few Excel records. By saving the source data in the comma-delimited format and then mapping that data to Outlook fields, you can import most data into the appropriate Outlook item with little effort. If you need to move data from Excel into Calendar in Outlook regularly, you should consider automating the process to save time.
I’m using Microsoft 365 Desktop on a Windows 10 64-bit system for this tutorial. You can work with your own Excel data or download the simple demonstration .xlsx file. Please note that Outlook.com does not support this technique.
SEE: Demo: Learn How to Import Excel Records Into an Outlook Calendar
The big picture
This article has a specific goal: to import Excel data into an Outlook appointment. Using .csv data and Outlook’s wizard, you can import lots of different data into different Outlook items. For a list of the most commonly used Outlook appointment field names, take a look at the table below. This will be particularly useful for power users of Microsoft Office products.
This table is not comprehensive by any means, but it is a helpful starting point for users who want to move data from Excel to Outlook. Outlook stores values with a Yes/No data type as -1 and 0, respectively.
Most common Outlook appointment field names
| All Day Event | Yes/No. If set to Yes, the Duration field is set to 24 hours (1440 minutes). |
| Attachment | Yes/No. |
| Created | Date/Time. Date and time the calendar item is created. |
| Duration | Duration stored as minutes. 24 hours (1,440 minutes) if the All Day Event field is set to Yes. Otherwise, the difference between the values of the End and Start fields. Saved as minutes. |
| End | Date/Time. End date and time of a calendar item. |
| Modified | Date/Time. Last time the calendar item was modified. |
| Notes | Text. Value of the text box of the appointment. |
| Read | Yes/No. Specifies whether the calendar item is marked as read. |
| Recurrence | The following settings apply: 0 None, 1 Daily, 2 Weekly, 3 Monthly, 4 Yearly |
| Recurrence Pattern | Text. Combination of the values of the Recurrence, Start and End fields. |
| Recurrence Range End | Date/Time. Last date and time of a recurring calendar item. |
| Recurrence Range Start | Date/Time. First date and time of a recurring calendar item. |
| Recurring | Yes/No. Specifies whether the calendar item recurs. |
| Remind Beforehand | Number. Minutes before the reminder runs prior to a meeting or appointment. |
| Reminder | Yes/No. If the start time for the meeting or appointment has already passed, the Reminder field cannot be set. |
| Reminder Sound File | Text. Path of the sound file to play as a reminder. |
| Text. Path of the sound file to play as a reminder. | The following settings apply: 0 Free, 1 Tentative, 2 Busy, 3 Out of Office |
| Start | Date/Time. Start time of a calendar item. |
SEE: 3 Ways to Find the Current Day in Outlook Calendar Views
Preparing the Excel data
In older versions of Outlook, you can import directly from an Excel workbook file, but that’s no longer the case in the most recent versions. Before you can import Excel data into Outlook using Microsoft 365, you must save that data to comma-separated (delimited) format or .csv.
SEE: How to Quickly Import a .txt or .csv File Into Microsoft Excel
To illustrate this process, we’ll use the simple data set shown in Figure A. You’ll see that there’s meaningful text to identify the appointment, the appointment date, and time values. The dates and times can be strings or Date/Time values because Outlook is very flexible.
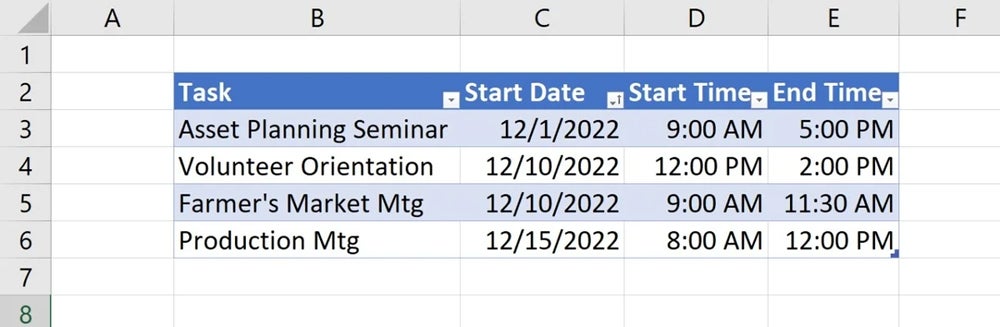
The demonstration .xlsx file contains only one sheet because that’s all the .csv feature supports. Excel won’t allow you to save a multiple-sheet workbook to .csv format. If you try, Excel will display an error message.
The demonstration sheet uses a Table object to organize the data, but you could also use a normal data range. Even though the records are sorted by date, Outlook doesn’t require a sorted data set for this technique to work.
Now, let’s save this sheet to .csv format as follows:
- Click the File tab and choose Save As in the left pane.
- Change the file name, if necessary, but Excel won’t write over your Excel workbook file — it will instead create a new .csv file.
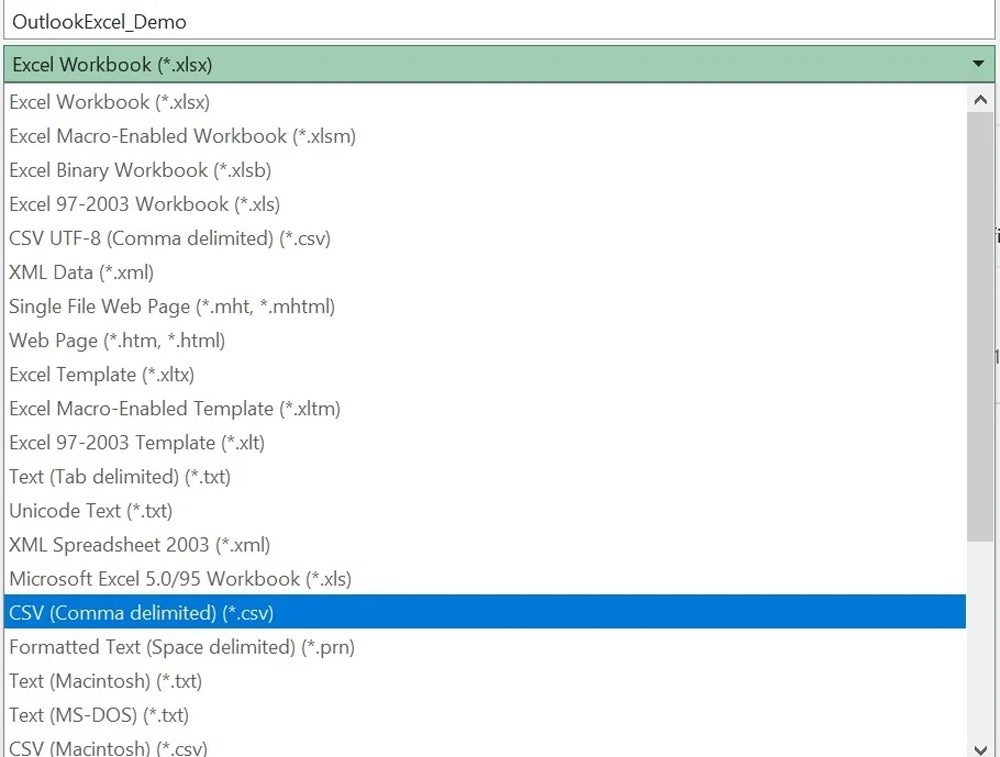
- From the File Type dropdown, choose the CSV (Comma delimited) (*.csv) option (Figure B). The import task will fail if the .csv file is open. Use the UTF-8 version if you’re importing special characters.
- Click Save. You can ignore the possible data loss error if shown. Be sure to note the location of the file if there’s any chance you won’t remember where it is.
- Close the .csv file you just created. Outlook won’t import the data if the .csv source file is open.
With this format, you can now import csv into Outlook calendar.
Importing the data into an Outlook calendar
Now it’s time to open Outlook and prepare to import the records in the .csv file. You will be importing them into an Outlook calendar using a wizard. During this process, you will map the Excel values to Outlook appointment fields.
By map, I mean to connect one Excel field to one Outlook field. You’re telling Outlook where to store the Excel values within Outlook. An Outlook field is similar to an Excel cell, but it’s much more involved. It has a name, a data type and other identifying features. Outlook even supports user-defined fields.
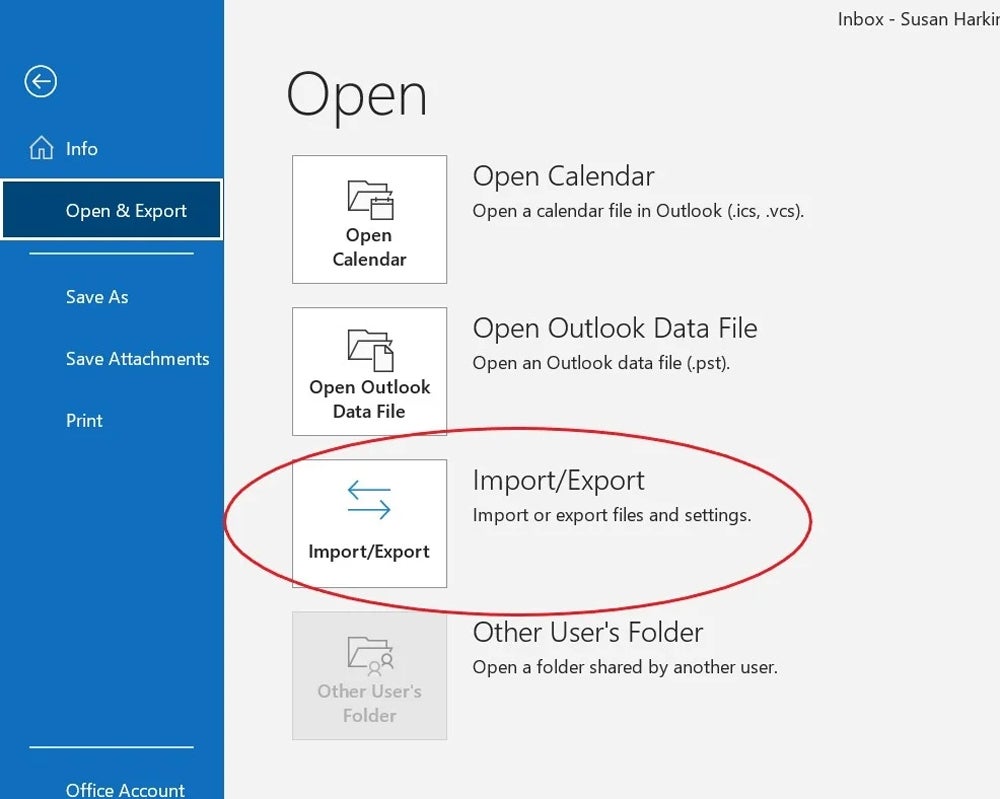
To launch the wizard, open Outlook if necessary and then click the File tab, choose Open & Export in the left pane and then click Import/Export from the Open section shown in Figure C.
Now, run the wizard as follows:
- In the wizard’s first pane, choose Import From Another Program Or File (if necessary) and click Next.
- Choose Comma Separated Values and click Next.
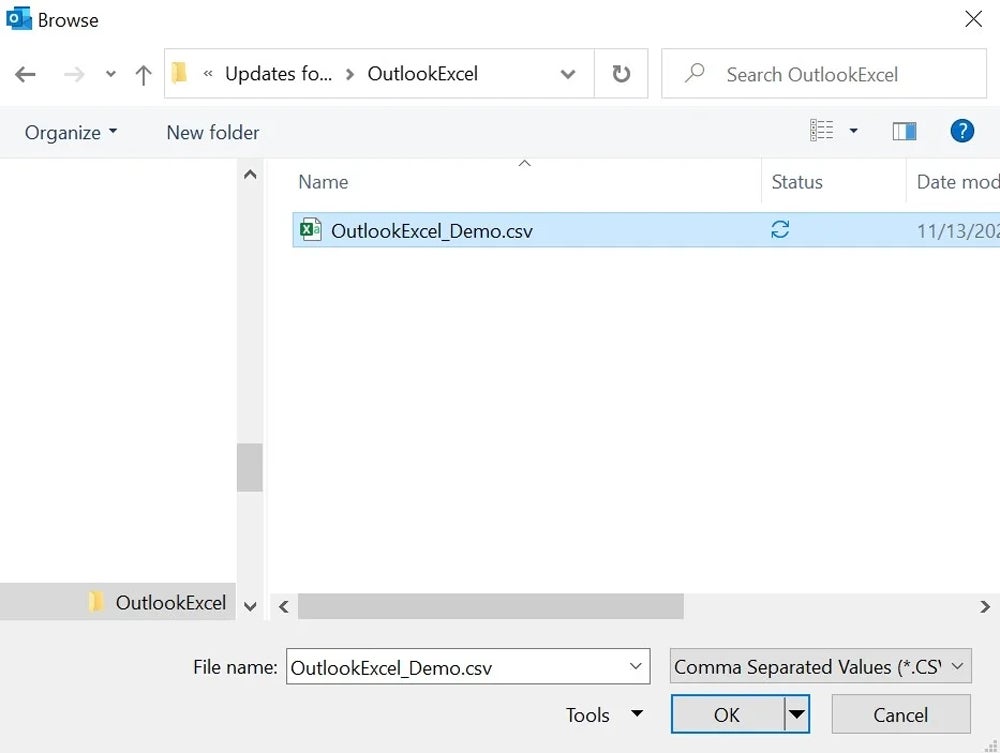
- Click the Browse button and work through the folder structure to select the .csv file you created earlier. Figure D shows the demonstration file.
- Click OK after selecting that file, and the wizard returns to the same pane, which also lets you determine how Outlook deals with duplicates in the .csv file. There won’t be any in our example, but when applying this to your own work, you’ll want to choose appropriately. For now, accept the default option, Allow Duplicates To Be Created, and click Next.
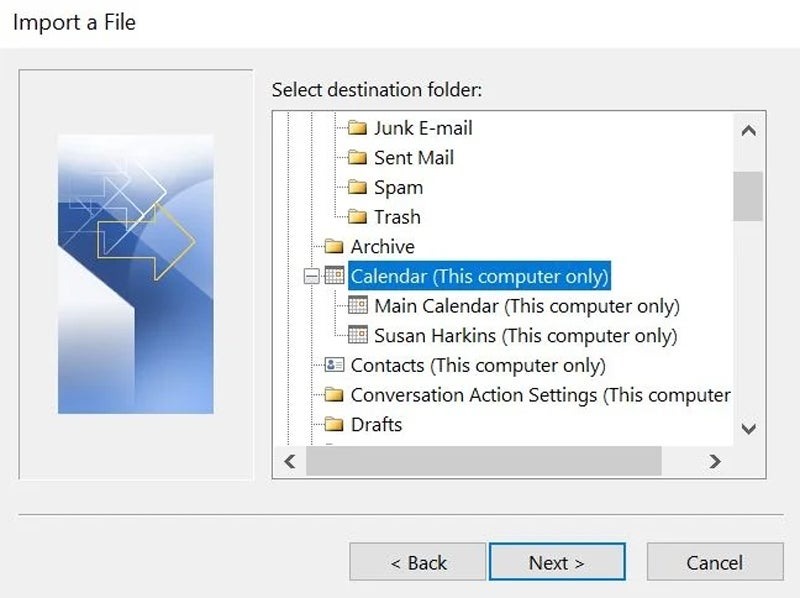
- Select calendar (Figure E) and click Next. If you have more than one calendar, be sure to select the right one.
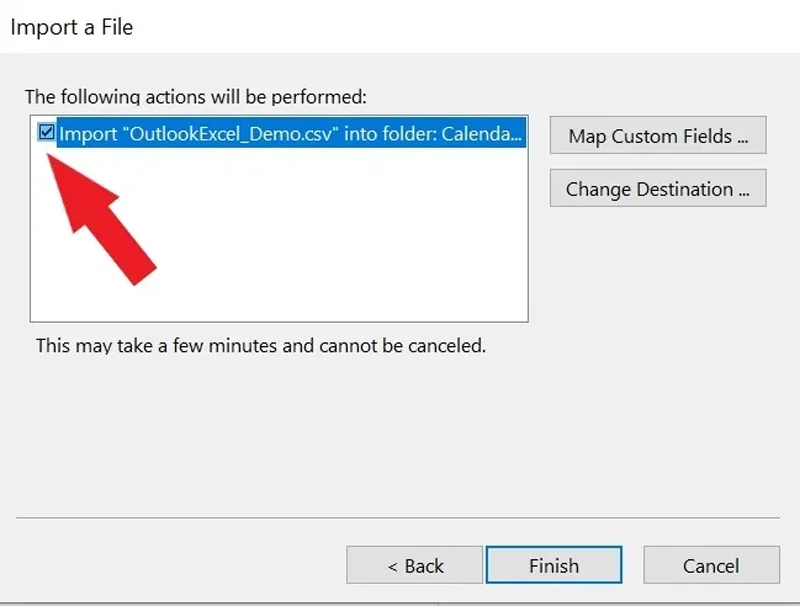
- The wizard will show the file to import. You must click the small square to the left of the file name to display the checkmark. If you don’t see this check (Figure F), the wizard won’t go any further. Once you click it correctly, the wizard might open the mapping dialog automatically. If that happens, you don’t need to click Map Custom Fields as described in the next step.
- Click on the Map Custom Fields option. This step may not be necessary, depending on the outcome you had during step six.
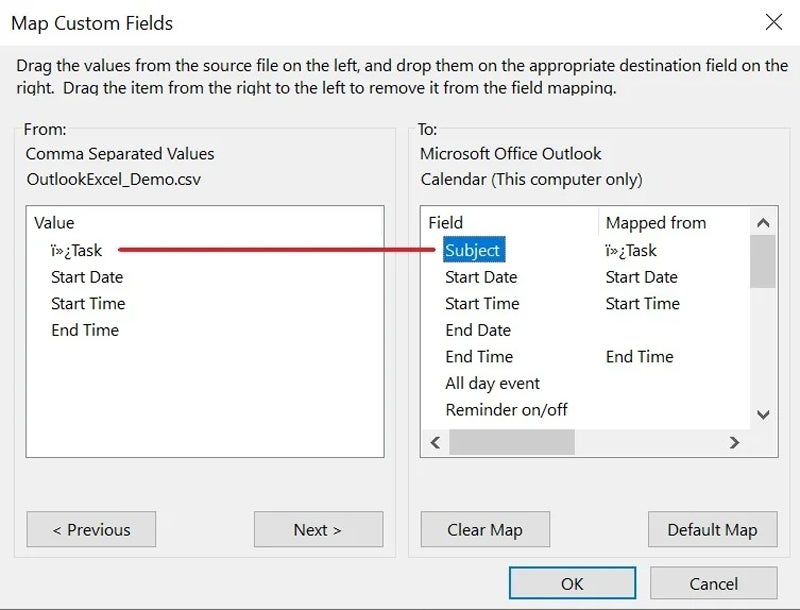
- At this point, you must match the Excel values to an Outlook appointment field. We mentioned earlier that this process is called mapping. The left pane lists the Excel fields, while the right pane lists the calendar fields.As you can see in Figure G, Outlook maps three of the fields correctly for you: Start Date, Start Time, and End Time. That’s because the Excel field names are the same as the Outlook field names.

- There’s no equivalent to the Task field, so you must map this field manually. To map the Task field, simply drag it from the left pane to the right pane (Figure H) and map it to the Outlook Subject field. You may need to repeat this step for any other fields that did not map automatically.
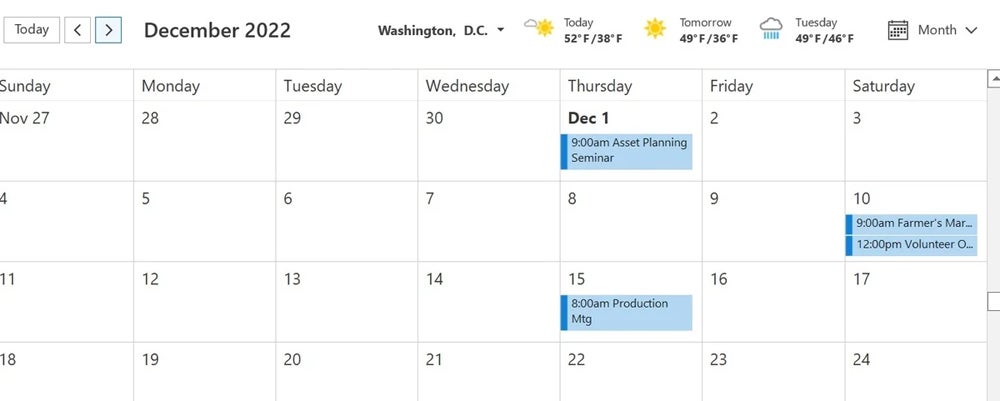
- When you’ve mapped all the fields, click OK and then Finish to trigger the import. Figure I shows the newly created appointments.
There are two things worth noting at this point. First, did you notice the phantom character in Task in the mapping dialog? If you see something like this, it will almost always be in the first field. It’s a formatting code that Excel failed to remove while converting to .csv. You can ignore it. If you do have trouble importing after mapping, try opening the .csv file and re-entering the field names.
Second, if you import the same Excel records, Outlook will duplicate the appointment. If you change the duplication option shown in step four to Do Not Import Duplicate Items, it won’t do this.
SEE: Microsoft Excel from Beginner to Advanced: Crash Course
Can you export Outlook calendar to Excel?
Unfortunately, there’s no native process for creating a dynamic link between Excel and Outlook or to export Outlook calendar to Excel. As you update the Excel file, you must repeat the process I’ve outlined in this article. However, if this happens often enough, you can use Microsoft Power Automate to create a flow that will automate the process.
We’ve created several resources if you want to learn more about the tool, including how to send a scheduled Microsoft Excel report email using Power Automate and how to schedule emails using Microsoft Power Automate.
Frequently asked questions
Can I sync Excel to a calendar?
Yes, you can sync data in Excel to calendars in Outlook by saving your Excel data into a .csv format and then importing it into your calendar application.
Does Excel have a built-in calendar?
No, Excel does not have a built-in calendar. However, it has a built-in feature for creating calendars. You can build one from pre-made templates or manually create one using formulas to populate the dates or via its Date Picker option.
How do I convert Excel data to a calendar?
To turn Excel data into a calendar, you can create a table in Excel with columns for Date, Time, Event, Location, etc. Then, save the data as a .csv file. Next, import the .csv file into your preferred calendar application by following the specific instructions provided by the application. You may need to map the columns in the .csv file to the corresponding fields in the calendar application for a smooth import process.
How do I import calendar entries into Outlook?
You can usually import calendar entries from Excel to calendars in Outlook by opening Outlook and selecting File > Open & Export > Import/Export. From there, choose Import from another program or file and select the .csv file containing the calendar entries. Follow the prompts to complete the import process, ensuring you map the data fields correctly for accurate entry transfer.
How to auto-populate a calendar in Excel?
To auto-populate a calendar in Excel, start by creating a table to represent your calendar and enter the starting date. Then, generate dates using an Excel formula and populate the days of the week in the next column. Next, auto-fill other information, such as events, tasks, or notes for specific dates. You can also apply conditional formatting to highlight special days, weekends, or holidays.