If you want a taste of the Raspberry Pi or simply a lightweight operating system that’ll run on an old computer, then why not try out Raspbian.
Raspbian is the official OS for the Raspberry Pi, based on the Linux-OS Debian, and has been repeatedly updated since 2012.
The OS bundles web browsing, office and programming software and was overhauled to make it simpler to use and more attractive, with the introduction of the PIXEL desktop.
Those who want to try Raspbian but don’t have a Raspberry Pi can now install the OS on a typical PC, any computer with an x86 processor. Even if you’ve limited interest in the Pi, Raspbian could breathe life into an ancient laptop, with the system working well on computers with just 512MB of RAM and Intel’s ageing, budget CPU, the Intel Celeron-M.
Trying out Raspbian on a PC is remarkable straightforward, with the Raspberry Pi Foundation releasing an installer that can be booted from a USB stick.
Here’s how to install and setup Raspbian on PC (with an accompanying video guide above):
- First, download the ISO, the image of the Raspbian OS that you will install. This can be downloaded from here or as a torrent from here.
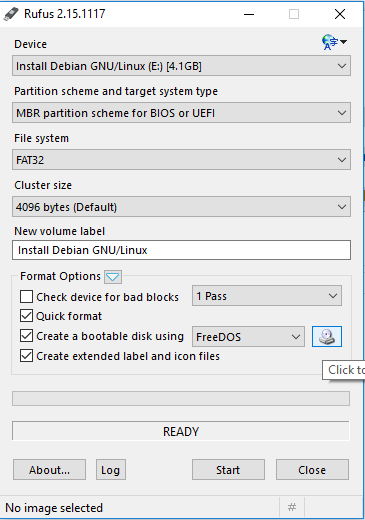
- Next you’ll need to create a bootable USB stick. On Windows a good program for creating a bootable USB stick is called Rufus, which is downloaded from here.
- Take a USB stick, with a size of 2GB or larger and run the downloaded Rufus .exe file. In Rufus, click on the dropdown menu for Device to select the USB stick. Next, click on the icon showing an image of a CD/DVD tray, which is about three quarters of the way down the box, next to ‘Create a bootable disk using’, and select the Raspbian ISO file you just downloaded. Then click Start.
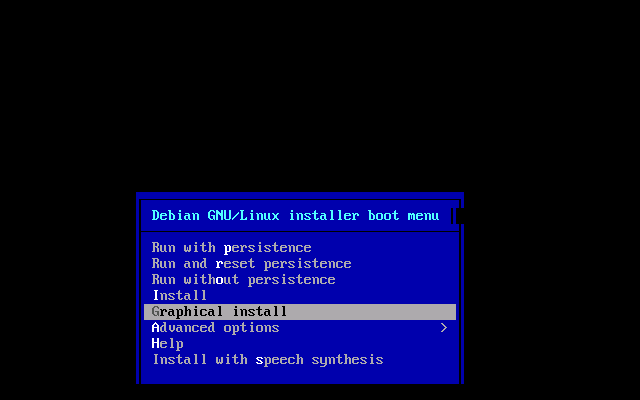
- The process will take some time. Once the bootable disk has been created, take the USB stick and insert it into the PC you want to install Raspbian on. Start/restart this PC, and you’ll be presented with the menu below. There are several options, including running the OS without installing it, with the option to store files between between runs. However in this instance you want to select ‘Graphical Install’ and hit ‘Enter’.
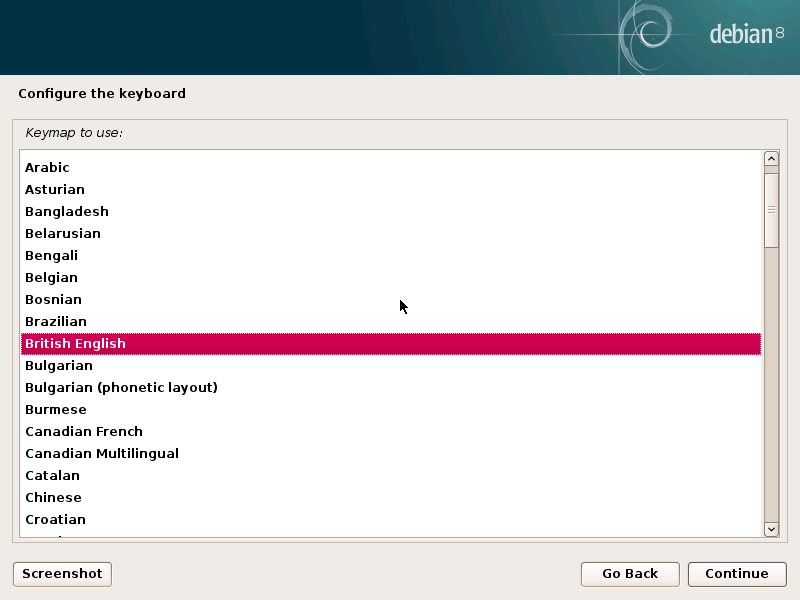
- Choose your language from the drop down menu, using the arrow keys or mouse cursor to select your language of choice, then hit ‘Continue’.
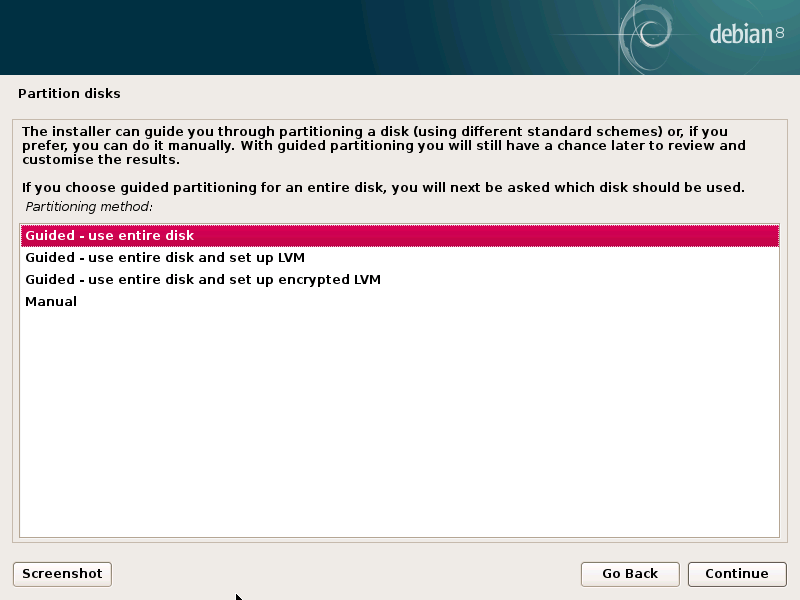
- There are several options. In this instance I’m choosing ‘Guided – entire disk’. This will wipe the hard drive, so only select this option if there is nothing on the hard disk you want to keep.
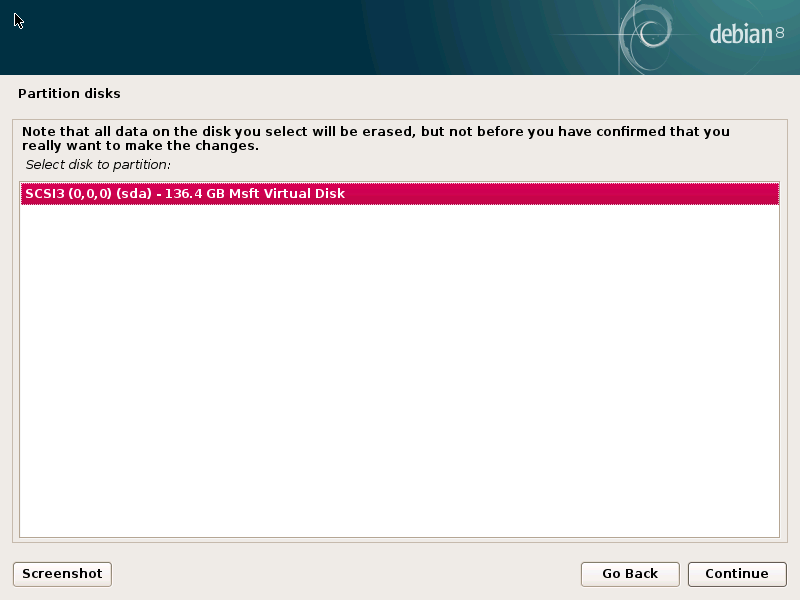
- Choose the drive you wish to install it on — in this instance Msft Virtual Disk. Next select ‘All files in one partition’ and hit ‘Continue’.
- Now wait some time while the system installs.
- The next prompt will ask you whether you want to install the GRUB boot loader on the hard disk. Hit ‘Yes’, then ‘Continue’.
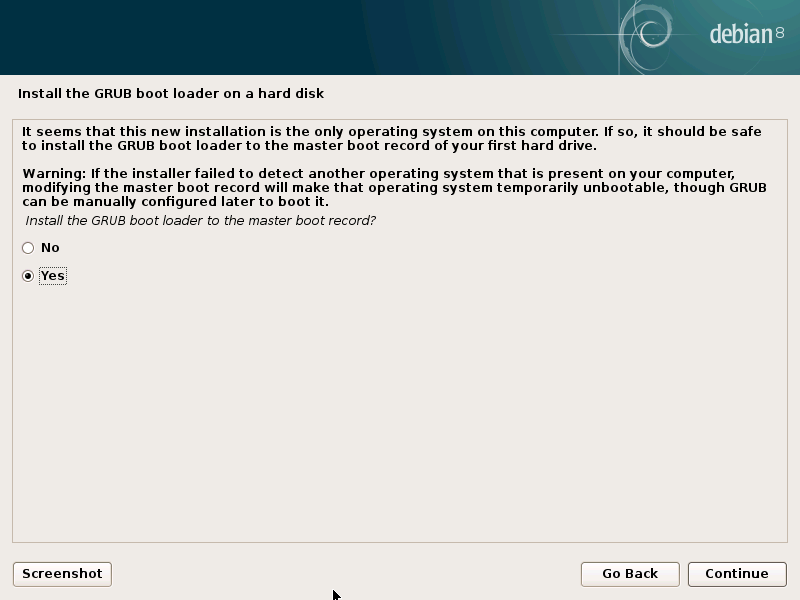
- Next you need to confirm which drive you wish to install the GRUB boot loader on. If the computer only has a single, unpartitioned drive, you should choose the option beginning with ‘/dev/sda’.
- The installation is now complete. Remove the USB stick from the drive and hit ‘Continue’ to reboot the machine.

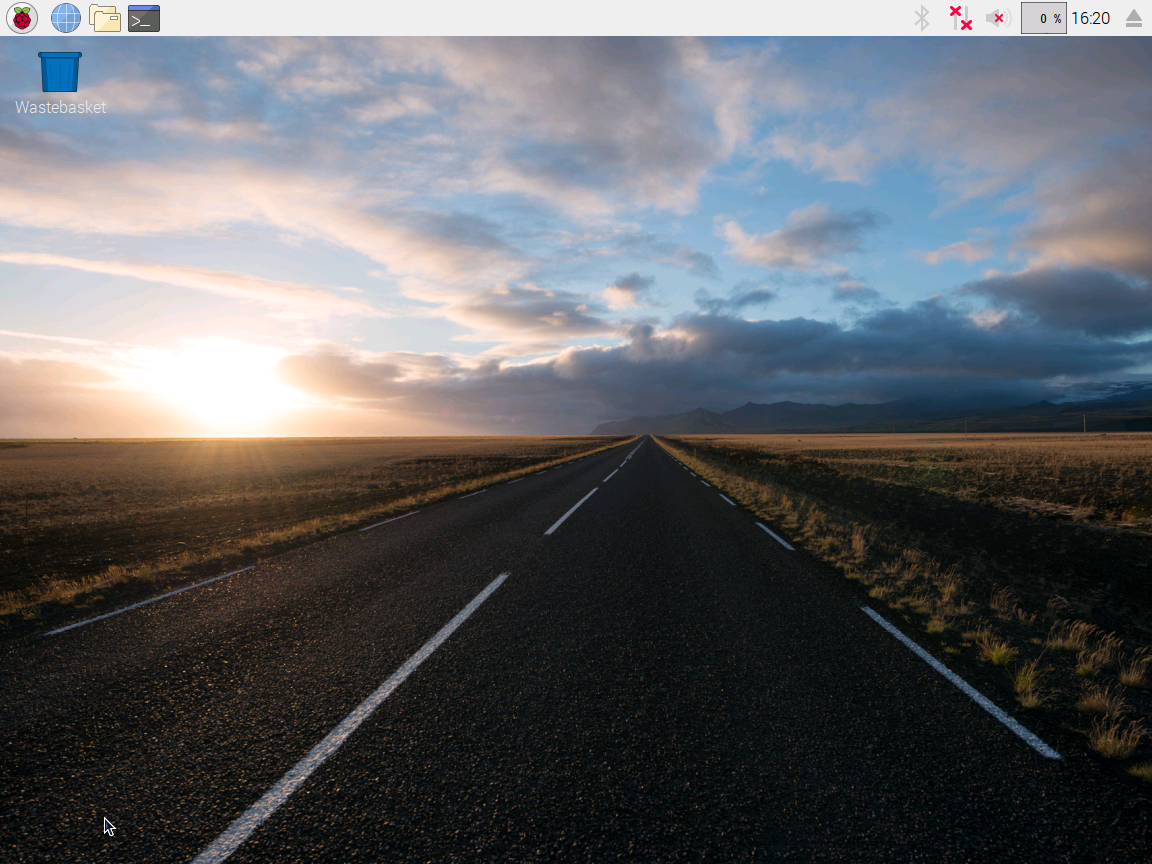
- That should be it. The machine should reboot to the desktop shown below. When I installed Raspbian on an old Acer Aspire Timeline 1830T laptop, with an Intel Core i3 processor, it worked pretty much perfectly, with smooth video playback on YouTube, working sound and no network connectivity issues. Click the Raspberry icon in the top left corner to begin exploring the many different programs. I hope you enjoy your time with Raspbian.