


Image: Getty Images/iStockphoto
The Files app for iOS and iPadOS is a handy tool as it helps you connect to online services and other locations, such as OneDrive, Google Drive, Box, and Dropbox. With iOS 13 and iPadOS, the Files app has been updated so that you can now connect to more places and spaces. One useful new option is the ability to connect to a server or network-attached storage; you can then work with the folders and files on that server. Let’s see how.
SEE: Apple iOS 13: A cheat sheet (free PDF) (TechRepublic)
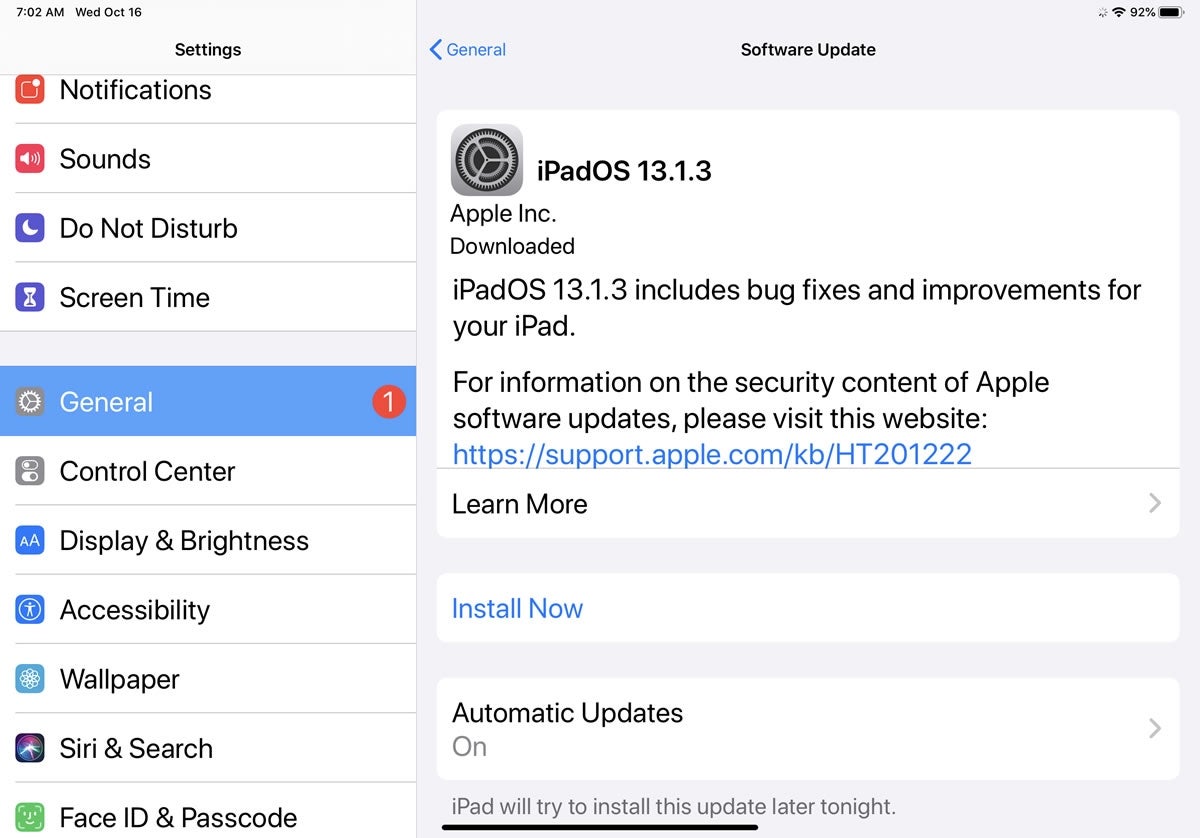
First, make sure you’re running iOS 13.1 or higher on your iPhone and iPadOS 13.1 or higher on your iPad. On either device, go to Settings and tap General. In the General section, tap Software Updates. You’ll either be told that your software is up to date, or the latest update will present itself for download and installation (Figure A).
Figure A
The server connection feature in the Files app requires that the Server Message Block (SMB) protocol be enabled on your server or NAS. SMB is a common and standard protocol for computers to allow sharing of files and printers with different devices on a network. All current versions of Windows include SMB for client and server connections. If you have the necessary permissions and access to a Windows network server, you should be able to connect to it. If you’re connecting to a server or NAS that you manage at home, in a home office, or in a small business, you need to make sure that SMB is enabled on the device. Further, the Files app requires SMB 2.0 or higher, so you’ll have to check the version as well.
You may also need to tweak the SMB settings on your network device. In my situation, I wanted to connect to a Synology NAS on my home office network. When I first tried connecting, I kept getting an error that there was a problem connecting to the server. After I hunted around for help on the web, someone on a discussion board explained that I had to set the maximum SMB protocol on my NAS to SMB3. Once I made that change, I was able to successfully connect to the NAS. If you bump into errors trying to connect this way, you may want to contact your device’s manufacturer for guidance.
To dive in, open the Files app. If you’ve already used the app to connect to your files on various online services, such as Microsoft OneDrive, Google Drive, Box, and Dropbox, that’s great; if not, no problem. You can still set up and use the app to connect to a server or NAS. To get started, tap the ellipsis icon in the upper right of the Browse pane and tap the command to Connect To Server (Figure B).
Figure B

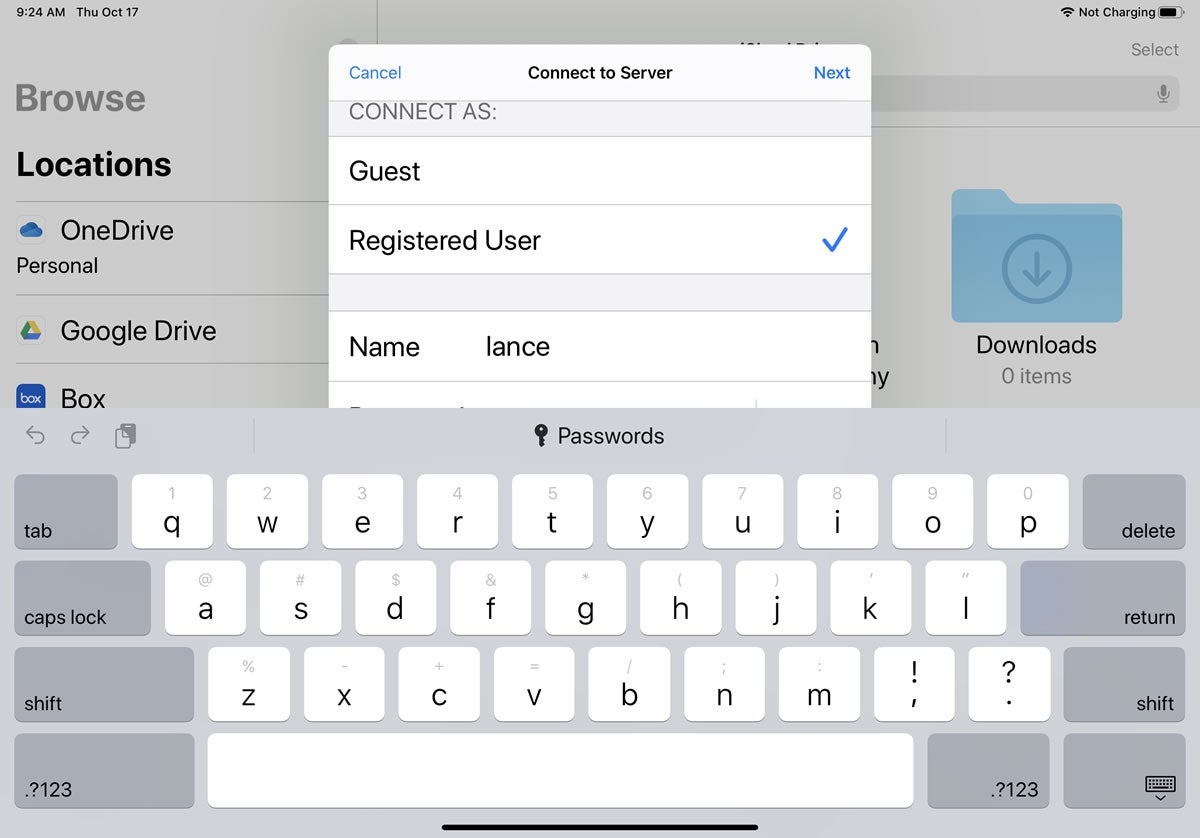
At the Server name field, type either the IP address or the fully-qualified domain name of the server or NAS you wish to access. In my case, assuming the name of my NAS is SynologyNAS, I had to type SynologyNAS.local as the server name. After entering the name, tap Connect (Figure C).
Figure C

At the next screen, enter the username and password for the server or NAS. Tap Next (Figure D).
Figure D
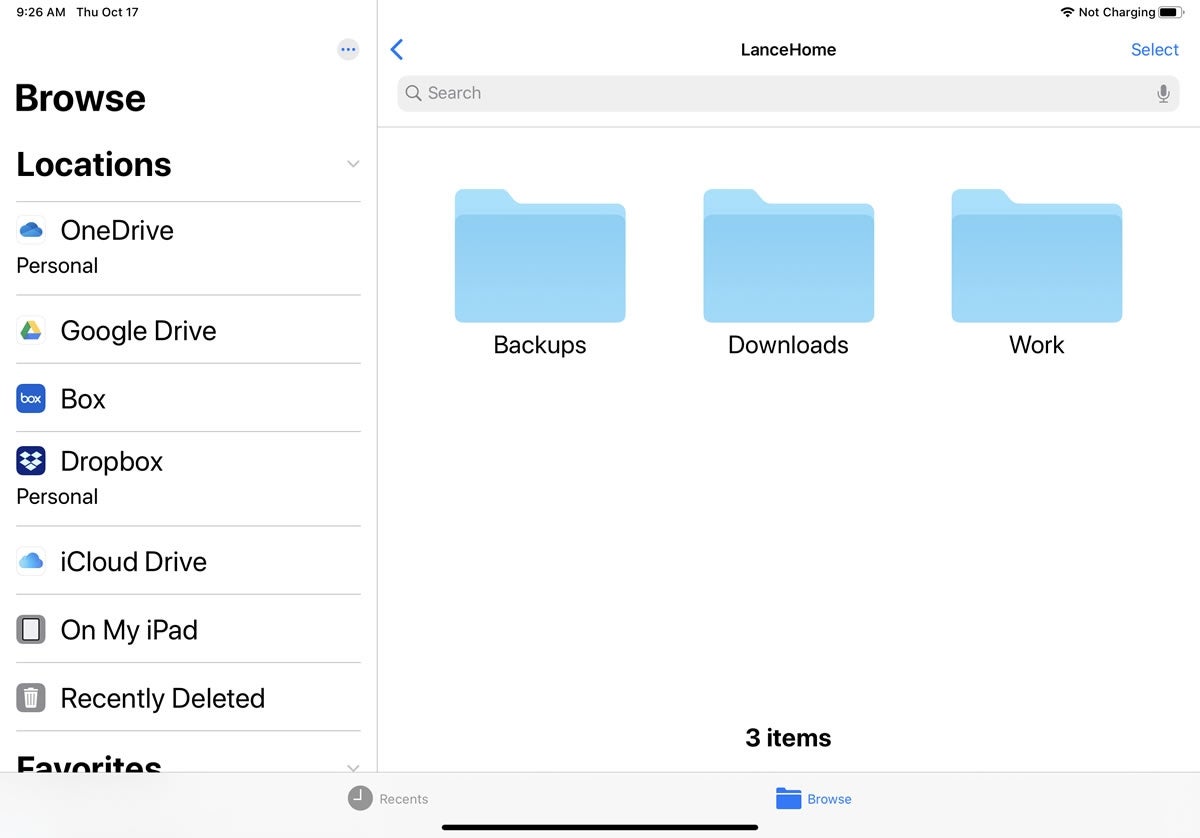
If all goes well, you should then be connected to the network device. You can now drill down through the folders and access files (Figure E).
Figure E
To open a viewable file, such as a PDF, image file, or video, just tap on it. To run a specific command on a folder or file, press down on it. From the popup menu, you can Copy, Duplicate, Move, Delete, Rename, Share, and Compress the file, among other commands (Figure F).
Figure F
