


So, you’ve rooted your device and have decided that getting OTA updates for the platform is more important than the extra features that comes along with root. You’ve tried various unrooting tools, but all have failed… your device is still rooted. What do you do? You can’t simply do a factory reset, as that won’t unroot the device, and you’ll just have to set it back up and still deal with root.
If the usual methods have failed you, there is one other method you can try–one that has worked for me on a number instances.
Manually unrooting. That’s right, manually removing the files that give you root access to your device. This will require a file manager such as ES File Explorer (so you can get access to system files). Get that file manager installed on your device, and let’s go about removing that root.
Warning: Rooting and unrooting your Android device does come with a certain level of caution. You can wind up with a bricked device. You have been warned.
The process
This is all about deleting particular files from the file system. Open up ES File Explorer, grant it superuser access, and navigate to /system/bin. Check for a file named su. This file may not exist here (depending on how you rooted the device). If the file is there, long-press it to select, and then tap the Delete button (Figure A).
Figure A
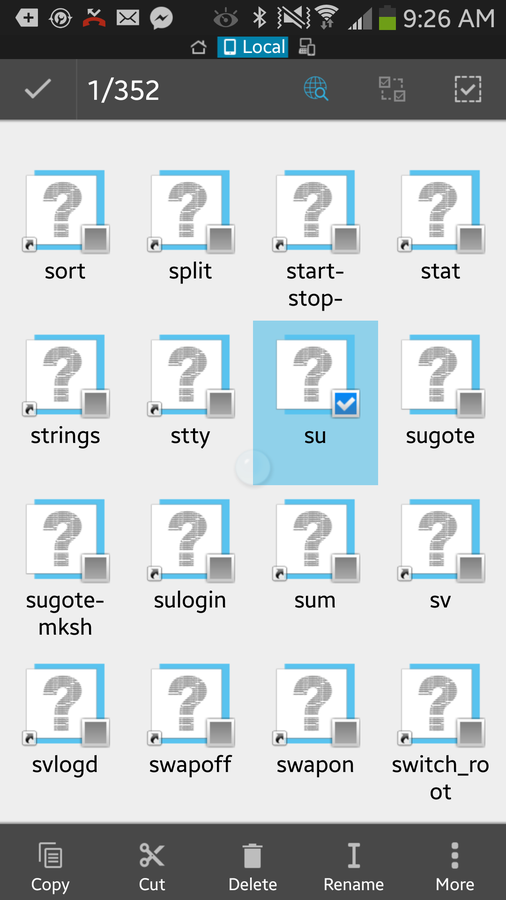
Unrooting a Verizon-branded Samsung Galaxy S4.
If the su file doesn’t exist in /system/bin, navigate to /system/xbin. Most likely, you’ll find su there. Delete that file.
Now, head over to the /system/app folder and locate the Superuser.apk file. Delete this file in the same way you deleted su.
Next, reboot your newly unrooted device. You can download and install the Root Checker app to test and see if the method worked as expected. You should now have an unrooted device and be able to get back to the standard OTA updates.
One thing I’ve done with this method is move the files in question to a separate file, update the device, and then move the files back (for a temporary unroot).
If you find the OTA updates still not working, you might have to clear the system cache on your device (how this is done will vary, depending on the device in question). Regardless of your Android device, you’ll have to boot into recovery mode to do this. Once the system cache is cleared, attempt the OTA again, and it should work. If not, your next step is to do a factory reset, which will clean up whatever remains of the rooting process.
Have you found an even easier method of unrooting a device? If so, please let us know in the discussion thread below.