

Editor’s note on March 18, 2019: This article was first published in October 2015. Since then, we have added a disclaimer and updated the related resources.
If you’re running Android Lollipop, and you rely on Wi-Fi, you have probably witnessed the dreaded “!” showing up in your Wi-Fi notification. What does it mean? How do you solve it? The possible solutions are many, but this is the only solution I’ve found that actually works. A caveat to this solution is that it requires you have a bit of information about the wireless network you’re having issues with.
Why is this happening? The best (and only) explanation that Google offers is that there’s a problem communicating with the wireless network. Yeah, I know that’s not a viable answer.
SEE: BYOD (bring-your-own-device) policy (Tech Pro Research)
To solve this issue, we’re going to set a static IP address for that particular Wi-Fi address. This means that you’ll need to know an available address on the LAN, the gateway address, and the DNS address(es) for the network. Note: You can use Google’s default DNS addresses of 8.8.8.8 and 8.8.4.4.
This is not the best solution, but it works. Here’s what you need to do.
Open the Settings on your Android device and go to Wi-Fi. Locate and long-press the wireless network in question, and then tap Modify network. In the resulting pop-up, tap Advanced options, and then select Static from the IP settings drop-down (Figure A).
Figure A
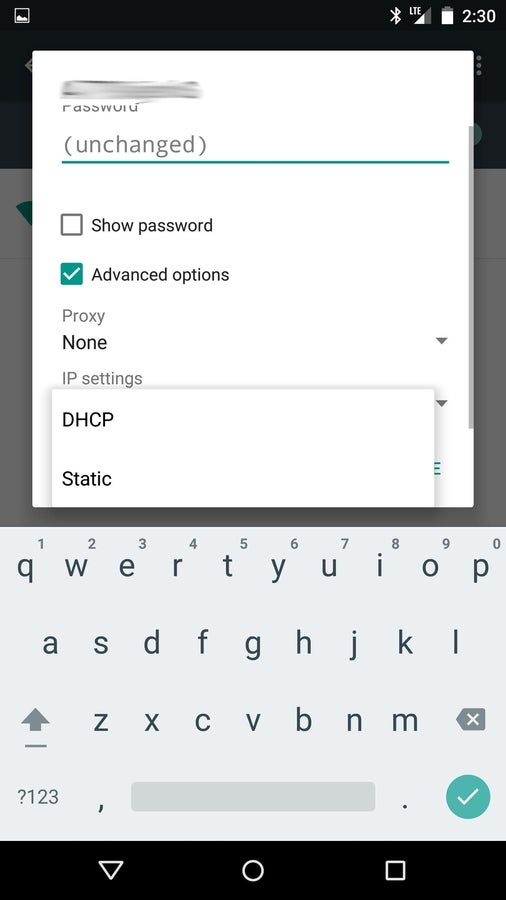
Setting a static address for a Wi-Fi network on a Verizon-branded Nexus 7.
Enter the necessary information for the network, and tap Save. Once you’ve done that, restart your device. When the device restarts, drag down the notification bar to reveal the same network without the dreaded exclamation point.
Yes, you’ll have to do this same thing for all wireless networks you connect with that happen to be plagued with the “!”. I’m hoping that the upgrade to Marshmallow will resolve this issue once and for all. Until then, a simple static IP address will fix what ails your device.
Disclaimer: Starting with Android Pie, it is no longer possible to configure DNS on a per-connection basis. With Android 9.0 (and going forward), DNS is set globally from Settings | Network & Internet | Advanced | Private DNS. In this configuration option, you must use a Fully Qualified Domain Name (FQDN) of a Private DNS service such as CloudFlare.
