


DBeaver is an open source universal database manager that’s previously been written about on TechRepublic. However, the software has grown since 2011, and there are two important features of DBeaver that deserve to be highlighted. Before we take a look
at them, let’s quickly recap what I consider to be the
main pros (and cons) of this tool today.
DBeaver: Powerful, but a bit overwhelming
DBeaver supports a whole screenful of databases, from MySQL and
PostgreSQL to SQLite and Microsoft Access. This is a multi-platform
application that — besides the usual Linux, Mac OS, and Windows — also
runs on venerable UNIX systems like Solaris, AIX, and HP-UX.
Clean entity-relationship diagrams are available (Figure A). The
internal SQL editor, with its autocompletion and database-specific
syntax highlighting, facilitates creation, analysis, and debugging of
complex queries. When dealing with MySQL databases, you may also process
the results of those queries in the same interface normally used to show the raw tables.
Figure A
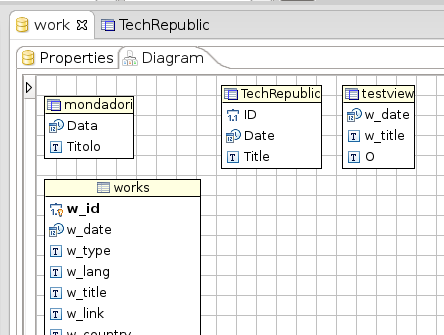
Clean entity-relationship diagrams are available.
As far as the graphic interface goes, its main (if not only) drawback is that it’s so packed of stuff that it’s easy to miss or
overlook something. I confess that, when I started using DBeaver, I didn’t know how to add records to a table without writing SQL code.
The answer was right in front of me (Figure B), but I had missed it among all the other
commands.
Figure B
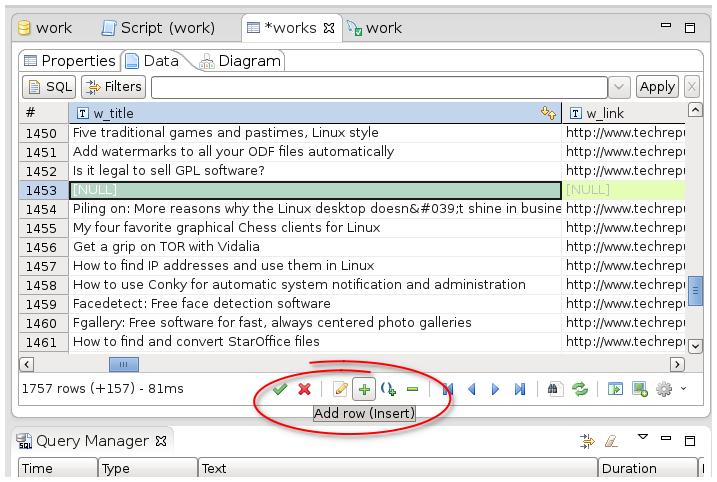
Add records to a table without writing SQL code.
On the same topic (and while you’re still looking at Figure B), that
window displays one record per row — but in practice, it will display only
parts of your tables. You can scroll, of course, but with that layout, you’ll only immediately see the few columns that actually fit
inside the window. Sometimes, it’s much more productive to see
all the fields of only one record at a time (Figure
C).
Figure C
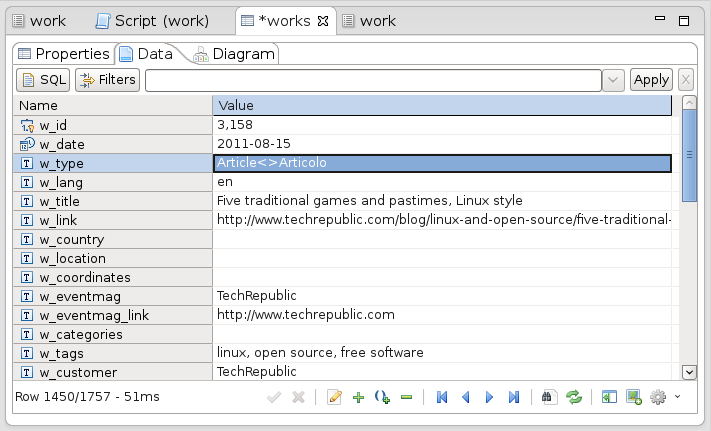
You can see all the fields of only one record at a time.
So, how do you switch back and forth from one display mode to the other?
The simple but very efficient answer is to just press the Tab key. I
only discovered this by chance, when I hit that key by mistake. Of course, the
bottom line here is to schedule some time to investigate and play with the DBeaver
interface before your actually start using it.
DBeaver templates
The first feature of DBeaver that deserves specific coverage is its
templates. These are what some other applications would call macros or shortcuts. I’m talking about all of those
snippets of SQL code that you use frequently, maybe in different
databases, and re-typing all of them could waste significant amounts of time. Any such snippet can and should become a DBeaver template, even if it isn’t really made of completely static, constant code.
The tab of Figure D, which you can open by clicking on Windows | Templates,
shows all the templates available in the current context (that is,
for a certain database driver or plugin) and lets you create new ones.
Whenever you are working in the SQL editor and need the code
corresponding to some template, just type its name and press Tab. DBeaver will automatically insert all of the code associated to that
template in the current query, prompting you to enter values for any
variable that you had included in its definition. You are welcome to ask
for template examples and share yours with other DBeaver users on the DBeaver forum.
Figure D
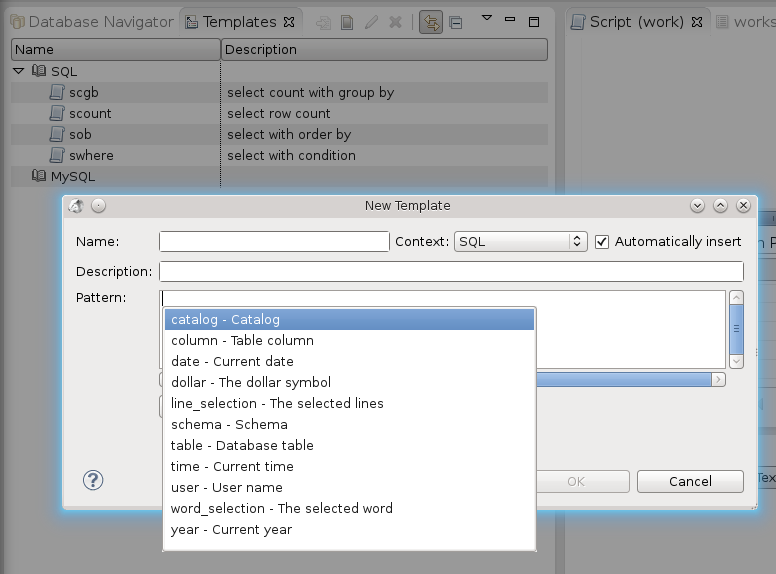
You can see all the templates available in the current context.
Data import and export
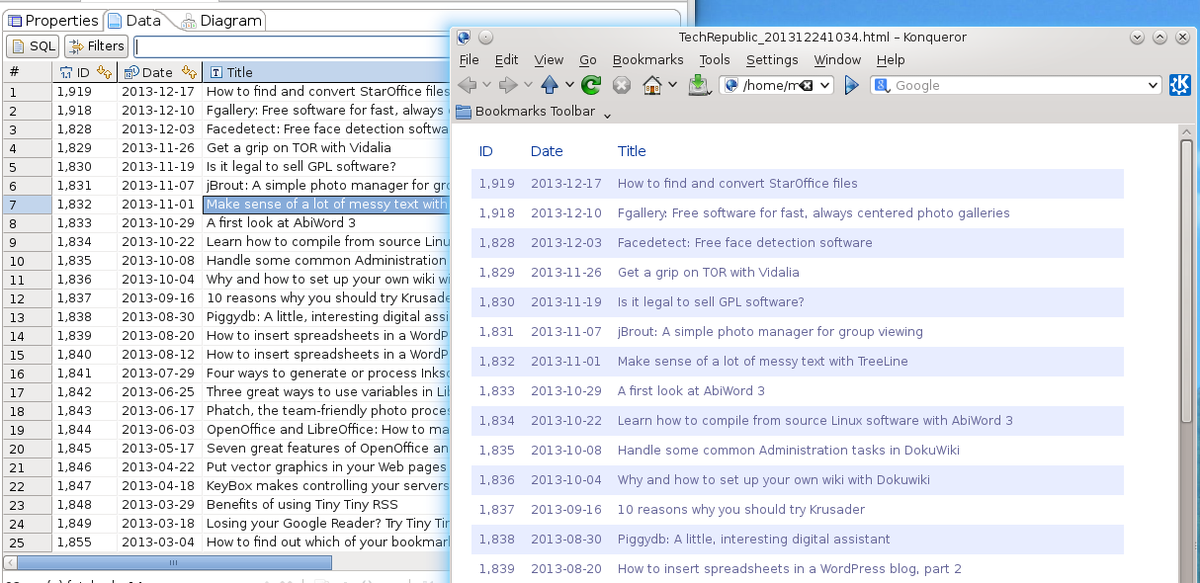
The DBeaver we have today can import data from CSV files and save tables
or query results in several formats, including: CSV, SQL “Insert”
statements, raw tables, XML, or HTML files
(Figure E). To export the result of your queries as tables that are immediately reusable in any web page, right-click on the Results view,
select Export Resultset, and then click Export to HTML. Leave the Extraction settings to their default values and click on the Images box to include graphics if your database contains such data.
Figure E
You can save tables or query results in several formats.
The next and final step of the export procedure defines name and
encoding of the HTML file. The first setting can basically be whatever
you like, but pay attention to the other. UTF-8, which is its default
value, is the right choice, in theory, and it should not create problems. However, I’ve seen several website management systems
unable to display the HTML correctly that’s generated straight from MySQL databases (*). Therefore, if you have records with non-ASCII characters,
try to convert them to HTML first. It only takes one minute,
and it will show you if there’s something in your DBeaver or database
configuration that should be tweaked.
(*) This doesn’t necessarily mean that there is an error in the database client. The database itself may have been created with non-standard character encoding setting.
Do you use DBeaver for managing your databases? Share your experience in the discussion thread below.