


Upon signup, you probably went through a setup wizard that guided you in setting up your QuickBooks Online account. Congratulations if you fulfilled all the requirements there! However, if you’re most people, you probably saw the Skip button at the bottom of the setup screen and clicked it to avoid the whole process. Don’t worry because you can still continue setting up your QuickBooks account at your own pace, and my guide will help you finish the setup.
- Step 1: Enter basic business information.
- Step 2: Get to know your QuickBooks Online dashboard.
- Step 3: Go through your QuickBooks Online setup checklist.
- Step 4: Configure your chart of accounts.
- Step 5: Customize your menu.
- Step 6: Seek help from a ProAdvisor.
- Additional resources
- Frequently asked questions (FAQs)
Step 1: Enter basic business information.
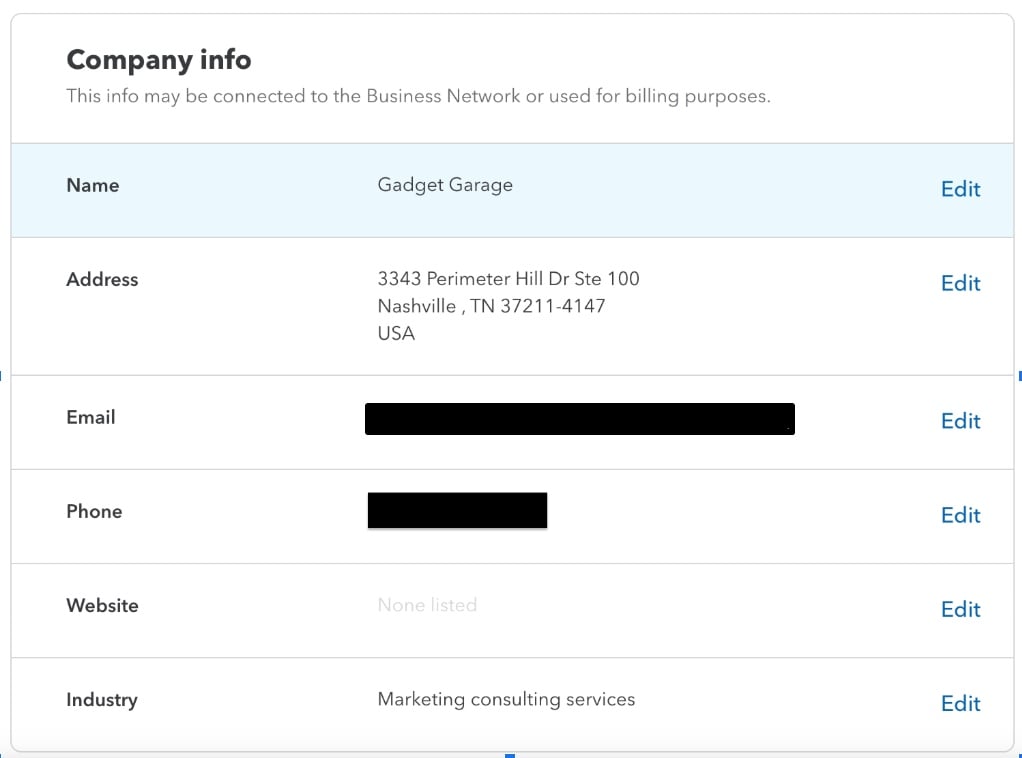
To update your company information in QuickBooks Online, start by clicking the cogwheel icon (⚙︎) in the top right corner to open the Settings menu. Under the Your Company section, choose Accounts and settings. In the Company tab, you’ll find the Company info section.
- Name
- Address
- Phone
- Website
- Industry
- Legal business name*
- EIN/SSN*
- Business type*
- Legal address*
- Customer contact information*
*not shown in the image below
Step 2: Get to know your QuickBooks Online dashboard.
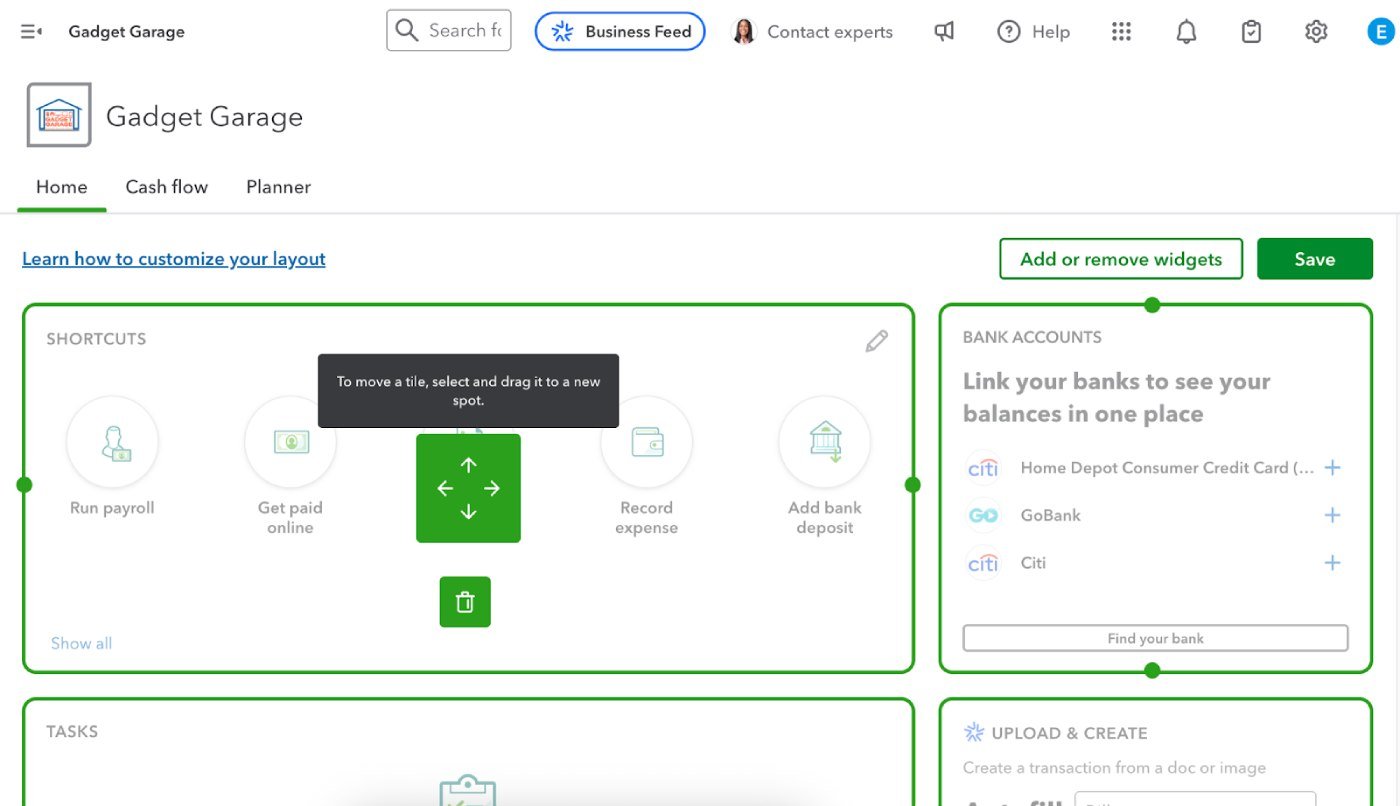
The dashboard is the first screen you’ll see each time you log in to QuickBooks Online, so it’s a good idea to tailor it to your preferences. Look for the Customize button. Click it, and you’ll be able to rearrange the widgets to better suit your workflow, similar to what’s in the image below.
Step 3: Go through your QuickBooks Online setup checklist.
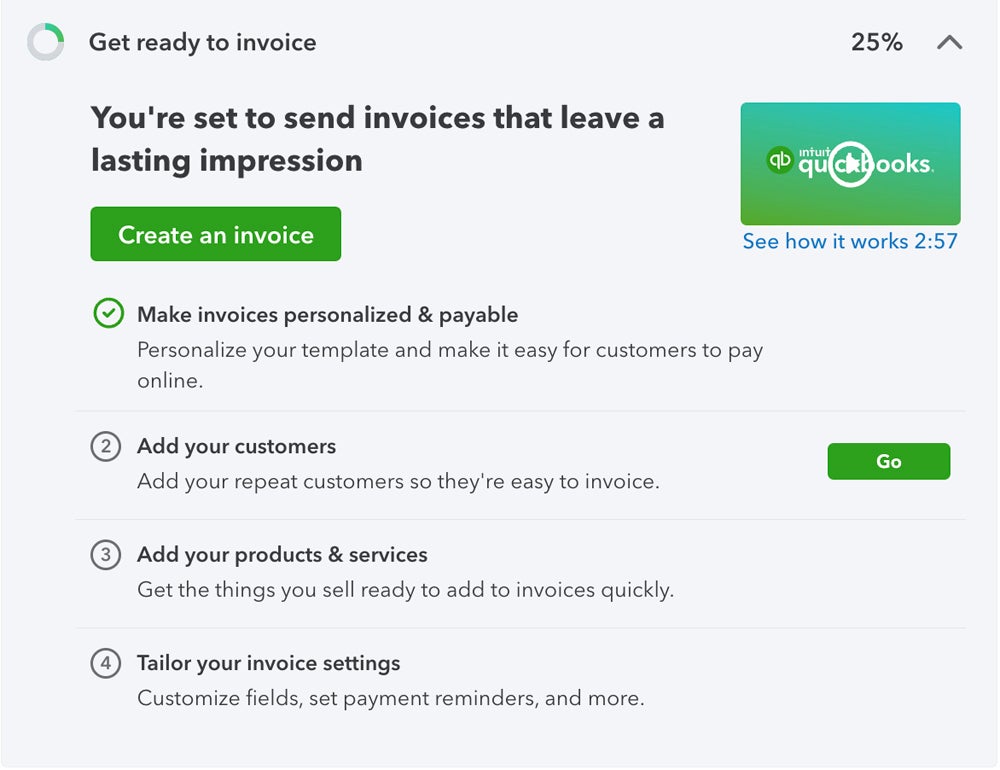
Once you’re familiar with QuickBooks Online’s layout and style, you can start working through the setup checklist. Each major task includes a step-by-step guide with checkmarks for progress tracking and embedded videos that walk you through the process.
Create an invoice
QuickBooks makes it easy to create your first invoice using its built-in invoicing tool. You can personalize a template with your brand logo, color scheme, and business details. You can also create new custom fields, with the number varying depending on the plan you get (Simple Start allows one; Essentials and Plus support up to four; and Advanced offers up to 12).
You’ll be guided through these core steps:
- Personalize your invoice layout, choose payment methods, and apply branding.
- Add customer information and set up billing details.
- Enter products or services. Both service and non-inventory items can be created directly from the invoice screen.
- Fine-tune your invoice with optional customizations.
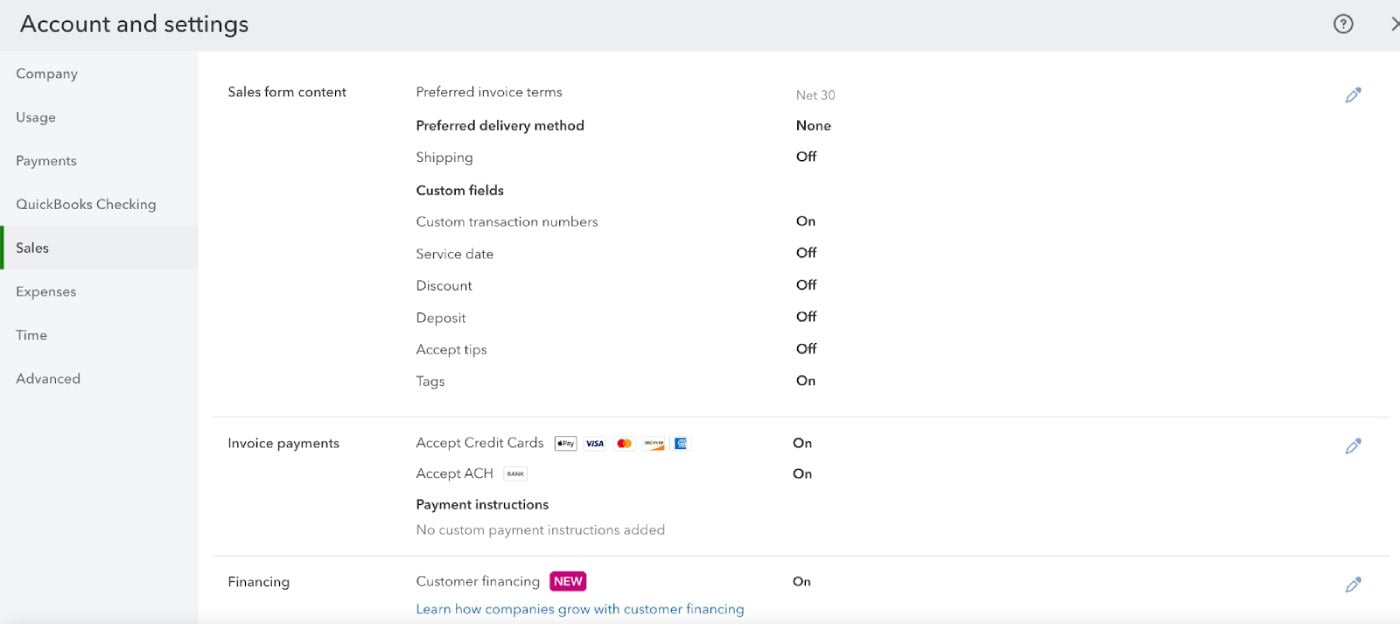
You can also enable payment options directly from the customization screen. QuickBooks Payments lets you accept ACH transfers, credit card payments, and send one-time payment links that expire after payment. You can toggle automatic reminders, apply late fees, and set recurring invoices — all without leaving the invoice setup flow.
As you complete each section, QuickBooks tracks your progress in real time with percentage indicators and checkmarks.
As you can see in the image below, if you enter basic business information after logging on to QuickBooks for the first time, the invoicing template will auto-populate with your business’s details and give you basic customization instructions.
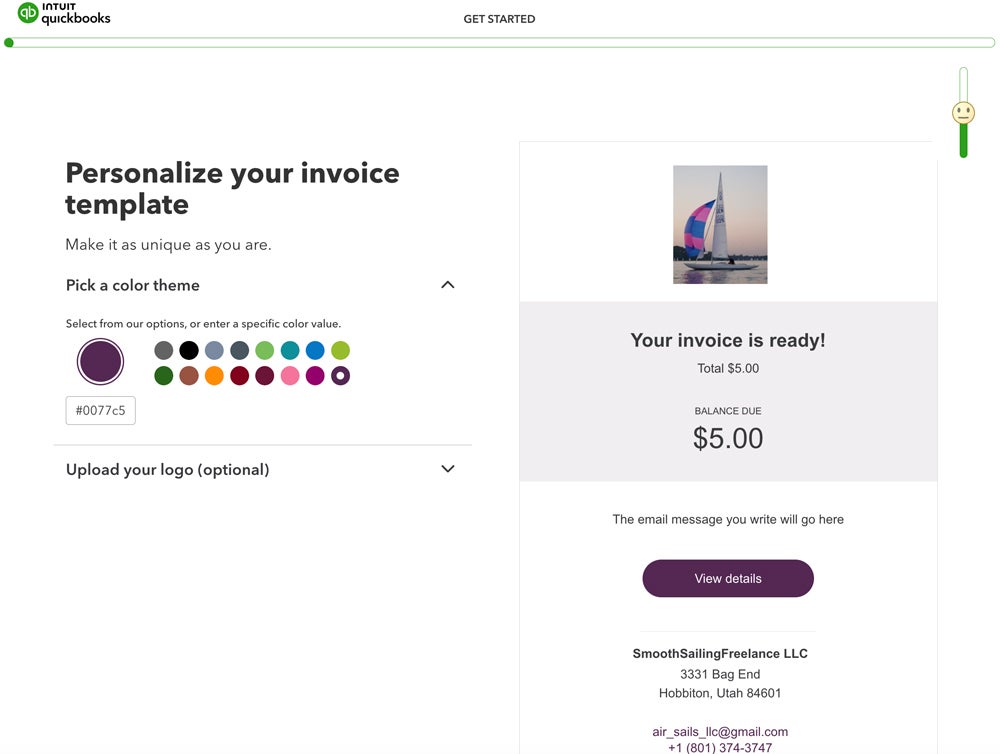
If you’d like, you can customize more aspects of your invoice by adding payment instructions, setting up late fees, writing a default message to send with sales, and automating invoice reminders.
Set up online payment acceptance
If you want to accept payments through QuickBooks, setting up QuickBooks Payments is quick and integrated into the setup checklist. You’ll need to do the following:
- Verify your business info (name, address, phone, email); and
- Provide your personal contact details.
Once verified, you can start accepting online payments via card, ACH, or payment links. You’ll also have the option to order a QuickBooks card reader for in-person transactions. Standard transaction fees apply.
- Online invoice: 2.99%
- ACH: 1%
- Card swipe/tap/dip: 2.5%
- Keyed-in: 3.5%
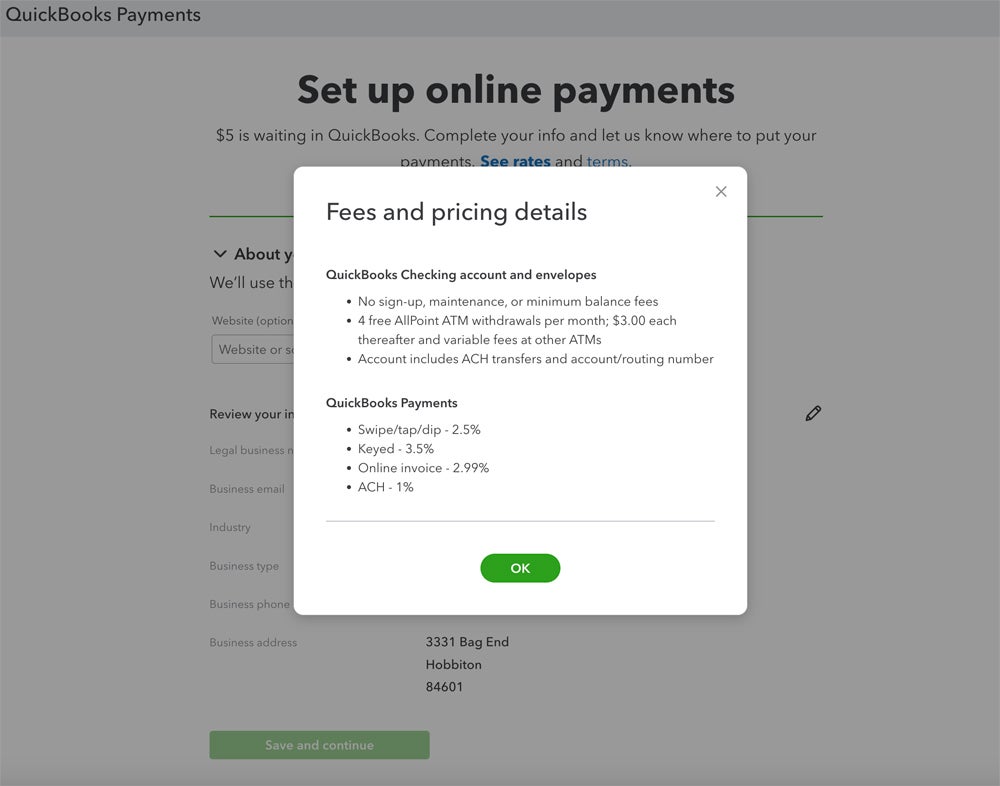
As a bonus, QuickBooks deposits $5 into your linked checking account once setup is complete to help you test the process.
Optional setup step: Open a QuickBooks Checking account. You’re not required to open a QuickBooks Checking account to accept payments, but it’s offered as a recommended option. You can either connect your current bank or apply for a QuickBooks Checking account. Approval is typically fast, and your debit card should arrive within seven business days. Read our QuickBooks Checking review for more details.
Organize expenses
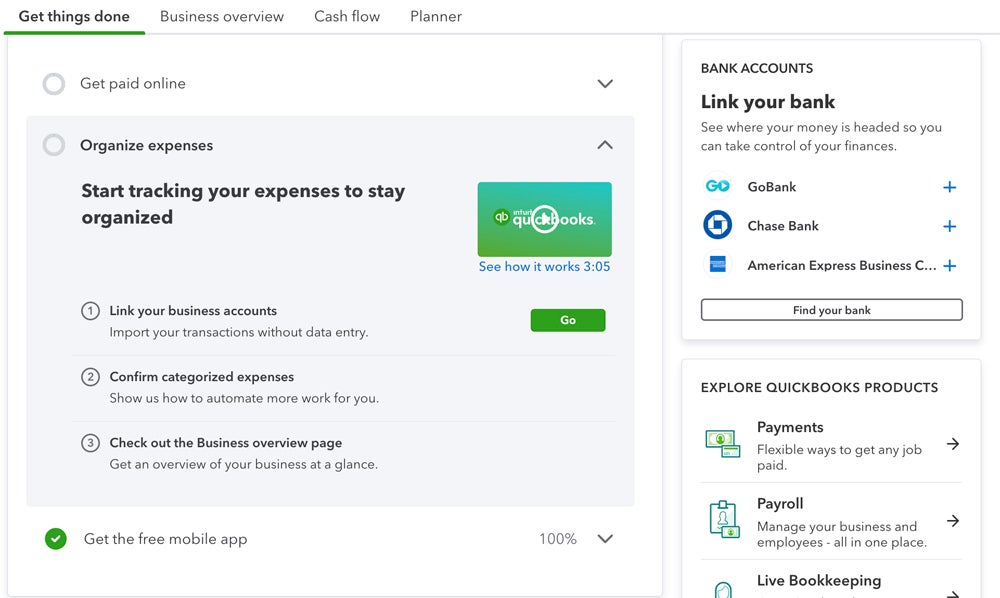
QuickBooks helps you stay on top of your business expenses from day one with three main steps.
- Connect your bank accounts and any credit cards. Use the built-in search tool to link your financial institutions. QuickBooks imports the last 90 days of transactions by default, but you can upload records from up to a year prior for improved historical accuracy.
- Confirm that QuickBooks has correctly categorized your expenses. QuickBooks auto-categorizes imported expenses, but you’ll be prompted to review and confirm the tags. If anything’s off, you can adjust the category or create a custom one. The more accurate your initial tags, the better QuickBooks becomes at categorizing transactions automatically over time.
- Explore QuickBooks’ overview of your finances. Navigate to the Business overview tab for a snapshot of your financial activity, including categorized expenses, invoice activity, and profit and loss summaries.
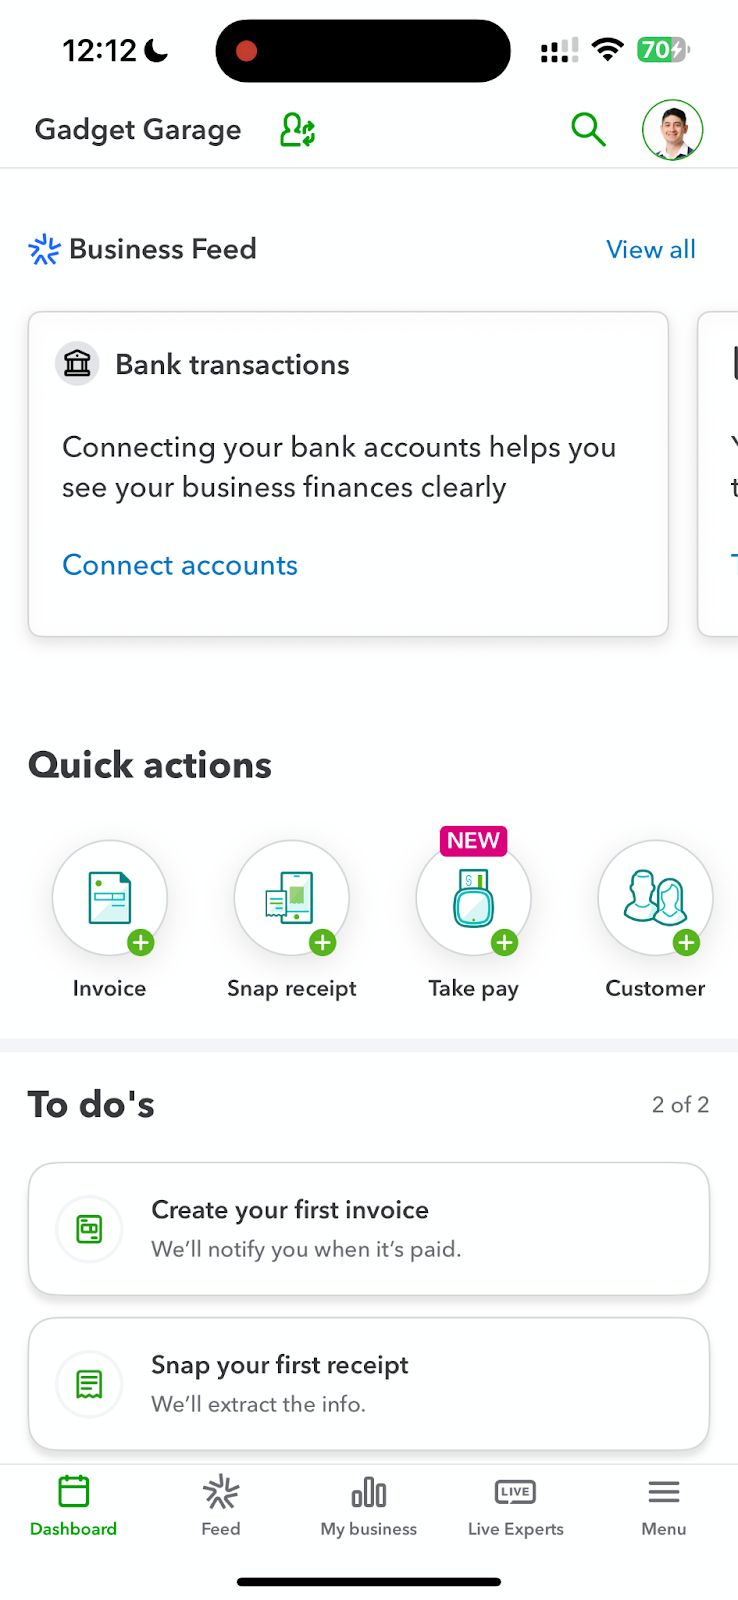
Download the QuickBooks Online mobile app
You may have already downloaded the QuickBooks accounting app earlier in the setup process, but if you haven’t, now’s the time to do so. The app is easy to set up and gives you the same basic financial overview as the dashboard interface. You can also use it to scan and upload receipts, send mobile invoices, and track mileage.
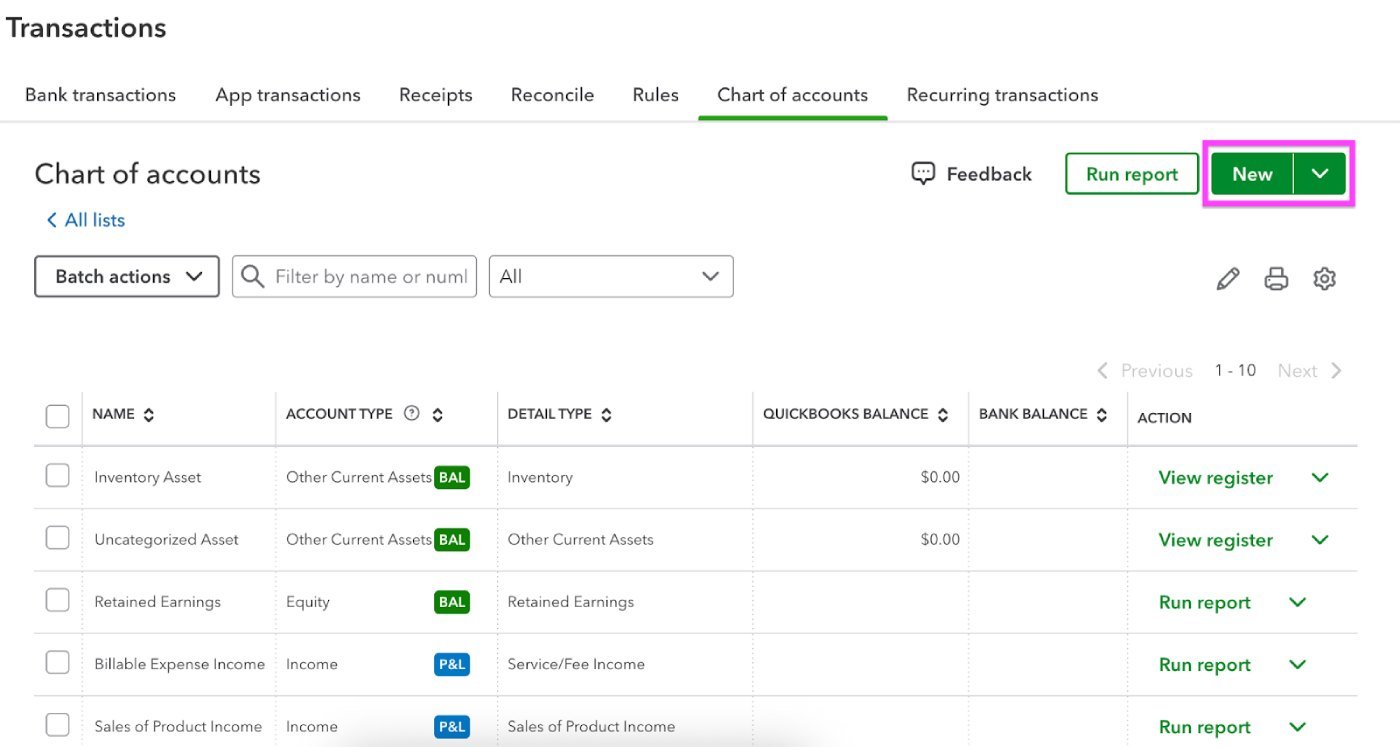
Step 4: Configure your chart of accounts.
A chart of accounts is essential for accurate double-entry bookkeeping. If you’re unsure how to build one, you can invite your accountant to collaborate via the My accountant tab. QuickBooks lets you share access at no extra cost per seat.
You can access your chart of accounts from the Transactions menu. From there, use the green New button to add accounts. If you’re setting up sub-accounts, you’ll choose a parent account directly within the account setup dialog, which streamlines the process, though some users may find the steps slightly less intuitive than before.
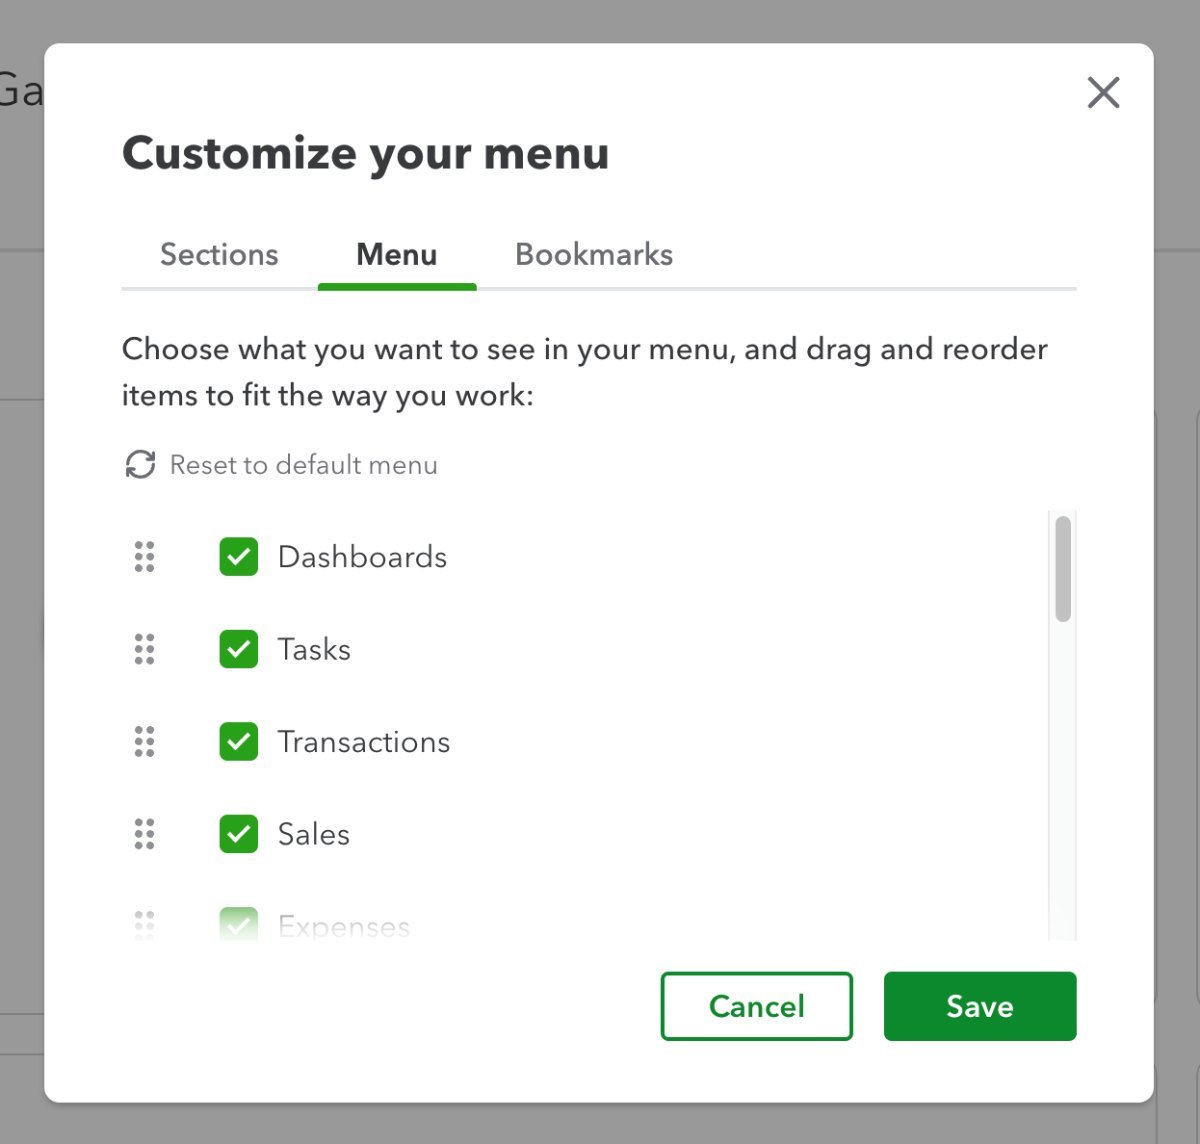
Step 5: Customize your menu.
In the left-side menu bar, click Menu settings, then choose Customize this menu. QuickBooks lets you reorder menu items so that the tools you use most often are easier to access.
To rearrange the menu, click and drag the drag handle icon (⠿) next to any item. You can also uncheck boxes for items you don’t use — this hides them from the menu and keeps your layout clean and focused. The image below shows what this customization looks like in action.
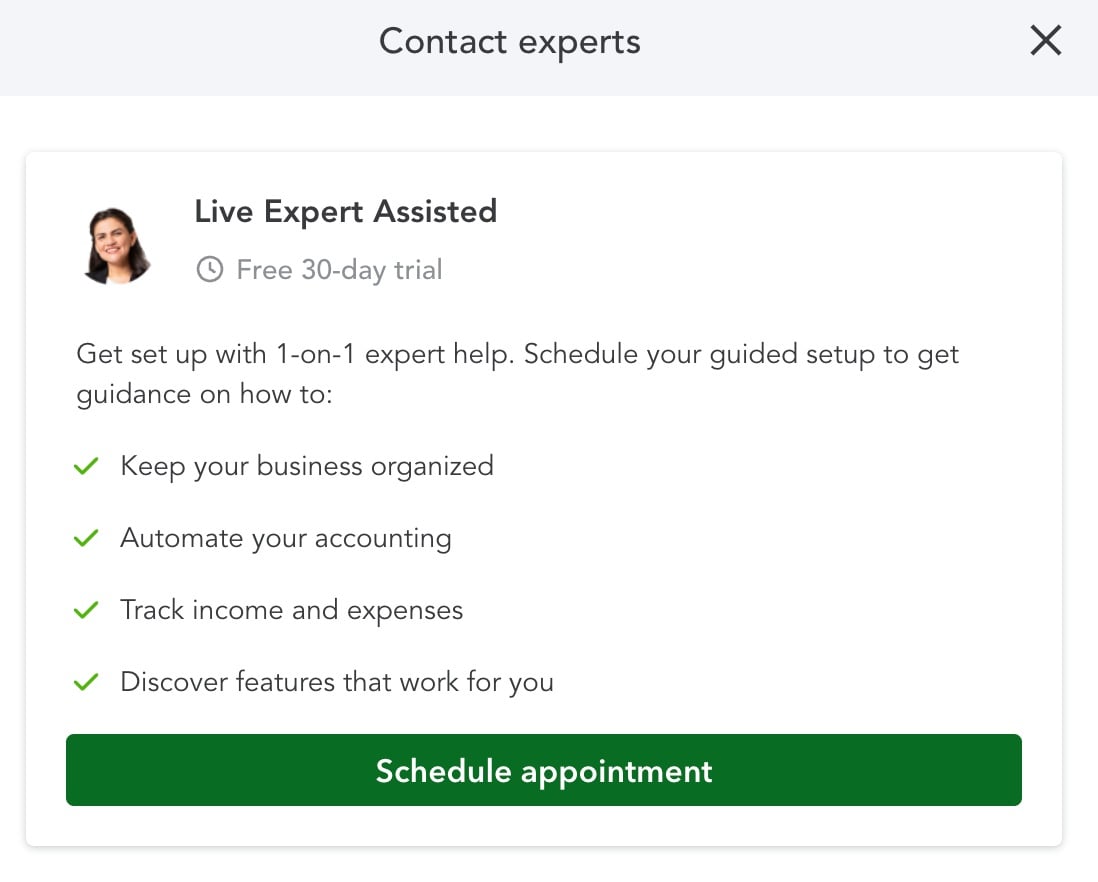
Step 6: Seek help from a ProAdvisor.
If QuickBooks or accounting isn’t your strong suit and you’d rather have someone set things up for you, you’re in luck! Every new QuickBooks plan includes a free one-on-one setup session with a ProAdvisor. It’s a great way to get started on the right foot, and I highly recommend taking advantage of it.
At the top of your QuickBooks screen, you’ll see a Contact experts option. Click it to open a new window (as shown below), then select Schedule appointment when you’re ready to book your session.
More about Accounting
- What Is Accounting? Definition, Types, Importance and Examples
- Best Accounting Software and Services
- Verito vs. Rightworks: Which IT Provider Is Best for Your Firm?
- Top Free Accounting Software
- Accounting Glossary
Additional resources
Reading how-to guides like this one is a great first step to setting up your QuickBooks Online account, but we’re just one resource among many. There’s plenty of information at your fingertips to help you make the most of your QuickBooks account.
QuickBooks’ online setup guide
With QuickBooks’ comprehensive setup guide, QuickBooks showcases useful setup videos, hosts setup seminars, and includes free guided setup for all first-time users.
One-time free setup assistance
If you’re new to the platform, take advantage of the free setup assistance
QuickBooks’ customer service team
In the top right corner of your QuickBooks dashboard, you’ll see a question mark icon next to the word “Help.” At any point during your setup experience, you can click the icon to access QuickBooks’ chatbot, search for helpful articles, or request help from a live customer service agent.
YouTube tutorials
Do you prefer auditory or visual instructions over written ones? QuickBooks’ YouTube page hosts its vast library of how-to videos. You may also find useful guides from third-party reviewers, but double-check the content creator’s credentials before relying on their videos for guidance, and be wary of any third-party sources pushing their own paid products or services alongside their QuickBooks setup guide.
Frequently asked questions (FAQs)
How do I set up a QuickBooks Online account?
To set up a QuickBooks Online account, start by visiting QuickBooks to choose an accounting plan. After signing up for either a 30-day free trial or 50% off your plan’s base cost for three months, you’ll be directed to a sign-in page where you can choose your username and password. From there, QuickBooks’ setup wizard will prompt you to enter your business’s information, sync any third-party apps you’re already using, customize invoices, and start tracking finances.
What information do I need when setting up QuickBooks Online?
When setting up QuickBooks Online, you’ll enter key details like your name, business name, address, and EIN. You’ll also have the option to sync your bank or credit card accounts to start tracking expenses and generating reports right away. If you’re migrating from another bookkeeping tool or spreadsheet, it’s helpful to have those records ready.
Can I have two companies on one QuickBooks Online account?
No. You can only have one account per company at a time. If you want to use QuickBooks for multiple companies, you need to subscribe to a separate account for each.