Virtualization is king and rightly so. The benefits to using this technology are many and mighty: cost effectiveness, reliability, recoverability, the list of pros goes on and on. And anyone digging deep into the world of virtualization knows that managing those virtual machines can sometimes be a daunting task.
Virtual machines are set up to expand to a set size and once you reach that size you are out of luck – unless you know how to add virtual drives to that machine. In VirtualBox this is quite possible, albeit a bit circuitous. The end results, however, will give you plenty of room to expand the capabilities of a virtual machine.
Step 1: Shut down the virtual machine
Make sure you don’t suspend the machine, because you won’t be able to access the settings.
Step 2: Create a new virtual drive
A couple of steps are required to make this work. The first is to actually walk through the process of creating a new Virtual Machine. During this process you will define a new drive for that machine. Make sure you make the new drive the size you want it for the additional drive. By default you will create a 10GB drive – if that will serve as enough additional space for your second virtual drive, leave it as is. If you need more space, adjust it during the creation of the virtual machine.
Once the new virtual machine is created you can then go back and delete the new virtual machine. This process will leave behind the newly created drive that you can then use for your original virtual machine.
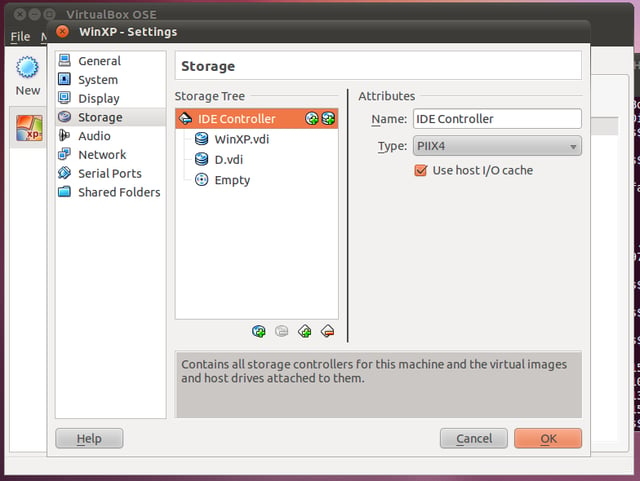
The next phase of this step is that you need to open up the settings of your virtual machine (the one you are adding the drive to) and then go to the Storage Section. Here you are going to add a new drive to this virtual machine. This new drive will be uninitialized and will have to be initialized later (from within the running Windows virtual machine – more on that in a bit).
This gallery is also available as a TechRepublic blog post and download. Image created by Jack Wallen for TechRepublic.
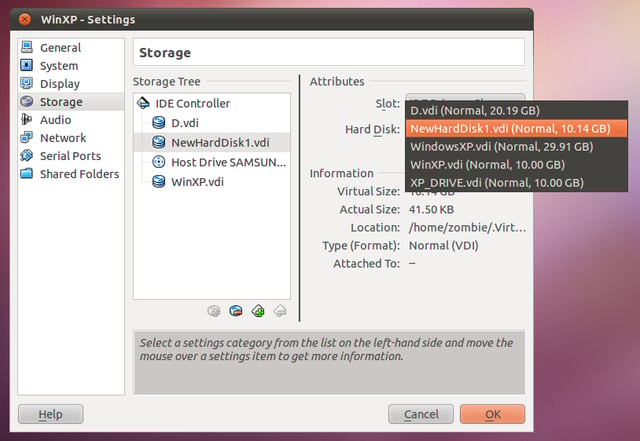
To create a new drive you need to select the main controller for the virtual machine and then click the Add Hard Disk button. When you do this a new disk will appear under the controller. If you select that new disk you can then change the hard disk from the drop down to the hard disk you just created earlier.
Once you have the hard drive chosen you will then need to select it as the Primary Slave (from the Slot dropdown) and then click OK.
This gallery is also available as a TechRepublic blog post and download. Image created by Jack Wallen for TechRepublic.
Step 3: Initialize the hard drive
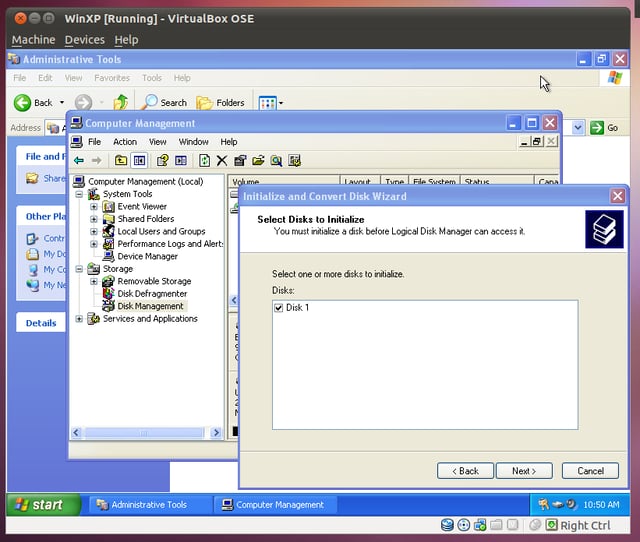
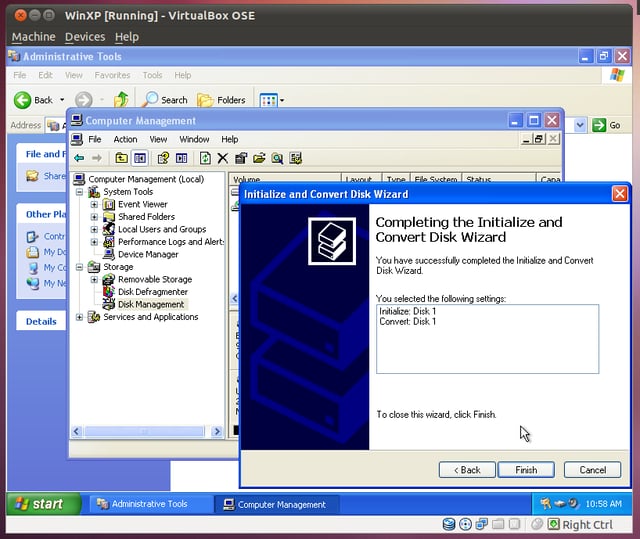
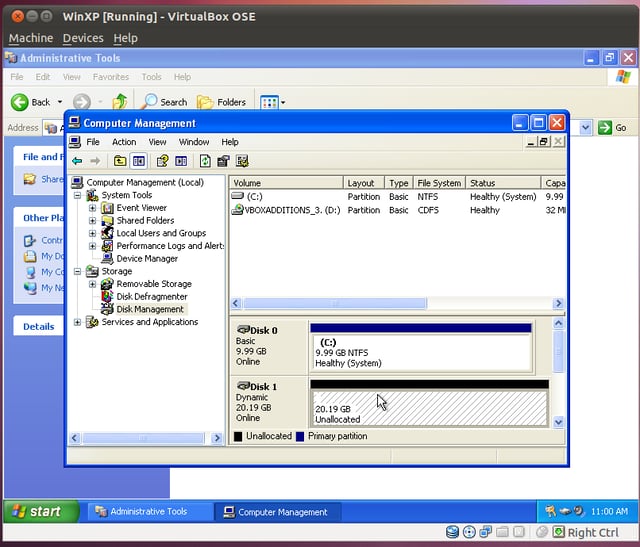
Now you need to go ahead and boot your virtual machine. Once that machine is booted and you have logged in, click Start | Run and then enter compmgmt.msc. When this tool starts click on the Disk Management section under Storage (Left navigation, you may have to expand the tree to view) and then click the disk you want to initialize. When you click the disk to initialize it, the Initialize and Convert Disk Wizard will appear. Check the disk to initialize and click Next.
This gallery is also available as a TechRepublic blog post and download. Image created by Jack Wallen for TechRepublic.
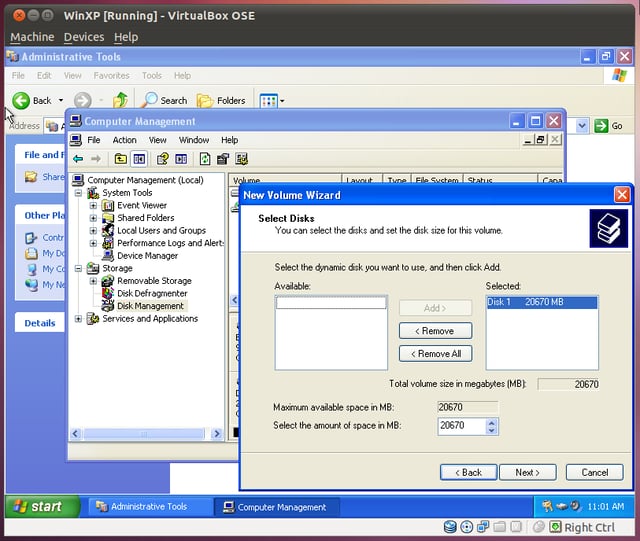
Step 4: Create the partition
You now have an initialized, unformatted drive. This drive has to be partitioned in order for it to be of use. You should right-click the unallocated space and then select New Partition. This will walk you through the Partition Wizard.
This gallery is also available as a TechRepublic blog post and download. Image created by Jack Wallen for TechRepublic.
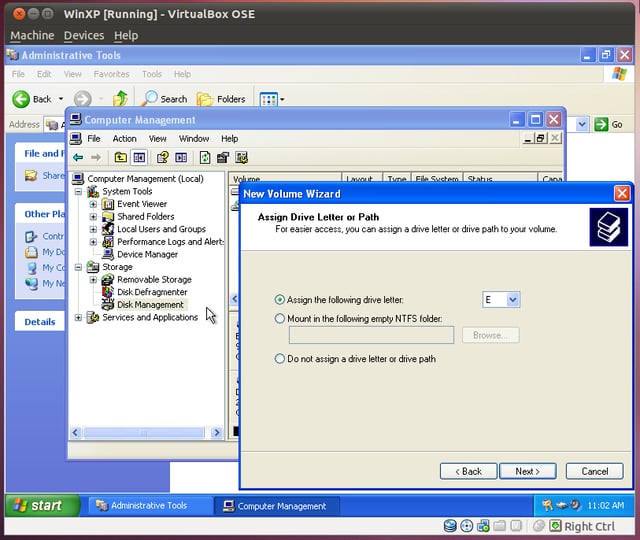
When your drive has been selected, click the Next button to move on to the next phase of the partitioning. In this phase you will assign the drive a letter and then click Next. On the next window, you select if you want to format the drive and, if so, what format you want the drive to be.
After you have this configured click Next and the formatting will complete. You are almost done with this task.
Step 5: Reboot
In order for this drive to be available to Windows you have to reboot the virtual machine. Once you have done that the drive will be available to the system.
Final thoughts
You now have a new drive available to your virtual machine. Although this process will add a new drive, it will not expand the size of the primary drive on the virtual machine. For that process you would have to use Clonezilla (or another disk cloning tool). But for the process of just adding a new virtual drive, the above will allow you to expand your virtual machine all you want.
This gallery is also available as a TechRepublic blog post and download. Image created by Jack Wallen for TechRepublic.

Jack Wallen is an award-winning writer for TechRepublic, The New Stack, and Linux New Media. He's covered a variety of topics for over twenty years and is an avid promoter of open source. For more news about Jack Wallen, visit his website jackwallen.com.


