With the iPhone’s release, Apple introduced the masses to Multi-Touch (using multiple-finger gestures to navigate the device’s UI). In 2008, they brought Multi-Touch to laptops with the launch of the Macbook Air and updates to the MacBook Pro. In 2010, Apple is trying to bring Multi-Touch to the desktop, with the Magic Trackpad.
Come along as Bill Detwiler cracks open the Apple Magic Trackpad in this teardown gallery.
Photo credit: Bill Detwiler / TechRepublic
Released in July 2010, the Apple Magic Trackpad costs $69 (US). It requires a Bluetooth-enabled Mac running OS X Snow Leopard v10.6.4. You may also need to download and install the Magic Trackpad drivers from Apple before using the Trackpad.
Photo credit: Bill Detwiler / TechRepublic
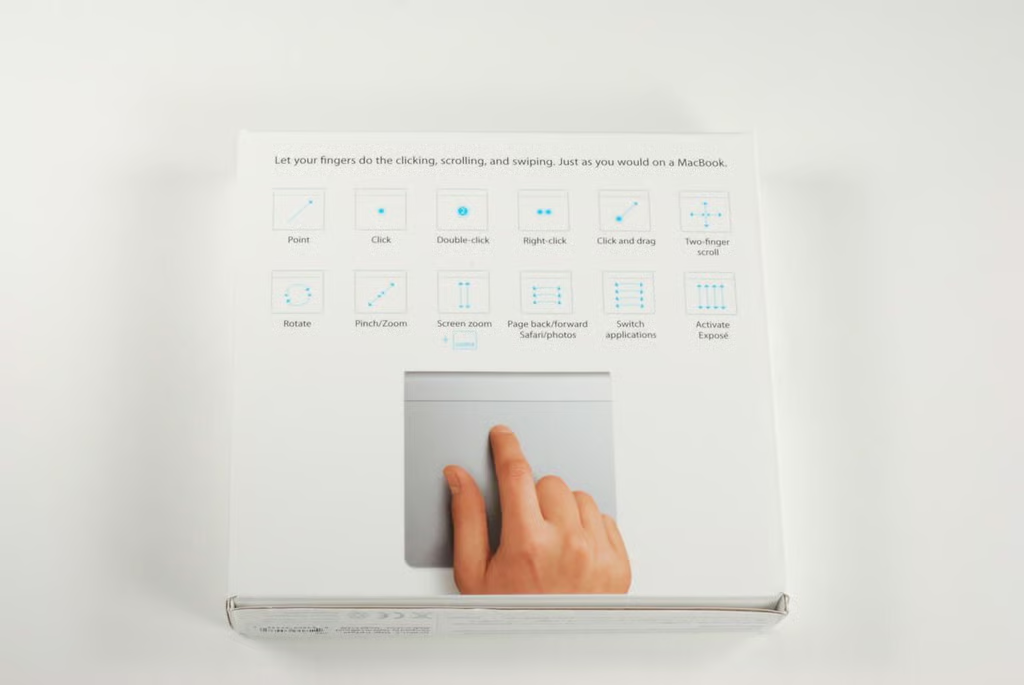
Apple’s Multi-Touch technology lets you use multiple-finger gestures to manipulate your computer’s GUI. Many of these motions are printed on the back of the Magic Trackpad box.
Photo credit: Bill Detwiler / TechRepublic
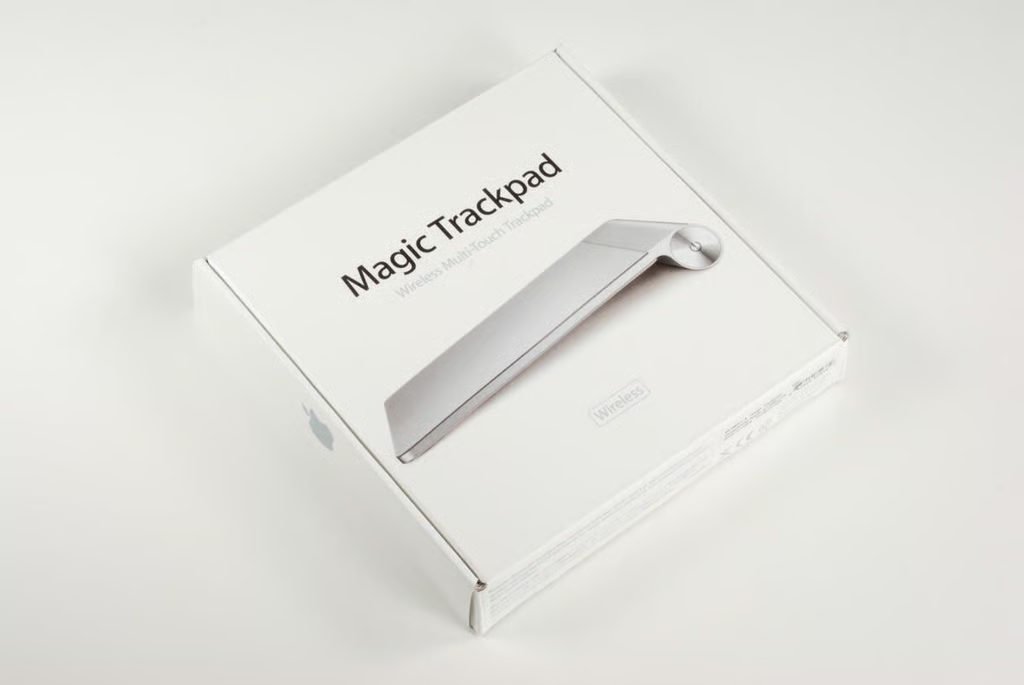
Opening the box reveals the Magic Trackpad.
Photo credit: Bill Detwiler / TechRepublic
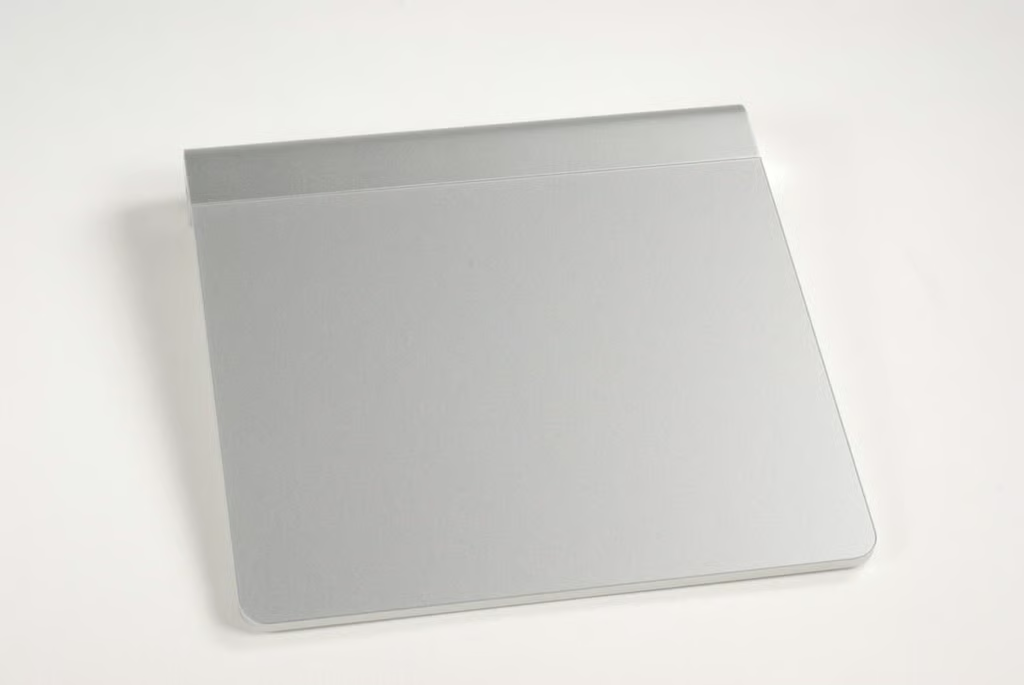
According to Apple, the Magic Trackpad is 5.17 inches long, 5.12 inches wide, and 0.18 to 0.72 inches tall (because of the angled touch surface). The pointing device weighs 4.94 ounces without batteries.
Photo credit: Bill Detwiler / TechRepublic
Along the Magic Trackpad’s left side, you find the battery compartment cap.
Photo credit: Bill Detwiler / TechRepublic
Along the Magic Trackpad’s right side, you find the power button.
Photo credit: Bill Detwiler / TechRepublic
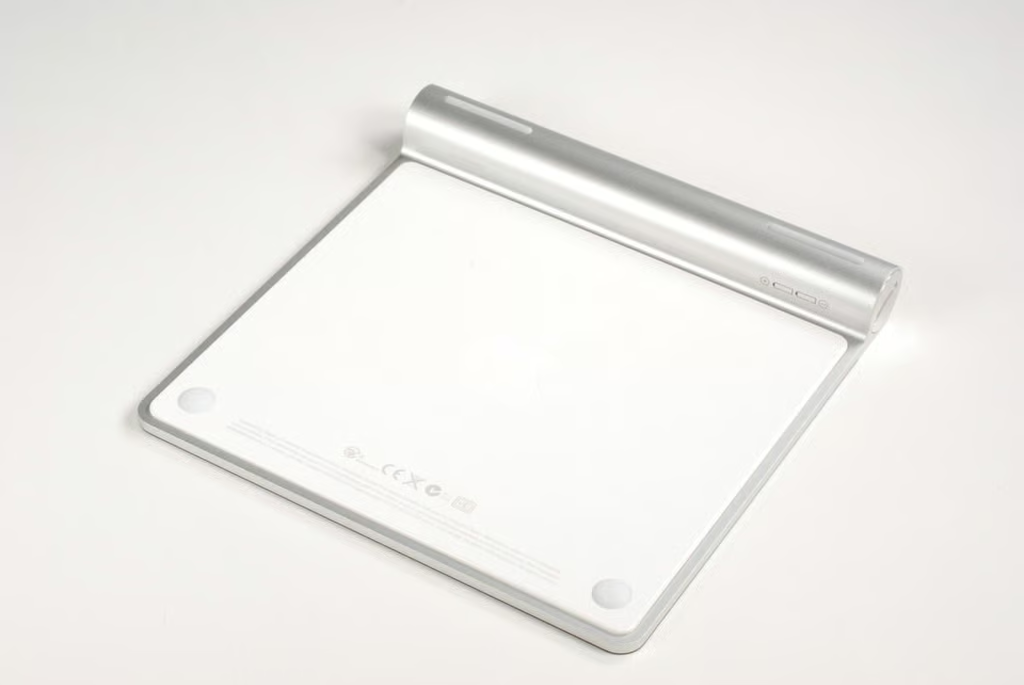
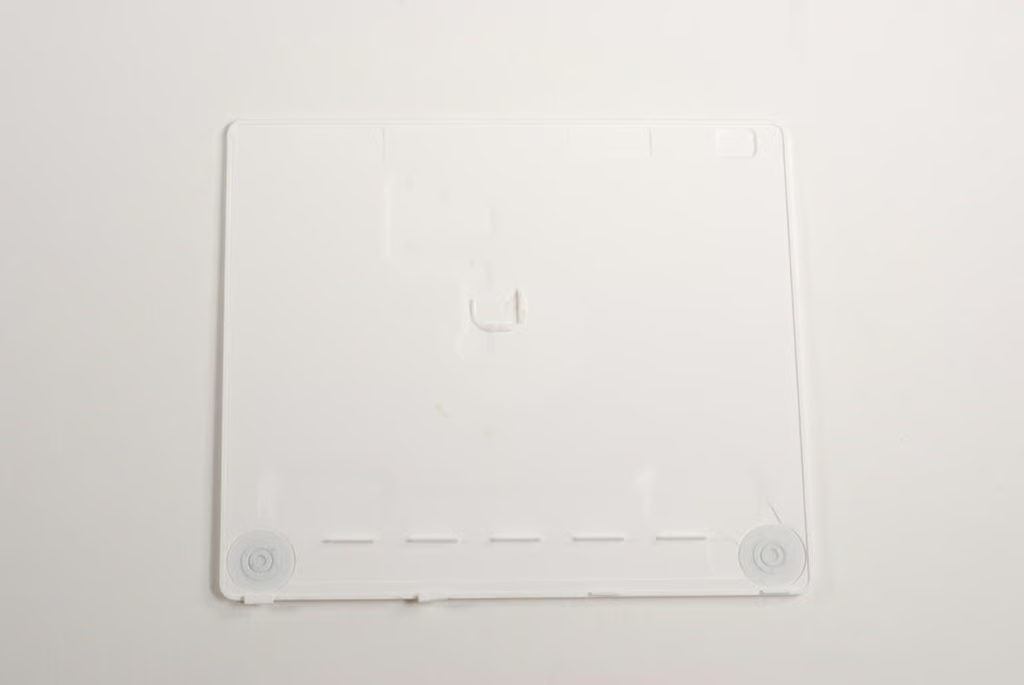
On the bottom of the Magic Trackpad, you find two elongated rubber feet on the battery compartment, a white plastic panel, and two circular rubber feet on the white panel. These circular feet actually help translate pressing down on the Trackpad into a mouse click.
Photo credit: Bill Detwiler / TechRepublic

Using a large Phillips screwdriver or plastic spludger (as shown in this photo), unscrew the battery compartment cap.
Photo credit: Bill Detwiler / TechRepublic
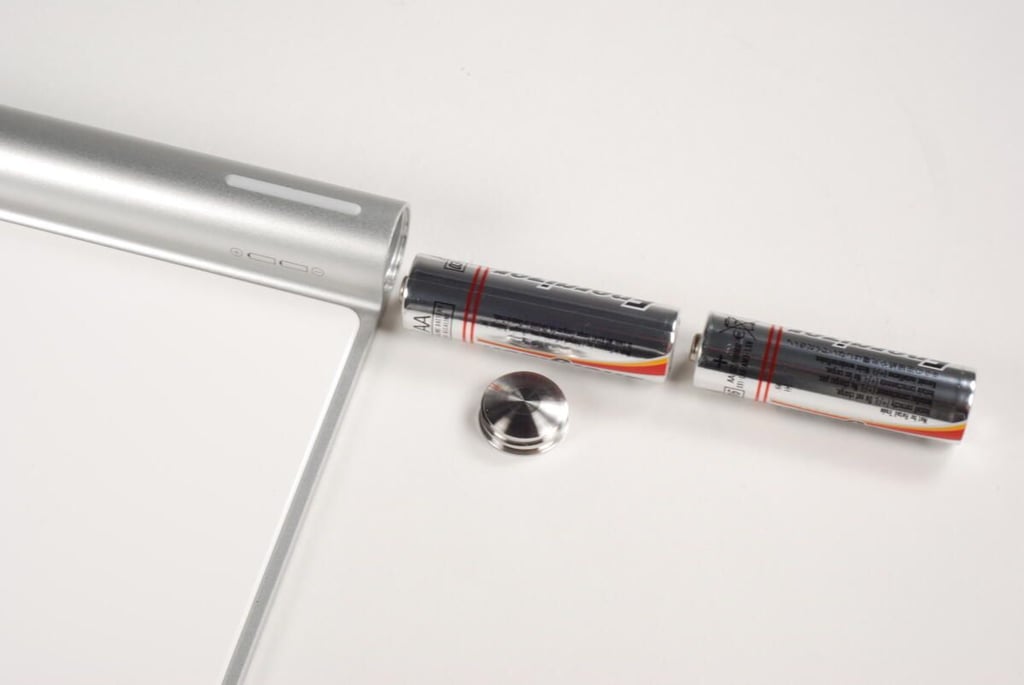
The Magic Trackpad requires two AA batteries to run, and Apple provides them with the device. Those who really want to go green can replace the standard batteries with rechargeable ones. Apple will even sell you a battery charger and six AA NiMH batteries for $29 (US).
Photo credit: Bill Detwiler / TechRepublic
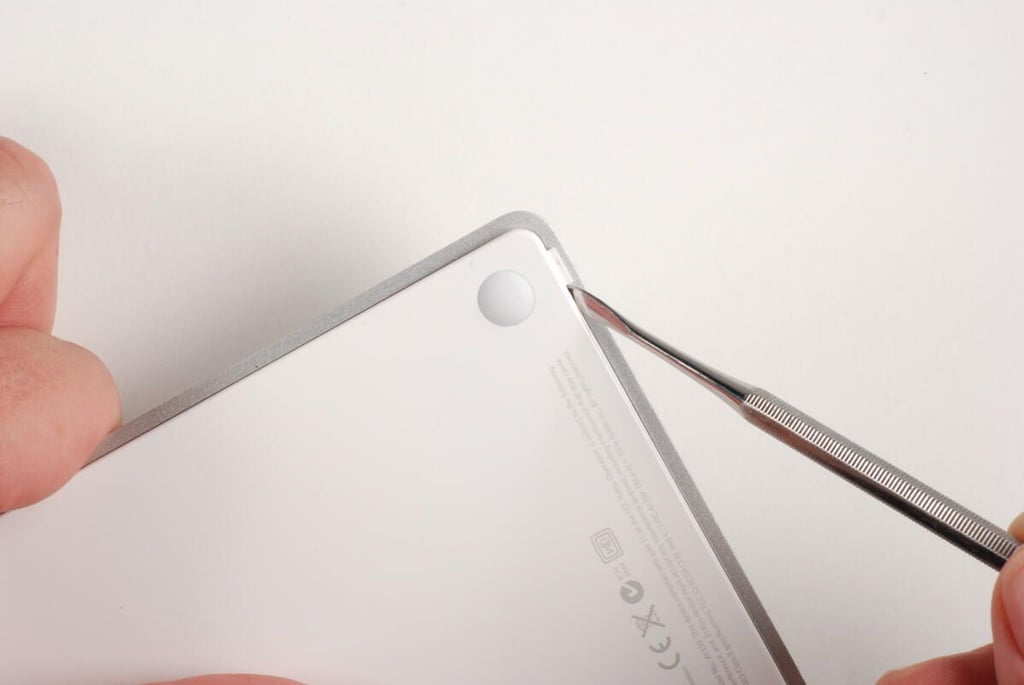
Our first step in cracking open the Magic Trackpad is removing the white plastic panel from the bottom of the device. Using a thin metal or plastic spludger or iPod/iPhone case opening tool, you should be able to pry loose the panel’s bottom edge. The panel has four tabs that slide into slots on the Magic Trackpad’s metal frame. Gently work your way around the bottom edge, releasing all the tabs and prying the white panel away from the metal frame.
Photo credit: Bill Detwiler / TechRepublic
The white panel is help in place by the four tabs and clear adhesive. The adhesive holds the panel to a plastic, white support structure within the Magic Trackpad.
Photo credit: Bill Detwiler / TechRepublic
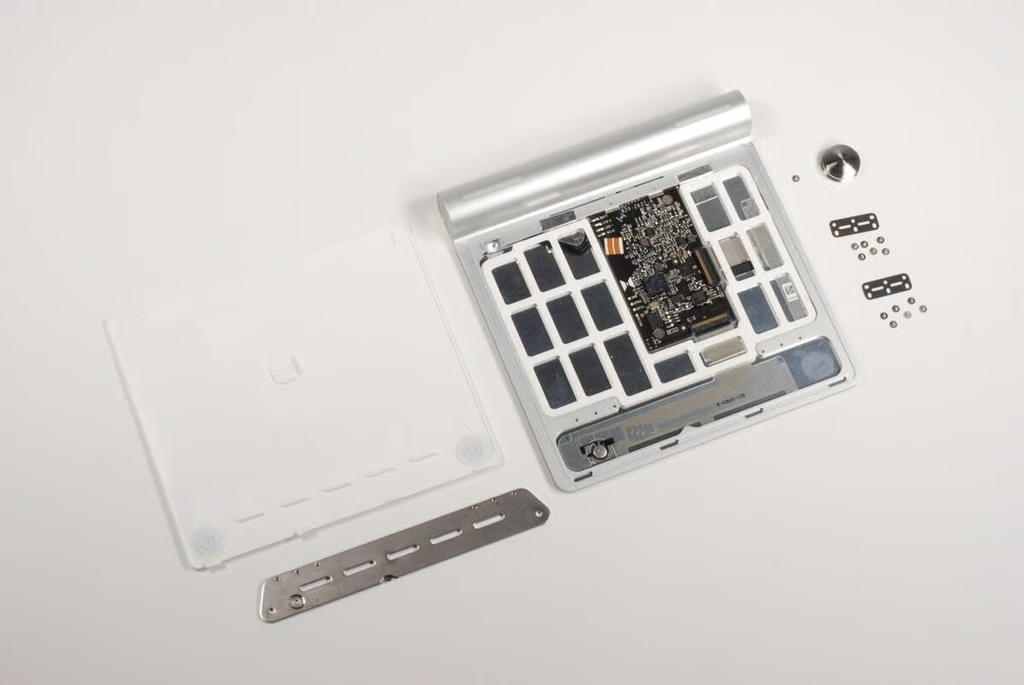
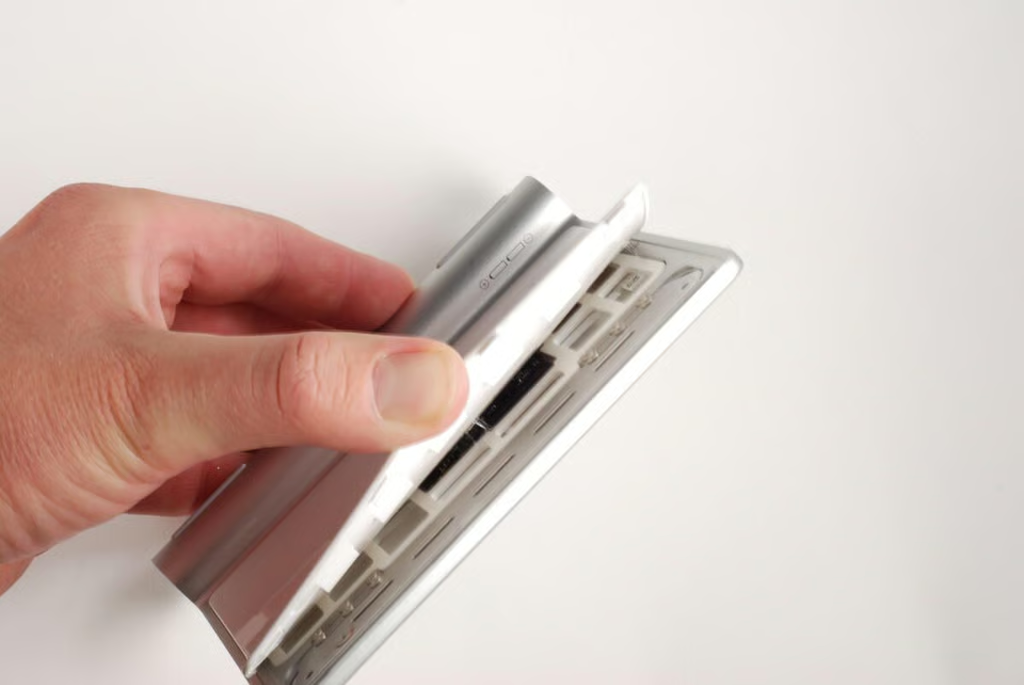
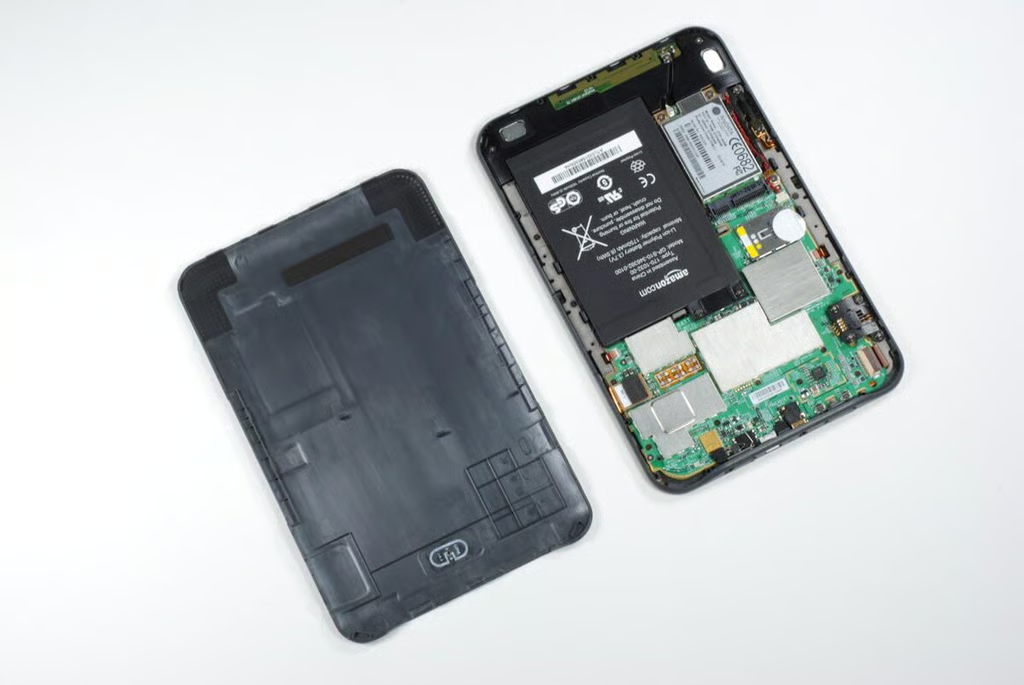
With the bottom panel removed, we get our first look inside the Apple Magic Trackpad. We can see the main logic board, white plastic support structure, “mouse-click” hinge plate, and the underside of the touch surface.
Photo credit: Bill Detwiler / TechRepublic
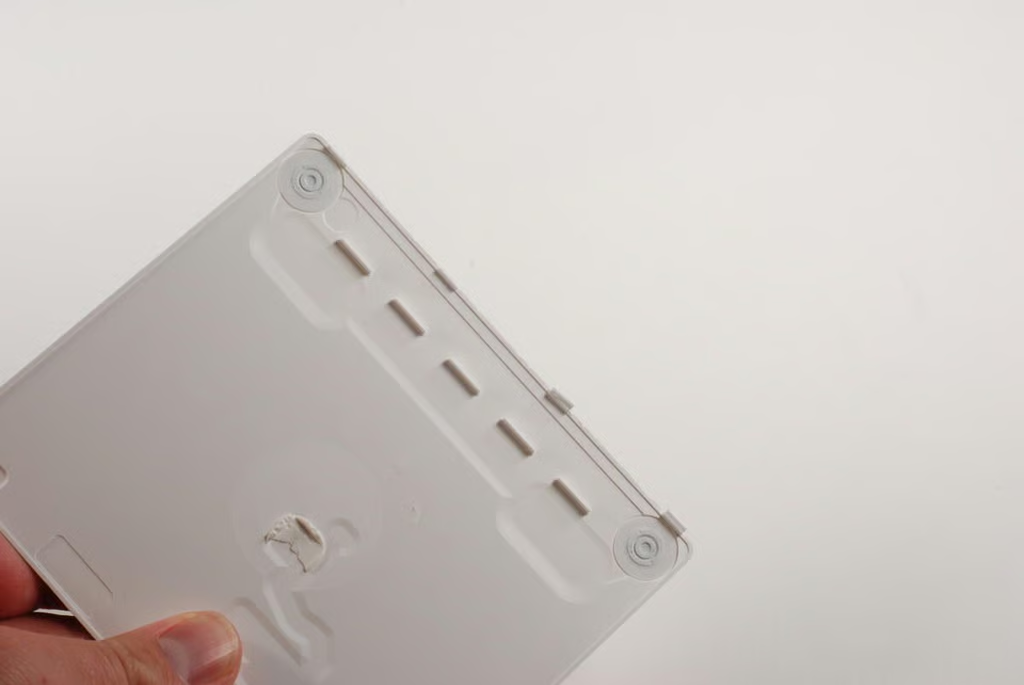
Looking at the internal side of the Trackpad’s bottom panel, we can see the four tabs and two circular rubber feet. Unfortunately, I broke two of the tabs when removing the panel.
As the panel is primarily help on with adhesive, it might actually have been better to pry the panel loose from the other end. Pulling it free from the frame and then sliding the tabs out of their corresponding slots.
Photo credit: Bill Detwiler / TechRepublic
The circular rubber feet on the back of the Magic Trackpad serve two purposes–holding the pointing device in one spot and translating the physical motion of pressing down on the device into a mouse click.
Photo credit: Bill Detwiler / TechRepublic
The circular rubber feet have hard centers that push up when you push down from the top of the Trackpad.
A small bit of adhesive cushion also remains in the center of the panel. This helps protect one of the main chips.
Photo credit: Bill Detwiler / TechRepublic
With the bottom panel removed, we can see the main components within the Apple Magic Trackpad. There is a white, plastic support structure that fills the void inside the device, the main logic board, a metal “mouse-click” hinge plate, and the underside of the touch surface.
Photo credit: Bill Detwiler / TechRepublic
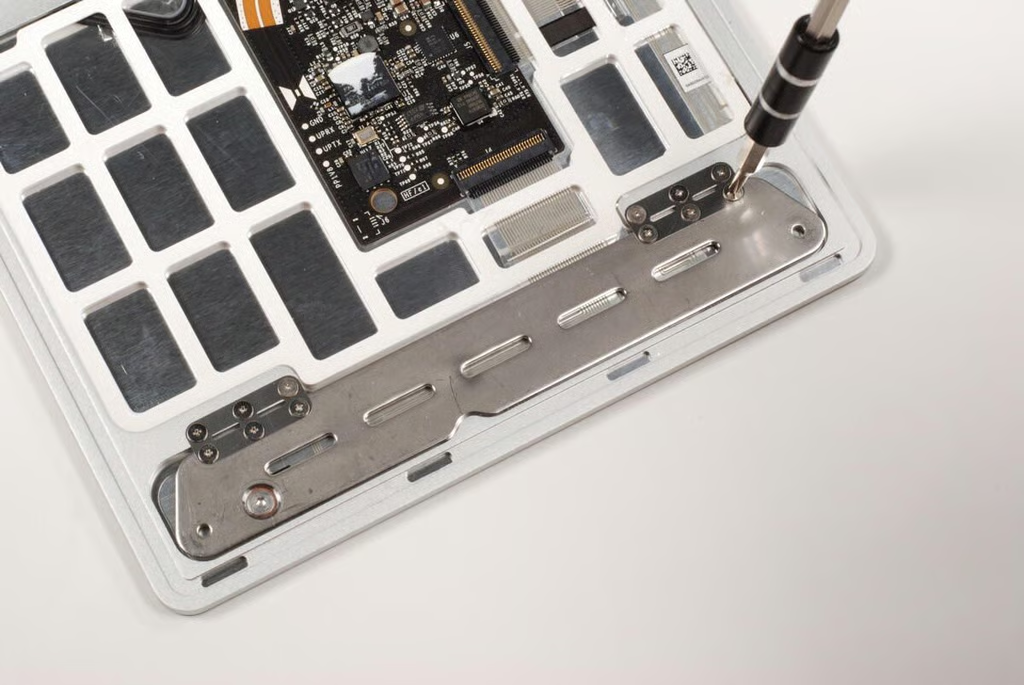
Our next step is disassembling the Magic Trackpad, is removing the “mouse-click” hinge plate. Along with the circular rubber feet (discussed previously), this hinge plate translates the physical motion of pressing down on the Trackpad into a mouse click. While this is an interesting may to generate a mouse click, it unfortunately means the device must be used on a hard surface unless you enable the tap-to-click option under the device’s software settings.
Photo credit: Bill Detwiler / TechRepublic
There are six, very small Phillips 00 screws that hold the hinge plate to the metal frame.
Photo credit: Bill Detwiler / TechRepublic
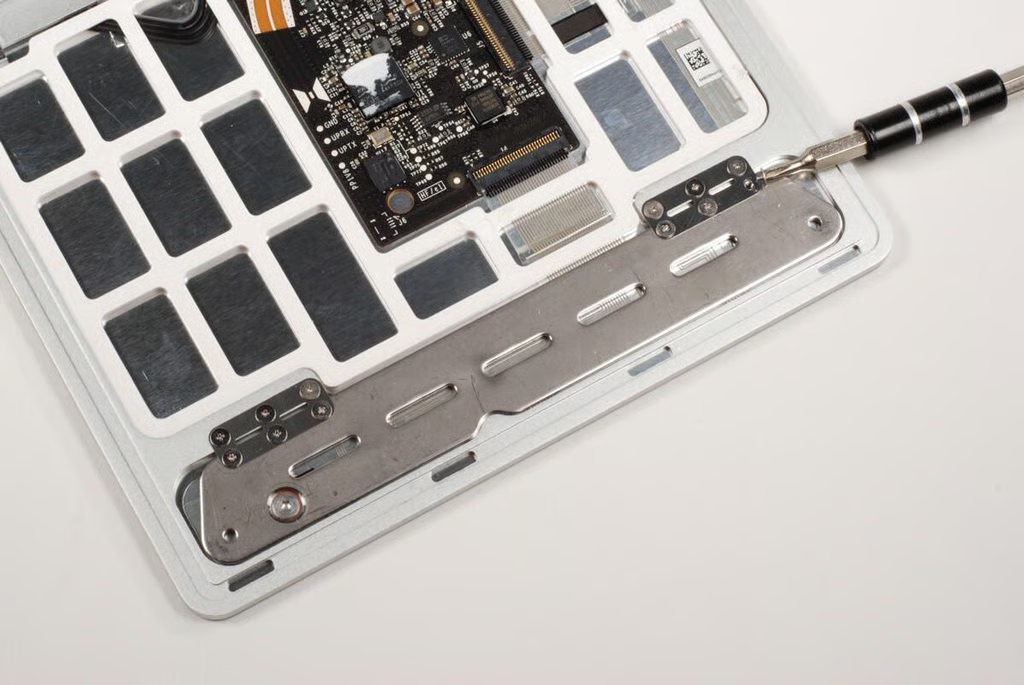
Thin metal hinges hold the plate to the metal frame.
Photo credit: Bill Detwiler / TechRepublic
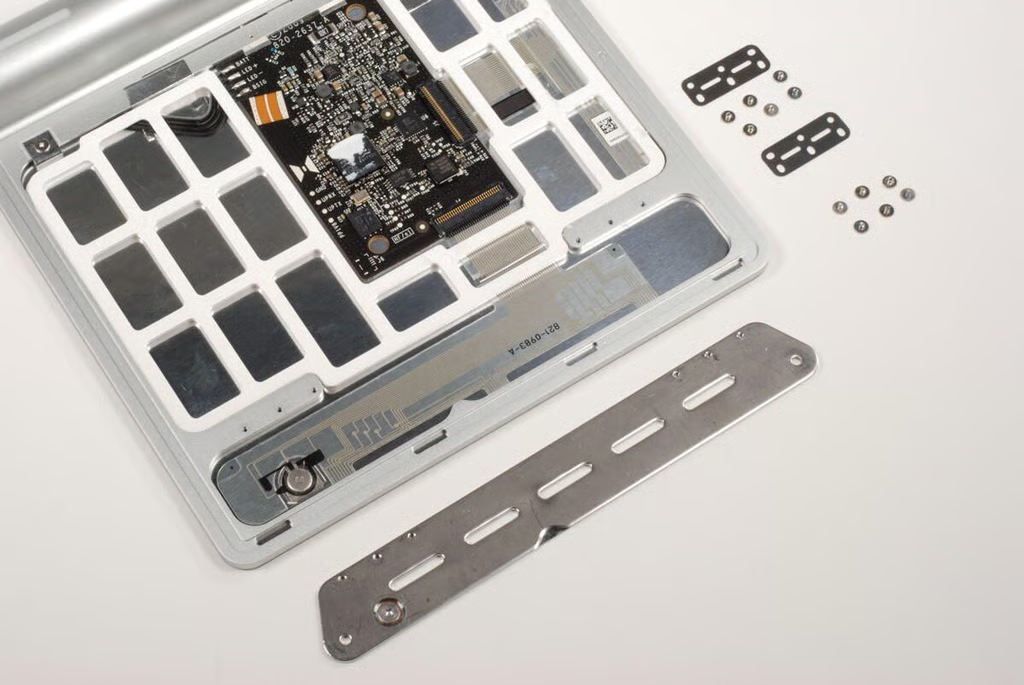
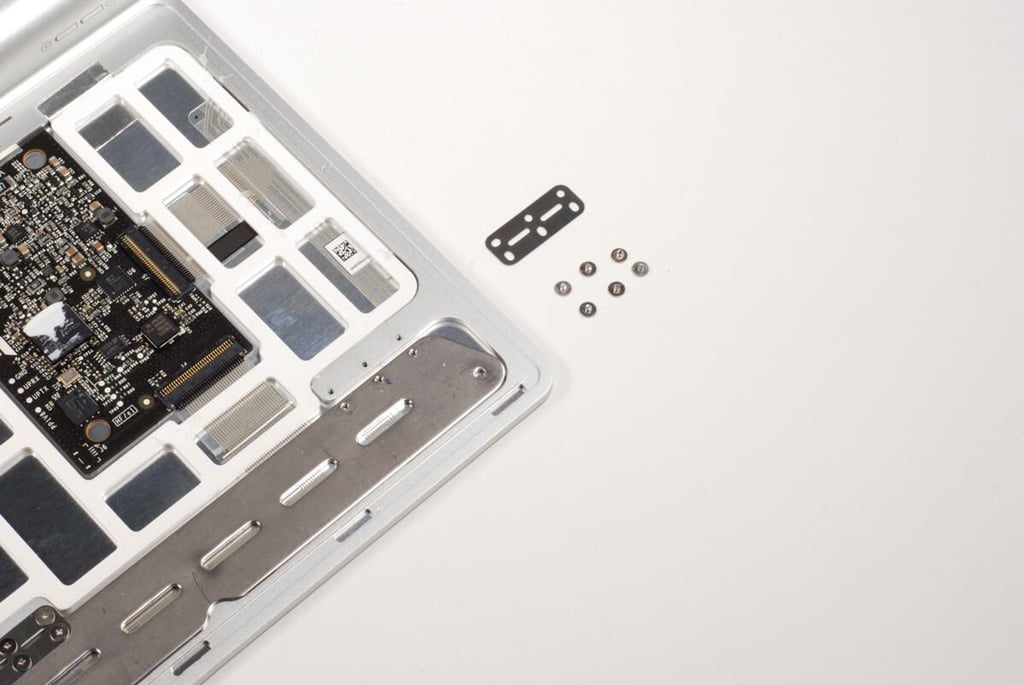
A total of 12 Phillips screws and two hinges hold the plate to the frame.
Photo credit: Bill Detwiler / TechRepublic
There is another screw at the top of the Magic Trackpad near the battery compartment. This screw doesn’t seem to hold anything in place, but appears to a grounding screw for the touch surface.
Photo credit: Bill Detwiler / TechRepublic
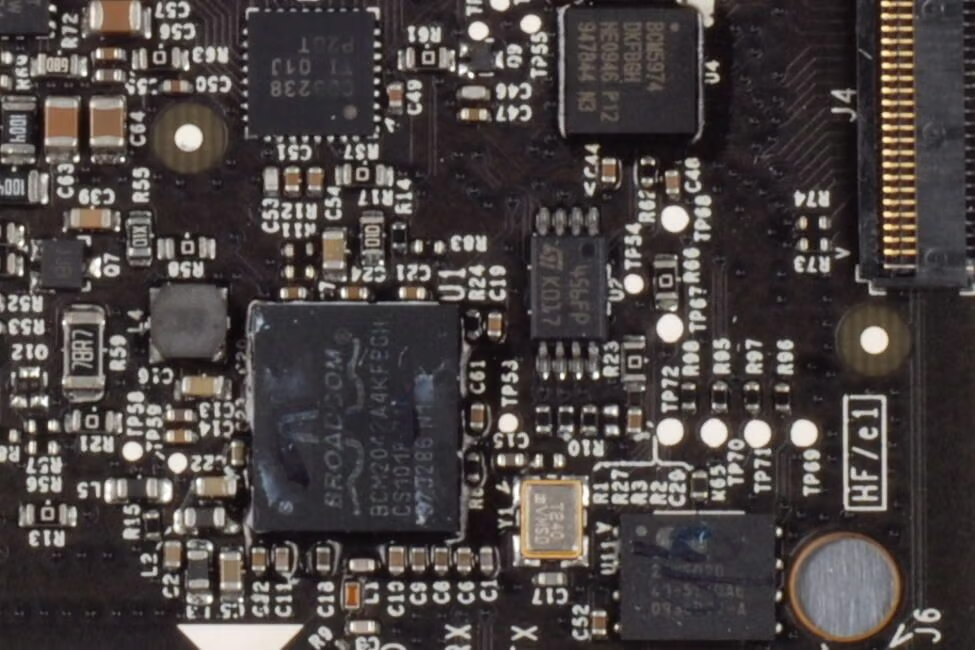
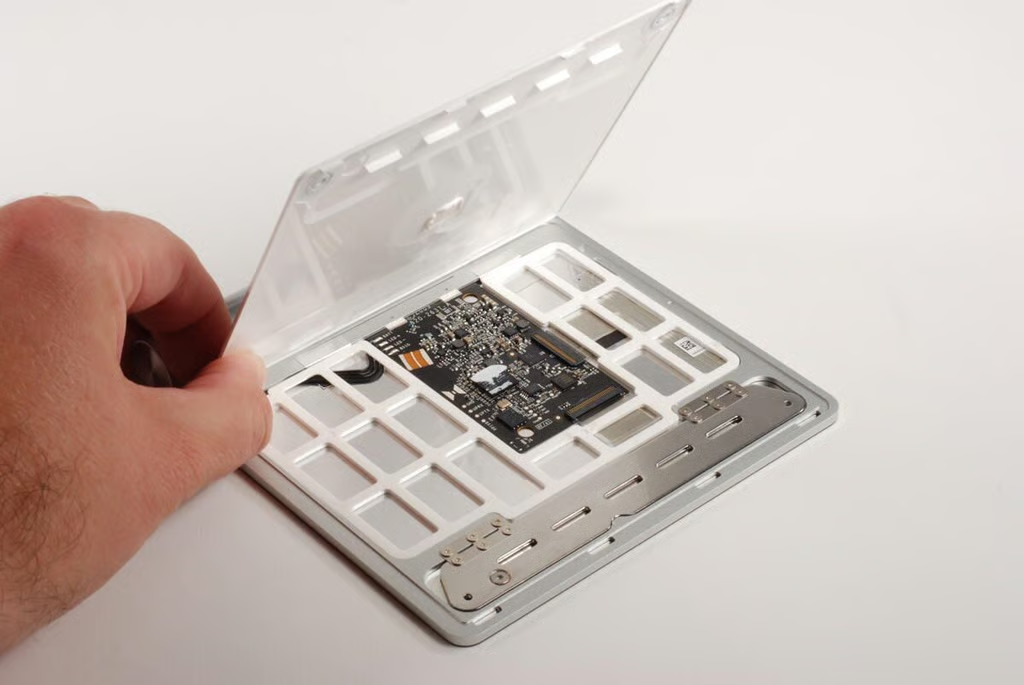
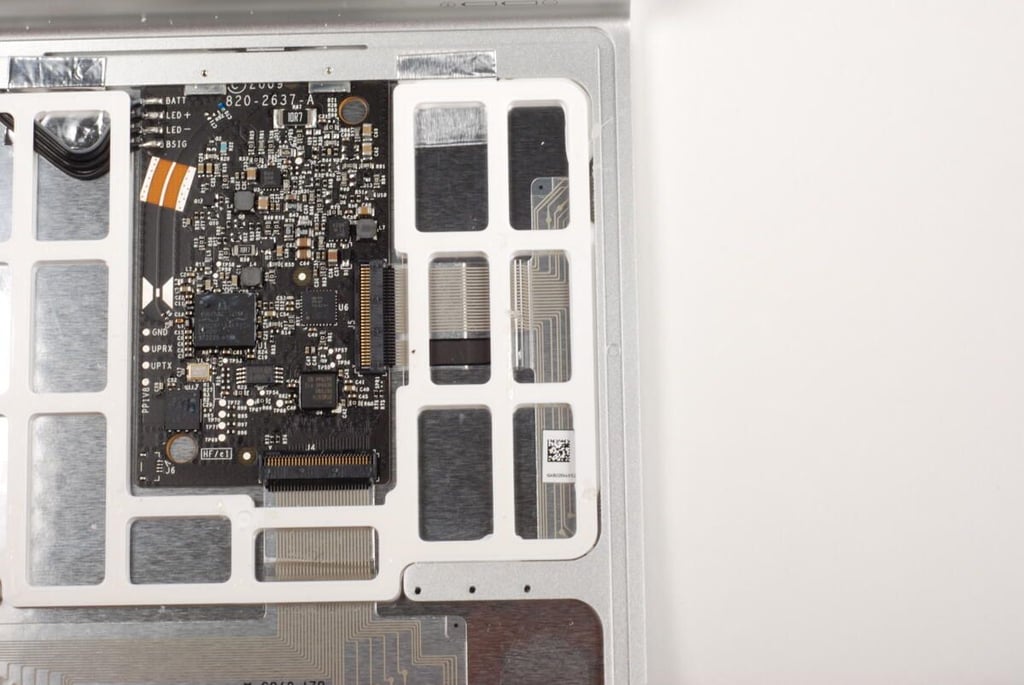
The large chip is the Broadcom BCM2042, which provides not only Bluetooth connectivity but also serves as the processor with built-in RAM/ROM memory.
Below and to the right of the large Broadcom chip is the SST25WF020, which provides 2Mbit of serial flash memory.
Above and to the right of the large chip is the Broadcom BCM5974 touchscreen controller. This is the same chip found in other Apple devices that support Multi-Touch, like the MacBook Pro.
Above the large Broadcom chip is a Texas Instruments chip with markings CD3238 TI 01J P20T.
Photo credit: Bill Detwiler / TechRepublic
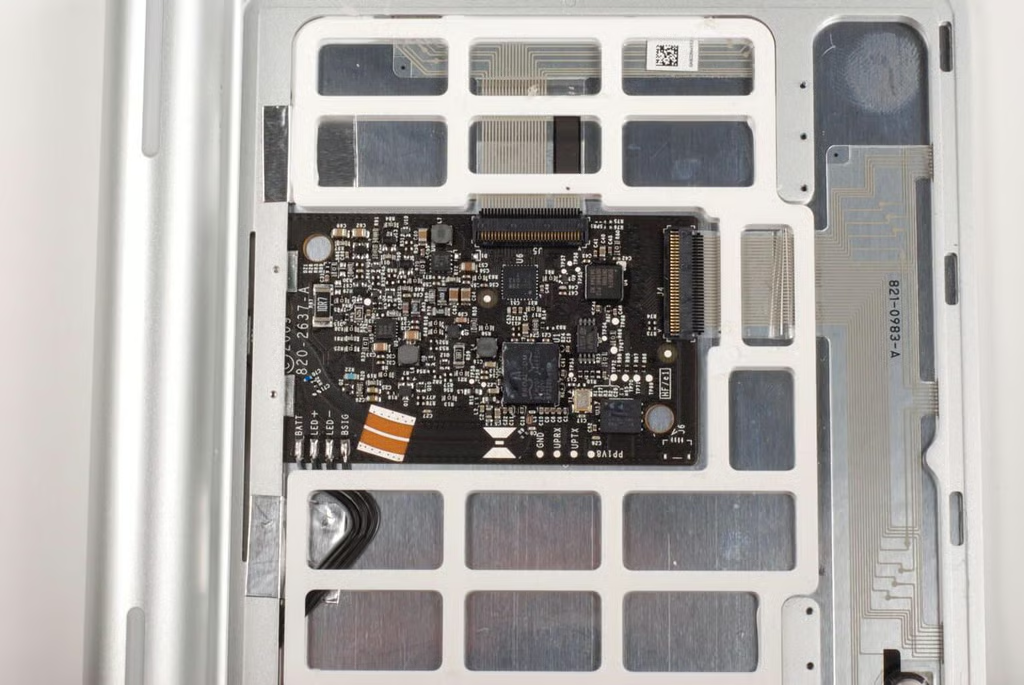
There are two ribbon cable connectors for the Multi-Touch surface on the main logic board.
Photo credit: Bill Detwiler / TechRepublic
Extremely thin wiring for the touch surface is located along the bottom of the Magic Trackpad.
Photo credit: Bill Detwiler / TechRepublic
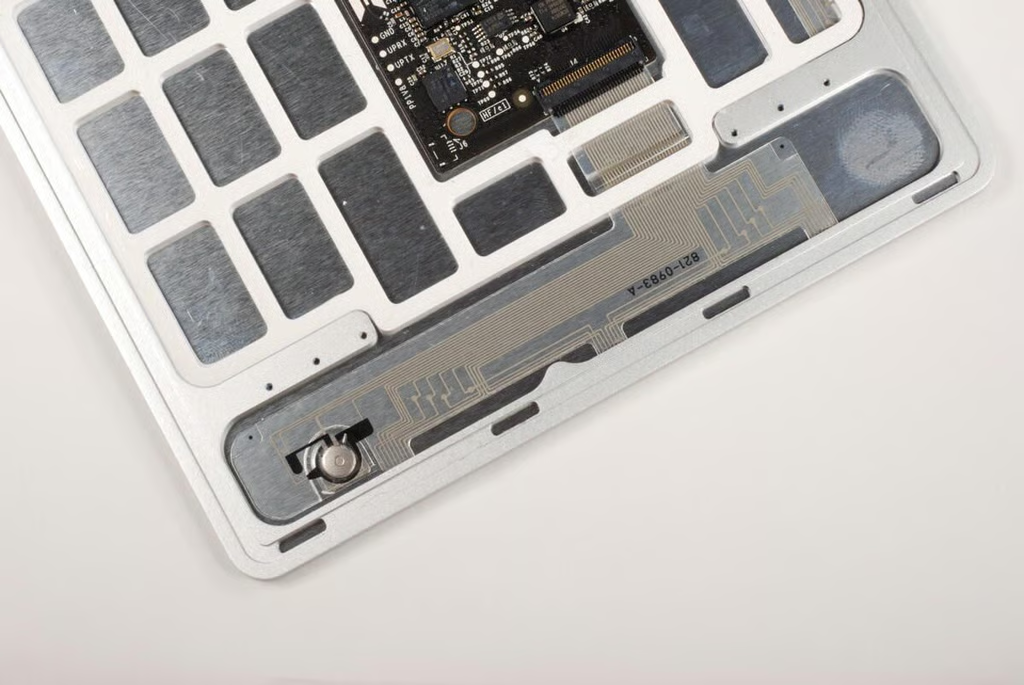
More wiring for the touch surface is located under the white support structure along the side.
Photo credit: Bill Detwiler / TechRepublic
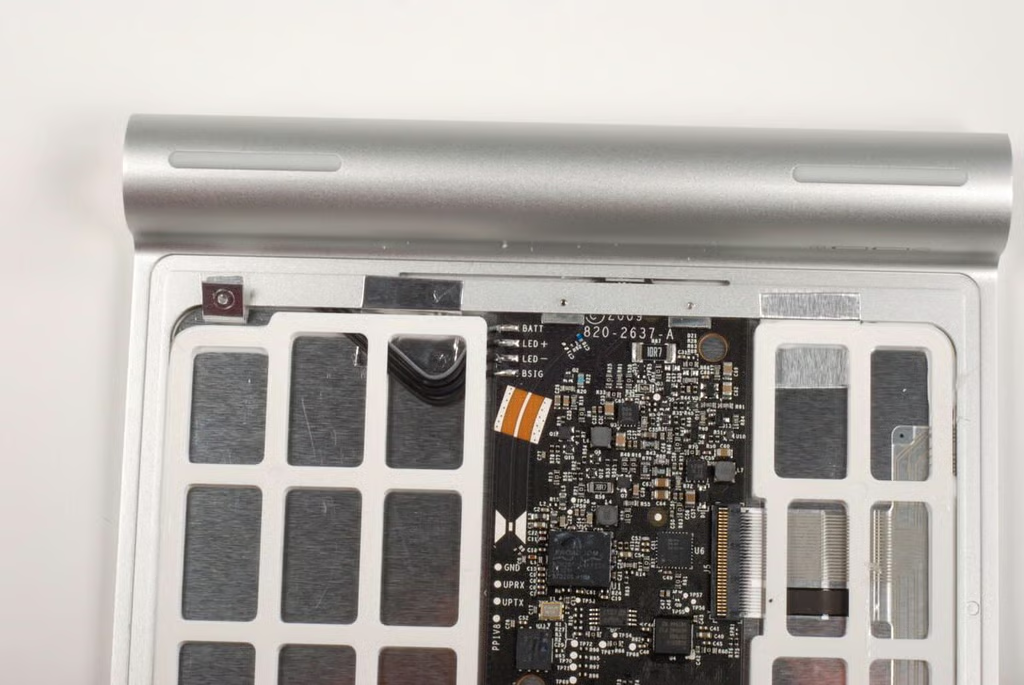
There are four wires soldered to the main logic board for the battery and LED connections.
Photo credit: Bill Detwiler / TechRepublic
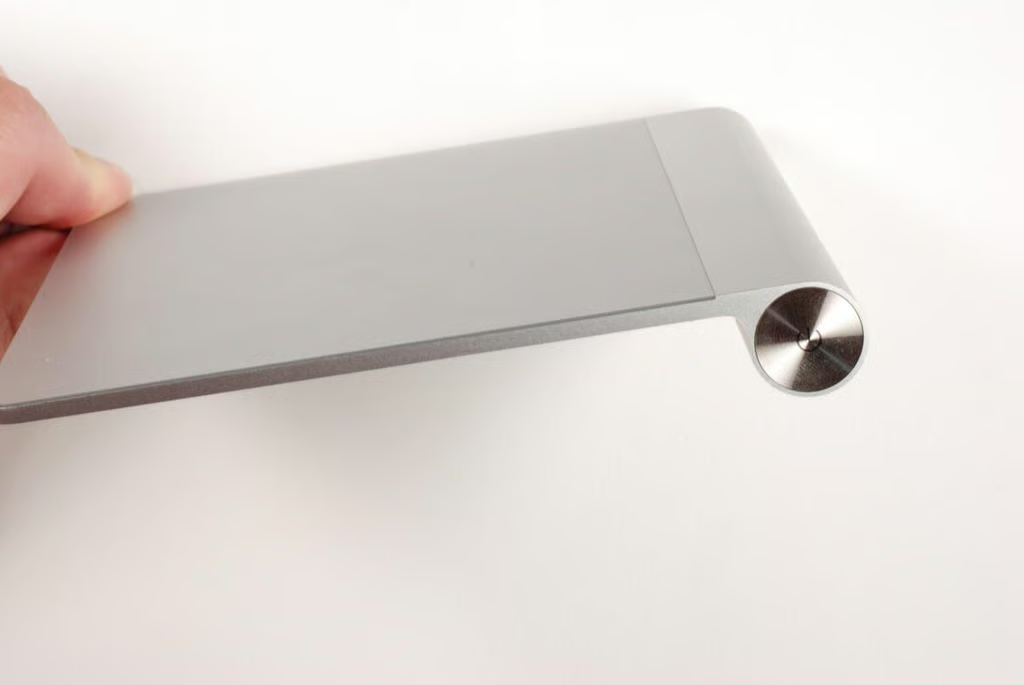
Looking at the device from the side, you can see the Magic Trackpad’s Multi-Touch surface–the darker gray layer onto of the shinny aluminum frame. This surface is held onto the frame with adhesive. To remove the surface, I would need to heat the adhesive. As this would likely damage the device beyond repair, I’m going to leave the surface in place.
Besides, there’s nothing really to see on the underside of the surface other than adhesive. You can see much of the touch surface’s underside through the internal support structure.
Photo credit: Bill Detwiler / TechRepublic
The Apple Magic Trackpad is definitely a unique touch interface device. It’s somewhere between a Wacom tablet and a mouse.
Unfortunately, there’s not much inside that’s user-serviceable. Other than replacing the batteries, the device shouldn’t require much, if any, routine maintenance.
Photo credit: Bill Detwiler / TechRepublic
Bill Detwiler is the Editor for Technical Content and Ecosystem at Celonis. He is the former Editor in Chief of TechRepublic and previous host of TechRepublic's Dynamic Developer podcast and Cracking Open, CNET and TechRepublic's popular online show. Previously, Bill was an IT manager in the social research and energy industries. He has bachelor's and master's degrees from the University of Louisville, where he has also lectured on computer crime and crime prevention.


