New versions of Microsoft Exchange and Windows Small Business Server require 64-bit server platforms. Having recently deployed several new 64-bit servers for clients, IT consultant Erik Eckel is familiar with the expenses typically accompanying such hardware requirements.\n
\nBut building a new 64-bit server from scratch doesn’t have to break the bank. In fact, Eckel built a 64-bit server for less than $775. Here’s how Eckel recommends building a budget 64-bit box.
——————————-
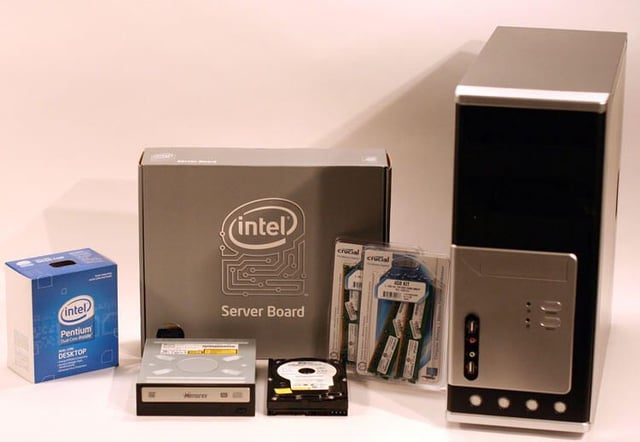
In order to build a proper 64-bit server, several components prove necessary. In addition to a capable case and power supply (more on that later), you need a server-class motherboard, a strong CPU, hard disks, an optical drive and more.
Images by Erik Eckel for TechRepublic
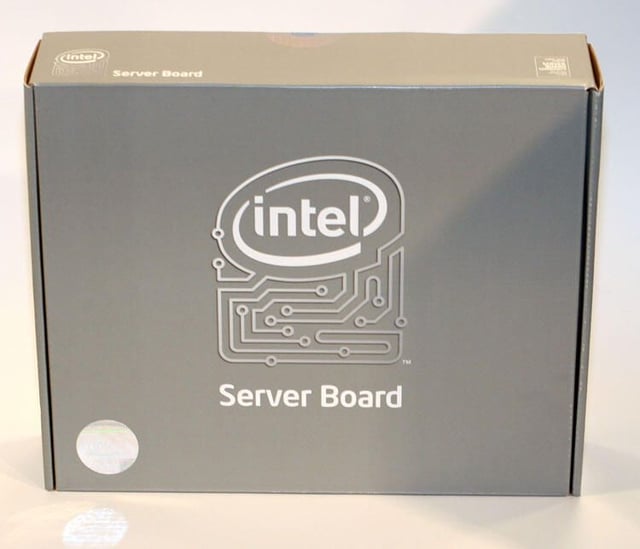
The motherboard is the single most expensive component when building a budget 64-bit server. In any environment in which a server is being deployed to manage production responsibilities, don’t skimp and purchase a desktop board. Server-specific motherboards help maximize performance and redundancy (via integrated RAID support).\n
\nFor this sub-$800 64-bit platform build, I chose an Intel Server Board model S3200SHV. This board supports 800/1066/1333MHz bus speeds, very fast CPU performance (up to a multi-core Intel Xeon 3000 sequence processor), four DIMM slots for DDR2 667/800MHz RAM, gigabit Ethernet, Intel System Management Software 2.0 management support, six SATA ports at 3.0/Gbps with embedded RAID 0, 1, 5 and 10, four PCI buses, PCI Express compatibility and integrated graphics.\n
\nI paid $239 for this motherboard.
Images by Erik Eckel for TechRepublic
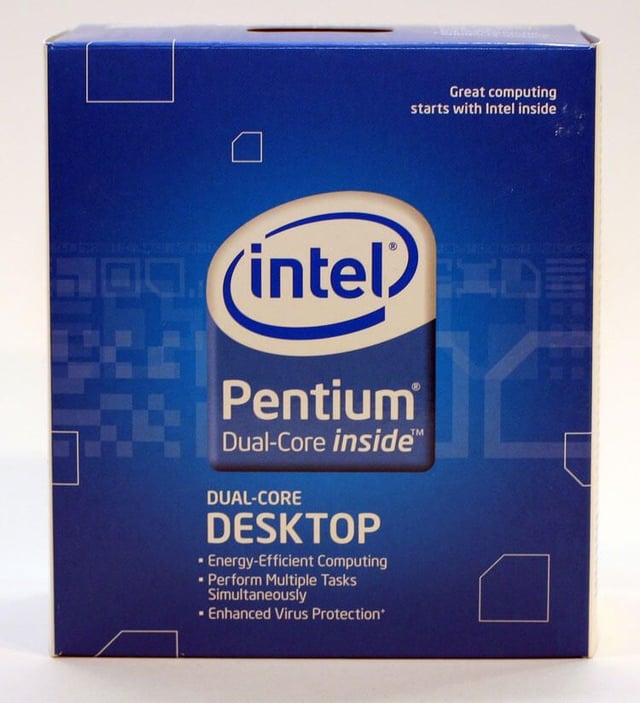
The budget server being built here needs to support a Windows Small Business Server 2008 installation supporting a half-dozen users. In addition to Exchange e-mail service, the server will fulfill print- and file-sharing responsibilities.\n
\nWith that in mind, a simple 2.5GHz Intel Pentium Dual-Core CPU is more than adequate for meeting those needs. Users requiring more horsepower can invest an extra $150 or so for an Intel Xeon processor.\n
\nI paid $89 for this CPU. I could have obtained it for less via mail-order, but was stuck purchasing locally as I needed to build this server in a hurry over a single weekend.
Images by Erik Eckel for TechRepublic
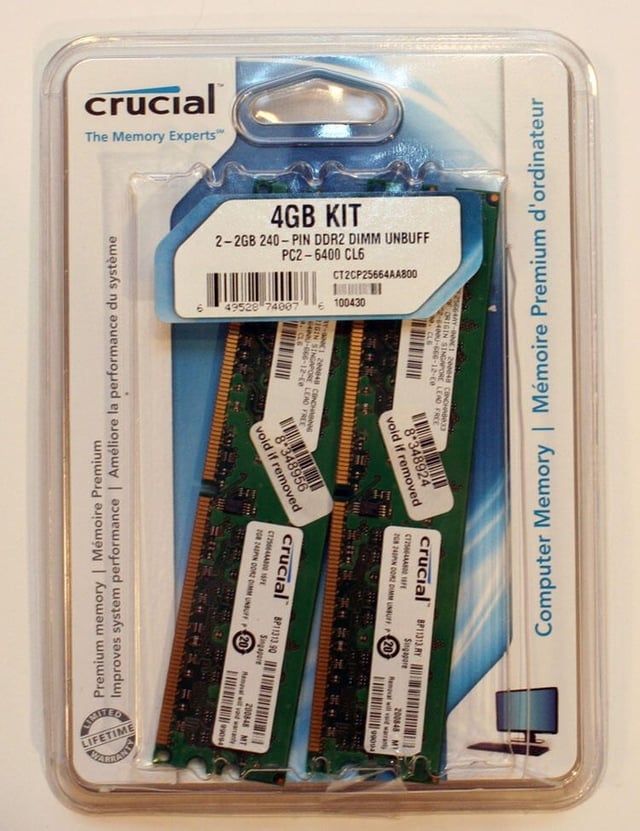
Many 64-bit server platforms (Small Business Server 2008, in particular) require a minimum of 8GB of RAM. I purchased two 4GB DDR2 PC2-6400 RAM kits from Crucial to power this box.\n
\nI paid $116 for this memory.
Images by Erik Eckel for TechRepublic
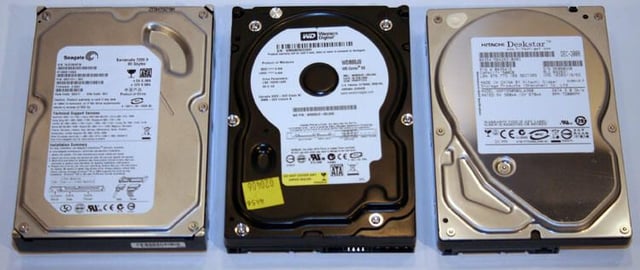
Storage has become quite inexpensive. This 64-bit platform will be built using a pair of 80GB SATA drives (to be deployed in a RAID 1 disk mirroring configuration). An extra 500GB 3.0/Gbps drive will hold user data, which will be automatically backed up off site.\n
\nAll told, these three hard disks cost less than $200, total.
Images by Erik Eckel for TechRepublic
When I first began building this budget server, I cut costs by purchasing this cheap scratch-and-dent case. The box included a low-cost power supply.\n
\nAlthough the original case and power supply, shown here, cost just $39, it did not work. I only discovered this to be the case after completing the entire install. I later exchanged the case (and power supply) for a better model that cost $99 (more on that in a moment).
Images by Erik Eckel for TechRepublic
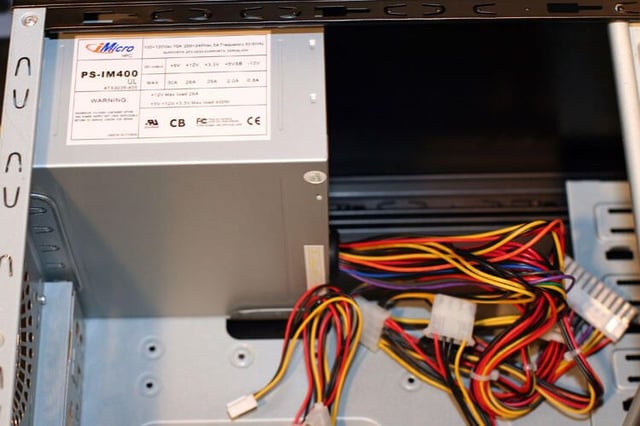
This power supply was rated for 400 watts. Ultimately, it failed to even turn the motherboard’s cooling fans.
Images by Erik Eckel for TechRepublic
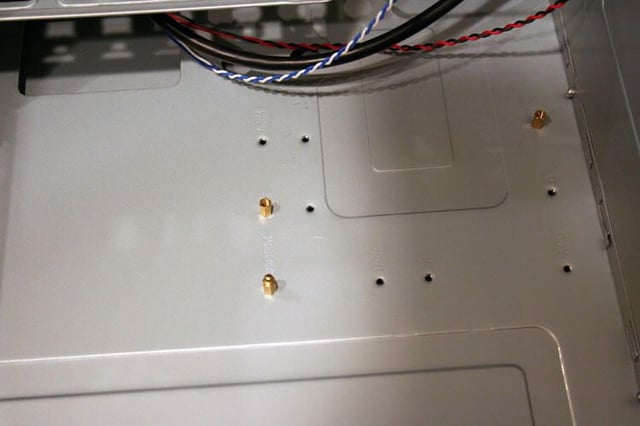
Before you can install the server motherboard in the machine’s case, you need to install these server bolts, known as standoffs. These threaded standoffs receive the screws used to secure the motherboard to the server’s chassis.
Images by Erik Eckel for TechRepublic

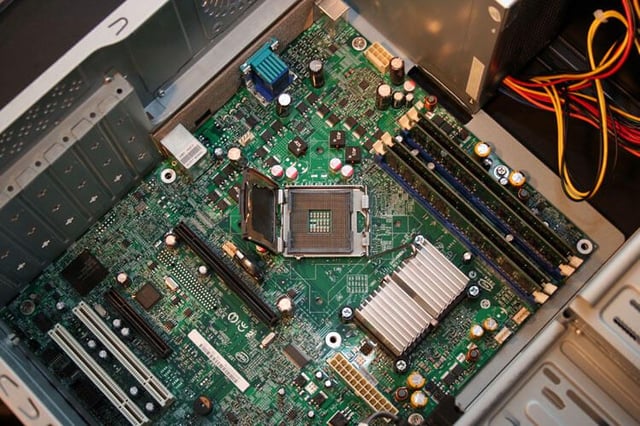
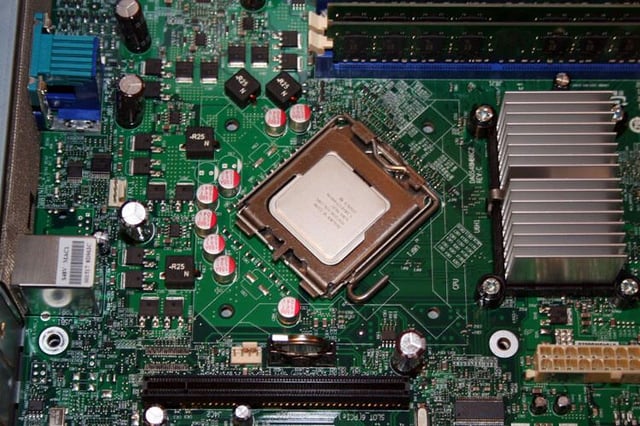
Here is the Intel server motherboard, model S3200SHV, in all its glory.
Images by Erik Eckel for TechRepublic
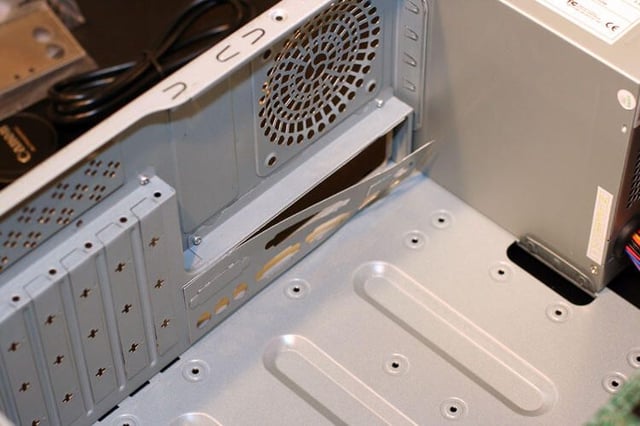
One more step must be completed before installing the motherboard. The initial metal blank, shown here partially pealed back, must first be removed to accommodate the motherboard’s I/O shield.\n
\nIf any reader’s know of an easy method for removing these blanks, please share it by posting a comment below. The only method I’ve found to work is to patiently pry the blank away using needle-nose pliers.
Images by Erik Eckel for TechRepublic
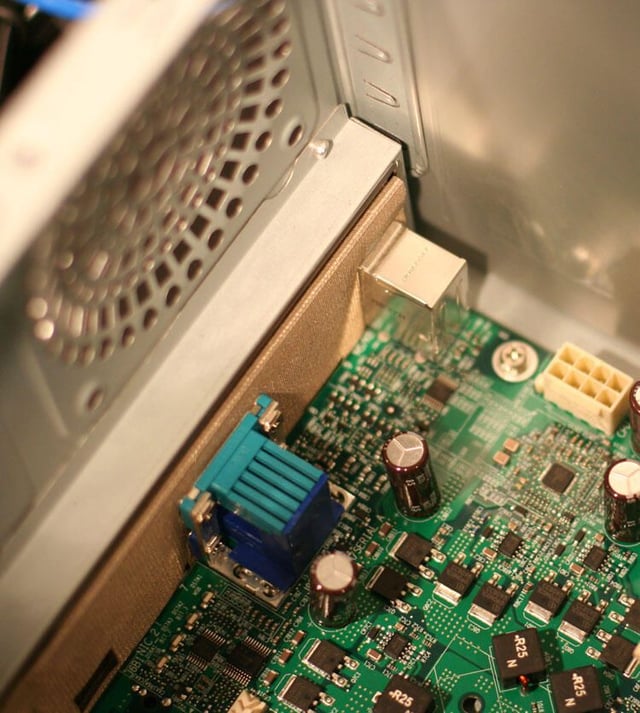
The new I/O shield, included in the Intel server motherboard box, installs from inside the case. Here you can see the I/O shield is installed and the motherboard in place.
Images by Erik Eckel for TechRepublic
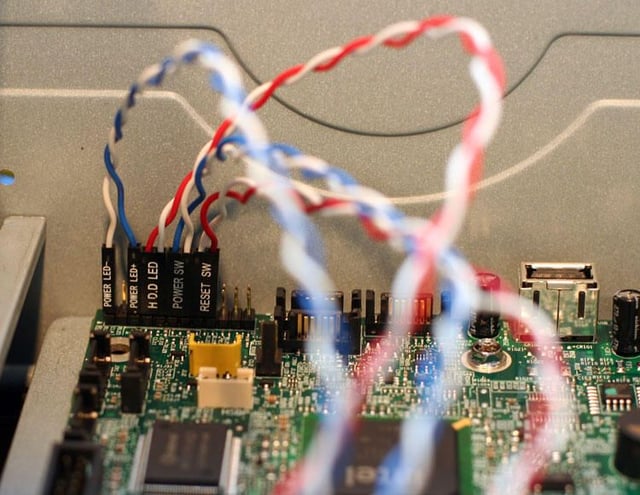
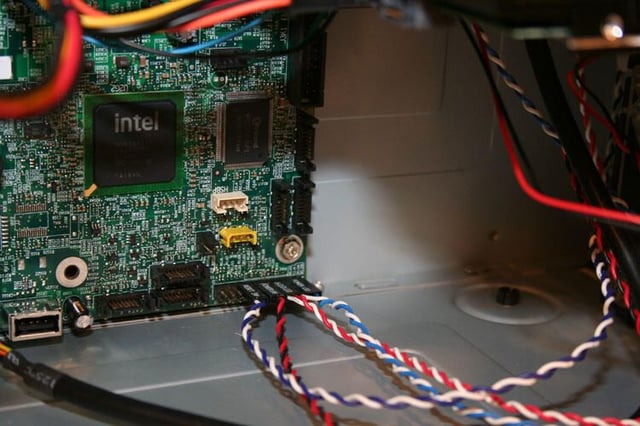
Possibly the most trying step, when installing a new motherboard, is connecting the myriad number of front panel header connectors. Here you can see connections use to enable the server’s front power and reset buttons and hard disk and power LEDs.
Images by Erik Eckel for TechRepublic
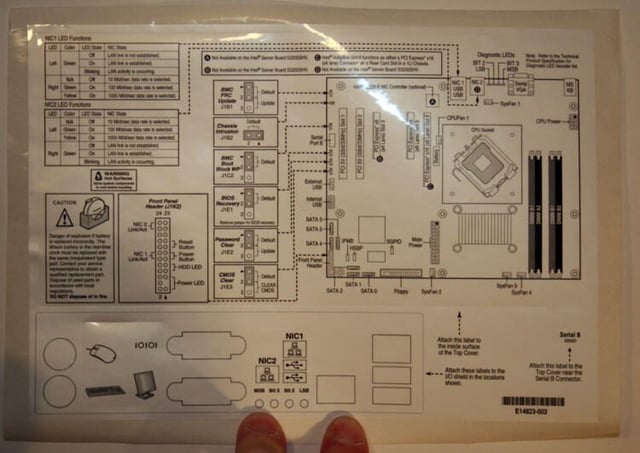
Intel includes this handy decal with the server motherboard. In addition to specifying proper front panel header pin locations, the schematic denotes various other critical connections.
Images by Erik Eckel for TechRepublic
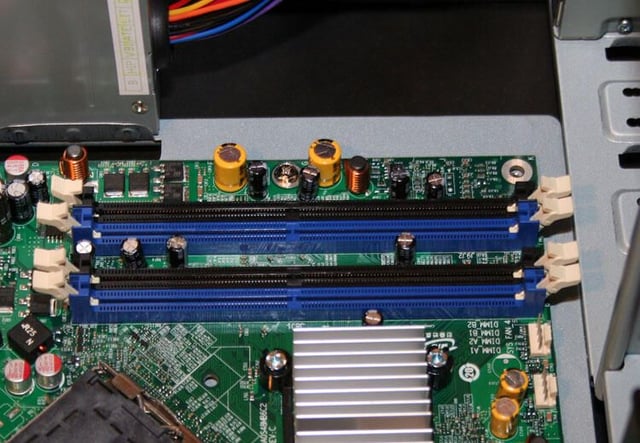
The Intel server board accepts four RAM chips. They mount in the blue and black bays, shown here toward the top center of the image (and above the silver-finned heat sink).
Images by Erik Eckel for TechRepublic
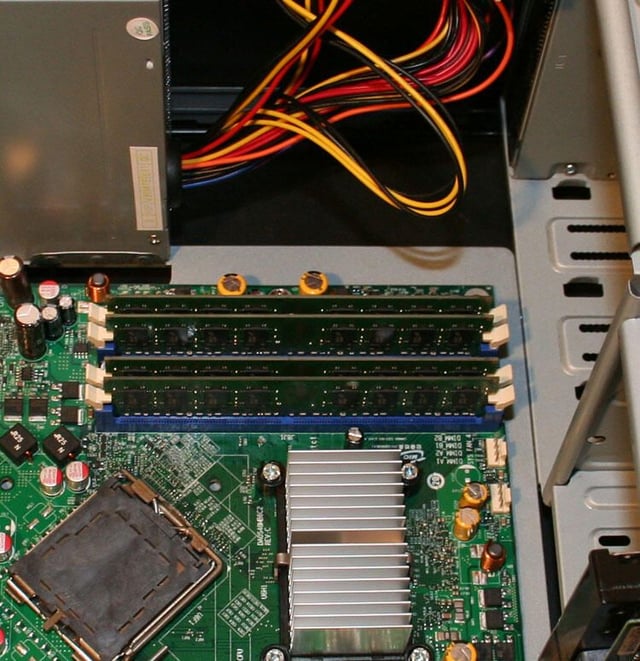
Here’s a look at the RAM once installed in sets of matching pairs. Note neither the CPU nor the CPU cooling fan are yet in place.
Images by Erik Eckel for TechRepublic
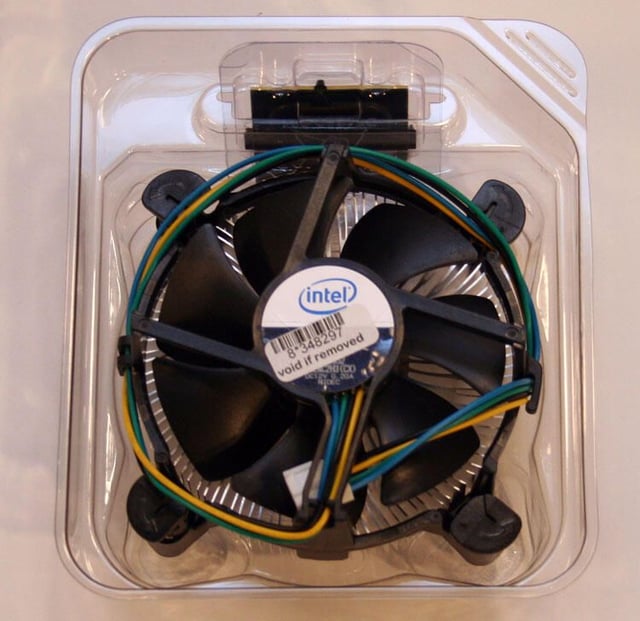
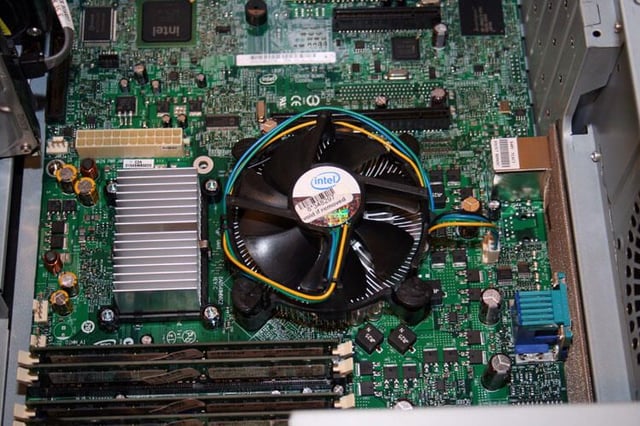
An official Intel fan was selected to cool this 64-bit server’s microprocessor. In fact, this cooling fan assembly is included with the boxed Pentium Dual-Core CPU.
Images by Erik Eckel for TechRepublic
The Intel server motherboard requires zero force to install the CPU. Just release the locking arm, open the lid, remove the black plastic spacer and drop in the new chip.
Images by Erik Eckel for TechRepublic
Once the CPU is in place, you need only close the lid and lock the lever in place.
Images by Erik Eckel for TechRepublic
Removing a plastic protective (found on the heat sink located beneath the fan assembly unit), reveals a thin, pre-measured amount of thermal grease. This grease serves to encourage proper CPU cooling.\n
\nThe CPU cooling fan’s power lead must then be connected to the motherboard’s CPU fan port.
Images by Erik Eckel for TechRepublic

Here is a close up view of two of the hard disks, once placed inside the original budget server case.
Images by Erik Eckel for TechRepublic
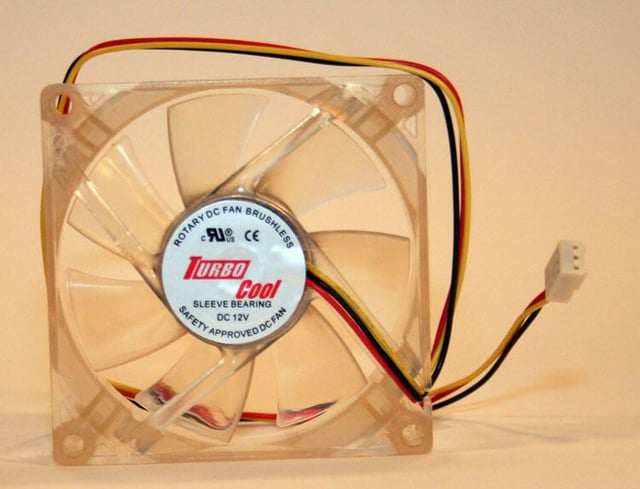
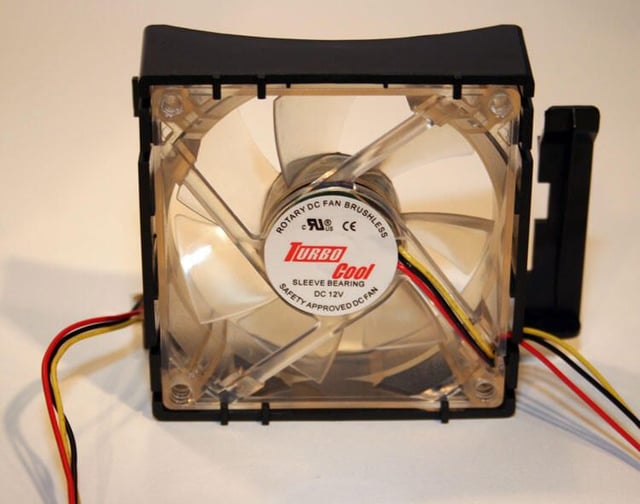
Inexpensive case fans, such as this Turbo Cool model, help ensure internal case temperatures remain tolerable. Better yet, this model cost only $5.
Images by Erik Eckel for TechRepublic

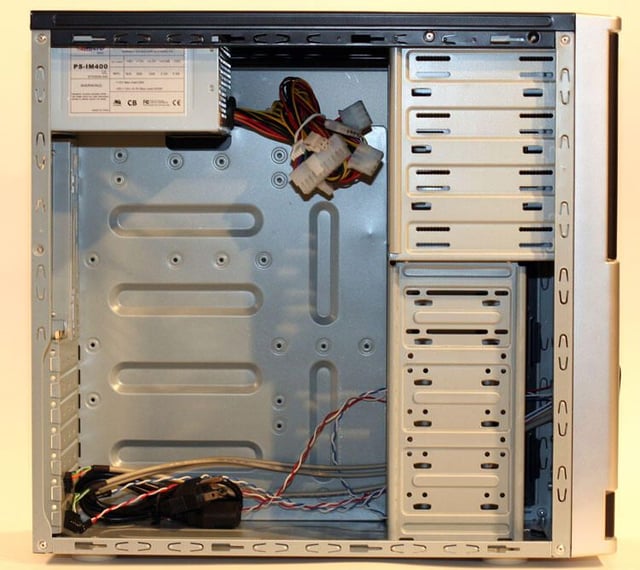
After completing the entire install, the original case failed to power the motherboard. The problem was due either to a faulty power switch or bad power supply lead. I replaced the case with this $99 case.
Images by Erik Eckel for TechRepublic
The new server case boasted not only a more spacious interior, but several additional cooling vents, shown here.
Images by Erik Eckel for TechRepublic
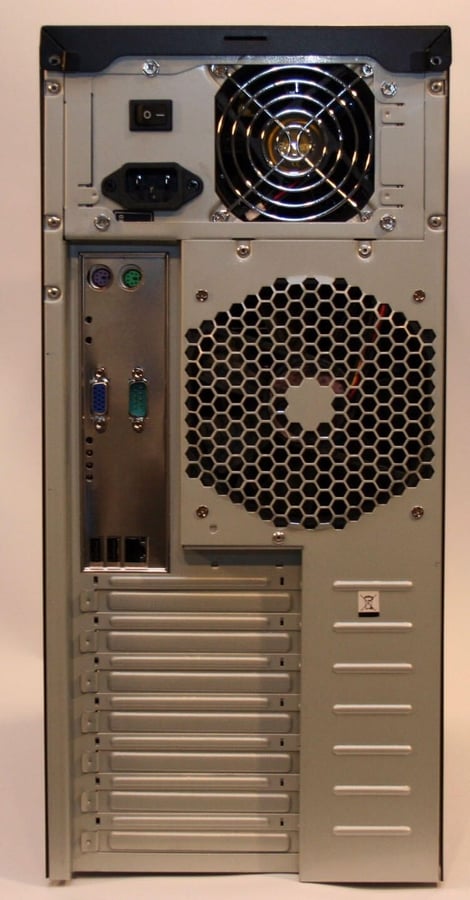
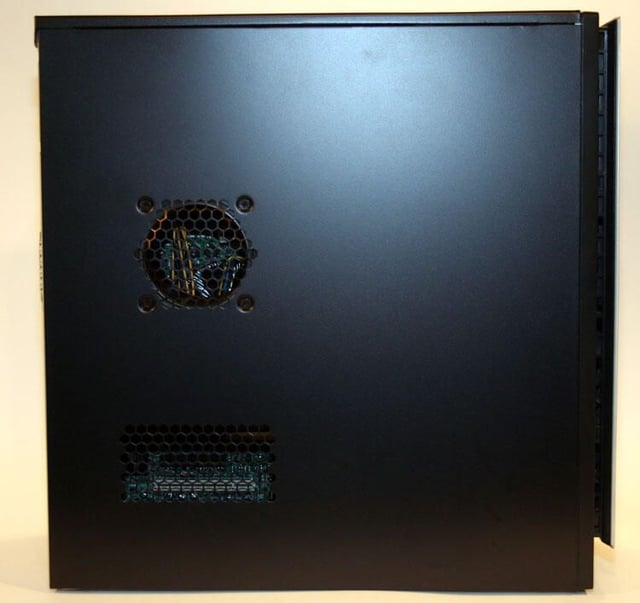
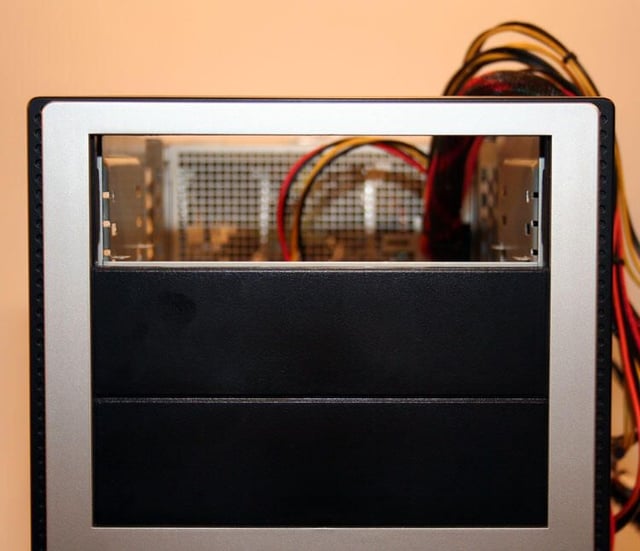
The new case’s rear view shows plenty of space for expansion slots, as well as a liberal rear cooling fan vent.
Images by Erik Eckel for TechRepublic
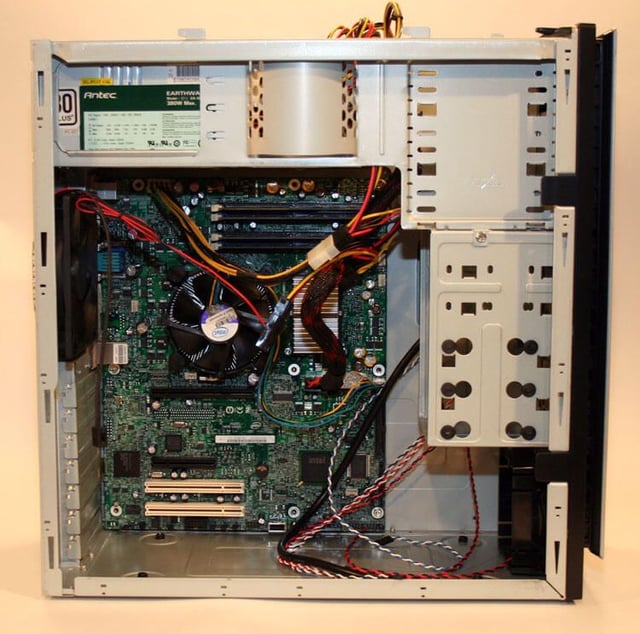
Here’s the new and improved case with the motherboard installed.
Images by Erik Eckel for TechRepublic
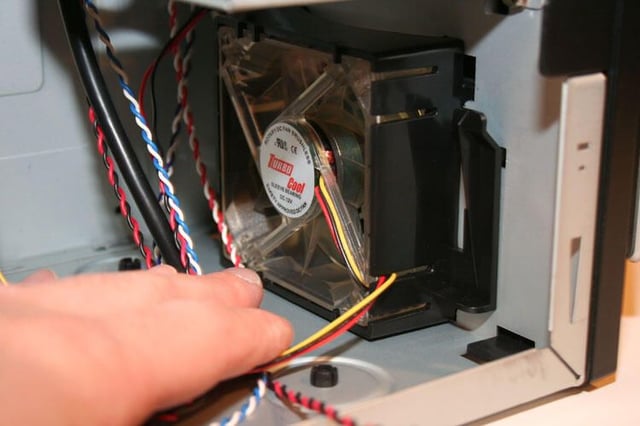
Since the new case included a large cooling fan in its rear bay, I recycled my existing cooling fan by installing it in the provided front bay location, shown here.
Images by Erik Eckel for TechRepublic
The Turbo Cool case fun must first be mounted within this bracket, included with the computer case, before the fan can be installed in the chassis.
Images by Erik Eckel for TechRepublic
Here’s a look at the front fan, once installed in its bay within the computer case.
Images by Erik Eckel for TechRepublic
Before installing the optical drive, the corresponding decorative blank must be removed.
Images by Erik Eckel for TechRepublic
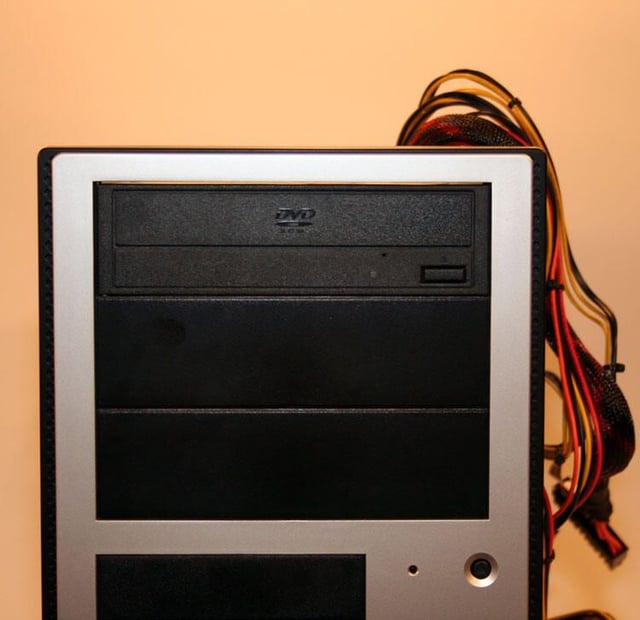
Because so many software releases are now distributed on DVDs, I chose to install a DVD drive in this server. Originally I’d planned a CD writer/DVD-ROM drive, but chose to keep it simple and proceed with just a DVD-ROM.
Images by Erik Eckel for TechRepublic
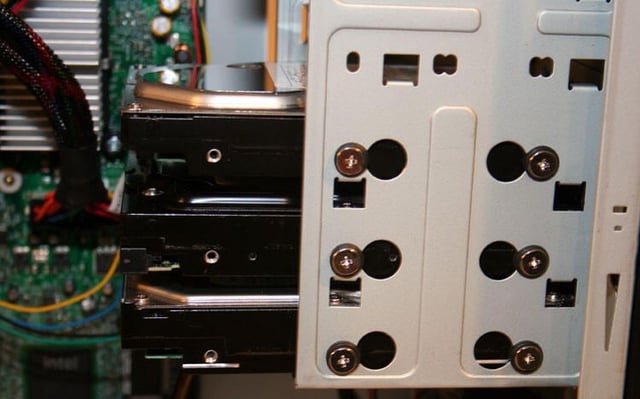
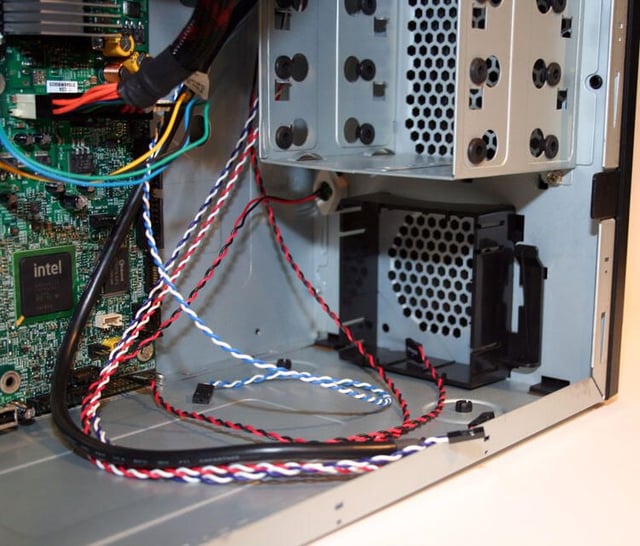
When migrating all the components to the new computer case, the hard disks received more space within the chassis. Note, too, the higher quality power supply cabling within the new case.
Images by Erik Eckel for TechRepublic
After moving the motherboard to the new case, the front panel header wires were among those needing to be reconnected.
Images by Erik Eckel for TechRepublic
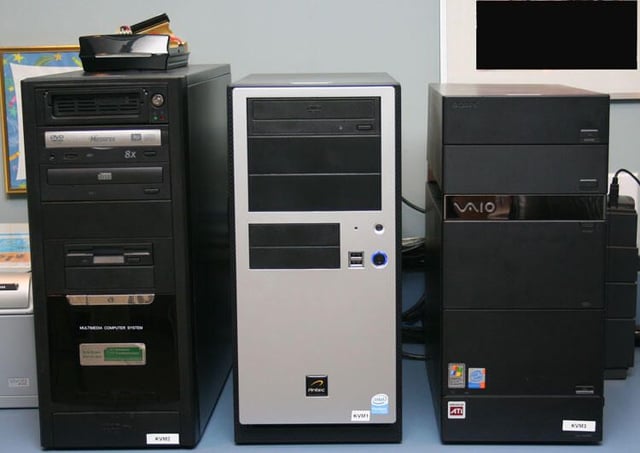
Here’s the budget server (the middle box), once deployed among a bank of test machines.
Images by Erik Eckel for TechRepublic
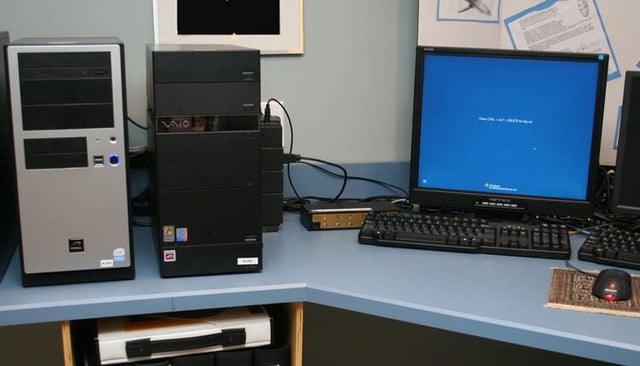
The new budget server I built now powers Windows Small Business Server 2008.
Images by Erik Eckel for TechRepublic
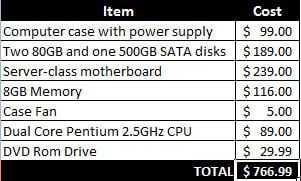
Here’s a breakdown of the budget server’s final costs. Not counting the OS (as many 64-bit server users may opt for Linux or other alternatives), the hardware expenses proved reasonable. At $766, there’s still plenty of room to accommodate hard disk, CPU or RAM upgrades and keep the price beneath $1,000.
Images by Erik Eckel for TechRepublic

Erik Eckel is a managing partner at Louisville Geek and president of Eckel Media Corp. He previously served as Executive Editor at TechRepublic. He received Microsoft Engineer accreditation from Sullivan University and earned his Bachelor's Degree in English from the University of Louisville. He's earned Network+, Windows NT 4.0 MCP+I and MCSE, and Windows 2000 Professional MCP accreditations.


