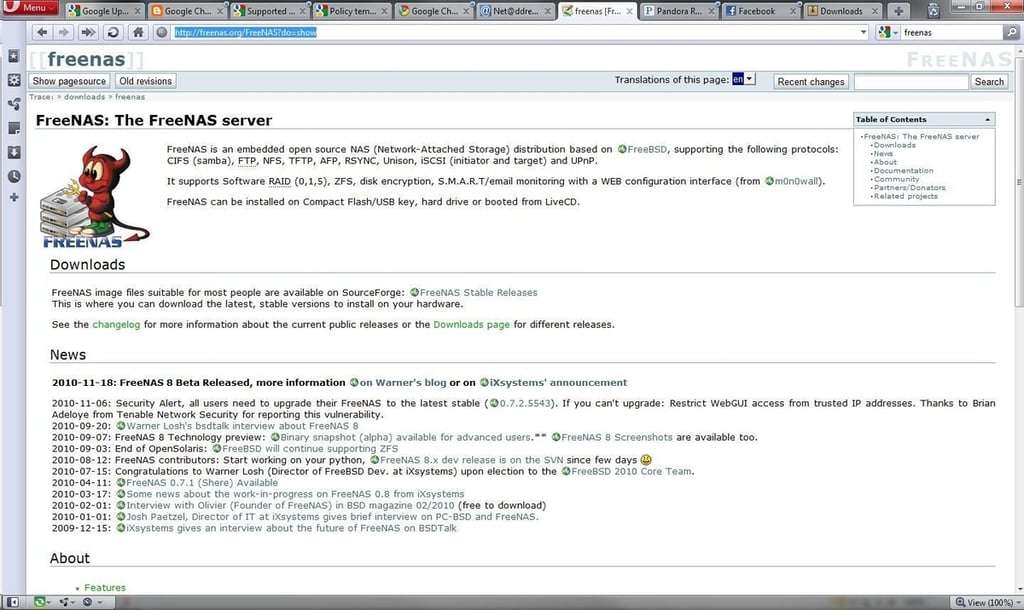
Organizations are always on the prowl for cost-effective storage solutions. In a number of previous posts, whenever a free storage product is mentioned, TechRepublic members frequently suggest FreeNAS as an alternative to StarWind, Openfiler and other software storage solutions. By its name, FreeNAS is a free solution. In this gallery, FreeNAS will be installed as a virtual machine and provisioned as a Windows file resource using the common internet file system (CIFS) storage protocol.

In the case of a virtual machine for this example, the FreeNAS server is provisioned as an x64 Linux distribution with 4GB of RAM and 1TB of local drive space attached to it as a main data partition. A separate partition is locally available as a thin-provisioned disk in case emergency space is needed for the install. If FreeNAS is to be used for anything beyond an experiment, a trip to the FreeNAS documentation site is worthwhile.
This gallery walks through booting right from the CD-ROM .ISO. (In another gallery, I will walk through installation options with FreeNAS to embedded and full installation types. In the installation option, the other partition (smaller than the 1TB allocation) is ideal for the installation of FreeNAS and its swap files.)
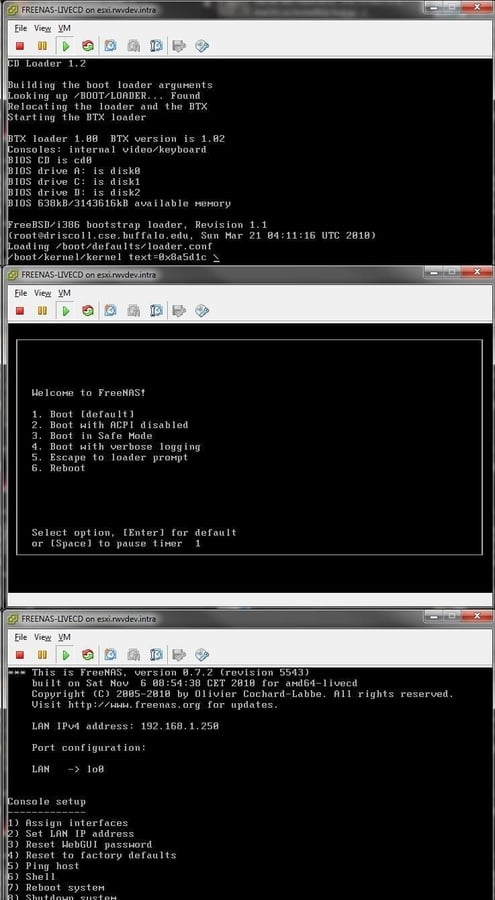
The FreeNAS boot sequence from the CD .ISO image is to first enumerate the hard drives, memory, and prepare the installation. The second step of the boot sequence is the “1. Boot [Default]” and then it runs into the setup console. This is where FreeNAS networking is configured. Option 1 to assign interfaces is the first step. In this example, the FreeNAS virtual machine will take a DHCP reservation that also provides a DNS entry (freenas.rwvdev.intra).
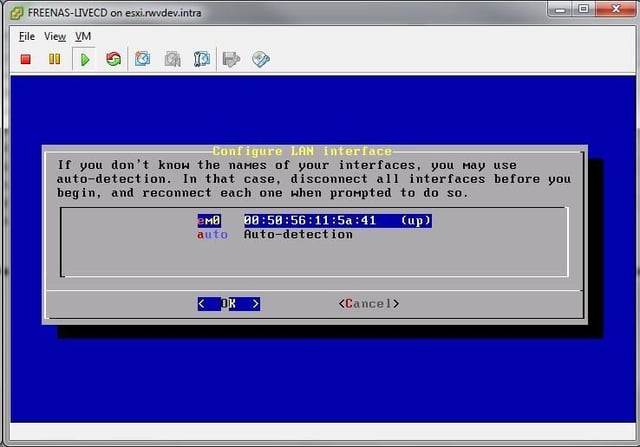
The first step in configuring the networking for a FreeNAS installation is the detection of the network interfaces. The auto-detection feature will determine most configurations. FreeNAS can be downloaded from Sourceforge, and this example is with the 0.7.2 stable release. If using a virtual machine, make sure the E1000 interface type is selected as FreeNAS may not recognize newer interfaces such as VMware’s VMXNET3. The same goes for the storage controller for a virtual machine; the newer Paravirtual SCSI adapter (PVSCI) controller isn’t a good idea.
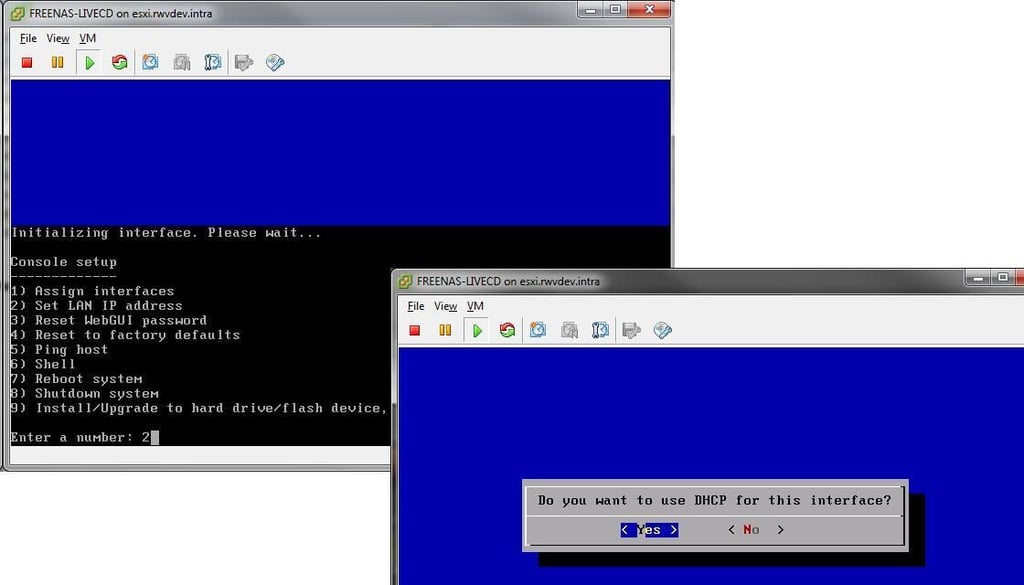
The next step is to set up the LAN interfaces, which will in this example utilize the DHCP and DNS information. Options are also presented to use IPv6, which is left to your own discretion. Once the interface is initialized, the DHCP interface is presented on screen and you can then to go a URL to configure the FreeNAS appliance further.
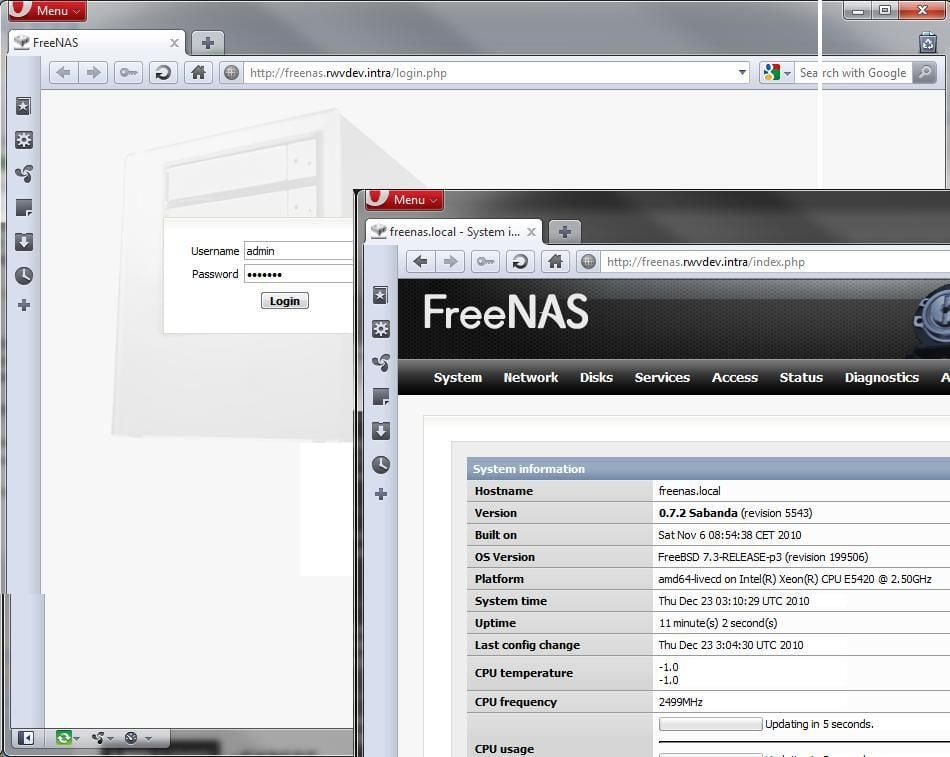
The browser login for FreeNAS is now available after that step. The default login is “admin” and the default password is “freenas.” Of course this is the first thing you should change, which is done in the System section by selecting Password. The Access section allows more users to be created as well as groups.
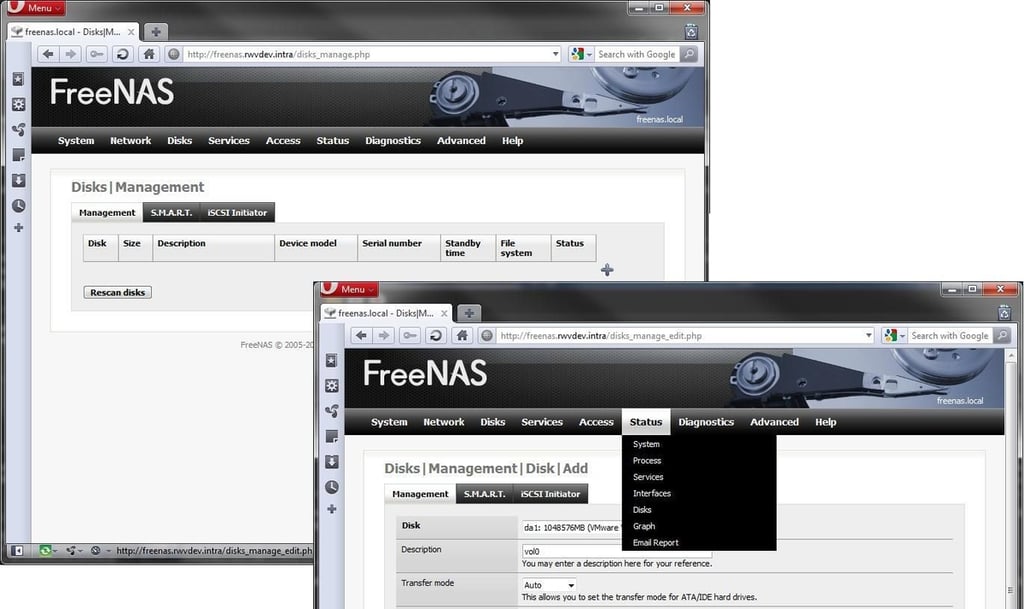
To provision the first disk, select the Disks section, then the plus arrow on the right to add a disk. Then the disk management options are presented to add them to FreeNAS. I’ve selected to preformat the volume with NTFS, which is the native file system for the CIFS endpoint.
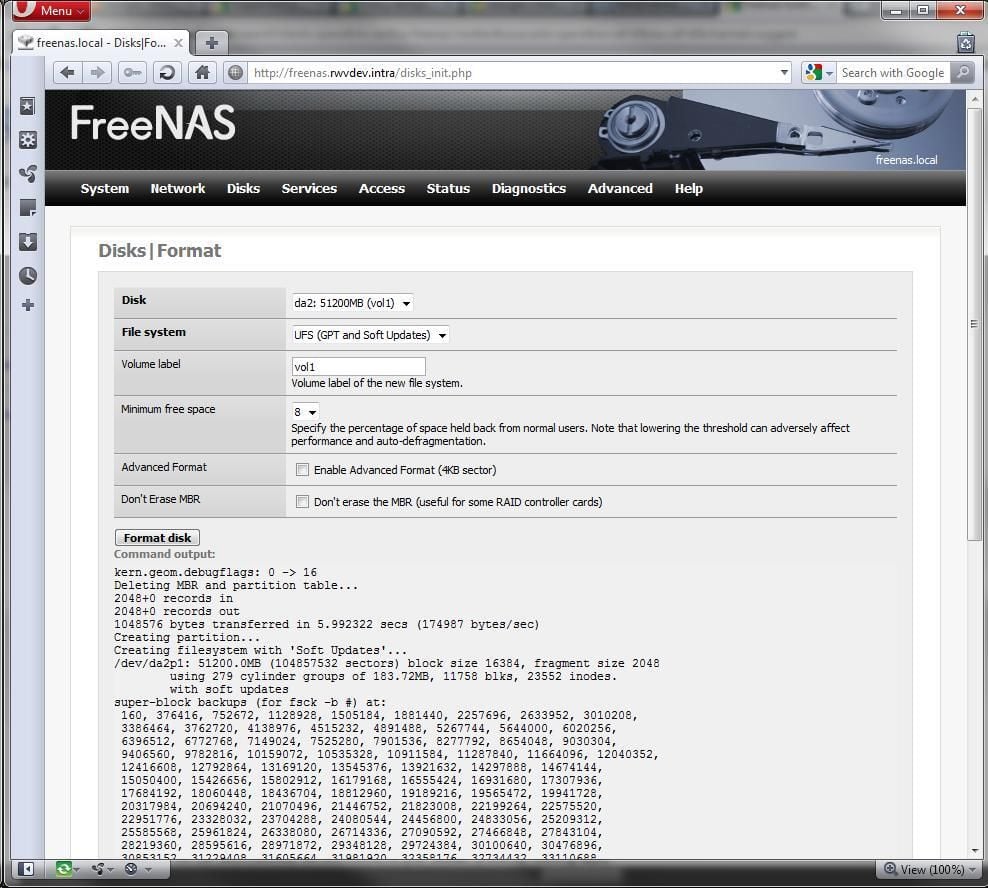
The next step is to format the new volume. This is from the Disks | Format menu. The newly created disk is available for format with a name and file system. This step is data destructive, so be careful in proceeding at this point.
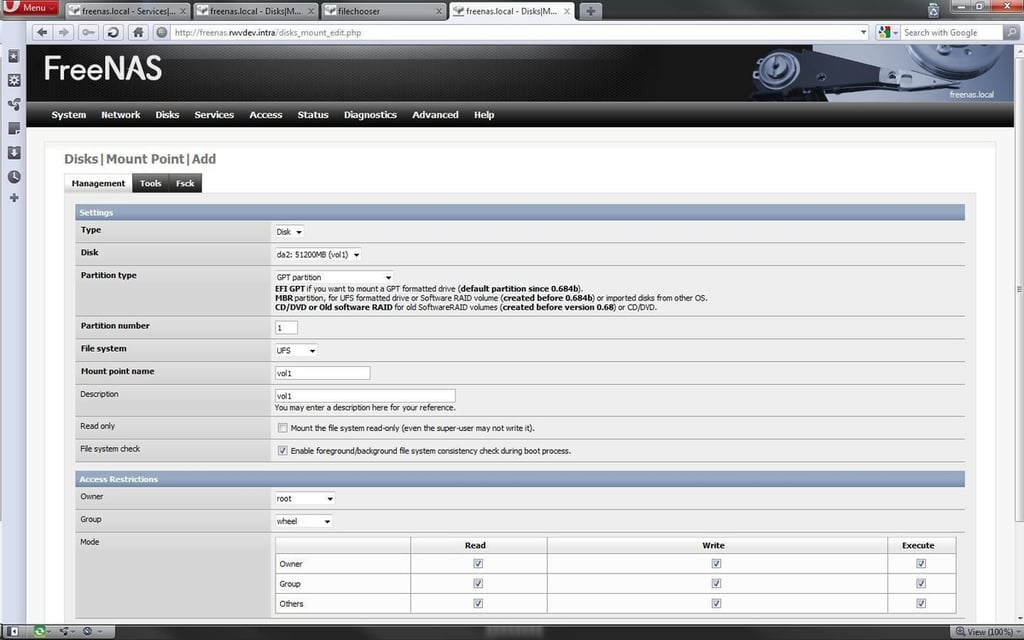
The last disk preparation step is to prepare the mount point. This is the path on the file system for the disk added. Think of the mount point as the location within the Linux-based system that contains the formatted extra disks, and is extensible.
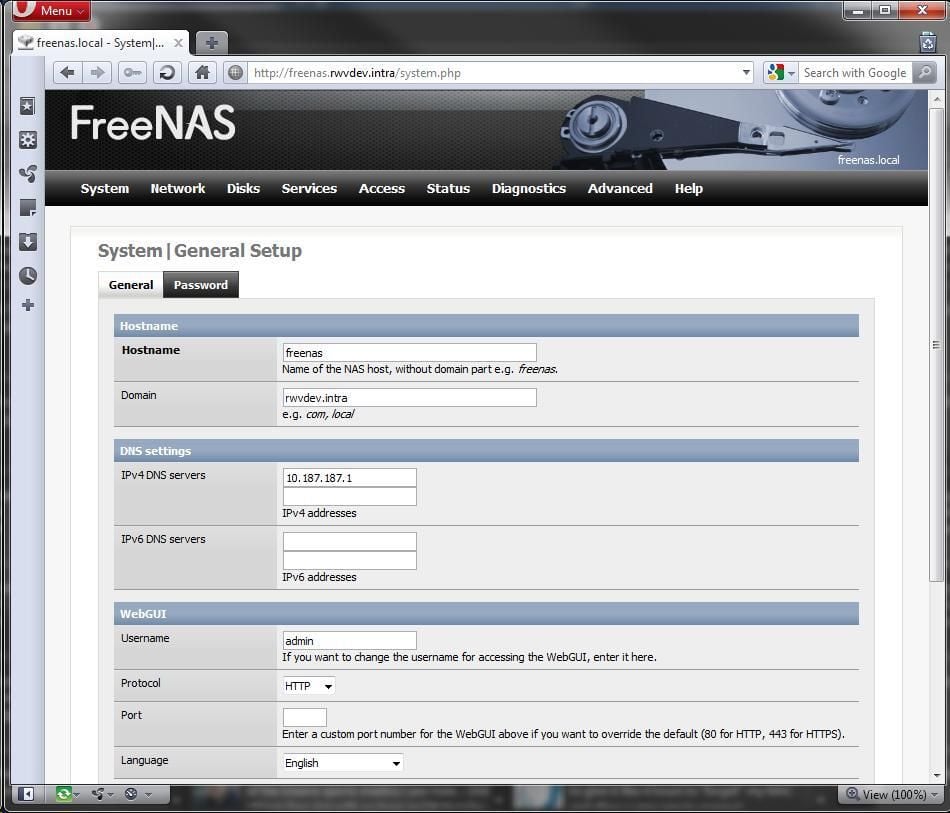
DNS is important for many things, and the FreeNAS configuration allows the networking and DNS suffix configuration to be configured through the web interface. This should be configured for the destination network, and then saved.
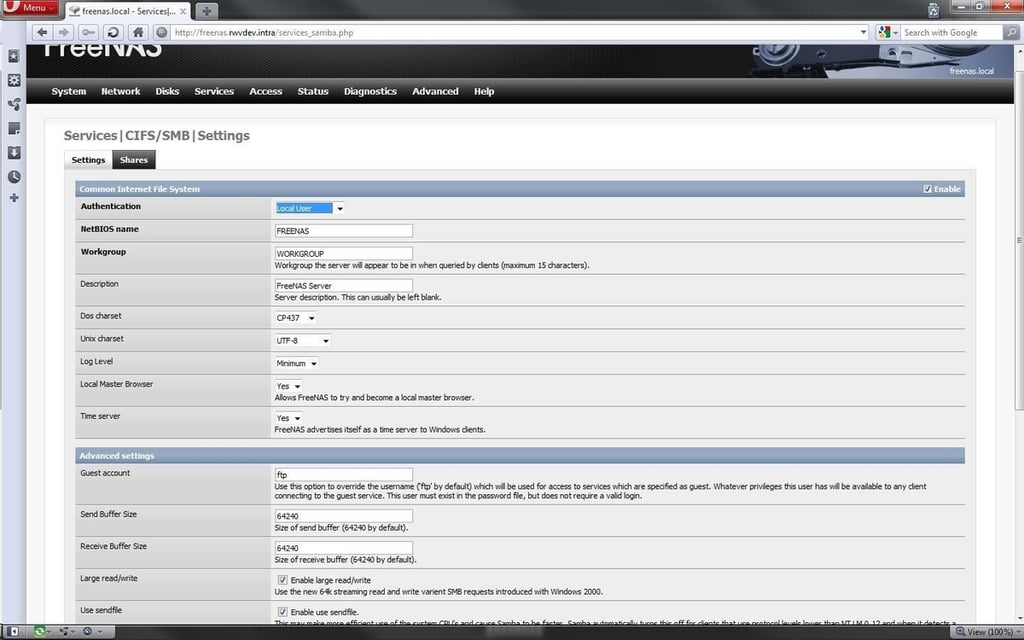
Configuring CIFS is done through the Services menu by selecting CIFS/SMB. The configuration is based on the parameters of either a workgroup or domain configuration. Once these changes are entered, a message is displayed that they have been applied successfully. This is an area where the pre-configured DNS entry and DHCP reservation can make these steps flow more smoothly. The same goes for a static IP address and pre-created DNS reservation, should that be the preference. A reboot is required to make these changes take effect.
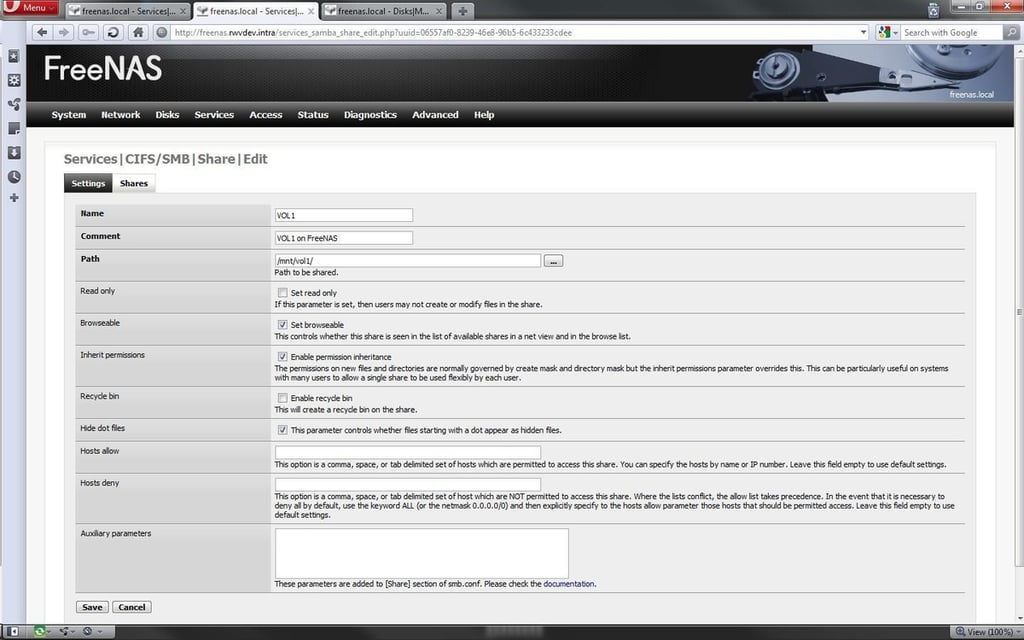
The next step is to create a share to be accessible via CIFS. A good timesaver is to make the name of the share the same as the disk, if one disk is for each share. This way, it is easier to view what storage and shares live on what disk.
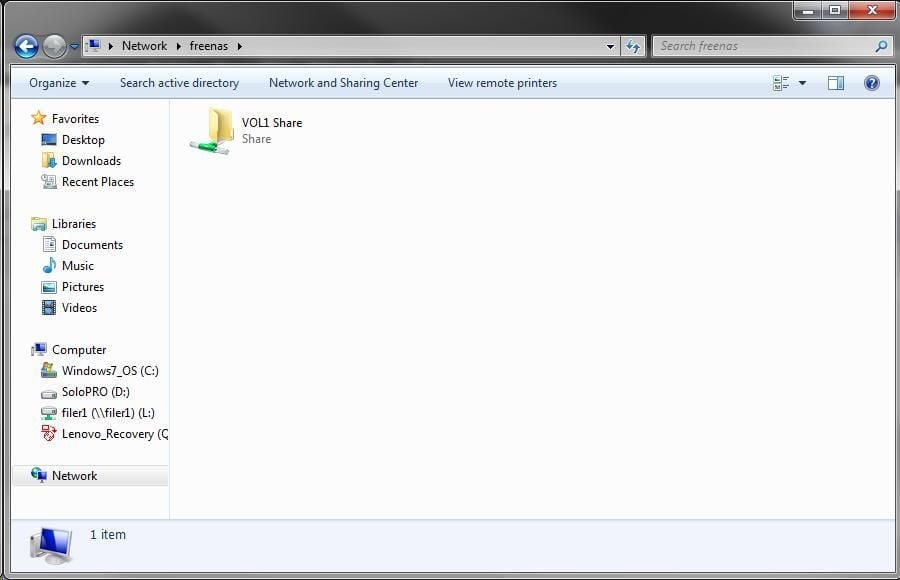
And just like that, the FreeNAS virtual machine is providing a usable file share resource. In summary, on FreeNAS thus far along, this product is fairly intuitive and the interface is quite refined compared to other products. Look for more galleries on point solutions with FreeNAS.
What do you want to see done with FreeNAS? Share your comments below.

Rick Vanover is an IT Infrastructure Manager for Alliance Data in Columbus, Ohio. Rick's IT certifications include VMware VCP, Microsoft Windows Server 2008 MCITP, Windows Server 2003 MCSA and others. \ \ Previous experiences included working for Dematic Corp (formerly Siemens L&A, Siemens Dematic, Rapistan)in Grand Rapids, MI in various capacities deploying custom software solutions to the material handling industry using a mix of current hardware and software products. You can reach Rick at b4real@usa.net. Follow rick on Twitter at @RickVanover


