Would you like to be able to still run Microsoft Windows XP while you get familiar with Windows 7? Well, moving your existing Windows XP system to a virtual machine that you can run in Windows 7 is a relatively easy procedure with the Disk2vhd tool from Microsoft’s Windows Sysinternals team: Mark Russinovich and Bryce Cogswell.
In this edition of the Windows Desktop Report, I’ll show you how to use Disk2vhd, which is a free tool, to move your Windows XP installation into Windows 7 and then run it with Windows Virtual PC.
What is Disk2vhd?
As its name implies, Disk2vhd is designed to create VHD versions of physical disks. This tool can be used to convert systems running Windows XP SP2 and up as well as Windows Server 2003 and up. To perform this task, the Disk2vhd utility makes use of the Windows Volume Snapshot feature built into the operating system. When you run Disk2vhd, it first creates a volume snapshot image of the hard disk. It then exports that image into a VHD that you can then add to Windows Virtual PC as well as to Hyper-V Manager. If you’ll be using Windows Virtual PC, keep in mind that it supports a maximum virtual disk size of 127GB. If you create a VHD from a larger disk it will not be accessible from a Windows Virtual PC virtual machine. Another thing to keep in mind is that Windows Virtual PC doesn’t support the Multiprocessor Specification and it will not be able to boot VHD’s captured from multiprocessor systems.
Preparation
In order to ensure a successful virtual machine transition, there are several tasks that you’ll want to perform on your Windows XP system in preparation for the operation. Let’s take a closer look.
Backup: You’ll want to back up your system using Windows XP’s Backup Utility or a third-party disk imaging tool, such as EASEUS Todo Backup, which is a free package that I used for my test configuration. That way if anything goes awry, you can restore your Windows XP system and get right back to work. Just to be on the safe side, you may also want to back up all your data on CD/DVD or on an external hard disk. While it may sound like overkill, having an extra backup of your data will give you peace of mind.
Optimization: You’ll want to make sure that your Windows XP system and hard disk is in tip-top shape by running Disk Cleanup and Disk Defragmenter. Doing so will help make the operation run quickly and smoothly. By running Disk Cleanup, all unnecessary files will be removed, such as trash in the Recycle Bin and Temporary Internet Files. By running Disk Defragmenter, your hard disk will be ready for optimal performance.
Windows Update: You’ll want to run Windows Update on your Windows XP system and make absolutely sure that all current updates are downloaded and installed.
My example configuration
In my example, I’ll be using two different computers: one computer running Windows XP SP3 and one computer running Windows 7. I’ll run Disk2vhd on the XP system and create the VHD on and external hard disk. The drive on this XP system is using about 40GB on an 80GB hard disk. I’ll then move the virtual machine over to Windows 7 and run it there using Windows Virtual PC.
Getting Disk2vhd
You can get and use Disk2vhd in one of two ways. You can download Disk2vhd from the Windows Sysinternals page on the Microsoft TechNet site. Or you can run immediately Disk2vhd from the Live.Sysinternals.com site. Either way, the utility does not require installation, which means that using it is as easy as launching the executable.
Converting the system
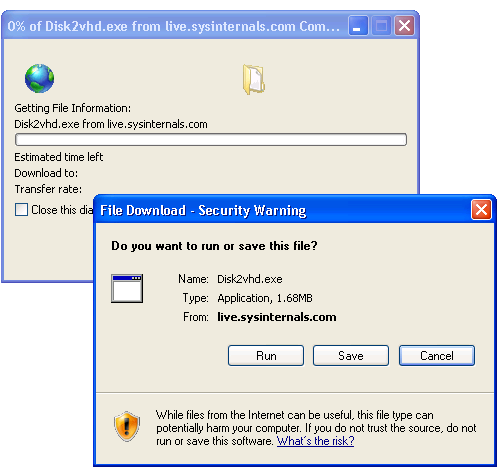
I decided to run Disk2vhd from the Live.Sysinternals.com site for this article. Once I clicked on the link, I immediately saw the Internet Explorer File Download \u2013 Security Warning dialog box.
This gallery is also available as a TechRepublic blog post and download. Image created by Greg Shultz for TechRepublic.
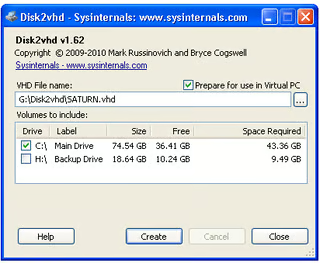
When you get to the main user interface, you’ll see that Disk2vhd automatically selects all of the available volumes/drives, sets a default location, and chooses a name for the VHD file. You can choose a different location and name if you want. In fact, the procedure will go faster if you select a different hard disk besides the one of which you are creating a VHD. Then, select the Prepare for use in Virtual PC check box. As you can see, I only chose the main drive and selected and external hard disk. When you are ready, click the Create button.
This gallery is also available as a TechRepublic blog post and download. Image created by Greg Shultz for TechRepublic.
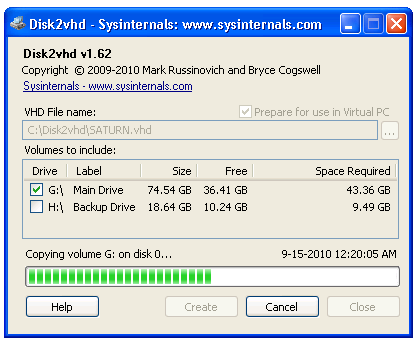
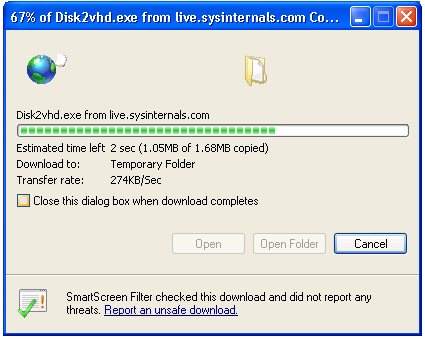
You’ll then have to sit back and wait. Depending on how large your hard disk is and the location of your destination folder, the process can take a while to complete. As the process chugs away, you’ll see the progress.
This gallery is also available as a TechRepublic blog post and download. Image created by Greg Shultz for TechRepublic.
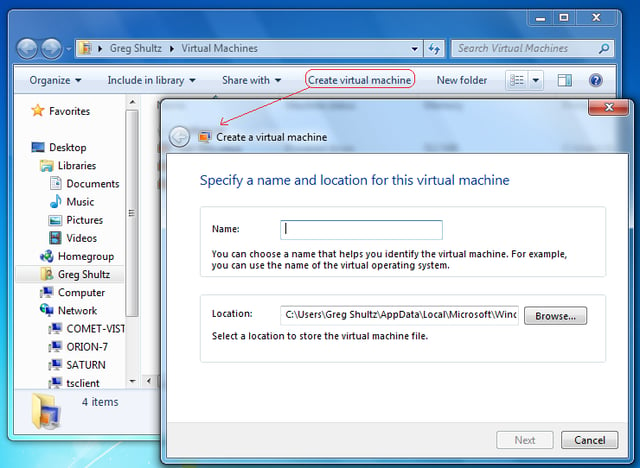
Once you copy the virtual Windows XP system’s .vhd file over to the Windows 7 system, you’ll then open Windows Virtual PC and launch the Create Virtual Machine wizard.
This gallery is also available as a TechRepublic blog post and download. Image created by Greg Shultz for TechRepublic.
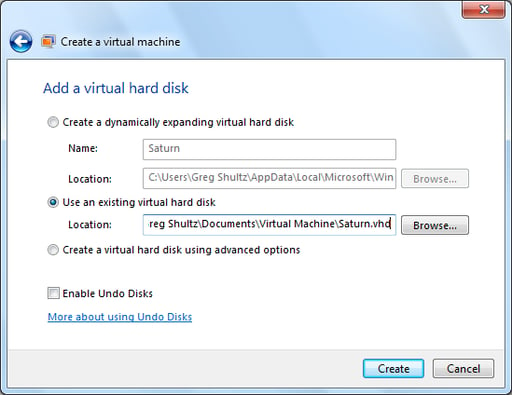
When prompted to add a virtual hard disk, select the Use an existing virtual hard disk option and then use the Browse button to locate your .vhd file. When you’ve done so, just click the Create button.
This gallery is also available as a TechRepublic blog post and download. Image created by Greg Shultz for TechRepublic.
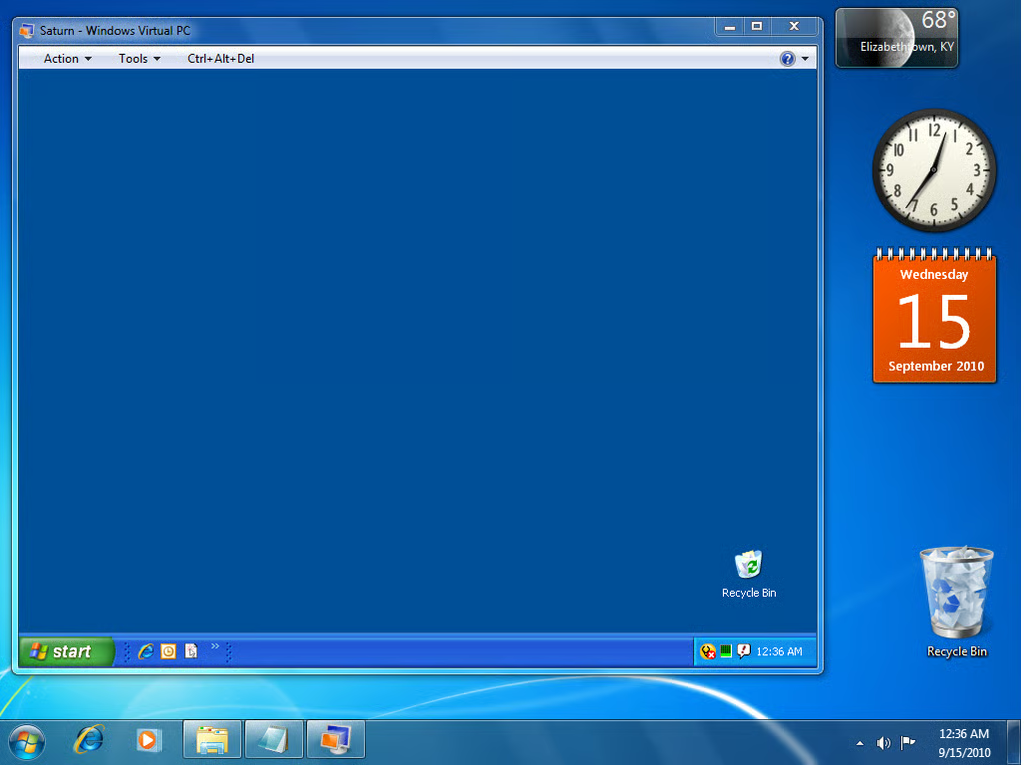
Once the Create Virtual Machine wizard is complete, then just reopen Windows Virtual PC, locate the new virtual machine and launch it. Of course I had to do a bit of tweaking in order to get my XP system running and because XP was now running on a new system, I had to reactivate Windows XP. However all of that was relatively painless and I was able to run my existing Windows XP installation in Window 7.
This gallery is also available as a TechRepublic blog post and download. Image created by Greg Shultz for TechRepublic.

My first computer was a Kaypro 16 \"luggable\" running MS-DOS 2.11 which I obtained while studying computer science in 1986. After two years, I discovered that I had a knack for writing documentation and shifted my focus over to technical writing.


