In a recent series of articles culminating with Make\r\nUSB devices accessible to a Windows XP virtual machine, I showed you how to\r\ncreate a Windows XP virtual machine in Windows 8 using the built-in Client\r\nHyper-V tool. I’ve received quite a few emails about that series and several\r\npeople have asked about the possibility of converting their existing Windows XP\r\ninstallation into a virtual machine. I’ve also had several people ask me about\r\nthe possibility of running Windows XP from a VHD in a dual-boot configuration\r\nsimilar to the one that I showed you in the article Install\r\nWindows 8.1 Preview in a dual-boot configuration using a VHD.
\r\n\r\n
Unfortunately, Windows XP was created way before native\r\nbooting from VHDs was commonplace and as such, the operating system is\r\nincapable of booting from from a standalone VHD. However, the technology does\r\nexist for taking a physical Windows XP system and converting it into a virtual\r\nmachine. In fact, there are products from Microsoft and other mainstream\r\nvendors that will allow you to perform such an operation with relative ease.
\r\n\r\n
I have recently been investigating converting Windows XP\r\ninto a virtual machine using VMware’s free\r\nproducts vCenter Converter Standalone and VMware Player and have been\r\nthoroughly impressed with both the process and the results. Using the vCenter\r\nConverter, I converted a live Windows XP system into a set of virtual machine\r\nfiles. I then copied those files over to a Windows 8 system and used VMware\r\nPlayer to run a fully functional Windows XP virtual machine.
\r\n\r\n
In this article, I’ll show you how to use these VMware\r\nproducts to convert your existing Windows XP system into a virtual machine and\r\nthen run it in Windows 8. As I do, I’ll walk you step-by-step through the\r\nentire operation. Along the way, I’ll point out some problems that I encountered\r\nand show you how to work through them.
\r\n\r\n
\r\n\r\n
As you may have guessed, when moving an operating system\r\nfrom one computer to another, you need to be concerned with licensing issues.\r\nSo, before you can begin this procedure, there are a few caveats that you need\r\nto be aware of.
\r\n\r\n
When you download the vCenter Converter or the VMware\r\nPlayer, you’ll need to fill out a registration form and agree to a EULA, which\r\nincludes the following sections pertaining to operating systems:
\r\n\r\n
\r\n
\r\n
\r\n\r\n
In other words, it’s up to you to determine whether you have\r\nproper licensing to simultaneously run more than one copy of Windows XP using a\r\nVolume License Key or whether you have the proper licensing to transfer Windows\r\nXP from one system to another. Keep in mind that you can only transfer a Retail\r\nlicense that you acquired by purchasing a Windows XP disc, not an OEM license\r\nthat you acquired by purchasing a computer with Windows XP preinstalled. (An\r\nOEM license is specifically tied to that computer.)
\r\n\r\n
You can investigate a PDF version of the Windows\r\nXP Professional license agreement (EULA) (PDF)\r\nfound on Microsoft’s Download page, which includes the following sections\r\npertaining use and transfer:
\r\n\r\n
\r\n
\r\n
\r\n\r\nIn some cases, when you\r\ntransfer a Windows XP Retail license to another computer, Product Activation\r\nprompts you to call Microsoft for validation. In other cases, you can simply\r\nactivate online.
\r\n\r\nCredit: Images by Greg Shultz for TechRepublic
\r\n\r\n
Even though converting your Windows XP system with vCenter\r\nConverter is a completely safe operation, you’ll want to make sure that you\r\nhave a full backup or a disk image of your Windows XP system before you start.\r\nThat way if something does go wrong, you can restore your Windows XP system and\r\nget right back to work.
\r\n\r\n
You can use Windows XP’s Backup Utility or a third-party\r\ndisk imaging tool. To create a disk image of my Windows XP test system, I used Macrium\r\nReflect Free Edition, which you\r\ncan download from the CNET Download.com site.
\r\n\r\n
Just to be on\r\nthe safe side, you may also want to back up all your data on CD/DVD or on an\r\nexternal hard disk. While it may sound like overkill, having an extra backup of\r\nyour data will give you peace of mind.
\r\n\r\n
\r\n\r\n
Once you have\r\nbacked up your Windows XP system, you can go to VMware’s Products page and\r\ndownload the latest version (5.1) of the vCenter Converter Standalone. You can then download the latest version (4.0) of the VMware Player on you Windows\r\n8 system. Both the converter and\r\nthe Player are free to use in a non commercial environment.
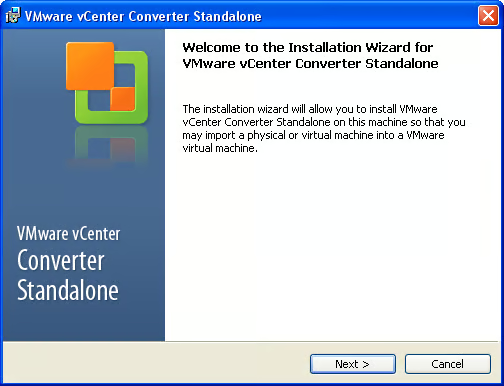
\r\n\r\nAs I mentioned, for my example I’ll be using two computers: One, running\r\nWindows XP and one running Windows 8. Installation of both products was a\r\nbreeze. You can install vCenter Converter on Windows XP using the installation wizard\r\nshown in Figure A.
\r\n\r\nCredit: Images by Greg Shultz for TechRepublic
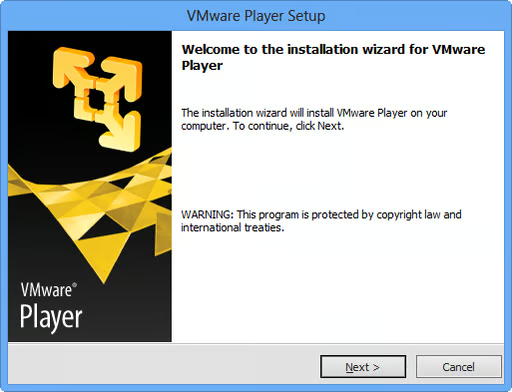
Once\r\nthe installation is complete, you can immediately launch vCenter Converter. While\r\nthe conversion is under way, you can go to the Windows 8 system and install the\r\nVMware Player using its installation wizard, shown in Figure B.
\r\n\r\nCredit: Images by Greg Shultz for TechRepublic
Keep in mind\r\nthat you cannot install VMware Player on a Windows 8 system that is running\r\nClient Hyper-V. If you happen to have Client Hyper-V installed on your Windows\r\n8 system, you’ll need to disable it by opening an Administrator Command prompt\r\nand using the command:
\r\n\r\n
bcdedit /set\r\nhypervisorlaunchtype off
\r\n\r\n
You’ll then need\r\nto reboot. You can then install VMware Player.
\r\n\r\n
If you want to\r\nuse Client Hyper-V in the future, you’ll use the following command to re-enable\r\nit:
\r\n\r\n
bcdedit /set\r\nhypervisorlaunchtype auto
\r\n\r\n
You’ll then\r\nneed to reboot.
\r\n\r\n
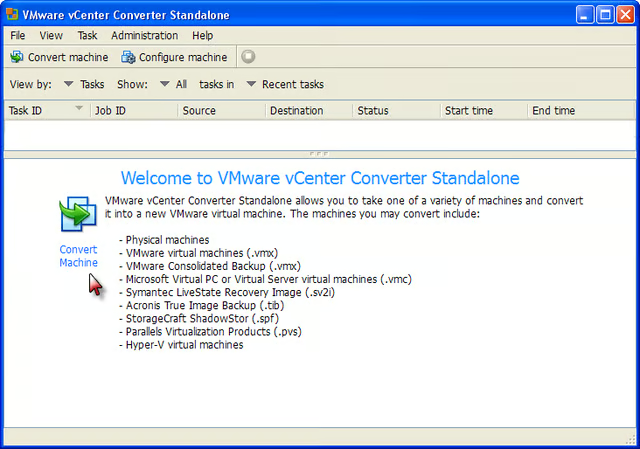
\r\n\r\nConverting your Windows XP\r\nsystem into a virtual machine is essentially a four-step operation. When you\r\nlaunch the vCenter Converter, you’ll see the Welcome screen and can\r\nbegin the conversion procedure by clicking the Convert Machine button on the\r\ntoolbar or by clicking the icon on the screen, as shown in Figure C.
\r\n\r\nCredit: Images by Greg Shultz for TechRepublic
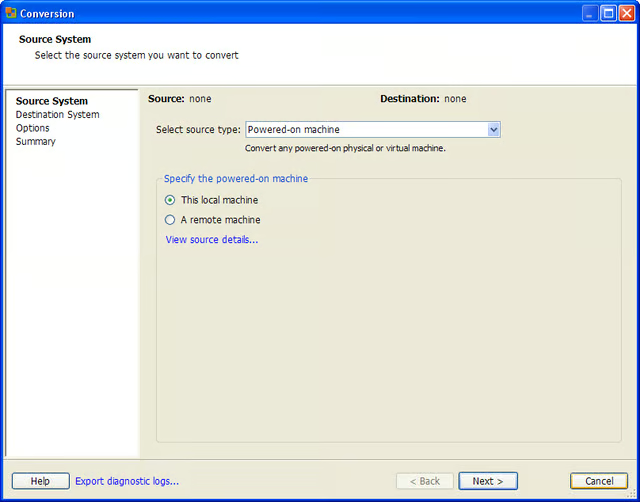
Once\r\nthe Conversion wizard launches, you’ll be prompted to specify the source for\r\nthe virtual machine. From the Select source type drop-down menu, choose\r\nPowered-on machine. Then, select the This\r\nlocal machine radio button, as shown in Figure D. To continue, click the Next button.
\r\n\r\nCredit: Images by Greg Shultz for TechRepublic
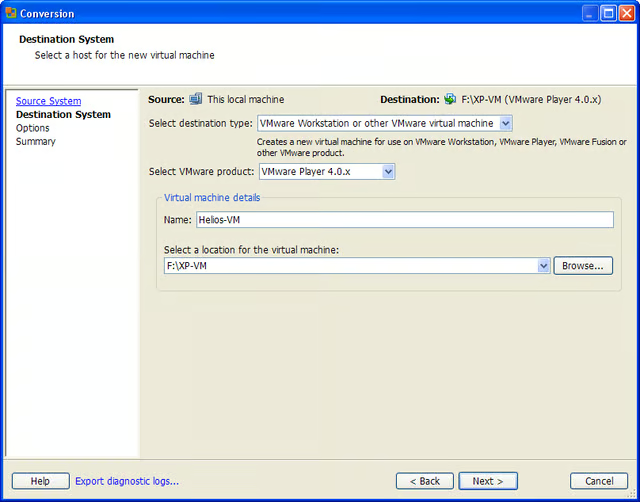
On\r\nthe next screen, you’ll specify the destination for the virtual machine files,\r\nas shown in Figure E. From the\r\nSelect destination type drop-down menu, choose VMware Workstation or other\r\nVMware virtual machine. From the Select VMware product drop-down menu, choose\r\nVMware Player 4.0.x. Then, in the Name text box, provide a name for your\r\nvirtual machine. Finally, click the Browse button adjacent to the Select a location\r\nfor the virtual machine text box and specify a folder or drive, such as an\r\nexternal device or a network, on which to save the virtual machine files.
\r\n\r\nCredit: Images by Greg Shultz for TechRepublic
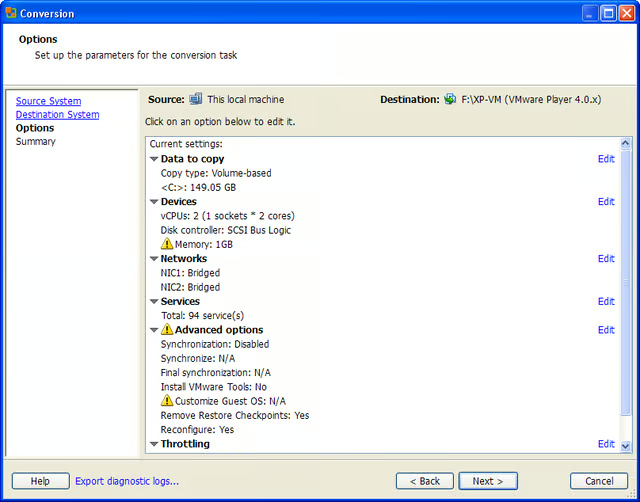
When\r\nyou get to the options screen, you’ll see a list of settings that the\r\nConversion wizard will use to create your Windows XP virtual machine. If you\r\nsee yellow exclamation icons next to any of the settings, you’ll want to\r\ninvestigate. Otherwise, you can leave the majority of the settings in the\r\ndefault configuration. As you can see in Figure\r\nF, my example system is showing that the Memory, Advanced options, and\r\nCustomize the Guest OS settings may need adjustments.
\r\n\r\nCredit: Images by Greg Shultz for TechRepublic
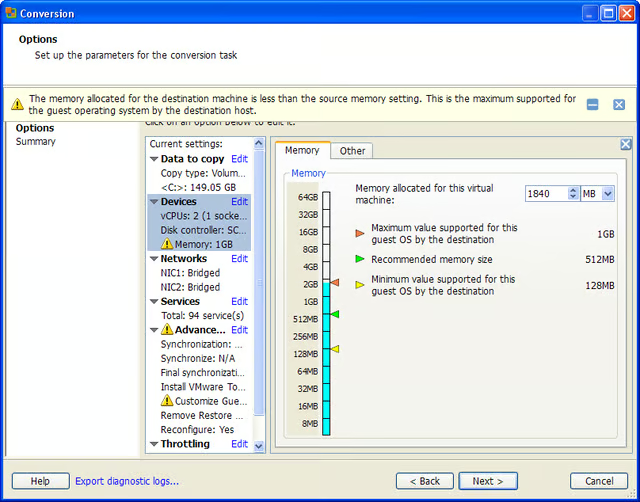
When\r\nI click Edit in the Devices section, the Conversion wizard indicates that the\r\nmemory allocated for the virtual machine is less than what is in the actual\r\nphysical machine, as shown in Figure G.\r\nThat’s because the Conversion wizard assumes that the virtual machine will be\r\nrunning on the physical machine and purposely reduces the amount of memory so\r\nthat both host and virtual machine can run on this particular system. In this\r\ncase, my physical Windows XP system has 2GB of memory, so the Conversion wizard\r\ndrops the amount of memory allocated to the virtual machine down to 1840MB.\r\nHowever, since I’ll be running this virtual machine on my Windows 8 system,\r\nwhich has 8GB of memory, I’ll adjust the memory back up to 2GB.
\r\n\r\nCredit: Images by Greg Shultz for TechRepublic
You’ll have to adjust your memory setting according to your\r\nsystem. However, keep in mind that you can also adjust memory allocation in the\r\nVMware Player.
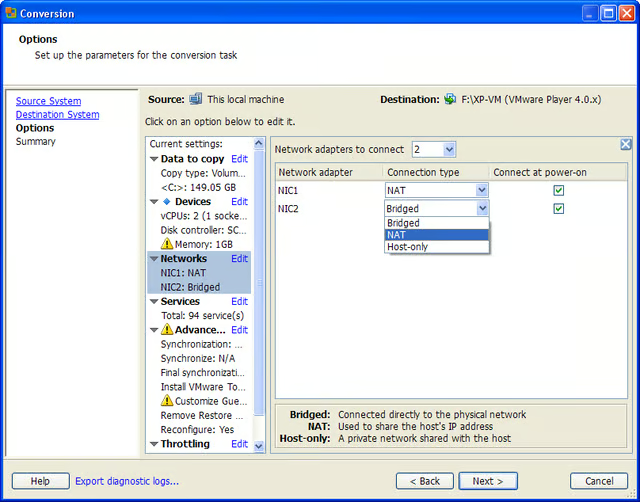
\r\n\r\nNow, even though there isn’t\r\na yellow exclamation icon next to the Networks section, you’ll want to make an\r\nadjustment there as well. As you can see in Figure H, you’ll want to change the Connection Type setting from\r\nBridged to NAT in order to configure the virtual machine to share the host\r\nsystem’s IP address.
\r\n\r\nCredit: Images by Greg Shultz for TechRepublic
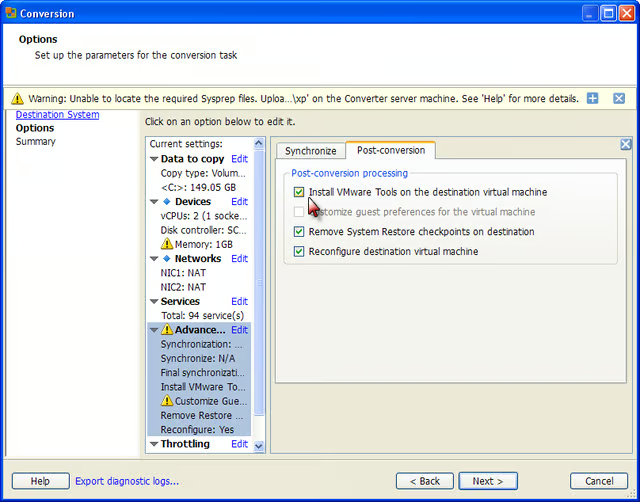
When\r\nyou select Advanced options, you’ll see a warning message at the top of the\r\nscreen, as shown in Figure I, which\r\nindicates Conversion wizard is unable to locate the Sysprep files. You can\r\nignore that message because those files aren’t needed for this type of\r\nconversion. However, you should select the Post-conversion tab and then select\r\nthe Install VMware Tools check box. Installing the VMware Tools will boost\r\nperformance and add extra features to the virtual machine. For example,\r\ngraphics performance will be improved, you’ll be able to move the mouse between\r\nthe virtual and host machines without special keystrokes, and copy and paste\r\noperations between virtual and host machines will be enabled.
\r\n\r\nCredit: Images by Greg Shultz for TechRepublic
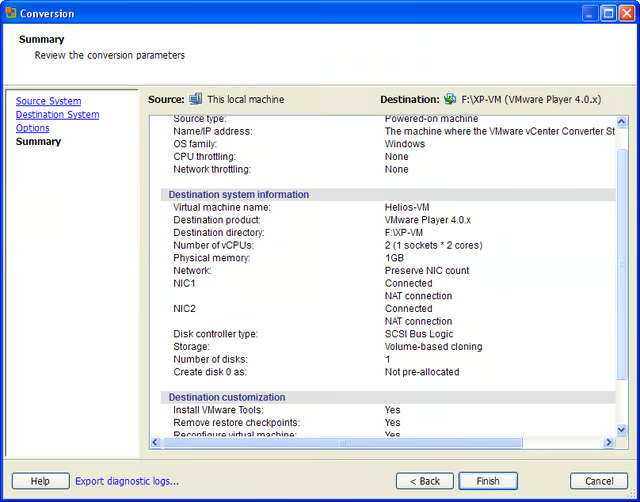
When\r\nyou get to the Summary screen, shown in Figure\r\nJ, you can look over all the settings that the conversion wizard will use\r\nto create you Windows XP virtual machine. To begin the actual conversion, click\r\nFinish.
\r\n\r\nCredit: Images by Greg Shultz for TechRepublic
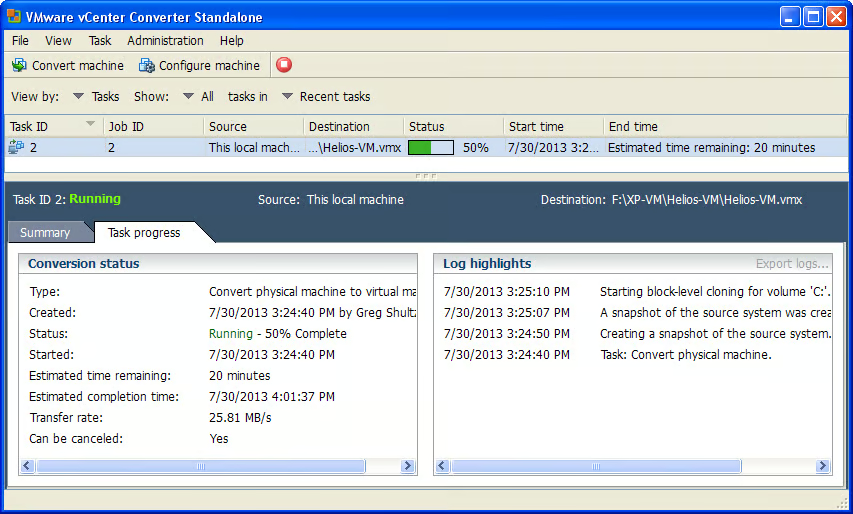
Keep\r\nin mind that the conversion operation, shown at 50% in Figure K, can take an hour or more depending on the size of your\r\nhard disk. As such, while the conversion operation is under way, you should go\r\nto your Windows 8 system and install the VMware Player.
\r\n\r\nCredit: Images by Greg Shultz for TechRepublic
\r\n\r\n
When the conversion operation is complete, you can transfer\r\nthe virtual machine files to your Windows 8 system. In my example, I connected\r\nthe external drive to my Windows 8 system and copied the XP-VM folder, which\r\ncontained two files, to the root directory. In my case, the two files were the\r\nvirtual machine file Helios-VM.vmdk and virtual disk file Helios-VM.vmx, and\r\nthey weighed in at about 90.2GB and took a little over an hour to copy to the\r\nhard disk.
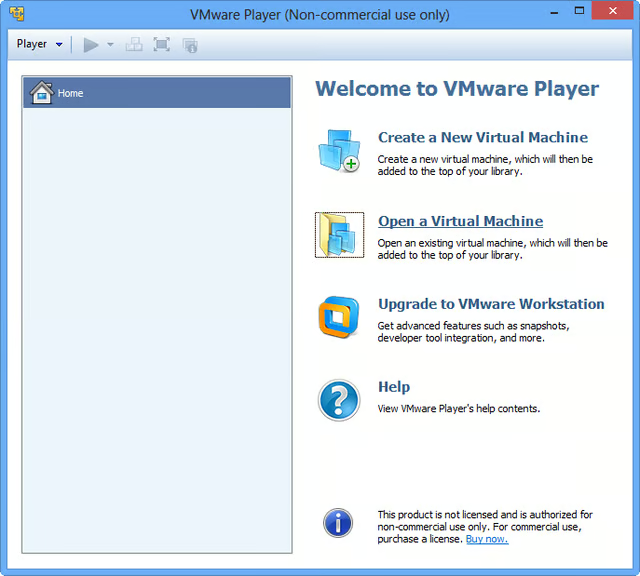
\r\n\r\nOnce the copy operation is\r\ncomplete, you can launch the VMware Player. When you see the Welcome to VMware\r\nPlayer screen, select the Open a Virtual Machine command, as shown in Figure L.
\r\n\r\nCredit: Images by Greg Shultz for TechRepublic
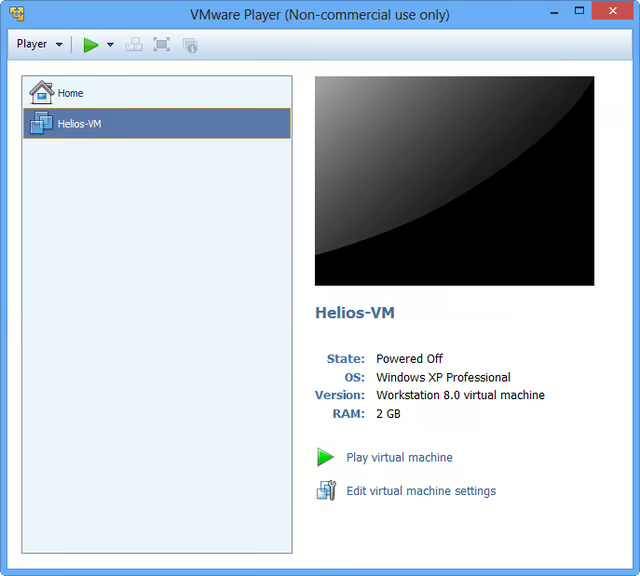
Then,\r\nlocate and select your virtual machine. As soon as you do so, you’ll see your\r\nvirtual machine in a powered-off state, as shown in Figure M. To get started, just click the Play virtual machine command.
\r\n\r\nCredit: Images by Greg Shultz for TechRepublic
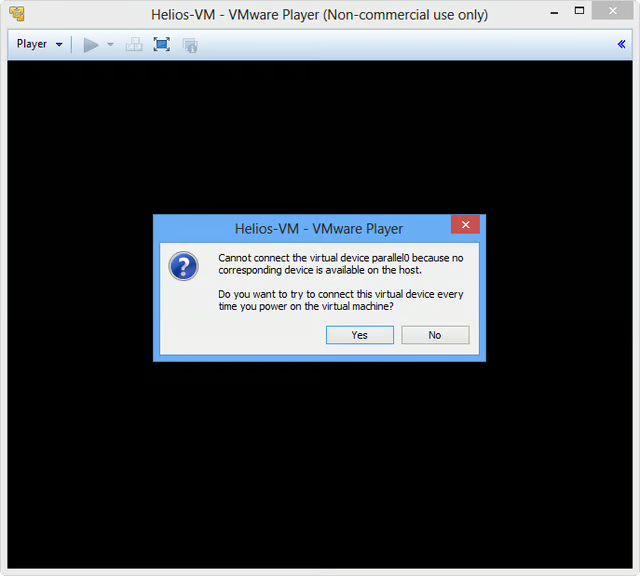
The\r\nfirst time you launch VMware Player, you may encounter warning messages about devices\r\nor drives that were part of your old physical system that are not part of your\r\nnew system. For example, Figure N\r\nshows a warning message about a parallel port. To prevent VMware Player from\r\ndisplaying the warning every time you launch the virtual machine, just click\r\nNo.
\r\n\r\nCredit: Images by Greg Shultz for TechRepublic
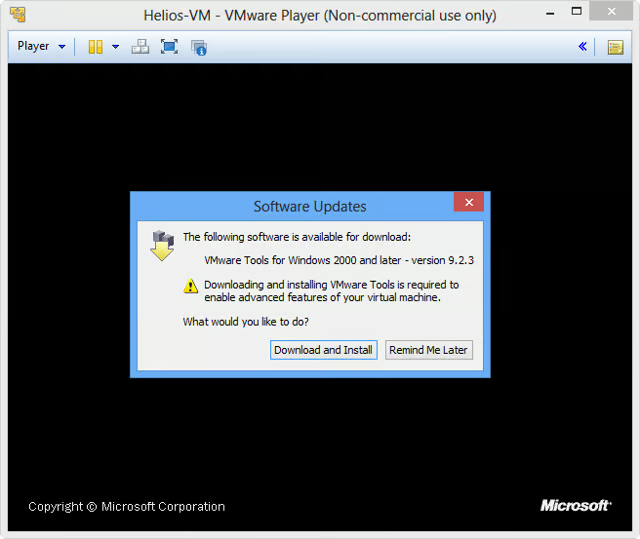
You’ll\r\nthen be prompted to download and install VMware Tools (Figure O). As I mentioned, these tools will provide you with all\r\nsorts of features that will make running your Windows XP installation as a\r\nvirtual machine much more convenient. So go ahead click the Download and\r\nInstall button.
\r\n\r\nCredit: Images by Greg Shultz for TechRepublic
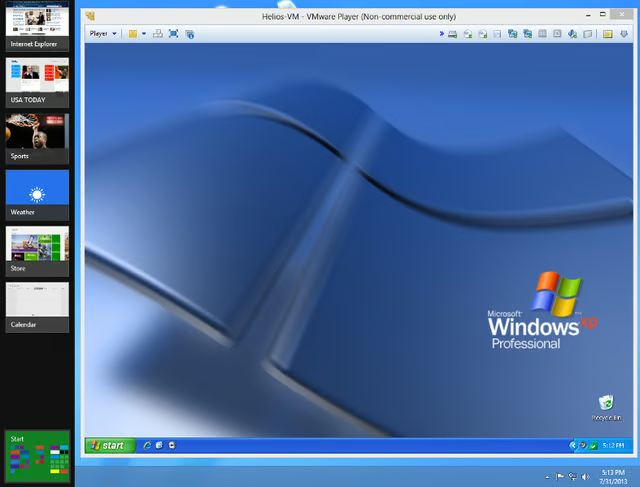
When\r\nyou’re done, you’ll have Windows XP running in VMware Player inside Windows 8,\r\nas shown in Figure P.
\r\n\r\nCredit: Images by Greg Shultz for TechRepublic

\r\n\r\n
To thoroughly test the conversion procedure, I converted\r\nseveral of my Windows XP test systems into virtual machines. While the majority\r\nwent very smooth, I did encounter a painstaking issue with one of my Windows XP\r\nsystems and it took me quite a while to find a solution. In a nutshell, the\r\nconversion procedure failed at 96% and displayed the following message, as\r\nshown in Figure Q.
\r\n\r\n
FAILED: Unable to find the system volume, reconfiguration is\r\nnot possible.
\r\n\r\n
\r\n\r\n
QQQQ
\r\n\r\n
\r\n\r\n
It turned out that I have previously installed Windows 8 in\r\na dual-boot configuration on this particular Windows XP test system. And even\r\nthough I had removed the dual-boot configuration, Windows 8 had left its Boot\r\nManager file and folder behind. Because the Boot folder and the Bootmgr file\r\nhad the Hidden and System attributes enabled, I didn’t know that they were\r\nthere, but the Conversion wizard, expecting to find only Windows XP’s Boot\r\nLoader (NTLDR) aborted the conversion procedure when it also found Windows 8’s\r\nBoot Manager.
\r\n\r\n
The solution was twofold: First I had to delete the Boot\r\nfolder and the Bootmgr file. Second I had to rebuild the Master Boot Record and\r\nrecreate the Boot.ini file.
\r\n\r\n
To delete the Boot folder and the Bootmgr file, I had to\r\nboot into Safe\r\nMode, log in as Administrator, take ownership of the Boot\r\nfolder and the Bootmgr file, and assign Full Control permissions to the\r\nAdministrator account. Then, I could simply delete the Boot folder and the\r\nBootmgr file from Windows Explorer.
\r\n\r\n
To rebuild the Master Boot Record and recreate the Boot.ini\r\nfile, I had to boot from the Windows XP CD and launch the Recovery\r\nConsole with the Administrator account. Once in the Recovery Console, I\r\nused the FixMBR\r\ncommand to rebuild the Master Boot Record. I then used the Bootcfg\r\n/rebuild command to recreate the Boot.ini file.
\r\n\r\n
If you encounter this problem and need further assistance,\r\njust drop a note in the Discussion area.
\r\n\r\n
\r\n\r\nWill you use this technique\r\nto virtualize your Windows XP system? Have you used VMware vCenter Converter or\r\nVMware Player before? As always, if you have comments or information to share\r\nabout this topic, please take a moment to drop by the Discussion area and let\r\nus hear from you.
\r\n\r\nCredit: Images by Greg Shultz for TechRepublic

My first computer was a Kaypro 16 \"luggable\" running MS-DOS 2.11 which I obtained while studying computer science in 1986. After two years, I discovered that I had a knack for writing documentation and shifted my focus over to technical writing.


