Skip to content

TechRepublic

  • Top Products Lists
  • Developer
  • 5G
  • Security
  • Cloud
  • Artificial Intelligence
  • Tech & Work
  • Mobility
  • Big Data
  • Innovation
  • Cheat Sheets
  • TechRepublic Academy
  • CES
  • TechRepublic Premium
  • Top Products Lists
  • Developer
  • 5G
  • Security
  • Cloud
  • Artificial Intelligence
  • Tech & Work
  • Mobility
  • Big Data
  • Innovation
  • Cheat Sheets
  • TechRepublic Academy
  • CES
  • See All Topics
  • Sponsored
  • Newsletters
  • Forums
  • Resource Library
TechRepublic Premium
Join / Sign In
Data Centers

Cracking Open A Cobalt RaQ 3i Server Appliance

By Erik Eckel October 10, 2008, 7:32 AM PDT

Image
1
of 45

240447.jpg
240447.jpg
Cracking Open A Cobalt RaQ 3i Server Appliance

The Cobalt Networks RaQ 3i

The Cobalt Networks RaQ 3i

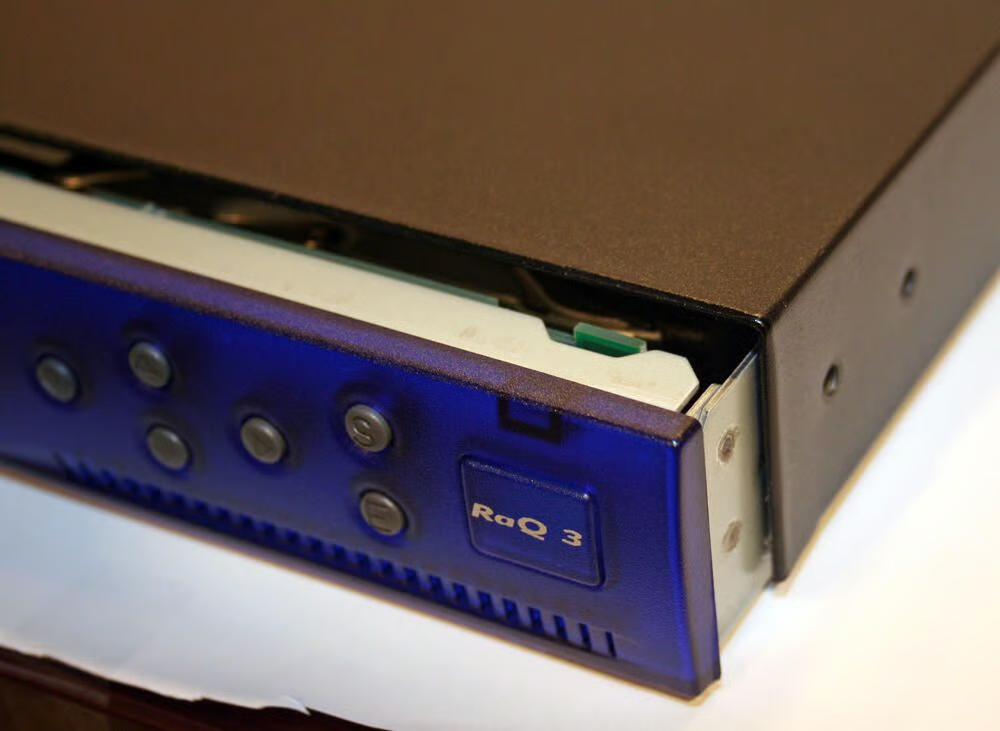
The Cobalt Networks RaQ 3i server appliance, as seen from the front.nnThis third-generation model included a full Internet application suite. Everything from Apache Web services to Sendmail, FTP, DNS and Front Page Server extensions were pre-configured on these modified Linux Red Hat-powered machines.

Cracking Open A Cobalt RaQ 3i Server Appliance

Cobalt RaQ 3i Top View

Cobalt RaQ 3i Top View

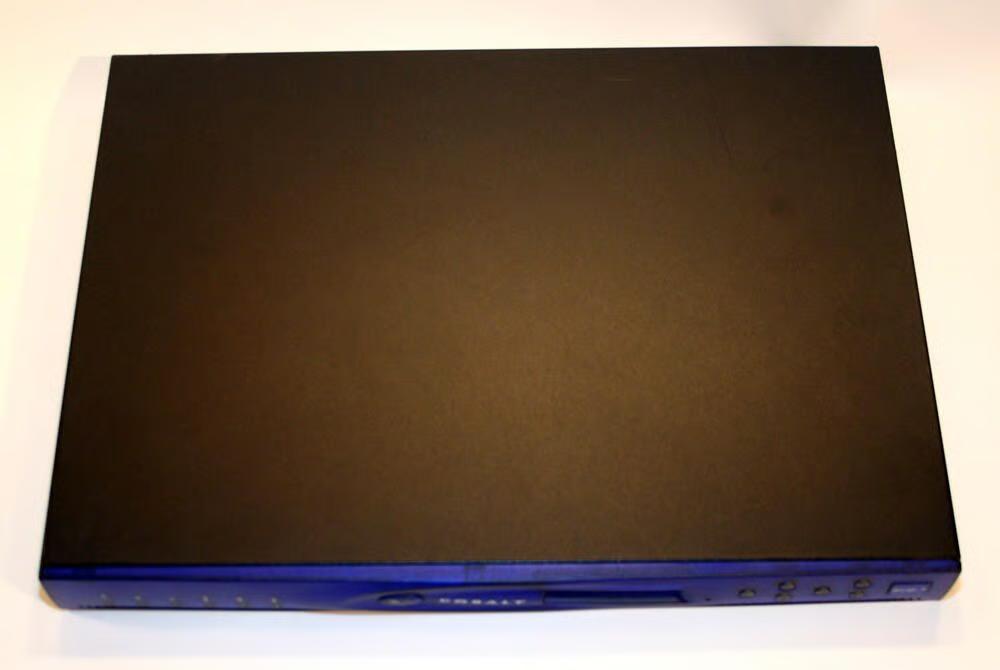
The Cobalt RaQ 3i server, as viewed from above.

Cracking Open A Cobalt RaQ 3i Server Appliance

Cobalt RaQ 3i Rear View

Cobalt RaQ 3i Rear View

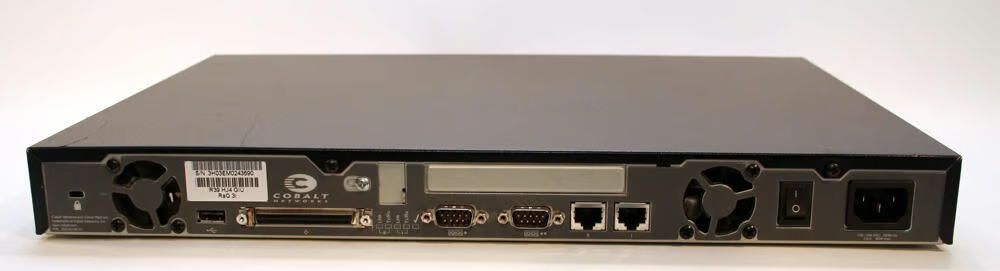
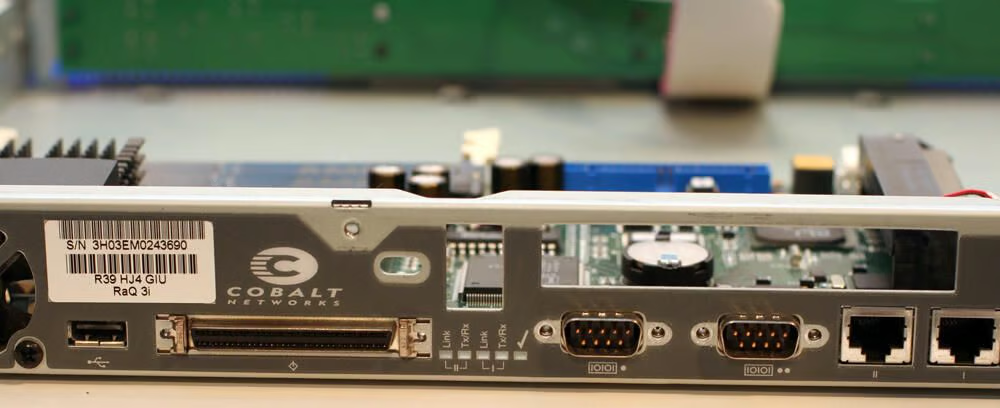
The Cobalt RaQ 3i 1U appliance, as seen from the rear.

Cracking Open A Cobalt RaQ 3i Server Appliance

Cobalt RaQ 3i Control Panel

Cobalt RaQ 3i Control Panel

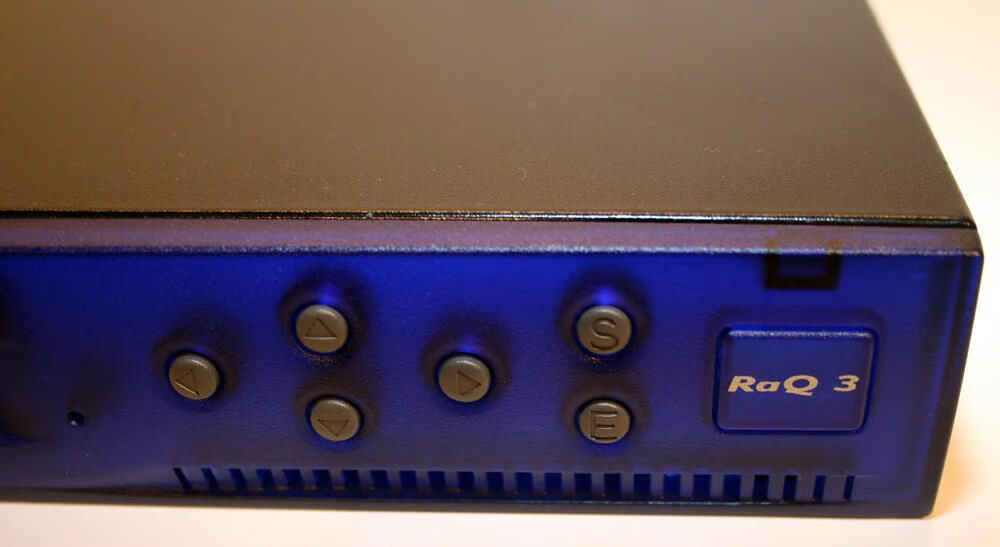
Here’s the Cobalt RaQ 3i’s control panel, which is located on the front right corner of the server appliance. The LCD arrow buttons enabled entering network configuration information, configuring a battery backup, rebooting the unit and powering down the server.

Cracking Open A Cobalt RaQ 3i Server Appliance

Cobalt RaQ 3i Status Indicators

Cobalt RaQ 3i Status Indicators

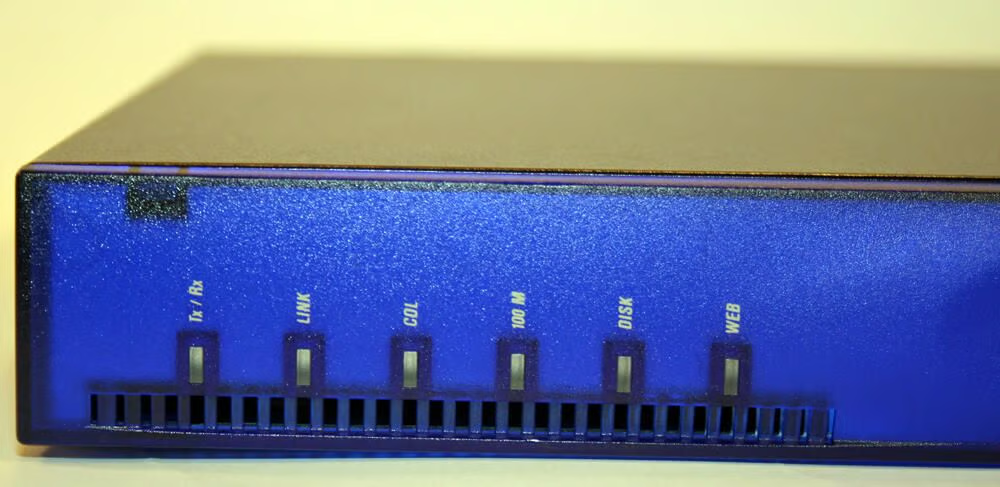
The RaQ 3i’s status indicators are positioned on the left edge of the server’s face plate.nnTx/Rx blinks to confirm network transmission and reception. The Link light indicates an active network interface connection. COL lights when network collisions occur on the system’s primary Ethernet interface. The 100 M LED, meanwhile, confirmed the network is running at 100 Base T speeds, while the Disk and Web indicators confirms hard disk and Web activity, respectively.

Cracking Open A Cobalt RaQ 3i Server Appliance

Cobalt LCD Screen

Cobalt LCD Screen

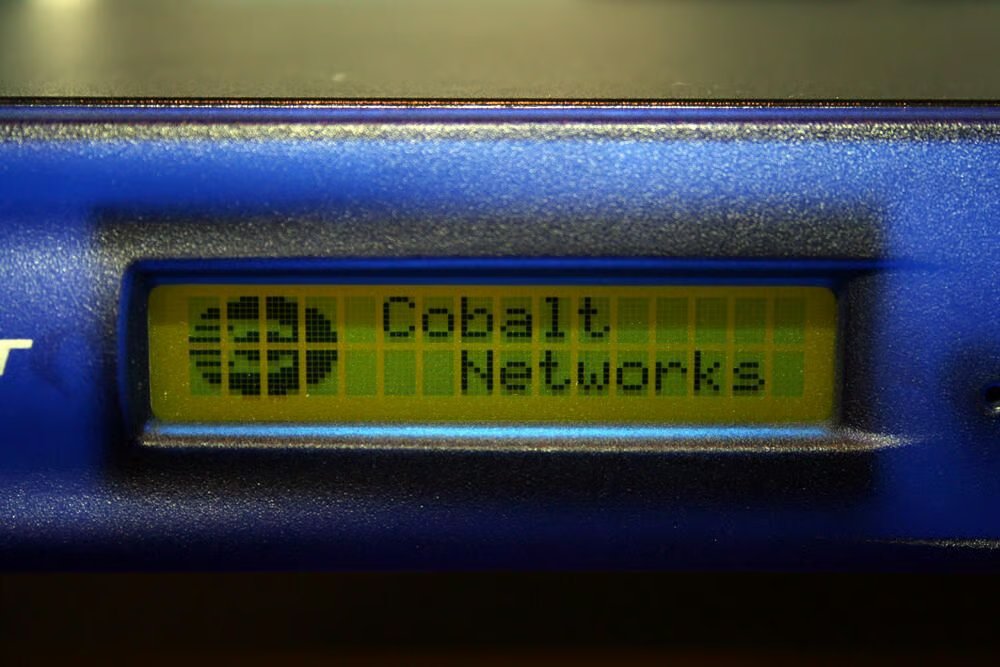
The RaQ 3i’s LCD screen displays server messages and values being entered using the server’s LCD arrow buttons.

Cracking Open A Cobalt RaQ 3i Server Appliance

Cobalt Logo Badge

Cobalt Logo Badge

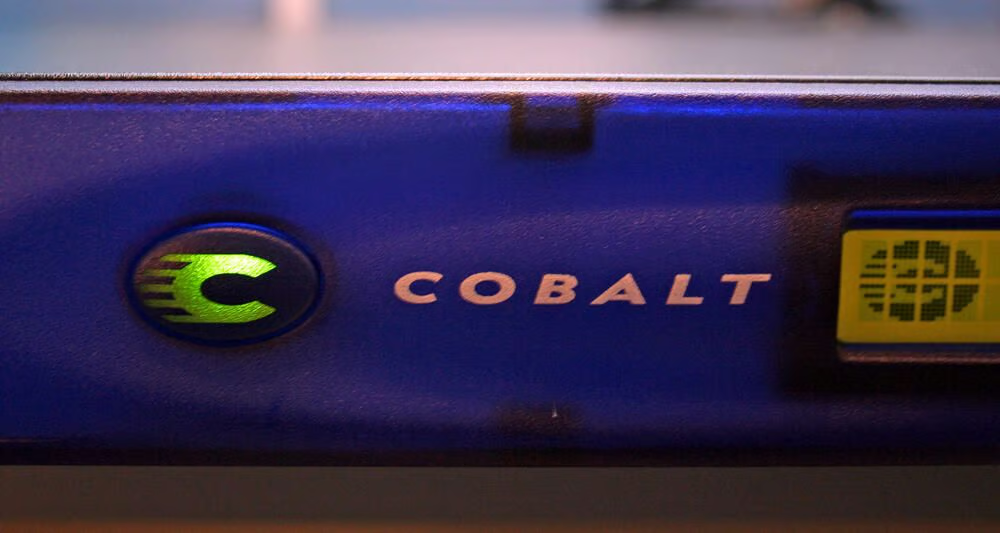
The Cobalt Logo Badge illuminates in an eye-catching green shade whenever the system is powered on.

Cracking Open A Cobalt RaQ 3i Server Appliance

Power Supply Connection

Power Supply Connection

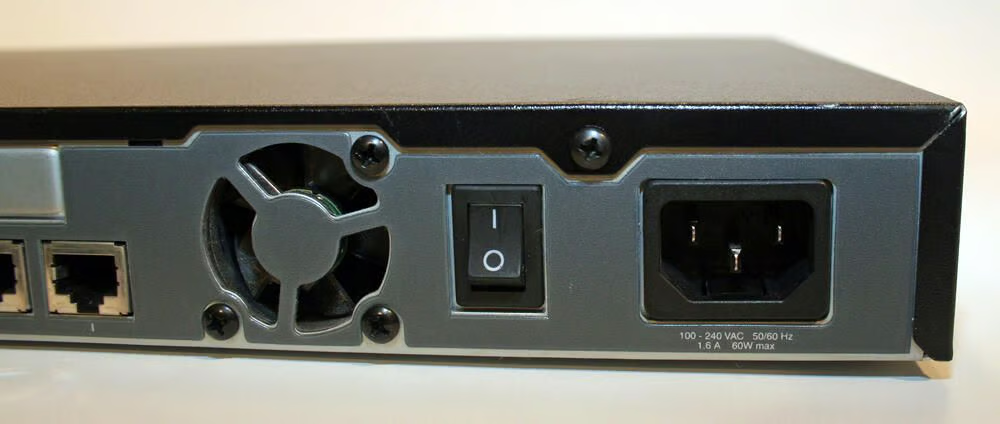
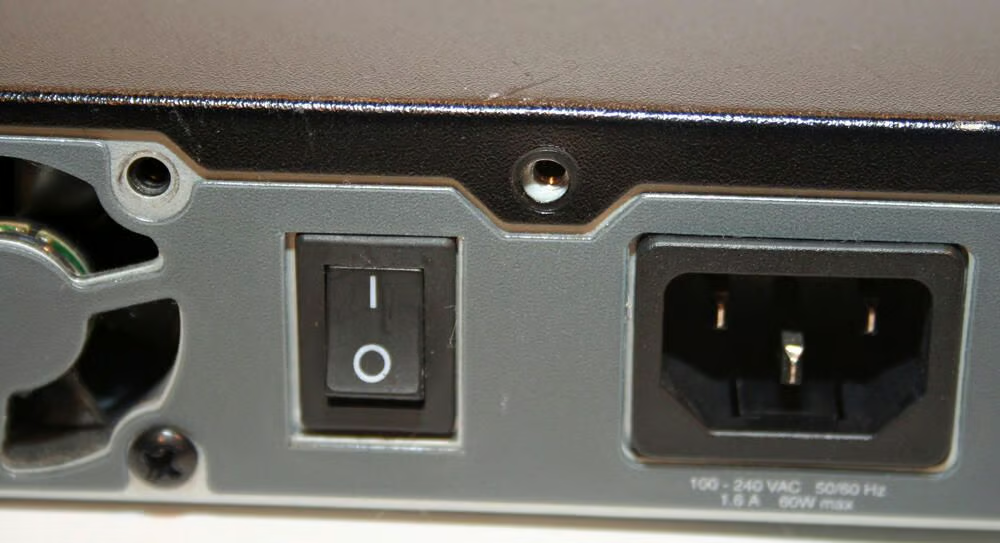
The server’s power plug port is located in the unit’s right rear corner. The adjacent master on/off power switch is shown here in the “on” position.nnTo the left of the power switch you can see one of the RaQ 3i’s two 35mm cooling fans. The cooling fans in the RaQ 3i were manufactured by Sunon and use 12-volt power.

Cracking Open A Cobalt RaQ 3i Server Appliance

RaQ 3i Ports

RaQ 3i Ports

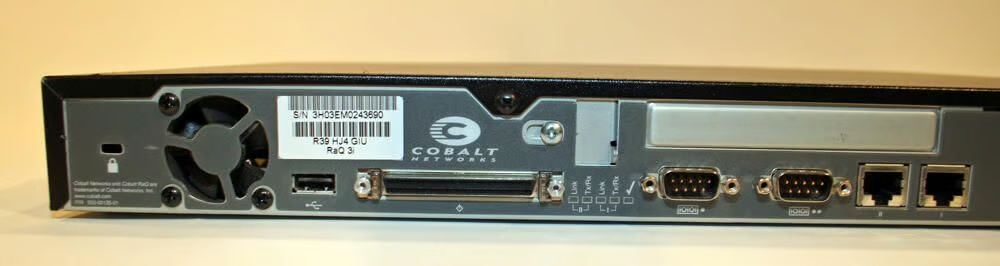
The RaQ 3i is identifiable due to its second Ethernet port (shown to the right in this photograph). The regular RaQ 3 possessed only a single Ethernet port.nnOther ports on the RaQ 3i are the two serial ports (visible to the left of the two Ethernet ports) and single SCSI connector (to the right of the unit’s single USB port, itself positioned to the right of the server’s second cooling fan).

Cracking Open A Cobalt RaQ 3i Server Appliance

RaQ 3i Bottom View

RaQ 3i Bottom View

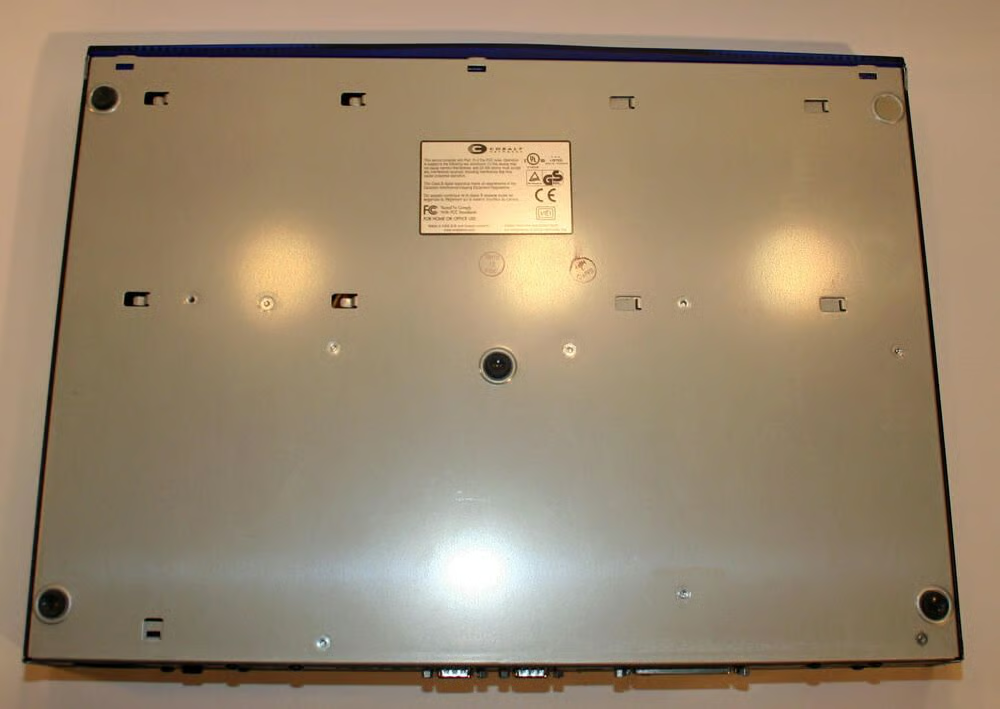
Here’s a look at the RaQ 3i’s bottom casing.

Cracking Open A Cobalt RaQ 3i Server Appliance

Removing The RaQ's Casing

Removing The RaQ's Casing

Before the RaQ 3i’s top metal casing can be opened, numerous Philips head screws must be removed from the shell, including these found on the left rear side of the server.

Cracking Open A Cobalt RaQ 3i Server Appliance

Opening The RaQ 3i

Opening The RaQ 3i

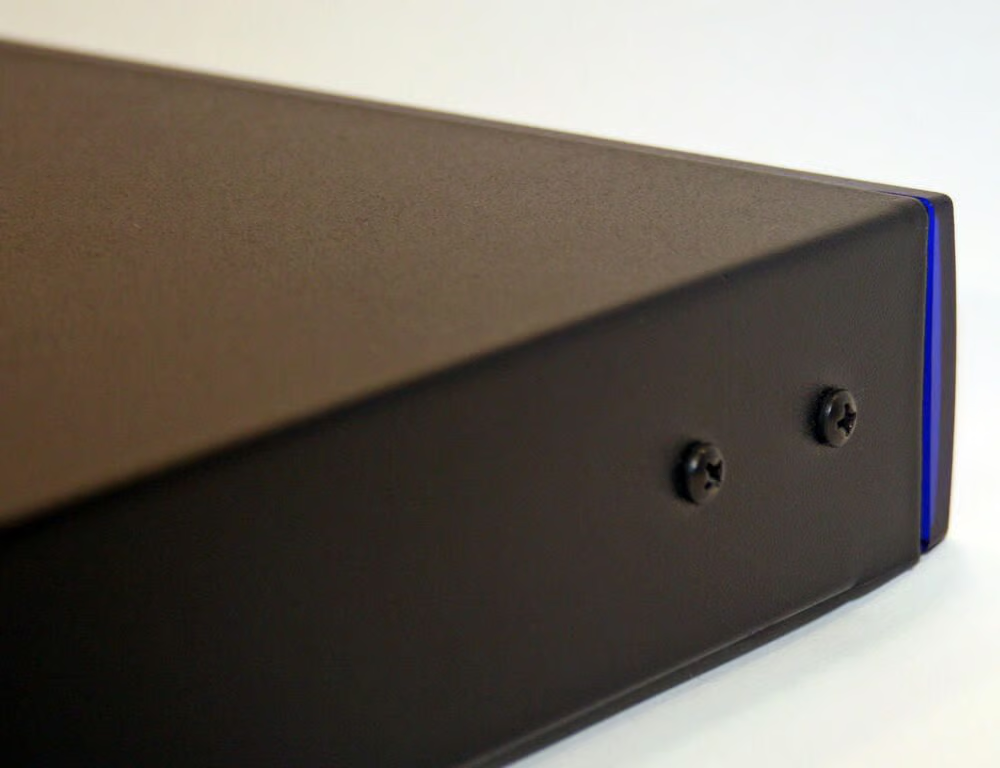
Philips head screws must also be removed from the front of each side panel.

Cracking Open A Cobalt RaQ 3i Server Appliance

Opening The RaQ 3i

Opening The RaQ 3i

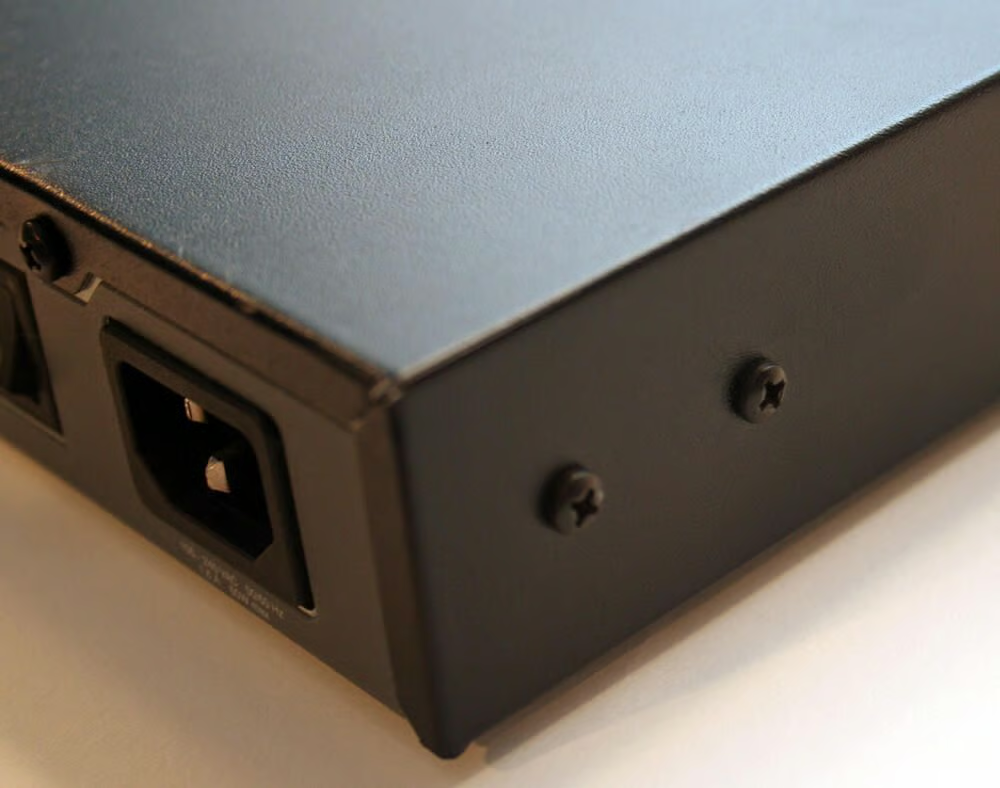
Screws must also be removed from the back of the RaQ 3i before the top shell can be opened.

Cracking Open A Cobalt RaQ 3i Server Appliance

Opening The RaQ 3i

Opening The RaQ 3i

With all necessary screws removed (some 10 total), the RaQ 3i’s main body (containing the motherboard and power supply) can be separated from its top metal cover. In fact, the main board sits in its own tray, which slides out from beneath the metal top cover, as shown here.

Cracking Open A Cobalt RaQ 3i Server Appliance

Top Shell, Removed From The Server

Top Shell, Removed From The Server

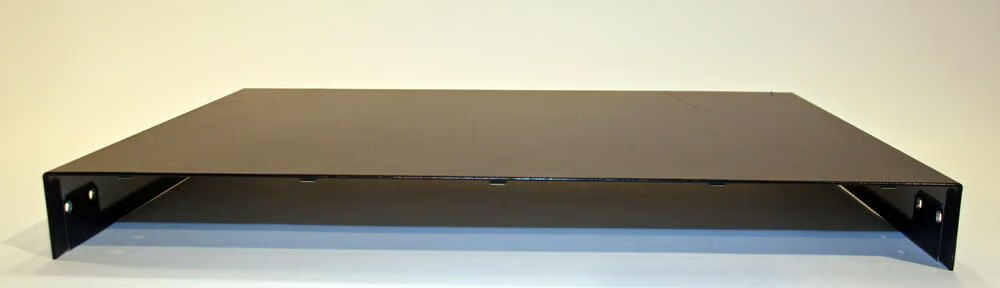
Here’s the top metal housing, once removed from the main server chassis.

Cracking Open A Cobalt RaQ 3i Server Appliance

Inside The RaQ 3i

Inside The RaQ 3i

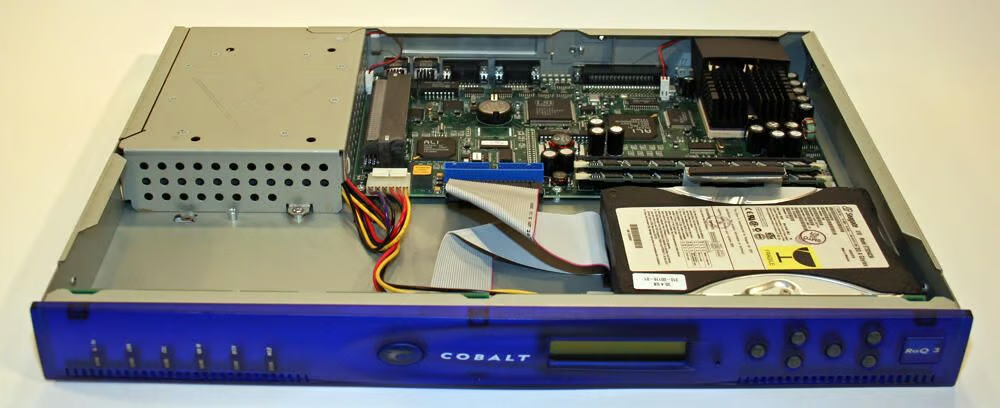
The RaQ 3i’s components are neatly stashed away inside its 1U case. The hard disk sits to the front right corner, while the mainboard the middle and right-rear corner. The power supply, meanwhile, occupies the left rear corner.

Cracking Open A Cobalt RaQ 3i Server Appliance

Cobalt-Seagate Relationship

Cobalt-Seagate Relationship

Cobalt Networks partnered with Seagate to build its RaQ servers. In addition to Seagate providing hard disks, as with this unit, Seagate also distributed some of its own versions of the server appliance using NasRaQ branding.

Cracking Open A Cobalt RaQ 3i Server Appliance

Server RAM

Server RAM

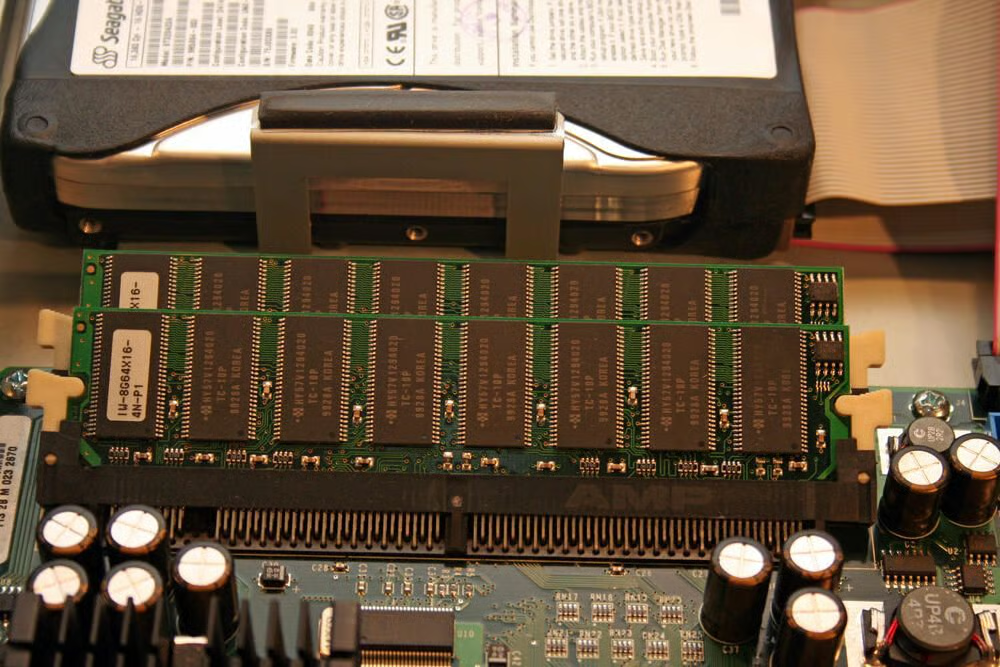
Here both of the RaQ’s two DIMM memory slots are occupied. Many RaQs shipped with 256MB of RAM, but 512MB obviously helps accelerate server performance.

Cracking Open A Cobalt RaQ 3i Server Appliance

Lithium Battery

Lithium Battery

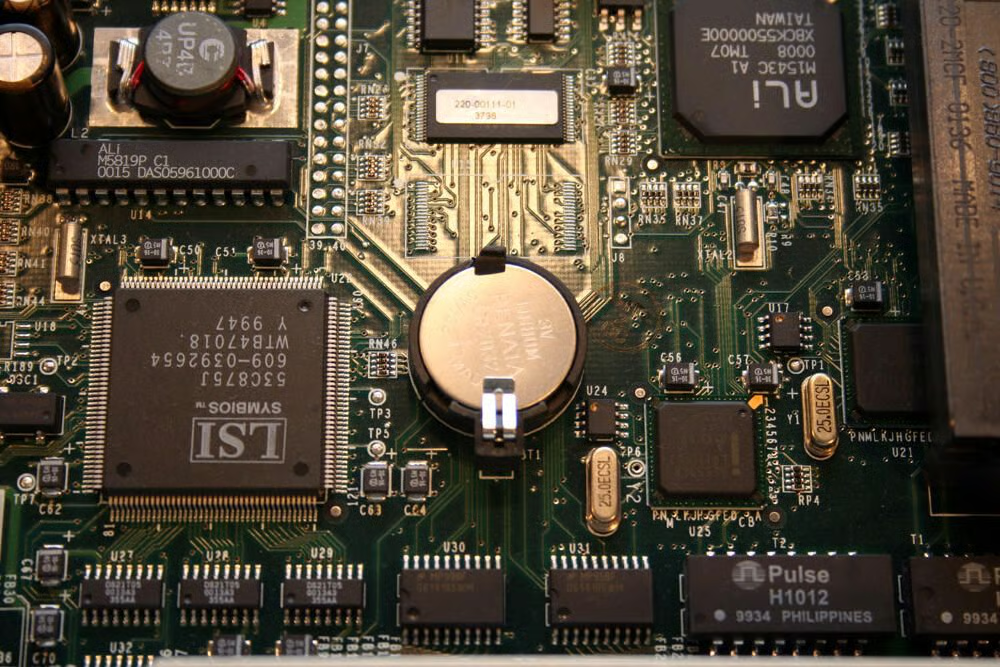
The RaQ 3i used this silver Lithium battery to power its real-time clock and CMOS RAM.

Cracking Open A Cobalt RaQ 3i Server Appliance

IDE Hard Drive Connector

IDE Hard Drive Connector

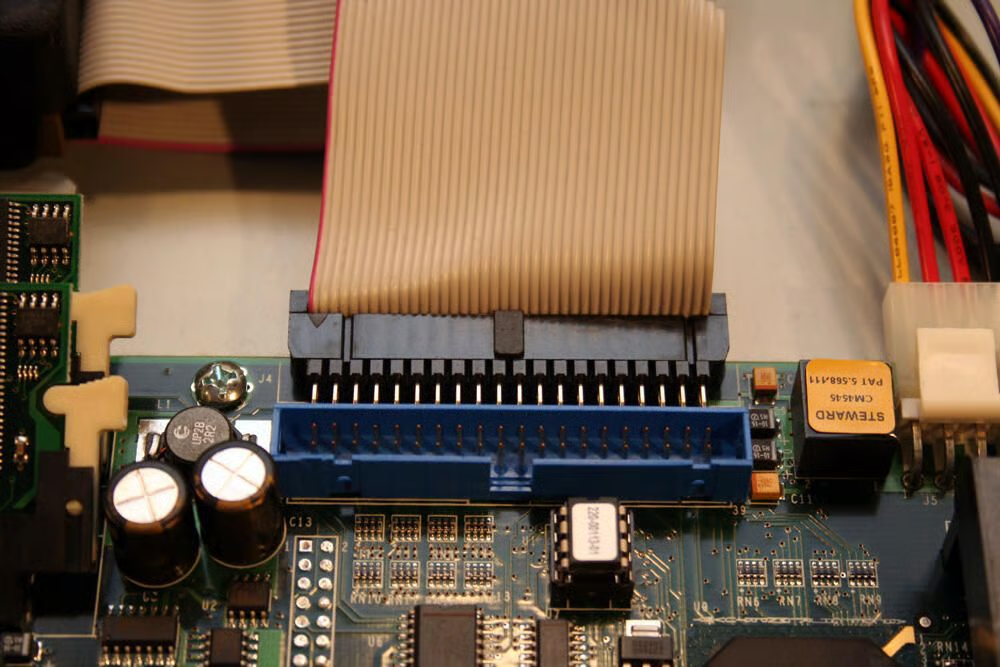
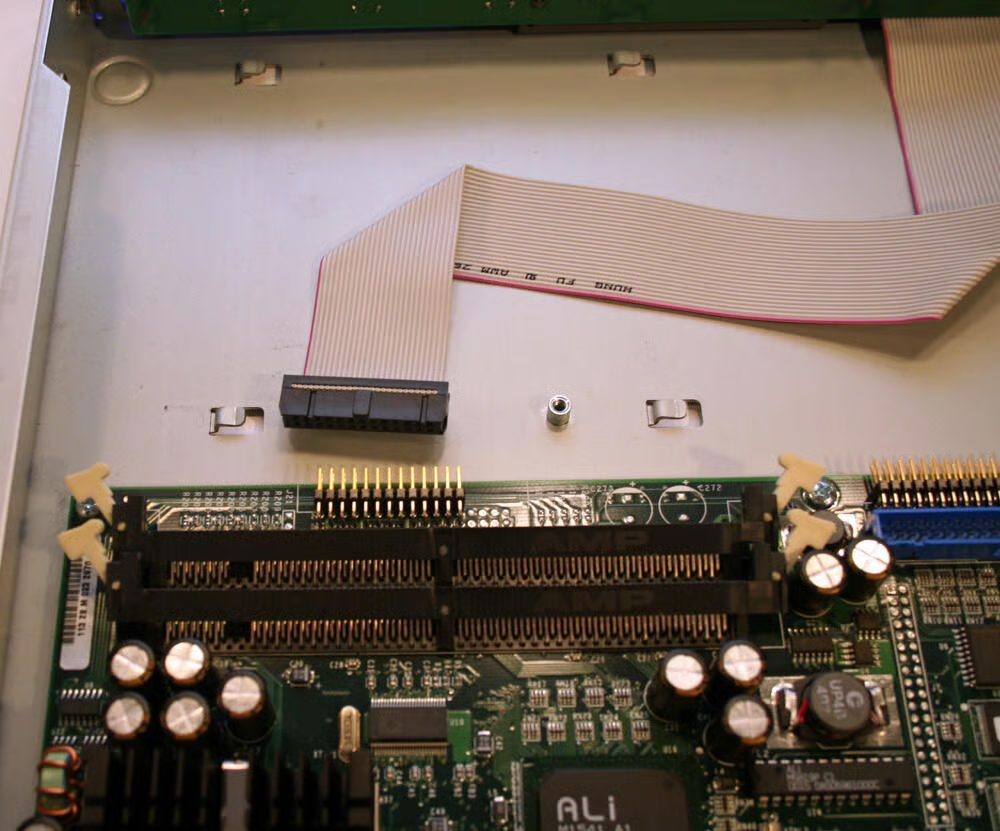
These IDE ports, located adjacent to the system memory bays on the main system board, are used to connect drives to the server.

Cracking Open A Cobalt RaQ 3i Server Appliance

Power Connector

Power Connector

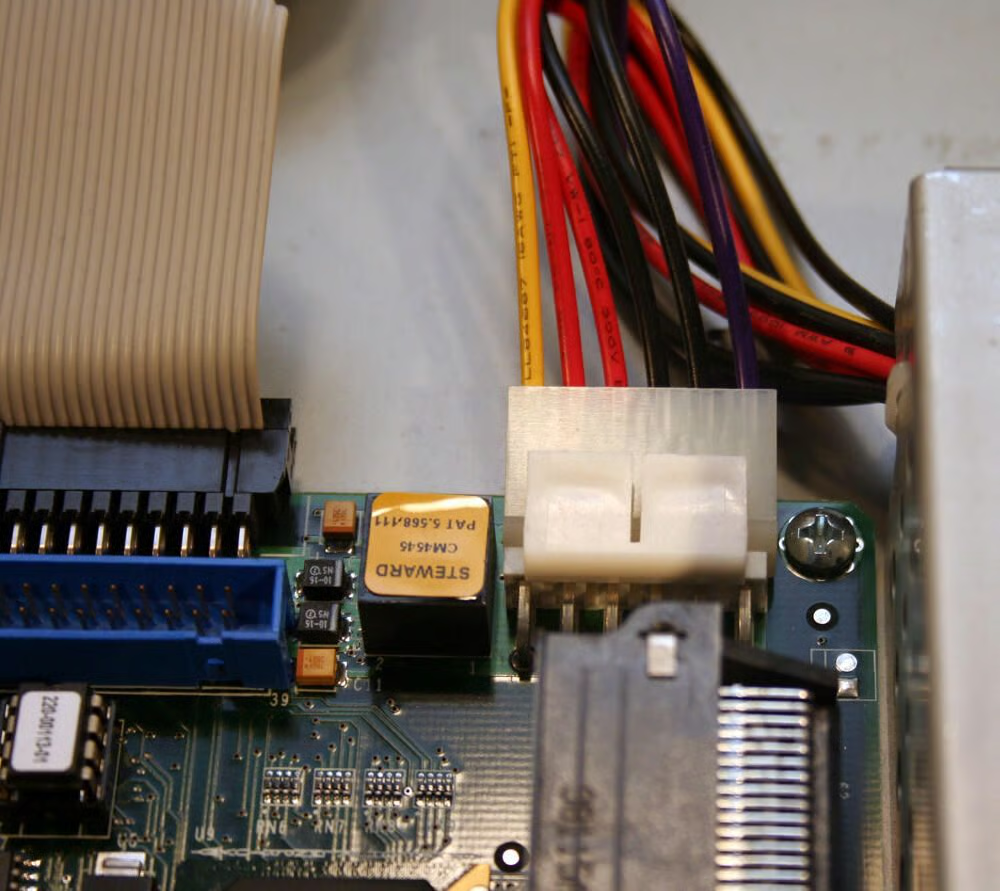
Here you can see the power connector that links the main board to electricity provided by the unit’s power supply.

Cracking Open A Cobalt RaQ 3i Server Appliance

Ali M1541 Chipset

Ali M1541 Chipset

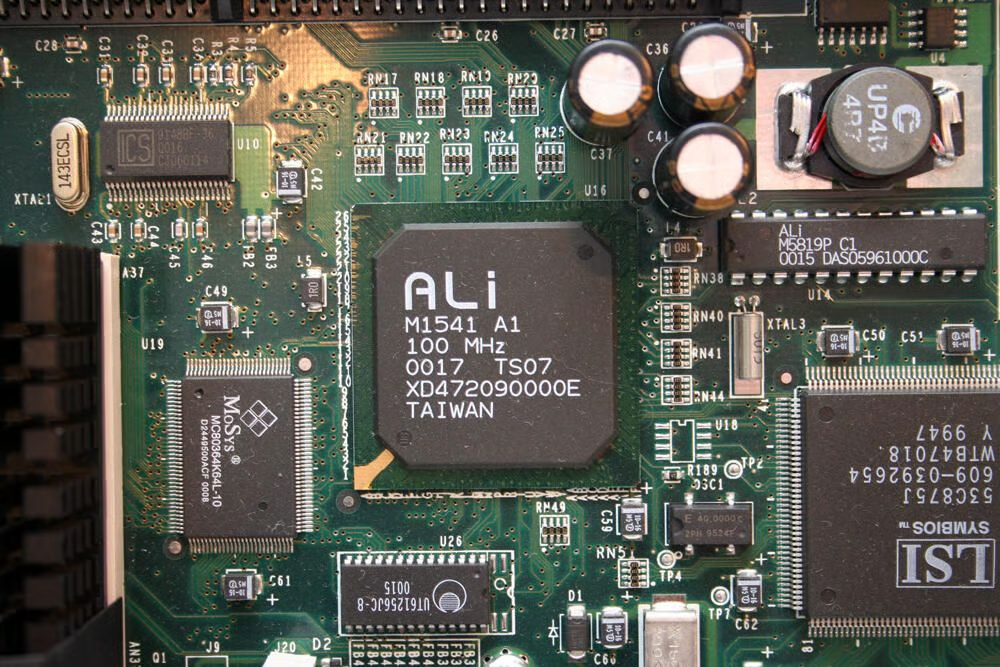
This Ali M1541 chipset, which ran at 100 MHz, helped power the AMD mainboard.

Cracking Open A Cobalt RaQ 3i Server Appliance

LSI Symbios Controller

LSI Symbios Controller

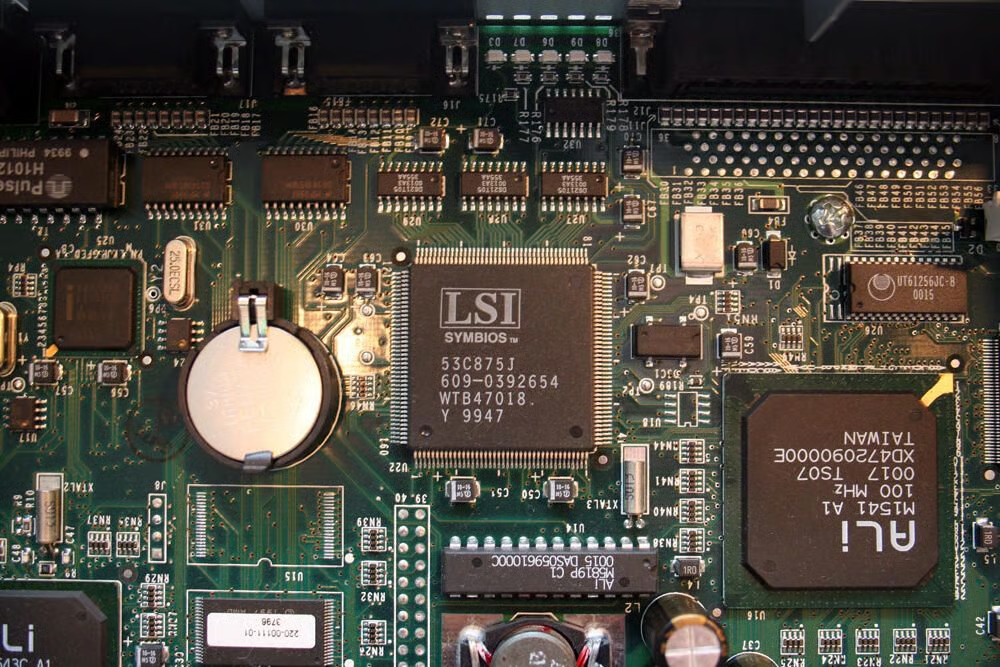
This LSI Symbios controller, model 53C875J, powered the server’s SCSI connection.

Cracking Open A Cobalt RaQ 3i Server Appliance

Server Heatsink

Server Heatsink

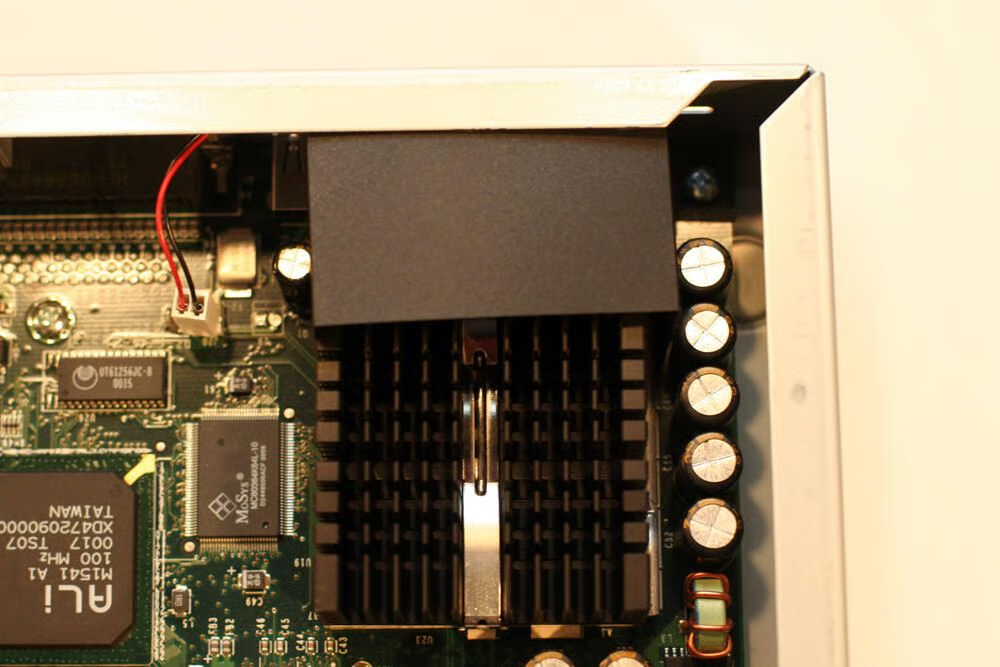
Here’s a close-up look at the server’s heatsink, which sits directly atop the unit’s AMD microprocessor.

Cracking Open A Cobalt RaQ 3i Server Appliance

AMD K6 Chip

AMD K6 Chip

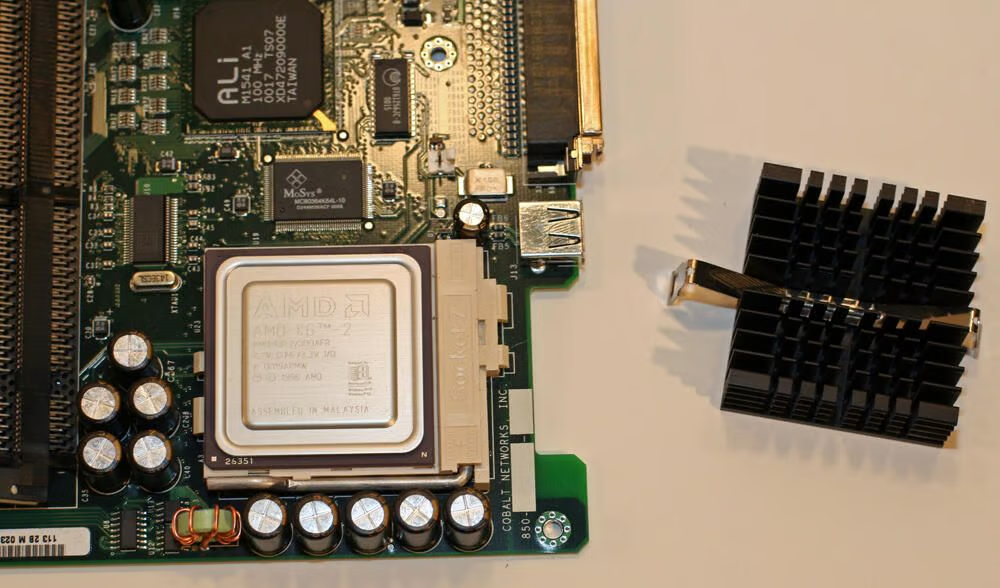
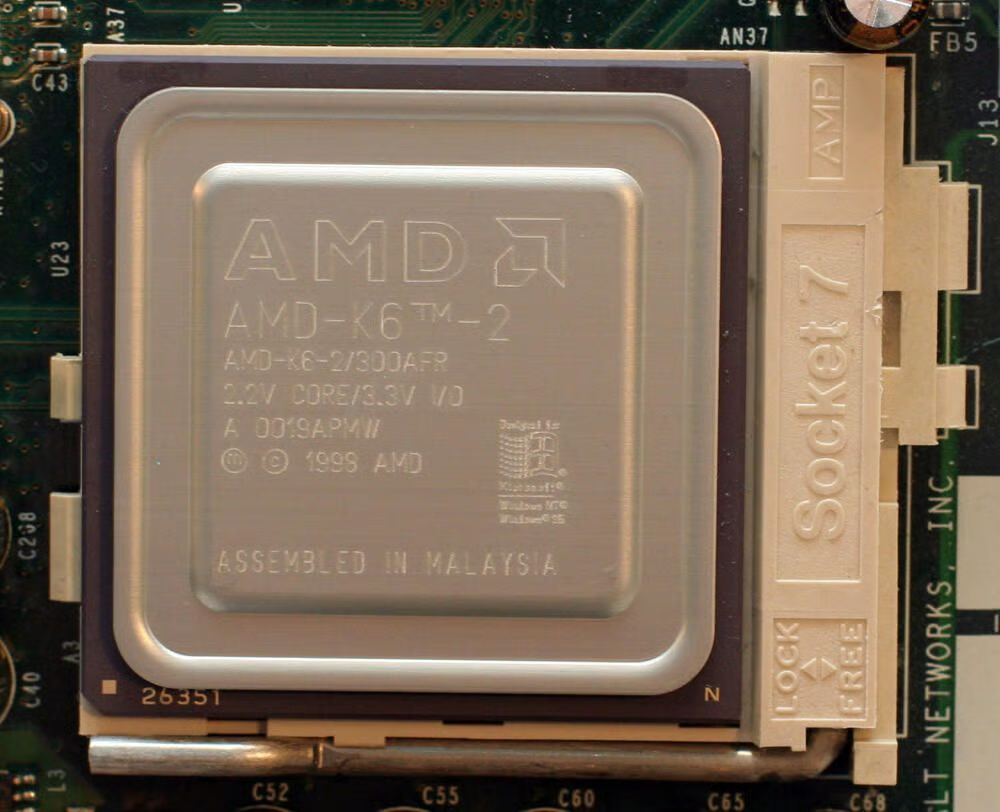
With the heatsink (pictured on the right) removed, the AMD K6 microprocessor is clearly visible.

Cracking Open A Cobalt RaQ 3i Server Appliance

AMD K6 Close Up

AMD K6 Close Up

Cracking Open A Cobalt RaQ 3i Server Appliance

Power Supply

Power Supply

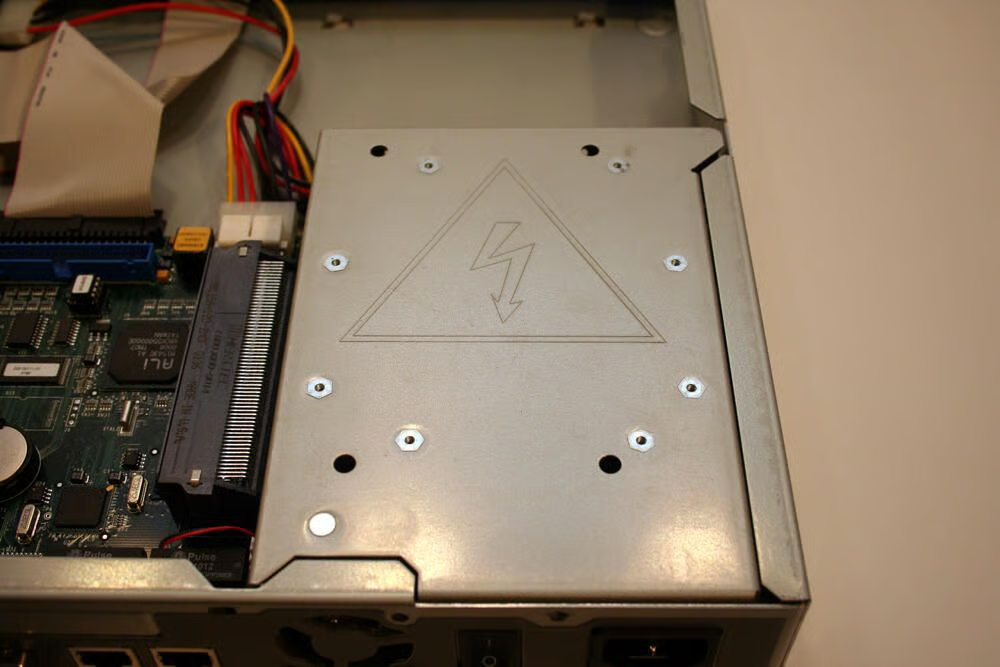
Within this compartment lies the server’s power supply unit.

Cracking Open A Cobalt RaQ 3i Server Appliance

Disconnecting The Power Supply

Disconnecting The Power Supply

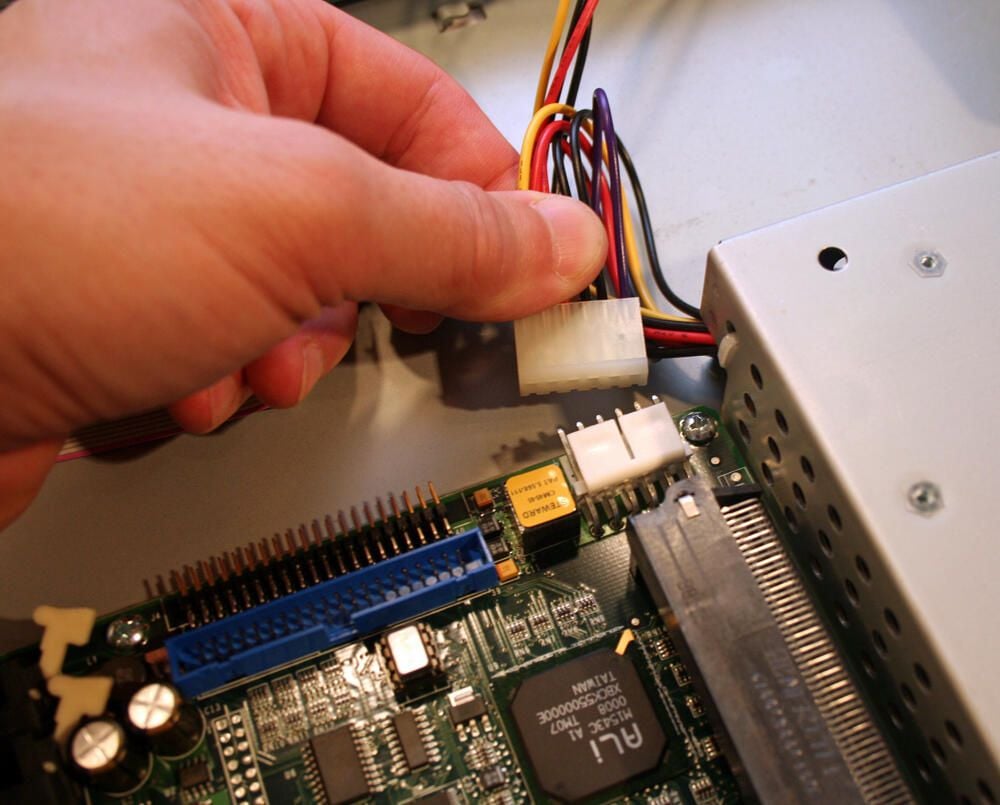
The power supply’s power connector must be disconnected from the main system board before the motherboard can be removed from the server chassis.

Cracking Open A Cobalt RaQ 3i Server Appliance

Opening The Power Supply

Opening The Power Supply

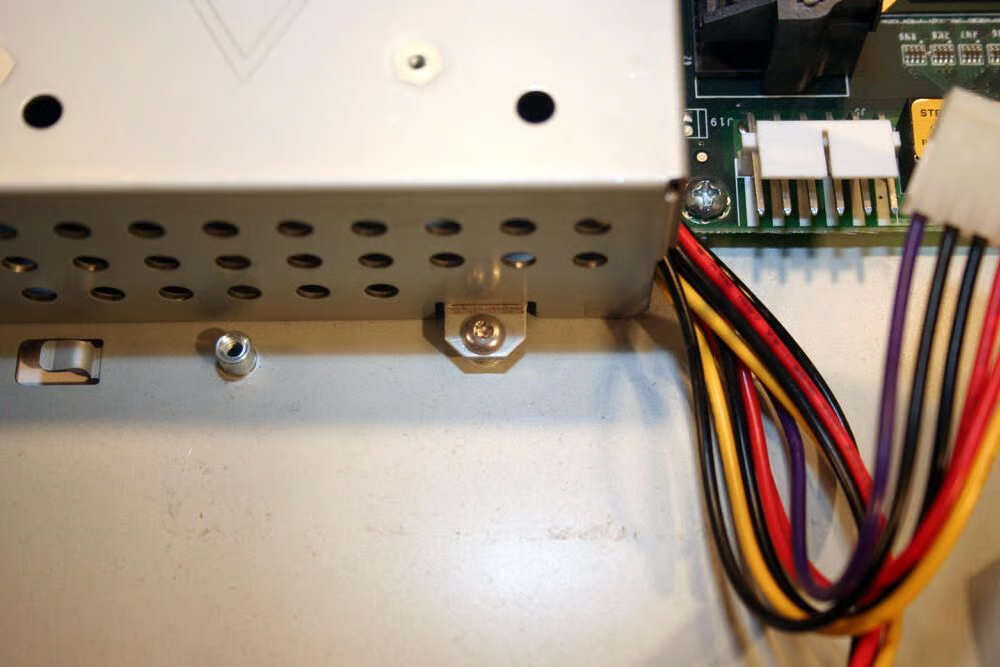
Before the power supply cover can be removed, this T-10 Torx screw must be unscrewed.

Cracking Open A Cobalt RaQ 3i Server Appliance

Inside The Power Supply Cover

Inside The Power Supply Cover

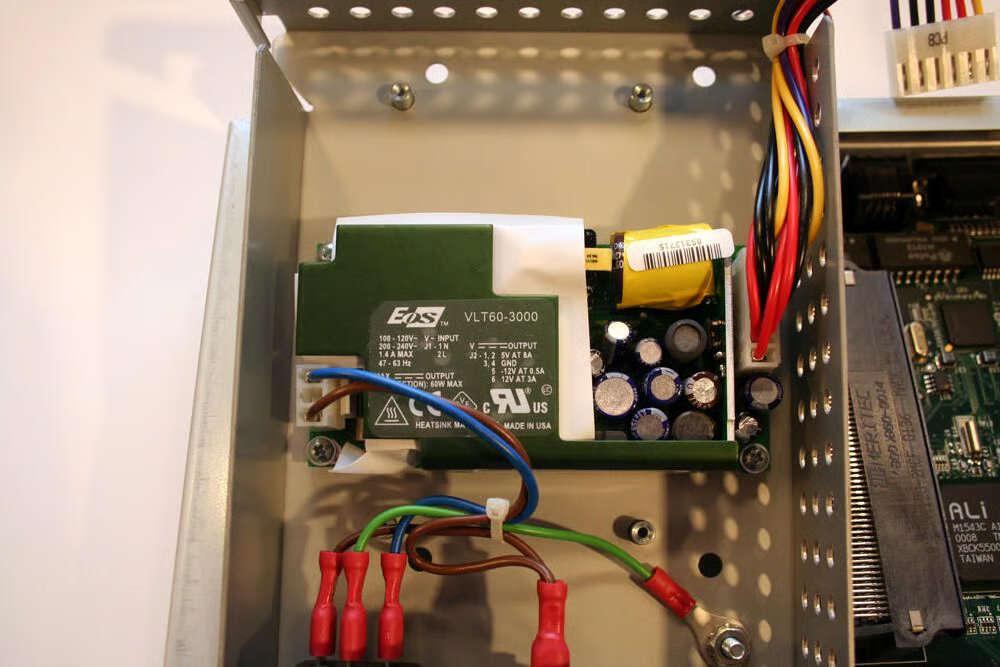
An EOS V-Series open-frame power supply powers this RaQ server. The 60-watt AC-DC power supply boasted a mean time between failures measure over 100,000 hours.

Cracking Open A Cobalt RaQ 3i Server Appliance

Hard Disk Cage

Hard Disk Cage

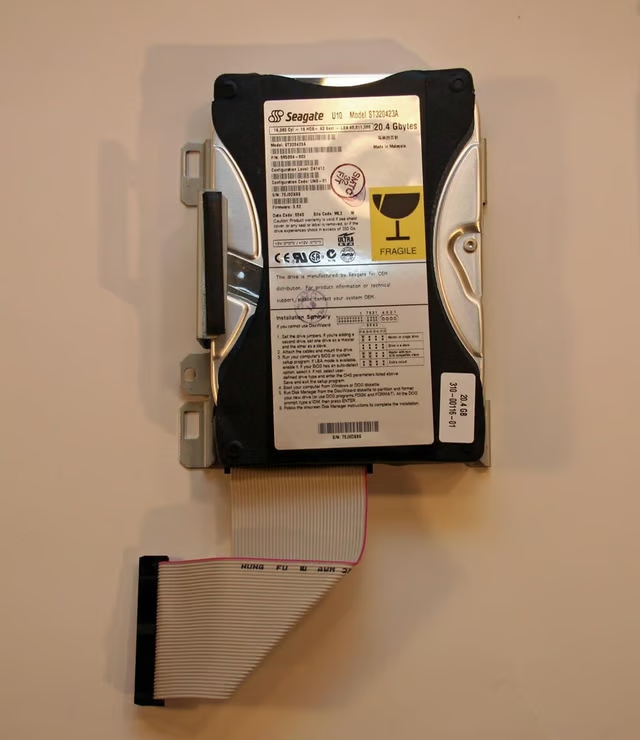
A custom hard disk cage holds the Seagate hard disk securely within the 1U server.

Cracking Open A Cobalt RaQ 3i Server Appliance

Removing The Hard Disk Cage

Removing The Hard Disk Cage

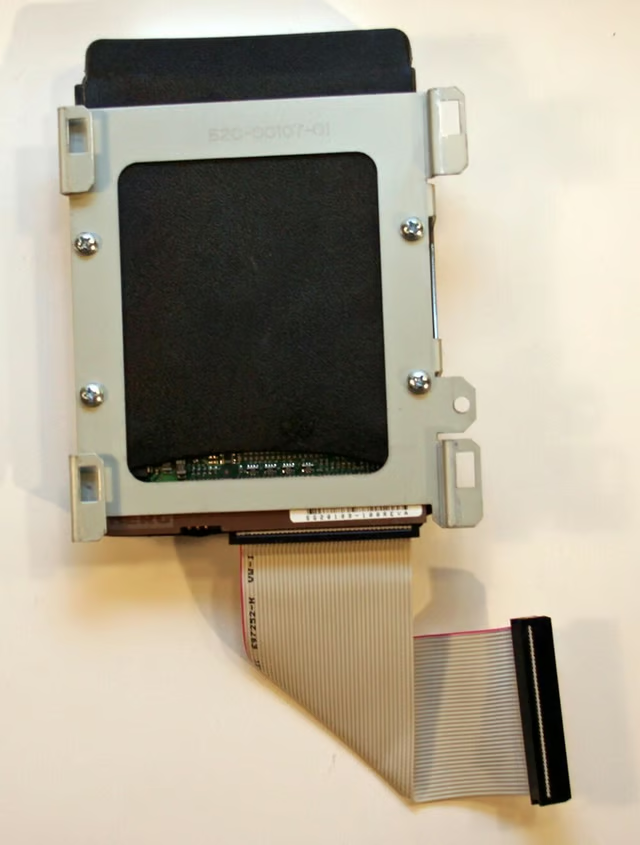
Four Philips head screws must be removed to separate the hard disk from the custom cage.

Cracking Open A Cobalt RaQ 3i Server Appliance

The Custom HDD Cage

The Custom HDD Cage

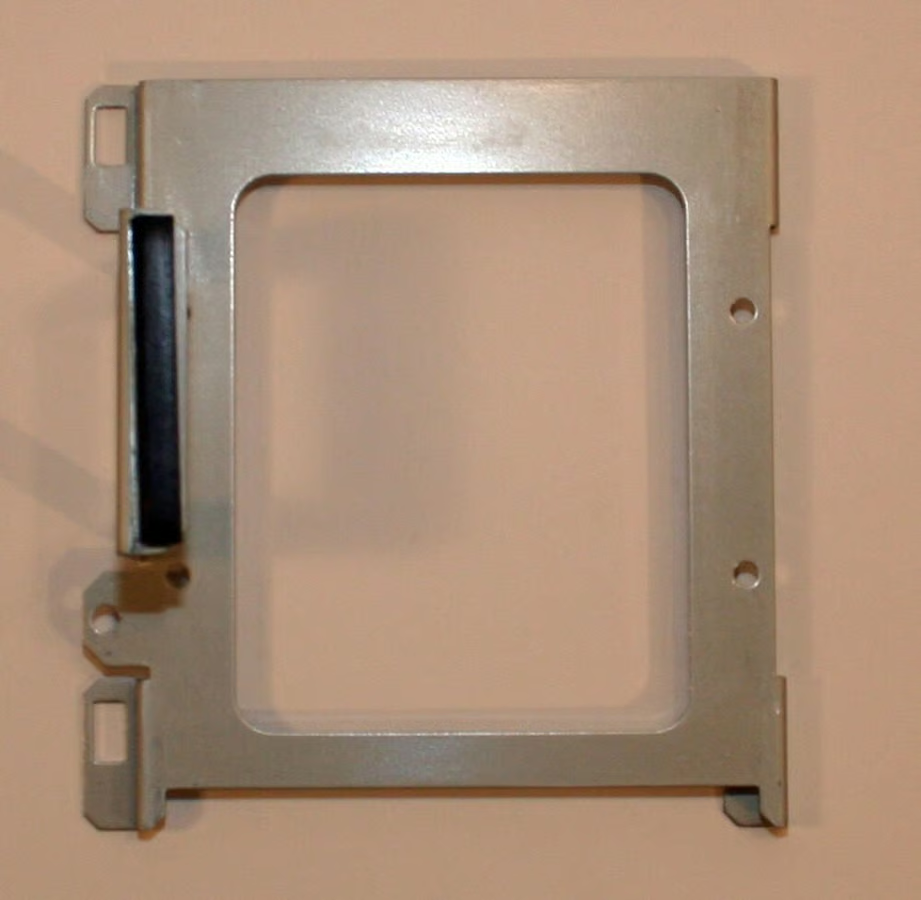
Here’s the hard disk drive cage, once separated from the server’s hard disk.

Cracking Open A Cobalt RaQ 3i Server Appliance

The Seagate Drive

The Seagate Drive

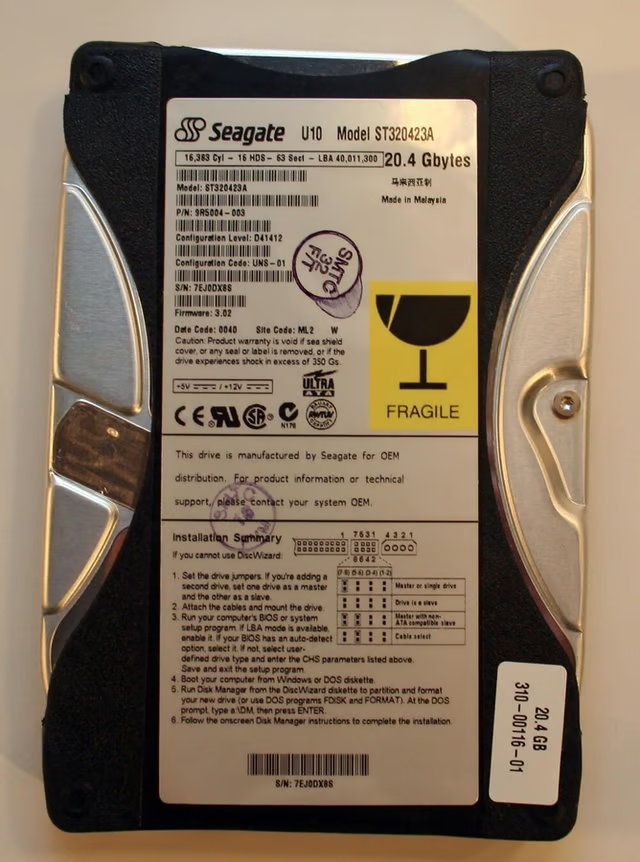
The RaQ 3i featured a 20.4GB hard disk manufactured in Malaysia.

Cracking Open A Cobalt RaQ 3i Server Appliance

Removing The Mainboard

Removing The Mainboard

To remove the system’s motherboard, this data cable must be removed that connects the front panel display and controls.

Cracking Open A Cobalt RaQ 3i Server Appliance

Fan Power Connectors

Fan Power Connectors

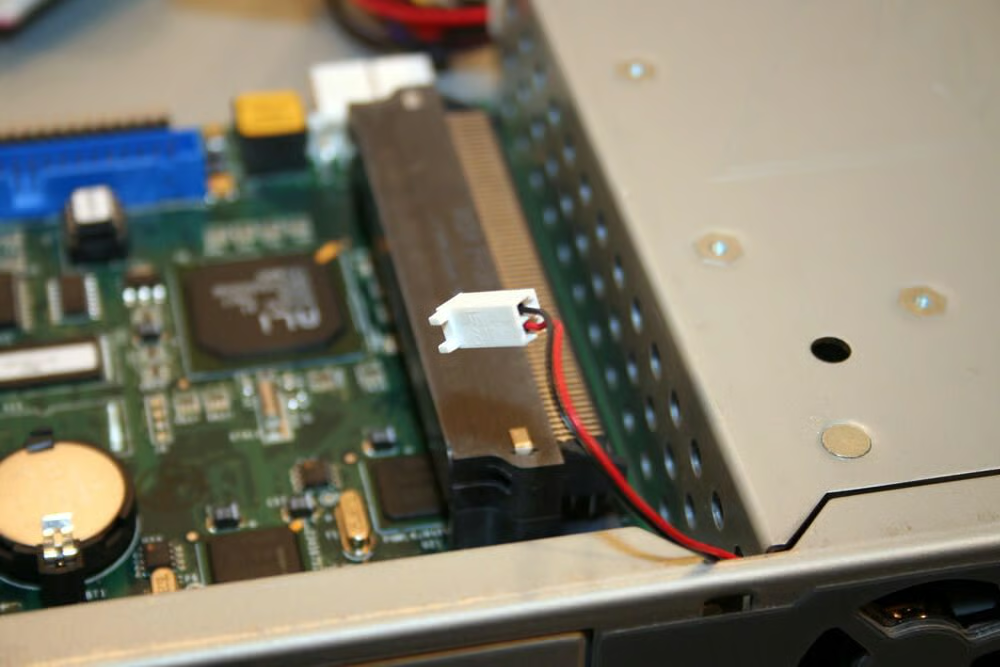
The unit’s two cooling fan power connectors must be disconnected, as well, before removing the motherboard from the server’s bottom chassis.

Cracking Open A Cobalt RaQ 3i Server Appliance

Meritec PCI Connector

Meritec PCI Connector

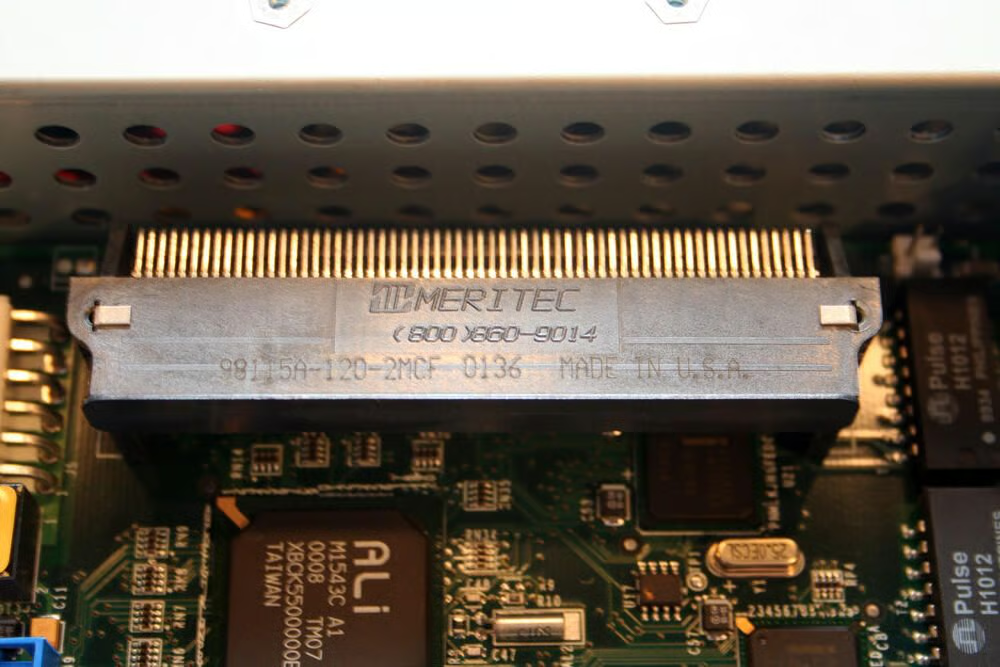
The RaQ 3i featured a single Meritec PCI Connector (model number 98115A-120-2MCF), which was not found on other Cobalt Networks RaQ 3 models.

Cracking Open A Cobalt RaQ 3i Server Appliance

Sunon Fan Close Up

Sunon Fan Close Up

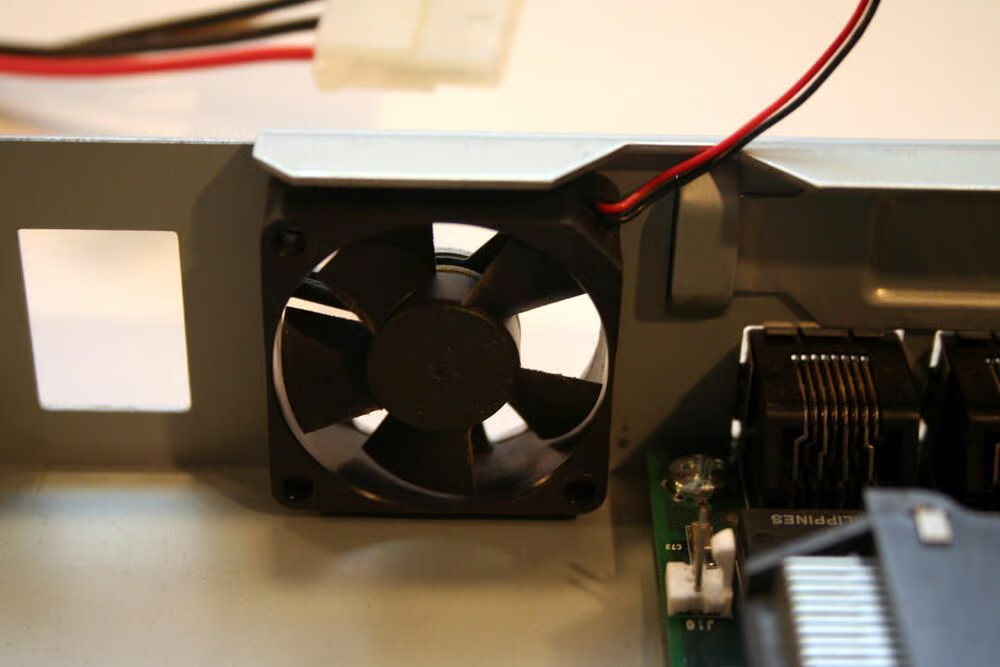
Here’s a close up view of one of the server’s two Sunon 35mm cooling fans.

Cracking Open A Cobalt RaQ 3i Server Appliance

Removing The Mainboard

Removing The Mainboard

The bolts securing the serial and SCSI ports to the server’s chassis must be removed before the motherboard can be separated from the server’s bottom chassis.

Cracking Open A Cobalt RaQ 3i Server Appliance

Server Bottom Tray

Server Bottom Tray

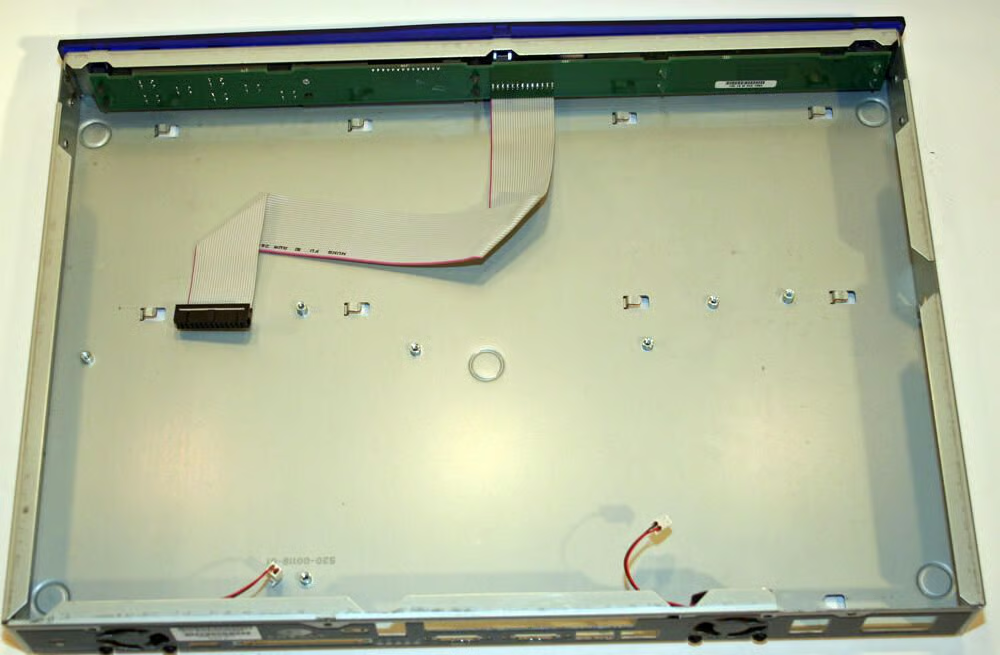
Here’s a look at the RaQ 3i’s bottom chassis with the motherboard and power supply removed. All that remains is the front control panel circuit board, its data cable, and the two 35mm cooling fans (and their respective power cables).

Cracking Open A Cobalt RaQ 3i Server Appliance

Removing The Front Decorative Panel

Removing The Front Decorative Panel

To remove the Cobalt’s front decorative panel, several blue plastic clips (one shown here at top center) must be depressed using a flat-head screwdriver.

Cracking Open A Cobalt RaQ 3i Server Appliance

The Decorative Front Panel

The Decorative Front Panel

The Cobalt front decorative panel looks like this (once it’s removed from the server chassis).

Cracking Open A Cobalt RaQ 3i Server Appliance

Removing The Front Panel Circuit Board

Removing The Front Panel Circuit Board

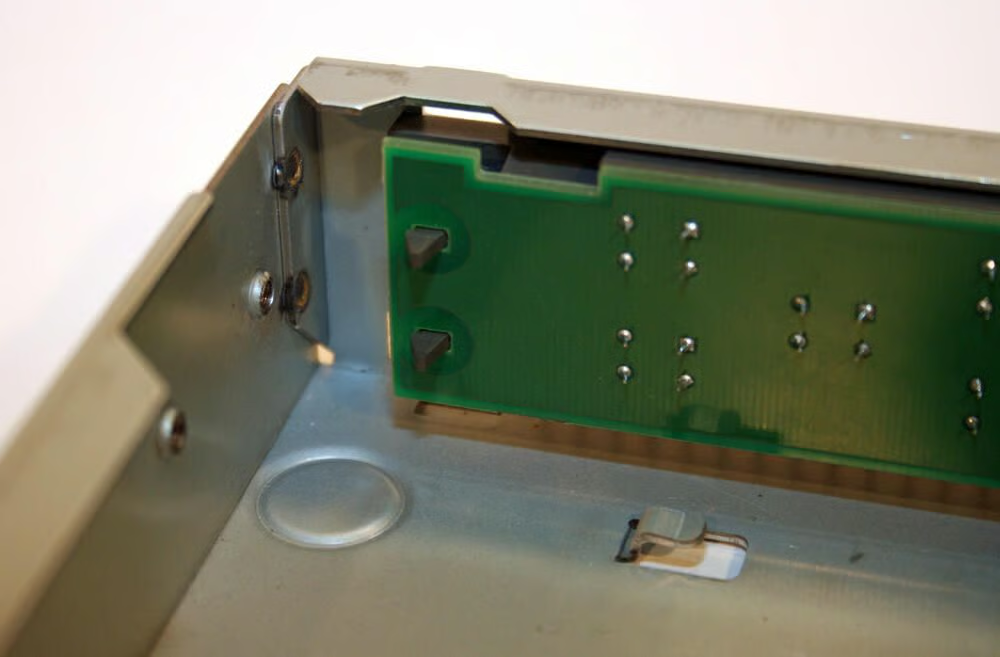
To remove the front panel circuit board, and its accompanying LCD display, several plastic clips must be pressed inward to enable disconnecting the circuit board.

Cracking Open A Cobalt RaQ 3i Server Appliance

The Front Panel Circuit Board

The Front Panel Circuit Board

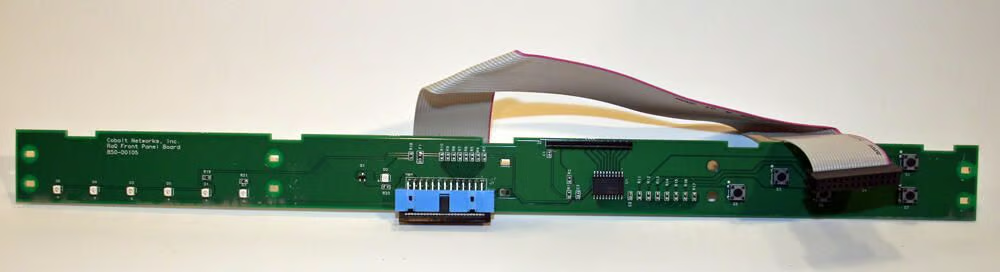
Here’s the Cobalt front panel circuit board, along with its connecting data cable, once removed from the server chassis’ front panel.

Cracking Open A Cobalt RaQ 3i Server Appliance

The RaQ 3i, Disassembled

The RaQ 3i, Disassembled

Here’s a look at most all of the components, including the server chassis, power supply, hard disk and accompanying cage, and other assorted components that compose the Cobalt Networks RaQ 3i server appliance.

  • Data Centers
  • Account Information

    Share with Your Friends

    Cracking Open A Cobalt RaQ 3i Server Appliance

    Your email has been sent

Share: Cracking Open A Cobalt RaQ 3i Server Appliance
Image of Erik Eckel
By Erik Eckel
Erik Eckel is a managing partner at Louisville Geek and president of Eckel Media Corp. He previously served as Executive Editor at CNET Networks' TechRepublic. He earned his Bachelor's Degree in English from the University of Louisville and received
  • Account Information

    Contact Erik Eckel

    Your message has been sent

  • |
  • See all of Erik's content

TechRepublic Premium

  • TechRepublic Premium

    Hardware inventory policy

    This policy describes guidelines your organization can follow to track, process and decommission IT equipment. From the policy: SUMMARY An organization’s IT hardware inventory constitutes a significant capital investment in order to perform company operations. Because hardware represents a critical asset and often holds organizational data, it is important for the company to track each ...

    Published:  January 23, 2023, 11:00 AM EST Modified:  January 24, 2023, 11:00 AM EST Read More See more TechRepublic Premium
  • TechRepublic Premium

    Malware response checklist

    Whether an infection is the result of a disgruntled employee, hardware vulnerability, software-based threat, social engineering penetration, robotic attack or human error, all organizations must be prepared to immediately respond effectively to such an issue if the corresponding damage is to be minimized. Because even the best protected networks become infected, all organizations must have ...

    Published:  January 22, 2023, 11:00 AM EST Modified:  January 23, 2023, 1:00 PM EST Read More See more TechRepublic Premium
  • TechRepublic Premium

    Checklist: Securing Windows 10 systems

    Every operating system should be appropriately secured, especially end user workstations which often contain or permit access to company data and upon which most employee job duties are based. To get the maximum security protection out of your Windows 10 deployments follow this checklist from TechRepublic Premium. Also included in this checklist: Security solutions Product ...

    Published:  January 22, 2023, 11:00 AM EST Modified:  January 23, 2023, 2:00 PM EST Read More See more TechRepublic Premium
  • TechRepublic Premium

    Cloud data storage policy

    Third-party cloud-based file storage applications such as Dropbox, OneDrive and Google Drive have all contributed to the success of business cloud data storage. These products have brought proven flexibility and ease of data access to users and businesses alike while ensuring security of confidential information. Cloud data storage offers many benefits to consumers and companies ...

    Published:  January 22, 2023, 11:00 AM EST Modified:  January 23, 2023, 3:00 PM EST Read More See more TechRepublic Premium

Services

  • About Us
  • Newsletters
  • RSS Feeds
  • Site Map
  • Site Help & Feedback
  • FAQ
  • Advertise
  • Do Not Sell My Information

Explore

  • Downloads
  • TechRepublic Forums
  • Meet the Team
  • TechRepublic Academy
  • TechRepublic Premium
  • Resource Library
  • Photos
  • Videos
  • TechRepublic
  • TechRepublic on Twitter
  • TechRepublic on Facebook
  • TechRepublic on LinkedIn
  • TechRepublic on Flipboard
© 2023 TechnologyAdvice. All rights reserved.
  • Privacy Policy
  • Terms of Use
  • Property of TechnologyAdvice