\n\tIn late September 2011, Amazon launched it’s long-awaited tablet–the Kindle Fire. At the same time, the company also introduced a three new Kindle e-ink readers–the Kindle, Kindle Touch, and Kindle Touch 3G.
\n\t
\n\tLast year, I cracked open Kindle Graphite and Kindle Graphite DX. This time around we’ll be dissecting all three devices. And, we’re starting with the 2011 Kindle.
\n\t
\n\tFor a more in-depth review of the 2011 Kindle’s internal hardware, check out my article, “Amazon Kindle (2011) Teardown: Faster Processor, fewer chips.”
\n\t
\n\tPhoto by: Bill Detwiler / TechRepublic
\n\tCaption by: Bill Detwiler
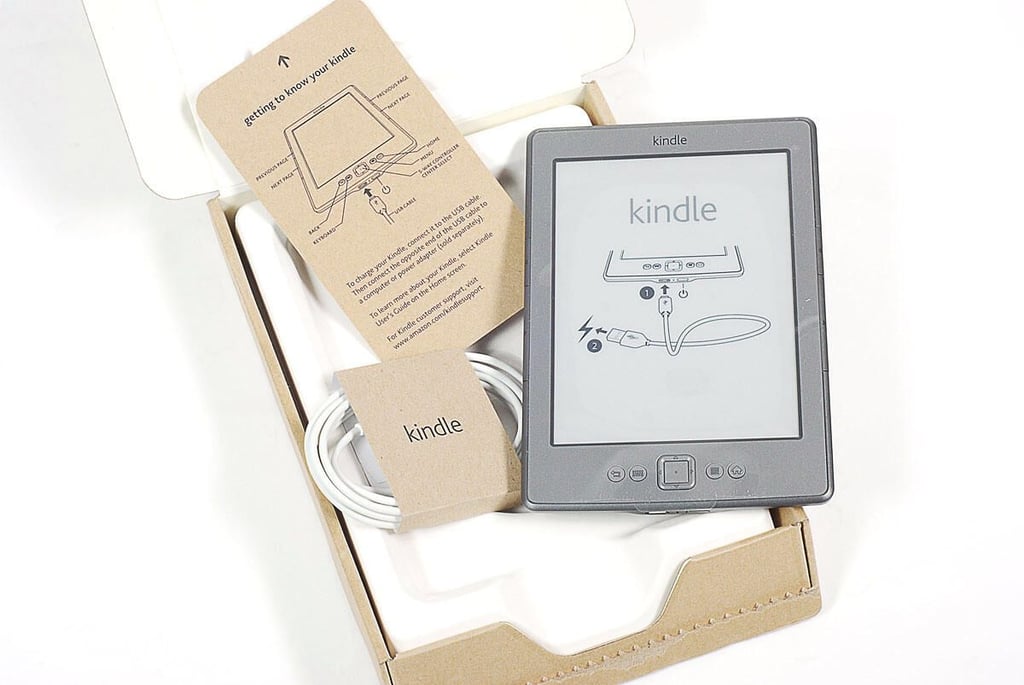
\n\tAs of this writing, the 2011 Amazon Kindle is available for $79 (with Amazon “Special Offers” advertising) and $109 (without advertising). Inside the box, you’ll find the Kindle e-ink reader, USB cable, and quick start card.
\n\t
\n\tPhoto by: Bill Detwiler / TechRepublic
\n\tCaption by: Bill Detwiler
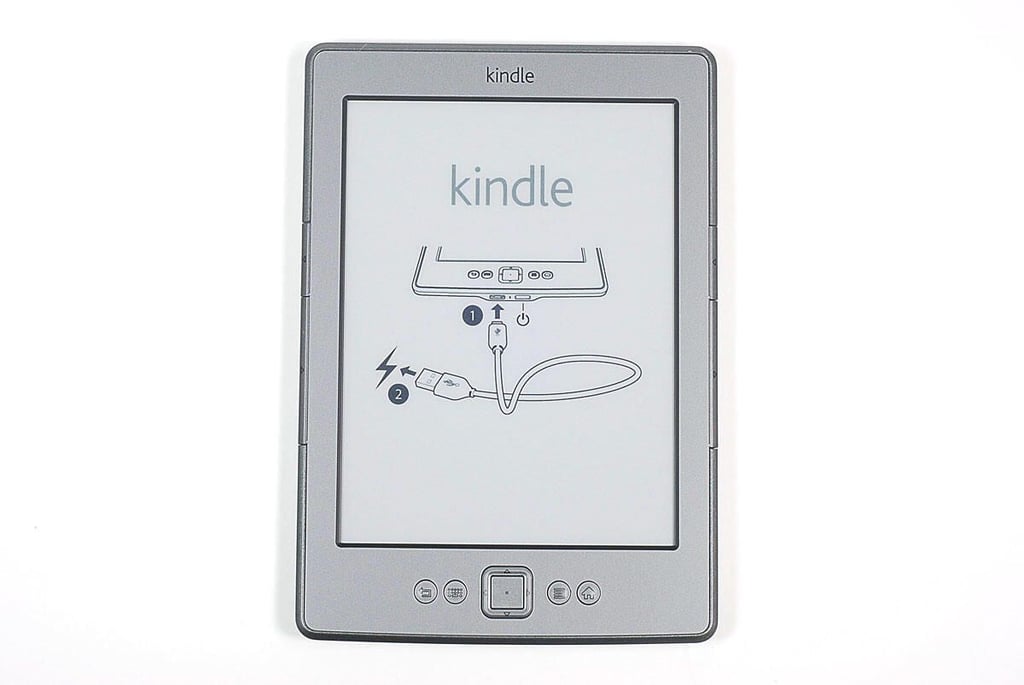
\n\tThe 2011 Kindle has a 6″ diagonal E Ink display (600 x 800 resolution at 167 ppi), 2GB of internal storage, 802.11b/g/n Wi-Fi support, and a USB 2.0 (micro-B connector).
\n\t
\n\tPhoto by: Bill Detwiler / TechRepublic
\n\tCaption by: Bill Detwiler
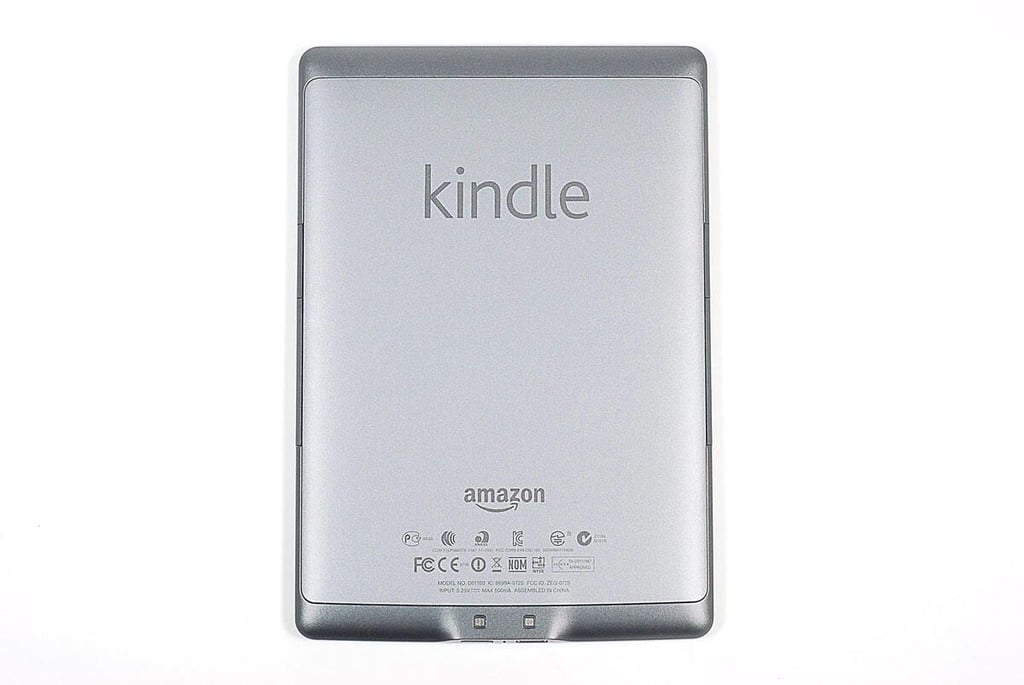
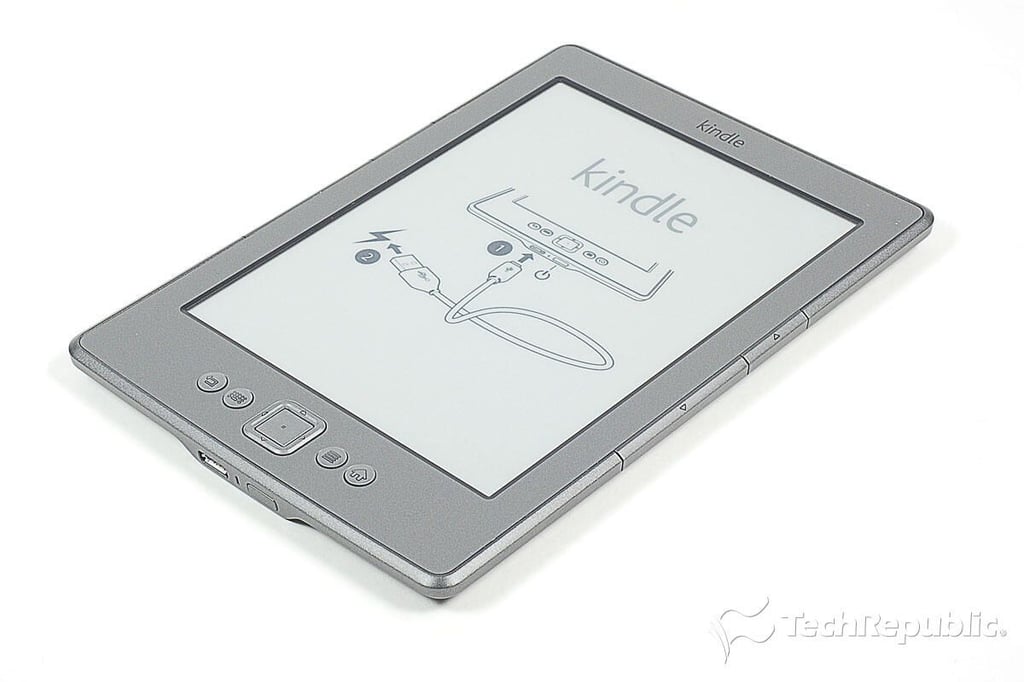
\n\tAccording to Amazon, the 2011 Kindle measures 6.5″ (H) x 4.5″ (W) x 0.34″ (D). It weighs 5.98 ounces.
\n\t
\n\tPhoto by: Bill Detwiler / TechRepublic
\n\tCaption by: Bill Detwiler
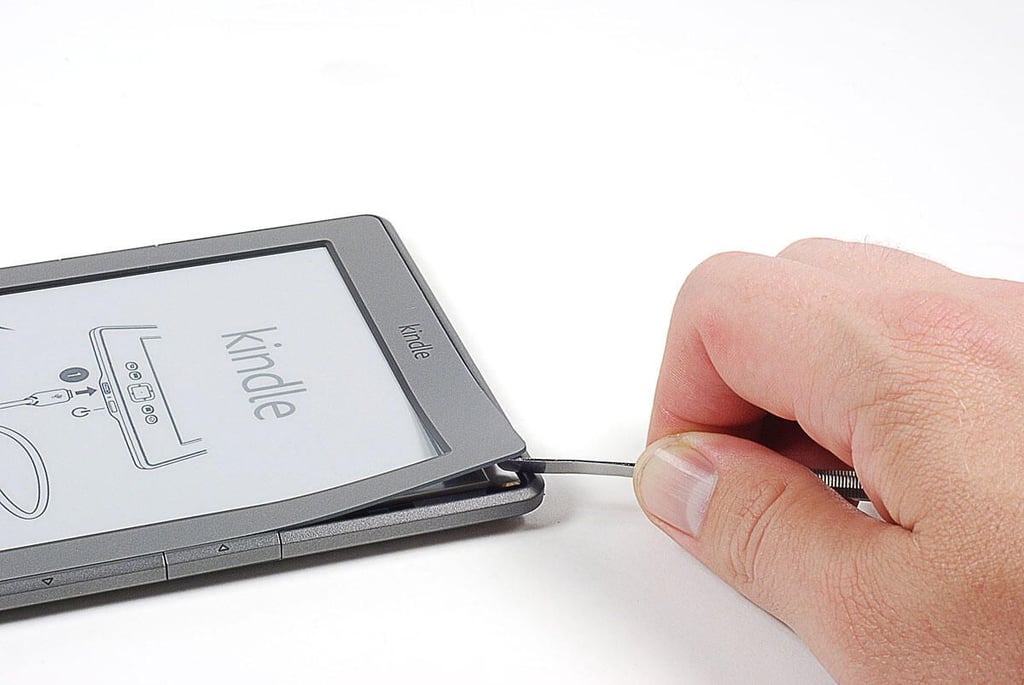
\n\tMy first step in cracking open the 2011 Kindle is removing the thing plastic bezel that surround the E Ink display. The bezel is held in place with adhesive.
\n
\n\tPhoto by: Bill Detwiler / TechRepublic
\n\tCaption by: Bill Detwiler
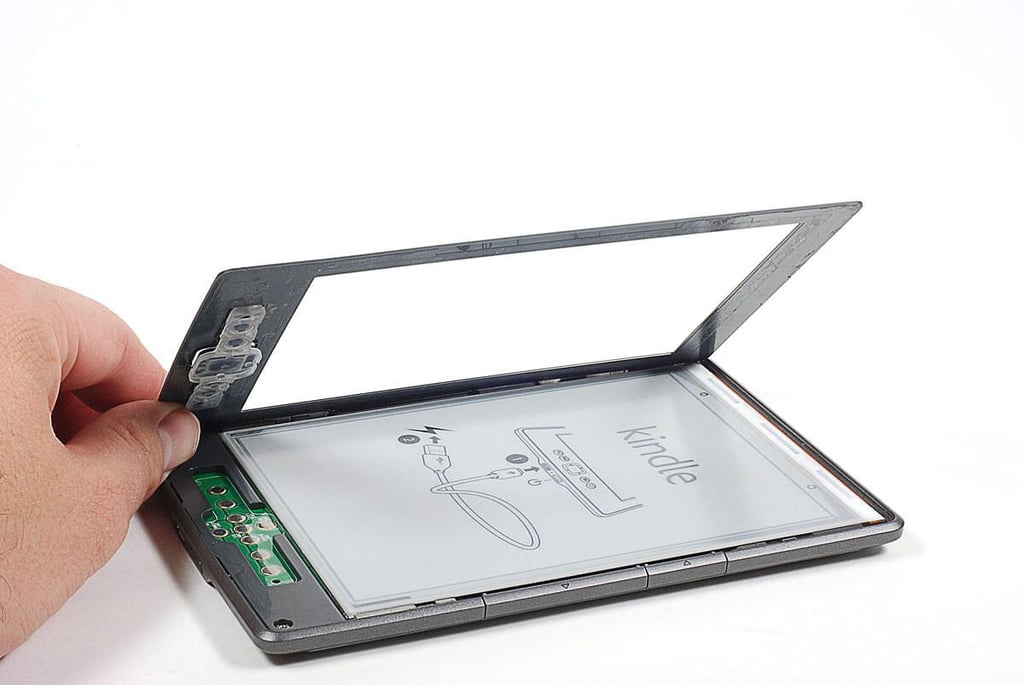
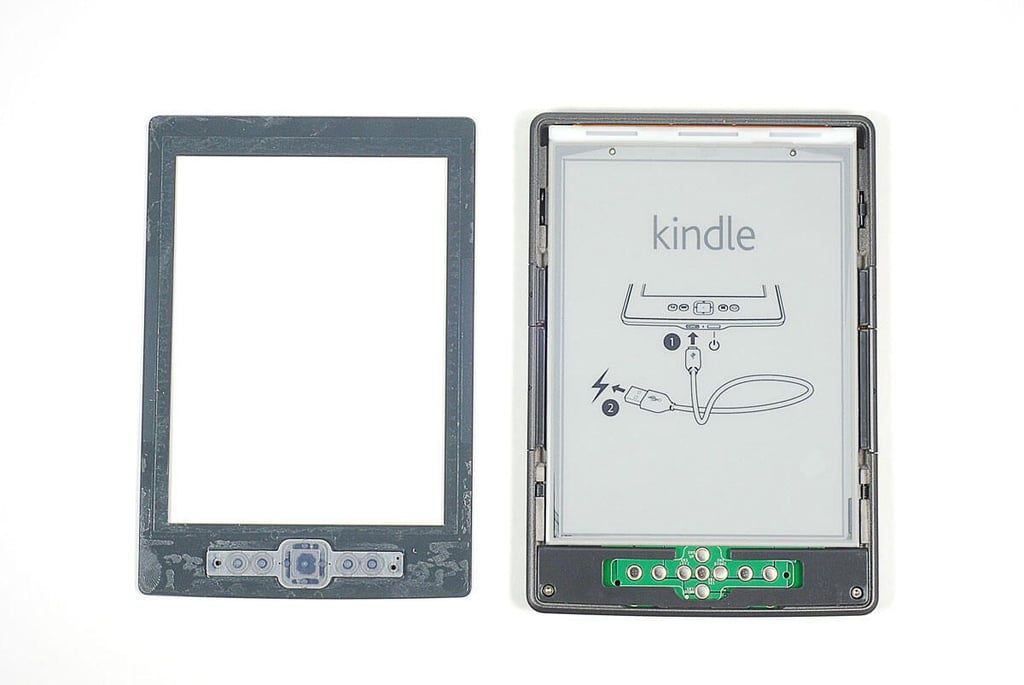
\n\tWith the front bezel removed, The Kindle’s E Ink display panel is complete exposed. The contacts from the front buttons are also visible below the display.
\n
\n\tPhoto by: Bill Detwiler / TechRepublic
\n\tCaption by: Bill Detwiler
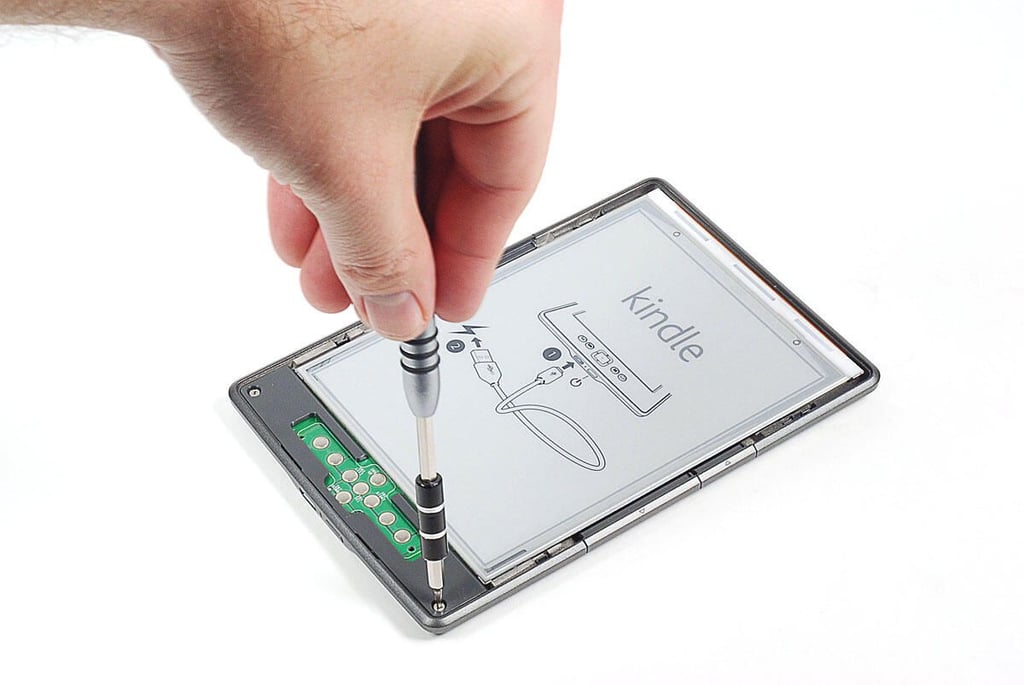
\n\tWith the 2011 Kindle’s front bezel removed, I removed two Torx T5 screws which this plastic plate in place.
\n
\n\tPhoto by: Bill Detwiler / TechRepublic
\n\tCaption by: Bill Detwiler
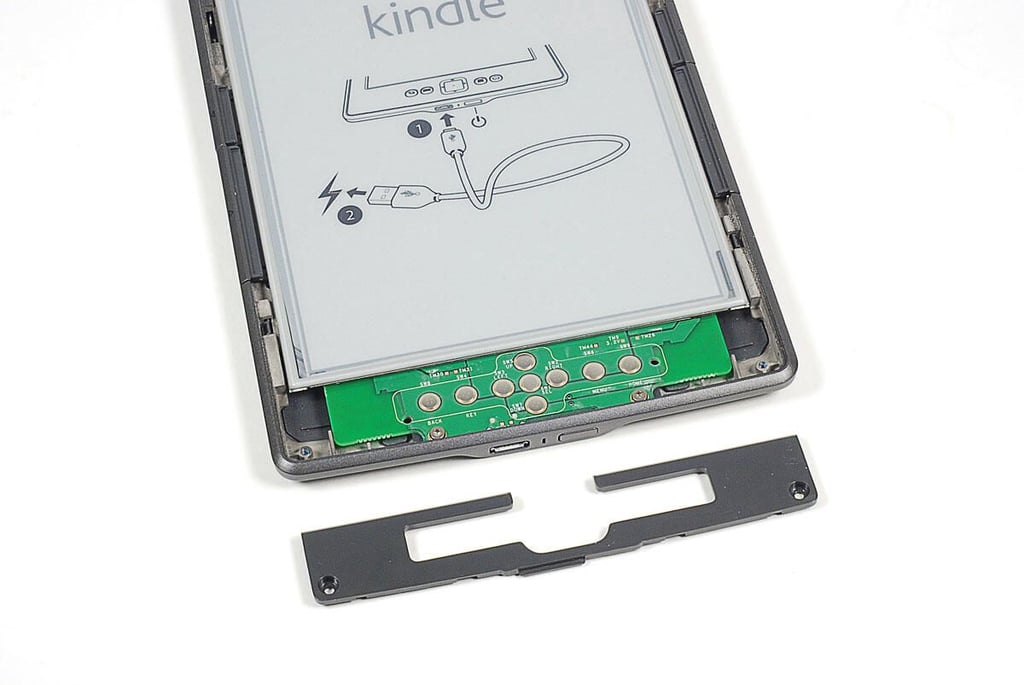
\n\tOnce the two screws are removed, I used a think metal blade to pry loose the plastic plate.
\n
\n\tPhoto by: Bill Detwiler / TechRepublic
\n\tCaption by: Bill Detwiler

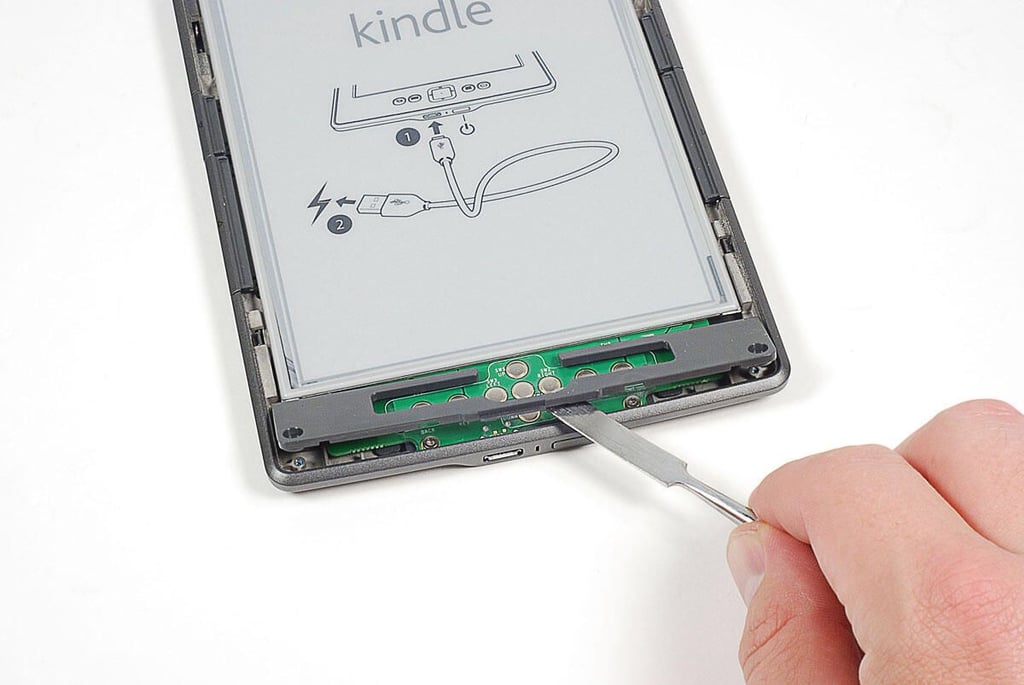
\n\tA pair of Torx T5 screws are located on the 2011 Kindle’s PCB behind the front control panel.
\n
\n\tPhoto by: Bill Detwiler / TechRepublic
\n\tCaption by: Bill Detwiler
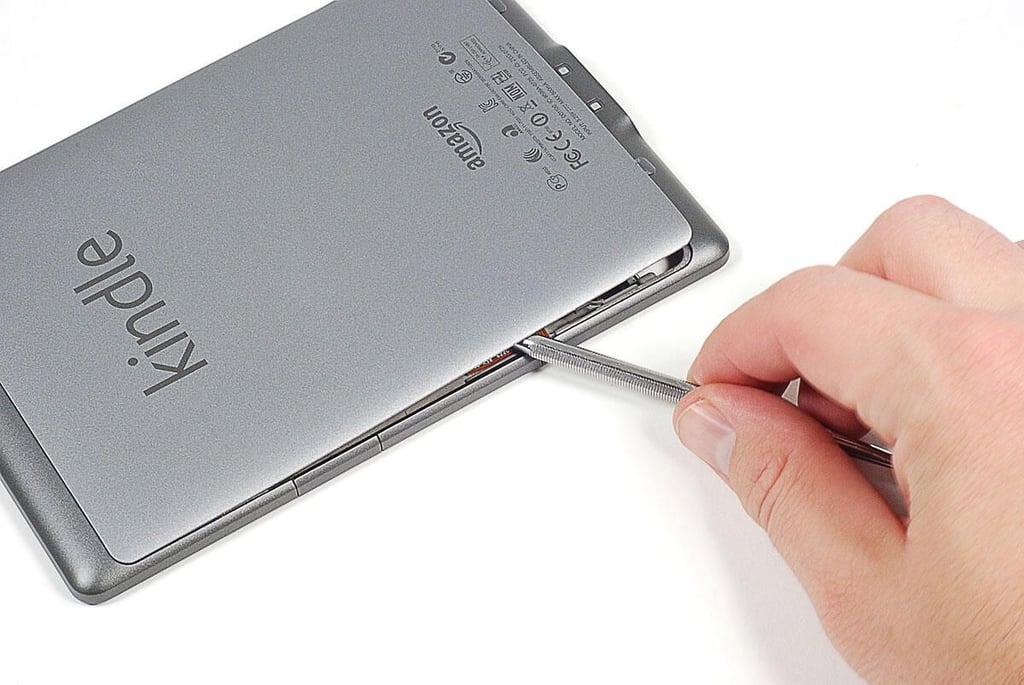
\n\tThe 2011 Kindle’s back cover is very difficult to remove. It’s held in place with plastic clips (which you must release from the front), stiff plastic tabs (which you must bend to dislodge), and a huge patch of adhesive (which I had to cut through).
\n
\n\tPhoto by: Bill Detwiler / TechRepublic
\n\tCaption by: Bill Detwiler
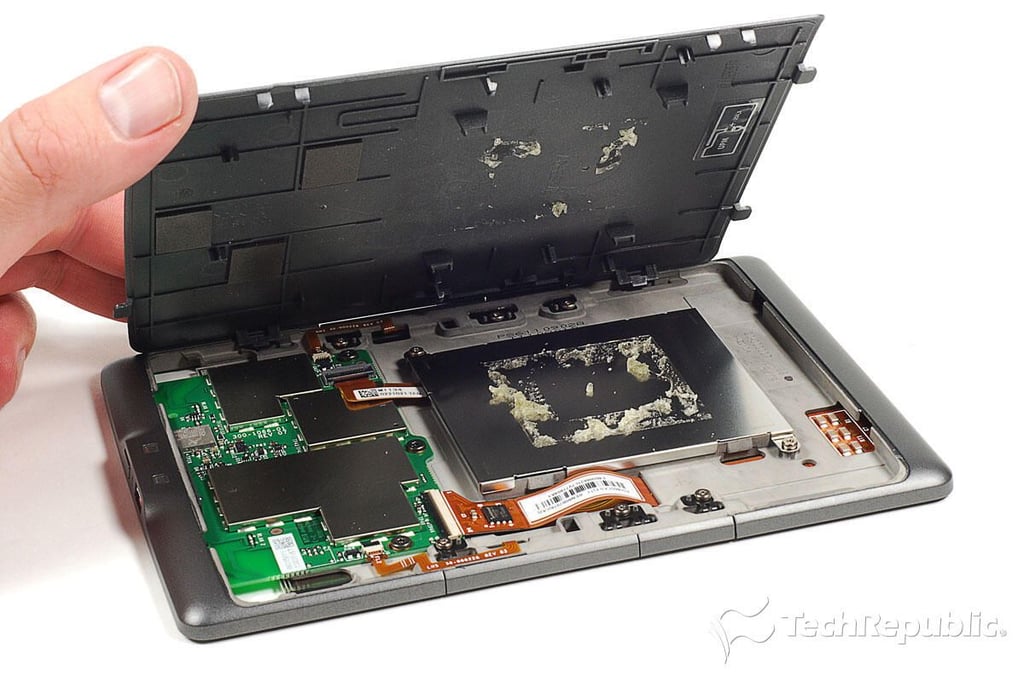
\n\tLifting off the 2011 Kindle’s back cover, you can see the adheisve that remains on the battery cover plate and inside wall of the cover.
\n
\n\tPhoto by: Bill Detwiler / TechRepublic
\n\tCaption by: Bill Detwiler
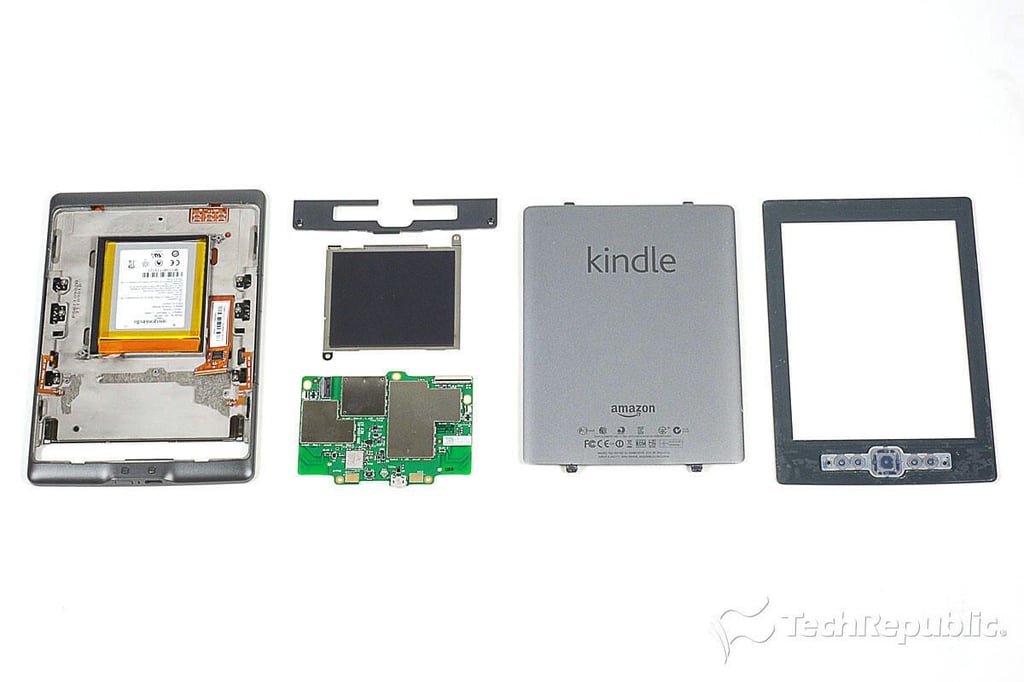
\n\tThe 2011 Kindle has an extremely clean internal hardware layout. Most chips are mounted to a single PCB, which occupies the case’s lower third. A large metal plate covers the battery. And, four ribbon cables connect the main PCB to the battery, display, and side buttons.
\n
\n\tPhoto by: Bill Detwiler / TechRepublic
\n\tCaption by: Bill Detwiler
\n\tTwo Torx T5 screws hold the battery cover to the 2011 Kindle’s internal metal frame.
\n
\n\tPhoto by: Bill Detwiler / TechRepublic
\n\tCaption by: Bill Detwiler
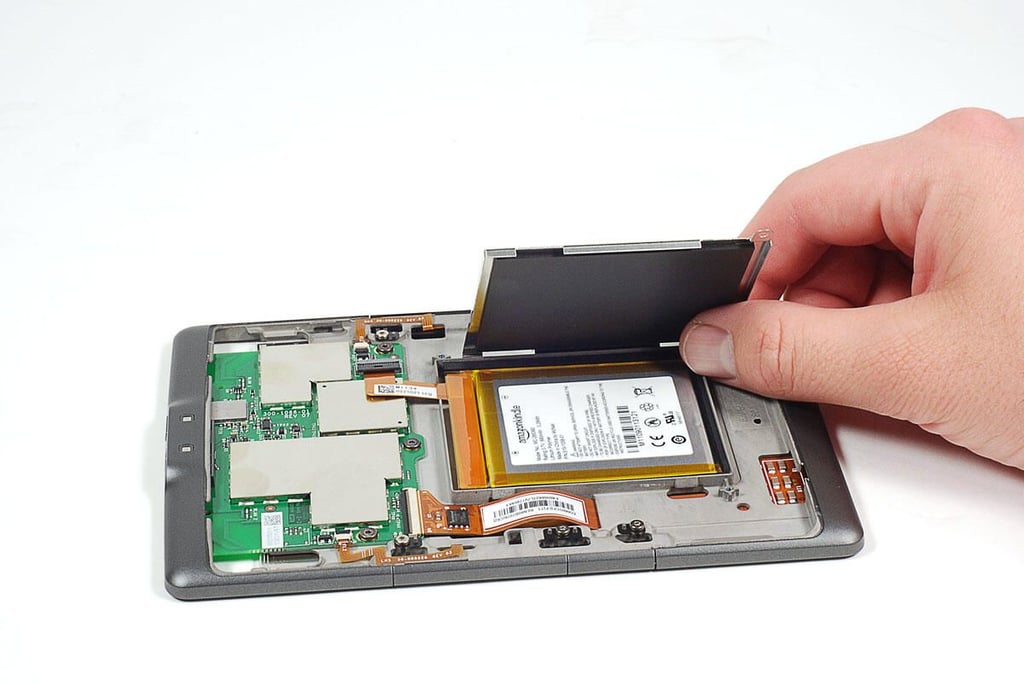
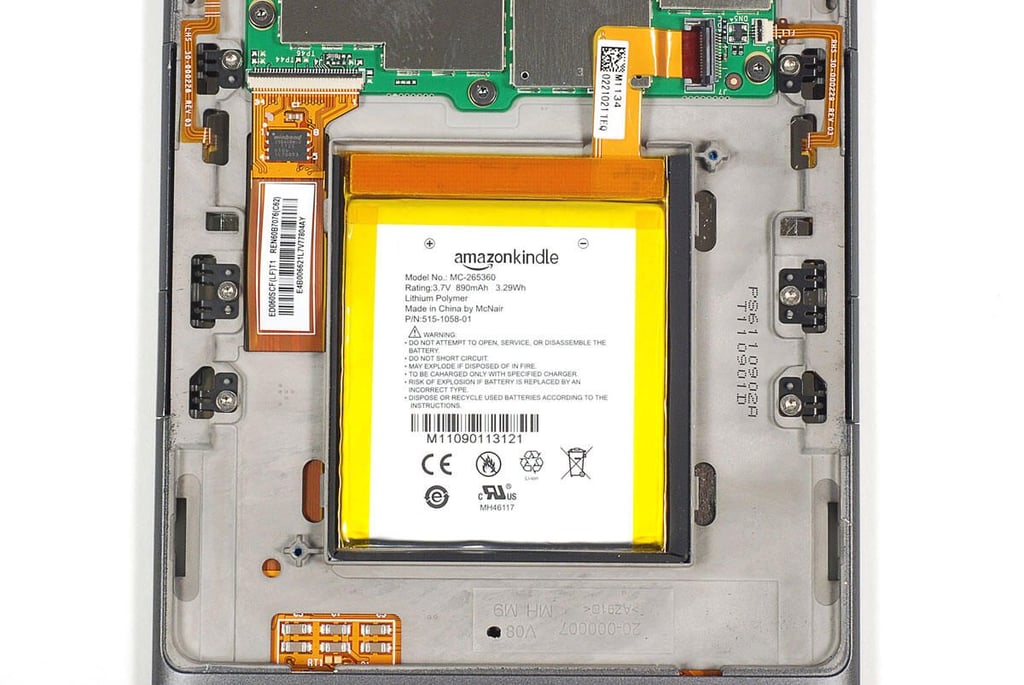
\n\tThe 2011 Kindle’s 3.7V, 890mAh, 3.29Wh Lithiutm polymer battery is stuck to the reader’s internal metal from with extremely strong adhesive. Afraid I would damage the battery by prying it loose, I left it alone.
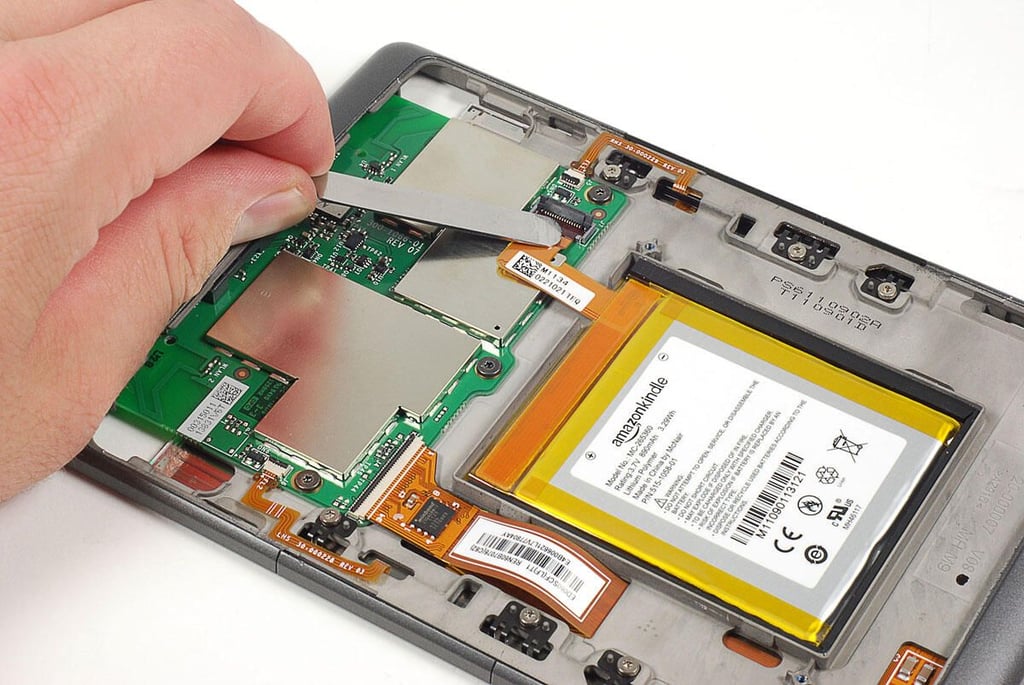
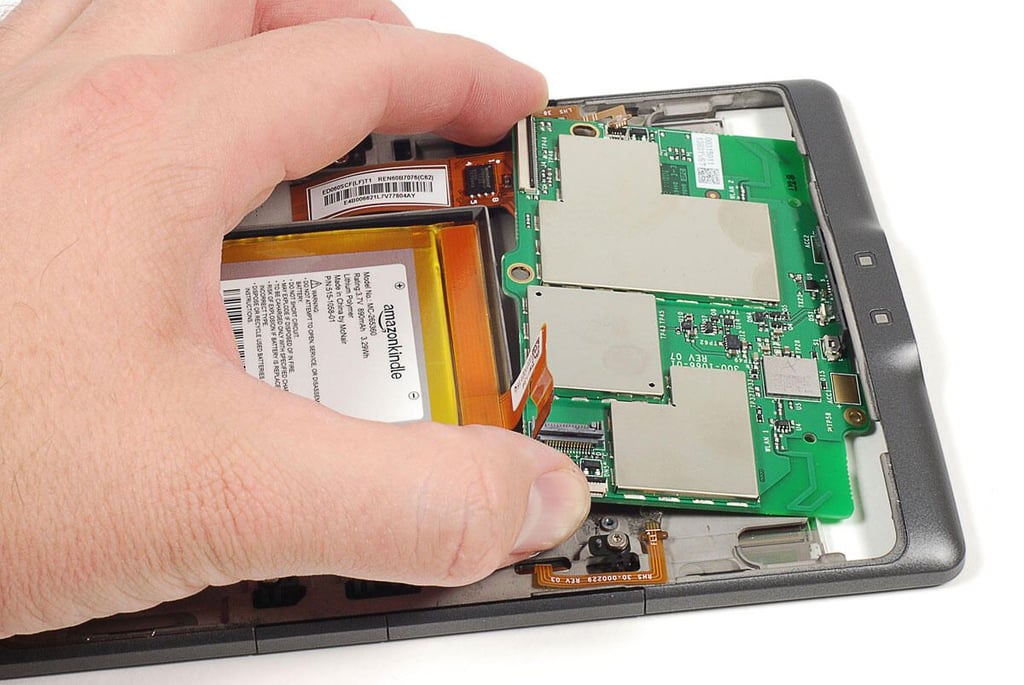
\n\tBefore removing the Kindle PCB, I disconnect the ribbon cables for the side control buttons, battery, and display.
\n
\n\tPhoto by: Bill Detwiler / TechRepublic
\n\tCaption by: Bill Detwiler
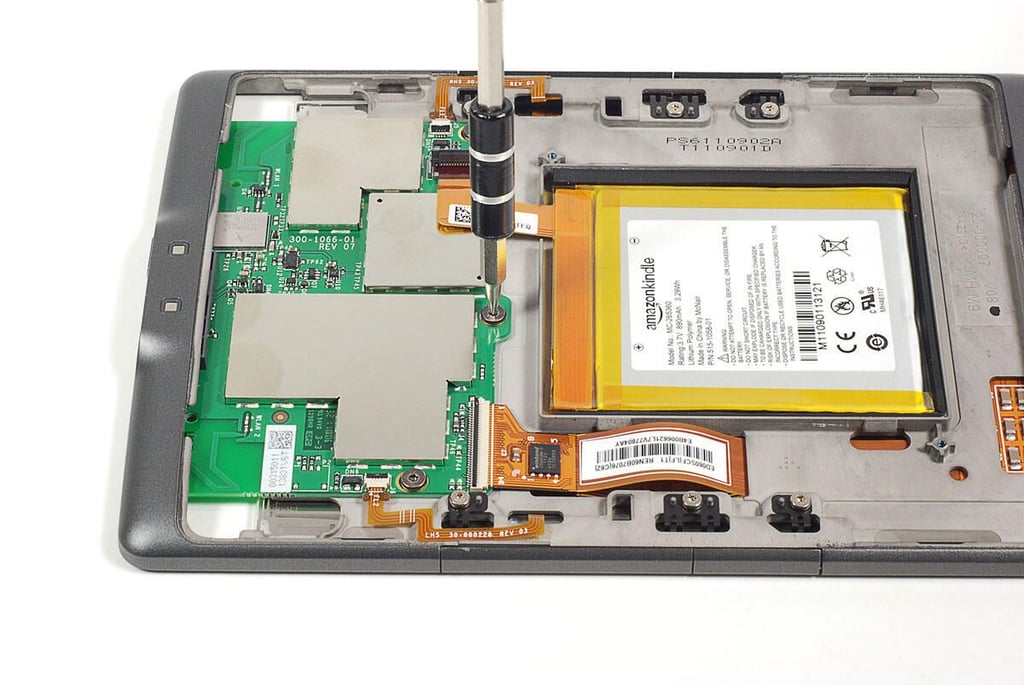
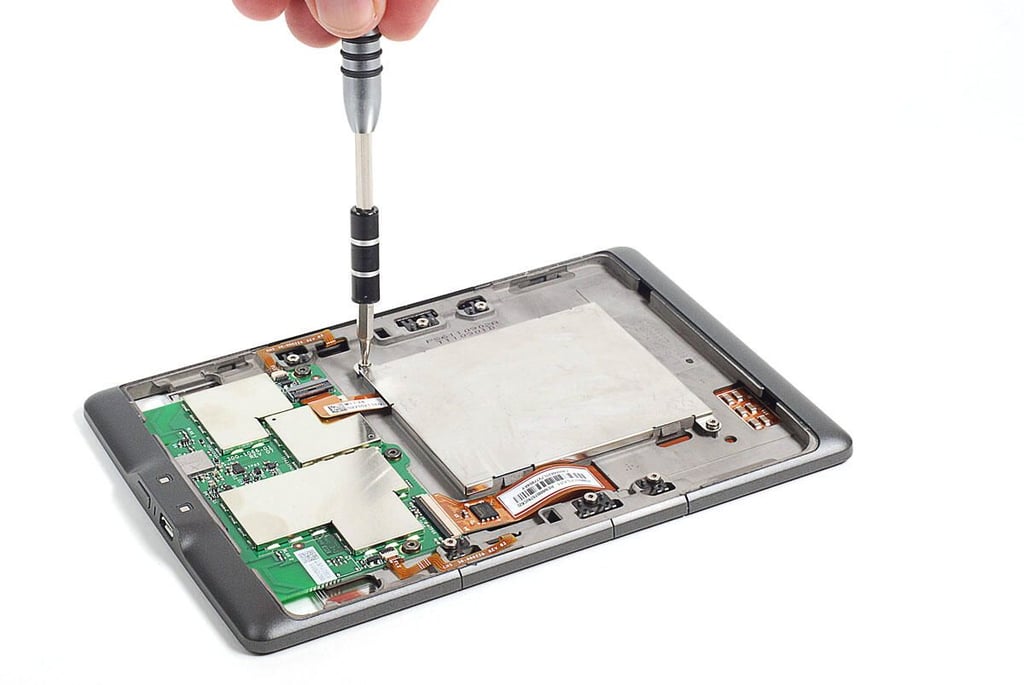
\n\tThree Torx T5 screws hold the PCB to the 2011 Kindle’s internal metal frame.
\n
\n\tPhoto by: Bill Detwiler / TechRepublic
\n\tCaption by: Bill Detwiler
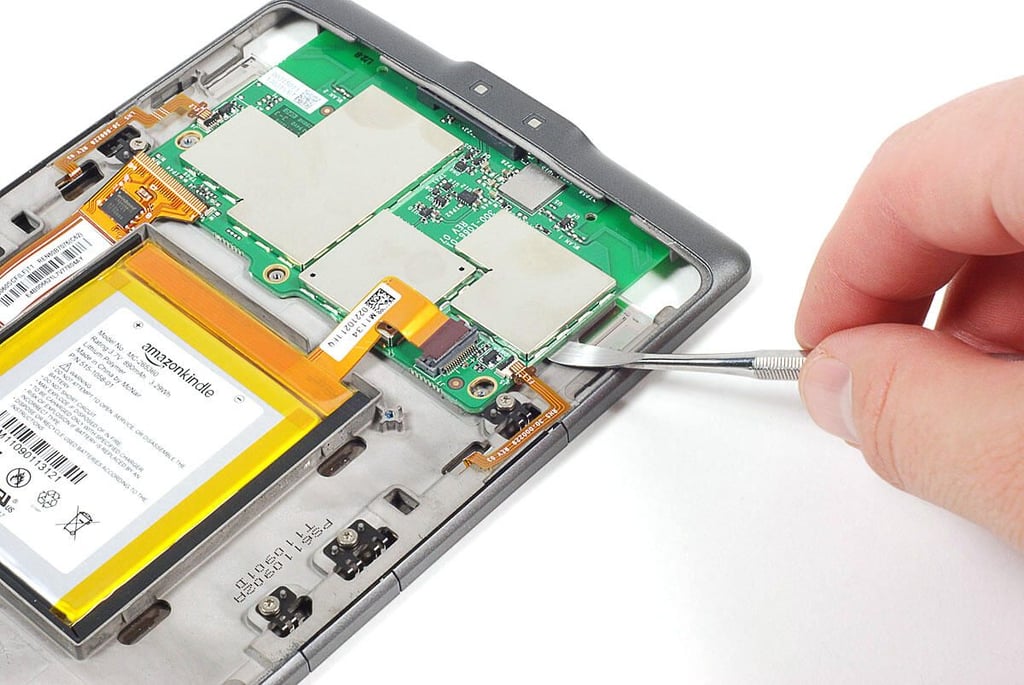
\n\tLike the battery and back cover, the 2011 Kindle’s PCB is held in place with strong adhesive. I was able to gently pry the board loose using a curved metal tool.
\n
\n\tPhoto by: Bill Detwiler / TechRepublic
\n\tCaption by: Bill Detwiler
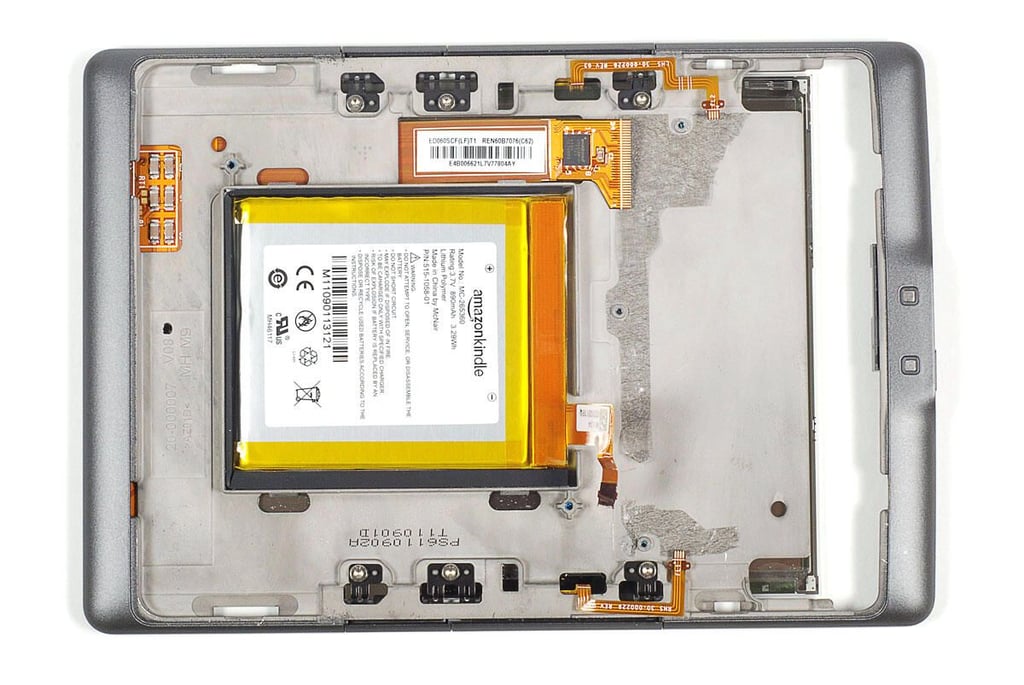
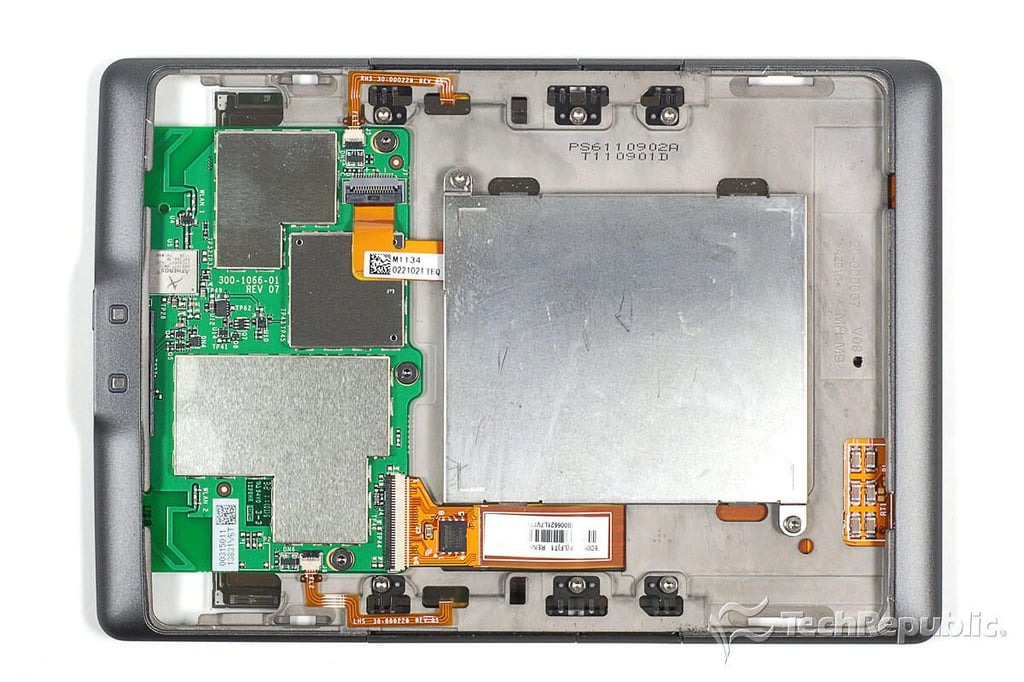
\n\tThe 2011 Kindle’s glass E Ink display, battery, and side control buttons are all mounted to a metal frame.
\n
\n\tPhoto by: Bill Detwiler / TechRepublic
\n\tCaption by: Bill Detwiler
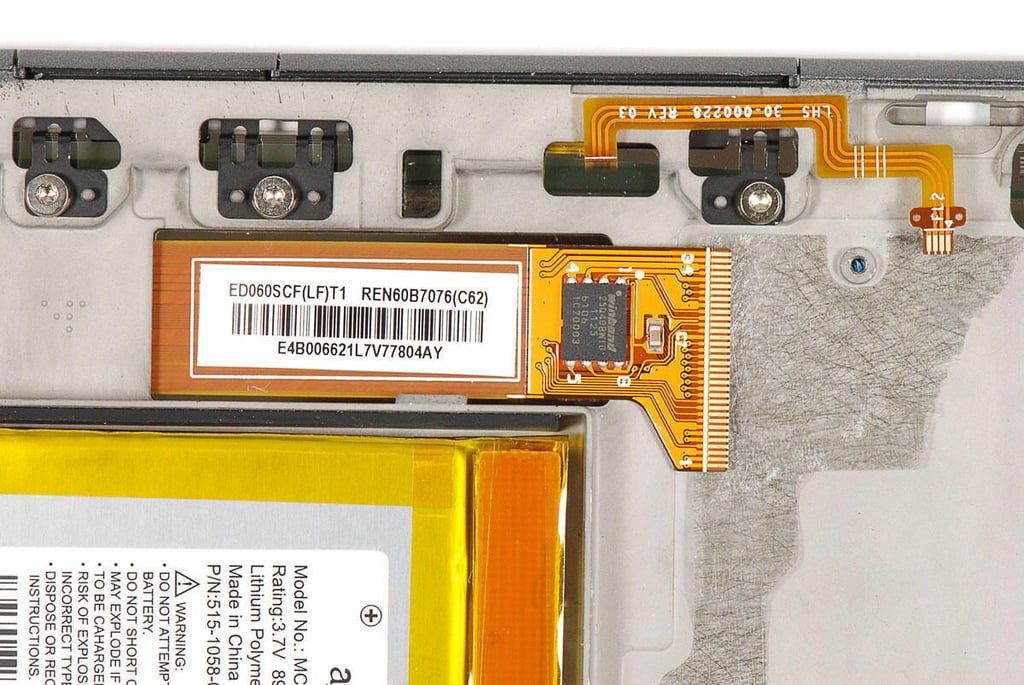
\n\tThe E Ink display’s ribbon cable has a sticker with the following markings:
\n
\n\tED060SCF(LF)T1
\n\tREN60B7076(C62)
\n\tE4B006621L7V77804AY

\n\tThis Winbond 25Q40BW1G Serial Flash Memory chip likely contains the E Ink controller software.
\n
\n\tPhoto by: Bill Detwiler / TechRepublic
\n\tCaption by: Bill Detwiler
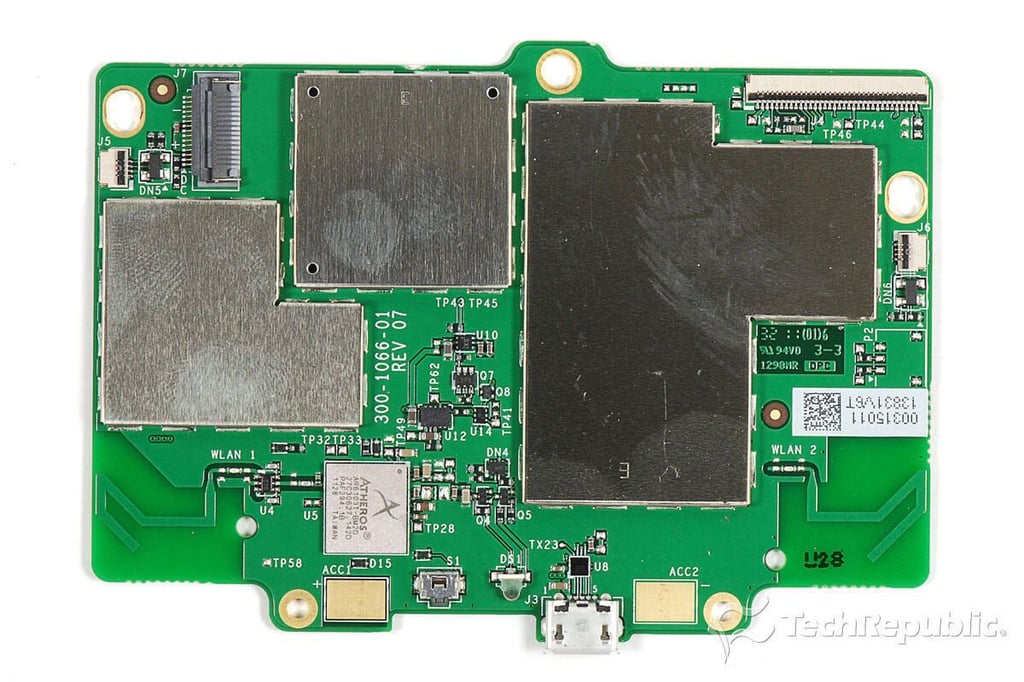
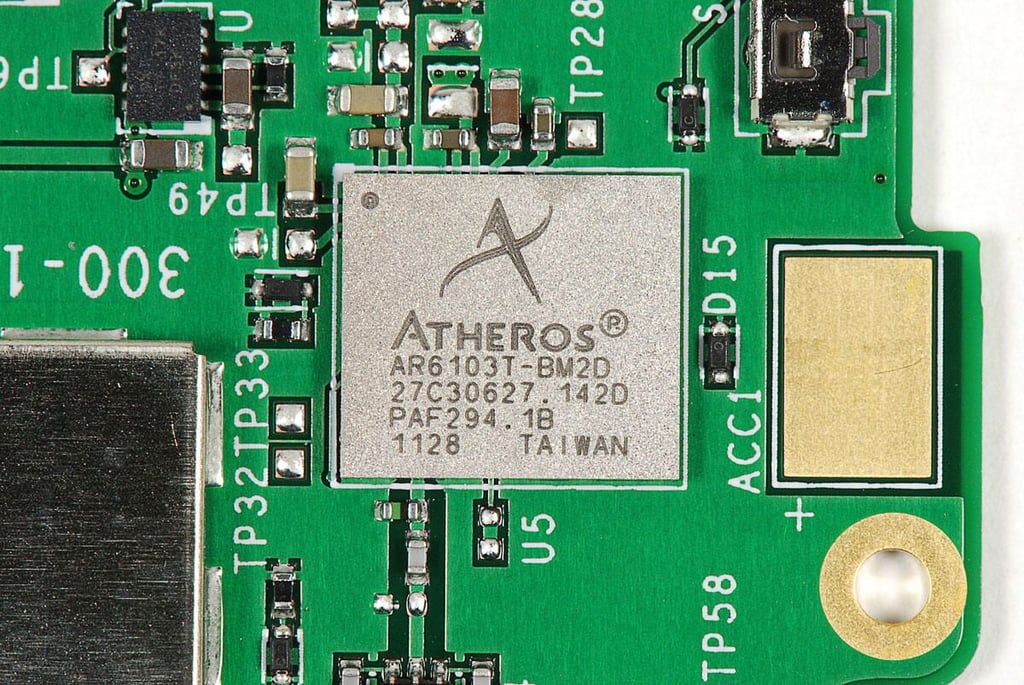
\n\tMost of the 2011 Kindle’s internal chips are mounted to a single PCB. Unfortunately, all be one of the chips is covered with EMI shields, which are soldered to the board. To avoid destroying the board, I am going to leave the shields in place.
\n
\n\tPhoto by: Bill Detwiler / TechRepublic
\n\tCaption by: Bill Detwiler
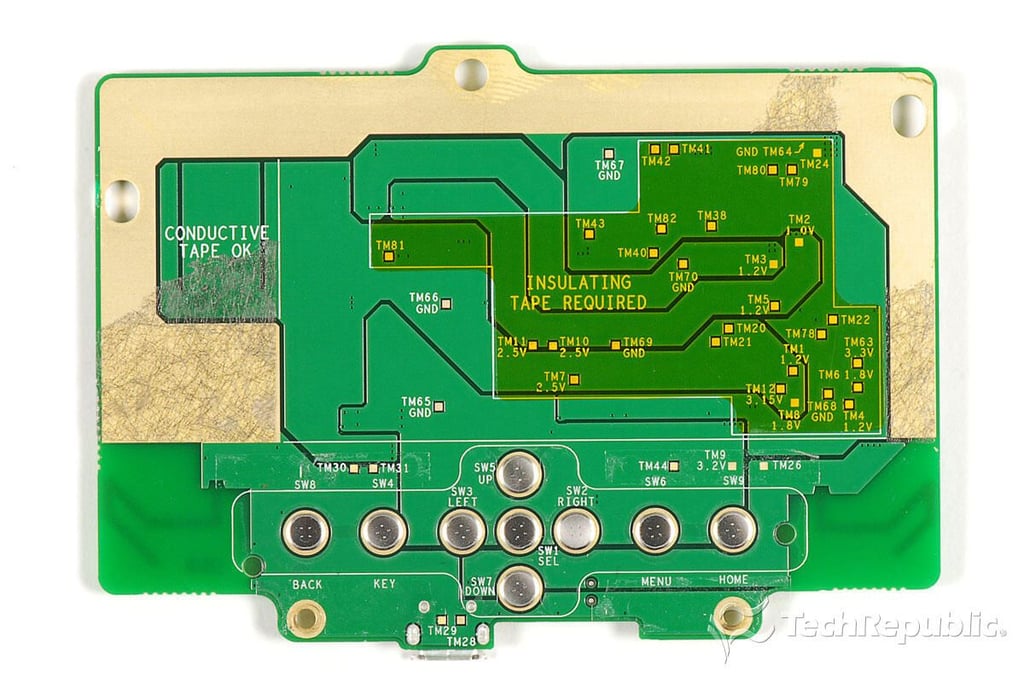
\n\tThe contacts for the Kindle’s front control buttons are mounted to the back of the main PCB.
\n
\n\tPhoto by: Bill Detwiler / TechRepublic
\n\tCaption by: Bill Detwiler
\n\tThe 2011 Kindle is a well-made, ultraportable ereader, but one that was never meant to be disassembled by anyone other than an authorized Amazon repair technician. The battery is glued to the device’s metal frame. The back cover is difficult to remove. And, there are few if any user-serviceable parts inside the case.
\n
\n\tFor a more in-depth review of the 2011 Kindle’s internal hardware, check out my article, “Amazon Kindle (2011) Teardown: Faster Processor, fewer chips.”
Bill Detwiler is the Editor for Technical Content and Ecosystem at Celonis. He is the former Editor in Chief of TechRepublic and previous host of TechRepublic's Dynamic Developer podcast and Cracking Open, CNET and TechRepublic's popular online show. Previously, Bill was an IT manager in the social research and energy industries. He has bachelor's and master's degrees from the University of Louisville, where he has also lectured on computer crime and crime prevention.


